TM-U220 Technical Reference guide EPSON - Perimatic.fr
TM-U220 Technical Reference guide EPSON - Perimatic.fr
TM-U220 Technical Reference guide EPSON - Perimatic.fr

You also want an ePaper? Increase the reach of your titles
YUMPU automatically turns print PDFs into web optimized ePapers that Google loves.
<strong>TM</strong>-<strong>U220</strong> <strong>Technical</strong> <strong>Reference</strong> Guide<br />
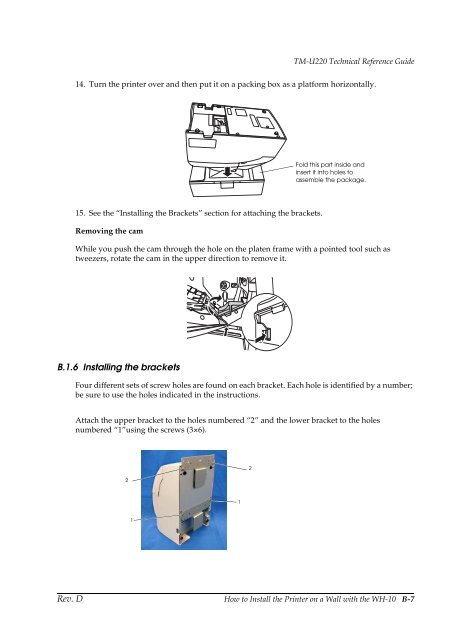
14. Turn the printer over and then put it on a packing box as a platform horizontally.<br />
Fold this part inside and<br />
insert it into holes to<br />
assemble the package.<br />
15. See the “Installing the Brackets” section for attaching the brackets.<br />
Removing the cam<br />
While you push the cam through the hole on the platen <strong>fr</strong>ame with a pointed tool such as<br />
tweezers, rotate the cam in the upper direction to remove it.<br />
B.1.6 Installing the brackets<br />
Four different sets of screw holes are found on each bracket. Each hole is identified by a number;<br />
be sure to use the holes indicated in the instructions.<br />
Attach the upper bracket to the holes numbered “2” and the lower bracket to the holes<br />
numbered “1”using the screws (3×6).<br />
2<br />
2<br />
1<br />
1<br />
Rev. D How to Install the Printer on a Wall with the WH-10 B-7