Tailgate Hidden Latch Instructions - Mar-K
Tailgate Hidden Latch Instructions - Mar-K
Tailgate Hidden Latch Instructions - Mar-K

Create successful ePaper yourself
Turn your PDF publications into a flip-book with our unique Google optimized e-Paper software.
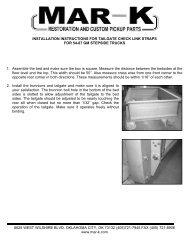
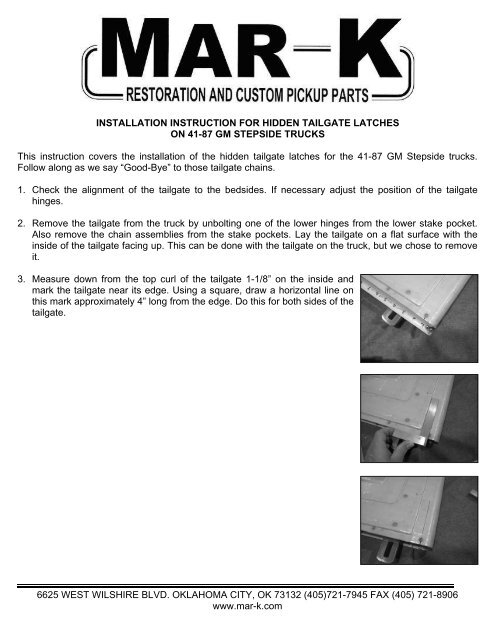
INSTALLATION INSTRUCTION FOR HIDDEN TAILGATE LATCHES<br />
ON 41-87 GM STEPSIDE TRUCKS<br />
This instruction covers the installation of the hidden tailgate latches for the 41-87 GM Stepside trucks.<br />
Follow along as we say “Good-Bye” to those tailgate chains.<br />
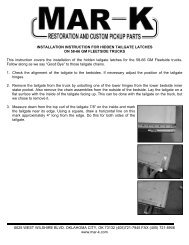
1. Check the alignment of the tailgate to the bedsides. If necessary adjust the position of the tailgate<br />
hinges.<br />
2. Remove the tailgate from the truck by unbolting one of the lower hinges from the lower stake pocket.<br />
Also remove the chain assemblies from the stake pockets. Lay the tailgate on a flat surface with the<br />
inside of the tailgate facing up. This can be done with the tailgate on the truck, but we chose to remove<br />
it.<br />
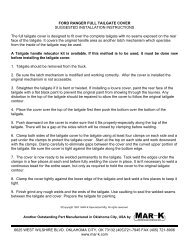
3. Measure down from the top curl of the tailgate 1-1/8” on the inside and<br />
mark the tailgate near its edge. Using a square, draw a horizontal line on<br />
this mark approximately 4” long from the edge. Do this for both sides of the<br />
tailgate.<br />
6625 WEST WILSHIRE BLVD. OKLAHOMA CITY, OK 73132 (405)721-7945 FAX (405) 721-8906<br />
www.mar-k.com
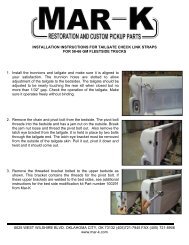
4. Measure in from the edge of the tailgate 3-5/8” and mark the tailgate on<br />
the line drawn in step #3. Center punch this mark and drill a 3/16” diameter<br />
hole. You may want to use a drill stop so that the drill point does not<br />
damage the tailgate on the outside when it breaks through. Make two other<br />
marks on this same line at 3-1/4” and 2-1/2” respectively. Center punch<br />
these two marks and drill them with a 3/8” drill. It usually works better if<br />
you start with a small drill bit and work your way up to the 3/8” diameter.<br />
5. Using a small high speed cutting wheel, connect the two 3/8” diameter<br />
holes by cutting the metal out between them. This will create the slot that<br />
the knob on the latch will slide in.<br />
6625 WEST WILSHIRE BLVD. OKLAHOMA CITY, OK 73132 (405)721-7945 FAX (405) 721-8906<br />
www.mar-k.com
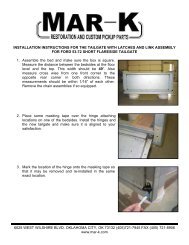
6. Disassemble the hidden latches by removing the aluminum knobs and the<br />
mounting screws. Slide the plungers and the springs out of the latch<br />
sleeves. Remove the #10-32 button-head screws from the latch sleeves.<br />
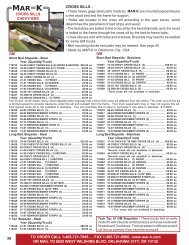
7. You need to mark and drill a 5/8” diameter hole in the tailgate ends for the<br />
hidden latch sleeve to slide into. This hole should be in line with the mark<br />
made on the tailgate skin and the latch sleeve should fit tight against the<br />
tailgate end. <strong>Mar</strong>k the tailgate end 5/16” down from the surface where the<br />
latch sleeve will fit. When drilling, start with a smaller bit and work up to the<br />
5/8” drill. You want to have a nice round hole for the latch sleeve. When<br />
finishing the hole with the 5/8” drill, it will be rubbing on the tailgate end<br />
material that is welded to the tailgate skin. This will keep the latch flat<br />
against the inside wall of the tailgate. You may find it necessary to use a<br />
round file after drilling the 5/8” hole to fit the latch sleeve. You will want to<br />
keep this a tight fit to keep the latch from moving around.<br />
8. Slide the latch sleeve into the tailgate through the 5/8” hole until the small<br />
threaded hole lines up with the small hole in the tailgate. Thread the 10-32<br />
button-head screw through the tailgate into the latch sleeve and tighten<br />
with the supplied 1/8” hex wrench. Check the alignment of the slot in the<br />
tailgate with the slot in the latch sleeve.<br />
6625 WEST WILSHIRE BLVD. OKLAHOMA CITY, OK 73132 (405)721-7945 FAX (405) 721-8906<br />
www.mar-k.com
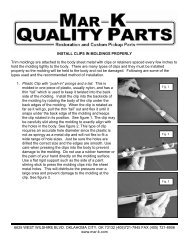
9. Install the spring on the plunger and slide it into the latch sleeve. A liberal<br />
amount of your favorite grease on the plunger is recommended before<br />
assembly.<br />
10. Push in on the plunger and position the aluminum knob with the stainless<br />
shoulder screw. Thread the screw into the plunger and tighten the screw<br />
with the 1/8” hex wrench.<br />
11. Test the movement of the plunger by sliding it back and fourth. Also pull<br />
the plunger all the way back and twist the knob to lock it in the retracted<br />
position. If the knob rubs on the tailgate or will not retract far enough to<br />
lock, you will need to enlarge the slotted hole in the tailgate with a file until<br />
full movement is obtained.<br />
12. Once the latches are installed on both ends of the tailgate, re-install the<br />
tailgate on the truck. Make sure both latches are retracted and shut the<br />
tailgate. Hold the tailgate tight against the bedsides and release the<br />
latches by twisting the knobs. The latches have a pointed tip that will mark<br />
the bedsides for the rubber grommet to be installed.<br />
13. Lower the tailgate and support it in the open position. At each marked<br />
location on the bedsides, you need to drill a 5/8” diameter hole. Again, it is<br />
better to start with a small drill and work up to the 5/8” diameter to ensure<br />
a more uniform round hole. If you have access to a step drill, these tend to<br />
make perfectly round holes in sheet metal.<br />
6625 WEST WILSHIRE BLVD. OKLAHOMA CITY, OK 73132 (405)721-7945 FAX (405) 721-8906<br />
www.mar-k.com
14. Insert the supplied rubber grommets into the bedside holes. Close the<br />
tailgate and release the latches into the grommets.<br />
Another Outstanding Part Manufactured in Oklahoma City, USA by<br />
©Copyright 2007 MAR-K Quality Parts L.L.C. All rights reserved.<br />
6625 WEST WILSHIRE BLVD. OKLAHOMA CITY, OK 73132 (405)721-7945 FAX (405) 721-8906<br />
www.mar-k.com