Threaded Insert Installation - Mar-K
Threaded Insert Installation - Mar-K
Threaded Insert Installation - Mar-K

Create successful ePaper yourself
Turn your PDF publications into a flip-book with our unique Google optimized e-Paper software.
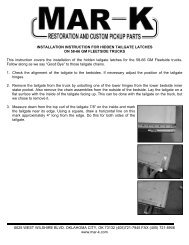
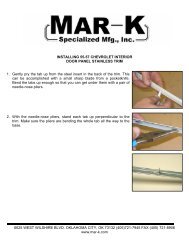
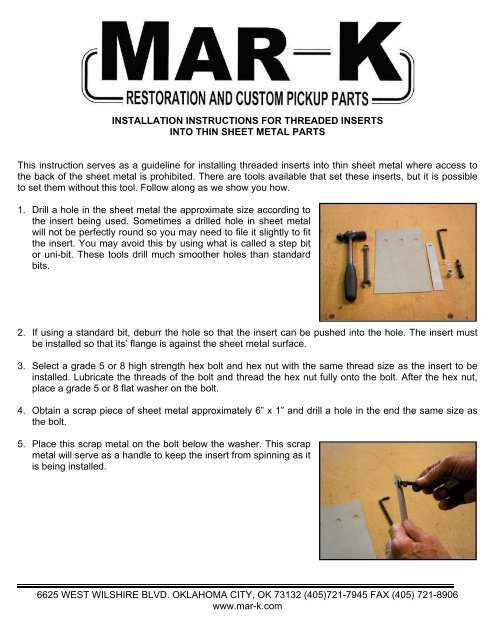
INSTALLATION INSTRUCTIONS FOR THREADED INSERTSINTO THIN SHEET METAL PARTSThis instruction serves as a guideline for installing threaded inserts into thin sheet metal where access tothe back of the sheet metal is prohibited. There are tools available that set these inserts, but it is possibleto set them without this tool. Follow along as we show you how.1. Drill a hole in the sheet metal the approximate size according tothe insert being used. Sometimes a drilled hole in sheet metalwill not be perfectly round so you may need to file it slightly to fitthe insert. You may avoid this by using what is called a step bitor uni-bit. These tools drill much smoother holes than standardbits.2. If using a standard bit, deburr the hole so that the insert can be pushed into the hole. The insert mustbe installed so that its’ flange is against the sheet metal surface.3. Select a grade 5 or 8 high strength hex bolt and hex nut with the same thread size as the insert to beinstalled. Lubricate the threads of the bolt and thread the hex nut fully onto the bolt. After the hex nut,place a grade 5 or 8 flat washer on the bolt.4. Obtain a scrap piece of sheet metal approximately 6” x 1” and drill a hole in the end the same size asthe bolt.5. Place this scrap metal on the bolt below the washer. This scrapmetal will serve as a handle to keep the insert from spinning as itis being installed.6625 WEST WILSHIRE BLVD. OKLAHOMA CITY, OK 73132 (405)721-7945 FAX (405) 721-8906www.mar-k.com
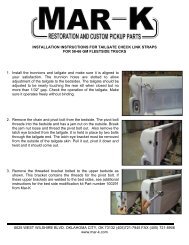
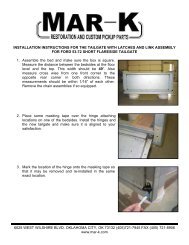
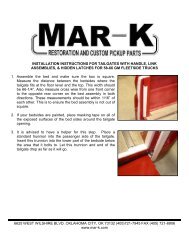
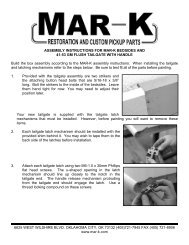
6. Thread the insert onto the bolt with its’ flange toward the bolthead. Thread it all the way until finger tight against the scrapmetal piece installed in step #5.7. Push the threaded insert into the drilled hole in the sheet metalof the body. Make sure that the insert goes all the way in untilthe flange of the insert is flush with the sheet metal. Tap theinsert in with a hammer if needed. Hold it firmly in place and flatagainst the body.8. For this step, you may need a helper. Use a wrench to keep thebolt head from turning and hold the scrap piece of metal. Withanother wrench, start to back the hex nut off of the bolt. The hexnut will draw the bolt outward while compressing the insertbehind the sheet metal panel.9. The insert will bulge out around its sides causing the insert toclamp down around the hole. Make sure to keep this assemblytight against the panel until the insert is fully squeezed andlocked in place. The hex nut will be fairly hard to turn, so beprepared to exert some force on the nut. Turn the nut until it willnot turn any more and the insert will be fully installed. Nowremove the bolt, hex nut, washer, and sheet metal handle.©Copyright 2007 MAR-K Quality Parts L.L.C. All rights reserved.6625 WEST WILSHIRE BLVD. OKLAHOMA CITY, OK 73132 (405)721-7945 FAX (405) 721-8906www.mar-k.com