manual - Sharkoon
manual - Sharkoon
manual - Sharkoon

You also want an ePaper? Increase the reach of your titles
YUMPU automatically turns print PDFs into web optimized ePapers that Google loves.
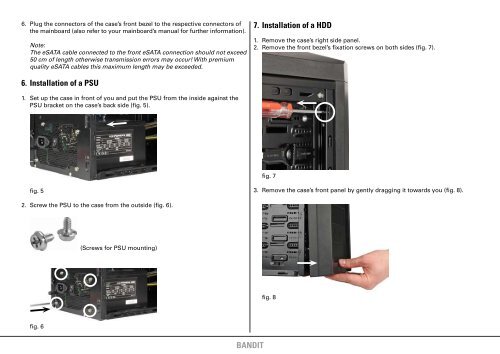
6. Plug the connectors of the case’s front bezel to the respective connectors of<br />
the mainboard (also refer to your mainboard’s <strong>manual</strong> for further information).<br />
Note:<br />
The eSATA cable connected to the front eSATA connection should not exceed<br />
50 cm of length otherwise transmission errors may occur! With premium<br />
quality eSATA cables this maximum length may be exceeded.<br />
7. Installation of a HDD<br />
1. Remove the case’s right side panel.<br />
2. Remove the front bezel’s fixation screws on both sides (fig. 7).<br />
6. Installation of a PSU<br />
1. Set up the case in front of you and put the PSU from the inside against the<br />
PSU bracket on the case’s back side (fig. 5).<br />
fig. 7<br />
fig. 5<br />
3. Remove the case’s front panel by gently dragging it towards you (fig. 8).<br />
2. Screw the PSU to the case from the outside (fig. 6).<br />
(Screws for PSU mounting)<br />
fig. 8<br />
fig. 6<br />
bandit