Changer (5152) - Assembly and Operation Manual - DaVinci Baby
Changer (5152) - Assembly and Operation Manual - DaVinci Baby
Changer (5152) - Assembly and Operation Manual - DaVinci Baby

Create successful ePaper yourself
Turn your PDF publications into a flip-book with our unique Google optimized e-Paper software.
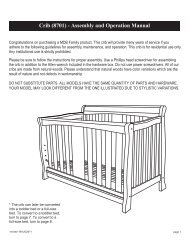
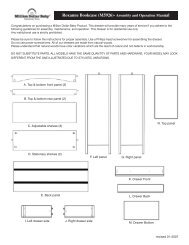
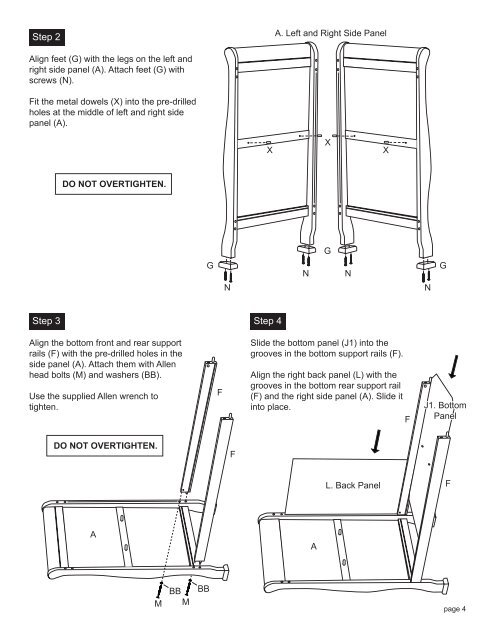
Step 2<br />
A. Left <strong>and</strong> Right Side Panel<br />
Align feet (G) with the legs on the left <strong>and</strong><br />
right side panel (A). Attach feet (G) with<br />
screws (N).<br />
Fit the metal dowels (X) into the pre-drilled<br />
holes at the middle of left <strong>and</strong> right side<br />
panel (A).<br />
X<br />
X<br />
X<br />
DO NOT OVERTIGHTEN.<br />
G<br />
G<br />
N<br />
N<br />
G<br />
N<br />
N<br />
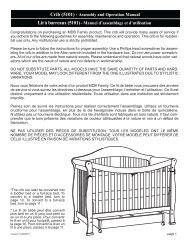
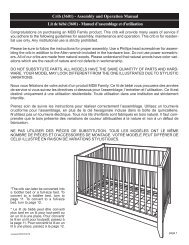
Step 3<br />
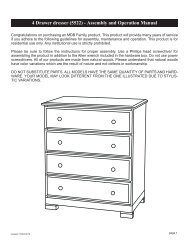
Step 4<br />
Align the bottom front <strong>and</strong> rear support<br />
rails (F) with the pre-drilled holes in the<br />
side panel (A). Attach them with Allen<br />
head bolts (M) <strong>and</strong> washers (BB).<br />
Use the supplied Allen wrench to<br />
tighten.<br />
F<br />
Slide the bottom panel (J1) into the<br />
grooves in the bottom support rails (F).<br />
Align the right back panel (L) with the<br />
grooves in the bottom rear support rail<br />
(F) <strong>and</strong> the right side panel (A). Slide it<br />
into place.<br />
F<br />
J1. Bottom<br />
Panel<br />
DO NOT OVERTIGHTEN.<br />
F<br />
L. Back Panel<br />
F<br />
A<br />
A<br />
M<br />
BB<br />
M<br />
BB<br />
page 4