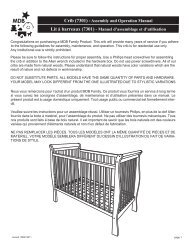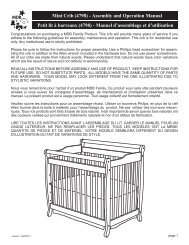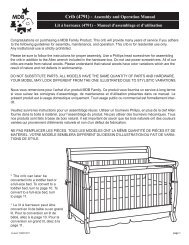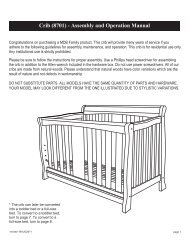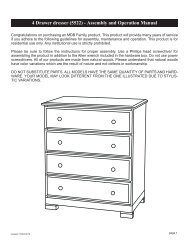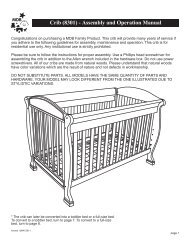
Changer (5152) - Assembly and Operation Manual - DaVinci Baby
Changer (5152) - Assembly and Operation Manual - DaVinci Baby
Changer (5152) - Assembly and Operation Manual - DaVinci Baby

You also want an ePaper? Increase the reach of your titles
YUMPU automatically turns print PDFs into web optimized ePapers that Google loves.
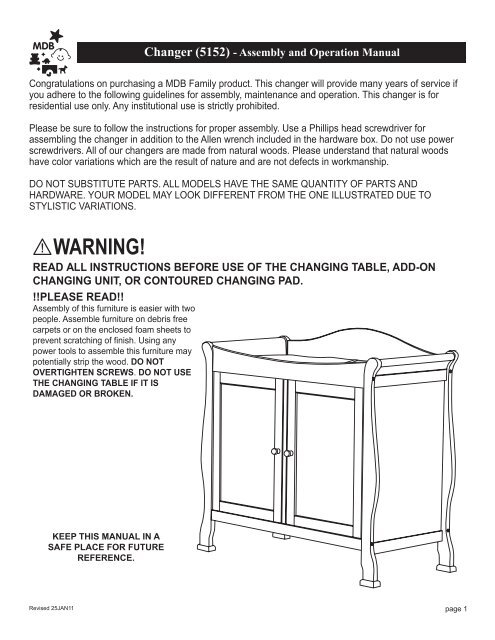
<strong>Changer</strong> (<strong>5152</strong>) - <strong>Assembly</strong> <strong>and</strong> <strong>Operation</strong> <strong>Manual</strong><br />
Congratulations on purchasing a MDB Family product. This changer will provide many years of service if<br />
you adhere to the following guidelines for assembly, maintenance <strong>and</strong> operation. This changer is for<br />
residential use only. Any institutional use is strictly prohibited.<br />
Please be sure to follow the instructions for proper assembly. Use a Phillips head screwdriver for<br />
assembling the changer in addition to the Allen wrench included in the hardware box. Do not use power<br />
screwdrivers. All of our changers are made from natural woods. Please underst<strong>and</strong> that natural woods<br />
have color variations which are the result of nature <strong>and</strong> are not defects in workmanship.<br />
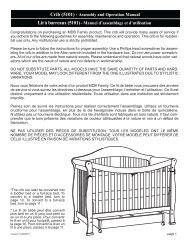
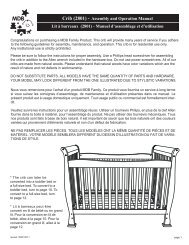
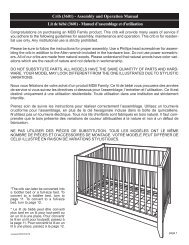
DO NOT SUBSTITUTE PARTS. ALL MODELS HAVE THE SAME QUANTITY OF PARTS AND<br />
HARDWARE. YOUR MODEL MAY LOOK DIFFERENT FROM THE ONE ILLUSTRATED DUE TO<br />
STYLISTIC VARIATIONS.<br />
!<br />
WARNING!<br />
READ ALL INSTRUCTIONS BEFORE USE OF THE CHANGING TABLE, ADD-ON<br />
CHANGING UNIT, OR CONTOURED CHANGING PAD.<br />
!!PLEASE READ!!<br />
<strong>Assembly</strong> of this furniture is easier with two<br />
people. Assemble furniture on debris free<br />
carpets or on the enclosed foam sheets to<br />
prevent scratching of finish. Using any<br />
power tools to assemble this furniture may<br />
potentially strip the wood. DO NOT<br />
OVERTIGHTEN SCREWS. DO NOT USE<br />
THE CHANGING TABLE IF IT IS<br />
DAMAGED OR BROKEN.<br />
KEEP THIS MANUAL IN A<br />
SAFE PLACE FOR FUTURE<br />
REFERENCE.<br />
Revised 25JAN11 page 1
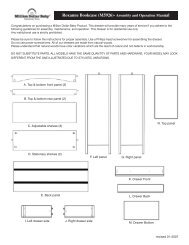
PARTS<br />
G. Foot (4)<br />
B. Center Panel<br />
H. Shelf (2)<br />
A. Left <strong>and</strong> Right Side Panel (2)<br />
D. Top Front Support Panel<br />
E. Top Rear Support Panel<br />
C. Left <strong>and</strong> Right Door (2)<br />
F. Bottom Front <strong>and</strong> Rear Support Panel (2)<br />
J1. Bottom<br />
Panel<br />
K. Changing<br />
Pad<br />
L. Back Panel (2)<br />
J2. Top Panel<br />
page 2
HARDWARE<br />
M. 2 3/4” Allen head bolt (8)<br />
N. 1 5/8” flat head<br />
screw (8)<br />
R. Barrel nut (8)<br />
S. 1” Phillips<br />
Head Bolt (2)<br />
T. 5/8” Flat Head<br />
Screw (4)<br />
U. 5/8” Pan Head<br />
Screw (8)<br />
X. Metal Dowel (20) Y. Door Peg (4)<br />
ZZ. Knob (2)<br />
AA. Strap<br />
BB. 1/2”<br />
Washer (8)<br />
Tools Needed<br />
(not included)<br />
DD. Door Catch (2) EE. Screw Plate (2) FF. Allen Wrench<br />
Phillips<br />
screwdriver<br />
Step 1<br />
Insert the barrel nuts (R) <strong>and</strong> metal<br />
dowel (X) into the pre-drilled holes<br />
in all support rails (D, E & F) as<br />
illustrated.<br />
X<br />
R<br />
D. Top Front Support Panel<br />
R<br />
X<br />
X<br />
X<br />
R<br />
E. Top Rear Support Panel<br />
R<br />
X<br />
X<br />
X<br />
X<br />
R<br />
F. Bottom Front <strong>and</strong> Rear<br />
Support Panel<br />
R<br />
R<br />
X<br />
page 3
Step 2<br />
A. Left <strong>and</strong> Right Side Panel<br />
Align feet (G) with the legs on the left <strong>and</strong><br />
right side panel (A). Attach feet (G) with<br />
screws (N).<br />
Fit the metal dowels (X) into the pre-drilled<br />
holes at the middle of left <strong>and</strong> right side<br />
panel (A).<br />
X<br />
X<br />
X<br />
DO NOT OVERTIGHTEN.<br />
G<br />
G<br />
N<br />
N<br />
G<br />
N<br />
N<br />
Step 3<br />
Step 4<br />
Align the bottom front <strong>and</strong> rear support<br />
rails (F) with the pre-drilled holes in the<br />
side panel (A). Attach them with Allen<br />
head bolts (M) <strong>and</strong> washers (BB).<br />
Use the supplied Allen wrench to<br />
tighten.<br />
F<br />
Slide the bottom panel (J1) into the<br />
grooves in the bottom support rails (F).<br />
Align the right back panel (L) with the<br />
grooves in the bottom rear support rail<br />
(F) <strong>and</strong> the right side panel (A). Slide it<br />
into place.<br />
F<br />
J1. Bottom<br />
Panel<br />
DO NOT OVERTIGHTEN.<br />
F<br />
L. Back Panel<br />
F<br />
A<br />
A<br />
M<br />
BB<br />
M<br />
BB<br />
page 4
Step 5<br />
Attach the two door catches (DD) to the top of<br />
the center panel (B) using the screws (U).<br />
Insert the metal dowel (X) into the pre-drilled<br />
holes in the center panel (B) as illustrated.<br />
X<br />
* Insert the metal dowels<br />
(X) into both sides of<br />
center panel (B).<br />
X<br />
DD<br />
X<br />
X<br />
U<br />
DD. Door<br />
Catch<br />
U<br />
X<br />
U<br />
U<br />
* Attach the door catches<br />
(DD) on both sides of<br />
center panel (B).<br />
DO NOT OVERTIGHTEN.<br />
X<br />
B. Center Panel<br />
X<br />
Step 6<br />
Align the groove on the center panel (B) with<br />
the back panel (L) <strong>and</strong> fit in place.<br />
Attach the center panel (B) using the screws<br />
(T) through the pre-drilled holes in the bottom<br />
panel (J1) <strong>and</strong> the two metal dowels (X) in the<br />
two bottom support rails (F).<br />
T<br />
T<br />
J1. Bottom<br />
Panel<br />
* The metal dowels (X) must be<br />
inserted into the pre-drilled holes in<br />
the two bottom support rails (F).<br />
B<br />
DO NOT OVERTIGHTEN.<br />
L. Back Panel<br />
page 5
Step 7<br />
Align the top front (D) <strong>and</strong> top rear (E)<br />
support panels with the dowels <strong>and</strong> predrilled<br />
holes in (A). Attach with Allen head<br />
bolts (M) <strong>and</strong> washers (BB). Use the Allen<br />
wrench (FF) to tighten.<br />
NOTE: Do not tighten the top front panel<br />
(D) until after the door attachment in step<br />
10.<br />
* Make sure to align the preattached<br />
metal dowels on<br />
the center panel (B) with the<br />
pre-drilled hole in the top<br />
panel (D & E).<br />
D<br />
E<br />
B<br />
DO NOT OVERTIGHTEN.<br />
F<br />
A<br />
Step 8<br />
BB<br />
M<br />
BB M<br />
Align the back panel (L) <strong>and</strong> the<br />
top panel (J2) with the grooves<br />
<strong>and</strong> slide them into place.<br />
Step 9<br />
Insert the metal door pegs (Y) into the pre-drilled holes in<br />
the top support panel (D) <strong>and</strong> bottom support rail (F).<br />
J2. Top<br />
Panel<br />
L. Back Panel<br />
F<br />
D<br />
B<br />
D<br />
F<br />
Y. Door<br />
Peg<br />
A<br />
page 6
Step 10<br />
Attach the doors (C) to the assembled unit using<br />
the metal door pegs (Y) in the pre-drilled holes in<br />
the top <strong>and</strong> bottom of the doors (C).<br />
Move the top support rail (D) to allow the pegs to<br />
slip into place. Tighten the top support rail (D)<br />
when finished.<br />
Attach the door knobs (ZZ) to the doors (C) using<br />
the Phillips head screws (S). Then attach the screw<br />
plates (EE) to the doors (C) using the screws (U).<br />
Step 11<br />
Align the metal dowels (X) in the in the pre-drilled<br />
holes in the support panels (D, E & F) with the holes<br />
in the left side pabel (A).<br />
Make sure that the barrel nuts (R) are placed in the<br />
proper position in the pre-drilled holes in the support<br />
panels (D, E & F). Attach the left side panel (A) with<br />
the Allen head bolts (M) <strong>and</strong> washers (BB). Tighten<br />
with the Allen wrench.<br />
M<br />
M<br />
M<br />
M<br />
ZZ. Knob<br />
EE. Screw<br />
Plate<br />
BB<br />
BB<br />
BB<br />
BB<br />
U<br />
A<br />
S<br />
C. Left Door<br />
X<br />
R<br />
R<br />
X<br />
D<br />
E<br />
F<br />
D<br />
C. Right Door<br />
S<br />
U<br />
ZZ. Knob<br />
EE. Screw<br />
Plate<br />
DO NOT OVERTIGHTEN.<br />
DO NOT OVERTIGHTEN.<br />
page 7
Step 12<br />
St<strong>and</strong> the unit upright on its feet <strong>and</strong><br />
place the shelves (H) on the metal<br />
dowels (X) on the right <strong>and</strong> left sides<br />
(A).<br />
A<br />
X<br />
H. Shelf<br />
Step 13<br />
Attach the safety strap (AA) to the top<br />
panels (D) <strong>and</strong> (E) using screws (T) .<br />
Step 14<br />
Place the changer pad (R) to the changer<br />
<strong>and</strong> the changer is ready to use.<br />
K. Changing Pad<br />
AA. Strap<br />
T<br />
E<br />
D<br />
The recommended maximum weight of<br />
the occupant is 30 lbs.<br />
page 8
WARNING:<br />
Restraint System<br />
During the diaper changing process, be sure always to keep one h<strong>and</strong> on the baby to prevent the baby from falling off the<br />
changing pad. Falling from the changing pad could cause severe injury or even death to the baby.<br />
Step 1.<br />
Place a baby on the pad with his/her bottom on the<br />
top of the diaper. Safely secure the baby on the pad<br />
with the safety straps <strong>and</strong> buckle on the pad. This<br />
helps prevent the baby from falling off the pad,<br />
which can result in severe injury or even death of<br />
the baby.<br />
Step 2.<br />
Remove the dirty diaper from the baby.<br />
Step 3.<br />
Push the baby’s legs forward <strong>and</strong> create a cavity<br />
under the baby’s bottom. Clean the baby.<br />
Step 4.<br />
Reattach the new diaper to a clean <strong>and</strong> happy<br />
baby!
WARNING!<br />
FALL HAZARD<br />
TO PREVENT DEATH OR SERIOUS<br />
INJURY, ALWAYS KEEP CHILD WITHIN<br />
ARM’S REACH.<br />
READ ALL INSTRUCTIONS BEFORE ASSEMBLING THIS<br />
PRODUCT. KEEP THE MANUAL FOR FUTURE USE.<br />
WARNING:<br />
•Read all instructions before use of the changing table.<br />
•Do not use changing table if it is damaged or broken.<br />
•This product is not intended to be used as a<br />
changing table without adult supervision. Use of the<br />
product without this may result in death or serious injury<br />
to your child from falling. Follow all instructions on<br />
attaching <strong>and</strong> using the changing table.<br />
•When using this product, always secure the child with<br />
the safety strip.<br />
•Only use the pad provided by MDB Family.<br />
•The maximum weight of the child for which the changing<br />
table is intended is 30 lbs.<br />
•Stop using this changing table when the child is able to<br />
sit up or roll over.<br />
•As with all infant <strong>and</strong> baby furniture, it is important to<br />
check fasteners, screws, <strong>and</strong> bolts periodically for tightness.<br />
Parents should ensure a safe environment for<br />
their child by checking the furtniture regularly before<br />
placing the child in the product.<br />
WARNING!<br />
FALL HAZARD<br />
To prevent death or<br />
serious injury, always<br />
keep child within arm’s<br />
reach. Never leave child<br />
unattended <strong>and</strong> always<br />
use restraining system.<br />
ONE YEAR LIMITED WARRANTY :<br />
We will replace any missing parts at the time<br />
of purchase or any defective item within a one<br />
year period from the date of original purchase.<br />
Please keep your receipt so that we may process<br />
your warranty request. This warranty only<br />
covers new units with original packaging <strong>and</strong><br />
ownership, <strong>and</strong> is not transferable. It does not<br />
cover any used, secondh<strong>and</strong> or demo models.<br />
This warranty does not cover any damaged<br />
or defective parts that result from installation<br />
<strong>and</strong> assembly, normal wear <strong>and</strong> tear, abuse,<br />
negligence, improper use or alteration to the<br />
design, <strong>and</strong> hardware of the crib. The<br />
legal rights of this warranty may vary<br />
from state to state. Some states do not allow<br />
any exclusion or limitation of incidental damages.<br />
Some stated do not allow limitation on<br />
how long an implied warranty lasts.<br />
Registering your product is even easier<br />
than before. You can register your<br />
product on our website at<br />
www.themdbfamily.com<br />
Maintenance <strong>and</strong> Cleaning:<br />
abrasive chemicals for cleaning. Clean with mild<br />
soap on a soft rag. Rinse <strong>and</strong> dry thoroughly. If<br />
the warranty will be voided.<br />
Storage:<br />
Pine woods exchange moisture with the air<br />
adjusting to major changes in room temperature<br />
<strong>and</strong> humidity. Therefore it is best to place your<br />
furniture away from heating or air-conditioning<br />
vents. Sunlight is not friendly to solid wood<br />
furniture <strong>and</strong> prolonged direct exposure to harsh<br />
sunlight can discolor the finish. Be careful not to<br />
place your furniture in direct sunlight for extended<br />
periods of time. As with all your fine furniture,<br />
blot up spills immediately.<br />
IF YOU WOULD LIKE TO ORDER REPLACEMENT<br />
OR MISSING PARTS. PLEASE VISIT US AT:<br />
WWW.THEMDBFAMILY.COM<br />
OR YOU CAN CONTACT US BY MAIL:<br />
MDB FAMILY<br />
855 WASHINGTON BLVD.<br />
MONTEBELLO, CA 90640