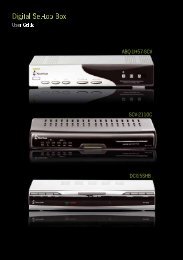
DVG-N5402SP - StarHub
DVG-N5402SP - StarHub
DVG-N5402SP - StarHub

You also want an ePaper? Increase the reach of your titles
YUMPU automatically turns print PDFs into web optimized ePapers that Google loves.
<strong>DVG</strong>-<strong>N5402SP</strong><br />
VoIP Wireless Router<br />
User’s Manual<br />
Version 1.4<br />
(30 March 2011)
© 2010 D-Link Corporation. All rights reserved.<br />
Reproduction in any manner whatsoever without the written permission of D-Link Corporation is strictly forbidden.<br />
Trademarks used in this text: D-Link and the D-Link logo are trademarks of D-Link Corporation/D-Link Systems<br />
Inc.; Other trademarks and trade names may be used in this document to refer to either the entities claiming the<br />
marks and names or their products. D-Link Corporation disclaims any proprietary interest in trademarks and trade<br />
names other than its own.<br />
Warranty: please contact your D-Link Authorized Reseller or the D-Link Branch Office nearest your place of<br />
purchase for information about the warranty offered on your D-Link product.<br />
Information in this document is subject to change without notice.<br />
FCC Warning<br />
This equipment has been tested and found to comply with the limits for a Class B digital device, pursuant to Part 15<br />
of the FCC Rules. These limits are designed to provide reasonable protection against harmful interference in a<br />
residential installation. This equipment generates, uses, and can radiate radio frequency energy and, if not installed<br />
and used in accordance with the instructions, may cause harmful interference to radio communication. However,<br />
there is no guarantee that interference will not occur in a particular installation. If this equipment does cause harmful<br />
interference to radio or television reception, which can be determined by turning the equipment off and on, the user<br />
is encouraged to try to correct the interference by one or more of the following measures:<br />
� Reorient or relocate the receiving antenna.<br />
� Increase the separation between the equipment and receiver.<br />
� Connect the equipment into an outlet on a circuit different from that to which the receiver is connected.<br />
� Consult the dealer or an experienced radio/TV technician for help.<br />
CE Mark Warning<br />
This is a Class B product. In a domestic environment, this product may cause radio interference in which case the<br />
user may be required to take adequate measures.<br />
Warnung!<br />
Dies ist ein Produkt der Klasse B. Im Wohnbereich kann dieses Produkt Funkstoerungen verursachen. In diesem<br />
Fall kann vom Benutzer verlangt werden, angemessene Massnahmen zu ergreifen.<br />
Precaución!<br />
Este es un producto de Clase B. En un entorno doméstico, puede causar interferencias de radio, en cuyo case, puede<br />
requerirse al usuario para que adopte las medidas adecuadas.<br />
Attention!<br />
Ceci est un produit de classe B. Dans un environnement domestique, ce produit pourrait causer des interférences<br />
radio, auquel cas l`utilisateur devrait prendre les mesures adéquates.<br />
Attenzione!<br />
Il presente prodotto appartiene alla classe B. Se utilizzato in ambiente domestico il prodotto può causare interferenze<br />
radio, nel cui caso è possibile che l`utente debba assumere provvedimenti adeguati.
Contents<br />
1. Introduction .......................................................................................................................................................... 1<br />
1-1 Product Overview ....................................................................................................................................... 1<br />
1-2 Hardware Description ................................................................................................................................. 2<br />
2. Getting Started ..................................................................................................................................................... 4<br />
3. VoIP Router Web Configuration (continued) ....................................................................................................... 5<br />
3-1 SETUP ........................................................................................................................................................ 5<br />
3-1-1 Wireless Setup ................................................................................................................................. 5<br />
3-1-2 LAN Setup ...................................................................................................................................... 12<br />
3-2 ADVANCED .............................................................................................................................................. 14<br />
3-2-1 Parental Control ............................................................................................................................. 14<br />
3-2-2 Firewall and DMZ ........................................................................................................................... 19<br />
3-2-3 Advanced Wireless ......................................................................................................................... 22<br />
3-2-4 Advanced Network ......................................................................................................................... 24<br />
3-2-5 Schedule ........................................................................................................................................ 28<br />
3-3 MAINTENANCE........................................................................................................................................ 29<br />
3-3-1 Device Management ...................................................................................................................... 29<br />
3-3-2 Backup and Restore ....................................................................................................................... 30<br />
3-3-3 Dynamic DNS ................................................................................................................................. 32<br />
3-3-4 USB File Sharing over FTP ............................................................................................................ 33<br />
3-3-5 Diagnostics ..................................................................................................................................... 34<br />
3-4 STATUS .................................................................................................................................................... 36<br />
3-4-1 Device Info ..................................................................................................................................... 36<br />
3-4-2 VoIP Status ..................................................................................................................................... 38<br />
3-4-3 LAN Client ...................................................................................................................................... 39<br />
3-4-4 Statistics ......................................................................................................................................... 40<br />
3-4-5 Logout ............................................................................................................................................ 41<br />
Appendix ................................................................................................................................................................ 42<br />
Product Features ............................................................................................................................................ 42<br />
D-Link Systems, Inc.
<strong>DVG</strong>-<strong>N5402SP</strong> User’s Manual Product Overview<br />
1. Introduction<br />
1-1 Product Overview<br />
The <strong>DVG</strong>-<strong>N5402SP</strong> is designed to carry both voice and facsimile over the IP network and wirelessly share<br />
Internet access. It uses the industry standard SIP call control protocol so as to be compatible with free registration<br />
services or VoIP service providers’ systems. As a standard user agent, it is compatible with all common Soft<br />
Switches and SIP proxy servers. While running optional server software, the VoIP Router can be configured to<br />
establish a private VoIP network over the Internet without a third-party SIP Proxy Server.<br />
The <strong>DVG</strong>-<strong>N5402SP</strong> can be seamlessly integrated into an existing network by connecting to a phone set and fax<br />
machine. With only a broadband connection such as an ADSL bridge/router, a Cable Modem or a leased-line<br />
router, the VoIP Router allows you to use voice and fax services over IP in order to reduce the cost of all long<br />
distance calls.<br />
The <strong>DVG</strong>-<strong>N5402SP</strong> is also an 802.11b/g/n wireless access point. Allow wireless clients to connect to it and share<br />
your broadband Internet connection. A built-in 4-port switch makes it possible to connect up to 4 Ethernet-enabled<br />
computers or devices to also share your Internet connection.<br />
D-Link Systems, Inc. 1
<strong>DVG</strong>-<strong>N5402SP</strong> User’s Manual Hardware Description<br />
1-2 Hardware Description<br />
Front Panel<br />
Power: A steady green light<br />
indicates a proper connection<br />
to a power source. A red light<br />
indicates the power-on self test<br />
fails or the device is<br />
malfunction.<br />
Prov/Alm: A blinking light<br />
indicates the VoIP Router can<br />
not register with SIP Server or<br />
can not get the IP address. A<br />
blinking light also indicates the<br />
VoIP Router is attempting to<br />
connect with the Provisioning<br />
server. Once the service<br />
connects, the LED will turn off.<br />
The LED will light solid red if<br />
the self-test or boot-up fails.<br />
Register: The Register LED<br />
will turn on and continuously<br />
working when the VoIP Router<br />
is connected to a VoIP service<br />
provider. The LED will flash if<br />
not connected to a service<br />
provider.<br />
WLAN: A steady light indicates a wireless connection. A blinking light indicates that the VoIP Router is<br />
receiving or transmitting from or to the wireless network.<br />
WAN: When a connection is established the LED will light up solid. The LED will blink to indicate the activity.<br />
If the LED does not light up when a cable is connected, verify the cable connections and ensure that your<br />
devices are powered on.<br />
LAN: When a connection is established the LED will light up solid on the appropriate port. The LEDs will<br />
blink to indicate the activity. If the LED does not light up when a cable is connected, verify the cable<br />
connections and ensure that your devices are powered on.<br />
USB: When a connection is established the LED will light up solid. The LED will blink to indicate the activity.<br />
If the LED does not light up when a USB device is connected, verify the USB connection and ensure that<br />
the devices are powered on.<br />
Phone: This LED displays the VoIP status and hook or ringing activity on the phone port that is used to<br />
connect your normal telephone(s). If a phone connected to a phone port is off the hook or in use, this LED<br />
will light solid. When a phone is ringing, the indicator will blink.<br />
Line: Light on means the line is in use (off-hook), and vice versa.<br />
WPS: When a WPS negotiation is established the LED will light up solid. The LED will blink to indicate the<br />
activity. If the LED does not light up when the WPS negotiation is failed or is not established.<br />
D-Link Systems, Inc. 2
<strong>DVG</strong>-<strong>N5402SP</strong> User’s Manual Hardware Description<br />
Rear Panel<br />
7. POWER: Power adapter, for connecting to the power adapter of 12V, 2A.<br />
1. Antenna: Connect to a<br />
wireless network.<br />
2. LINE: Connect to the<br />
telephone line on the wall jack<br />
through a telephone cable.<br />
3. PHONE2/PHONE1:<br />
Connect to your phones through<br />
a standard telephone cable.<br />
4. USB: USB host 2.0 port,<br />
for connecting to another USB<br />
device to supply some<br />
value-added application.<br />
5. LAN4/LAN3/LAN2/LAN1:<br />
RJ-45 port, for connecting to the<br />
Ethernet port of a PC or the<br />
Ethernet devices through an<br />
Ethernet cable.<br />
6. WAN: Connect to your<br />
ONT through an Ethernet cable.<br />
8. RESET: Restore to factory defaults. To restore factory defaults, keep the VoIP Router powered on, push a<br />
paper clip into the hole to press the button for over 5 seconds and then release.<br />
9. WPS: Button to enable or disable WPS.<br />
10. ON/OFF: Power switch, power on or power off the VoIP Router.<br />
WARNING: DO NOT (1) connect the phone ports to each other (FXS to FXS) or (2) connect any<br />
phone port directly to a PSTN line (FXS to PSTN) or to an internal PBX line (FXS to PBX extension).<br />
(3) Stacking is forbidden. Doing so may damage your VoIP Router.<br />
Use the Reset Button to restore factory default settings:<br />
1. Power on.<br />
2. Press and hold the Reset button for over 5 seconds.<br />
3. Release the Reset button. Factory settings are restored.<br />
D-Link Systems, Inc. 3
<strong>DVG</strong>-<strong>N5402SP</strong> User’s Manual SETUP<br />
2. Getting Started<br />
To access the Web-based configuration utility, open a Web browser such as IE (Internet Explorer) and enter the<br />
IP address of the <strong>DVG</strong>-<strong>N5402SP</strong> from LAN port.<br />
Open your Web browser and enter<br />
http://192.168.0.1 into the URL address<br />
bar. Click Enter.<br />
Click Login to enter Web site.<br />
The default username and password of user account: admin/password .<br />
D-Link Systems, Inc. 4
<strong>DVG</strong>-<strong>N5402SP</strong> User’s Manual SETUP<br />
3. VoIP Router Web Configuration (continued)<br />
3-1 SETUP<br />
3-1-1 Wireless Setup<br />
This section instructs you how to setup your wireless network on the VoIP Router device.<br />
Setup Hint:<br />
1. Every device in the same wireless network must use the same SSID.<br />
2. To avoid wireless network overlap, a specific and different channel is needed.<br />
3. Make sure security used by every device in the same wireless network is compatible with the wireless<br />
AP.<br />
3-1-1-1 Wireless Basic<br />
SETUP → Wireless Setup → Wireless Basic<br />
Enable Wireless LAN Interface: Enable wireless basic settings on LAN interface.<br />
D-Link Systems, Inc. 5
<strong>DVG</strong>-<strong>N5402SP</strong> User’s Manual SETUP<br />
Wireless Network Name (SSID): SSID is the name of your wireless network. All wireless-equipped<br />
devices share the same SSID to communicate with each other. It must be unique to identify separated<br />
wireless network. For security, you should change the default SSID to a special ID. By default the SSID will<br />
be name “<strong>DVG</strong>-<strong>N5402SP</strong>-XXXXXX” and “XXXXXX” will be the last 6 numbers of your WAN connection<br />
“TR069” MAC Address.<br />
Visibility Status: Select the visibility status.<br />
Visible indicates that the device broadcasts the SSID.<br />
Invisible indicates that the device does not broadcast the SSID.<br />
Country: Select the country where you are located from the drop-down menu.<br />
802.11 Mode: The VoIP Router can operate in 2.4GHz ISM band with different speed of wireless<br />
connection, Select the wireless band of your network.<br />
802.11b only - Allow all 802.11B compliant wireless devices to associate with the wireless AP.<br />
802.11g only - Allow all 802.11G compliant wireless devices to associate with the wireless AP.<br />
802.11n only - Allow all 802.11N compliant wireless devices to associate with the wireless AP.<br />
Mixed 802.11b/g – Allow a mix of both 802.11B and 802.11G compliant wireless devices to associate<br />
with the wireless AP.<br />
Mixed 802.11n/g - Allow a mix of both 802.11N and 802.11G compliant wireless devices to associate<br />
with the wireless AP.<br />
Mixed 802.11b/g/n - Allow a mix of 802.11B, 802.11G, and 802.11N compliant wireless devices to<br />
associate with the wireless AP.<br />
Bandwidth: Select the bandwidth from the drop-down list. You can select 20M, 40M Plus, or 40M Minus.<br />
Wireless Channel: Select a clear and appropriate channel for your wireless network. A device on your<br />
wireless network must use a specific channel to transmit and receive data. If wireless network has overlap,<br />
change a different channel number.<br />
User Isolation: The isolation among all the stations that are connected with the same VAP (Virtual Access<br />
Point). You can select Off or On.<br />
D-Link Systems, Inc. 6
<strong>DVG</strong>-<strong>N5402SP</strong> User’s Manual SETUP<br />
3-1-1-2 Wireless Security<br />
This section introduces you different ways of wireless security you can set up. It is important to enable<br />
secure algorithm to protect your data from eavesdropping by unauthorized wireless users.<br />
SETUP → Wireless Setup → Wireless Security<br />
Wireless Security Mode: Select the encryption/authentication type: None, WEP, WPA only, WPA2 only,<br />
or WPA/WP2 Mixed.<br />
D-Link Systems, Inc. 7
<strong>DVG</strong>-<strong>N5402SP</strong> User’s Manual SETUP<br />
SETUP → Wireless Setup → Wireless Security (WEP)<br />
WEP Key Length: Select 64-bit or 128-bit data encryption.<br />
Default Tx Key: You can select one of the keys as active key at a time.<br />
WEP Key Format: Select the preferred WEP Key Format according to which WEP encryption you choose.<br />
When WEP 64bits is enabled, you can select ASCII (5 characters) and Hex (10 characters). When WEP<br />
128bits is enabled, you can select ASCII (13 characters) and Hex (26 characters).<br />
WEP Key 1 – 4: You can manually enter key value from Key1 to Key4. Type a character sting and apply<br />
changes.<br />
For a 64-bit WEP key - Enter 5 characters (ASCII sting) or 10 hexadecimal characters (“0-9”, “A-F”).<br />
For a 128-bit WEP key - Enter 13 characters (ASCII sting) or 26 hexadecimal characters (“0-9”, “A-F”).<br />
D-Link Systems, Inc. 8
<strong>DVG</strong>-<strong>N5402SP</strong> User’s Manual SETUP<br />
WPA Authentication Mode<br />
The wireless network can use WPA Authentication to verify whether a wireless device is allowed to access<br />
your Access Point or not. You can choose to use Enterprise (RADIUS) method or Personal (Pre-Shared<br />
Key). The encryption mechanism used for RADIUS and WPA-PSK is the same. The difference between the<br />
two is that WPA-PSK uses a specific characters sting like password instead of a user-authentication.<br />
SETUP → Wireless Setup → Wireless Security (WPA-PSK)<br />
If WPA Security Mode is set to WPA (WPA only, WPA2 only, or WPA/WP2 Mixed), you can set WPA<br />
Mode to WPA-Personal or WPA-Enterprise, select the security mode according to your wireless network.<br />
Encryption Mode: Encryption mode is used for the configuration of WPA or WPA2 Mixed.<br />
TKIP - TKIP is the security protocol used in WPA. The length of TKIP encryption is longer than WEP<br />
encryption that increases the complexity of decoding for crackers.<br />
AES - The most powerful encryption algorithm that is commonly used in WPA.<br />
Group Key Update Interval: Set the update interval of the group key.<br />
Pre-Shared Key: Enter a key of 8-64 characters long in the Pre-Shared Key filed. Make sure this key is<br />
exactly the same on all other wireless stations. By default, the Pre-Shared Key will be the serial number<br />
located below your device. Use that to access your wireless network.<br />
D-Link Systems, Inc. 9
<strong>DVG</strong>-<strong>N5402SP</strong> User’s Manual SETUP<br />
SETUP → Wireless Settings → Wireless Security (WPA-Enterprise)<br />
If WPA Security Mode is set to WPA (WPA only, WPA2 only, or WPA2 Mixed), you can set WPA Mode<br />
to WPA-Enterprise (WPA- Enterprise, WPA2- Enterprise, WPA2 Mixed- Enterprise), select the security<br />
mode according to your wireless network.<br />
WPA Mode: Select WPA-Enterprise.<br />
WPA Cipher Suite: WPA Cipher Suite is used for the configuration of WPA or WPA2 Mixed.<br />
TKIP - TKIP is the security protocol used in WPA. The length of TKIP encryption is longer than WEP<br />
encryption that increases the complexity of decoding for crackers.<br />
AES - The most powerful encryption algorithm that is commonly used in WPA.<br />
RADIUS Server:<br />
RADIUS server IP Address - Enter the IP address of the authentication RADIUS server.<br />
RADIUS server Port - Enter the port number of the authentication RADIUS server. Keep the default<br />
value: 2801 unless the server required change to another number.<br />
RADIUS server Shared Secret - Enter the password such as a security Key.<br />
D-Link Systems, Inc. 10
<strong>DVG</strong>-<strong>N5402SP</strong> User’s Manual SETUP<br />
3-1-1-3 WPS<br />
SETUP → Wireless Setup → WPS<br />
Wireless SSID: Select the VAP (Virtual Access Point) of which the WPS function is enabled.<br />
Note: There is only one VAP of which the WPS function is enabled each time. If the WPS function of the<br />
VAP has been enabled, the WPS function would be disabled before you enable the WPS function of<br />
another VAP.<br />
Enable: Enable or disable the WPS function. The WPS function of the VoIP Router only supports the<br />
following three authentication methods: WPA2-PSK, WPA2-PSK, or WPA2-Mixed. If the page is in gray,<br />
you need to enable WPA2-PSK, WPA2-PSK, or WPA2-Mixed.<br />
PBC Button: Click the PBC button to trigger WPS negotiation session through PBC.<br />
Input Station PIN: Enter the PIN code (Personal Identification Number) of the station.<br />
WPS Session Status: It shows the. There are four WPS negotiation status: INPROCESS, ERROR,<br />
SUCCESS, or OVERLAP.<br />
D-Link Systems, Inc. 11
<strong>DVG</strong>-<strong>N5402SP</strong> User’s Manual SETUP<br />
3-1-2 LAN Setup<br />
SETUP → LAN Setup<br />
Router IP Address: Enter the LAN IP address of the VoIP Router. It is also the default gateway for DHCP<br />
clients.<br />
Subnet Mask: Enter the subnet mask for DHCP clients.<br />
D-Link Systems, Inc. 12
<strong>DVG</strong>-<strong>N5402SP</strong> User’s Manual SETUP<br />
SETUP → LAN Setup<br />
Enable DHCP Server: This variable is to assign the IP address for the devices connected to LAN port of<br />
the VoIP Router.<br />
IP Pool Starting Address: Enter the starting IP address for the DHCP server's IP assignment.<br />
IP Pool Ending Address: Enter the ending IP address for the DHCP server's IP assignment.<br />
DHCP Lease Time: Enter the length of time for the IP lease.<br />
Domain Name Server Assignment: Select Auto or Manual to get the IP address of DNS (Domain Name<br />
Server) assigned by ISP or manually.<br />
Domain Name Server IP: Enter the primary and secondary IP address of DNS (Domain Name Server) if<br />
Domain Name Server Assignment is Manual. Otherwise, the VoIP Router will not be able to access hosts<br />
using hostnames instead of IPs.<br />
D-Link Systems, Inc. 13
<strong>DVG</strong>-<strong>N5402SP</strong> User’s Manual MAINTENANCE<br />
3-2 ADVANCED<br />
3-2-1 Parental Control<br />
3-2-1-1 MAC Filtering<br />
Use MAC Filters to deny computers within the local area network from accessing the Internet. You can<br />
either manually add a MAC address that are connected to the VoIP Router.<br />
ADVANCED → Parental Control → MAC Filtering<br />
Configure Block MAC Address:<br />
Disable Block MAC Address – Unable the MAC Filtering<br />
Enable Block MAC, allow following PC to access network – MAC Address that include in the list will be able to connect to the<br />
network.<br />
Enable Block MAC, deny following PC to access network – MAC Address that include in the list will not be able to connect to<br />
the network.<br />
MAC Address: Enter the MAC of the computer in the LAN (Local Area Network) to be used in the MAC<br />
filtering list.<br />
DHCP client list: Get the MAC address from computer that’s listed in the LAN client list.<br />
Schedule: Select a rule in the drop down list. Rules in the list can be configured in Advanced -> Schedules.<br />
Click the Schedules button to go to the page.<br />
D-Link Systems, Inc. 14
<strong>DVG</strong>-<strong>N5402SP</strong> User’s Manual MAINTENANCE<br />
3-2-1-2 IP Filtering<br />
Use IP Filters to deny particular LAN IP addresses from accessing the Internet. You can deny specific port<br />
numbers or all ports for a specific IP address. The screen will display well-known ports that are defined. To<br />
use them, click the edit icon. You will only need to enter the LAN IP address (es) of the computer (s) that will<br />
be denied Internet access.<br />
ADVANCED → Parental Control → IP Filtering<br />
Enable IP Filtering: Check the box to deny particular LAN IP addresses from accessing the Internet.<br />
IP: Enter the IP address that you want to deny in this filed.<br />
TCP/UDP: Select TCP, UDP or Both that will be used with the IP address that will be blocked.<br />
Remark: Enter comments.<br />
D-Link Systems, Inc. 15
<strong>DVG</strong>-<strong>N5402SP</strong> User’s Manual MAINTENANCE<br />
3-2-1-3 Port Filtering<br />
Port filtering enables you to control all data that can be transmitted over routers. When the port used at the<br />
source end is within the defined scope, it will be filtered without transmission.<br />
ADVANCED → Parental Control → Port Filtering<br />
Enable Port Filtering: This variable is to restrict certain types of data packets by port.<br />
Port Range: Enter the port range that will be denied access to the Internet.<br />
TCP/UDP: Select TCP, UDP or Both that will be used with the port that will be blocked.<br />
Remark: Enter comments.<br />
D-Link Systems, Inc. 16
<strong>DVG</strong>-<strong>N5402SP</strong> User’s Manual MAINTENANCE<br />
3-2-1-4 URL Filtering<br />
URL Filtering is used to block websites (for example, www.yahoo.com).<br />
ADVANCED → Parental Control → URL Filtering<br />
Enable URL Filtering: Enable or disable the URL function.<br />
URL Black Filtering: Users unable to access the website that are listed in the URL Filtering List.<br />
URL White Filtering: Users can only access the website that are listed in the URL Filtering List.<br />
URL: URL (Uniform Resource Locator) is a mark method for describing the Websites on the Internet and<br />
other resource locations.<br />
Comment: Enter the comments.<br />
Schedule: Select a rule in the drop down list. Rules in the list can be configured in Advanced -> Schedules.<br />
Click the Schedules button to go to the page.<br />
D-Link Systems, Inc. 17
<strong>DVG</strong>-<strong>N5402SP</strong> User’s Manual MAINTENANCE<br />
3-2-1-5 DHCP Filtering<br />
DHCP Filtering is used to control network access based on the IP address of the network device. It is used<br />
to deny network or Internet access.<br />
ADVANCED → Parental Control → DHCP Filtering<br />
Enable DHCP Filter: Enable or disable the DHCP filtering function.<br />
ADVANCED → Firewall and DMZ → DHCP Filtering<br />
WHITE LIST: Bind the static IP address with the specified MAC address. If the MAC address of the device<br />
on the LAN consists with the specified MAC address, the VoIP Router assigns the binding IP address.<br />
IP: Enter the binding IP address.<br />
MAC: Enter the binding MAC address.<br />
D-Link Systems, Inc. 18
<strong>DVG</strong>-<strong>N5402SP</strong> User’s Manual MAINTENANCE<br />
ADVANCED → Firewall and DMZ → DHCP Filtering<br />
BLACK LIST: If the MAC address of the device on the LAN, the VoIP Router does not assign the IP<br />
address.<br />
MAC: Enter the MAC address of the device on the LAN.<br />
3-2-2 Firewall and DMZ<br />
3-2-2-1 DMZ<br />
DMZ (Demilitarized Zone) allows the server on the LAN site to be directly exposed to the Internet for<br />
accessing data and to forward all incoming ports to the DMZ Host. Adding a client to the DMZ may expose<br />
that computer to a variety of security risks; so only use this option as a last resort.<br />
ADVANCED → Firewall and DMZ → DMZ<br />
D-Link Systems, Inc. 19
<strong>DVG</strong>-<strong>N5402SP</strong> User’s Manual MAINTENANCE<br />
Enable DMZ: Check the box to enable DMZ feature.<br />
WAN Connection: Select the WAN port that enables DMZ from the drop-down list. Users can access the<br />
DMZ host that is provided by this WAN connection through Internet access.<br />
DMZ Host IP Address: Enter the IP address of that computer as a DMZ Host with unrestricted Internet<br />
access.<br />
Note: Either this function or virtual server can be selected for use in accessing external services.<br />
3-2-2-2 Dos Protection<br />
ADVANCED → Firewall and DMZ → Dos Protection<br />
Enable Attack Prevent: Check the box to prevent DoS attacks from WAN or LAN. There are various types<br />
of DoS attacking. Leave settings in this field to the default if you are not familiar with it.<br />
D-Link Systems, Inc. 20
<strong>DVG</strong>-<strong>N5402SP</strong> User’s Manual MAINTENANCE<br />
3-2-2-3 Virtual Server<br />
Enable users on Internet to access the WWW, FTP and other services from your NAT. It is also known as<br />
port forwarding. When remote users are accessing Web or FTP servers through WAN IP address, it will be<br />
routed to the server with LAN IP address.<br />
ADVANCED → Firewall and DMZ → Virtual Server<br />
WAN Connection (s): Select the WAN interface for the Internet connection. Users can access the virtual<br />
server through the WAN connection.<br />
WAN Port Range: Enter the port range for the WAN side.<br />
TCP/UDP: Select the communication protocols used by the server, TCP, UDP or Both.<br />
LAN Host IP Address: Enter the IP address of the device that provides various services.<br />
Server Port Range: Enter comments.<br />
Remark: Enter comments.<br />
D-Link Systems, Inc. 21
<strong>DVG</strong>-<strong>N5402SP</strong> User’s Manual MAINTENANCE<br />
3-2-3 Advanced Wireless<br />
3-2-3-1 Advanced<br />
This section introduces advanced configuration of the wireless access point. If you are not familiar with the<br />
following functions, keep the default parameters. In some cases, incorrect settings may reduce wireless<br />
performance.<br />
ADVANCED → Advanced Wireless → Advanced<br />
Transmission Rate: You can select it from the drop-down list. Auto rate changes automatically to get<br />
better throughput depending on the range and environment of the wireless network.<br />
Transmit Power: You can adjust the percentage of power 100, 80, 60, 40, 20 of your VoIP Router to<br />
change the coverage of wireless network. Keep the default value, 100% to reach full range.<br />
Beacon Period: It indicates the frequency interval of target beacon transmission time which can be found<br />
in a packet body. The VoIP Router transmits the beacon packet to help a wireless client to identify the<br />
existence of nearby AP (Access Point). If the beacon intervals are too long, it would be hard to access the<br />
network. If the beacon intervals are too short, the resources would be wasted. The default value is 100.<br />
RTS Threshold: It is a mechanism to implement in collision avoidance. In a large wireless network, two<br />
stations do not hear each other but can hear wireless access point. When the two send data to AP (Access<br />
Point) at the same time, it may result in data collision and a loss of messages for both wireless stations. In<br />
most case, it is recommended to keep the default value:2347.<br />
Fragmentation Threshold: A packet can be fragmented into small units to pass over a network medium<br />
that can not support the original packet size. If you encounter a busy network, a lower value of fragment<br />
threshold could improve performance. If the traffic flows are not very busy, a higher fragment threshold<br />
D-Link Systems, Inc. 22
<strong>DVG</strong>-<strong>N5402SP</strong> User’s Manual MAINTENANCE<br />
provides good network performance. In most case, it is recommended to keep the default value: 2346.<br />
Preamble Type: It defines the length of the preamble which sends out with a packet format. Specify an<br />
appropriate preamble type for your network. If you do not know which one to select, it is recommended to<br />
keep the default setting.<br />
3-2-3-2 Access Control<br />
The Access Control setting provides a service that you can control different access rights for different<br />
wireless clients connected to your VoIP Router. The local and remote stations are limited to access the<br />
Internet through your AP (Access Point) using MAC address of wireless client. Choose the appropriate<br />
Access Control Services from the option of Access Control Mode.<br />
ADVANCED → Advanced Wireless → Access Control<br />
Access Control Mode:<br />
Disable: The VoIP Router does not response to any access rules. You are not allowed to modify the<br />
configuration in this page.<br />
Allow: If you select Allow, only those wireless clients whose MAC addresses are in the WLAN<br />
FILTER LIST are allowed to connect to your AP (Access Point).<br />
Deny: If you select Deny, only those wireless clients whose MAC addresses are in the WLAN FILTER<br />
LIST are restricted and denied to connect to your AP (Access Point).<br />
MAC: Specify the MAC address for permitting or blocking the access to your AP (Access Point).<br />
Comment: Enter the comments.<br />
D-Link Systems, Inc. 23
<strong>DVG</strong>-<strong>N5402SP</strong> User’s Manual MAINTENANCE<br />
3-2-4 Advanced Network<br />
3-2-4-1 ALG<br />
ALG (Application Layer Gateway) is also named the third generation firewall. When the user on the trusted<br />
network wants to connect to the untrusted network (Internet), the application will be guided to the proxy<br />
server of the firewall. The proxy server disguises the actual server on the Internet. It can estimate the<br />
request, and decides the permission or deny of the request according to the rule in a suit of unit network<br />
service.<br />
ADVANCED → Advanced Network → ALG<br />
D-Link Systems, Inc. 24
<strong>DVG</strong>-<strong>N5402SP</strong> User’s Manual MAINTENANCE<br />
3-2-4-2 QoS<br />
LAN QoS<br />
ADVANCED → Advanced Network → QoS<br />
Enable LAN QoS: Check the box to enable LAN QoS by Hardware.<br />
Priority: Use the drop-down menu to select Low or HIGH for the VoIP Router to deliver the packets from<br />
LAN interface when the packets arrive at the same time.<br />
Flow Control: Check the box to limit incoming and outgoing rate.<br />
Incoming Rate Limit: Select the proper rate limit for the specific LAN port from the drop-down menu. The<br />
flow is from LAN to WAN, and the rate limit can not exceed the real upstream bandwidth.<br />
Outgoing Rate Limit: Select the proper rate limit for the specific LAN port from the drop-down menu. The<br />
flow is from WAN to LAN, and the rate limit can not exceed the real downstream bandwidth.<br />
D-Link Systems, Inc. 25
<strong>DVG</strong>-<strong>N5402SP</strong> User’s Manual MAINTENANCE<br />
3-2-4-3 Static Routing<br />
Build static routes within an internal network. These routes will not apply to the Internet.<br />
ADVANCED → Advanced Network → Static Routing<br />
Destination Network Address: The destination IP address of the router.<br />
Subnet Mask: The subnet mask of the destination IP address.<br />
Use Gateway IP Address: The gateway IP address of the router.<br />
Use Interface: The interface name of the router output port.<br />
You can only choose Use Gateway IP Address or Use Interface.<br />
Click Apply to save the settings.<br />
D-Link Systems, Inc. 26
<strong>DVG</strong>-<strong>N5402SP</strong> User’s Manual MAINTENANCE<br />
3-2-4-4 UPNP<br />
ADVANCED → Advanced Network → UPNP<br />
Enable UPNP: Check the box to enable the IP traffic of the VOIP Router to pass through an Internet<br />
sharing device.<br />
D-Link Systems, Inc. 27
<strong>DVG</strong>-<strong>N5402SP</strong> User’s Manual MAINTENANCE<br />
3-2-5 Schedule<br />
To access the Schedules window, click the schedules button in the Advanced directory.<br />
You can add schedules in this page and then apply them to Parental Control.<br />
Name: Enter a Name for the schedule.<br />
Day(s): Use the radio buttons to click the desired Day(s), either All Week or Select Day(s) (in which case<br />
you must tick the checkboxes for the desired individual days of the week),<br />
All Day – 24 hrs: Tick to apply the rules for whole day.<br />
Start Time: Start time in hour and minute (24 Hour Time)<br />
End Time: End Time in hour and minute (24 Hour Time)<br />
Click Apply to see the entry in the Schedule Rule table. To remove an entry in the table, select the entry,<br />
and click the Delete button. To modify an entry in the table, select the entry, click the Edit button, make the<br />
desired changes, and then click the Apply button.<br />
D-Link Systems, Inc. 28
<strong>DVG</strong>-<strong>N5402SP</strong> User’s Manual MAINTENANCE<br />
3-3 MAINTENANCE<br />
3-3-1 Device Management<br />
MAINTENANCE → Device Management<br />
Note: Logging in as user, you can only access to some specific settings of the VoIP Router.<br />
Current Password: Enter the password for accessing the VoIP Router.<br />
New Password: Modify the password for accessing the VoIP Router.<br />
It is highly recommended that you modify the password for securing your VoIP Router.<br />
Confirm Password: Enter the modified password again.<br />
MAINTENANCE → Device Management<br />
You can manage the router through the following function with the selected WAN connection.<br />
PING: When you select the check box, you can ping the router with the WAN connection.<br />
WWW: When you select the check box, you can access the Web server of the router to manage the router.<br />
USB over FTP: When you select the check box, you can access your external storage through the internet<br />
side by acting the router as a FTP Server.<br />
D-Link Systems, Inc. 29
<strong>DVG</strong>-<strong>N5402SP</strong> User’s Manual MAINTENANCE<br />
3-3-2 Backup and Restore<br />
Reboot<br />
MAINTENANCE → Backup and Restore →Reboot<br />
Reboot: Click the Reboot button to reboot the system.<br />
Backup Setting<br />
The current system settings can be saved as a file onto the local hard drive.<br />
MAINTENANCE → Backup and Restore → Backup Setting<br />
Backup Setting: Click the Backup Settings button to save all current settings to a file on your PC.<br />
D-Link Systems, Inc. 30
<strong>DVG</strong>-<strong>N5402SP</strong> User’s Manual MAINTENANCE<br />
Update Setting<br />
MAINTENANCE → Backup and Restore → Update Setting<br />
To restore the system settings file, click the Browse button to search the local hard drive for the file to be<br />
used. Once you locate the file, click the Upload Setting button to overwrite the current settings with the<br />
settings saved to the file.<br />
Restore Default Setting<br />
MAINTENANCE → Backup and Restore → Restore Default Setting<br />
Click Restore Default Setting to reset the settings of the VoIP Router to the factory default settings.<br />
D-Link Systems, Inc. 31
<strong>DVG</strong>-<strong>N5402SP</strong> User’s Manual MAINTENANCE<br />
3-3-3 Dynamic DNS<br />
ADVANCED → Dynamic DNS<br />
Enable Dynamic DNS: Check the box to enable DDNS (Dynamic Domain Name Server) function. It is only<br />
necessary when the VoIP Router is set up behind an Internet sharing device that uses a dynamic IP<br />
address and does not support DDNS.<br />
Wan Connection: Select the WAN connection that you want to configure DDNS.<br />
Server Address: Select a DDNS service from the drop-down menu.<br />
Hostname: Enter the URL of the system (or NAT) – applied from domain name registration providers (e.g.<br />
www.dyndns.org).<br />
Username or Key: Enter the user name for logging into the DDNS server.<br />
D-Link Systems, Inc. 32
<strong>DVG</strong>-<strong>N5402SP</strong> User’s Manual MAINTENANCE<br />
Password or Key: Enter the password for logging into the DDNS server.<br />
Verify Password or Key: Enter the password again for confirmation.<br />
3-3-4 USB File Sharing over FTP<br />
MAINTENANCE → USB File Sharing over FTP<br />
Enabled FTP Server: Select the check box to enable the FTP server.<br />
FTP Server Status: The current status of FTP server.<br />
User Name: Enter the user name that accesses the FTP server.<br />
Password: Enter the password that accesses the FTP server.<br />
Purview: You can select View, Upload, Download for the user.<br />
D-Link Systems, Inc. 33
<strong>DVG</strong>-<strong>N5402SP</strong> User’s Manual MAINTENANCE<br />
3-3-5 Diagnostics<br />
3-3-5-1 Ping<br />
In this page, you can use ping to verify whether a remote peer is reachable.<br />
MAINTENANCE → Diagnostics → Ping<br />
Ping Destination: Enter the IP address or domain name for ping.<br />
Number of Ping: Enter the number of ping. Its range is in 1 to 100.<br />
Ping Packet Size: Set the packet size for ping. Its range is in 1 to 5600.<br />
D-Link Systems, Inc. 34
<strong>DVG</strong>-<strong>N5402SP</strong> User’s Manual MAINTENANCE<br />
3-3-5-2 Traceroute<br />
MAINTENANCE → Diagnostics → Traceroute<br />
Host: Enter the IP address or domain name for testing.<br />
Max TTL: Set the survival time of the data packets during testing. Its range is in 1 to 128.<br />
Wait times: Set the waiting time during testing. Its range is in 2 to 60.<br />
D-Link Systems, Inc. 35
<strong>DVG</strong>-<strong>N5402SP</strong> User’s Manual STATUS<br />
3-4 STATUS<br />
3-4-1 Device Info<br />
STATUS → Device Info<br />
For WAN Port Information, it shows IP address, subnet mask, default gateway and Domain name server. If<br />
you use PPPoE to obtain IP, you will know if the IP is obtained through this method. If IP address, subnet<br />
mask, default gateway is blank, it means that the VoIP Router does not obtain IP.<br />
D-Link Systems, Inc. 36
<strong>DVG</strong>-<strong>N5402SP</strong> User’s Manual STATUS<br />
For LAN Port Information, it shows LAN port IP, subnet mask, and the MAC address.<br />
For Hardware, it shows the hardware platform and driver version.<br />
D-Link Systems, Inc. 37
<strong>DVG</strong>-<strong>N5402SP</strong> User’s Manual STATUS<br />
3-4-2 VoIP Status<br />
STATUS → VoIP Status<br />
For Port Status, it includes if each port registers to Proxy successfully, the last dialed number, how many<br />
calls each port has made since the VoIP Router is start, etc.<br />
D-Link Systems, Inc. 38
<strong>DVG</strong>-<strong>N5402SP</strong> User’s Manual STATUS<br />
3-4-3 LAN Client<br />
STATUS → LAN Client<br />
The LAN CLIENTS table displayed the local LAN information.<br />
The ACTIVE WIRELESS CLIENTS table displayed the identification and transmission status of active<br />
wireless clients on wireless LAN interface.<br />
The DHCP CLIENTS table displayed LAN device that has already been assigned an address from<br />
<strong>DVG</strong>-<strong>N5402SP</strong>. You can check if the DHCP client has obtain an IP address.<br />
D-Link Systems, Inc. 39
<strong>DVG</strong>-<strong>N5402SP</strong> User’s Manual STATUS<br />
3-4-4 Statistics<br />
STATUS → Statistics<br />
It displays the information of the last call made. Press Refresh button to get the latest RTP Packet<br />
Summary.<br />
D-Link Systems, Inc. 40
<strong>DVG</strong>-<strong>N5402SP</strong> User’s Manual STATUS<br />
3-4-5 Logout<br />
STATUS → Logout<br />
If setting or parameter has been changed, remember to save the changes before you logout the<br />
configuration menu.<br />
D-Link Systems, Inc. 41
<strong>DVG</strong>-<strong>N5402SP</strong> User’s Manual Appendix<br />
Appendix<br />
Product Features<br />
WAN<br />
• One 10/100/1000Mbps auto-negotiation, auto-crossover RJ-45 Ethernet port<br />
• Support Static IP, DHCP, PPPoE, PPTP, L2TP, 3G USB Adapter, and Bridge.<br />
• QoS: IP TOS (Type of Services) and DiffServ (Differentiated Services) for both SIP<br />
signaling and RTP<br />
• NAT Traversal : Port Forwarding, STUN and Outbound Proxy<br />
• NTP: (Network Time Protocol RFC 1305), Accepts up to 3 Time Server<br />
• Time Zone Support<br />
• MAC Address Clone<br />
• RTP Packet Summary : packet sent, packet received, packet loss for voice quality<br />
analysis<br />
LAN<br />
• Four 10/100/1000Mbps auto-negotiation, auto-crossover RJ 45 Ethernet ports<br />
• Support router and bridge mode (NAT mode and Non-NAT mode)<br />
• DHCP server<br />
Voice Features<br />
• SIP (RFC3261) compatible<br />
• Voice codecs : G.711 a /ulaw, G.726, G.729A, G.723.1, G722, iLBC<br />
• CNG (Comfort Noise Generation)<br />
• VAD (Voice Activity Detection)<br />
• G.165/G.168 echo cancellation<br />
• Adjustable Jitter Buffer and programmable Gain Control<br />
• In-Band DTMF, Out-Of-Band DTMF relay (RFC2833, SIP INFO)<br />
• Multiple SIP Proxy server entries with failover mechanism<br />
• Polarity reversal generation (FXS)<br />
• T.30 (G.III) / Real time T.38 / Secured T.38 FAX relay<br />
• DTMF, FSK (Bellcore & ETSI) Caller ID generation.<br />
• Support Caller ID Restriction (CLIR)<br />
• Digit Map for dial plan<br />
• Speed Dial<br />
• Local phone book for peer-to-peer calling<br />
• E.164 Numbering & ENUM support<br />
• Hot-Line, Warm-Line support<br />
• Single Number / Account (reprehensive number) for multiple ports<br />
• Call features:<br />
o Call Hold, Call Waiting, Call Pickup<br />
o Call Forward - Unconditional, Busy, No Answer<br />
o Call Transfer - Unattended, Attended<br />
o Three Way Calling (Media Server required)<br />
• Analogue interface<br />
o Connector : RJ-11<br />
o Signaling protocol : Loop Start<br />
Configuration & Maintenance<br />
• Configuration methods:<br />
o Web<br />
D-Link Systems, Inc. 42
<strong>DVG</strong>-<strong>N5402SP</strong> User’s Manual Appendix<br />
o IVR<br />
o Telnet<br />
• Status reports:<br />
o Port status<br />
o Registration status<br />
o Ping tests<br />
o Hardware / software information<br />
• Firmware Upgrade through LOCAL, TFTP, FTP, HTTP, HTTPS server<br />
• Configuration Backup/Restore<br />
• Reset button (with restore factory default function)<br />
D-Link Systems, Inc. 43