Line 6 GearBox 3.5 - Recording Setup Guide - MIDI Manuals
Line 6 GearBox 3.5 - Recording Setup Guide - MIDI Manuals
Line 6 GearBox 3.5 - Recording Setup Guide - MIDI Manuals

Create successful ePaper yourself
Turn your PDF publications into a flip-book with our unique Google optimized e-Paper software.
Adobe Audition 3 <strong>Setup</strong> - Windows<br />
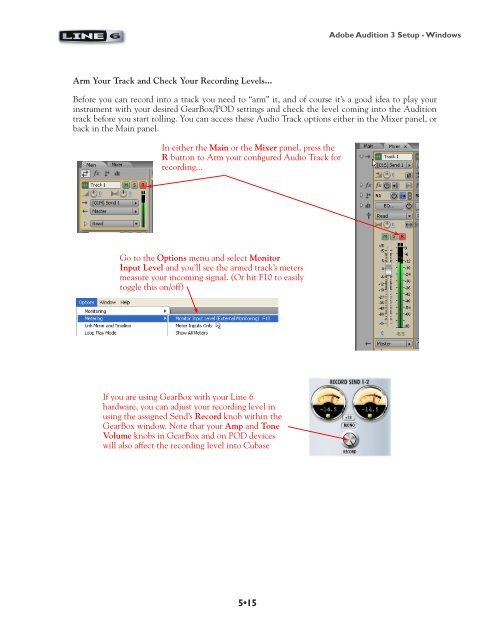
Arm Your Track and Check Your <strong>Recording</strong> Levels...<br />
Before you can record into a track you need to “arm” it, and of course it’s a good idea to play your<br />
instrument with your desired <strong>GearBox</strong>/POD settings and check the level coming into the Audition<br />
track before you start rolling. You can access these Audio Track options either in the Mixer panel, or<br />
back in the Main panel.<br />
In either the Main or the Mixer panel, press the<br />
R button to Arm your configured Audio Track for<br />
recording...<br />
Go to the Options menu and select Monitor<br />
Input Level and you’ll see the armed track’s meters<br />
measure your incoming signal. (Or hit F10 to easily<br />
toggle this on/off)<br />
If you are using <strong>GearBox</strong> with your <strong>Line</strong> 6<br />
hardware, you can adjust your recording level in<br />
using the assigned Send’s Record knob within the<br />
<strong>GearBox</strong> window. Note that your Amp and Tone<br />
Volume knobs in <strong>GearBox</strong> and on POD devices<br />
will also affect the recording level into Cubase<br />
5•15