Savannah Dresser with Door - Mamas & Papas
Savannah Dresser with Door - Mamas & Papas
Savannah Dresser with Door - Mamas & Papas

Create successful ePaper yourself
Turn your PDF publications into a flip-book with our unique Google optimized e-Paper software.
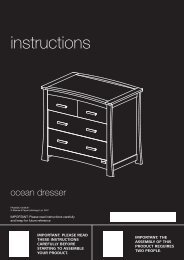
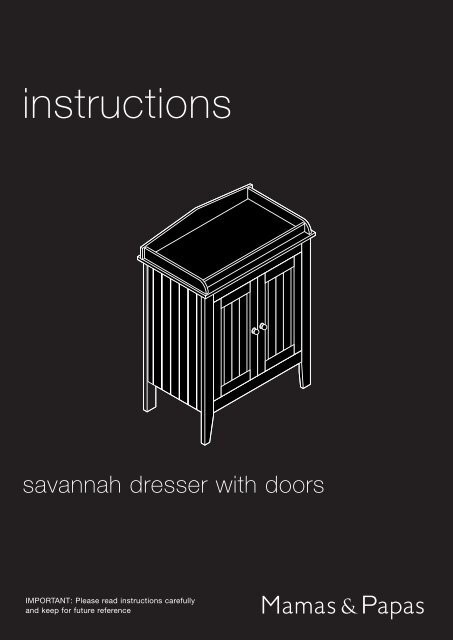
instructions<br />
savannah dresser <strong>with</strong> doors<br />
IMPORTANT: Please read instructions carefully<br />
and keep for future reference
SAVANNAH DRESSER/CHANGER<br />
THESE INSTRUCTIONS ARE IMPORTANT.<br />
PLEASE READ CAREFULLY AND RETAIN FOR FUTURE REFERENCE.<br />
The correct use and maintenance of your <strong>Savannah</strong> dresser/changer will ensure it gives long and trouble-free use.<br />
Remember the safety of your child is your responsibility.<br />
ASSEMBLY<br />
V2<br />
Before you begin to assemble the <strong>Savannah</strong> dresser/changer,<br />
please read through these instructions. Then carefully unpack<br />
your <strong>Savannah</strong> dresser/changer and check against the<br />
Fittings and Parts Check Lists to ensure you have a complete<br />
set of parts.<br />
TIPS: We recommend that you assemble your <strong>Savannah</strong><br />
dresser/changer on a clean, flat surface, making sure there<br />
are no sharp objects present which may mark or damage the<br />
panels.<br />
All wooden dowels are to be fitted by hand and not hammered<br />
into the wood as this could cause the panels to split.<br />
TOOL LIST: You will need 2 people, a crosshead screwdriver,<br />
a flathead screwdriver, a hammer and a tape measure.<br />
AFTER SALES SERVICE: If when you have unpacked your dresser you find that any parts are missing, or you<br />
have trouble assembling the dresser please do not return your purchase to the retailer. Please contact our<br />
Customer Care Helpline on: 01484 438222, where one of our trained advisors will be able to help you.<br />
Item Description Qty.<br />
FITTINGS CHECK LIST<br />
Item Description Qty.<br />
1 Hinge 4<br />
2 Mounting plate 4<br />
3 22mm Screw - washer headed crosshead 2<br />
4 Handle 2<br />
5 34mm Cam stud 17<br />
6 15mm Cam 17<br />
7 35mm Dowel 26<br />
8 16.5mm Shelf support 4<br />
9 4mm x 16mm Screw - crosshead 8<br />
10 Nail 20<br />
11 658mm H-section 1<br />
12 Euro Screw 8<br />
13 50mm Confirmat screw 4<br />
14 4mm Allen key 1<br />
15 Bumper 4<br />
16 13mm Hole Cover 4<br />
17 Glue 1<br />
2<br />
1 4<br />
3<br />
5 6<br />
7<br />
8<br />
9 10<br />
11<br />
12<br />
13<br />
14<br />
15<br />
16<br />
17<br />
GLUE<br />
CAUTION<br />
There are many small<br />
components used in the<br />
construction of this <strong>Savannah</strong><br />
dresser/changer.<br />
These items should be kept out<br />
of the reach of young children<br />
whilst assembling the unit.<br />
– 2 –
Item Description Qty.<br />
PARTS CHECK LIST<br />
Item Description Qty.<br />
15 Left end panel / legs 1<br />
16 Right end panel / legs 1<br />
17 Top 1<br />
18 Shelf - adjustable 1<br />
19 Base 1<br />
20 <strong>Door</strong> 2<br />
22 Rail - top front 1<br />
23 Rail - bottom 1<br />
24 Rear upstand 1<br />
25 Left side upstand 1<br />
26 Right side upstand 1<br />
27 Changer rail 1<br />
21 Back 2<br />
17 18<br />
15<br />
16<br />
20 22<br />
19<br />
21<br />
23<br />
24<br />
25 26<br />
27<br />
INFORMATION: JOINING PANELS WITH CAMS<br />
When the cam has been fitted, check<br />
that the arrow on top of the cam is<br />
facing along the connecting hole.<br />
To join two panels, simply insert the<br />
cam stud into the connecting hole<br />
and lock the cam by turning it<br />
through 180º <strong>with</strong> a screwdriver.<br />
– 3 –
FIXING OF UPSTANDS TO TOP<br />
Step 1a:<br />
Screw 3 cam studs (item 5) into the corresponding<br />
holes in the back edge of the top face of the top.<br />
Insert 2 wooden dowels (item 7) into<br />
the holes between the cam studs.<br />
Insert 4 wooden dowels (item 7)<br />
into the holes at the sides of<br />
the top as shown.<br />
Step 1b:<br />
Insert 3 cams (item 6) into the holes in the rear face<br />
of the rear upstand, the arrows of the cams need to<br />
point outwards towards the join.<br />
Important Safety Notice - Use as Baby Changing Unit<br />
If you wish to use your <strong>Savannah</strong> dresser as a changing unit, the changer rail (item 27) MUST be fitted (See step 3 below).<br />
If the dresser is not to be used as a changer you may omit the changer rail, the unused holes in the upstands<br />
(items 25 & 26) should then be filled using the hole covers (item 6) secured <strong>with</strong> the glue (item 17) supplied.<br />
Step 2:<br />
Slide the rear upstand over the fittings and tighten<br />
the cams.<br />
Step 3:<br />
Insert two wooden dowels (item 7) into the predrilled<br />
holes in the curved end of each side upstand<br />
(item 25 & 26).<br />
Insert the side upstand dowels into<br />
the corresponding holes in the<br />
changer rail (item 27).<br />
Step 4a:<br />
Push the side upstands into position<br />
and fix from the underside <strong>with</strong> 2<br />
confirmat screws (item 13),<br />
using the allen key<br />
provided to tighten<br />
the screws<br />
(item 14).<br />
Step 4b:<br />
Finally, fix the rear upstand to the side upstands<br />
using 2 confirmat screws (item 13).<br />
– 4 –
INSERTING FITTINGS INTO TOP AND FRONT RAIL<br />
Step 5a:<br />
Screw 7 of the cam studs (item 5) into the holes in<br />
the underside of the top as indicated in the diagram.<br />
Insert 8 wooden dowels (item 7) into the remaining<br />
holes.<br />
Step 5b:<br />
Insert 3 cams (item 6) into the top front rail,<br />
ensuring that the arrows on the cams are pointing<br />
outwards - towards the joining edge - see diagram.<br />
Step 6:<br />
Slide the front rail onto the fittings and push down<br />
firmly until the rail touches the top. Then tighten<br />
the cams, (turn clockwise to tighten).<br />
Note:<br />
The cams should be on the inside face.<br />
FIXING THE FRONT RAIL<br />
Step 7a:<br />
Insert 7 cams (item 6) into the holes in the base as<br />
indicated in the diagram, again ensuring the arrows<br />
on the fittings face outwards.<br />
INSERTING FITTINGS INTO BASE AND BOTTOM RAIL<br />
Step 7b:<br />
Screw 3 of the cam studs (item 5) into the bottom<br />
rail in the holes shown.<br />
Push in 2 wooden dowels (item 7) into the 2<br />
remaining holes in the rail.<br />
– 5 –
Step 8:<br />
Slide the bottom rail onto the front edge of the<br />
base panel as shown and tighten the cams. Ensure<br />
that the cams are uppermost when fixing the rail.<br />
FIXING THE BOTTOM RAIL<br />
INSERTING THE FITTINGS INTO THE ENDS<br />
Step 9:<br />
Insert 2 cam studs (item 5) into the holes in the end<br />
as indicated in the diagram.<br />
Push 3 wooden dowels (item 7) into the holes at<br />
either side of the cam studs as shown in the diagram.<br />
Insert 2 cams (item 6) into the holes towards the<br />
top of the panel as shown - remember the arrows!<br />
Position two mounting plates (item 2) over the<br />
corresponding holes in the inner face of the front<br />
leg - <strong>with</strong> the central slot in the mounting plates<br />
facing away from the end panel - insert 2 euro<br />
screws (item 12) through the holes in each<br />
mounting plate and screw into the leg.<br />
Repeat for the other end panel.<br />
central slot<br />
Step 10:<br />
Slide the base panel over the fittings at the bottom<br />
of the end, and tighten the cams.<br />
Ensure that the rail is to the front of the end (the<br />
front leg is tapered) and that the cams are on the<br />
underside of the base.<br />
FIXING THE BASE TO THE RIGHT HAND END<br />
tapered front leg<br />
– 6 –
Step 11:<br />
Carefully turn the right hand end over onto its back.<br />
Then slide the left hand end panel onto the base<br />
panel. Tighten the cams.<br />
FIXING OF THE LEFT HAND END<br />
Step 12:<br />
Slide the top panel onto the 2 ends.<br />
Take care to ensure that the front rail<br />
fits between the front legs.<br />
FIXING OF THE TOP<br />
Step 13:<br />
Taking care to make sure that there is nothing on the floor that could damage the product, carefully turn the<br />
<strong>Savannah</strong> dresser/changer onto its face.<br />
– 7 –
Step 14:<br />
Before fixing the back panel the unit has to be<br />
square. To do this measure the diagonals - they<br />
should be equal.<br />
Measure from the bottom of a leg to a diagonally<br />
opposite point i.e. where the back leg meets the top<br />
(see diagram). If the dimensions are unequal the<br />
<strong>Savannah</strong> dresser/changer is not square.<br />
To ‘square up’ the <strong>Savannah</strong> dresser/changer, gently<br />
push the longest diagonal, then re-measure the<br />
diagonals to check they are equal. Repeat until the<br />
dimensions are equal (<strong>with</strong>in 2-3mm is acceptable).<br />
SQUARING UP THE UNIT<br />
Step 15:<br />
Rest the 2 backs onto the back of the <strong>Savannah</strong><br />
dresser/changer. Position the backs up to the edges<br />
of the recesses in the ends and the top.<br />
Fix the outside edges of the back to the legs <strong>with</strong><br />
the nails (item 10) one to each corner, see diagram.<br />
Slide the H section (item 11) onto the backs from<br />
the bottom edge and slide it up until it reaches the<br />
underside of the top.<br />
FIXING OF THE BACK<br />
– 8 –
Step 16:<br />
Hammer the rest of the nails (item 10) into the back.<br />
FIXING OF THE BACK<br />
Step 17:<br />
Carefully stand the unit up and move into its final<br />
position.<br />
POSITIONING THE UNIT<br />
Take care to lift the <strong>Savannah</strong> dresser/changer -<br />
do not drag it. Seek assistance as required.<br />
FIXING OF HINGES TO DOOR<br />
Step 18a:<br />
Fit the hinges (item 1) into the large holes in the back<br />
of each door. Screw (item 9) the hinges to the door.<br />
Step 18b:<br />
Once the hinges are fitted to the doors swing the<br />
hinge arm out as shown.<br />
Step 18c:<br />
To fit the door bumpers (item 15), measure 20mm<br />
in from the edge of the door as shown and mark<br />
the position <strong>with</strong> a soft pencil. Then using a hammer<br />
knock in the door bumpers.<br />
20mm<br />
20mm<br />
20mm<br />
20mm<br />
– 9 –
FITTING OF THE DOORS<br />
Step 19:<br />
Slide the hinges onto the mounting plates.<br />
The ‘U’ in the hinge arm slides around the<br />
head of the screw in the mounting plate.<br />
It is best to start <strong>with</strong> the top hinge<br />
then the bottom.<br />
Note:<br />
Slide home both hinges then tighten<br />
screw A onto the mounting plate.<br />
Repeat for the second door, then<br />
gently close the doors.<br />
A<br />
LEVELLING THE DOORS ON THE SAVANNAH DRESSER/CHANGER<br />
Step 20:<br />
The <strong>Savannah</strong> dresser/changer can now be placed in the<br />
position you want.<br />
Important: Before use, the <strong>Savannah</strong> dresser/changer<br />
must be placed on a stable level surface.<br />
If when you have placed the <strong>Savannah</strong><br />
dresser/changer in a level position the doors are not<br />
aligned correctly then you will have to adjust the<br />
hinges to compensate. To do this follow the<br />
information given in Steps 21 and 22.<br />
Step 21:<br />
Making small adjustments to the width of the gap<br />
between the doors, loosen screw A then turn screw<br />
B either clockwise or anti-clockwise until the gap<br />
between the doors is even then re-tighten screw A.<br />
ADJUSTING THE GAP BETWEEN THE DOORS<br />
B<br />
A<br />
– 10 –
ALIGNING THE TOPS OF THE DOORS<br />
Step 22:<br />
If one door is lower, loosen the screws C on<br />
both hinges and lift the door, re-tighten the<br />
screws once the tops of the doors are aligned.<br />
C<br />
C<br />
FITTING THE SHELF<br />
Step 23:<br />
There are 3 height positions for the shelf, choose the<br />
appropriate height and push in the shelf supports<br />
(item 8). The cut-outs in the shelf go to the back.<br />
Lower the shelf onto the supports.<br />
FIXING THE HANDLES<br />
Step 24:<br />
Locate the screws (item 3) through the holes in the<br />
doors - from the rear face, and screw<br />
into the handles (item 4).<br />
Step 25:<br />
Now that you have assembled your dresser, go back and check that all of the fittings have been fully tightened.<br />
YOUR SAVANNAH DRESSER/CHANGER IS NOW COMPLETE AND READY FOR USE.<br />
– 11 –
REMOVING THE CHANGER RAIL<br />
If you wish to remove the changer rail (item 27) when you have finished using the furniture as a baby changing unit, remove the upstand<br />
assembly from the top of the unit by unscrewing the four confirmat screws (item 13) - see steps 4a and 4b.<br />
Remove the changer rail and the four dowels (item 7). The holes in the upstands (items 25 & 26) must then be filled using the four hole<br />
covers (item 16), these must be secured in position using the glue supplied (item 17). The upstands can then be repositioned back on top of<br />
the unit <strong>with</strong> the confirmat screws.<br />
INSTRUCTIONS FOR SAFE USE & MAINTENANCE<br />
1. WARNING: Never leave your child unattended.<br />
The safety of your child is your responsibility.<br />
Always watch your child carefully when in a bath<br />
or on a changer top.<br />
2. Before use, ensure the <strong>Savannah</strong> dresser/changer is on<br />
a stable, level surface.<br />
3. Do not allow children to climb on the <strong>Savannah</strong><br />
dresser/changer.<br />
4. Never use the <strong>Savannah</strong> dresser/changer if any parts<br />
are broken or missing.<br />
5. Check regularly that all fittings and screws are<br />
correctly tightened and are not damaged. Loose<br />
screws can pinch parts of the body and clothing<br />
resulting in the risk of strangulation.<br />
6. Do not place the <strong>Savannah</strong> dresser/changer in the near<br />
vicinity of open fires or other sources of strong heat,<br />
such as electric or gas fires.<br />
7. Always leave the <strong>Savannah</strong> dresser/changer clean and<br />
dry. Wipe away any spillage straight away.<br />
The <strong>Savannah</strong> dresser/changer can be cleaned <strong>with</strong> a<br />
damp cloth or silicon wax polish. Never use abrasive,<br />
bleach or strong detergents.<br />
8. A changing mattress is not supplied <strong>with</strong> this product.<br />
We recommend that you only use a <strong>Mamas</strong> & <strong>Papas</strong><br />
changing mattress <strong>with</strong> the <strong>Savannah</strong> dresser/changer.<br />
Lay the changing mattress on the changing surface,<br />
<strong>with</strong>in the retaining rails.<br />
9. When used as a changer use a <strong>Mamas</strong> & <strong>Papas</strong> cabinet<br />
lock to secure the doors in the closed position.<br />
Due to constant updating and improvements, some components may occasionally differ slightly from the diagrams shown in these instructions.<br />
Any spare components should be thrown away after you have fully constructed your product. We reserve the right to change the specifications of any<br />
piece of furniture <strong>with</strong>out prior notice.<br />
AFTER SALES SERVICE: If when you receive your <strong>Mamas</strong> & <strong>Papas</strong> product you need<br />
assistance, spare parts or if you are unhappy <strong>with</strong> any aspect of the goods, please<br />
contact our Customer Care Helpline on: 01484 438222, or e-mail us on<br />
customer.care@mamasandpapas.co.uk where one of our trained advisors will be able<br />
to help you.<br />
You can also visit our website at www.mamasandpapas.co.uk for the latest product information.<br />
I0085: V6/08/02<br />
ALL OUR PRODUCTS ARE MADE FROM THE FINEST QUALITY MATERIALS<br />
AND ARE MANUFACTURED UNDER THE STRICTEST QUALITY CONTROLS<br />
We guarantee all our products or part thereof, for a period of six months from the date of purchase<br />
against faulty manufacture. This guarantee is not effective against damage caused as a result<br />
of incorrect usage of the product or accidental damage. This in no way affects your statutory rights.<br />
GUARANTEE<br />
To validate this guarantee, please fill in the coupon and return to:<br />
<strong>Mamas</strong> & <strong>Papas</strong> Ltd, Colne Bridge Road, Huddersfield, West Yorkshire. HD5 0RH.<br />
Or alternatively, call our Guarantee Registration Line on 01484 438225 <strong>with</strong> your details, or visit our website on: www.mamasandpapas.co.uk.<br />
Name<br />
Address<br />
Postcode<br />
Retailer<br />
Home Phone No.<br />
Item purchased <strong>Savannah</strong> dresser/drawers Purchase Date<br />
Price<br />
By validating your guarantee, your information will be entered onto our database. If you do not wish to receive information from other reputable companies, please let us know.<br />
– 12 –