Owners Manual - Precor
Owners Manual - Precor
Owners Manual - Precor

Create successful ePaper yourself
Turn your PDF publications into a flip-book with our unique Google optimized e-Paper software.
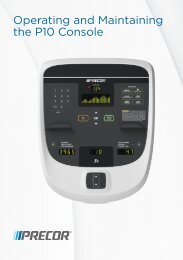
Operating and Maintaining<br />
the P10 Console
Edition Information<br />
OPERATING AND MAINTAINING THE P10 CONSOLE<br />
P/N 302291-101 rev A<br />
Copyright © January 2013 <strong>Precor</strong> Incorporated. All rights<br />
reserved. Specifications subject to change without notice.<br />
Trademark Note<br />
<strong>Precor</strong>, AMT, EFX, and Preva are registered trademarks of<br />
<strong>Precor</strong> Incorporated. Other names in this document may be<br />
the trademarks or registered trademarks of their respective<br />
owners.<br />
Intellectual Property Notice<br />
All rights, title, and interests in and to the software of the<br />
Preva Business Suite, the accompanying printed materials,<br />
any copies of such software, and all data collected via the<br />
Preva Business Suite, are exclusively owned by <strong>Precor</strong> or its<br />
suppliers, as the case may be.<br />
<strong>Precor</strong> is widely recognized for its innovative, award-winning<br />
designs of exercise equipment. <strong>Precor</strong> aggressively seeks U.S.<br />
and foreign patents for both the mechanical construction and<br />
the visual aspects of its product design. Any party<br />
contemplating the use of <strong>Precor</strong> product designs is hereby<br />
forewarned that <strong>Precor</strong> considers the unauthorized<br />
appropriation of its proprietary rights to be a very serious<br />
matter. <strong>Precor</strong> will vigorously pursue all unauthorized<br />
appropriation of its proprietary rights.<br />
<strong>Precor</strong> Incorporated<br />
20031 142nd Ave NE, P.O. Box 7202<br />
Woodinville, WA 98072-4002<br />
1-800-347-4404<br />
http://www.precor.com
Important Safety Instructions<br />
Important: Save these instructions for future reference.<br />
Read all instructions in the documentation provided with your<br />
exercise equipment, including all assembly guides, user<br />
guides, and owner’s manuals, before installation of this<br />
device.<br />
Note: This product is intended for commercial use.<br />
The display apparatus (hereinafter referred to as the console)<br />
is intended to be shipped with new <strong>Precor</strong> exercise equipment<br />
(hereinafter referred to as the base unit). It is not packaged for<br />
individual sale.<br />
WARNING<br />
To prevent injury, the console must be<br />
attached securely to the base unit following all<br />
assembly and installation instructions shipped<br />
with the base unit. The console is intended to<br />
be connected to AC mains power through the<br />
furnished power supply ONLY. It should be<br />
powered on only when installed as described<br />
in the assembly and installation instructions<br />
shipped with the base unit. The console is<br />
intended for use only with <strong>Precor</strong> fitness<br />
equipment, not as a standalone device.<br />
Safety Precautions<br />
Always follow basic safety precautions when using this<br />
equipment to reduce the chance of injury, fire, or damage.<br />
Other sections in this manual provide more details of safety<br />
features. Be sure to read these sections and observe all safety<br />
notices. These precautions include the following:<br />
• Read all instructions in this guide before installing and<br />
using the equipment and follow any labels on the<br />
equipment.
4 Operating and Maintaining the P10 Console<br />
• Make sure all users see a physician for a complete<br />
physical examination before they begin any fitness<br />
program, particularly if they have high blood pressure,<br />
high cholesterol or heart disease; have a family history of<br />
any of the preceding conditions; are over the age of 45;<br />
smoke; are obese; have not exercised regularly in the past<br />
year; or are taking any medication.<br />
French equivalent of the above notice, for Canadian<br />
markets: Il est conseillé aux utilisateurs de subir un examen<br />
médical complet avant d’entreprendre tout programme<br />
d’exercice, en particulier s’ils souffrent d’hypertension<br />
artérielle, ou de cardiopathie ou ont un taux de cholestérol<br />
élevé, s’ils ont des antécédents familiaux des précédentes<br />
maladies, s’ils ont plus de 45 ans, s’ils fument, s’ils sont<br />
obèses, s’ils n’ont pas fait d’exercices réguliers au cours de<br />
l’année précédente ou s’ils prennent des médicaments. Si vous<br />
avez des étourdissements ou des faiblesses, arrêtez les<br />
exercices immédiatement.<br />
• Do not allow children, or people unfamiliar with the<br />
operation of this equipment, on or near it. Do not leave<br />
children unsupervised around the equipment.<br />
• Make sure all users wear proper exercise clothing and<br />
shoes for their workouts and avoid loose or dangling<br />
clothing. Users should not wear shoes with heels or<br />
leather soles, and they should check the soles of their<br />
shoes to remove any dirt and embedded stones. They<br />
should also tie long hair back.<br />
• Never leave the equipment unattended when it is plugged<br />
in. Unplug the equipment from its power source when it is<br />
not in use, before cleaning it, and before providing<br />
authorized service.<br />
Note: The optional power adapter is considered a power<br />
source for self-powered equipment.<br />
• Use the power adapter provided with the equipment. Plug<br />
the power adapter into an appropriate, grounded power<br />
outlet as marked on the equipment.<br />
• Care should be taken when mounting or dismounting the<br />
equipment.<br />
• For Treadmills: Do not use typing or web surfing features<br />
while walking at speeds that exceed a slow and relaxed<br />
leisurely pace. Always stabilize yourself by holding a<br />
stationary handle bar while using typing or web surfing<br />
features.<br />
• For AMT and EFX: Always stabilize yourself by holding a<br />
stationary handle bar while using typing or web surfing<br />
features.
Important Safety Instructions 5<br />
• Read, understand, and test the emergency stop<br />
procedures before use.<br />
• Keep the power cord or optional power adapter and plug<br />
away from heated surfaces.<br />
• Route power cables so that they are not walked on,<br />
pinched, or damaged by items placed upon or against<br />
them, including the equipment itself.<br />
• Ensure the equipment has adequate ventilation. Do not<br />
place anything on top of or over the equipment. Do not<br />
use on a cushioned surface that could block the<br />
ventilation opening.<br />
• Assemble and operate the equipment on a solid, level<br />
surface.<br />
• SPACING—The below minimum spacing<br />
recommendations are based on a combination of the<br />
ASTM (U.S.) voluntary standards and EN (European)<br />
regulations as of October 1, 2012, for access, passage<br />
around, and emergency dismount:<br />
• Treadmills—a minimum of 0.5 m (19.7 in.) on each<br />
side of the treadmill and 2 m (78 in.) behind the<br />
machine.<br />
• Cardio equipment other than treadmills—a<br />
minimum of 0.5 m (19.7 in.) on at least one side, and<br />
0.5 m (19.7 in.) behind or in front the machine.<br />
Careful consideration should be given to the<br />
requirements of the Americans with Disabilities Act<br />
(ADA), US Code 28 CFR (see Section 305). ASTM<br />
standards are voluntary and may not reflect current<br />
industry standards. The actual area for access, passage<br />
around, and emergency dismount is the responsibility of<br />
the facility. The facility should consider the total space<br />
requirements for training on each unit, voluntary and<br />
industry standards, and any local, state, and federal<br />
regulations. Standards and regulations are subject to<br />
change at any time.<br />
Important: These spacing recommendations should be used<br />
when positioning equipment away from sources of heat, such<br />
as radiators, heat registers, and stoves. Avoid temperature<br />
extremes.<br />
• Keep equipment away from water and moisture. Avoid<br />
dropping anything on or spilling anything inside the<br />
equipment to prevent electric shock or damage to the<br />
electronics.
6 Operating and Maintaining the P10 Console<br />
• When using the treadmill, always attach the safety clip to<br />
your clothing before beginning your workout. Failure to<br />
use the safety clip may pose a greater risk of injury in the<br />
event of a fall.<br />
• Keep in mind that heart rate monitors are not medical<br />
devices. Various factors, including the user’s movement,<br />
may affect the accuracy of the heart rate readings. The<br />
heart rate monitors are intended only as exercise aids in<br />
determining heart rate trends in general.<br />
• Do not operate electrically powered equipment in damp<br />
or wet locations.<br />
• Never operate this equipment if it has a damaged cord or<br />
plug, if it is not working properly, or if it has been dropped,<br />
damaged, or exposed to water. Call for service<br />
immediately if any of these conditions exist.<br />
• Maintain the equipment to keep it in good working<br />
condition, as described in the Maintenance section of the<br />
owner’s manual. Inspect the equipment for incorrect,<br />
worn, or loose components, and then correct, replace or<br />
tighten prior to use.<br />
• If you plan to move the equipment, obtain help and use<br />
proper lifting techniques.<br />
• Equipment Weight Restrictions: Do not use the treadmill<br />
if you weigh more than 500 pounds (225 kg). If you weigh<br />
more than 350 pounds (160 kg), do not run on the<br />
treadmill. For all other fitness equipment, the weight limit<br />
is 350 pounds (160 kg).<br />
• Use the equipment only for its intended purpose as<br />
described in this manual. Do not use accessory<br />
attachments that are not recommended by <strong>Precor</strong>. Such<br />
attachments may cause injuries.<br />
• Do not operate the equipment where aerosol (spray)<br />
products are being used or where oxygen is being<br />
administered.<br />
• Do not use outdoors.<br />
• Do not attempt to service the equipment yourself, except<br />
to follow the maintenance instructions in the owner’s<br />
manual.<br />
• Never drop or insert objects into any opening. Keep hands<br />
away from moving parts.
Important Safety Instructions 7<br />
• Do not set anything on the stationary handrails,<br />
handlebars, control console, or covers. Place liquids,<br />
magazines, and books in the appropriate receptacles.<br />
• Do not lean on or pull on the console at any time.<br />
CAUTION: DO NOT remove the cover, or you may risk injury due<br />
to electric shock. Read the assembly and maintenance guide<br />
before operating. There are no user-serviceable parts inside.<br />
Contact Customer Support if the equipment needs servicing. For<br />
use with single phase AC power only.<br />
Hazardous Materials and Proper Disposal<br />
The batteries within self-powered equipment contain<br />
materials that are considered hazardous to the environment.<br />
Federal law requires proper disposal of these batteries.<br />
If you plan to dispose of your equipment, contact <strong>Precor</strong><br />
Commercial Products Customer Support for information<br />
regarding battery removal. Refer to Obtaining Service.<br />
Product Recycling and Disposal<br />
This equipment must be recycled or discarded according to<br />
applicable local and national regulations.<br />
Product labels, in accordance with European Directive<br />
2002/96/EC concerning waste electrical and electronic<br />
equipment (WEEE), determine the framework for the return<br />
and recycling of used equipment as applicable throughout the<br />
European Union. The WEEE label indicates that the product is<br />
not to be thrown away, but rather reclaimed upon end of life<br />
per this Directive.<br />
In accordance with the European WEEE Directive, electrical<br />
and electronic equipment (EEE) is to be collected separately<br />
and to be reused, recycled, or recovered at end of life. Users<br />
of EEE with the WEEE label per Annex IV of the WEEE<br />
Directive must not dispose of end of life EEE as unsorted<br />
municipal waste, but use the collection framework available<br />
to customers for the return, recycling, and recovery of WEEE.<br />
Customer participation is important to minimize any potential<br />
effects of EEE on the environment and human health due to<br />
the potential presence of hazardous substances in EEE. For<br />
proper collection and treatment, refer to Obtaining Service.
8 Operating and Maintaining the P10 Console<br />
Regulatory Notices for Cardiovascular<br />
Exercise Equipment<br />
The regulatory information in this section applies to the<br />
exercise equipment and its control console.<br />
Safety Approvals for Cardiovascular Equipment<br />
<strong>Precor</strong> equipment has been tested and found to comply with<br />
the following applicable safety standards.<br />
Cardiovascular Type Equipment:<br />
• CAN/CSA, IEC, EN 60335-1 (Household and similar<br />
electrical appliances - Safety)<br />
• EN 957 (Stationary training equipment, class S/B<br />
compliant equipment)<br />
Radio Frequency Interference (RFI)<br />
This <strong>Precor</strong> exercise equipment conforms to the following<br />
national standards defining acceptable limits for radio<br />
frequency interference (RFI).<br />
Federal Communications Commission, Part 15<br />
This equipment has been tested and found to comply with the<br />
limits for a Class A digital device, pursuant to Part 15 of the<br />
FCC Rules. These limits are designed to provide reasonable<br />
protection against harmful interference in a commercial<br />
installation. The equipment generates, uses, and can radiate<br />
radio frequency energy and, if not installed and used in<br />
accordance with the owner’s manual instructions, can cause<br />
harmful interference to radio communications.<br />
Operation is subject to the following two conditions: (1) this<br />
device may not cause harmful interference, and (2) this<br />
device must accept any interference received, including<br />
interference that may cause undesired operation.<br />
WARNING<br />
Per FCC rules, changes or modifications not<br />
expressly approved by the manufacturer could<br />
void the user’s authority to operate the<br />
equipment.
Important Safety Instructions 9<br />
Industry Canada<br />
This device complies with RSS-210:2007 of the Spectrum<br />
Management & Telecommunications Radio Standards<br />
Specification. Operation is subject to the following two<br />
conditions: (1) this device may not cause harmful<br />
interference, and (2) this device must accept any interference<br />
received, including interference that may cause undesired<br />
operation.<br />
This Class A digital apparatus complies with Canadian<br />
ICES-003.<br />
Cet appareil numérique de la classe A est conforme à la norme<br />
NMB-003 du Canada.<br />
ATTENTION: Haute Tension<br />
Débranchez avant de réparer<br />
European Applications<br />
CE compliance is claimed to the following directives:<br />
• 2004/108/EC EMC Directive<br />
• 2006/95/EC LVD Directive<br />
• 2002/95/EC RoHS Directive<br />
Directive compliance has been verified to the following<br />
standards:<br />
• EN 55022<br />
• EN 55024<br />
• EN 60335-1<br />
• EN 60065 (P80 and PVS)
10 Operating and Maintaining the P10 Console<br />
Electrical Recommendations: 120 V and 240<br />
V Treadmills<br />
Note: This is a recommendation only. NEC (National Electric<br />
Code) guidelines or local region electric codes must be<br />
followed.<br />
You should have received a power cable that meets your local<br />
electrical code requirements along with the equipment.<br />
<strong>Precor</strong> treadmills must be connected to a 20 amp individual<br />
branch circuit that can be shared only with one PVS. If you<br />
need additional help with the power connections contact your<br />
<strong>Precor</strong> authorized dealer.<br />
Important: An individual branch circuit provides a hot conductor<br />
and neutral conductor to a receptacle. The conductors must not be<br />
looped, "daisy-chained", or connected to any other conductors.<br />
The circuit must be grounded according to NEC guidelines or local<br />
region electric codes.<br />
Figure 1: North American 120-volt, 20-amp power receptacle<br />
Figure 2: North American 240-volt, 20-amp power receptacle
Important Safety Instructions 11<br />
Electrical Recommendations: All Equipment<br />
Excluding Treadmills<br />
Note: This is a recommendation only. NEC (National Electric<br />
Code) guidelines or local region electric codes must be<br />
followed.<br />
For equipment fitted with a P80 console or Personal Viewing<br />
System (PVS) screen a separate power connection is<br />
required. For a 20 amp branch circuit up to 10 screens can be<br />
connected. If the branch circuit has any other devices plugged<br />
into the circuit, then the number of screens must be reduced<br />
by the wattage of the other devices.<br />
Note: The typical splitter power cords that have IEC-320 C13<br />
and C14 plugs have a recommended maximum capacity of<br />
five screens.<br />
Figure 3: IEC-320 C13 and C14 plugs<br />
Obtaining Service<br />
Do not attempt to service the equipment except for<br />
maintenance tasks. If any items are missing, contact your<br />
dealer. For more information regarding customer support<br />
numbers or a list of <strong>Precor</strong> authorized service centers, visit<br />
the <strong>Precor</strong> web site at http://www.precor.com.
12 Operating and Maintaining the P10 Console
Table of Contents<br />
Important Safety Instructions ................................................... 3<br />
Safety Precautions .................................................................................3<br />
Hazardous Materials and Proper Disposal .................................... 7<br />
Product Recycling and Disposal ....................................................... 7<br />
Regulatory Notices for Cardiovascular<br />
Exercise Equipment ...................................................................... 8<br />
Electrical Recommendations: 120 V and<br />
240 V Treadmills ........................................................................ 10<br />
Electrical Recommendations: All Equipment<br />
Excluding Treadmills .................................................................... 11<br />
Obtaining Service .................................................................................. 11<br />
Getting Started ........................................................................ 15<br />
Activating the Console for Self-Powered Equipment ................ 15<br />
Identifying Parts of the Console ....................................................... 17<br />
Setting Up the Console ............................................................ 19<br />
System Settings .................................................................................... 19<br />
Club Parameters .................................................................................. 20<br />
Viewing the Informational Displays .............................................. 24<br />
User ID Entry with CSAFE Equipment ........................................... 28<br />
Introducing Users to the P10 Console ..................................... 29<br />
Using the Touch Heart Rate Feature ............................................. 29<br />
Using a Chest Strap Transmitter ..................................................... 31<br />
Using the Treadmill Safety Clip ...................................................... 32<br />
Treadmill Auto Stop (Automatic Stop) Function ................... 34<br />
Starting a Workout .................................................................. 35<br />
Starting a Preset Programmed Workout ...................................... 36<br />
Pausing and Resuming an Exercise Session ................................ 36<br />
Ending a Session.................................................................................. 38<br />
Maintenance ............................................................................ 39<br />
Cleaning the Console and Display ................................................. 39<br />
Changing the Belt (Newer Model AMT Only) ........................... 40
14 Operating and Maintaining the P10 Console
Chapter 1<br />
Getting Started<br />
The P10 console offers administrators the ability to set default<br />
values that meet their specific needs. These values include<br />
items like language, units of measure, and setting a maximum<br />
allowed workout time for each piece of equipment.<br />
Activating the Console for Self-Powered<br />
Equipment<br />
<strong>Precor</strong> equipment is either self-powered or externally<br />
powered using an optional power adapter. Self-powered<br />
equipment requires the user exercise to initialize the console.<br />
This section provides more detail about powering equipment.<br />
Activating the Console for Self-Powered Equipment<br />
On self-powered equipment, when a user starts exercising,<br />
the console initializes and displays the Welcome banner. A<br />
minimum rate of motion must be maintained for the<br />
Welcome banner to appear. The words PEDAL FASTER (or<br />
the equivalent message depending on the equipment type)<br />
appear in the display when the rate of motion drops below the<br />
minimum requirements.<br />
The equipment saves its battery charge by moving into a<br />
shutdown mode. If the user does not maintain the minimum<br />
rate of motion, a 30-second shutdown process begins.<br />
In this mode, the console displays a countdown indicator and<br />
ignores all keypresses. If no movement is detected or the rate<br />
of motion remains below the minimum, the indicator changes<br />
as the countdown continues.<br />
Note: The user can resume exercising before the countdown<br />
period elapses and the workout will continue from the point at<br />
which it was paused.
16 Operating and Maintaining the P10 Console<br />
Optional Use of the Power Adapter<br />
An optional AC power adapter provides sustained power to<br />
the equipment. This adapter allows you to change settings<br />
without having to pedal the equipment. To purchase the<br />
power adapter, contact your dealer.<br />
If you purchase the optional power adapter, you must also<br />
purchase the internal cable kit. The kit supplies the cable,<br />
bracket, and fasteners that connect the power adapter to the<br />
lower electronics board.<br />
CAUTION: The internal cable kit must be installed by authorized<br />
service personnel. Do not attempt installation on your own as you<br />
could void the <strong>Precor</strong> Limited Warranty. For more information,<br />
refer to Obtaining Service.<br />
Important: If this equipment includes a P80 console, the optional<br />
power adapter and the internal cable kit must still be installed to<br />
provide continuous power to the base unit and support its internal<br />
battery.<br />
Once the internal cable kit is installed, you can plug the<br />
optional power adapter into the equipment. Plug the opposite<br />
end into the appropriate power source for your equipment<br />
(120 V or 240 V). Review the safety instructions found at the<br />
beginning of this manual before using the power adapter.<br />
CAUTION: When the optional power adapter is in use, make sure<br />
that the power supply cord does not create a safety hazard. Keep<br />
it out of the way of traffic and moving parts. If the power supply<br />
cord or power conversion module is damaged, it must be replaced.<br />
The control console functions differently when the power<br />
adapter is connected. Because the power adapter provides a<br />
constant source of power, a user can pause for brief periods<br />
without initiating shutdown procedures. When the pause time<br />
limit expires and the user has not resumed exercising, the<br />
console returns to the Welcome screen. The default pause<br />
time is 30 seconds for all fitness equipment. Refer to the<br />
manual for your control console for instructions on setting or<br />
changing the pause time limit.
Getting Started 17<br />
Identifying Parts of the Console<br />
The following figure provides information about the console<br />
keys. The number and actions of the console keys may differ<br />
slightly depending on the type of equipment.<br />
Figure 4: P10 console keys<br />
Table 1. Parts of the console<br />
Number Name<br />
Number pad<br />
Heart Rate<br />
Lower Display<br />
Details<br />
Enter numerical information such<br />
as age, weight, and passwords.<br />
You can also enter and change<br />
channels using the number pad.<br />
• Press Clear to delete the<br />
numbers you entered.<br />
• Press Enter to confirm your<br />
selection.<br />
Displays your current heart rate.<br />
Displays graphical information<br />
about your workout progress.
18 Operating and Maintaining the P10 Console<br />
Number Name<br />
Workouts<br />
Pause<br />
OK and Up/Down<br />
arrows<br />
Quick Start<br />
• Calories<br />
• Time Elapsed<br />
• Time Remaining<br />
• Watts (bike)<br />
• Time (bike)<br />
Incline or Crossramp<br />
Speed or Resistance<br />
• Average Speed<br />
(treadmill)<br />
• Speed (bike)<br />
• Pace (treadmill)<br />
• Distance (all<br />
equipment)<br />
• RPM (bike)<br />
• Cals/Min (AMT)<br />
• Strides/Min<br />
(AMT, EFX)<br />
• Total Strides (EFX)<br />
Details<br />
Examples of workouts:<br />
• <strong>Manual</strong><br />
• Heart Rate<br />
• Interval<br />
• Weight Loss<br />
• Variety<br />
• Performance<br />
Use to pause or end a workout<br />
session.<br />
Use to navigate options and<br />
settings.<br />
Press Quick Start to begin<br />
exercising.<br />
Use the ▲ or ▼ arrows to<br />
change what information is<br />
displayed.<br />
Available on treadmill and EFX<br />
(dual).<br />
Available on AMT, bike,<br />
treadmill, EFX (single), and EFX<br />
(dual).<br />
Use the ▲ or ▼ arrows to<br />
change what information is<br />
displayed.
Chapter 2<br />
Setting Up the Console<br />
Use the System mode to configure settings in ways that<br />
benefit your users and your facility. The System menu is<br />
visible only to administrators and registered service<br />
technicians. Changes made to these settings are saved to the<br />
fitness equipment.<br />
The System Settings categories are:<br />
• Club Parameters<br />
• Informational Display<br />
System Settings<br />
System Setting features remain hidden from club patrons and<br />
can only be accessed using special keypresses. To view the<br />
System Settings, the equipment must be in the Welcome<br />
state. The equipment is in the Welcome state when it is on,<br />
but not actually in use. This means that there is no exercise<br />
session, data entry, or diagnostic operation in progress.<br />
When the equipment is in the Welcome state:<br />
• SELECT A WORKOUT OR PRESS QUICKSTART TO<br />
BEGIN scrolls in the text display.<br />
• On the treadmill, the belt is not moving and the lift motor<br />
is off.<br />
Note: On self-powered equipment, the console initializes<br />
when you begin working out. You must maintain a minimum<br />
rate of motion for the Welcome banner to appear.<br />
The changes made in System Setting modes become the<br />
default settings when the display resets to the Welcome<br />
banner.<br />
CAUTION: If you change the Unit of Measure display on the<br />
treadmill, check the speed setting to verify that it is correct.
20 Operating and Maintaining the P10 Console<br />
To view the Club Settings:<br />
1. At the Welcome banner, press Pause.<br />
2. Press the following number keys in sequence to enter the<br />
password:<br />
5 6 5 1 5 6 5<br />
3. Press OK.<br />
The Set Club Parameters banner appears.<br />
Table 2. Navigational keys for the system setting modes<br />
Key<br />
▲ or<br />
▼<br />
OK<br />
Function<br />
Navigates the settings menu<br />
Selects a menu setting and confirms the changes made to<br />
the value setting<br />
CLEAR Returns to the previous menu level without saving changes<br />
PAUSE Exits the System Settings mode and returns to the<br />
Welcome banner<br />
Club Parameters<br />
Use the following information to customize the equipment for<br />
your setting.<br />
Note: When you make changes to the club parameters, the<br />
new settings replace the factory default settings.<br />
Safety Code (Treadmill only)<br />
Value: Enabled or Disabled<br />
(Default: Disabled)<br />
When the equipment is shipped from the factory, the safety<br />
code protection feature is disabled. If you enable the safety<br />
code, your users will need to enter a four digit number to<br />
begin their exercise session and start the running belt. The<br />
code is 1 2 3 4.
Setting Up the Console 21<br />
Select Language (All Equipment)<br />
Value: English, Deutsch, Espanol, Francais, Netherlands,<br />
Portugues, Rucckijj, and Italiano<br />
(Default: English)<br />
Select your preferred language for the console display.<br />
Note: Programming prompts are not affected by language<br />
selection. The prompts in this section continue to appear in<br />
English.<br />
Set Units (All Equipment)<br />
Value: U.S. or Metric<br />
(Default: U.S.)<br />
The equipment can display measurements in either Metric or<br />
U.S. Standard.<br />
Important: If you change the Unit of Measure on a treadmill, be<br />
sure to check the speed setting to verify that it is correct.<br />
Set Max Workout Time (All Equipment)<br />
Value Range: 1 to 240 minutes<br />
(Default: 60 minutes)<br />
You can set a maximum workout time per session. Choose a<br />
time limit between 1 and 240 minutes, or select No Limit if<br />
you do not want to set a time limit. For example, if you set the<br />
time limit to 20 minutes, users can only enter a workout time<br />
between 1 and 20 minutes.<br />
Set Max Pause Time (All Equipment)<br />
Value Range: 1 to 120 seconds<br />
(Default: 120 seconds)<br />
This setting limits how long equipment remains in a paused<br />
banner during a workout before it resets.<br />
Note: The optional power adapter must be connected on<br />
self-powered equipment to establish a definitive pause time<br />
limit. If the optional power adapter is not attached and the<br />
rate of motion drops below the minimum requirements, the<br />
equipment begins its shutdown, effectively eliminating pause<br />
mode.
22 Operating and Maintaining the P10 Console<br />
Set Cool Down Time (All Equipment)<br />
Value Range: 0 to 5 minutes<br />
(Default: 5 minutes)<br />
Select the maximum amount of time the equipment remains<br />
in the cool down mode. The cool down time is the period of<br />
time following the completion of a program when the user<br />
exercises at a reduced work rate.<br />
Set Speed Limit (Treadmill only)<br />
Value Range: Full speed range of equipment<br />
(Default: Maximum speed)<br />
This setting limits how fast the running belt moves and,<br />
consequently, the number of speed settings that are available<br />
to the user. Use it to set the maximum speed that a user can<br />
enter when using the equipment.<br />
The speed is displayed in miles per hour (mph) or kilometers<br />
per hour (kph) depending upon the units of measure (U.S.<br />
Standard or Metric) selected earlier. The values range from<br />
0.5 to 12 mph (0.8 to 20 kph).<br />
Set Incline Limit (Treadmill only)<br />
Value Range: Full grade range of equipment<br />
(Default: Maximum grade possible)<br />
Select the maximum percent incline that a user can enter<br />
when using the equipment. Values range from 0.0 to 15.0.<br />
Hidden Programs (Treadmill only)<br />
Value: Show Programs or Hide Programs<br />
(Default: Hide Programs)<br />
When set to Show Programs the Fitness Test is available.<br />
If set to HIDE PROGRAMS, when the user presses<br />
PERFORMANCE, the message WORKOUT NOT AVAILABLE<br />
will scroll in the text display.
Setting Up the Console 23<br />
Remote Speed Control (Treadmill only)<br />
Value: Enable or Disable<br />
(Default: Disable)<br />
When this feature is enabled, the CSAFE SetSpeed command<br />
and the CSAFE SetGrade command are available if:<br />
• The treadmill is in the CSAFE "InUse" state.<br />
• The speed or grade values sent are within range.<br />
Set Auto Stop (Treadmill only)<br />
Value: On or Off<br />
(Default: On)<br />
Set to On to bring the treadmill to a gradual stop when no<br />
user is on the equipment. This can occur if a user steps off the<br />
equipment during a workout and does not turn it off.<br />
Set Crossramp Auto-level (EFX only)<br />
Value Range: 0 to 20<br />
(Default: 10)<br />
Use this setting to choose a specific ramp incline so that the<br />
EFX automatically returns to that incline at the end of a<br />
workout session.<br />
Set Resistance Range (Bike only)<br />
Value Range: High, Medium, or Low<br />
(Default: High)<br />
You can set a low, medium, or high base resistance on the<br />
recumbent or upright bikes. There are 25 levels of resistance<br />
within each base setting, but the base setting affects the<br />
overall resistance range. The following ranges are available:<br />
• High: Provides full resistance range.<br />
• Medium: Provides approximately two thirds of the<br />
resistance that is available within the high group setting.<br />
• Low: Provides approximately one third of the resistance<br />
that is available within the high group setting.
24 Operating and Maintaining the P10 Console<br />
Viewing the Informational Displays<br />
Informational Display settings are values that provide you<br />
with information about the equipment. Types of information<br />
contained in this setting group include, an event log, software<br />
and equipment serial numbers, and usage information.<br />
To view the System settings:<br />
1. At the Welcome banner, press Pause.<br />
2. Press the following number keys in sequence to enter the<br />
password:<br />
6 5<br />
3. Press Enter.<br />
Use the following table to set up customized Informational<br />
Display values.<br />
Table 3. Informational Displays values<br />
Product Value<br />
Information provided<br />
All ODOMETER Correlates to the type of equipment and<br />
the standard of units, U.S. or Metric,<br />
selected in the programs.<br />
• Treadmill and AMT: Displays the<br />
number of cumulative miles or<br />
kilometers logged to date. In<br />
addition, the AMT displays the<br />
number of vertical strides.<br />
• EFX: Displays the number of total<br />
strides logged to date.<br />
• Bike: Displays the number of total<br />
revolutions logged to date.<br />
AMT BELT USAGE • Belt Stride Count: Tracks the<br />
number of strides on equipment.<br />
• Stride Count Reset: Reset increases<br />
by one each time a reset is<br />
performed.<br />
• Odometer at Last Reset: Records<br />
the odometer reading at the time<br />
the belt was changed. The<br />
equipment odometer continues to<br />
count forward after the belt change.
Setting Up the Console 25<br />
Product Value<br />
Information provided<br />
All HOUR METER Displays the number of hours that the<br />
equipment has been in use.<br />
Note: The equipment tracks the elapsed<br />
minutes, but the value that appears is<br />
truncated to the nearest full hour.<br />
All<br />
All<br />
All<br />
All<br />
All<br />
UPPER BOOT<br />
SW PART<br />
NUMBER<br />
UPPER BASE<br />
SW PART<br />
NUMBER<br />
LOWER BASE<br />
SW PART<br />
NUMBER<br />
METRICS<br />
BOARD<br />
SERIAL<br />
NUMBER<br />
Upper board application software part<br />
number and version.<br />
Displays the upper base application<br />
software version.<br />
Displays the lower application software<br />
version.<br />
Displays the software number on the<br />
Metrics Board.<br />
Displays the model and type of<br />
equipment.<br />
All USAGE LOG • Displays the number of times each<br />
workout has been used and displays<br />
the associated cumulative minutes.<br />
• Displays the user preferences in<br />
workout selection.<br />
All ERROR LOG Displays any event codes that may have<br />
been detected by the software. For<br />
more information, refer to Event Log.
26 Operating and Maintaining the P10 Console<br />
Event (Error) Log<br />
The event log (sometimes referred to as an error log)<br />
contains the following information:<br />
• Event number<br />
• Odometer value when the event occurred<br />
• Hour meter value at the time the event occurred<br />
• Current drawn by the motor when the event occurred<br />
(treadmill only)<br />
The following table contains a list of events detectable by the<br />
software.<br />
Table 4. Event log numbers and descriptions<br />
Event Description of Event<br />
Number<br />
00 Upper PCA memory location event<br />
02 RAM location event<br />
03 EEPROM checksum event<br />
05 Depressed key at power up<br />
09 Lower PCA memory test event<br />
10 Line Frequency out of acceptable range<br />
11 Watchdog (Upper PCA) low voltage power<br />
12 Watchdog (Lower PCA) low voltage power<br />
13 Fan at incorrect speed (version 1 treadmills)<br />
14 Fan fail (Lower PCA)<br />
15 AC input voltage too high<br />
16 AC input voltage too low<br />
20 Too many maximum power requests in one second<br />
21 Too many maximum consecutive power requests<br />
22 No motor pulses at start up<br />
23 Motor pulses missing after start up<br />
24 Reduce speed requested, speed is not reducing<br />
26 Motor pulse width incorrect<br />
27 Too much drive motor current<br />
28 Temperature too high<br />
29 Excessive AC input current<br />
30 Communications event lower board to upper board
Setting Up the Console 27<br />
Event Description of Event<br />
Number<br />
31 Incorrect Communications event upper board to lower<br />
board<br />
32 Communication event upper board to lower board<br />
33 Incorrect communications event lower board to upper<br />
board<br />
37 E-STOP error (treadmill only)<br />
40 Lift motion detected<br />
42 Lift position value out of range<br />
43 Zero switch not found<br />
44 Un-commanded lift motion<br />
45 Lift going in the wrong direction<br />
50 Too much brake (magnet) current<br />
53 Cannot read target, cannot find home switch<br />
54 Target pulses lost during operation<br />
55 Brake home switch activated unexpectedly<br />
60 Auto Stop sensor failure (treadmill only)<br />
61 Auto Stop not present (treadmill only)<br />
62 Vertical sensor failure (AMT only)<br />
70 Belt replacement, lower control board not read (AMT<br />
only)<br />
71 Belt replacement, new lower control board (AMT only)<br />
72 Belt replacement, lower control board version unknown<br />
(AMT only)<br />
73 Belt replacement, lower control board record bad (AMT<br />
only)<br />
74 Belt replacement, lower control board refurbished<br />
console (AMT only)<br />
75 Belt replacement, refurbished lower control board<br />
(AMT only)<br />
76 Belt replacement, console stride count is less than lower<br />
control board (AMT only)<br />
77 Belt replacement, console stride count is greater than<br />
lower control board (AMT only)<br />
78 Belt replacement warning (AMT only)<br />
79 Belt replacement required (AMT only)
28 Operating and Maintaining the P10 Console<br />
User ID Entry with CSAFE Equipment<br />
This equipment is fully compatible with CSAFE protocols.<br />
When the equipment is connected to a CSAFE master device,<br />
the user is prompted to press ENTER and begin an<br />
identification process. The user ID is displayed as five zeros<br />
and indicates the starting point. The following table describes<br />
key functions while in CSAFE mode.<br />
Table 5. CSAFE access keys<br />
Keys<br />
Number<br />
Keypad<br />
CLEAR<br />
OK<br />
PAUSE<br />
Function<br />
Use the number keys to enter a user ID. Once you<br />
have entered the user ID number, press OK to submit<br />
the user ID.<br />
Erases individual numbers in the user ID from right to<br />
left.<br />
Submits the user ID.<br />
Note: User ID entry is bypassed when the user enters<br />
five zeros. No workout statistics are recorded.<br />
Resets to the Welcome banner.<br />
A message appears on the display and indicates when the<br />
user ID is accepted by the CSAFE master device. Once<br />
program selection is complete, the user can begin exercising.
Chapter 3<br />
Introducing Users to the P10<br />
Console<br />
CAUTION: Before beginning any fitness program, see your<br />
physician for a thorough physical examination. Seek advice from<br />
your physician to learn the target heart rate appropriate for your<br />
fitness level.<br />
The P10 console offers an easy-to-follow display and multiple<br />
workouts to help people meet their exercise needs.<br />
Important: Please review the following sections in this guide with<br />
your users before allowing them to use the fitness equipment:<br />
• Important Safety Instructions<br />
• Getting Started<br />
• Using the Safety Clip (for treadmill only)<br />
Using the Touch Heart Rate Feature<br />
Note: Touch heart rate performance may vary based on a<br />
user’s physiology, fitness level, age, and other factors. You<br />
may experience an erratic readout if your hands are dry, dirty,<br />
or oily, or if the skin on your palms is especially thick. Wearing<br />
hand lotion can also cause an erratic readout. In addition,<br />
make sure that the sensors are clean to ensure proper contact<br />
can be maintained.<br />
To use the touch heart rate feature, place the palm of your<br />
hands directly on the metal heart rate sensors on the<br />
equipment’s handlebars. To ensure an accurate heart rate<br />
readout, make sure you follow these tips:<br />
• Both hands must grip the sensors for your heart rate to<br />
register.<br />
• It takes a number of consecutive heartbeats (15-20<br />
seconds) for your heart rate to register.
30 Operating and Maintaining the P10 Console<br />
• When gripping the sensors, do not grip tightly. Keep a<br />
loose, cupping hold. Holding the grips tightly can affect<br />
the reading.<br />
• As you work out, your perspiration will help transmit your<br />
heart rate signal. If you have difficulty using the handheld<br />
grips to determine your heart rate, try the sensors again<br />
later in the workout to see if you can obtain a heart rate<br />
signal.<br />
• If the touch heart rate feature does not work for you,<br />
<strong>Precor</strong> recommends that you use a chest transmitter<br />
strap.<br />
Figure 5: Heart rate target zones<br />
CAUTION: Your heart rate should never exceed 85% of your<br />
maximum aerobic heart rate. Your maximum heart rate is equal to<br />
220 minus your age.
Introducing Users to the P10 Console 31<br />
Using a Chest Strap Transmitter<br />
WARNING<br />
Signals used by the chest strap transmitter<br />
(or heart rate strap) may interfere with<br />
pacemakers or other implanted devices.<br />
Consult your physician and the<br />
manufacturers of your chest strap<br />
transmitter and implanted device before<br />
using a chest strap transmitter.<br />
Wearing a chest strap transmitter during your workout<br />
provides steady heart rate information. For the equipment to<br />
detect your heart rate, you must grip the touch heart rate<br />
sensors or wear a chest strap transmitter while exercising. In<br />
the presence of both touch and wireless data, the touch data<br />
takes precedence and will display.<br />
Note: To receive an accurate reading, the strap needs to be in<br />
direct contact with the skin on the lower sternum (just below<br />
the bust line for women).<br />
To use a chest strap transmitter:<br />
1. Carefully dampen the back of the strap with tap water.<br />
Important: Do not use deionized water. It does not have the<br />
proper minerals and salts to conduct electrical impulses.<br />
2. Adjust the strap and fasten it around your chest. The<br />
strap should feel snug, not restrictive.<br />
3. Make sure that the chest strap is right-side-up, lies<br />
horizontally across, and is centered in the middle of your<br />
chest.<br />
4. Test the chest strap placement by checking the heart rate<br />
function on the equipment. If a heart rate is registering,<br />
your chest strap placement is correct. If the equipment<br />
does not register a heart rate, readjust the strap and<br />
recheck the heart rate function.
32 Operating and Maintaining the P10 Console<br />
Using the Treadmill Safety Clip<br />
The treadmill is equipped with two different stop functions,<br />
which behave as follows:<br />
If the user …<br />
Pulls on the lanyard<br />
attached to the safety<br />
clip and trips the<br />
restart switch.<br />
Presses down on the<br />
red STOP button.<br />
Then the<br />
treadmill belt …<br />
Slows to a stop.<br />
Slows to a stop.<br />
And the console …<br />
Shows the words PUSH<br />
TO RESET SWITCH. On<br />
some console models, an<br />
arrow points toward the<br />
Restart switch.<br />
Shows that the exercise<br />
workout is paused.<br />
The restart switch is located just below the console and<br />
immediately behind the red STOP button, as shown in the<br />
following figure. When it is tripped, the bar pops up,<br />
displaying the words PUSH TO RESET on its front side. The<br />
treadmill does not operate while these words are visible.<br />
Figure 6: Restart switch<br />
Instruct users on how important it is to use the safety clip<br />
while exercising on the treadmill, and demonstrate how they<br />
should attach it to their clothing near the waistline.
Introducing Users to the P10 Console 33<br />
If the restart switch trips during exercise, perform the<br />
following steps:<br />
1. Reattach the safety clip if necessary.<br />
2. Press the restart switch down until it clicks, returning it to<br />
its normal position.<br />
Note: If the restart switch trips, all information about the<br />
current workout is deleted.<br />
3. Start the workout from the beginning, reducing the time<br />
as needed to account for the amount of exercise that has<br />
been completed.<br />
Figure 7: Attaching the safety clip
34 Operating and Maintaining the P10 Console<br />
Treadmill Auto Stop (Automatic Stop)<br />
Function<br />
Important: The default setting for this feature is ON. An<br />
administrator can turn off this feature in the System Settings;<br />
however, <strong>Precor</strong> recommends it remain ON.<br />
The Auto Stop (Automatic Stop) feature is designed to<br />
bring the treadmill to a gradual stop when it is not in use. This<br />
might occur if a user steps off the treadmill before the end of<br />
a workout and leaves the treadmill running.<br />
Sixty seconds after a treadmill workout starts or resumes, the<br />
equipment begins Auto Stop monitoring. If a user is detected,<br />
then no message appears, and the selected workout<br />
continues.<br />
If no user is detected after an additional 30 seconds, the<br />
console displays the message NO USER DETECTED,<br />
STOPPING IN 10 SECONDS as notification of the pending<br />
stop. During the display of this message, a ten second<br />
countdown begins. If a user does not override the countdown,<br />
the belt comes to a gradual stop after the countdown is<br />
complete.<br />
Note: Users weighing more than 90 pounds (41 kg) are<br />
detected within the speed and position limits of the feature.<br />
Users weighing 50 pounds (22.7 kg) to 89 pounds (40.5 kg)<br />
may not be detected depending on their speed and location.<br />
Always be aware of and follow the console’s instructions for<br />
proper operation.
Chapter 4<br />
Starting a Workout<br />
CAUTION: If you are using a treadmill, be sure to attach the<br />
security clip to your clothing before starting your workout.<br />
The equipment is in the Welcome state when the words<br />
SELECT A WORKOUT OR PRESS QUICKSTART TO BEGIN<br />
scroll across the scrolling text display.<br />
If the equipment is connected to CSAFE, the words SELECT A<br />
WORKOUT, PRESS QUICKSTART, OR ENTER TO BEGIN<br />
scroll across the text display.<br />
If anything else appears on the screen, press Pause to display<br />
the Welcome banner.<br />
From this screen, there are two ways to begin a workout:<br />
• Press Quick Start.<br />
This action launches the <strong>Manual</strong> program. Calculations,<br />
such as calories used, are based on a 150-lb (68 kg),<br />
35-year old person.<br />
• Press one of the preset workouts.<br />
When a user reaches the club time limit during a workout, the<br />
workout limit in minutes appears before the words CLUB<br />
TIME LIMIT REACHED, WORKOUT ENDING, appear in the<br />
text display.
36 Operating and Maintaining the P10 Console<br />
Starting a Preset Programmed Workout<br />
Preset workouts are a great way to tailor your workouts to<br />
your fitness goals, stay challenged, and add variety to your<br />
sessions. Most P10 equipment contains multiple preset<br />
workouts. These workouts include:<br />
• <strong>Manual</strong><br />
• Heart Rate<br />
• Interval<br />
• Weight Loss<br />
• Variety<br />
• Performance<br />
Pausing and Resuming an Exercise Session<br />
When you interrupt a workout, the equipment responds in<br />
one of two ways, depending on how it is powered.<br />
Paused (Externally Powered Equipment)<br />
When the session is paused, the belt speed is slowly reduced<br />
to zero, or the resistance is slowly reduced to the minimum.<br />
The lift motor is turned off leaving the incline or crossramp at<br />
its current position. Data entry is canceled.<br />
When you press Pause on all non-treadmill equipment, it<br />
displays the summary screen with your workout metrics.<br />
After displaying the summary, it returns to the Welcome<br />
screen.
Starting a Workout 37<br />
Pending Shutdown (Self-Powered Equipment)<br />
On self-powered machines, the paused state is equivalent to<br />
the pending shutdown state. When you stop working out, the<br />
equipment begins a 30 second countdown.<br />
The accumulated metrics (e.g., time, strides, distance,<br />
calories) hold their current values and do not change. Data<br />
entry may not be started.<br />
To restart the program, begin working out again. The<br />
resistance is reset to what it was when the program was<br />
paused.<br />
If the equipment remains inactive for more than 30 seconds,<br />
the power is lost and the equipment bypasses the workout<br />
summary screen.<br />
Three different types of metrics are captured during a<br />
workout.<br />
Controlled Metrics can be set and changed. They include:<br />
• Resistance Level (AMT, EFX, bike)<br />
• Speed (treadmill)<br />
• Incline (treadmill, EFX)<br />
• Crossramp (EFX)<br />
Current Performance Metrics describe the intensity of a<br />
workout in real time. They include:<br />
• Pace (treadmill)<br />
• Heart Rate<br />
• Speed (bike)<br />
• Revolutions/Minute (bike)<br />
• Strides/Minute (AMT, EFX)<br />
• Watts (bike)<br />
Accumulated Metrics describe the overall performance<br />
throughout the entire exercise session. They include:<br />
• Time Elapsed<br />
• Time Remaining<br />
• Distance<br />
• Calories<br />
• Time (bike)<br />
• Total Strides (EFX)<br />
• Average Speed (treadmill)
38 Operating and Maintaining the P10 Console<br />
Ending a Session<br />
Cooling down is an important aspect of your workout because<br />
it helps reduce muscle stiffness and soreness by transporting<br />
excess lactic acid out of the working muscles. In addition, a<br />
three to five minute cool down allows your heart rate to<br />
return to its normal, resting state.<br />
At the end of your workout, a Summary screen displays your<br />
average heart rate during your workout and your accumulated<br />
workout metrics.<br />
If you performed a fitness test exercise program, an initial<br />
message presents a fitness score.<br />
The next two messages display the user’s average and<br />
maximum heart rate during the session. These messages are<br />
only displayed if heart rate data was acquired during the<br />
session, i.e., a valid heart rate number was displayed at least<br />
once during the session.<br />
The summary state times out in two minutes, causing a return<br />
to the Welcome banner. If the machine is in a CSAFE Finished<br />
state then the summary state must last for at least the CSAFE<br />
timeout value, typically 10 seconds or less. If it has not lasted<br />
that long, then before returning to the Welcome banner, the<br />
word RESETTING appears until the CSAFE finished state<br />
ends.
Chapter 5<br />
Maintenance<br />
To keep the equipment functioning properly, perform the<br />
minor maintenance tasks in this section at the intervals<br />
suggested. Failure to maintain the equipment as described in<br />
this section could void the <strong>Precor</strong> Limited Warranty.<br />
DANGER<br />
To reduce the risk of electrical shock, always<br />
disconnect the equipment from its power source<br />
before cleaning it or performing any maintenance<br />
tasks. If the equipment uses an optional power<br />
adapter, disconnect the adapter.<br />
Cleaning the Console and Display<br />
The console requires little maintenance once installed. <strong>Precor</strong><br />
recommends that you clean the console before and after each<br />
exercise session.<br />
To remove dust and dirt from the console:<br />
• Wipe all exposed surfaces with a soft cloth that you have<br />
moistened with a solution of 30 parts of water to 1 part of<br />
Simple Green® (for more information, visit<br />
www.simplegreen.com).<br />
Important: Do not use any acidic cleaners. Doing so will weaken<br />
the paint or powder coatings and void the <strong>Precor</strong> Limited<br />
Warranty. Never pour water or spray liquids directly on the<br />
console or console’s screen.<br />
• It is important to avoid using any corrosive chemicals on the<br />
console or screen.<br />
• Always dampen the cloth and then clean the screen. Be sure<br />
to spray the cleaning liquid onto the cloth, not the console, so<br />
that drips do not seep into the console.<br />
• Apply the cleaner with a soft, lint-free cloth. Avoid using gritty<br />
cloths.
40 Operating and Maintaining the P10 Console<br />
Changing the Belt (Newer Model AMT Only)<br />
The AMT uses belts to provide motion. These belts eventually<br />
wear and must be replaced.<br />
When the belt stride count reaches 90 million, the message<br />
BELTS MUST BE CHANGED SOON scrolls on the Welcome<br />
screen. While this message appears, the AMT operates<br />
normally.<br />
Important: If this message displays on your AMT, please contact<br />
<strong>Precor</strong> Customer Support for assistance.<br />
When the belt stride count reaches 100 million (and the belt<br />
has not been changed), the message BELTS CHANGE<br />
REQUIRED scrolls continuously on the Welcome screen. The<br />
input keys are not functional and the user cannot enter values<br />
or begin a workout until the belts are changed. Please contact<br />
<strong>Precor</strong> Customer Support to schedule a belt change.
<strong>Precor</strong> Incorporated<br />
20031 142nd Avenue NE<br />
P.O. Box 7202<br />
Woodinville, WA USA 98072-4002<br />
P10 OM 302291-101 rev A, en<br />
January 2013
Assembling and Maintaining<br />
the EFX® 811<br />
Elliptical Fitness Crosstrainer
Edition Information<br />
ASSEMBLING AND MAINTAINING THE EFX 811 ELLIPTICAL<br />
FITNESS CROSSTRAINER<br />
P/N 300763-141 rev C<br />
Copyright © October 2012 <strong>Precor</strong> Incorporated. All rights<br />
reserved. Specifications subject to change without notice.<br />
Trademark Note<br />
<strong>Precor</strong>, AMT, EFX, and Preva are registered trademarks of<br />
<strong>Precor</strong> Incorporated. Other names in this document may be<br />
the trademarks or registered trademarks of their respective<br />
owners.<br />
Intellectual Property Notice<br />
All rights, title, and interests in and to the software of the<br />
Preva Business Suite, the accompanying printed materials,<br />
any copies of such software, and all data collected via the<br />
Preva Business Suite, are exclusively owned by <strong>Precor</strong> or its<br />
suppliers, as the case may be.<br />
<strong>Precor</strong> is widely recognized for its innovative, award-winning<br />
designs of exercise equipment. <strong>Precor</strong> aggressively seeks U.S.<br />
and foreign patents for both the mechanical construction and<br />
the visual aspects of its product design. Any party<br />
contemplating the use of <strong>Precor</strong> product designs is hereby<br />
forewarned that <strong>Precor</strong> considers the unauthorized<br />
appropriation of its proprietary rights to be a very serious<br />
matter. <strong>Precor</strong> will vigorously pursue all unauthorized<br />
appropriation of its proprietary rights.<br />
<strong>Precor</strong> Incorporated<br />
20031 142nd Ave NE, P.O. Box 7202<br />
Woodinville, WA 98072-4002<br />
1-800-347-4404<br />
http://www.precor.com
Important Safety Instructions<br />
Important: Save these instructions for future reference.<br />
Read all instructions in the documentation provided with your<br />
exercise equipment, including all assembly guides, user<br />
guides, and owner’s manuals, before installation of this<br />
device.<br />
Note: This product is intended for commercial use.<br />
The display apparatus (hereinafter referred to as the console)<br />
is intended to be shipped with new <strong>Precor</strong> exercise equipment<br />
(hereinafter referred to as the base unit). It is not packaged for<br />
individual sale.<br />
WARNING<br />
To prevent injury, the console must be<br />
attached securely to the base unit following all<br />
assembly and installation instructions shipped<br />
with the base unit. The console is intended to<br />
be connected to AC mains power through the<br />
furnished power supply ONLY. It should be<br />
powered on only when installed as described<br />
in the assembly and installation instructions<br />
shipped with the base unit. The console is<br />
intended for use only with <strong>Precor</strong> fitness<br />
equipment, not as a standalone device.
4 Assembling and Maintaining the EFX 811 Elliptical Fitness Crosstrainer<br />
Safety Precautions<br />
Always follow basic safety precautions when using this<br />
equipment to reduce the chance of injury, fire, or damage.<br />
Other sections in this manual provide more details of safety<br />
features. Be sure to read these sections and observe all safety<br />
notices. These precautions include the following:<br />
• Read all instructions in this guide before installing and<br />
using the equipment and follow any labels on the<br />
equipment.<br />
• Make sure all users see a physician for a complete<br />
physical examination before they begin any fitness<br />
program, particularly if they have high blood pressure,<br />
high cholesterol or heart disease; have a family history of<br />
any of the preceding conditions; are over the age of 45;<br />
smoke; are obese; have not exercised regularly in the past<br />
year; or are taking any medication.<br />
French equivalent of the above notice, for Canadian<br />
markets: Il est conseillé aux utilisateurs de subir un examen<br />
médical complet avant d’entreprendre tout programme<br />
d’exercice, en particulier s’ils souffrent d’hypertension<br />
artérielle, ou de cardiopathie ou ont un taux de cholestérol<br />
élevé, s’ils ont des antécédents familiaux des précédentes<br />
maladies, s’ils ont plus de 45 ans, s’ils fument, s’ils sont<br />
obèses, s’ils n’ont pas fait d’exercices réguliers au cours de<br />
l’année précédente ou s’ils prennent des médicaments. Si vous<br />
avez des étourdissements ou des faiblesses, arrêtez les<br />
exercices immédiatement.<br />
• Do not allow children, or people unfamiliar with the<br />
operation of this equipment, on or near it. Do not leave<br />
children unsupervised around the equipment.<br />
• Make sure all users wear proper exercise clothing and<br />
shoes for their workouts and avoid loose or dangling<br />
clothing. Users should not wear shoes with heels or<br />
leather soles, and they should check the soles of their<br />
shoes to remove any dirt and embedded stones. They<br />
should also tie long hair back.<br />
• Never leave the equipment unattended when it is plugged<br />
in. Unplug the equipment from its power source when it is<br />
not in use, before cleaning it, and before providing<br />
authorized service.<br />
Note: The optional power adapter is considered a power<br />
source for self-powered equipment.<br />
• Use the power adapter provided with the equipment. Plug<br />
the power adapter into an appropriate, grounded power<br />
outlet as marked on the equipment.
Important Safety Instructions 5<br />
• Care should be taken when mounting or dismounting the<br />
equipment.<br />
• For Treadmills: Do not use typing or web surfing features<br />
while walking at speeds that exceed a slow and relaxed<br />
leisurely pace. Always stabilize yourself by holding a<br />
stationary handle bar while using typing or web surfing<br />
features.<br />
• For AMT and EFX: Always stabilize yourself by holding a<br />
stationary handle bar while using typing or web surfing<br />
features.<br />
• Read, understand, and test the emergency stop<br />
procedures before use.<br />
• Keep the power cord or optional power adapter and plug<br />
away from heated surfaces.<br />
• Route power cables so that they are not walked on,<br />
pinched, or damaged by items placed upon or against<br />
them, including the equipment itself.<br />
• Ensure the equipment has adequate ventilation. Do not<br />
place anything on top of or over the equipment. Do not<br />
use on a cushioned surface that could block the<br />
ventilation opening.<br />
• Assemble and operate the equipment on a solid, level<br />
surface.
6 Assembling and Maintaining the EFX 811 Elliptical Fitness Crosstrainer<br />
• SPACING—The below minimum spacing<br />
recommendations are based on a combination of the<br />
ASTM (U.S.) voluntary standards and EN (European)<br />
regulations as of October 1, 2012, for access, passage<br />
around, and emergency dismount:<br />
• Treadmills—a minimum of 0.5 m (19.7 in.) on each<br />
side of the treadmill and 2 m (78 in.) behind the<br />
machine.<br />
• Cardio equipment other than treadmills—a<br />
minimum of 0.5 m (19.7 in.) on at least one side, and<br />
.5 m (19.7 in.) behind or in front the machine.<br />
Careful consideration should be given to the<br />
requirements of the Americans with Disabilities Act<br />
(ADA), US Code 28 CFR (see Section 305). ASTM<br />
standards are voluntary and may not reflect current<br />
industry standards. The actual area for access, passage<br />
around, and emergency dismount is the responsibility of<br />
the facility. The facility should consider the total space<br />
requirements for training on each unit, voluntary and<br />
industry standards, and any local, state, and federal<br />
regulations. Standards and regulations are subject to<br />
change at any time.<br />
Important: These spacing recommendations should be used<br />
when positioning equipment away from sources of heat, such<br />
as radiators, heat registers, and stoves. Avoid temperature<br />
extremes.<br />
• Keep equipment away from water and moisture. Avoid<br />
dropping anything on or spilling anything inside the<br />
equipment to prevent electric shock or damage to the<br />
electronics.<br />
• When using the treadmill, always attach the safety clip to<br />
your clothing before beginning your workout. Failure to<br />
use the safety clip may pose a greater risk of injury in the<br />
event of a fall.<br />
• Keep in mind that heart rate monitors are not medical<br />
devices. Various factors, including the user’s movement,<br />
may affect the accuracy of the heart rate readings. The<br />
heart rate monitors are intended only as exercise aids in<br />
determining heart rate trends in general.<br />
• Do not operate electrically powered equipment in damp<br />
or wet locations.<br />
• Never operate this equipment if it has a damaged cord or<br />
plug, if it is not working properly, or if it has been dropped,<br />
damaged, or exposed to water. Call for service<br />
immediately if any of these conditions exist.
Important Safety Instructions 7<br />
• Maintain the equipment to keep it in good working<br />
condition, as described in the Maintenance section of the<br />
owner’s manual. Inspect the equipment for incorrect,<br />
worn, or loose components, and then correct, replace or<br />
tighten prior to use.<br />
• If you plan to move the equipment, obtain help and use<br />
proper lifting techniques.<br />
• Equipment Weight Restrictions: Do not use the treadmill<br />
if you weigh more than 500 pounds (225 kg). If you weigh<br />
more than 350 pounds (160 kg), do not run on the<br />
treadmill. For all other fitness equipment, the weight limit<br />
is 350 pounds (160 kg).<br />
• Use the equipment only for its intended purpose as<br />
described in this manual. Do not use accessory<br />
attachments that are not recommended by <strong>Precor</strong>. Such<br />
attachments may cause injuries.<br />
• Do not operate the equipment where aerosol (spray)<br />
products are being used or where oxygen is being<br />
administered.<br />
• Do not use outdoors.<br />
• Do not attempt to service the equipment yourself, except<br />
to follow the maintenance instructions in the owner’s<br />
manual.<br />
• Never drop or insert objects into any opening. Keep hands<br />
away from moving parts.<br />
• Do not set anything on the stationary handrails,<br />
handlebars, control console, or covers. Place liquids,<br />
magazines, and books in the appropriate receptacles.<br />
• Do not lean on or pull on the console at any time.<br />
CAUTION: DO NOT remove the cover, or you may risk injury due<br />
to electric shock. Read the assembly and maintenance guide<br />
before operating. There are no user-serviceable parts inside.<br />
Contact Customer Support if the equipment needs servicing. For<br />
use with single phase AC power only.
8 Assembling and Maintaining the EFX 811 Elliptical Fitness Crosstrainer<br />
Educating Users<br />
Take time to educate users about the Important Safety<br />
Instructions found in both the User Reference <strong>Manual</strong> and<br />
Product Owner’s <strong>Manual</strong>. Explain to your club or facility<br />
patrons that they should observe the following precautions:<br />
• Hold onto a stationary handrail or handlebar while<br />
assuming the starting position on the equipment.<br />
• Face the console at all times.<br />
• Hold on to a stationary handrail or handlebar with one<br />
hand whenever you operate the console keys with the<br />
other hand.<br />
Hazardous Materials and Proper Disposal<br />
The batteries within self-powered equipment contain<br />
materials that are considered hazardous to the environment.<br />
Federal law requires proper disposal of these batteries.<br />
If you plan to dispose of your equipment, contact <strong>Precor</strong><br />
Commercial Products Customer Support for information<br />
regarding battery removal. Refer to Obtaining Service.<br />
Product Recycling and Disposal<br />
This equipment must be recycled or discarded according to<br />
applicable local and national regulations.<br />
Product labels, in accordance with European Directive<br />
2002/96/EC concerning waste electrical and electronic<br />
equipment (WEEE), determine the framework for the return<br />
and recycling of used equipment as applicable throughout the<br />
European Union. The WEEE label indicates that the product is<br />
not to be thrown away, but rather reclaimed upon end of life<br />
per this Directive.<br />
In accordance with the European WEEE Directive, electrical<br />
and electronic equipment (EEE) is to be collected separately<br />
and to be reused, recycled, or recovered at end of life. Users<br />
of EEE with the WEEE label per Annex IV of the WEEE<br />
Directive must not dispose of end of life EEE as unsorted<br />
municipal waste, but use the collection framework available<br />
to customers for the return, recycling, and recovery of WEEE.<br />
Customer participation is important to minimize any potential<br />
effects of EEE on the environment and human health due to<br />
the potential presence of hazardous substances in EEE. For<br />
proper collection and treatment, refer to Obtaining Service.
Important Safety Instructions 9<br />
Regulatory Notices for the RFID Module<br />
When equipped with a control console as described in this<br />
document, this equipment may include a radio-frequency<br />
identification (RFID) module. The RFID module has been<br />
certified to operate at temperatures between -20°C and 85°C<br />
(-4°F and 185°F).<br />
Radio Frequency Interference (RFI)<br />
The RFID module conforms to the following national<br />
standards defining acceptable limits for radio frequency<br />
interference (RFI).<br />
Federal Communications Commission, Part 15<br />
This equipment has been tested and found to comply with the<br />
limits for a Class A digital device, pursuant to Part 15 of the<br />
FCC Rules. These limits are designed to provide reasonable<br />
protection against harmful interference in a commercial<br />
installation. The equipment generates, uses, and can radiate<br />
radio frequency energy and, if not installed and used in<br />
accordance with the owner’s manual instructions, can cause<br />
harmful interference to radio communications.<br />
Operation is subject to the following two conditions: (1) this<br />
device may not cause harmful interference, and (2) this<br />
device must accept any interference received, including<br />
interference that may cause undesired operation.<br />
WARNING<br />
Per FCC rules, changes or modifications not<br />
expressly approved by the manufacturer could<br />
void the user’s authority to operate the<br />
equipment.
10 Assembling and Maintaining the EFX 811 Elliptical Fitness Crosstrainer<br />
Industry Canada<br />
This device complies with RSS-210:2007 of the Spectrum<br />
Management & Telecommunications Radio Standards<br />
Specification. Operation is subject to the following two<br />
conditions: (1) this device may not cause harmful<br />
interference, and (2) this device must accept any interference<br />
received, including interference that may cause undesired<br />
operation.<br />
This Class A digital apparatus complies with Canadian<br />
ICES-003.<br />
Cet appareil numérique de la classe A est conforme à la norme<br />
NMB-003 du Canada.<br />
ATTENTION: Haute Tension<br />
Débranchez avant de réparer<br />
European Applications<br />
CE compliance is claimed to the following directives:<br />
• 1999/5/EC R&TTE Directive<br />
• 2006/95/EC LVD Directive<br />
• 2002/95/EC RoHS Directive<br />
Directive compliance has been verified to the following<br />
standards:<br />
• EN 55022<br />
• EN 300 330-1 V1.5.1<br />
• EN 300 330-2 V1.3.1<br />
• EN 301 489-3 V1.4.1<br />
• EN 301 489-1 V1.8.1<br />
• EN 60950-1
Important Safety Instructions 11<br />
Regulatory Notices for Cardiovascular<br />
Exercise Equipment<br />
The regulatory information in this section applies to the<br />
exercise equipment and its control console.<br />
Safety Approvals for Cardiovascular Equipment<br />
<strong>Precor</strong> equipment has been tested and found to comply with<br />
the following applicable safety standards.<br />
Cardiovascular Type Equipment:<br />
• CAN/CSA, IEC, EN 60335-1 (Household and similar<br />
electrical appliances - Safety)<br />
• EN 957 (Stationary training equipment, class S/B<br />
compliant equipment)<br />
PVS and P80 Regulatory Notice<br />
This <strong>Precor</strong> equipment has been tested and found to comply<br />
with the following applicable safety standards.<br />
• CAN/CSA, UL, IEC, EN 60065 (Audio, video and similar<br />
electronic apparatus - Safety)<br />
Radio Frequency Interference (RFI)<br />
This <strong>Precor</strong> exercise equipment conforms to the following<br />
national standards defining acceptable limits for radio<br />
frequency interference (RFI).<br />
Federal Communications Commission, Part 15<br />
This equipment has been tested and found to comply with the<br />
limits for a Class A digital device, pursuant to Part 15 of the<br />
FCC Rules. These limits are designed to provide reasonable<br />
protection against harmful interference in a commercial<br />
installation. The equipment generates, uses, and can radiate<br />
radio frequency energy and, if not installed and used in<br />
accordance with the owner’s manual instructions, may cause<br />
harmful interference to radio communications.<br />
WARNING<br />
Per FCC rules, changes or modifications not<br />
expressly approved by <strong>Precor</strong> could void the<br />
user’s authority to operate the equipment.
12 Assembling and Maintaining the EFX 811 Elliptical Fitness Crosstrainer<br />
Industry Canada<br />
This Class A digital apparatus complies with Canadian<br />
ICES-003.<br />
Cet appareil numérique de la classe A est conforme à la norme<br />
NMB-003 du Canada.<br />
ATTENTION: Haute Tension<br />
Débranchez avant de réparer<br />
European Applications<br />
CE compliance is claimed to the following directives:<br />
• 2004/108/EC EMC Directive<br />
• 2006/95/EC LVD Directive<br />
• 2002/95/EC RoHS Directive<br />
Directive compliance has been verified to the following<br />
standards:<br />
• EN 55022<br />
• EN 55024<br />
• EN 60335-1<br />
• EN 60065 (P80 and PVS)
Important Safety Instructions 13<br />
Electrical Recommendations: All Equipment<br />
Excluding Treadmills<br />
Note: This is a recommendation only. NEC (National Electric<br />
Code) guidelines or local region electric codes must be<br />
followed.<br />
For equipment fitted with a P80 console or Personal Viewing<br />
System (PVS) screen a separate power connection is<br />
required. For a 20 amp branch circuit up to 10 screens can be<br />
connected. If the branch circuit has any other devices plugged<br />
into the circuit, then the number of screens must be reduced<br />
by the wattage of the other devices.<br />
Note: The typical splitter power cords that have IEC-320 C13<br />
and C14 plugs have a recommended maximum capacity of<br />
five screens.<br />
Figure 1: IEC-320 C13 and C14 plugs<br />
Obtaining Service<br />
Do not attempt to service the equipment except for<br />
maintenance tasks. If any items are missing, contact your<br />
dealer. For more information regarding customer support<br />
numbers or a list of <strong>Precor</strong> authorized service centers, visit<br />
the <strong>Precor</strong> web site at http://www.precor.com.
14 Assembling and Maintaining the EFX 811 Elliptical Fitness Crosstrainer<br />
Obtaining Updated Documentation<br />
Current <strong>Precor</strong> product documentation is available at<br />
http://www.precor.com/productmanuals. You may want to<br />
check in for updated information from time to time.
Table of Contents<br />
Important Safety Instructions .................................................... 3<br />
Safety Precautions ................................................................................ 4<br />
Educating Users .................................................................................... 8<br />
Hazardous Materials and Proper Disposal .................................... 8<br />
Product Recycling and Disposal ....................................................... 8<br />
Regulatory Notices for the RFID Module ....................................... 9<br />
Regulatory Notices for Cardiovascular Exercise<br />
Equipment ....................................................................................... 11<br />
Electrical Recommendations: All Equipment<br />
Excluding Treadmills ................................................................... 13<br />
Obtaining Service ................................................................................. 13<br />
Obtaining Updated Documentation ............................................... 14<br />
Assembling the EFX ................................................................... 17<br />
Installation Requirements.................................................................. 18<br />
Assembling the EFX ............................................................................ 21<br />
Breaking in the Equipment ............................................................... 30<br />
Installing the Console ................................................................ 31<br />
Threading the Cable Assembly ....................................................... 32<br />
Connecting Cables.............................................................................. 33<br />
Completing the Console Installation ............................................. 36<br />
Self-Powered Features .............................................................. 37<br />
Informational Displays Prior to Shutdown ................................... 38<br />
Symptoms of a Low Battery ............................................................. 38<br />
Using the Optional Power Adapter ................................................ 39<br />
The Optional Power Adapter Kit .................................................... 39<br />
Replacing the Battery ........................................................................ 40
16 Assembling and Maintaining the EFX 811 Elliptical Fitness Crosstrainer<br />
Maintenance .............................................................................. 41<br />
Daily Cleaning ...................................................................................... 41<br />
Daily Inspection .................................................................................. 42<br />
Weekly Maintenance ........................................................................ 43<br />
Monthly Maintenance ...................................................................... 43<br />
Storing the Chest Strap ..................................................................... 44<br />
Moving the Equipment ..................................................................... 44<br />
Long-Term Storage ............................................................................ 44<br />
Commercial Cardiovascular Equipment Limited Warranty ..... 45
Chapter 1<br />
Assembling the EFX<br />
WARNING<br />
You will need the assistance of two other<br />
people to assemble this unit. DO NOT attempt<br />
assembly by yourself.<br />
Important: The instructions in the following procedures are<br />
described from the perspective of a person standing directly in<br />
front of the equipment (that is, on the opposite side of the<br />
control console from a person using the equipment). These<br />
descriptions may not match the names of certain parts in the parts<br />
list, because such parts are named relative to the back of the<br />
equipment.<br />
To prepare the EFX for assembly:<br />
• Open the box and assemble the components in the<br />
sequence presented in this guide.<br />
• Assemble and operate your equipment on a hard, level<br />
surface in the area intended for use.<br />
• Use a hand truck or furniture dolly to move the EFX unit.<br />
Important: Do not grasp the unit by any of its plastic parts to<br />
move it. The plastic parts are non-structural covers and are<br />
not capable of supporting the weight of the unit.<br />
• Provide ample space around the unit.
18 Assembling and Maintaining the EFX 811 Elliptical Fitness Crosstrainer<br />
• Assemble the equipment according to the guidelines in<br />
this manual to ensure that you do not void the <strong>Precor</strong><br />
Limited Warranty.<br />
Important: Any damage caused during installation is not<br />
covered by the <strong>Precor</strong> Limited Warranty.<br />
• Begin installation of all fasteners by hand, then partially<br />
tighten them. Do not fully tighten fasteners until<br />
instructed to do so.<br />
Important: When wrench-tightening the screws, make sure<br />
the head of the fastener is parallel to the product surface. If it<br />
is not, stop tightening to avoid cross-threading. To avoid<br />
further damage, stop assembly work and contact Customer<br />
Support.<br />
Installation Requirements<br />
Follow these installation requirements when assembling the<br />
unit:<br />
• Assemble the unit near the location where you plan to<br />
use it.<br />
• Provide ample space around the unit.<br />
• Open space around the unit allows for easier access.<br />
• Set up the unit on a solid, flat surface.<br />
• A smooth, flat surface under the unit helps keep it level. A<br />
level unit has fewer malfunctions.<br />
• Open the box and assemble the components in the<br />
sequence presented in this guide.<br />
• The unit is shipped in one box. Ask for help from two or<br />
more people to unpack and assemble the Climber.<br />
• Insert all fasteners with your fingers.<br />
• Use your fingers to properly align and thread the<br />
fasteners. This helps alleviate cross-threading. Do not<br />
fully wrench tighten fasteners until instructed to do so.<br />
Important: When wrench tightening, the head of the<br />
fastener should be flush with the product. If it is not,<br />
cross-threading may have occurred. Do not attempt to<br />
rework the assembly as more damage to the equipment<br />
will occur. Contact Customer Support. Refer to Obtaining<br />
Service.<br />
• If you plan to move the unit, obtain help and use a hand<br />
truck.<br />
• Do not grasp any plastic parts while lifting or moving the<br />
unit. The plastic parts are not capable of supporting the<br />
weight of the unit and they may break.
Assembling the EFX 19<br />
Required Tools<br />
• Wire tie cutter<br />
• Phillips-head screwdriver<br />
• Two ⁹⁄₁₆-inch combination wrenches (open-end and box)<br />
• SAE Standard socket set<br />
Hardware Kit (not to scale)<br />
Table 1. Hardware Kit<br />
Fasteners<br />
Buttonhead<br />
screw (1-inch)<br />
Quantity<br />
14<br />
Washer<br />
(⁵⁄₁₆-inch)<br />
20<br />
Socket head<br />
cap screw<br />
(1¼-inch)<br />
6<br />
Split washer<br />
(⁵⁄₁₆-inch)<br />
Hex head<br />
screw<br />
(1¼-inch)<br />
Washer<br />
(³⁄₈-inch)<br />
20<br />
2<br />
4<br />
Self-tapping<br />
screw<br />
(1½-inch)<br />
4
20 Assembling and Maintaining the EFX 811 Elliptical Fitness Crosstrainer<br />
Fasteners<br />
Phillips-head<br />
screw<br />
(¾-inch)<br />
Quantity<br />
3<br />
Bushings 2<br />
Link arm caps 2<br />
Pivot arm<br />
caps<br />
2<br />
Pivot axle<br />
covers<br />
2<br />
Upright<br />
support<br />
covers<br />
(packaged<br />
separately)<br />
4
Assembling the EFX 21<br />
Assembling the EFX<br />
DANGER<br />
Do not attempt to connect electrical power until<br />
all assembly procedures are complete and the<br />
console is properly installed.<br />
Assemble the EFX in the order presented. Once you have<br />
assembled it, clean the ramp with a soft cloth dampened in a<br />
diluted solution of mild soap and water.<br />
To begin assembly:<br />
1. Feed the cable through the right upright support. Tape the<br />
cable to the top of the upright support to secure it<br />
temporarily.<br />
Important: Do not stretch, crimp, or damage the cable.<br />
Cables damaged by improper installation will not be<br />
covered by the <strong>Precor</strong> Limited Warranty.<br />
Figure 2: Feed cable through right upright support
22 Assembling and Maintaining the EFX 811 Elliptical Fitness Crosstrainer<br />
2. Attach both upright supports to the base frame using<br />
eight buttonhead screws, eight split washers, and eight<br />
washers. Finger tighten.<br />
Figure 3: Attaching the upright supports
Assembling the EFX 23<br />
Installing the Display Console Mount<br />
1. Ask your assistant to hold the display console mount<br />
above the upright supports while you connect the cable.<br />
Remove and discard the tape after you connect the cable.<br />
Important: Place excess cable inside the upright support.<br />
2. Have your assistant lower the display console mount<br />
while you align the mounting brackets on the inside of the<br />
upright supports.<br />
Figure 4: Attaching the console mount to the upright supports
24 Assembling and Maintaining the EFX 811 Elliptical Fitness Crosstrainer<br />
3. Fasten the display console mount to each upright support<br />
by threading a buttonhead screw, washer, and split<br />
washer through opposite mounting holes. Check that the<br />
base fasteners are loose before installing the display<br />
console fasteners.<br />
CAUTION: Make sure the display console mount screws are<br />
properly threaded into the inserts. Do not cross thread. The<br />
<strong>Precor</strong> Limited Warranty does not cover damage that occurs<br />
during installation.<br />
Figure 5: Attaching the side bolts<br />
4. Check alignments and thread the remaining four display<br />
console mount screws, four washers, and four split<br />
washers. Wrench tighten with a ³⁄₁₆-inch hex key so the<br />
assemblies come together, but leave room for<br />
adjustments.<br />
5. When all fasteners are snug against the unit, begin at the<br />
base and alternately wrench tighten all fasteners. Follow<br />
the sequence from step 2 through step 5.
Assembling the EFX 25<br />
Installing the Bottle Holder<br />
The bottle holder attaches to the right stationary arm<br />
handrail.<br />
To install the bottle holder:<br />
1. Position the water bottle holder as shown and attach it to<br />
the right stationary handrail.<br />
Figure 6: Attaching the water bottle<br />
2. Secure the holder using three Phillips-head screws and a<br />
Phillips-head screwdriver.
26 Assembling and Maintaining the EFX 811 Elliptical Fitness Crosstrainer<br />
Installing the Handlebars<br />
CAUTION: Handlebars can swing and cause injury. Have your<br />
assistant hold the handlebar and gently lower it into a vertical<br />
position when the handlebar assembly is complete.<br />
To install the moving handlebars:<br />
1. For proper alignment, rotate the pivot arm to a horizontal<br />
position. Apply pressure to fit the protrusion on the<br />
handlebar into the handlebar bracket.<br />
Figure 7: Handlebar and bracket attachment<br />
2. Insert three socket head cap screws, three split washers,<br />
and three washers through each handlebar bracket. To<br />
secure the handlebars, wrench tighten the fasteners using<br />
a ¼-inch hex key.<br />
Figure 8: Upper body handlebar attachment detail
Assembling the EFX 27<br />
3. Attach the handlebars to the link arms using two hex<br />
head screws, two bushings, and four washers. For ease of<br />
installation, slide the corresponding foot pedal to the top<br />
of the ramp before attaching each handlebar.<br />
Important: Install the fasteners in the order shown. The<br />
bushing slides inside the link arm. The heads of the screws<br />
remain on the ramp side of the link arm.<br />
Figure 9: Attaching the movable arms<br />
4. Wrench tighten the fasteners using a ⁹⁄₁₆-inch box-end or<br />
socket wrench.
28 Assembling and Maintaining the EFX 811 Elliptical Fitness Crosstrainer<br />
Attaching the Caps and Upright Support Cover<br />
You will need the arm caps and foot covers to complete the<br />
following tasks.<br />
To attach the caps and upright support covers:<br />
1. Align the cut-out inside the link arm cap with the link arm<br />
mounting hole. Apply pressure to the cap until it snaps<br />
into place.<br />
Figure 10: Attaching the link and pivot arm caps<br />
2. Attach the pivot arm caps.<br />
Figure 11: Attaching the upright support covers<br />
3. Place one inner and one outer upright support cover<br />
around an upright support. Align each pair so the arrows<br />
on the covers point toward the front of the unit. Apply<br />
pressure to engage the inner cover protrusions with the<br />
outer cover screw holes.
Assembling the EFX 29<br />
4. Slide the covers down into the base mount. Secure each<br />
pair of covers using two self-tapping screws and a<br />
Phillips-head screwdriver.<br />
Figure 12: Attaching the pivot axle covers<br />
5. Insert the two pivot axle covers and press firmly into<br />
place.<br />
Making Sure the Unit is Stable<br />
Make sure the unit is level before allowing anyone to use it.<br />
CAUTION: To eliminate movement, make sure the adjustable feet<br />
are in contact with the floor.<br />
To level the unit:<br />
1. Gently rock the unit. If there is any movement, ask your<br />
assistant to tip the unit to one side while you locate the<br />
adjustable feet.<br />
2. Correct the height of each adjustable foot as follows.<br />
If you want to … Then turn the adjustable feet …<br />
Raise the unit<br />
Lower the unit<br />
Counterclockwise<br />
Clockwise<br />
Important: Place the unit on a flat surface. Rotating the<br />
adjustable feet cannot compensate for extremely uneven surfaces.<br />
When you are finished adjusting the unit, place the unit on the<br />
floor and recheck that it is level.
30 Assembling and Maintaining the EFX 811 Elliptical Fitness Crosstrainer<br />
Verifying that the Heart Rate Display is Operational<br />
To verify that the heart rate display is operational:<br />
1. Hold on to a stationary handrail and step on the foot<br />
pedals.<br />
2. When you are comfortably situated, begin pedaling. A<br />
pedaling speed above 40 strides per minute must be<br />
maintained for several seconds.<br />
3. Grasp both touch-sensitive handrail grips on the<br />
stationary handrails.<br />
4. Look at the HEART RATE display. After a few seconds, a<br />
number appears indicating your heart rate.<br />
Note: If a number does not appear in the HEART RATE<br />
display, you may need to disassemble the unit and check<br />
the cable connection.<br />
Breaking in the Equipment<br />
<strong>Precor</strong> equipment does not require an actual break-in period.<br />
However, moving components such as belts, gears, and<br />
bearings can settle while the equipment is being stored or<br />
shipped. This can cause the equipment to operate with a<br />
small amount of roughness or noise when it starts up for the<br />
first time.<br />
The equipment usually returns to smooth operation after a<br />
day or two of normal use. If it does not, contact your dealer<br />
for assistance. For more information, refer to Obtaining<br />
Service.
Chapter 2<br />
Installing the Console<br />
To make installation easier, all <strong>Precor</strong> Experience Series<br />
consoles use the same mounting hardware and connector<br />
locations whenever possible. The installation sequence for<br />
any of them is as follows:<br />
• Threading the cable assembly<br />
• Connecting cables<br />
• Completing the installation (tightening the mounting<br />
screws and attaching the back cover)<br />
The following sections describe how to perform these tasks.
32 Assembling and Maintaining the EFX 811 Elliptical Fitness Crosstrainer<br />
Threading the Cable Assembly<br />
Earlier in the installation, you threaded the necessary cables<br />
through the frame of the base unit and out the passthrough<br />
opening in the console mount. As you line up the back plate<br />
on the console with the console mount, you must make sure<br />
that the cable assembly passes correctly through the<br />
openings in both components.<br />
Important: Before you begin the following procedure, remove the<br />
rear cover from the control console. Set the cover and its mounting<br />
hardware aside for later use.<br />
To thread the cable assembly:<br />
1. Make sure that as much of each cable as possible passes<br />
through the opening in the middle of the console mount<br />
on the base unit.<br />
2. Position the console over the console mount.<br />
3. Rest the console on the console mount so that the notch<br />
on the bottom of the console’s back plate rests on the<br />
rectangular hook at the bottom of the console mount, as<br />
shown in the following figure.<br />
4. Tilt the console forward until it stops. Use one hand to<br />
steady the console in this position, or ask your assistant<br />
to do so.<br />
5. Pull all cables upward and forward until you can drape<br />
them over the top of the console’s back plate.<br />
Figure 13: Cable positioning
Installing the Console 33<br />
Connecting Cables<br />
Important: Pass all cables through the semicircular opening just<br />
above the console mount, as shown in the following figure. Do not<br />
attempt to route any cables through other openings or through the<br />
steel channel above the mount.<br />
Figure 14: Cable routing from the mount into the console
34 Assembling and Maintaining the EFX 811 Elliptical Fitness Crosstrainer<br />
After the console has been seated, separate the individual<br />
cables out of the end of the cable assembly and attach them<br />
to the appropriate circuit connectors inside the console. Refer<br />
to the following diagram and table to identify the cables and<br />
connectors.<br />
Figure 15: Cable connections, P30 and P10 consoles
Installing the Console 35<br />
Table 2. P30 and P10 internal cable connections<br />
Cable Connector Type Circuit<br />
Connector<br />
Location<br />
Safety key (treadmills<br />
only)<br />
Six-contact strip, keyed<br />
Automatic stop sensor<br />
(treadmills only)<br />
Data from base unit<br />
Heart rate sensors<br />
Four-contact strip,<br />
keyed<br />
Eight-contact modular,<br />
on flat gray cable<br />
Four-contact strip,<br />
keyed<br />
CSAFE<br />
Eight-contact modular,<br />
on flat gray cable
36 Assembling and Maintaining the EFX 811 Elliptical Fitness Crosstrainer<br />
Completing the Console Installation<br />
Before you complete the final installation steps, double-check<br />
the connections you have made. Make sure that all cables are<br />
fully and securely connected, and that any unneeded cables<br />
are tied back properly.<br />
To complete the installation:<br />
1. Feed extra cable back into the neck tube.<br />
2. Tilt the control console backward (toward yourself) until<br />
the tab on the top edge of its back plate slides along the<br />
top edge of the console mount and the screw holes align<br />
properly.<br />
3. Insert the four ⁵₈-inch flat head screws through the holes<br />
in the console mount and thread them into the holes in<br />
the back plate on the console. Partially tighten the screws<br />
using a ⁵₃₂-inch hex wrench.<br />
4. Line up the two small tabs at the bottom of the console’s<br />
back cover with the slots at the bottom of the console<br />
case. Insert the tabs into the slots.<br />
5. Insert the two #8–32 x ¹₂-inch Phillips-head screws that<br />
you removed earlier into the holes at the top edge of the<br />
console’s back cover. Tighten the screws fully.<br />
Important: Use caution not to pinch the cables between the<br />
back cover and PVS mounting screw heads.<br />
6. Fully tighten the four mounting screws (partially<br />
tightened in step 3) using a ⁵₃₂-inch hex wrench.
Chapter 3<br />
Self-Powered Features<br />
Important: This chapter of the manual describes <strong>Precor</strong> fitness<br />
equipment that can operate without being connected to AC<br />
power. This includes units equipped with P30 or P10 consoles.<br />
However, P80 consoles must be connected to AC power through<br />
their power supplies to operate. For this reason, this chapter does<br />
not apply to units equipped with P80 consoles.<br />
On self-powered equipment, the system initializes and<br />
displays the Welcome screen when a user starts exercising. A<br />
minimum rate of motion must be maintained for the banner to<br />
appear, as shown in the following table. When a person meets<br />
the requirements, the power that is generated allows the<br />
equipment to function properly.<br />
Table 3. Minimum requirements for operation<br />
Equipment Rate of Motion<br />
AMT<br />
EFX<br />
Climber<br />
Bike<br />
40 strides per minute (SPM)<br />
40 strides per minute (SPM)<br />
30 steps per minute<br />
20 revolutions per minute (RPM)<br />
Informational displays appear when the battery is low or<br />
when the rate of motion drops below the minimum<br />
requirements. The display explains what to do to retain<br />
power. If the messages are ignored, the equipment begins<br />
shutdown procedures to maintain the charge of the battery.<br />
Refer to Informational Displays Prior to Shutdown.<br />
An optional power adapter can be purchased and provides<br />
sustained power to the equipment. If you plan to change the<br />
club settings on a unit equipped with a P30 or P10 console,<br />
the power adapter is highly recommended. To purchase the<br />
optional power adapter, check with your dealer. Refer to<br />
Obtaining Service.
38 Assembling and Maintaining the EFX 811 Elliptical Fitness Crosstrainer<br />
Informational Displays Prior to Shutdown<br />
The equipment saves its battery charge by moving into a<br />
shutdown mode. If the user does not maintain the minimum<br />
rate of motion, a 30-second shutdown process begins.<br />
In this mode, the console displays a countdown indicator and<br />
ignores all keypresses. If no movement is detected or the rate<br />
of motion remains below the minimum, the indicator changes<br />
as the countdown continues.<br />
Note: The user can resume exercising before the countdown<br />
period elapses and the workout will continue from the point at<br />
which it was paused.<br />
Important: If the equipment is connected to a CSAFE master<br />
device, it follows a slightly different shutdown process. Ten<br />
seconds before the equipment shuts down, it ends the exercise<br />
session and displays a reset message while it disconnects from the<br />
CSAFE master device. It ignores all keypresses during these last<br />
ten seconds.<br />
Symptoms of a Low Battery<br />
If no one has used the equipment for an extended period of<br />
time, the battery may need recharging.<br />
Symptoms of a low battery include the following:<br />
• A flickering or erratic display<br />
• Loss of user and program information after the user stops<br />
exercising, without any display of a workout summary or a<br />
notification of pending shutdown<br />
• Inability to decrease the incline setting (if any)<br />
Important: To maintain a constant power source, use the optional<br />
power adapter.
Self-Powered Features 39<br />
Using the Optional Power Adapter<br />
After connecting the power adapter to the equipment, plug<br />
the opposite end into the appropriate power source (120 V or<br />
240 V).<br />
CAUTION: When the optional power adapter is in use, make sure<br />
that the power supply cord does not create a safety hazard. Keep<br />
it out of the way of traffic and moving parts. If the power supply<br />
cord or power conversion module is damaged, it must be replaced.<br />
The control console functions differently when the power<br />
adapter is connected. Because the power adapter provides a<br />
constant source of power, a user can pause for brief periods<br />
without initiating shutdown procedures. When the pause time<br />
limit expires and the user has not resumed exercising, the<br />
console returns to the Welcome screen. The default pause<br />
time is 30 seconds for all fitness equipment. Refer to the<br />
manual for your control console for instructions on setting or<br />
changing the pause time limit. To learn how to install the<br />
power adapter, refer to The Optional Power Adapter Kit.<br />
The Optional Power Adapter Kit<br />
If you purchase the optional power adapter, you must also<br />
purchase the internal cable kit. The kit supplies the cable,<br />
bracket, and fasteners that connect the power adapter to the<br />
lower electronics board.<br />
CAUTION: The internal cable kit must be installed by authorized<br />
service personnel. Do not attempt installation on your own as you<br />
could void the <strong>Precor</strong> Limited Warranty. For more information,<br />
refer to Obtaining Service.<br />
Important: If this equipment includes a P80 console, the optional<br />
power adapter and the internal cable kit must still be installed to<br />
provide continuous power to the base unit and support its internal<br />
battery.<br />
Once the internal cable kit is installed, you can plug the<br />
optional power adapter into the equipment. Plug the opposite<br />
end into the appropriate power source for your equipment<br />
(120 V or 240 V). Review the safety instructions found at the<br />
beginning of this manual before using the power adapter.
40 Assembling and Maintaining the EFX 811 Elliptical Fitness Crosstrainer<br />
Replacing the Battery<br />
The equipment’s battery is built to last for a long time.<br />
However, if you feel that the battery may need replacing,<br />
check with an authorized service technician. Refer to<br />
Obtaining Service.<br />
CAUTION: The battery stored inside the equipment contains<br />
hazardous materials and must be disposed of according to<br />
Hazardous Waste Regulations. Refer to Hazardous Materials and<br />
Proper Disposal.
Chapter 4<br />
Maintenance<br />
To keep the equipment functioning properly, perform the<br />
minor maintenance tasks in this section at the intervals<br />
shown on the maintenance checklist. Failure to maintain the<br />
equipment as described in this section could void the <strong>Precor</strong><br />
Limited Warranty.<br />
DANGER<br />
To reduce the risk of electrical shock, always<br />
disconnect the equipment from its power source<br />
before cleaning it or performing any maintenance<br />
tasks. If the equipment is self-powered but also<br />
uses the optional power adapter, disconnect the<br />
adapter.<br />
Daily Cleaning<br />
<strong>Precor</strong> recommends that you clean the equipment before and<br />
after each exercise session. To remove dust and dirt from the<br />
equipment, wipe all exposed surfaces with a soft cloth that<br />
you have moistened with one of the following cleaners:<br />
• A solution of 30 parts of water to 1 part of Simple Green®<br />
(for more information, visit www.simplegreen.com)<br />
• ENVIR-O-SAFE oxygen enhanced cleaner or multi-task<br />
cleaner concentrate, diluted according to the<br />
manufacturer’s instructions (for more information, visit<br />
www.daleyinternational.com)
42 Assembling and Maintaining the EFX 811 Elliptical Fitness Crosstrainer<br />
Alternatively, you can clean the equipment with Athletix<br />
fitness equipment cleaning wipes (for more information, visit<br />
www.athletixproducts.com)<br />
CAUTION: Read and follow the manufacturer’s instructions,<br />
particularly dilution instructions, before using any cleaner on<br />
<strong>Precor</strong> fitness equipment. Do not use concentrated cleaners at full<br />
strength, or acidic cleaners of any kind; such cleaners weaken the<br />
protective finish on the equipment and void the <strong>Precor</strong> Limited<br />
Warranty. Never pour water or spray liquids onto any part of the<br />
equipment. Allow the equipment to dry completely before using.<br />
Vacuum the floor underneath the equipment frequently to<br />
prevent the accumulation of dust and dirt that can interfere<br />
with its operation. Use a soft nylon scrub brush to clean the<br />
grooves on equipment with foot pedals.<br />
Daily Inspection<br />
At least once every day, examine the equipment for the<br />
following problems:<br />
• Slipping belts<br />
• Loose fasteners<br />
• Unusual noises<br />
• Worn or frayed power cords<br />
• Any other indication that the equipment may be in need<br />
of service<br />
Important: If you determine that the equipment needs service,<br />
disconnect all power connections (television, Ethernet, and power)<br />
and move the equipment away from the exercise area. Place an<br />
OUT OF SERVICE sign on the equipment and make it clear to all<br />
patrons and other users that they must not use it.<br />
To order parts or to contact a <strong>Precor</strong> authorized service<br />
provider in your area, refer to Obtaining Service.
Maintenance 43<br />
Weekly Maintenance<br />
Perform the following maintenance tasks every week:<br />
1. Disconnect the external power supply.<br />
2. Clean the ramps and wheels with water or an approved<br />
cleaner.<br />
3. Inspect the power cord to verify that it is not pinched<br />
under the equipment or between any two moving parts.<br />
4. Clean the floor under the equipment using a vacuum<br />
cleaner or a damp mop.<br />
5. When the floor is completely dry, reconnect the power.<br />
6. Test all console functions, including heart rate monitoring<br />
features.<br />
7. Verify that the unit sits squarely on the floor. All of its feet<br />
should be touching the floor and the unit should not rock<br />
or wobble when in use. If not, re-level it as described in.<br />
Monthly Maintenance<br />
DANGER<br />
USE EXTREME CAUTION when the rear cover of<br />
any EFX is removed. Serious injury could result if<br />
fingers are pinched between the flywheel spokes,<br />
cranks, movable arms, and the drive weldment.<br />
Securing the movable arm to the crank with a<br />
clamp is recommended. Be aware of other people<br />
within your work area who might cause the arm<br />
to move.<br />
Perform the following maintenance tasks every month:<br />
1. Clean the frame, cover and arms with water or an<br />
approved cleaner.<br />
2. Wipe the exterior of the console with a damp sponge or<br />
soft cloth, and dry with a clean towel. Keep water away<br />
from electronic components to prevent electrical shock or<br />
damage.<br />
3. Clean the touchscreen using a soft, lint-free cloth<br />
dampened with a 91% isopropyl alcohol solution (either<br />
as sold or diluted with an equal amount of water).<br />
4. Remove the rear cover. Vacuum out any debris, being<br />
careful not to bring the vacuum cleaner nozzle too close<br />
to any circuit board (unless your vacuum cleaner is<br />
protected against static buildup).<br />
5. Check the belt tension of the step-up and drive belts.
44 Assembling and Maintaining the EFX 811 Elliptical Fitness Crosstrainer<br />
6. Clean and lubricate the lift motor screw with an approved<br />
grease such as SuperLube® with Teflon® or Mobil 1®<br />
synthetic grease (adjustable-ramp models only).<br />
7. Check all fasteners for proper tightness and torque.<br />
8. Replace all covers.<br />
9. Verify that the unit sits squarely on the floor. All of its feet<br />
should be touching the floor and the unit should not rock<br />
or wobble when in use. If not, re-level it as described in.<br />
Storing the Chest Strap<br />
If you purchased the optional heart rate chest strap, store it in<br />
a place where it remains free of dust and dirt (for example, in<br />
a closet or drawer). Be sure to protect the chest strap from<br />
extremes in temperature. Do not store it in a place that may<br />
be exposed to temperatures below 32° F (0° C).<br />
To clean the chest strap, use a sponge or soft cloth dampened<br />
in mild soap and water. Dry the surface thoroughly with a<br />
clean towel.<br />
Moving the Equipment<br />
The equipment is very heavy. If you plan to move it to a new<br />
location, obtain the help of an adult assistant and use proper<br />
lifting techniques. If the equipment includes roller wheels on<br />
one end, use the wheels to reduce the load on yourself and<br />
your assistant.<br />
We recommend a four-wheeled dolly to move Elliptical<br />
Fitness Crosstrainers.<br />
Long-Term Storage<br />
If you do not expect anyone to use the equipment for a long<br />
time, perform the following tasks to prepare it for storage:<br />
• If it has a power cord, disconnect the cord.<br />
• If it has an optional power adapter, connect the adapter to<br />
prevent damage to the internal battery.<br />
• Position it so that it will not become damaged and will not<br />
interfere with people or other equipment.
Chapter 5<br />
Commercial Cardiovascular<br />
Equipment Limited Warranty<br />
PLEASE READ THESE WARRANTY TERMS AND CONDITIONS CAREFULLY BEFORE<br />
USING YOUR PRECOR INCORPORATED PRODUCT. BY USING THE EQUIPMENT, YOU<br />
ARE CONSENTING TO BE BOUND BY THE FOLLOWING WARRANTY TERMS AND<br />
CONDITIONS.<br />
Limited Warranty.<br />
<strong>Precor</strong> Incorporated warrants all new <strong>Precor</strong> products to be free from defects in materials<br />
and manufacture for the warranty periods set forth below. The warranty periods<br />
commence on the invoice date of the original purchase. This warranty applies only against<br />
defects discovered within the warranty period and extends only to the original purchaser<br />
of the product. Parts repaired or replaced under the terms of this warranty will be<br />
warranted for the remainder of the original warranty period only. To claim under this<br />
warranty, the buyer must notify <strong>Precor</strong> or your authorized <strong>Precor</strong> dealer within 30 days<br />
after the date of discovery of any nonconformity and make the affected product available<br />
for inspection by <strong>Precor</strong> or its service representative. <strong>Precor</strong>’s obligations under this<br />
warranty are limited as set forth below.<br />
Warranty Periods and Coverage.<br />
All Commercial Cardiovascular Products (excluding StretchTrainer, Strength<br />
Products, and coverage specific to certain models and options as defined<br />
below):<br />
• Frame: 7 years<br />
• Treadmill drive motor: 5 years<br />
• Items subject to wear: 1 year<br />
• All other parts (including mechanical parts and electronic parts): 2 years<br />
• Labor: 1 year<br />
880 Line Commercial Cardiovascular Products (superseding the coverage<br />
above where applicable):<br />
• Labor on the P80 console: 2 years<br />
• High wear items on the P80 console, including headphone jack, USB connector, and<br />
iPod® connector: 90 days
46 Assembling and Maintaining the EFX 811 Elliptical Fitness Crosstrainer<br />
Options / Accessories<br />
Many options or accessories have components that are connected internally or mounted<br />
inside the electronic console. The following guidelines determine the warranty for these<br />
components. If the internal components are installed by the factory or by an authorized<br />
dealer as part of the original sale and delivery, they have a warranty that is identical to the<br />
warranty of the equipment in which they are connected or mounted. If the internal<br />
components are not installed by the factory or by an authorized dealer as part of the<br />
original sale and delivery, they have a 90 days parts and labor limited warranty. All<br />
components that are not internally connected have a 90 days parts only limited warranty.<br />
Satisfactory proof of purchase is required in all cases.<br />
Conditions and Restrictions.<br />
This warranty is valid only in accordance with the conditions set forth below:<br />
1. The warranty applies to the <strong>Precor</strong> product only while<br />
a. it remains in the possession of the original purchaser and proof of purchase is<br />
demonstrated.<br />
b. it has not been subjected to accident, misuse, abuse, improper service, or<br />
non-<strong>Precor</strong> modification.<br />
c. claims are made within the warranty period.<br />
2. This warranty does not cover damage or equipment failure caused by electrical wiring<br />
not in compliance with electrical codes or <strong>Precor</strong> owner’s manual specifications, or<br />
failure to provide reasonable and necessary maintenance as outlined in the owner’s<br />
manual.<br />
3. <strong>Precor</strong> is not responsible for Internet connectivity to its products. This restriction<br />
applies to services, such as those provided by an Internet service provider (ISP), and<br />
also to hardware related to Internet connectivity, such as Ethernet cabling, routers,<br />
servers and switches.<br />
4. <strong>Precor</strong> is not responsible for the quality of television, video, audio, or other media<br />
supplied to its products. This restriction applies to services, such as those provided<br />
by a cable or satellite television provider; to signal strength and clarity; and also to<br />
hardware related to the reception and delivery of television, video, audio, and other<br />
media. Such hardware can include (but is not limited to) audio, video, and<br />
radio-frequency (RF) cabling, connectors, receivers, modulators, combiners,<br />
distribution amplifiers, splitters, and so on.<br />
5. <strong>Precor</strong> cannot guarantee that the heart rate measurement system on its products will<br />
work for all users. Heart rate measurement accuracy varies based on a number of<br />
factors, including the user’s physiology and age, the method in which the heart rate<br />
measurement system is used, external interference, and other factors that may<br />
influence heart rate acquisition.<br />
6. Except in Canada, <strong>Precor</strong> does not pay labor outside the United States.<br />
7. Warranties outside the United States and Canada may vary. Please contact your local<br />
Dealer for details.
Commercial Cardiovascular Equipment Limited Warranty 47<br />
This Limited Warranty shall not apply to:<br />
1. Software version upgrades.<br />
2. Software defects that do not materially and negatively affect the normal performance<br />
of the product under normal conditions of use.<br />
3. Consumable goods or cosmetic items of the product, the exterior of which has been<br />
damaged or defaced as a result of abuse, misuse, accident, improper service or<br />
installation, mishandling, or modification in design or construction not authorized by<br />
<strong>Precor</strong>.<br />
4. Repairs performed on <strong>Precor</strong> equipment missing a serial number or with a serial tag<br />
that has been altered or defaced.<br />
5. Service calls to correct installation of the equipment or instruct owners on how to use<br />
the equipment.<br />
6. Pickup and delivery involved with repairs.<br />
7. Any labor costs incurred beyond the applicable labor warranty period.<br />
Disclaimer and Release.<br />
The warranties provided herein are the exclusive warranties given by <strong>Precor</strong> and<br />
supersede any prior, contrary or additional representations, whether oral or written. ANY<br />
IMPLIED WARRANTIES, INCLUDING THE WARRANTY OF MERCHANTABILITY OR<br />
FITNESS FOR A PARTICULAR PURPOSE THAT APPLY TO ANY PARTS DESCRIBED<br />
ABOVE ARE LIMITED IN DURATION TO THE PERIODS OF EXPRESS WARRANTIES<br />
GIVEN ABOVE FOR THOSE SAME PARTS. PRECOR HEREBY DISCLAIMS AND<br />
EXCLUDES THOSE WARRANTIES THEREAFTER. Some States do not allow limitations on<br />
how long an implied warranty lasts, so the above limitation may not apply to you. PRECOR<br />
ALSO HEREBY DISCLAIMS AND EXCLUDES ALL OTHER OBLIGATIONS OR LIABILITIES,<br />
EXPRESS OR IMPLIED, ARISING BY LAW OR OTHERWISE, WITH RESPECT TO ANY<br />
NONCONFORMANCE OR DEFECT IN ANY PRODUCT, INCLUDING BUT NOT LIMITED<br />
TO: (A) ANY OBLIGATION, LIABILITY, RIGHT, CLAIM OR REMEDY IN TORT, WHETHER<br />
OR NOT ARISING FROM THE NEGLIGENCE OF PRECOR OR ITS SUPPLIERS (WHETHER<br />
ACTIVE, PASSIVE OR IMPUTED); AND (B) ANY OBLIGATION, LIABILITY, RIGHT,<br />
CLAIM OR REMEDY FOR LOSS OF OR DAMAGE TO ANY EQUIPMENT. This disclaimer<br />
and release shall apply even if the express warranty set forth above fails of its essential<br />
purpose.<br />
Exclusive Remedies.<br />
For any product described above that fails to conform to its warranty, <strong>Precor</strong> will provide,<br />
at their option, one of the following: (1) repair; (2) replacement; or (3) refund of the<br />
purchase price. <strong>Precor</strong> Limited Warranty service may be obtained by contacting the<br />
authorized dealer from whom you purchased the item. <strong>Precor</strong> compensates Servicers for<br />
warranty trips within their normal service area to repair commercial equipment at the<br />
customer’s location. You may be charged a trip charge outside the service area. THESE<br />
SHALL BE THE SOLE AND EXCLUSIVE REMEDIES OF THE BUYER FOR ANY BREACH OF<br />
WARRANTY.
48 Assembling and Maintaining the EFX 811 Elliptical Fitness Crosstrainer<br />
EXCLUSION OF CONSEQUENTIAL AND INCIDENTAL<br />
DAMAGES.<br />
PRECOR AND/OR ITS SUPPLIERS SHALL HAVE NO OBLIGATION OR LIABILITY,<br />
WHETHER ARISING IN CONTRACT (INCLUDING WARRANTY), TORT (INCLUDING<br />
ACTIVE, PASSIVE, OR IMPUTED NEGLIGENCE AND STRICT LIABILITY), OR<br />
OTHERWISE, FOR DAMAGE TO THE EQUIPMENT, PROPERTY DAMAGE, LOSS OF USE,<br />
REVENUE OR PROFIT, COST OF CAPITAL, COST OF SUBSTITUTE EQUIPMENT,<br />
ADDITIONAL COSTS INCURRED BY BUYER (BY WAY OF CORRECTION OR<br />
OTHERWISE) OR ANY OTHER INCIDENTAL, SPECIAL, INDIRECT, OR CONSEQUENTIAL<br />
DAMAGES, WHETHER RESULTING FROM NONDELIVERY OR FROM THE USE, MISUSE<br />
OR INABILITY TO USE THE PRODUCT. This exclusion applies even if the above warranty<br />
fails of its essential purposes and regardless of whether such damages are sought for<br />
breach of warranty, breach of contract, negligence, or strict liability in tort or under any<br />
other legal theory. Some states do not allow the exclusion or limitation of incidental or<br />
consequential damages, so the above limitation may not apply to you.<br />
This warranty gives you specific legal rights, and you may also have other rights, which<br />
vary from state to state.<br />
Complete this portion and keep for your records.<br />
Purchased From:<br />
Phone Number:<br />
Product/model:<br />
Serial number:<br />
Example: Dealer or store name.<br />
Example: Dealer or store telephone number.<br />
Example: AMT 885 or EFX 883.<br />
The serial number is found on the shipping container.<br />
Effective 1 November 2010<br />
P/N 36286-114
<strong>Precor</strong> Incorporated<br />
20031 142nd Avenue NE<br />
P.O. Box 7202<br />
Woodinville, WA USA 98072-4002<br />
EFX 811 PAG/OM 300763-141 rev C<br />
Warranty #36286-114<br />
October 2012