Wireless LAN (IC-1500Wg) / Fast Ethernet (IC-1500 ... - Edimax
Wireless LAN (IC-1500Wg) / Fast Ethernet (IC-1500 ... - Edimax
Wireless LAN (IC-1500Wg) / Fast Ethernet (IC-1500 ... - Edimax

You also want an ePaper? Increase the reach of your titles
YUMPU automatically turns print PDFs into web optimized ePapers that Google loves.
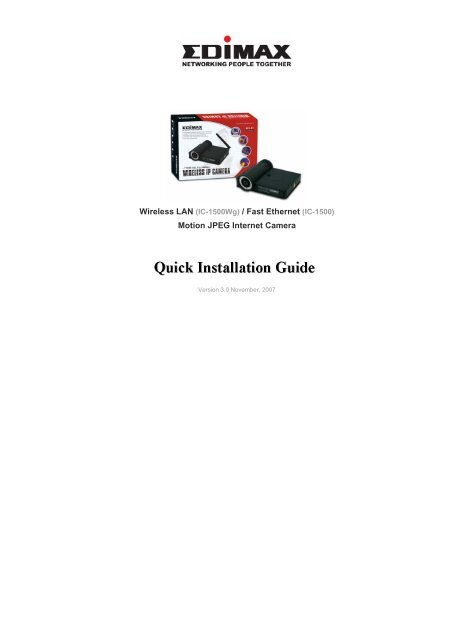
<strong>Wireless</strong> <strong>LAN</strong> (<strong>IC</strong>-<strong><strong>1500</strong>Wg</strong>) / <strong>Fast</strong> <strong>Ethernet</strong> (<strong>IC</strong>-<strong>1500</strong>)<br />
Motion JPEG Internet Camera<br />
Version 3.0 November, 2007
Multi-Language QIG Is Available in the CD
Before You Begin<br />
1. Check your package contents<br />
� One Internet Camera / with antenna (<strong>IC</strong>-<strong><strong>1500</strong>Wg</strong> only)<br />
� One external power adapter<br />
� One camera stand and 100M Cat.5 <strong>Ethernet</strong> cable<br />
� One Quick Installation Guide and User’s CD<br />
Please contact your dealer if any items above are missing.<br />
2. System Requirements<br />
� OS: Windows 98SE, Me, NT, 2000, XP, Vista, Server 2003<br />
� CPU: Intel Pentium III 750MHz or Celeron 1GHz above<br />
� Memory Size: 128MB (256MB recommended)<br />
� VGA Card Resolution: 800 x 600 or above<br />
3. Your computer must have at least the following:<br />
� A CD-ROM Drive<br />
� An <strong>Ethernet</strong> Connection<br />
1. Hardware Installation<br />
1. Connect the cable<br />
Connect to a power outlet.<br />
Connect to the<br />
router/network.<br />
� Connect an <strong>Ethernet</strong> cable to the <strong>LAN</strong> port located at the back panel of<br />
the Internet Camera and attach it to the router or your network (or your<br />
pc).<br />
� Connect the power adapter to the Internet Camera located at the back<br />
panel and connect it to a power outlet.<br />
When power on the Internet Camera, the Ready LED will light in<br />
orange. It is highly recommended to use the power adapter shipped with the<br />
Internet Camera, do NOT use any other power adapter from any sources.
1. Hardware Installation (Continued)<br />
2. Check the LED and Focusing at the front panel<br />
The Internet Camera has a focus ring that allows you to modify the focus<br />
of the Internet Camera. To adjust the focus, rotate the dark focus ring.<br />
There are three (<strong>IC</strong>-<strong>1500</strong>) or four (<strong>IC</strong>-<strong>1500</strong>wg) LEDs indicating the Internet<br />
Camera status and networking status.<br />
�Monitoring : When someone is viewing the Internet Camera, the<br />
LED will stay lit.<br />
�Ready : When the Internet Camera is powered on and ready for<br />
access, the LED will stay lit.<br />
�<strong>LAN</strong> : When the Internet Camera is linked to the wired network, the LED<br />
will stay lit. The LED will be flashing when a video is transmitting or<br />
receiving through the wired network.<br />
�W<strong>LAN</strong> (<strong>IC</strong>-<strong><strong>1500</strong>Wg</strong> only) : When the Internet Camera is linked to a<br />
<strong>Wireless</strong> <strong>LAN</strong> AP or a <strong>Wireless</strong> Station, the LED will stay lit. The LED<br />
will be flashing when a video is transmitting or receiving through<br />
wireless network.<br />
3. Familiar with the Internet Camera’s ports<br />
The Camera has three ports and a Reset button at the back panel.<br />
�Antenna Connector : (<strong>IC</strong>-<strong><strong>1500</strong>Wg</strong> only) Standard reverse SMA connector<br />
where any antennas with reverse SMA connector can connect to this<br />
Internet Camera.<br />
�Power : Connect to the power adapter.<br />
�<strong>LAN</strong> : Connect to the <strong>Ethernet</strong> network cable.<br />
�Reset :<br />
To reset but keep your existing settings, power on the Internet Camera and<br />
press the reset button with a pencil tip for 2 seconds. The Internet Camera<br />
will reboot and keeping your existing settings.<br />
To reset the Internet Camera to factory default settings, power<br />
on the Internet Camera and press the reset button with a pencil tip for<br />
20 seconds. The Internet Camera will reboot and restore to the factory<br />
default settings.
2. Installing Software With The Installation<br />
Wizard<br />
You must disable all personal firewall (eg: Norton/McAfee) during this<br />
software installation.<br />
�Insert the CD shipped along with the Internet Camera into your CD-ROM<br />
drive. The “Autorun.exe” program should be executed automatically. If not,<br />
run “Autorun.exe” manually from “Autorun” folder in the CD-ROM drive.<br />
�The Installation Wizard will show four selections, select “<strong>IC</strong>-<strong>1500</strong> / Wg”<br />
and click on “Setup Utility”.<br />
1) Click On Setup Utility.<br />
2) Click Next.<br />
3) Click Next.
2. Installing Software With The Installation<br />
Wizard (Continued) (<br />
4) Click Install.<br />
5) Click Finish.<br />
�The software installation is completed. The system will auto run the<br />
software called “Admin Utility“ to allow you to configure the Internet<br />
Camera.
3. Configuring Your Internet Camera With The<br />
Admin Utility (<br />
You must disable all personal firewall (eg: Norton/McAfee) during this<br />
configuration. You can enable the firewall once the configuration is<br />
completed.<br />
�The Admin Utility will search for the Internet Camera. The cameras found<br />
in the network will be listed at the left window. Select the <strong>IC</strong>-<strong>1500</strong> icon and<br />
click on “Setting Wizard”.<br />
�By default the password is “1234” and click “OK” to login to the IP setup<br />
page.<br />
�The IP Address, Subnet and Gateway must correspond to your<br />
router/network IP range. By default, the IP address of the Internet Camera<br />
is 192.168.2.3.<br />
� IP Address => Set an IP address within your router’s IP range.<br />
� Subnet => Set the Subnet Mask that correspond to your<br />
router.<br />
� Gateway => Gateway is the IP address of your router.<br />
� By default Video port is 4321. Please use the default “4321”.<br />
.<br />
.<br />
1) Select <strong>IC</strong>-<strong>1500</strong>.<br />
2) Click on Setting<br />
Wizard.<br />
Enter password<br />
“1234” and then<br />
click OK button.<br />
Click “Finish” to<br />
save the settings.
4. Viewing Your Internet Camera Using The<br />
Camera Viewer Software<br />
�A window will pop up to ask you if you want to run the “Camera Viewer”<br />
to view the video of the Internet Camera. Click “OK”.<br />
Click “OK”.<br />
�The Camera Viewer will display the video immediately. You can view 4<br />
Internet Cameras at the same time using the Camera Viewer.<br />
The installation and configuration of the Internet Camera is now<br />
completed. You can now enable any firewall you have disabled during the<br />
above installation.<br />
�You also can view the Internet Camera using the web browser (Internet<br />
Explorer 6.x and above)<br />
5. Viewing Your Internet Camera Using The<br />
Web Browser<br />
�Open the Internet Explorer. Click on Start>All Program>Internet Explorer.<br />
At the Address bar, type the IP address of your<br />
Internet Camera (in this example, we use<br />
192.168.2.3). Press Enter.
5. Viewing Your Internet Camera Using The<br />
Web Browser (Continued)<br />
�Install the ActiveX Plug-in.<br />
Enter User name as<br />
“admin” (lower case).<br />
Password is “1234”.<br />
Then, Click “OK”.<br />
Click “Install”.<br />
You are only required to install this ActiveX Plug-in once. At the very<br />
first time when you are viewing the Internet Camera with the Internet<br />
Explorer.<br />
�After the installation of the ActiveX Plug-in, the video image will be<br />
displayed in the Internet Explorer.<br />
In this example, the IP<br />
Address of Internet<br />
Camera is<br />
192.168.2.3. Your<br />
<strong>IC</strong>-<strong>1500</strong>/<strong>IC</strong>-<strong><strong>1500</strong>Wg</strong><br />
may have different<br />
IP Address.
6. Configuring Your Internet Camera To A<br />
<strong>Wireless</strong> Network (Only for <strong>IC</strong>-<strong><strong>1500</strong>Wg</strong>)<br />
�You can configure your <strong>IC</strong>-<strong><strong>1500</strong>Wg</strong> to connect to a wireless router/network<br />
using the web browser (Internet Explorer 6.x or above).<br />
Click on “W<strong>LAN</strong>”.<br />
�Select Enable <strong>Wireless</strong> Connection and click Apply to save the setting.<br />
Click on “Enable”<br />
and then click<br />
Apply button.
6. Configuring Your Internet Camera To A<br />
<strong>Wireless</strong> Network (Only for <strong>IC</strong>-<strong><strong>1500</strong>Wg</strong>)<br />
(Continued)<br />
�<strong>IC</strong>-<strong><strong>1500</strong>Wg</strong> will automatically detect any wireless router/network and it will<br />
be listed in a table. In this example, connect your <strong>IC</strong>-<strong><strong>1500</strong>Wg</strong> to your<br />
router BTBusinessHub-330.<br />
Step 3: Click Apply to save.<br />
Step 2: Configure<br />
the Encryption<br />
that correspond<br />
to your router.<br />
�After the wireless settings have been saved successfully, unplug the <strong>LAN</strong><br />
<strong>Ethernet</strong> cable from the <strong>IC</strong>-<strong><strong>1500</strong>Wg</strong>. (You must unplug the <strong>LAN</strong> cable to<br />
allow wireless connection to take effect).<br />
�You can now view the <strong>IC</strong>-<strong><strong>1500</strong>Wg</strong> without a <strong>LAN</strong> <strong>Ethernet</strong> cable<br />
connected to the wireless router.<br />
Step 1: Select<br />
BTBusinessHub-<br />
330.<br />
If you connected the <strong>LAN</strong> <strong>Ethernet</strong> cable to the <strong>IC</strong>-<strong><strong>1500</strong>Wg</strong>, the<br />
wireless connection won’t work. The <strong>IC</strong>-<strong><strong>1500</strong>Wg</strong> only allows one connection<br />
at a time, either <strong>LAN</strong> <strong>Ethernet</strong> connection or wireless connection.<br />
<strong>Wireless</strong> Router<br />
<strong>Wireless</strong><br />
<strong>IC</strong>‐<strong><strong>1500</strong>Wg</strong>