Chapter 9. BIND DNS Server
Chapter 9. BIND DNS Server
Chapter 9. BIND DNS Server
Create successful ePaper yourself
Turn your PDF publications into a flip-book with our unique Google optimized e-Paper software.
<strong>Chapter</strong> <strong>9.</strong> <strong>BIND</strong> <strong>DNS</strong> <strong>Server</strong><br />
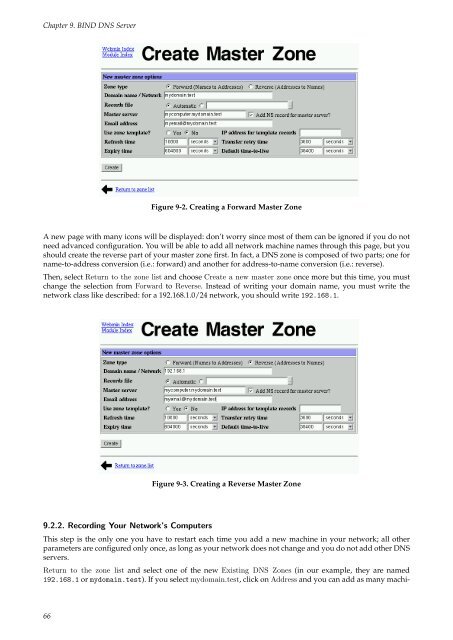
Figure 9-2. Creating a Forward Master Zone<br />
A new page with many icons will be displayed: don’t worry since most of them can be ignored if you do not<br />
need advanced configuration. You will be able to add all network machine names through this page, but you<br />
should create the reverse part of your master zone first. In fact, a <strong>DNS</strong> zone is composed of two parts; one for<br />
name-to-address conversion (i.e.: forward) and another for address-to-name conversion (i.e.: reverse).<br />
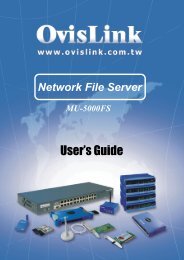
Then, select Return to the zone list and choose Create a new master zone once more but this time, you must<br />
change the selection from Forward to Reverse. Instead of writing your domain name, you must write the<br />
network class like described: for a 192.168.1.0/24 network, you should write 192.168.1.<br />
Figure 9-3. Creating a Reverse Master Zone<br />
<strong>9.</strong>2.2. Recording Your Network’s Computers<br />
This step is the only one you have to restart each time you add a new machine in your network; all other<br />
parameters are configured only once, as long as your network does not change and you do not add other <strong>DNS</strong><br />
servers.<br />
Return to the zone list and select one of the new Existing <strong>DNS</strong> Zones (in our example, they are named<br />
192.168.1 or mydomain.test). If you select mydomain.test, click on Address and you can add as many machi-<br />
66


