VASCO Digipass, Juniper SSL VPN configuration guide - Orbit One
VASCO Digipass, Juniper SSL VPN configuration guide - Orbit One
VASCO Digipass, Juniper SSL VPN configuration guide - Orbit One
- No tags were found...

You also want an ePaper? Increase the reach of your titles
YUMPU automatically turns print PDFs into web optimized ePapers that Google loves.
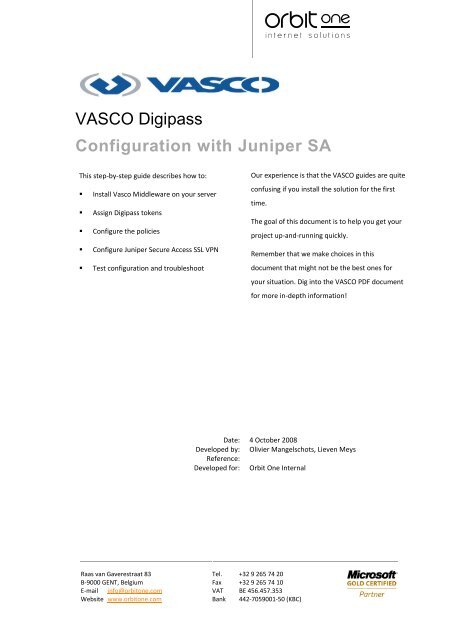
<strong>VASCO</strong> <strong>Digipass</strong>Configuration with <strong>Juniper</strong> SAThis step-by-step <strong>guide</strong> describes how to:• Install Vasco Middleware on your server• Assign <strong>Digipass</strong> tokens• Configure the policies• Configure <strong>Juniper</strong> Secure Access <strong>SSL</strong> <strong>VPN</strong>• Test <strong>configuration</strong> and troubleshootOur experience is that the <strong>VASCO</strong> <strong>guide</strong>s are quiteconfusing if you install the solution for the firsttime.The goal of this document is to help you get yourproject up-and-running quickly.Remember that we make choices in thisdocument that might not be the best ones foryour situation. Dig into the <strong>VASCO</strong> PDF documentfor more in-depth information!Date: 4 October 2008Developed by: Olivier Mangelschots, Lieven MeysReference:Developed for: <strong>Orbit</strong> <strong>One</strong> InternalRaas van Gaverestraat 83B-9000 GENT, BelgiumE-mail info@orbitone.comWebsite www.orbitone.comTel. +32 9 265 74 20Fax +32 9 265 74 10VAT BE 456.457.353Bank 442-7059001-50 (KBC)
Contents1. Introduction _______________________________________________________________ 41.1. About the solution ____________________________________________________ 41.2. Requirements ________________________________________________________ 51.3. Windows Server 2008 Active Directory ____________________________________ 61.4. Some terminology (important!) __________________________________________ 62. <strong>Digipass</strong> deployment strategy _________________________________________________ 72.1. Choose an Authentication method _______________________________________ 72.2. Understanding Assignment modes _______________________________________ 72.3. Transition (grace) period _______________________________________________ 82.3.1. Convincing users _____________________________________________ 82.4. Always use <strong>Digipass</strong>? ___________________________________________________ 93. Prepare Windows server _____________________________________________________ 103.1. Server requirements ___________________________________________________ 103.2. Extend the Active Directory Schema ______________________________________ 103.3. Configure Enterprise Root CA ____________________________________________ 103.4. System Clock _________________________________________________________ 114. VACMAN Middleware________________________________________________________ 124.1. Install Middleware ____________________________________________________ 124.2. Configure the Authentication Server ______________________________________ 125. Import and assign <strong>Digipass</strong> tokens ______________________________________________ 145.1. Import <strong>Digipass</strong> records ________________________________________________ 145.2. Moving <strong>Digipass</strong> to other OU ____________________________________________ 165.3. Manual assign <strong>Digipass</strong> to User __________________________________________ 165.4. Prepare <strong>Digipass</strong> for Self-Assignment _____________________________________ 175.4.1. Moving users and <strong>Digipass</strong> in Active Directory ______________________ 175.5. Test the <strong>Digipass</strong> ______________________________________________________ 186. Configure Policies ___________________________________________________________ 196.1. Understanding the topology _____________________________________________ 196.1.1. Firewall ports ________________________________________________ 196.2. Open the <strong>Digipass</strong> Administration MMC ___________________________________ 196.3. Create your Policy _____________________________________________________ 206.4. Configure the Policy assigned to the Authentication Server ____________________ 236.5. Configure the RADIUS Client _____________________________________________ 24<strong>Orbit</strong> <strong>One</strong> Internal<strong>VASCO</strong> <strong>Digipass</strong> - Configuration with <strong>Juniper</strong> SA - 4 October 2008 2
6.6. Reset the <strong>Digipass</strong> Windows Service ______________________________________ 246.7. Test using Radius Client Simulator ________________________________________ 256.7.1. Self-Assignment ______________________________________________ 256.7.2. Normal authentication (without PIN code) ________________________ 266.8. Troubleshouting / Audit ________________________________________________ 277. Configure <strong>Juniper</strong> SA ________________________________________________________ 287.1. Set the Authentication Servers ___________________________________________ 287.1.1. Active Directory Authentication Server ___________________________ 287.1.2. <strong>Digipass</strong> Authentication Server __________________________________ 297.2. Set the User Realms ___________________________________________________ 307.2.1. <strong>Digipass</strong>+Active Directory Realm ________________________________ 307.2.2. Active Directory Only Realm ____________________________________ 317.3. Configure your Sign-In Pages ____________________________________________ 327.3.1. Create <strong>Digipass</strong> Sign-In Page ____________________________________ 327.3.2. Create No <strong>Digipass</strong> Sign-In Page _________________________________ 347.4. Set Sign-In Policies ____________________________________________________ 357.4.1. Create “*/nodigipass/” Policy ___________________________________ 357.4.2. Configure “*/” Policy __________________________________________ 367.5. Test <strong>Juniper</strong> SA Authentication __________________________________________ 37<strong>Orbit</strong> <strong>One</strong> Internal<strong>VASCO</strong> <strong>Digipass</strong> - Configuration with <strong>Juniper</strong> SA - 4 October 2008 3
1. Introduction1.1. About the solution<strong>Juniper</strong> Secure Access <strong>SSL</strong> <strong>VPN</strong> devices are one of the best solutions to make it easy for yourstaff/team to work from remote locations. The users can connect from anywhere without theneed to install complex <strong>VPN</strong> clients.But making everything so simple also brings a security risk. Protecting access to your networkwith a username and password might be enough when users are within the organisation walls,but is a quite poor solution for remote working.Anyone, anywhere that knows the username/password combination of one of your usersconnect and gain access to your network. And you have no idea who that person is!We need a way to know for sure that the user who is logging in is actually the person whoworks for your organisation. A cost effective and secure way to do this is by using “tokens”. Apiece of hardware that you hand over to yourusers and that cannot be duplicated.In this document we discuss the <strong>configuration</strong> of<strong>VASCO</strong> <strong>Digipass</strong> Go3 with Windows Server 2003and <strong>Juniper</strong> SA <strong>SSL</strong> <strong>VPN</strong>.<strong>VASCO</strong> <strong>Digipass</strong> Go3http://www.vasco.com/documents/literature/pdf/DP%20GO%203.pdf<strong>Juniper</strong> <strong>SSL</strong> <strong>VPN</strong> Solutionshttp://www.juniper.net/solutions/literature/brochures/150023.pdf<strong>Orbit</strong> <strong>One</strong> Internal<strong>VASCO</strong> <strong>Digipass</strong> - Configuration with <strong>Juniper</strong> SA - 4 October 2008 4
1.2. Requirements• <strong>One</strong> or more “<strong>Digipass</strong> Packs”. This <strong>guide</strong> uses the <strong>Digipass</strong>03 devices:• The <strong>VASCO</strong> documentation. You can find these on the CD that comes with the <strong>Digipass</strong>pack, or download it from http://www.vasco.com > Support & Downloads > DownloadCentral > select “Product” VACMAN Middleware 3.0” > Search.• A Windows Server 2003 32-bit Active Directory server, or member server.This <strong>guide</strong> only describes the steps for <strong>configuration</strong> on a Windows 2003 AD-server.Note that Windows Server 2008 is NOT supported for the Vasco Middleware, nor is anyx64 platform!• A <strong>Juniper</strong> Secure Access device with the latest firmware.This <strong>guide</strong> uses a SA 2500 with 6.3R1-1 (build 13563)<strong>Orbit</strong> <strong>One</strong> Internal<strong>VASCO</strong> <strong>Digipass</strong> - Configuration with <strong>Juniper</strong> SA - 4 October 2008 5
1.3. Windows Server 2008 Active Directory<strong>VASCO</strong> Middleware 3.0 cannot be installed on a Windows Server 2008. If all your Active Directoryservers are running Win2008, you need to use server running Windows Server 2003 32bit, thathas joined the 2008 Active Directory domain. Note that this setup has NOT been tested by us,and <strong>VASCO</strong> support cannot guarantee it will work.>> We will update this document as soon as we have more info.1.4. Some terminology (important!)• Local Authentication: this is the authentication performed by the Vasco Middleware,checking your PIN code and <strong>Digipass</strong> dynamic code.• Back-End Authentication: this is the authentication performed by Windows ActiveDirectory, checking your username and password.• OTP: <strong>One</strong>-time password. This is the numeric code that the <strong>Digipass</strong> device displayswhen you push the button. The code changes every 36 seconds and each code can beused only once.• PIN: a numeric code that the user needs to remember when working with his <strong>Digipass</strong>.When you deploy the solution you can choose if you want to work with or without PINcode (see later in this document).• Static password: the Active Directory password of the user• Serial number: the serial number on the back of each <strong>Digipass</strong><strong>Orbit</strong> <strong>One</strong> Internal<strong>VASCO</strong> <strong>Digipass</strong> - Configuration with <strong>Juniper</strong> SA - 4 October 2008 6
2. <strong>Digipass</strong> deployment strategy2.1. Choose an Authentication methodAn important choice you have to make, is how users will need to authenticate. You have severaloptions:• Username + OTP onlyThis should NOT be used, if someone steals the <strong>Digipass</strong>, he can authenticate in yournetwork without the need to know any “secret”.• Username + OTP + PINThis is a safe way to authenticate, but it requires people to remember yet another PINcode...• Username + OTP + Active Directory passwordThis is our preferred way of authentication, your users are already familiar withauthentication using username and password. We just add the <strong>Digipass</strong> OTP to thiswhen they work remotely.• Username + OTP + PIN + Active Directory passwordThis is very safe but a bit overkill.See VACMAN Middleware Product Guide.pdf, page 13 for more information.2.2. Understanding Assignment modesYou need to decide how you will link the <strong>Digipass</strong> devices to your users.• Manual Assignment (see 5.3)The administrator manually assigns a <strong>Digipass</strong> device to each user in Active Directory.Then you physically give the <strong>Digipass</strong> with the correct serial number to the person.• Self-AssignmentYou give each user a <strong>Digipass</strong> device. You instruct the user how to “activate” his <strong>Digipass</strong>the first time he will use it. This is called “self-assignment”.They will need to enter the following string in the password:No PIN = “SERIALNUMBERpasswordOTP”PIN active = “SERIALNUMBERpasswordPINOTPIn this document we use the “self-assignment” mode.See page 48 of the VACMAN Middleware Product Guide.pdf for more info.<strong>Orbit</strong> <strong>One</strong> Internal<strong>VASCO</strong> <strong>Digipass</strong> - Configuration with <strong>Juniper</strong> SA - 4 October 2008 7
2.4. Always use <strong>Digipass</strong>?In some situations it can make sense to allow limited access to information for remote workerswithout <strong>Digipass</strong> authentication. For example your organisation has an internal media server witheBooks. People want to download and read eBooks from home.Giving read-only access to the eBooks using only username and password is quite ok, since theeBooks do not contain any sensitive information about your company, and the access is readonly.It would not be such a bit issue if someone would gain access illegally.<strong>Orbit</strong> <strong>One</strong> Internal<strong>VASCO</strong> <strong>Digipass</strong> - Configuration with <strong>Juniper</strong> SA - 4 October 2008 9
3. Prepare Windows serverFollow the steps in the VACMAN Middleware Installation Guide.pdf3.1. Server requirementsEnglish Only3.2. Extend the Active Directory Schema• To be sure: Make a full backup of your Active Directory• Copy the dpadadmin.exe from the Vasco CDROM to your server.• Execute “dpadmin addschema –v” (make sure you are logged in with a user that has therights to extend the AD schema)• Enter “y” if DPADadmin asks you to permit Schema extensions• Wait a few minutes (AD replication can take some time)3.3. Configure Enterprise Root CA• Open Windows Add or Remove Programs.• Click on the Add/Remove Windows Components button.• The Windows Components Wizard will be displayed.• Tick the Certificate Services checkbox and click Next.• Select the Enterprise root CA option button and click Next.• Enter the details required and click on Next.• If required, modify the Data Storage Locations. Otherwise, leave these as the defaultvalues and click on Next.The Certificate Server has now been installed. Wait several minutes to allow the DomainControllers to enrol for Domain Controller certificates.<strong>Orbit</strong> <strong>One</strong> Internal<strong>VASCO</strong> <strong>Digipass</strong> - Configuration with <strong>Juniper</strong> SA - 4 October 2008 10
3.4. System ClockThe <strong>Digipass</strong> devices uses a real-time-clock to display the correxct one-time-password. It is veryimportant that the time on your Windows server is always up-to-date. We recommend using NTPto get the time from the internet. Go to command line and type “net time /querysntp” to seehow your server it getting his time info:See http://www.pool.ntp.org/ for a list of NTP servers.More info about <strong>configuration</strong> of NTP server can be found onhttp://support.microsoft.com/kb/816042<strong>Orbit</strong> <strong>One</strong> Internal<strong>VASCO</strong> <strong>Digipass</strong> - Configuration with <strong>Juniper</strong> SA - 4 October 2008 11
4. VACMAN MiddlewareFollow the steps in the VACMAN Middleware Installation Guide.pdf, page 174.1. Install Middleware• Run Install (use <strong>VASCO</strong> CDROM)• Select “Server install using Active Directory”• Select componentso Authentication Servero <strong>Digipass</strong> Extension for Active Directory Users and Computerso Administration MMC Interface• Enter customer information. The Serial Number can be found on the DIgipass pack• Enter the domain name (fully qualified “domain.ext”)• Activate Vasco online• Reboot server4.2. Configure the Authentication Server• Go to Program Files > <strong>VASCO</strong> > VACMAN Middleware 3 > Authentication ServerConfiguration• Default settings are ok for now.<strong>Orbit</strong> <strong>One</strong> Internal<strong>VASCO</strong> <strong>Digipass</strong> - Configuration with <strong>Juniper</strong> SA - 4 October 2008 12
Here you can configure things such as:• Auditing – log to a text file or to the Windows Event Log. You can also set up a live AuditViewer connection to the Authentication Server if preferred, but it is simpler if you areworking on the server machine anyway to use the text files.• Tracing.• Domain connection parameters (Active Directory only) – modify or select a DomainController to connect to if required.<strong>Orbit</strong> <strong>One</strong> Internal<strong>VASCO</strong> <strong>Digipass</strong> - Configuration with <strong>Juniper</strong> SA - 4 October 2008 13
5. Import and assign <strong>Digipass</strong> tokensFollow the steps in the VACMAN Middleware Getting Started.pdf, page 85.1. Import <strong>Digipass</strong> recordsYou need to assign a batch of <strong>Digipass</strong> tokens to Organization units.Follow the steps in the VACMAN Middleware Getting Started.pdf, page 12• Open the Active Directory Users and Computers interface.• Right-click on the container or Organizational Unit where the test user account islocated.• Click on Import <strong>Digipass</strong>...• Enter or browse for the import path and filename for the DPX file.Important!! The CD contains 2 directories:ooSTATICPW = authentication with PIN + OTP (one-time-password)NOSTATIC = authentication with OTP onlyIn our situation we will use NOSTATIC, where the user authenticates with OTPonly (no PIN).<strong>Orbit</strong> <strong>One</strong> Internal<strong>VASCO</strong> <strong>Digipass</strong> - Configuration with <strong>Juniper</strong> SA - 4 October 2008 14
• Enter the encryption key (as printed on the paper that goes with the <strong>Digipass</strong> pack)• Click on Import All Applications.• Go go “View > Advanced Features” to enable:• You will now see the <strong>Digipass</strong> tokens assigned to your Organization Unit:<strong>Orbit</strong> <strong>One</strong> Internal<strong>VASCO</strong> <strong>Digipass</strong> - Configuration with <strong>Juniper</strong> SA - 4 October 2008 15
5.2. Moving <strong>Digipass</strong> to other OUWhen you import it will always take all the <strong>Digipass</strong>es that are in your pack. (most packs contain5 <strong>Digipass</strong>es). You can move the <strong>Digipass</strong> to other organization units by drag-and-drop.5.3. Manual assign <strong>Digipass</strong> to User• Open the Active Directory Users and Computers Snap-In.• Drag-and-drop the <strong>Digipass</strong> to the OU where the user is located• Select the User account to be assigned a <strong>Digipass</strong>• Right-click on the record and select Assign <strong>Digipass</strong>...• Select the <strong>Digipass</strong> record to be assigned to the User account.oooClick “Find”Select the <strong>Digipass</strong> serial number that you want to assignClick OK• Click on OK.<strong>Orbit</strong> <strong>One</strong> Internal<strong>VASCO</strong> <strong>Digipass</strong> - Configuration with <strong>Juniper</strong> SA - 4 October 2008 16
5.4. Prepare <strong>Digipass</strong> for Self-AssignmentIn order to allow users to assign their <strong>Digipass</strong> on first authentication, it’s important that the<strong>Digipass</strong> is located in the same Organisation Unit as the user, or an Organisation Unit upwards inthe Hierarchy. Example:We have a root OU called “<strong>Digipass</strong> Test”. This contains a sub OU called “Users”, and Userscontains a sub OU called “Special Users”. Our user account is located in the OU “Users”:In order to have a successful self-assignment, the <strong>Digipass</strong> needs to be located in the root OU“<strong>Digipass</strong> test” or the OU “Users”. Placing the <strong>Digipass</strong> in the OU “Special Users” will not work.Also placing the <strong>Digipass</strong> in another OU outside of “<strong>Digipass</strong> Test” will not work.5.4.1. Moving users and <strong>Digipass</strong> in Active DirectoryWhen the user has performed the self-assignment, the <strong>Digipass</strong> will be moved to the same OU asthe user. If you need to move the user to another OU, make sure to also move his <strong>Digipass</strong>,otherwise <strong>Digipass</strong> authentication will fail!<strong>Orbit</strong> <strong>One</strong> Internal<strong>VASCO</strong> <strong>Digipass</strong> - Configuration with <strong>Juniper</strong> SA - 4 October 2008 17
5.5. Test the <strong>Digipass</strong>• Open the Active Directory Users and Computers Snap-In.• Go to the Organization Unit (OU) where the <strong>Digipass</strong> is located• Select the <strong>Digipass</strong>• Choose Properties• Go to the tab “GO3DEFAULT”• Select Test (on the right)ooIf you selected NOSTATIC in step 4.1, enter your one-time-password, asdisplayed on the <strong>Digipass</strong> screen.If you selected STATICPW in step 4.1, enter your PIN code + the one-timepassword.(If you did not assign a PIN yet, do this first)•make sure you are using the correct <strong>Digipass</strong>, check the serial number on the back<strong>Orbit</strong> <strong>One</strong> Internal<strong>VASCO</strong> <strong>Digipass</strong> - Configuration with <strong>Juniper</strong> SA - 4 October 2008 18
6. Configure Policies6.1. Understanding the topologyIn this scenario we the user will authenticate using their Username + OTP + Active Directorypassword.• Left: users with a <strong>Digipass</strong>• Middle: The RADIUS client will be the <strong>Juniper</strong> SA (<strong>SSL</strong> <strong>VPN</strong>)• Right: The VACMAN Middleware is the service you just installed on the Windows 2003server• Note that Active Directory is called by the VACMAN Middleware6.1.1. Firewall portsCheck VACMAN Middleware Administration Reference.PDF page 1816.2. Open the <strong>Digipass</strong> Administration MMCFollow the steps in the VACMAN Middleware Getting Started.pdf, page 14• Open Select Programs -> <strong>VASCO</strong> -> VACMAN Middleware -> Administration MMCInterface from the Start menu.• Expand the <strong>Digipass</strong> Administration node.• Right-click on the domain node.• Select Connect from the list.<strong>Orbit</strong> <strong>One</strong> Internal<strong>VASCO</strong> <strong>Digipass</strong> - Configuration with <strong>Juniper</strong> SA - 4 October 2008 19
6.3. Create your Policy• Click on “Policies”• Create a new Policy by• Edit the Properties of your new Policy• Go to “<strong>Digipass</strong> Settings”• Go to the “Main Settings” tab• Change the Local Auth. to “<strong>Digipass</strong> Only”This will force the users to authenticate with their OTP• Change the Back-End Auth. to “If Needed”• Change the Back-End Protocol to “Windows”<strong>Orbit</strong> <strong>One</strong> Internal<strong>VASCO</strong> <strong>Digipass</strong> - Configuration with <strong>Juniper</strong> SA - 4 October 2008 20
• Change the Assignment Mode to “Self-Assignment”, the Search updards in Org. UnitHierarch to “Yes” and Application Type to “Response Only”• Go to the “User Settings” tab, and set the “Windows Group Check” to No Check.A different setting can be useful in specific situations. See page 37 of VACMANMiddleware Product Guide.pdf<strong>Orbit</strong> <strong>One</strong> Internal<strong>VASCO</strong> <strong>Digipass</strong> - Configuration with <strong>Juniper</strong> SA - 4 October 2008 21
••• OK<strong>Orbit</strong> <strong>One</strong> Internal<strong>VASCO</strong> <strong>Digipass</strong> - Configuration with <strong>Juniper</strong> SA - 4 October 2008 22
6.4. Configure the Policy assigned to theAuthentication Server• Go to “Components” and select “Authentication Server”• Click Properties• Change the Policy to the one you have just created<strong>Orbit</strong> <strong>One</strong> Internal<strong>VASCO</strong> <strong>Digipass</strong> - Configuration with <strong>Juniper</strong> SA - 4 October 2008 23
6.5. Configure the RADIUS ClientA RADIUS Client Component record is required when machines will be sending authenticationrequests to the Authentication Server using the RADIUS protocol.• Go to “Components” and select “RADIUS Client”• Click Properties• Change the Policy to the one you have just created• Choose and enter a Shared Secret (write it down somewhere!)6.6. Reset the <strong>Digipass</strong> Windows Service• Before any changes are applied, you need to restart the Windows Service “<strong>Digipass</strong>Authentication Server”. This will load the new Policy settings.<strong>Orbit</strong> <strong>One</strong> Internal<strong>VASCO</strong> <strong>Digipass</strong> - Configuration with <strong>Juniper</strong> SA - 4 October 2008 24
6.7. Test using Radius Client Simulator• Program Files > <strong>VASCO</strong> > Radius Client Simulator > Radius Client Simulator• Configure the Server IP, this should be the IP address of the server where your VascoMiddleware is installed• Enter the Shared Secret as chosen before• Click Save• Then click on one of the Simulation NAS Ports6.7.1. Self-AssignmentWe are now going to assign a new <strong>Digipass</strong> to a user. It’s important that the <strong>Digipass</strong> is located inthe same OU as the user, or an OU upwards in the hierarchy (see chapter 5.4).• Enter the username of a user that has a <strong>Digipass</strong> assigned. You can enter it in 3 ways:ooousername (if your domain is set to default)domain\usernameusername@domain.ext• Enter the serial number of the <strong>Digipass</strong>, followed by the Active Directory password,followed by the OTP displayed on the <strong>Digipass</strong>.Example: “1120963682mypassword550665”• When you check in the Active Directory Users and Computers MMC, you will see thatthe <strong>Digipass</strong> was assigned to the user.<strong>Orbit</strong> <strong>One</strong> Internal<strong>VASCO</strong> <strong>Digipass</strong> - Configuration with <strong>Juniper</strong> SA - 4 October 2008 25
6.7.2. Normal authentication (without PIN code)We will now test a normal <strong>Digipass</strong> authentication using the username and OTP:• Enter the username. You can enter it in 3 ways:o username (if your domain is set to default)o domain\usernameo username@domain.ext• Enter the one-time-password displayed on the <strong>Digipass</strong>.(make sure you use the correct <strong>Digipass</strong>, check the serial number on the back)• Click Login<strong>Orbit</strong> <strong>One</strong> Internal<strong>VASCO</strong> <strong>Digipass</strong> - Configuration with <strong>Juniper</strong> SA - 4 October 2008 26
7. Configure <strong>Juniper</strong> SAThere are several ways you can configure the <strong>Juniper</strong> device. The solution we describe belowprovides the most flexibility and simplicity for most of our deployments.• Browse to the Admin interface of the device https://vpn.domain.com/admin to logininto the Central Manager7.1. Set the Authentication Servers7.1.1. Active Directory Authentication Server• Go to Authentication > Auth. Servers• Select server type “Active Directory / Windows NT” and click “New Server”• Save Changes<strong>Orbit</strong> <strong>One</strong> Internal<strong>VASCO</strong> <strong>Digipass</strong> - Configuration with <strong>Juniper</strong> SA - 4 October 2008 28
7.1.2. <strong>Digipass</strong> Authentication Server• Go to Authentication > Auth. Servers• Select server type “Radius Server” and click “New Server”• Enter a name for the new server, the IP address of the server where you installed VascoMiddleware, the shared Secret and check the “Users authenticate using tokens or onetimepasswords.• Save Changes<strong>Orbit</strong> <strong>One</strong> Internal<strong>VASCO</strong> <strong>Digipass</strong> - Configuration with <strong>Juniper</strong> SA - 4 October 2008 29
7.2. Set the User RealmsWe will create two Realms• <strong>Digipass</strong>+Active Directory: For users with active directory password AND <strong>Digipass</strong>. Theseusers will be granted access to secure resources in our network.• Active Directory Only: For users that do not have a <strong>Digipass</strong>. We will only allow themVERY LIMITED access rights. For example the “eBooks Library” as described in chapter2.4.7.2.1. <strong>Digipass</strong>+Active Directory Realm• Go to “Users” > “User Realms”• Click New.• Configure the following settings:• Save Changes<strong>Orbit</strong> <strong>One</strong> Internal<strong>VASCO</strong> <strong>Digipass</strong> - Configuration with <strong>Juniper</strong> SA - 4 October 2008 30
Set Role Mapping for this Realm• Click on the “Role Mapping” tab• New Rule• Select Rule based on “Group membership” and click “Update”• Click on “Groups” to get the Group selection popup• Click on “Search”• You will see a list of all your Active Directory groups• Check the boxed for the groups that you want to use in <strong>Juniper</strong> <strong>SSL</strong> <strong>VPN</strong> and click “AddSelected” on top.• Click OK• In “Rule... If users is a member of any of these selected groups” >> Select one or moregroups and click the “Add” button.• “... then assign these roles” >> select the <strong>Juniper</strong> role you want to assign to these groups(you will need to create roles before you start!)• Save Changes7.2.2. Active Directory Only Realm• Go to “Users” > “User Realms”• Click New.• Configure the following settings:• Save Changes<strong>Orbit</strong> <strong>One</strong> Internal<strong>VASCO</strong> <strong>Digipass</strong> - Configuration with <strong>Juniper</strong> SA - 4 October 2008 31
7.3. Configure your Sign-In PagesWe will create two sign-in pages:• <strong>Digipass</strong>: this will be the default sign-in page and will allow users to authenticate withtheir username + password + <strong>Digipass</strong>.• No <strong>Digipass</strong>: this sign-in page will be used for authentication without <strong>Digipass</strong>. Typicallyto gain access to low security resources such as the “eBooks” example.Note: We want to make is a simple as possible for the users, in order to avoid helpdesk calls.(Especially when users work remotely in the evenings and weekends )7.3.1. Create <strong>Digipass</strong> Sign-In Page• Go to Authentication > Signing In > Sign-in Pages• New Page• Configure the following settings:<strong>Orbit</strong> <strong>One</strong> Internal<strong>VASCO</strong> <strong>Digipass</strong> - Configuration with <strong>Juniper</strong> SA - 4 October 2008 32
Copy paste this code in Instructions (feel free to change!):Please sign in to begin your secure session.Users without <strong>Digipass</strong> clickhere.First use of <strong>Digipass</strong>The first time you sign in using a new <strong>Digipass</strong>, you need toactivate it:Username: your windows usernamePassword: your windows password<strong>Digipass</strong>: SERIALpasswordCODE- 10 digit serial number (see back of your <strong>Digipass</strong>), followedby- your windows password, followed by- 6 digit code (press button on <strong>Digipass</strong> to get code)Example: 1221984624password123456Normal Sign-In<strong>Digipass</strong>: 6 digit code (press button on <strong>Digipass</strong> to getcode)• Save Changes<strong>Orbit</strong> <strong>One</strong> Internal<strong>VASCO</strong> <strong>Digipass</strong> - Configuration with <strong>Juniper</strong> SA - 4 October 2008 33
7.3.2. Create No <strong>Digipass</strong> Sign-In Page• Go to Authentication > Signing In > Sign-in Pages• New Page• Configure the following settings:Copy paste this code in Instructions (feel free to change!):Please sign in to begin your secure session.Users with <strong>Digipass</strong> click here.• Save Changes<strong>Orbit</strong> <strong>One</strong> Internal<strong>VASCO</strong> <strong>Digipass</strong> - Configuration with <strong>Juniper</strong> SA - 4 October 2008 34
7.4. Set Sign-In Policies7.4.1. Create “*/nodigipass/” Policy• Go to Authentication > Signing In > Sign-in Policies• Click “New URL”• Enter “*/nodigipass/” in the Sign-in URL, select “No <strong>Digipass</strong>” as Sign-in page, and select“Active Directory Only” as realm. Also set to “User picks from a list of authenticationrealms”:• Save Changes<strong>Orbit</strong> <strong>One</strong> Internal<strong>VASCO</strong> <strong>Digipass</strong> - Configuration with <strong>Juniper</strong> SA - 4 October 2008 35
7.4.2. Configure “*/” Policy• Select the “User URL” policy “*/”• Change the “Sign-in page” to <strong>Digipass</strong>. Ser “User picks for a list of authentication realms”and select the “<strong>Digipass</strong>+Active Directory” realm.• Save Changes<strong>Orbit</strong> <strong>One</strong> Internal<strong>VASCO</strong> <strong>Digipass</strong> - Configuration with <strong>Juniper</strong> SA - 4 October 2008 36
7.5. Test <strong>Juniper</strong> SA Authentication• Browse to the public URL of the <strong>Juniper</strong> <strong>SSL</strong> <strong>VPN</strong> system, for examplehttps://vpn.domain.com• Try to activate a new <strong>Digipass</strong>, logout and then try to login with the <strong>Digipass</strong>• Click on “Users without <strong>Digipass</strong> click here”• Try to authenticate with a username and password only<strong>Orbit</strong> <strong>One</strong> Internal<strong>VASCO</strong> <strong>Digipass</strong> - Configuration with <strong>Juniper</strong> SA - 4 October 2008 37