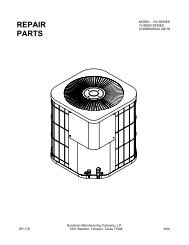
7.5 TON - 12.5 TON PACKAGE GAS SERIES CPG SERIES - Goodman
7.5 TON - 12.5 TON PACKAGE GAS SERIES CPG SERIES - Goodman
7.5 TON - 12.5 TON PACKAGE GAS SERIES CPG SERIES - Goodman

Create successful ePaper yourself
Turn your PDF publications into a flip-book with our unique Google optimized e-Paper software.
EVAPORATOR FAN ROTATION CHECK (THREE PHASE MODELS<br />
ONLY)<br />
Check that fan rotates clockwise when viewed from the drive<br />
side of unit and in accordance with rotation arrow shown on<br />
blower housing. If it does not, reverse any two incoming power<br />
cables at Single Point Power Block. In this case, repeat bearing<br />
check.<br />
Do not attempt to change load side wiring. Internal wiring<br />
assures all motors and compressors will rotate in correct direction<br />
once evaporator fan motor rotation check has been<br />
made.<br />
ELECTRICAL INPUT CHECK<br />
Make preliminary check of evaporator fan ampere draw and<br />
verify that motor nameplate amps are not exceeded. A final<br />
check of amp draw should be made upon completion of air<br />
balancing of the duct system (see Appendix C).<br />
RESTORING CONNECTIONS<br />
With disconnect switch open, remove jumper wire from terminals<br />
R and G at TB1 terminal block, and reconnect thermostat<br />
wires to terminals Y and W.<br />
REFRIGERATION SYSTEM CHECKS<br />
Ensure the hold-down bolts on the compressor are secure<br />
and have not vibrated loose during shipment. Check that vibration<br />
grommets have been installed. Visually check all piping<br />
and clamps. The entire refrigeration system has been<br />
factory charged and tested, making it unnecessary to field<br />
charge. Factory charges are shown in Appendix C and on<br />
the unit nameplate.<br />
Install service manifold hoses. Gauges should read saturation<br />
pressure corresponding to ambient temperature. Charge<br />
should be checked to obtain 12° to 15° of sub-cooling per<br />
system (i.e. compressor circuits).<br />
Rollout Protection Control<br />
The rollout protection device opens, cutting power to the<br />
gas valve, if the flames from the burners are not properly<br />
drawn into the heat exchanger. The rollout protection<br />
device is located on the burner bracket. The reason for<br />
elevated temperatures at the control should be<br />
determined and repaired prior to resetting this manual<br />
reset control.<br />
WARNING<br />
TO AVOID PROPERTY DAMAGE, PERSONAL INJURY OR DEATH DUE TO<br />
FIRE OR EXPLOSION, A QUALIFIED SERVICER MUST INVESTIGATE THE<br />
REASON FOR THE ROLLOUT PROTECTION DEVICE TO OPEN BEFORE<br />
MANUALLY RESETTING THE ROLLOUT PROTECTION DEVICE.<br />
Secondary Limit Control<br />
The secondary limit control is located on the top of the blower<br />
scroll assembly. This control opens when elevated temperatures<br />
are sensed. Elevated temperatures at the control are<br />
normally caused by blower failure. The reason for the opening<br />
should be determined and repaired prior to resetting.<br />
If the power to the unit is interrupted during the heating cycle,<br />
it may cause the secondary limit to trip. Once the blower compartment<br />
temperature drops below the limit reset temperature,<br />
the limit will automatically reset.<br />
Pre-Operation Checks<br />
1. Close the manual gas valve external to the unit.<br />
2. Turn off the electrical power supply to the unit.<br />
3. Set the room thermostat to its lowest possible setting.<br />
4. Remove the heat exchanger door on the side of the<br />
unit by removing screws.<br />
5. This unit is equipped with an ignition device which<br />
automatically lights the main burner. DO NOT try to<br />
light burner by any other method.<br />
6. Move the gas control valve switch to the OFF position.<br />
Do not force.<br />
7. Wait five minutes to clear out any gas.<br />
8. Smell for gas, including near the ground. This is<br />
important because some types of gas are heavier than<br />
air. If you have waited five minutes and you do smell<br />
gas, immediately follow the warnings on page 3 of<br />
this manual. If having waited for five minutes and no<br />
gas smell is noted, move the gas control valve switch<br />
to the ON position.<br />
9. Replace the heat exchanger door on the side of the<br />
unit.<br />
10. Open the manual gas valve external to the unit.<br />
11. Turn on the electrical power supply to the unit.<br />
12. Set the thermostat to desired setting.<br />
Gas Supply And Manifold Check<br />
Gas supply pressure and manifold pressure with the burners<br />
operating must be as specified on the rating plate.<br />
Gas Inlet Pressure Check<br />
Gas inlet pressure must be checked and adjusted in accordance<br />
to the type of fuel being consumed.<br />
With Power And Gas Off:<br />
1. Connect a water manometer or adequate gauge to<br />
the inlet pressure tap of the gas valve.<br />
Inlet gas pressure can also be measured by removing<br />
the cap from the dripleg and installing a predrilled cap<br />
with a hose fitting.<br />
With Power And Gas On:<br />
2. Put unit into heating cycle and turn on all other gas<br />
consuming appliances.<br />
16