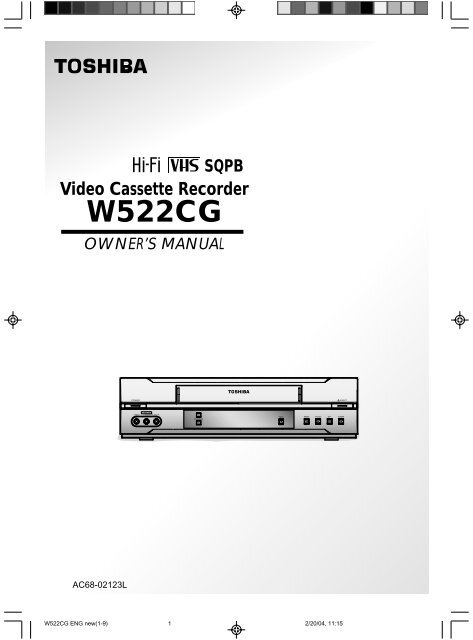
SQPB Video Cassette Recorder W522CG ... - Toshiba Canada
SQPB Video Cassette Recorder W522CG ... - Toshiba Canada
SQPB Video Cassette Recorder W522CG ... - Toshiba Canada

Create successful ePaper yourself
Turn your PDF publications into a flip-book with our unique Google optimized e-Paper software.
<strong>SQPB</strong><br />
<strong>Video</strong> <strong>Cassette</strong> <strong>Recorder</strong><br />
<strong>W522CG</strong><br />
OWNER’S MANUAL<br />
AC68-02123L<br />
<strong>W522CG</strong> ENG new(1-9) 1<br />
2/20/04, 11:15
SAFETY PRECAUTIONS<br />
The lightning flash with arrowhead symbol,<br />
within an equilateral triangle, is intended to<br />
alert the user to the presence of uninsulated<br />
“dangerous voltage” within the product’s enclosure<br />
that may be of sufficient magnitude<br />
to constitute a risk of electric shock to persons.<br />
The exclamation point within an equilateral<br />
triangle is intended to alert the user to the<br />
presence of important operating and maintenance<br />
(servicing) instructions in the literature<br />
accompanying the appliance.<br />
WARNING:<br />
CAUTION:<br />
TO REDUCE THE RISK OF FIRE OR ELECTRIC SHOCK, DO NOT EXPOSE<br />
THIS APPLIANCE TO RAIN<br />
OR MOISTURE. DANGEROUS HIGH VOLTAGES ARE PRESENT INSIDE THE<br />
ENCLOSURE. DO NOT OPEN THE CABINET. REFER SERVICING TO QUALI-<br />
FIED PERSONNEL ONLY.<br />
TO PREVENT ELECTRIC SHOCK, MATCH WIDE BLADE OF PLUG TO WIDE<br />
SLOT, FULLY INSERT.<br />
Product Name: <strong>Video</strong> <strong>Cassette</strong> <strong>Recorder</strong><br />
Model Number: <strong>W522CG</strong><br />
FCC Notice: “Declaration of Corformity”.<br />
This device complies with part 15 of the FCC Rules. Operation is subject to the following two<br />
conditions: (1) This device may not cause harmful Interference, and (2) this device must accept any<br />
interference received, including interference that may cause undesired operation.<br />
Contact: <strong>Toshiba</strong> America Consumer Products, L.L.C.<br />
Address: 1420 <strong>Toshiba</strong> Drive, Lebanon, TN 37087<br />
Telephone: 615-449-2360<br />
User Installer Caution: Changes or modification made to this equipment not expressly approved by<br />
<strong>Toshiba</strong> Corporation or parties authorized by <strong>Toshiba</strong> Corporation could void the user’s authority to<br />
operate the equipment.<br />
Note to CATV system installer:<br />
This reminder is provided to call the CATV system installer’s attention to Article 820-40 of the NEC<br />
that provides guidelines for proper grounding and, in particular, specifies that the cable ground shall<br />
be connected to the grounding system of the building, as close to the point of cable entry as practical.<br />
2<br />
<strong>W522CG</strong> ENG new(1-9) 2<br />
2/20/04, 11:15
IMPORTANT PRECAUTIONS<br />
Save Original Packing Materials<br />
The original shipping carton and packing materials will come in handy if you ever have to ship<br />
your VCR. For maximum protection, repack the set as it was originally packed at the factory.<br />
Avoid Volatile Liquid<br />
Do not use volatile liquids, such as an insect spray, near the unit.<br />
Do not leave rubber or plastic products touching the unit for a long time. They will mar the<br />
finish.<br />
INTRODUCTION<br />
Moisture Condensation<br />
Never operate this unit immediately after moving it from a cold location to a warm location.<br />
When the VCR is exposed to such a change in temperature, moisture may condense on the<br />
cylinder inside, one of its most crucial internal parts. To prevent the VCR from possible<br />
damage, do not use the unit for at least 2 hours when there is an extreme or sudden change<br />
in temperature.<br />
Compatibility<br />
This video cassette recorder (VCR) is compatible with any other VCR bearing the<br />
mark. HQ VHS equipment is also compatible with existing, non-HQ VHS equipment.<br />
Copyright<br />
It is permissible to record television programs, film, video tapes and other material only in<br />
the event that third party copyrights and other rights are not violated.<br />
®<br />
As an ENERGY STAR Partner, TOSHIBA has determined that this product or<br />
®<br />
product model meets the ENERGY STAR guidelines for energy efficiency.<br />
In the spaces provided below, record the Model and Serial No. located at the rear of your video<br />
cassette recorder.<br />
Model No.<br />
Serial No.<br />
Retain this information for future reference.<br />
3<br />
<strong>W522CG</strong> ENG new(1-9) 3<br />
2/20/04, 11:15
IMPORTANT SAFETY<br />
INSTRUCTIONS<br />
CAUTION:<br />
PLEASE READ AND OBSERVE ALL WARNINGS AND INSTRUCTIONS<br />
GIVEN IN THIS OWNER’S MANUAL AND THOSE MARKED ON THE UNIT.<br />
RETAIN THIS BOOKLET FOR FUTURE REFERENCE.<br />
This set has been designed and manufactured to assure personal safety. Improper use can<br />
result in electric shock or fire hazard. The safeguards incorporated in this unit will protect<br />
you if you observe the following procedures for installation, use and servicing. This unit is<br />
fully transistorized and does not contain any parts that can be repaired by the user.<br />
DO NOT REMOVE THE CABINET COVER, OR YOU MAY BE EXPOSED TO<br />
DANGEROUS VOLTAGE. REFER SERVICING TO QUALIFIED SERVICE PERSONNEL<br />
ONLY.<br />
1. Read owner’s manual<br />
After unpacking this product, read the owner’s manual carefully, and follow all<br />
the operating and other instructions.<br />
2. Power Sources<br />
This product should be operated only from the type of power source indicated<br />
on the marking label. If you are not sure of the type of power supply to your<br />
home, consult your product dealer or local power company. For products<br />
intended to operate from battery power, or other sources, refer to the operating<br />
instructions.<br />
3. Grounding or Polarization<br />
This product may be equipped with a polarized alternating current line plug (a<br />
plug having one blade wider than the other). This plug will fit into the power<br />
outlet only one way. This is a safety feature. If you are unable to insert the plug<br />
fully into the outlet, try reversing the plug. If the plug should still fail to fit, contact<br />
your electrician to replace your obsolete outlet. Do not defeat the safety<br />
purpose of the polarized plug.<br />
4. Ventilation<br />
Slots and openings in the cabinet are provided for ventilation and to ensure<br />
reliable operation of the product and to protect it from overheating, and these<br />
openings must not be blocked or covered. The openings should never be<br />
blocked by placing the product on a bed, sofa, rug or other similar surface. This<br />
product should not be placed in a built-in installation such as a bookcase or rack<br />
unless proper ventilation is provided or the manufacturer’s instructions have<br />
been adhered to.<br />
5. Heat<br />
The product should be situated away from heat sources such as radiators, heat<br />
registers, stoves, or other products (including amplifiers) that produce heat.<br />
4<br />
<strong>W522CG</strong> ENG new(1-9) 4<br />
2/20/04, 11:15
6. Water and Moisture<br />
Do not use this product near water - for example, near a bath tub, wash bowl,<br />
kitchen sink, or laundry tub; in a wet basement; or near a swimming pool and<br />
the like.<br />
7. Cleaning<br />
Unplug this product from the wall outlet before cleaning. Do not use liquid<br />
cleaners or aerosol cleaners. Use a damp cloth for cleaning.<br />
8. Power-Cord Protection<br />
Power-supply cords should be routed so that they are not likely to be walked<br />
on or pinched by items placed upon or against them, paying particular attention<br />
to cords at plugs, convenience receptacles, and the point where they exit from<br />
the product.<br />
INTRODUCTION<br />
9. Overloading<br />
Do not overload wall outlets; extension cords, or integral convenience receptacles<br />
as this can result in a risk of fire or electric shock.<br />
10. Outdoor Antenna Grounding<br />
If an outside antenna or cable system is connected to the product, be sure the antenna or cable system<br />
is grounded so as to provide some protection against voltage surges and built-up static charges. Article<br />
810 of the National Electrical Code, ANSI/NFPA 70, provides information with regard to proper<br />
grounding of the mast and supporting structure, grounding of the lead-in wire to an antenna discharge<br />
unit, size of grounding conductors, location of antenna-discharge unit, connection to grounding<br />
electrodes, and requirements for the grounding electrode.<br />
EXAMPLE OF ANTENNA GROUNDING AS PER<br />
NATIONAL ELECTRICAL CODE<br />
GROUND<br />
CLAMP<br />
ANTENNA<br />
LEAD IN<br />
WIRE<br />
ELECTRIC<br />
SERVICE<br />
EQUIPMENT<br />
ANTENNA<br />
DISCHARGE UNIT<br />
(NEC SECTION 810-20)<br />
GROUNDING CONDUCTORS<br />
(NEC SECTION 810-21)<br />
GROUND CLAMPS<br />
POWER SERVICE GROUNDING<br />
ELECTRODE SYSTEM<br />
(NEC ART 250, PART H)<br />
NEC – NATIONAL ELECTRICAL CODE<br />
S2898A<br />
11. Power Lines<br />
An outside antenna system should not be located in the vicinity of overhead power lines or other electric<br />
light or power circuits, or where it can fall into such power lines or circuits. When installing an outside<br />
antenna system, extreme care should be taken to keep from touching such power lines or circuits as<br />
contact with them might be fatal.<br />
5<br />
<strong>W522CG</strong> ENG new(1-9) 5<br />
2/20/04, 11:15
IMPORTANT SAFETY<br />
INSTRUCTIONS<br />
12. Lightning<br />
For added protection for this product during storm, or when it is left unattended<br />
and unused for long periods of time, unplug it from the wall outlet and<br />
disconnect the antenna or cable system. This will prevent damage to the<br />
product due to lightning and power-line surges.<br />
13. Object and Liquid Entry<br />
Never push objects of any kind into this product through openings as they may<br />
touch dangerous voltage points or short-out parts that could result in a fire or<br />
electric shock. Never spill liquid of any kind on the product.<br />
14. Attachments<br />
Do not use attachments not recommended by the product manufacturer as they may cause hazards.<br />
15. Accessories<br />
Do not place this product on an unstable cart, stand, tripod, bracket, or table.<br />
The product may fall, causing serious injury to a child or adult, and serious<br />
damage to the product. Use only with a cart, stand, tripod, bracket, or table<br />
recommended by the manufacturer, or sold with the product. Any mounting of<br />
the product should follow the manufacturer’s instructions, and should use a<br />
mounting accessory recommended by the manufacturer.<br />
A product and cart combination should be moved with care. Quick stops,<br />
excessive force, and uneven surfaces may cause the product and cart<br />
combination to overturn.<br />
S3125A<br />
16. Damage Requiring Service<br />
Unplug this product from the wall outlet and refer servicing to qualified service personnel under the<br />
following conditions:<br />
a) When the power-supply cord or plug is damaged.<br />
b) If liquid has been spilled, or objects have fallen into the product.<br />
c) If the product has been exposed to rain or water.<br />
d) If the product does not operate normally by following the operating instructions. Adjust only those<br />
controls that are covered by the operating instructions as an improper adjustment of other controls<br />
may result in damage and will often require extensive work by a qualified technician to restore the<br />
product to its normal operation.<br />
e) If the product has been dropped or damaged in any way.<br />
f) When the product exhibits a distinct change in performance - this indicates a need for service.<br />
17. Servicing<br />
Do not attempt to service this product yourself as opening or removing covers<br />
may expose you to dangerous voltage or other hazards. Refer all servicing to<br />
qualified service personnel.<br />
18. Replacement Parts<br />
When replacement parts are required, be sure the service technician has used replacement parts<br />
specified by the manufacturer or have the same characteristics as the original part. Unauthorized<br />
substitutions may result in fire, electric shock, or other hazards.<br />
19. Safety Check<br />
Upon completion of any service or repairs to this product, ask the service<br />
technician to perform safety checks to determine that the product is in proper<br />
operating condition.<br />
6<br />
<strong>W522CG</strong> ENG new(1-9) 6<br />
2/20/04, 11:15
Contents<br />
INTRODUCTION<br />
Provides important notes and general<br />
explanation of the VCR, including names of the<br />
buttons, jacks, etc.<br />
SAFETY PRECAUTIONS .................... 2<br />
IMPORTANT PRECAUTIONS ............. 3<br />
IMPORTANT SAFETY<br />
INSTRUCTIONS ................................... 4<br />
Contents .............................................. 7<br />
Identification of Controls ................... 8<br />
• Front Panel<br />
• Remote Control<br />
• VCR Display<br />
• Rear Panel<br />
PREPARATION<br />
Explains what you need to do before operating<br />
the VCR.<br />
How to Use the Remote Control ...... 10<br />
Connections ...................................... 11<br />
Auto Set Up ....................................... 13<br />
Initial Settings Using On-screen<br />
Display ............................................... 14<br />
• Setting the Language<br />
• Setting the VCR output channel<br />
• Optional settings on the SETUP<br />
screen<br />
• Setting the Clock<br />
Storing Channels on the VCR.......... 16<br />
<strong>Video</strong> <strong>Cassette</strong> Use .......................... 18<br />
PLAYBACK<br />
Explains variable functions concerning<br />
playback.<br />
Playback ............................................ 19<br />
• Basic Playback<br />
• Double Speed Playback<br />
• S-VHS Quasi Playback (<strong>SQPB</strong>)<br />
Variable Speed Playback ................. 20<br />
• Picture Search<br />
• Commercial Movie Skip<br />
• Still Picture<br />
• Frame Advance<br />
• Slow-motion Picture<br />
Useful Functions in Tape<br />
Operation ........................................... 22<br />
• Counter Function<br />
• Tape Remaining Time<br />
• Memory Stop Feature (Zero Return)<br />
RECORDING<br />
Explains recording functions.<br />
Recording a TV Program.................. 24<br />
• Basic Recording<br />
• Watching a TV program while<br />
recording another<br />
• Skipping unnecessary scenes while<br />
recording<br />
• Recording off time setting<br />
Timer Program Recording ............... 25<br />
MTS Broadcast Compatibility .......... 28<br />
ADDITIONAL INFORMATION<br />
Remote Control<br />
for TOSHIBA TVs .............................. 29<br />
Before Calling Service Personnel ... 30<br />
Specifications ................................... 31<br />
Accessories ...................................... 31<br />
LIMITED WARRANTY............. Back cover<br />
INTRODUCTION<br />
7<br />
<strong>W522CG</strong> ENG new(1-9) 7<br />
2/20/04, 11:15
INTRODUCTION<br />
Identification of Controls<br />
See the page in for details.<br />
This manual shows the names of buttons in italics.<br />
Front Panel<br />
14<br />
POWER<br />
<strong>Cassette</strong> Compartement<br />
REC<br />
EJECT<br />
24 18<br />
LINE IN AUDIO<br />
( L/MONO, R) jaks<br />
24<br />
CHANNEL<br />
19 19 19 19<br />
REW PLAY FF STOP<br />
LINE IN VIDEO jack<br />
Remote<br />
sensor<br />
VCR Display<br />
Remote Control<br />
To operate your TV. TV 29<br />
To operate this VCR. VCR<br />
14<br />
Number<br />
buttons 17<br />
A.SELECT 28<br />
PLAY * 19<br />
EJECT 18<br />
REW * 19<br />
SLOW 21<br />
DISPLAY 22<br />
REMAIN/COUNTER 22<br />
I.SELECT 24<br />
REC 24<br />
TV VOL 29<br />
SLOW<br />
VCR<br />
EJECT<br />
DISPLAY<br />
I.SELECT<br />
TV VOL<br />
TV<br />
1 2 3<br />
4<br />
7<br />
A.SELECT<br />
REW<br />
5<br />
8<br />
0<br />
REMAIN/<br />
COUNTER<br />
REC<br />
PLAY<br />
ENTER<br />
STOP<br />
6<br />
9<br />
100<br />
COUNT<br />
RESET<br />
PROG.<br />
POWER<br />
CM SKIP<br />
FF<br />
PAUSE/STILL<br />
SP/ SLP<br />
TIMER<br />
CANCEL<br />
14 POWER<br />
19 CH/TRK<br />
24 TV/VCR<br />
20 CM SKIP<br />
17 100<br />
14 ENTER<br />
19 PLAY *<br />
19 FF *<br />
19 STOP *<br />
20 PAUSE/STILL<br />
24 SP/SLP<br />
22 COUNT RESET<br />
26 TIMER<br />
27 CANCEL<br />
14 PROG.<br />
* These buttons are used to control the<br />
cursor on the screen.<br />
8<br />
<strong>W522CG</strong> ENG new(1-9) 8<br />
2/20/04, 11:15
VCR Display<br />
<strong>Cassette</strong> indicator<br />
Timer recording indicator<br />
INTRODUCTION<br />
TIMER<br />
VCR<br />
Hi-Fi<br />
Hi-Fi indicator<br />
VCR indicator<br />
Multifunctional<br />
indicator<br />
Rear Panel<br />
LINE OUT AUDIO jack (L,R)<br />
RF IN (FROM ANT.) terminal<br />
LINE<br />
OUT<br />
R<br />
IN<br />
(FROM ANT.)<br />
AUDIO<br />
L<br />
VIDEO<br />
OUT<br />
(TO TV)<br />
RF<br />
TO Wall outlet<br />
LINE OUT VIDEO jack<br />
RF OUT (TO TV) terminal<br />
LINE IN Front jacks<br />
If the connected equipment is monaural (has one audio output jack), connect the L (MONO) side, the same<br />
sound is recorded on both L and R on the Hi-Fi track.<br />
9<br />
<strong>W522CG</strong> ENG new(1-9) 9<br />
2/20/04, 11:15
PREPARATION<br />
How to Use the Remote Control<br />
This section explains how to get ready for remote control operation.<br />
Setting up the Remote Control<br />
1 Open the battery compartment lid on the<br />
rear panel.<br />
2 Install 2 batteries (“AA” size) following<br />
the polarity diagrams.<br />
3 Close the battery compartment lid.<br />
+<br />
+<br />
4 Point the remote control at the VCR and press the buttons within the operating range.<br />
Distance: within about 7 m from the front of the remote sensor<br />
Angles: within about 30˚ in every direction<br />
Notes on batteries<br />
• The life of the batteries is about 1 year<br />
depending on the conditions of use.<br />
• If the remote control does not operate correctly,<br />
replace all batteries with new ones.<br />
• If the remote control is not to be used for a<br />
long period of time, remove the batteries to<br />
avoid possible damage from battery corrosion.<br />
Caring for the remote control<br />
• Do not expose the remote sensor of the VCR<br />
to a strong light source such as direct sunlight<br />
or illumination (especially high-frequency<br />
lighting) when using the remote control.<br />
• Be careful not to spill water on the remote<br />
control or to place it on anything wet, and avoid<br />
sharp impacts.<br />
10<br />
<strong>W522CG</strong> ENG new (10-19) 10<br />
2/20/04, 11:16
(FROM ANT.)<br />
(TO TV)<br />
(FROM ANT.)<br />
(TO TV)<br />
(FROM ANT.)<br />
(TO TV)<br />
PREPARATION<br />
Connections<br />
Before you use this VCR, it is necessary to connect it to your TV. Several ways of connecting are<br />
available depending on your use of TV or cable box. Select one which is applicable to your equipment.<br />
Antenna/VCR/TV Connection<br />
1 Disconnect the antenna cable from your TV and connect it to the RF IN terminal on the<br />
VCR.<br />
2 Connect the RF OUT terminal to the TV.<br />
VHF/UHFcombination<br />
antenna<br />
VHF antenna<br />
only<br />
UHF antenna<br />
only<br />
PREPARATION<br />
LINE<br />
OUT<br />
R<br />
IN<br />
IN<br />
(FROM ANT.)<br />
1<br />
AUDIO<br />
L<br />
VIDEO<br />
OUT RF<br />
OUT RF<br />
(TO TV)<br />
2<br />
VHF/UHF<br />
VHF UHF<br />
AUDIO/VIDEO Connections<br />
Antenna splitter<br />
(not supplied)<br />
The AUDIO/VIDEO jacks are also available to connect your TV.<br />
LINE<br />
OUT<br />
R<br />
AUDIO<br />
L<br />
VIDEO<br />
IN<br />
OUT<br />
RF<br />
LINE OUT VIDEO<br />
VIDEO IN<br />
When connected your TV using the<br />
AUDIO/VIDEO OUT jacks<br />
To watch video pictures, set the video input mode<br />
on your TV. For the video input mode, refer to the<br />
manual of your TV.<br />
LINE OUT AUDIO<br />
AUDIO IN<br />
Cable Connection<br />
Choose one of the below according to your usage of the cable box.<br />
This set-up will enable you to:<br />
– record an unscrambled channel.<br />
LINE<br />
– watch an unscrambled channel while recording it.<br />
OUT<br />
IN<br />
R<br />
– record an unscrambled channel while watching<br />
AUDIO<br />
L<br />
OUT<br />
another (only when you connect a cablecompatible<br />
TV).<br />
VIDEO<br />
You will need to:<br />
• select TV channel 3 or 4 to receive video signals.<br />
(See page 14)<br />
Incoming cable<br />
•.<br />
to record a channel while watching another, press<br />
TV/VCR on the remote control to turn off the<br />
“VCR” indicator in the VCR display and select a<br />
desired channel on the TV (only when you connect<br />
a cable-compatible TV)<br />
11<br />
<strong>W522CG</strong> ENG new (10-19) 11<br />
2/20/04, 11:16
LINE<br />
OUT<br />
(FROM ANT.)<br />
(TO TV)<br />
LINE<br />
OUT<br />
R<br />
AUDIO<br />
L<br />
VIDEO<br />
R<br />
AUDIO<br />
L<br />
VIDEO<br />
(FROM ANT.)<br />
(TO TV)<br />
(FROM ANT.)<br />
(TO TV)<br />
R<br />
AUDIO<br />
L<br />
VIDEO<br />
Connections (continued)<br />
LINE<br />
OUT<br />
R<br />
AUDIO<br />
L<br />
VIDEO<br />
Incoming cable<br />
IN<br />
OUT<br />
Cable box<br />
IN<br />
OUT<br />
This set-up will enable you to:<br />
– record an unscrambled channel.<br />
– watch an unscrambled channel while recording it.<br />
– record an unscrambled channel while watching<br />
another (scrambled or unscrambled).<br />
You will need to:<br />
• set TV channel to the output channel of the cable<br />
box.<br />
• turn on the cable box and select cable channel 3<br />
or 4 according to the output channel of the VCR.<br />
• to record a channel while watching another, press<br />
TV/VCR on the remote control to turn off the<br />
“VCR” indicator in the VCR display and select a<br />
desired cable channel on the cable box.<br />
IN<br />
Cable box<br />
Incoming cable<br />
OUT<br />
IN<br />
OUT<br />
RF<br />
This set-up will enable you to:<br />
– watch an unscrambled or scrambled channel<br />
while recording it.<br />
– record any channels through the cable box.<br />
You will need to:<br />
• set TV channel 3 or 4 to receive video signal.<br />
(See page 14. )<br />
• set VCR channel to the output channel of the<br />
cable box, and select a desired cable channel on<br />
the cable box.<br />
• while the VCR is turned off or the “VCR” indicator<br />
is not lit in the VCR display, set TV channel to the<br />
output channel of the cable box.<br />
A/B switch<br />
Cable box<br />
A<br />
B<br />
A<br />
B<br />
IN<br />
OUT<br />
RF<br />
This set-up will enable you to:<br />
– watch an unscrambled or scrambled channel<br />
while recording it.<br />
– record an unscrambled channel while watching<br />
another unscrambled channel (only when you<br />
connect a cable-compatible TV).<br />
• A/B switch “A”: record and watch an unscrambled<br />
channel which comes bypassing<br />
the cable box.<br />
• A/B switch “B”: record and watch a scrambled or<br />
unscrambled channel coming<br />
through the cable box.<br />
Cable box<br />
Front AV<br />
LINE<br />
OUT<br />
IN<br />
(FROM ANT.)<br />
OUT RF<br />
(TO TV)<br />
This set-up will enable you to:<br />
– watch or record a channel through the cable box<br />
via the LINE IN (AUDIO/VIDEO) jacks.<br />
You will need to:<br />
• press I.SELECT so that the VCR display shows<br />
“L”.<br />
12<br />
<strong>W522CG</strong> ENG new (10-19) 12<br />
2/20/04, 11:16
REMAIN/<br />
COUNTER<br />
PREPARATION<br />
Auto Set Up<br />
The VCR’s clock and tuner channels are set automatically when the VCR is plugged into the AC outlet.<br />
Auto Set up<br />
VCR TV<br />
POWER<br />
1 2 3<br />
4 5 6<br />
CM SKIP<br />
7 8 9<br />
A.SELECT<br />
0 100<br />
EJECT<br />
1 Plug the VCR into the AC outlet<br />
2 “Auto” blink while the VCR automatically sets the clock using<br />
the data broadcast by the local TV stations.<br />
While “Auto” is blinking, channel memory is also set<br />
automatically.<br />
PREPARATION<br />
PLAY<br />
REW<br />
ENTER<br />
FF<br />
STOP<br />
SLOW<br />
DISPLAY<br />
COUNT<br />
RESET<br />
PAUSE/STILL<br />
SP/ SLP<br />
I.SELECT<br />
REC<br />
TIMER<br />
TV VOL<br />
PROG.<br />
CANCEL<br />
CANCEL<br />
3 When Auto set up has been completed, the VCR is on<br />
standby mode.<br />
Notes<br />
• It may takes several minutes during the Auto set-up<br />
• Press CANCEL on the remote control to cancel the auto set-up.<br />
13<br />
<strong>W522CG</strong> ENG new (10-19) 13<br />
2/20/04, 11:16
REMAIN/<br />
COUNTER<br />
PREPARATION<br />
Initial Settings Using On-screen Display<br />
The language selection and clock setting must be set first when VCR is first plugged in or after it<br />
encounters a power failure.<br />
Preparation<br />
• Turn on the TV, and select the video channel (3 or 4), or the video input mode if you made the Audio/<strong>Video</strong><br />
connection (page 11).<br />
• Press VCR to set the remote control operating the VCR.<br />
VCR<br />
Setting the Language<br />
VCR TV<br />
POWER<br />
1 2 3<br />
4 5 6<br />
CM SKIP<br />
7 8 9<br />
A.SELECT<br />
0 100<br />
EJECT<br />
POWER<br />
REW<br />
1 Press POWER to turn on the VCR.<br />
2 Press PROG..<br />
The following screen appears on the TV.<br />
PLAY<br />
REW<br />
ENTER<br />
STOP<br />
FF<br />
FF<br />
PLAY, STOP<br />
SLOW<br />
DISPLAY<br />
I.SELECT<br />
TV VOL<br />
REC<br />
COUNT<br />
RESET<br />
PROG.<br />
PAUSE/STILL<br />
SP/ SLP<br />
TIMER<br />
CANCEL<br />
ENTER<br />
PROG.<br />
3 Select the language using PLAY or<br />
STOP and press PROG..<br />
The screen turns to the MENU screen.<br />
4 Press PROG. to return to the normal TV screen.<br />
Setting the VCR Output Channel<br />
1 Press PROG..<br />
2 Select SET UP using FF or REW and press ENTER.<br />
3 Select the VCR OUTPUT using PLAY or STOP and set VCR<br />
output channel using FF or REW.<br />
4 Press PROG. to exit.<br />
A message will appear indicating the VCR output channel is changed.<br />
Optional settings on the SET UP screen<br />
Other optional settings can be made. Press ENTER while “SET UP” is<br />
selected on the MENU screen. The screen turns to the SET UP screen.<br />
Page 14<br />
Page 22<br />
Page 28<br />
Page 23<br />
To change the language, move down here and set to the desired one.<br />
14<br />
To exit, press PROG. once.<br />
<strong>W522CG</strong> ENG new (10-19) 14<br />
2/20/04, 11:16
Setting the Clock<br />
Example: To set the clock to 2:30 p.m. on<br />
August 25 (summer time) 2004<br />
1 Press PROG..<br />
The MENU screen appears on the TV.<br />
2 Select “PRESET” using FF or REW, and<br />
press ENTER.<br />
3 Press ENTER to select “CLOCK SET”.<br />
4 Select “AUTO” or “MANU” using PLAY or<br />
STOP.<br />
AUTO: The VCR automatically sets or adjusts<br />
the clock.<br />
If you select “AUTO” mode, proceed to step 8.<br />
MANU: You can set the clock manually.<br />
If you select “MANU” mode. Select “ SUMMER<br />
TIME “ using FF Set to “IN“ or “OUT“ for the<br />
SUMMER (daylight saving ) time using PLAY or<br />
stop.(For “IN” and “OUT” selections, see the<br />
5 Move to the next using FF<br />
(To move back,press Rew.)<br />
6 Vary the digits to set the hour.<br />
PLAY : To increase.<br />
STOP : To decrease.<br />
7 Repeat step 5 and 6 to set the minutes,<br />
month, day , and the year (by the last<br />
two digits).<br />
Proceed to step 10 to start the clock.<br />
8 Press ENTER to start the “AUTO” clock<br />
set feature.<br />
After the VCR is turned off, it automatically<br />
updates the clock using the data broadcast<br />
by the local TV stations.<br />
*The clock is<br />
revised by<br />
broadcasting<br />
signal at 8:00 A.M<br />
every morning.<br />
9 Select the options using FF or REW.<br />
Change the data using PLAY or STOP.<br />
1) Set “SUMMER TIME<br />
(Daylight-Saving Time)”.<br />
DST start: Daylight-saving time begins on<br />
the first Sunday in April. Because the<br />
clock automatically changes from 2:00 AM<br />
to 3:00 AM (forward one hour).<br />
DST end: Daylight-saving time ends on<br />
the last Sunday in October. The VCR<br />
clock automatically changes from 2:00 AM<br />
to 1:00 AM (back one hour).<br />
Remember that any part of a scheduled<br />
Timer Recording that falls between these<br />
two times will not be recorded.<br />
AUTO: the VCR is using the clock data<br />
Broadcast by the local TV stations.<br />
IN: You want to use the DST function, and<br />
you are living in the area that apply<br />
Daylight-saving time.<br />
OUT: You are not living in the area that<br />
apply Daylight-saving time and you do not<br />
want to use DST function.<br />
2) Set “TIME ZONE”.<br />
If you select “AUTO” for your time zone,<br />
the VCR sets the clock using the first<br />
Coordinated Universal Time information it<br />
finds. If the time is not correct, select<br />
another time zone or use the “MANU”<br />
option.<br />
3) Set “CLOCK DATA CH”.<br />
If you don't know the clock data channel,<br />
select “AUTO”. The VCR will scan<br />
automatically to tune the channel carrying<br />
the clock data.<br />
If AUTO CLOCK SET is unsuccessful, set the<br />
time and date through the “MANU” clock<br />
set menu selection.<br />
10 Press PROG..<br />
Now the clock starts.<br />
PREPARATION<br />
15<br />
<strong>W522CG</strong> ENG new (10-19) 15<br />
2/20/04, 11:16
REMAIN/<br />
COUNTER<br />
PREPARATION<br />
Storing Channels on the VCR<br />
This section is required if you receive only normal TV or unscrambled cable channels.<br />
Incoming Antenna/Cable(CATV) Signals<br />
The VCR scans through all receivable TV and CATV channels and stores only the active<br />
ones in your area into the memory. Once the storing is finished, you can select a desired<br />
channel using CH/TRK.<br />
Preparation<br />
• Turn on the TV, and select the video channel (3 or 4) or the video input mode if you made the Audio/<strong>Video</strong><br />
connection (page 11).<br />
• Press I.SELECT so that the channel number will appear if “L” is displayed in the VCR display.<br />
Incoming Antenna/Cable(CATV) Signals<br />
VCR<br />
TV<br />
POWER<br />
1 2 3<br />
Number<br />
4 5 6<br />
buttons<br />
CM SKIP<br />
7 8 9<br />
A.SELECT<br />
0 100 100<br />
1 Press PROG. to display the MENU screen.<br />
2 Select “PRESET” using FF or REW,<br />
and press ENTER.<br />
EJECT<br />
REW<br />
PLAY<br />
REW<br />
ENTER<br />
STOP<br />
FF<br />
FF<br />
PLAY, STOP<br />
SLOW<br />
DISPLAY<br />
I.SELECT<br />
TV VOL<br />
REC<br />
COUNT<br />
RESET<br />
PROG.<br />
PAUSE/STILL<br />
SP/ SLP<br />
TIMER<br />
CANCEL<br />
ENTER<br />
1,6<br />
I.SELECT<br />
3 Select “CH MEMORY” using PLAY<br />
or STOP, and press ENTER.<br />
4 Set “TV/CATV“ to “TV” or “CATV” using FF or REW.<br />
TV: To store channels received via the antenna.<br />
CATV: To store channels received via the incoming cable.<br />
5 Select “AUTO SCAN” using PLAY or<br />
STOP, and press FF to set to “ON”.<br />
The VCR starts scanning and the<br />
channels are stored in the VCR in<br />
ascending order. When the scanning is<br />
finished, the screen automatically<br />
returns.<br />
6 Press PROG. twice to exit.<br />
16<br />
<strong>W522CG</strong> ENG new (10-19) 16<br />
2/20/04, 11:17
Adding or erasing channels<br />
Adding channels<br />
If a desired channel cannot be scanned<br />
automatically because of a weak signal, it can be<br />
added to the memory.<br />
Erasing channels<br />
You can erase a stored channel from the memory<br />
if it is unnecessary.<br />
3) Enter a channel number of 1 to 125 using<br />
number buttons.<br />
For more than 100 number, first press 100.<br />
For CATV channels, refer to the chart below.<br />
(For other orders, check with your cable<br />
company.)<br />
4) Repeat steps 2) and 3) to add or erase<br />
channels as necessary.<br />
5) Press PROG. two times to exit.<br />
1) Follow steps 1 to 3 of “Incoming Antenna/<br />
CATV Signals”.<br />
2) Select “ADD CH” or “ERASE CH” using PLAY<br />
or STOP.<br />
To add channels<br />
To erase channels<br />
Selecting stored channels<br />
Once the active channels have been stored, you<br />
can select the channels in two ways below.<br />
Number buttons<br />
To enter digits of the channel number.<br />
• For one-digit number, enter 0 before.<br />
• For more than 100 number, first press 100.<br />
• Each number button needs to be pressed<br />
within 2 seconds.<br />
CH/TRK buttons<br />
To shift up or down the stored channel numbers.<br />
PREPARATION<br />
Channel reference chart<br />
Number on the VCR<br />
Corresponding channel number<br />
CH NUMBER 1 2 3 4 5 6 7 8 9<br />
TV<br />
– 2 3 4 5 6 7 8 9<br />
CATV STD (HRC/IRC) 1(A-8) 2 3 4 5(A-7) 6(A-6) 7 8 9<br />
10 11 12 13 14 15 16 17 18 19 20 21 22 23 24 25 26 27 28 29 30<br />
10 11 12 13 14 15 16 17 18 19 20 21 22 23 24 25 26 27 28 29 30<br />
10 11 12 13 A B C D E F G H I J K L M N O P Q<br />
31 32 33 34 35 36 37 38 39 40 41 42 43 44 45 46 47 48 49 50 51<br />
31 32 33 34 35 36 37 38 39 40 41 42 43 44 45 46 47 48 49 50 51<br />
R S T U V W AA BB CC DD EE FF GG HH II JJ KK LL MM NN OO<br />
52 53 54 55 56 57 58 59 60 61 62 63 64 65 66 67 68 69 70 71 …<br />
52 53 54 55 56 57 58 59 60 61 62 63 64 65 66 67 68 69 – – …<br />
PP QQ RR SS TT UU VV WW XX YY ZZ AAA BBB 65 66 67 68 69 70 71 …<br />
93 94 95 96 97 98 99 100 101 102 103 … 121 122 123 124 125<br />
– – – – – – – – – – – … – – – – –<br />
93 94 A-5 A-4 A-3 A-2 A-1 100 101 102 103 … 121 122 123 124 125<br />
CATV signals<br />
• STD (standard) cable TV signals<br />
• HRC (Harmonic Related Carriers) cable TV signals<br />
• IRC (Incremental Related Carriers) cable TV signals<br />
IRC is also called ICC (Incremental Coherent Carriers)<br />
17<br />
<strong>W522CG</strong> ENG new (10-19) 17<br />
2/20/04, 11:17
PREPARATION<br />
<strong>Video</strong> <strong>Cassette</strong> Use<br />
<strong>Video</strong> <strong>Cassette</strong> Use<br />
Loading a cassette<br />
Push the cassette into the cassette compartment with the window side facing up and the<br />
label side towards the front. The VCR is automatically turned on. The indicator will<br />
appear in the VCR display.<br />
Ejecting a cassette<br />
Press EJECT. The cassette is ejected from the cassette compartment.<br />
Warning<br />
Do not insert your hands or any foreign objects into the compartment. This may result<br />
in injury or damage. Take special care with children to avoid accidents.<br />
Precautions when using video cassettes<br />
<strong>Video</strong> cassettes have a safety tab to prevent accidental erasure. If the tab has already been removed,<br />
recording cannot be performed.<br />
To prevent accidental erasure<br />
Remove this safety tab with a screwdriver.<br />
To record again<br />
Cover the tab hole with adhesive tape.<br />
• Avoid exposing cassettes to direct sunlight. Keep them away from heaters.<br />
Avoid extreme humidity, vibrations or shock, strong magnetic fields (near a motor, transformer or<br />
magnet) and dusty place.<br />
18<br />
<strong>W522CG</strong> ENG new (10-19) 18<br />
2/20/04, 11:17
REMAIN/<br />
COUNTER<br />
PLAYBACK<br />
Playback<br />
This section explains the basic playback operation.<br />
Preparation<br />
• Select the video channel (3 or 4) or video input mode on the TV.<br />
• Press VCR to set the remote control operating the VCR.<br />
Basic Playback<br />
VCR<br />
EJECT<br />
SLOW<br />
TV<br />
1 2 3<br />
4 5 6<br />
7<br />
A.SELECT<br />
REW<br />
DISPLAY<br />
I.SELECT<br />
8<br />
0<br />
REC<br />
PLAY<br />
ENTER<br />
STOP<br />
9<br />
100<br />
COUNT<br />
RESET<br />
POWER<br />
CM SKIP<br />
FF<br />
PAUSE/STILL<br />
SP/ SLP<br />
TIMER<br />
CH/TRK<br />
2<br />
FF<br />
3<br />
REW<br />
1 Load a recorded cassette.<br />
Power is turned on.<br />
If the cassette has no safety tab,<br />
playback starts automatically.<br />
2 Press PLAY to start playback.<br />
3 To stop playback, press STOP.<br />
TIMER<br />
S L P<br />
S<br />
VCR REC L<br />
ST<br />
VCR<br />
L<br />
VCR<br />
PREPARATION PLAYBACK<br />
TV VOL<br />
PROG.<br />
CANCEL<br />
Double Speed Playback<br />
1 Press PLAY during playback.<br />
A tape runs at double speed<br />
playback.<br />
Adjusting the tracking<br />
To resume normal playback Press PLAY.<br />
Rewinding / Fast-forwarding<br />
Press REW or FF in the stop mode.<br />
When playback starts, the VCR automatically adjusts the tracking for clear pictures and sound<br />
(Digital Auto Tracking).<br />
If the VCR cannot locate the best possible tracking point, hold down one of CH/TRK to adjust the<br />
tracking manually.<br />
Notes<br />
• During the adjusting, the playback picture and sound may be distorted.<br />
• The digital auto tracking is activated only in the playback mode.<br />
• The noise on the screen may not be completely eliminated depending on the tape used, especially when the<br />
tape was recorded on another VCR.<br />
S-VHS Quasi Playback (<strong>SQPB</strong>)<br />
• This VCR can also play back at tape which is recorded in S-VHS format.<br />
But the playback pictures does not have the same quality and resolution as the original S-VHS<br />
playback picture.<br />
• This VCR cannot record in S-VHS format.<br />
• <strong>SQPB</strong> is an abbreviation for S-VHS Quasi Playback.<br />
19<br />
<strong>W522CG</strong> ENG new (10-19) 19<br />
2/20/04, 11:17
REMAIN/<br />
COUNTER<br />
PLAYBACK<br />
Variable Speed Playback<br />
You can play back a tape at various tape speeds.<br />
SLOW<br />
VCR<br />
EJECT<br />
TV<br />
1 2 3<br />
4 5 6<br />
7<br />
A.SELECT<br />
REW<br />
DISPLAY<br />
I.SELECT<br />
TV VOL<br />
8<br />
0<br />
REC<br />
PLAY<br />
ENTER<br />
STOP<br />
9<br />
100<br />
COUNT<br />
RESET<br />
PROG.<br />
POWER<br />
CM SKIP<br />
FF<br />
PAUSE/STILL<br />
SP/ SLP<br />
TIMER<br />
CANCEL<br />
CM SKIP<br />
PLAY<br />
FF<br />
REW<br />
PAUSE/STILL<br />
SLOW<br />
Picture Search<br />
A tape runs at 5 times or 7 times the normal playback speed so<br />
that you can quickly locate a particular scene.<br />
1 Press FF or REW during playback.<br />
The tape runs at 5 times the normal playback speed.<br />
2 To change the tape speed to 7 times the normal playback<br />
speed, press and hold FF or REW.<br />
If you release it, the tape speed returns to 5 times.<br />
Note<br />
If you press FF or REW during picture search, the mode changes to fastforwarding<br />
or rewinding.<br />
To resume normal playback<br />
Press PLAY.<br />
Commercial Movie Skip<br />
You can skip a portion of playback you do not want ( such as a<br />
commercial ) and then return to normal playback.<br />
1 Press CM SKIP during playback.<br />
The VCR will automatically search forward for 30 seconds<br />
to a maximum of 3 minutes ( six presses ) and then<br />
resume normal playback.<br />
Still Picture<br />
A picture freezes so that you can watch closer.<br />
1 Press PAUSE/STILL during playback.<br />
The picture freezes.<br />
To resume normal playback<br />
Press PAUSE/STILL again.<br />
Notes<br />
• The still mode is automatically cancelled after about 5 minutes and returns<br />
to normal playback.<br />
• The still picture may shake if a picture of a fast-moving object or scene is<br />
frozen. This is not a defect in the unit.<br />
Adjusting Still Picture Stability<br />
If the still picture is distorted or flickers, hold down one of CH/TRK until<br />
the picture becomes stable.<br />
Note<br />
The distortion of the still picture may not be eliminated completely.<br />
20<br />
<strong>W522CG</strong> ENG new(20-23) 20<br />
2/20/04, 11:18
REMAIN/<br />
COUNTER<br />
Frame Advance<br />
VCR<br />
TV<br />
POWER<br />
A picture advances frame by frame.<br />
EJECT<br />
SLOW<br />
1 2 3<br />
4 5 6<br />
7<br />
A.SELECT<br />
REW<br />
DISPLAY<br />
I.SELECT<br />
TV VOL<br />
8<br />
0<br />
REC<br />
PLAY<br />
ENTER<br />
STOP<br />
9<br />
100<br />
COUNT<br />
RESET<br />
PROG.<br />
CM SKIP<br />
FF<br />
PAUSE/STILL<br />
SP/ SLP<br />
TIMER<br />
CANCEL<br />
CH/TRK<br />
PLAY<br />
PAUSE/STILL<br />
SLOW<br />
1 Press PLAY during still playback.<br />
Each time you press PLAY, the picture advances one frame.<br />
To resume normal playback<br />
Press PAUSE/STILL.<br />
Slow-motion Picture<br />
The tape runs at 1/7th or 1/15th the normal playback speed.<br />
1 Press SLOW during playback.<br />
The tape runs at about 1/7th the normal playback speed.<br />
Each time you press SLOW, the speed alternates between 1/7th and<br />
1/15th.<br />
PLAYBACK<br />
To resume normal playback<br />
Press PLAY.<br />
Notes<br />
• The slow-motion picture mode is automatically cancelled after about 5<br />
minutes and returns to normal playback.<br />
• The slow-motion picture may flicker up and down. This is not a defect in the<br />
unit.<br />
Adjusting the Tracking Manually<br />
If the slow-motion picture is noisy, hold down one of CH/TRK until the<br />
best picture is obtained.<br />
Note<br />
The noise in the slow-motion picture may not be eliminated completely.<br />
21<br />
<strong>W522CG</strong> ENG new(20-23) 21<br />
2/20/04, 11:18
REMAIN/<br />
COUNTER<br />
PLAYBACK<br />
Useful Functions in Tape Operation<br />
These functions will help your playback.<br />
Counter Function<br />
VCR<br />
TV<br />
POWER<br />
You can view the clock, linear time counter or tape remaining<br />
time in the VCR display or on the TV screen.<br />
1 2 3<br />
4 5 6<br />
CM SKIP<br />
7 8 9<br />
A.SELECT<br />
0 100<br />
ENTER<br />
Each time you press REMAIN/COUNTER, the VCR display<br />
changes in sequence as follows:<br />
→ Linear time counter → Tape remaining time (R) → Clock<br />
EJECT<br />
SLOW<br />
REW<br />
DISPLAY<br />
I.SELECT<br />
TV VOL<br />
REC<br />
PLAY<br />
ENTER<br />
STOP<br />
COUNT<br />
RESET<br />
PROG.<br />
FF<br />
PAUSE/STILL<br />
SP/ SLP<br />
TIMER<br />
CANCEL<br />
PLAY<br />
FF<br />
REW<br />
STOP<br />
The indication above will also appear on the TV screen by pressing<br />
DISPLAY. They are switchable with REMAIN/COUNTER.<br />
COUNT RESET To reset the linear time counter to “0:00:00”<br />
PROG. The counter is automatically reset to “0:00:00” when a cassette is<br />
ejected. If you want to reset at another point, such as the beginning of<br />
a new recording, just press COUNT RESET.<br />
REMAIN/<br />
COUNTER<br />
DISPLAY<br />
Notes<br />
• The linear time counter does not work on non-recorded portions on the<br />
tape.<br />
• When the tape is ejected or the VCR is turned off, the display changes to<br />
clock.<br />
• If the tape rewinds back over “00:00”, “–” appears in the VCR display.<br />
• The displayed time of the linear time counter is only an approximation.<br />
Tape Remaining Time<br />
To view the tape remaining time in the VCR display, select the<br />
tape length beforehand.<br />
1 Turn on the VCR and load a cassette.<br />
2 Press PROG. to display the MENU screen.<br />
3 Select “SET UP” using FF or REW, and press ENTER.<br />
4 Select the length of the tape, using<br />
FF or REW.<br />
T120: for a T-120 tape or shorter<br />
T160: for a T-140 or T-160 tape<br />
T180: for a T-180 tape<br />
5 Press PROG. to exit.<br />
6 Press REMAIN/COUNTER.<br />
The remaining time (“R - : - -”) appears in the VCR display.<br />
Notes<br />
• The displayed remaining time is an approximation.<br />
• The remaining time is calculated according to the tape speed (SP or SLP)<br />
and the cassette type.<br />
22<br />
<strong>W522CG</strong> ENG new(20-23) 22<br />
2/20/04, 11:18
REMAIN/<br />
COUNTER<br />
Memory Stop Feature (Zero Return)<br />
VCR TV<br />
POWER<br />
1 2 3<br />
4 5 6<br />
CM SKIP<br />
7 8 9<br />
A.SELECT<br />
0 100<br />
ENTER<br />
1 On the SET UP screen, select<br />
“COUNTER MEM.” using PLAY or<br />
STOP, and set to “ON” using<br />
REW or FF.<br />
EJECT<br />
REW<br />
SLOW<br />
DISPLAY<br />
I.SELECT<br />
TV VOL<br />
REC<br />
PLAY<br />
ENTER<br />
STOP<br />
COUNT<br />
RESET<br />
PROG.<br />
FF<br />
PAUSE/STILL<br />
SP/ SLP<br />
TIMER<br />
CANCEL<br />
PLAY<br />
FF 2 Press PROG. to exit.<br />
REW<br />
STOP The memory-stop feature allows you to quickly return to a<br />
counter reading of “0H00M00S” from any point on the tape.<br />
COUNT RESET<br />
Memory stop is automatically turned on whenever the time<br />
PROG.<br />
counter with memory is displayed on the TV screen. This is<br />
REMAIN/ convenient when you want to watch a segment of the tape<br />
COUNTER<br />
repeatedly. You may also discover other useful application<br />
DISPLAY<br />
for this feature.<br />
PLAYBACK<br />
Notes: If you are rewinding the tape and the VCR stops at<br />
“0H00M00S M”, press REW again to continue<br />
rewinding.<br />
If you press the FF (fast-forward) button and the<br />
time counter never reaches “0H00M00S M” between<br />
that point and the end of the tape, the VCR will<br />
continue to fastforward to the end of the tape.<br />
23<br />
<strong>W522CG</strong> ENG new(20-23) 23<br />
2/20/04, 11:18
REMAIN/<br />
COUNTER<br />
RECORDING<br />
Recording a TV Program<br />
This section explains the basic recording operation.<br />
Preparation<br />
• Select the video channel (3 or 4) or video input mode on the TV.<br />
Basic Recording<br />
VCR TV<br />
POWER<br />
1 2 3<br />
4 5 6<br />
CM SKIP<br />
7 8 9<br />
A.SELECT<br />
0 100<br />
3<br />
1 Load a cassette with the safety tab attached.<br />
2 Press TV/VCR so that the “VCR”<br />
indicator appears in the VCR display.<br />
VCR<br />
EJECT<br />
SLOW<br />
REW<br />
DISPLAY<br />
I.SELECT<br />
TV VOL<br />
REC<br />
PLAY<br />
ENTER<br />
STOP<br />
COUNT<br />
RESET<br />
PROG.<br />
FF<br />
PAUSE/STILL<br />
SP/ SLP<br />
TIMER<br />
CANCEL<br />
2<br />
6<br />
4<br />
5<br />
I.SELECT<br />
To record from other<br />
connected equipment<br />
In step 3, press I.SELECT to<br />
switch the display as follows:<br />
L : To record via the LINE IN<br />
jacks on the front panel.<br />
3 Select a channel to record with<br />
CHANNEL on the VCR, or CH/TRK VCR<br />
or number buttons on the remote<br />
control.<br />
• If you record cable channels via the cable box, make the output<br />
channel number of the cable box or “L” appear, depending on your<br />
connection. (See pages 11– 12.)<br />
4 Press SP/SLP to select the<br />
TIMER<br />
recording tape speed.<br />
VCR REC<br />
SP: Suitable for general recording with<br />
better picture and sound quality.<br />
SLP: Suitable for tripling recording time, but with less picture and<br />
sound quality than using the SP tape speed.<br />
5 Press REC on the VCR, or<br />
simultaneously press both REC on<br />
the remote control.<br />
Recording starts.<br />
6 Press STOP to stop recording.<br />
VCR<br />
REC<br />
TIMER<br />
TIMER<br />
L<br />
S<br />
24<br />
Watching a TV program while<br />
recording another<br />
1) While recording, press TV/VCR to turn off<br />
“VCR” indicator.<br />
2) Choose another channel using the channel<br />
selector on the TV.<br />
Skipping unnecessary scenes while<br />
recording<br />
Press PAUSE/STILL to stop recording<br />
momentarily. To resume recording, press<br />
PAUSE/STILL again.<br />
Note<br />
The VCR automatically shifts to the stop mode if the<br />
recording pause mode continues for 10 minutes.<br />
Recording off time setting<br />
By setting the recording off time, the recording<br />
stops and the VCR is turned off automatically.<br />
While recording, press simultaneously both REC<br />
on the remote repeatedly to set the desired off<br />
time.<br />
Each time you press REC, each half-hour up to<br />
about 4 hours appear cyclically.<br />
VCR<br />
Notes<br />
• To cancel the recording in progress, press<br />
POWER on the VCR.<br />
<strong>W522CG</strong> ENG new(24-29) 24<br />
2/20/04, 11:19
REMAIN/<br />
COUNTER<br />
RECORDING<br />
Timer Program Recording<br />
The programmable timer allows you to record up to 6 different programs over one month.<br />
Preparation<br />
• Select the video channel (3 or 4) or video input mode on the TV.<br />
• Make sure that the clock is set correctly ( page 15).<br />
• Store the channels on the VCR (pages 16 and 17).<br />
Timer Programming Procedure<br />
VCR<br />
EJECT<br />
SLOW<br />
DISPLAY<br />
TV<br />
1 2 3<br />
4 5 6<br />
7<br />
A.SELECT<br />
REW<br />
I.SELECT<br />
8<br />
0<br />
REC<br />
PLAY<br />
ENTER<br />
STOP<br />
9<br />
100<br />
COUNT<br />
RESET<br />
POWER<br />
CM SKIP<br />
FF<br />
PAUSE/STILL<br />
SP/ SLP<br />
TIMER<br />
Number<br />
buttons<br />
ENTER<br />
PLAY<br />
FF<br />
STOP<br />
REW<br />
Example: To record cable channel 25 in the SP tape speed from<br />
9:20 p.m. until 10:00 p.m. on August 30. Today is August 25.<br />
1 Load a cassette with the safety tab attached.<br />
2 Press PROG. to display the MENU screen.<br />
3 Select “PROGRAM” using FF or<br />
REW, and press ENTER.<br />
RECORDING<br />
TV VOL<br />
PROG.<br />
CANCEL<br />
10<br />
2,9<br />
4 Move to the next using FF, and<br />
select the channel number 25 by<br />
pressing number buttons 2 and 5,<br />
PLAY or STOP.<br />
• You can make appear on the channel number position by pressing<br />
I.SELECT depending on your connection.<br />
(See pages 12).<br />
To make corrections:<br />
Press REW to move back to the item, or FF to forward.<br />
(Continued)<br />
25<br />
<strong>W522CG</strong> ENG new(24-29) 25<br />
2/20/04, 11:19
Timer Program Recording (continued)<br />
5 Move to the next using FF, and set<br />
the recording date using PLAY or<br />
STOP.<br />
The date changes as follows:<br />
→ 8/25 → 9/25 → … → 7/25 → WKLYSU → …<br />
MO~FR ← WKLYSA ←<br />
[WKLYSU]…[WKLYSA]: You can record TV programs on the same<br />
channel on the day and time every week.<br />
[MO~FR]: You can record TV programs on the same channel on the<br />
day and time Monday through Friday.<br />
6 Move to the next using FF, and set<br />
the hour and minutes of the<br />
recording start time.<br />
P M<br />
7 Move to the next, and set the<br />
recording off time.<br />
26<br />
Auto Speed Select<br />
8 Move to the next, and select the<br />
tape speed (SP) using PLAY or<br />
STOP.<br />
For the tape speed “AUTO (Auto Speed<br />
Select)”, see below.<br />
To set another program, press FF, and<br />
select the next line pressing STOP.<br />
Repeat steps 4 to 8.<br />
9 Press PROG..<br />
Now programming is completed.<br />
10 Press both TIMER simultaneously.<br />
The power turns off and the VCR enters<br />
the timer standby mode.<br />
Notes<br />
If you are not sure the tape is long enough for<br />
timer program recording in the SP tape speed,<br />
set the recording tape speed to “AUTO”.<br />
Recording starts in the SP tape speed and the<br />
VCR automatically selects the tape speed to<br />
record the program to the end. If the tape length<br />
is not long enough, the tape speed automatically<br />
changes from SP to SLP.<br />
REC<br />
TIMER<br />
TIMERHi-Fi<br />
STEREO<br />
L SAP<br />
• Make sure that the tape length is selected correctly<br />
according to the tape used on the SET UP screen<br />
(page 22).<br />
• When the SLP tape speed is selected and the tape<br />
length is not sufficient to record the program to the<br />
end, the program cannot be recorded to the end.<br />
• The picture will be distorted when playing the part<br />
where the recording tape speed is switched from<br />
SP to SLP with the Auto Speed Select feature.<br />
<strong>W522CG</strong> ENG new(24-29) 26<br />
2/20/04, 11:19
Confirming the timer programs<br />
If a power failure occurs during<br />
the timer program recording<br />
Press PROG. during timer recording mode. • When a power failure has occurred, the<br />
The screen for confirming will appear.<br />
programmed contents are not affected,<br />
reset the clock.<br />
P P M M<br />
Overlaps of the programs<br />
Press PROG.again to exit from confirmation<br />
page.<br />
Changing/cancelling the timer<br />
programs<br />
1) If the TIMER indicator is lit, press both<br />
TIMER to turn it off, and then turn the VCR<br />
on by pressing VCR POWER.<br />
2) With steps 2 to 9, change the items.<br />
To cancel a program, select the program you<br />
want to cancel in step 4, and press CANCEL.<br />
The line is then cleared.<br />
3) Press both TIMER to return to the timer<br />
standby mode.<br />
If two timer programs overlap, the recording<br />
start time of program 1 has priority over the<br />
recording off time of program 2.<br />
Program 1<br />
(Start time)<br />
Program 2<br />
(Start time)<br />
Overlapped portion<br />
(not recorded)<br />
RECORDING<br />
Error indication<br />
The “--E-” ( Error ) indicator appears in the VCR<br />
display if you press both TIMER when:<br />
–– a cassette is not loaded.<br />
–– the loaded cassette has no safety tab.<br />
–– timer recording is in progress.<br />
In these cases, a recording can not be made.<br />
To cancel the Timer Recording<br />
By pressing the POWER button on the front<br />
panel of the VCR, it will cancel the timer<br />
recording and go to standby.<br />
27<br />
<strong>W522CG</strong> ENG new(24-29) 27<br />
2/20/04, 11:19
REMAIN/<br />
COUNTER<br />
RECORDING<br />
MTS Broadcast Compatibility<br />
This VCR can receive or record MTS (Multichannel TV Sound) broadcasts. By connecting the VCR to<br />
your stereo system or stereo TV, you will experience the SAP or stereo sound.<br />
Preparation<br />
Connect a stereo TV or stereo system to the AUDIO OUT jacks of the VCR.<br />
VCR<br />
TV<br />
POWER<br />
Recording the SAP/Stereo Broadcast<br />
1 2 3<br />
4 5 6<br />
CM SKIP<br />
7 8 9<br />
A.SELECT<br />
0 100<br />
EJECT<br />
PLAY<br />
A.SELECT<br />
1 On the SET UP screen (page 14),<br />
select “SAP SET” using PLAY or<br />
STOP, and set to “ON” using REW<br />
or FF.<br />
REW<br />
ENTER<br />
STOP<br />
FF<br />
1<br />
SLOW<br />
DISPLAY<br />
I.SELECT<br />
TV VOL<br />
REC<br />
COUNT<br />
RESET<br />
PROG.<br />
PAUSE/STILL<br />
SP/ SLP<br />
TIMER<br />
CANCEL<br />
DISPLAY<br />
2<br />
2 Press PROG. once to exit.<br />
3 Perform a recording.<br />
SAP (Second Audio Program broadcast):<br />
A separate audio program, usually broadcast in a second language with the<br />
main language.<br />
Selecting a sound<br />
Sounds recorded on the tape<br />
According to your setting of “SAP SET” on the SET UP screen, the sound is recorded onto different<br />
tracks of the tape as below. Set “SAP SET” to “ON” or “OFF” appropriately.<br />
Type of receiving<br />
broadcast<br />
Regular<br />
(monaural audio)<br />
Stereo<br />
Regular+SAP<br />
Stereo+SAP<br />
Setting of “SAP SET”<br />
on the SET UP<br />
screen<br />
On-Screen Display<br />
(Press DISPLAY.)<br />
“SAP”<br />
“STEREO”<br />
Contents of recorded sound<br />
Normal sound Hi-Fi sound track<br />
track (Mono) L R<br />
“ON” or “OFF” not lit not lit MONO MONO MONO<br />
“ON” or “OFF” not lit lit MONO (MIXED) STEREO<br />
“ON” lit not lit MONO MONO SAP<br />
“OFF” lit not lit MONO MONO MONO<br />
“ON” lit lit MONO MONO SAP<br />
“OFF” lit lit MONO (MIXED) STEREO<br />
Sounds in playback<br />
You can play SAP and/or stereo broadcasts with this VCR. Press A.SELECT to select a desired sound.<br />
Desired sound<br />
SAP sound<br />
Stereo sound<br />
L , R indicators in the On-Screen display<br />
R (right) is on.<br />
Both R (right) and L (left) are on.<br />
Sound output<br />
SAP<br />
HIFI Sound<br />
28<br />
Note<br />
When the TV is connected to the RF OUT terminal of the VCR, the output sound is monaural.<br />
<strong>W522CG</strong> ENG new(24-29) 28<br />
2/20/04, 11:19
REMAIN/<br />
COUNTER<br />
ADDITIONAL INFORMATION<br />
Remote Control for TOSHIBA TVs<br />
The remote control can control TOSHIBA TVs.<br />
VCR<br />
A.SELECT<br />
EJECT<br />
TV<br />
1 2 3<br />
4 5 6<br />
7<br />
8<br />
0<br />
PLAY<br />
9<br />
100<br />
POWER<br />
CM SKIP<br />
1<br />
POWER<br />
CH/TRK<br />
100<br />
Number<br />
buttons<br />
TOSHIBA TV’s Control<br />
1 Press TV to set the remote control operating your TV.<br />
2<br />
Point the remote control at your TV and use each button<br />
listed below to make sure that your TV is operate correctly.<br />
REW<br />
SLOW<br />
DISPLAY<br />
I.SELECT<br />
TV VOL<br />
REC<br />
ENTER<br />
STOP<br />
COUNT<br />
RESET<br />
PROG.<br />
FF<br />
PAUSE/STILL<br />
SP/ SLP<br />
TIMER<br />
CANCEL<br />
ENTER<br />
DISPLAY<br />
TV VOL<br />
I.SELECT<br />
POWER To turn the TV on or off.<br />
CH/TRK To select TV channels in the upper or lower<br />
direction.<br />
TV VOL To adjust the sound level.<br />
I.SELECT To select an external source such as a VCR.<br />
Number buttons To select TV channels. When selecting channels<br />
1 to 9, first enter 0 and then the desired number.<br />
100 To substitute for 100 channel key.<br />
DISPLAY To turn on or off TV’s screen display.<br />
ENTER To use for the TV’s ENTER key.<br />
RECORDING ADDITIONAL INFORMATION<br />
Important<br />
Some TV’s may not respond to all<br />
the operations above, or may not<br />
be operated at all with this remote<br />
control. in this case, operate your<br />
TV with it’s own remote control.<br />
29<br />
<strong>W522CG</strong> ENG new(24-29) 29<br />
2/20/04, 11:19
ADDITIONAL INFORMATION<br />
Before Calling Service Personnel<br />
Check the following symptoms before requesting servicing.<br />
No power.<br />
• The power cord is not plugged in.<br />
– Plug the power cord into the outlet firmly.<br />
Although the power is on, the VCR<br />
will not work.<br />
• There is no cassette.<br />
– Load a cassette. (page 18)<br />
The clock does not work.<br />
• There has been a power failure.<br />
– Reset the clock. (page 15)<br />
The timer does not work properly.<br />
• The time is incorrect.<br />
– Set the clock correctly. (page 15)<br />
The picture does not appear on the<br />
TV screen.<br />
• The video channel or video input mode is not<br />
set correctly.<br />
– Set the TV channel to the video channel ( 3<br />
or 4 ) or set the video input mode on the TV.<br />
(page 11,14)<br />
• The TV signal is weak.<br />
– Adjust the antenna direction or use an<br />
optional antenna booster.<br />
• The power cord is not plugged in.<br />
– Plug the power cord into the outlet firmly.<br />
The picture does not appear on the<br />
TV screen during recording and<br />
playback.<br />
• The video channel or VCR mode is not set<br />
correctly.<br />
– Press TV/VCR to select the VCR mode and<br />
set the TV channel to 3 or 4. (pages 11,14, 24)<br />
The VCR does not record.<br />
• The loaded cassette has no safety tab.<br />
– Use a cassette with a safety tab or cover the<br />
hole with adhesive tape. (page 19)<br />
The playback picture is poor.<br />
• Tracking is not set appropriately.<br />
– Adjust the tracking manually. (page 19)<br />
• The video heads are dirty.<br />
– Clean the video heads with a commercially<br />
available cleaning tape.<br />
The desired sound is not heard, such<br />
as SAP, stereo, or regular sound.<br />
• Setting of sounds is not correct.<br />
– Select a desired sound using A.SELECT. (page 28)<br />
30<br />
Noise is present in the Hi-Fi sound<br />
being played.<br />
• Tracking is not set appropriately.<br />
– Adjust the tracking manually. (page 19)<br />
The timer recording function does<br />
not work.<br />
• There is an error in programming.<br />
– Reset the timer recording program. (page 27)<br />
• There is no cassette in the VCR.<br />
– Load a cassette with the safety tab attached.<br />
(page 18)<br />
• The cassette does not have the safety tab.<br />
– Use another cassette with a safety tab or<br />
cover the hole with adhesive tape. (page 18)<br />
• The timer indicator is not displayed.<br />
– Press both TIMER simultaneously. (page 26)<br />
• There has been a power failure.<br />
– Reset the clock. (page 15)<br />
The remote control does not work<br />
properly.<br />
• The batteries are exhausted.<br />
– Replace all batteries. (page 10)<br />
• The remote control is operated beyond the<br />
operating range.<br />
– Make sure the remote control is within 30° of<br />
the remote sensor on the VCR. (page 10)<br />
• Too far from the VCR.<br />
– Use the remote control within 7 m from the<br />
front of the VCR. (page 10)<br />
• An obstacle may be in the way of the operation.<br />
– Remove the obstacle.<br />
• The operating mode of the remote control is not<br />
set correctly.<br />
– Press VCR or TV depending on the<br />
equipment you want to operate. (pages 14,29)<br />
The cassette is ejected immediately<br />
after it is loaded.<br />
• The cassette was inserted with the label side<br />
not paralleling the compartment.<br />
– Reload it carefully. (page 18)<br />
The cassette does not go into the<br />
cassette compartment.<br />
• There is already a cassette in the VCR.<br />
– Eject the cassette and reload the new one.<br />
(page 18)<br />
<strong>W522CG</strong> ENGnew (30-32) 30<br />
2/20/04, 11:20
Specifications<br />
Power Supply:<br />
120 V AC, 60 Hz<br />
Power consumption:<br />
18 W<br />
External dimensions:<br />
360 x 94 x 252mm (W.H.D.)<br />
Mass:<br />
3.0 kg<br />
Channels received: VHF: Channels 2–13<br />
UHF: Channels 14–69<br />
CATV: Channels A7-A1,A-CCC, 66-125<br />
Antenna input/output terminals: UHF/VHF: 75 Ω F type connector<br />
Signal system:<br />
Standard NTSC<br />
Recording/Playback system: Recording: VHS format (SP, SLP)<br />
Playback: VHS format (SP, LP, SLP)<br />
<strong>Cassette</strong>: <strong>Video</strong> cassette with mark<br />
Tape speed:<br />
SLP: 11.1 mm/s, SP: 33.4 mm/s<br />
<strong>Video</strong> recording/playback time: SLP: 480 minutes, SP: 160 minutes (When T-160<br />
video cassette is used.)<br />
Fast forward/rewind time:<br />
Within approx. 60 s (When T-120 video cassette is<br />
used.)<br />
<strong>Video</strong> input:<br />
1 V (p-p), 75 Ω, unbalanced, negative sync., pin<br />
jack<br />
<strong>Video</strong> output:<br />
1 V (p-p), 75 Ω, unbalanced, negative sync., pin<br />
jack<br />
Audio input:<br />
Line input: 308 mV (rms), more than 47 kΩ, pin<br />
jack<br />
Audio output:<br />
Line output: 308 mV (rms), less than 4.7 kΩ, pin<br />
jack<br />
Audio frequency range (Hi-Fi) : 20 Hz – 20 kHz<br />
Audio dynamic range (Hi-Fi) : 68 dB<br />
Utilization conditions : Temperature: 5°C to 40°C<br />
Humidity: less than RH 80%<br />
Accessories<br />
ADDITIONAL INFORMATION<br />
Antenna cable ....................................... 1<br />
Remote control ..................................... 1<br />
Batteries (AA) .................................... 2<br />
Designs and specifications are subject to change without notice.<br />
31<br />
<strong>W522CG</strong> ENGnew (30-32) 31<br />
2/20/04, 11:20
CANADIAN WARRANTY<br />
TOSHIBA VIDEO CASSETTE RECORDER<br />
To obtain a “CANADIAN WARRANTY”, the consumer must complete and forward the attached<br />
“CANADIAN WARRANTY REGISTRATION FORM” to <strong>Toshiba</strong> of <strong>Canada</strong> Limited, Consumer<br />
Electronics Group Warranty Registration Office, 191 McNabb Street, Markham, Ontario L3R<br />
8H2 within 30 days of purchase!<br />
This warranty ofter provides the manufacturer’s parts and labour warranty provided that<br />
the consumer registers for a CANADIAN WARRANTY.<br />
To obtain service under warranty, contact the nearest authorized TOSHIBA SERVICE<br />
CENTRE or the nearest TOSHIBA FACTORY SERVICE DEPARTEMENT (list enclosed).<br />
PRODUCT UTILIZED FOR RENTAL OF COMMERCIAL PURPOSES ARE NOT COVERED<br />
BY THIS WARRANTY.<br />
This warranty applies only to the original purchaser and is not transferable. The video head<br />
warranty is also covered, during which TOSHIBA will provide a replacement head warranted<br />
for the unexpired portion of the warranty. This warranty does not apply to sets subjected<br />
to misuse, neglect, accident, act of God or improper installation. Sets with serial number<br />
removed, altered, replaced or defaced will not be covered by this warranty. ALL IN-<br />
WARRANTY REPAIRS MUST ME MADE BY A TOSHIBA FACTORY SERVICE DEPARTEMENT,<br />
OR BY AN AUTHORIZED TOSHIBA SERVICE CENTRE. REPAIRS MADE ELSEWHERE<br />
WILL INVALIDATE THIS WARRANTY.<br />
THIS WARRANTY IS ONLY VALYD WHEN THE SET IS PURCHASED FROM AN AUTHORIZED<br />
TOSHIBA DEALER AND USED IN CANADA<br />
THIS WARRANTY IS IN LIEU OF ALL OTHER WARRANTIES, GUARANTIES OR<br />
AGREEMENTS, WHETHER EXPRESSED OR IMPLIED, AND NO PERSON, AGENT,<br />
DISTRIBUTOR, DEALER, SERVICE CENTRE OR COMPANY IS AUTHORIZED TO CHANGE,<br />
MODIFY OR EXTEND ITS TERMS IN ANY MANNER WHATSOEVER.<br />
IMPORTANT: Also keep your “Bill of Sale” as proof of purchase.<br />
WARRANTY: Carry-in Service<br />
TYPE OF SET: Colour <strong>Video</strong> <strong>Cassette</strong> <strong>Recorder</strong><br />
PARTS:<br />
12 Months<br />
LABOUR:<br />
12 Months<br />
VIDEO HEAD: 12 Months<br />
Thank you for purchasing this fine product from one of your authorized: CANADIAN<br />
TOSHIBA DEALERS.<br />
TOSHIBA OF CANADA, LTD.<br />
HEAD OFFICE<br />
191 MCNABB STREET MARKHAM, ONTARIO L3R 8H2, CANADA TEL: (905)470-5400<br />
SERVICE CENTER<br />
TORONTO: 191 MCNABB STREET MARKHAM, ONTARIO L3R 8H2, CANADA TEL: (905)470-5400<br />
MONTREAL: 1643 N. SERVICE RD. DORVAL, QUEBEC, H9P 1J1, CANADA TEL: (514)856-4100<br />
VANCOUVER: 22171 FRASERWOOD WAY, RICHMOND, B.C. V6W 1J5, CANADATEL: (604)303-2500<br />
32 32 Printed in Indonesia<br />
<strong>W522CG</strong> ENGnew (30-32) 32<br />
2/20/04, 11:20