MICRImage Check Reader, Technical Reference Manual - MagTek
MICRImage Check Reader, Technical Reference Manual - MagTek
MICRImage Check Reader, Technical Reference Manual - MagTek

Create successful ePaper yourself
Turn your PDF publications into a flip-book with our unique Google optimized e-Paper software.
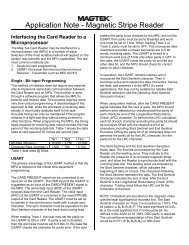
EXCELLA<br />
MICR CHECK READER<br />
AND DUAL-SIDED SCANNER<br />
INSTALLATION AND OPERATION MANUAL<br />
NOVEMBER 2009<br />
<strong>Manual</strong> Part Number: 99875310-7<br />
REGISTERED TO ISO 9001:2008<br />
1701 Apollo Court<br />
Seal Beach, CA 90740<br />
Phone: (562) 546-6400<br />
<strong>Technical</strong> Support: (651) 415-6800<br />
www.magtek.com
Copyright © 2004 - 2009<br />
<strong>MagTek</strong> ® , Inc.<br />
Printed in the United States of America<br />
Information in this document is subject to change without notice. No part of this document may be<br />
reproduced or transmitted in any form or by any means, electronic or mechanical, for any purpose,<br />
without the express written permission of <strong>MagTek</strong>, Inc.<br />
<strong>MagTek</strong> is a registered trademark of <strong>MagTek</strong>, Inc.<br />
Excella TM is a trademark of <strong>MagTek</strong>, Inc.<br />
REVISIONS<br />
Rev Number Date Notes<br />
1 12 Aug 04 Initial Release<br />
2 22 Sep 04<br />
Section 1, Specifications: changed hopper capacity to 70. Section 3,<br />
Operation, Multiple checks: Changed capacity to 70 <strong>Check</strong>s.<br />
3 9 Nov 04<br />
Throughout: removed access cover on six illustrations; Added<br />
loading zone mark, modified text, in Figs 1-1, 2-1, 2-2, 2-3, 2-6, 2-7,<br />
2-8, 3-1, 3-3, 3-4, 3-6 and changed position of hand in Fig 3-3, and<br />
added callouts. Added Appendix C: License and Copyright.<br />
4 17 Feb 05<br />
Updated Figures 1-1, 2-1, 2-2, 2-3, 2-6, 2-7, 2-8, 3-1,<br />
3-3, 3-4, 3-5, 3-6 and accompanying text to reflect new parts.<br />
5 6 Jul 05<br />
To all sections: changed illustrations where appropriate to reflect new<br />
configurations or for clarity<br />
Front Matter: added CE Standards to agency page. Added additional<br />
statement (ICES) to agency page<br />
Sec 1: to Features added JFIF and BMP, to USB 2.0 changed to add<br />
High Speed, deleted USB 1.1 compatible and added Ethernet,<br />
deleted Aux interface port<br />
Sec 2: Added two illustrations changed LED indicator section and<br />
closing the unit<br />
Sec 3: Changed operator button text, added closing the unit section,<br />
added illustration for cleaning the ink cartridge.<br />
Appendix A: newly added<br />
Appendix B: ewly added<br />
Other appendices renamed as C and D<br />
6 9 Feb 05<br />
Front Matter: Limited Warranty newly added. Appendix A: Updated;<br />
Appendix B: Removed reference to Demo API CD for USB<br />
Configuration Utility.<br />
7 2 Nov 09<br />
Front Cover: Image added and <strong>Technical</strong> support number changed;<br />
Limited Warranty updated; FCC Statement Page updated, Fig 1.1<br />
moved to Section 1<br />
Sec 1: Two Features added to Features list p. 2; Document Speeds<br />
added to Table 1.2<br />
Appendix A: Screen Shots Updated; System Configuration added<br />
ii
LIMITED WARRANTY<br />
<strong>MagTek</strong> warrants that the products sold pursuant to this Agreement will perform in accordance with <strong>MagTek</strong>’s<br />
published specifications. This warranty shall be provided only for a period of one year from the date of the<br />
shipment of the product from <strong>MagTek</strong> (the “Warranty Period”). This warranty shall apply only to the “Buyer”<br />
(the original purchaser, unless that entity resells the product as authorized by <strong>MagTek</strong>, in which event this<br />
warranty shall apply only to the first repurchaser).<br />
During the Warranty Period, should this product fail to conform to <strong>MagTek</strong>’s specifications, <strong>MagTek</strong> will, at its<br />
option, repair or replace this product at no additional charge except as set forth below. Repair parts and<br />
replacement products will be furnished on an exchange basis and will be either reconditioned or new. All<br />
replaced parts and products become the property of <strong>MagTek</strong>. This limited warranty does not include service to<br />
repair damage to the product resulting from accident, disaster, unreasonable use, misuse, abuse, negligence, or<br />
modification of the product not authorized by <strong>MagTek</strong>. <strong>MagTek</strong> reserves the right to examine the alleged<br />
defective goods to determine whether the warranty is applicable.<br />
Without limiting the generality of the foregoing, <strong>MagTek</strong> specifically disclaims any liability or warranty for<br />
goods resold in other than <strong>MagTek</strong>’s original packages, and for goods modified, altered, or treated without<br />
authorization by <strong>MagTek</strong>.<br />
Service may be obtained by delivering the product during the warranty period to <strong>MagTek</strong> (1710 Apollo Court,<br />
Seal Beach, CA 90740). If this product is delivered by mail or by an equivalent shipping carrier, the customer<br />
agrees to insure the product or assume the risk of loss or damage in transit, to prepay shipping charges to the<br />
warranty service location, and to use the original shipping container or equivalent. <strong>MagTek</strong> will return the<br />
product, prepaid, via a three (3) day shipping service. A Return Material Authorization (“RMA”) number must<br />
accompany all returns. Buyers may obtain an RMA number by contacting <strong>Technical</strong> Support at (888) 624-8350.<br />
EACH BUYER UNDERSTANDS THAT THIS MAGTEK PRODUCT IS<br />
OFFERED AS IS. MAGTEK MAKES NO OTHER WARRANTY, EXPRESS OR<br />
IMPLIED, AND MAGTEK DISCLAIMS ANY WARRANTY OF ANY OTHER<br />
KIND, INCLUDING ANY WARRANTY OF MERCHANTABILITY OR FITNESS<br />
FOR A PARTICULAR PURPOSE.<br />
IF THIS PRODUCT DOES NOT CONFORM TO MAGTEK’S SPECIFICATIONS, THE SOLE REMEDY<br />
SHALL BE REPAIR OR REPLACEMENT AS PROVIDED ABOVE. MAGTEK’S LIABILITY, IF ANY,<br />
SHALL IN NO EVENT EXCEED THE TOTAL AMOUNT PAID TO MAGTEK UNDER THIS<br />
AGREEMENT. IN NO EVENT WILL MAGTEK BE LIABLE TO THE BUYER FOR ANY DAMAGES,<br />
INCLUDING ANY LOST PROFITS, LOST SAVINGS, OR OTHER INCIDENTAL OR CONSEQUENTIAL<br />
DAMAGES ARISING OUT OF THE USE OF, OR INABILITY TO USE, SUCH PRODUCT, EVEN IF<br />
MAGTEK HAS BEEN ADVISED OF THE POSSIBILITY OF SUCH DAMAGES, OR FOR ANY CLAIM BY<br />
ANY OTHER PARTY.<br />
LIMITATION ON LIABILITY<br />
EXCEPT AS PROVIDED IN THE SECTIONS RELATING TO MAGTEK’S LIMITED WARRANTY,<br />
MAGTEK’S LIABILITY UNDER THIS AGREEMENT IS LIMITED TO THE CONTRACT PRICE OF THIS<br />
PRODUCT.<br />
MAGTEK MAKES NO OTHER WARRANTIES WITH RESPECT TO THE PRODUCT, EXPRESSED OR<br />
IMPLIED, EXCEPT AS MAY BE STATED IN THIS AGREEMENT, AND MAGTEK DISCLAIMS ANY<br />
IMPLIED WARRANTY, INCLUDING WITHOUT LIMITATION ANY IMPLIED WARRANTY OF<br />
MERCHANTABILITY OR FITNESS FOR A PARTICULAR PURPOSE.<br />
MAGTEK SHALL NOT BE LIABLE FOR CONTINGENT, INCIDENTAL, OR CONSEQUENTIAL<br />
DAMAGES TO PERSONS OR PROPERTY. MAGTEK FURTHER LIMITS ITS LIABILITY OF ANY KIND<br />
WITH RESPECT TO THE PRODUCT, INCLUDING ANY NEGLIGENCE ON ITS PART, TO THE<br />
CONTRACT PRICE FOR THE GOODS.<br />
MAGTEK’S SOLE LIABILITY AND BUYER’S EXCLUSIVE REMEDIES ARE STATED IN THIS SECTION<br />
AND IN THE SECTION RELATING TO MAGTEK’S LIMITED WARRANTY.<br />
iii
FCC WARNING STATEMENT<br />
This equipment has been tested and was found to comply with the limits for a Class A digital device pursuant to<br />
Part 15 of FCC Rules. These limits are designed to provide reasonable protection against harmful interference<br />
when the equipment is operated in a commercial environment. This equipment generates, uses, and can radiate<br />
radio frequency energy and, if not installed and used in accordance with the instruction manual, may cause<br />
harmful interference with radio communications. Operation of this equipment in a residential area is likely to<br />
cause harmful interference in which case the user will be required to correct the interference at his own expense.<br />
FCC COMPLIANCE STATEMENT<br />
This device complies with Part 15 of the FCC Rules. Operation of this device is subject to the following two<br />
conditions: (1) this device may not cause harmful interference, and (2) this device must accept any interference<br />
received, including interference that may cause undesired operation.<br />
CANADIAN DOC STATEMENT<br />
This digital apparatus does not exceed the Class A limits for radio noise from digital apparatus set out in the<br />
Radio Interference Regulations of the Canadian Department of Communications.<br />
Le présent appareil numérique n’émet pas de bruits radioélectriques dépassant les limites applicables aux<br />
appareils numériques de la classe A prescrites dans le Réglement sur le brouillage radioélectrique édicté par le<br />
ministère des Communications du Canada.<br />
This Class A digital apparatus complies with Canadian ICES-003.<br />
Cet appareil numériqué de la classe A est conformé à la norme NMB-003 du Canada.<br />
CE STANDARDS<br />
Testing for compliance with CE requirements was performed by an independent laboratory. The unit under test<br />
was found compliant with standards established for Class A devices.<br />
UL/CSA<br />
This product is recognized per Underwriter Laboratories and Canadian Underwriter Laboratories 1950.<br />
RoHS STATEMENT<br />
When ordered as RoHS compliant, this product meets the Electrical and Electronic Equipment (EEE) Reduction<br />
of Hazardous Substances (RoHS) European Directive 2002/95/EC. The marking is clearly recognizable, either as<br />
written words like “Pb-free”, “lead-free”, or as another clear symbol ( ).<br />
iv
TABLE OF CONTENTS<br />
SECTION 1. OVERVIEW .......................................................................................................................................... 1<br />
CONFIGURATIONS ................................................................................................................................................... 2<br />
FEATURES ................................................................................................................................................................ 2<br />
ACCESSORIES .......................................................................................................................................................... 3<br />
CABLES ..................................................................................................................................................................... 3<br />
SPECIFICATIONS ...................................................................................................................................................... 4<br />
SECTION 2. INSTALLATION ................................................................................................................................... 5<br />
REQUIREMENTS ....................................................................................................................................................... 5<br />
DEVICE DESCRIPTION ............................................................................................................................................. 5<br />
INSTALLATION SUMMARY ....................................................................................................................................... 6<br />
UNPACKING .............................................................................................................................................................. 6<br />
INSTALLING OR REPLACING THE PRINTER/CARTRIDGE ................................................................................... 6<br />
OPENING THE UNIT ................................................................................................................................................. 7<br />
CLOSING THE UNIT .................................................................................................................................................. 9<br />
CABLE CONNECTIONS ............................................................................................................................................ 9<br />
CABLING .................................................................................................................................................................. 10<br />
LED INDICATORS ................................................................................................................................................... 12<br />
SECTION 3. OPERATION AND MAINTENANCE .................................................................................................. 15<br />
POWER UP .............................................................................................................................................................. 15<br />
TILT-DOWN CHECK STOP ..................................................................................................................................... 15<br />
OPERATOR BUTTON ............................................................................................................................................. 15<br />
OPERATION ............................................................................................................................................................ 15<br />
Single <strong>Check</strong> – <strong>Manual</strong> Feed ................................................................................................................................... 16<br />
Multiple <strong>Check</strong>s – Automatic Feed ........................................................................................................................... 17<br />
CLEANING ............................................................................................................................................................... 18<br />
Printer ....................................................................................................................................................................... 19<br />
Scan Bars and Card Path ......................................................................................................................................... 20<br />
Clearing the <strong>Check</strong> Path ........................................................................................................................................... 20<br />
APPENDIX A. BUILT-IN WEB PAGE ...................................................................................................................... 23<br />
OVERVIEW .............................................................................................................................................................. 23<br />
STATUS ................................................................................................................................................................... 23<br />
MAINTENANCE ....................................................................................................................................................... 24<br />
CALIBRATE .............................................................................................................................................................. 24<br />
UPDATE FIRMWARE .............................................................................................................................................. 25<br />
CONFIGURATION ................................................................................................................................................... 27<br />
Network Configuration Tab ....................................................................................................................................... 27<br />
Ethernet Configuration Tab ...................................................................................................................................... 28<br />
USB Configuration Tab ............................................................................................................................................. 30<br />
Save/Restore Configuration Tab .............................................................................................................................. 33<br />
APPENDIX B. USB CONFIGURATION UTILITY ................................................................................................... 35<br />
OVERVIEW .............................................................................................................................................................. 35<br />
IP ADDRESS SETUP ............................................................................................................................................... 36<br />
APPENDIX C. CHECK READING .......................................................................................................................... 37<br />
E13-B CHARACTER SET ........................................................................................................................................ 37<br />
CMC-7 CHARACTER SET ....................................................................................................................................... 37<br />
CHECK LAYOUTS ................................................................................................................................................... 38<br />
MICR FIELDS ........................................................................................................................................................... 39<br />
1-Transit Field ........................................................................................................................................................... 39<br />
2-On-Us Field ........................................................................................................................................................... 40<br />
3-Amount Field ......................................................................................................................................................... 40<br />
4-Auxiliary On-Us Field ............................................................................................................................................. 40<br />
APPENDIX D. LICENSE AND COPYRIGHT .......................................................................................................... 41<br />
eCos PUBLIC LICENSE ........................................................................................................................................... 41<br />
v
FIGURES<br />
Figure 1-1. Excella <strong>Check</strong> <strong>Reader</strong> and Dual-Sided Scanner ....................................................................... 1<br />
Table 1-1. Excella Cables and Power Supply .............................................................................................. 3<br />
Table 1-2. Specifications .............................................................................................................................. 4<br />
Figure 2-1. Top View, Excella Features ....................................................................................................... 5<br />
Figure 2-2. Installing or Replacing the Printer/Cartridge .............................................................................. 7<br />
Figure 2-3. Opening the Entry and Exit Guides ........................................................................................... 8<br />
Figure 2-4. Separating the Cover from the Outside Entry Guide ................................................................. 8<br />
Figure 2-5. Closing the Unit ......................................................................................................................... 9<br />
Figure 2-6. Cable Connections .................................................................................................................. 10<br />
Figure 2-7. Cabling, USB, 4-pin, Right Angle, P/N 22310301 .................................................................... 11<br />
Table 2-1. USB Pin List .............................................................................................................................. 11<br />
Figure 2-8. Cabling, Ethernet, 8-pin RJ45P, Right Angle, P/N 22310302 or 22310304 ............................ 11<br />
Table 2-2. Ethernet Cable Pin List, P/N 22310302 .................................................................................... 11<br />
Table 2-3. Ethernet Crossover Cable Pin List, P/N 22310304 ................................................................... 12<br />
Figure 2-9. Power Supply and Cords. P/N 64300098 and 71100001 ....................................................... 12<br />
Figure 2-10. LED Indicators ....................................................................................................................... 13<br />
Table 2-4. LED Indicators .......................................................................................................................... 13<br />
Figure 3-1. <strong>Check</strong> Orientation - Insertion ................................................................................................... 16<br />
Figure 3-2. Separate <strong>Check</strong>s by Fanning .................................................................................................. 17<br />
Figure 3-3. Stacking <strong>Check</strong>s in Input Hopper ............................................................................................ 18<br />
Figure 3-4. Opening the Unit for Cleaning ................................................................................................. 19<br />
Figure 3-5. Cleaning the Ink Cartridge ....................................................................................................... 19<br />
Figure 3-6. Cleaning Scan Bars ................................................................................................................. 20<br />
Figure 3-7. Clearing Debris or Removing <strong>Check</strong>s ..................................................................................... 21<br />
Figure A-1. Excella Status Page ................................................................................................................ 23<br />
Figure A-2. Maintenance Page .................................................................................................................. 24<br />
Figure A-3. Update Firmware Page ........................................................................................................... 25<br />
Figure A-4. Network Configuration Tab ..................................................................................................... 27<br />
Figure A-5. Ethernet Configuration Tab ..................................................................................................... 28<br />
Figure A-6. USB Configuration Tab ........................................................................................................... 30<br />
Figure A-7. System Configuration Tab ....................................................................................................... 32<br />
Figure A-8. Save/Restore Configuration Tab ............................................................................................. 33<br />
Figure B-1. ExcellaUSBConfig Utility Screen ............................................................................................. 35<br />
Table C-1. CMC-7 Nonnumeric Characters ............................................................................................... 38<br />
Figure C-1. Personal <strong>Check</strong>s .................................................................................................................... 38<br />
Figure C-2. Business <strong>Check</strong>s .................................................................................................................... 39<br />
TABLES<br />
Table 1-1. Excella Cables and Power Supply .............................................................................................. 3<br />
Table 1-2. Specifications .............................................................................................................................. 4<br />
Table 2-1. USB Pin List .............................................................................................................................. 11<br />
Table 2-2. Ethernet Cable Pin List, P/N 22310302 .................................................................................... 11<br />
Table 2-3. Ethernet Crossover Cable Pin List, P/N 22310304 ................................................................... 12<br />
Table 2-4. LED Indicators .......................................................................................................................... 13<br />
Table C-1. CMC-7 Nonnumeric Characters ............................................................................................... 38<br />
vi
SECTION 1. OVERVIEW<br />
The Excella TM <strong>Check</strong> <strong>Reader</strong> is a MICR check reader (Magnetic Ink Character Recognition) and<br />
dual-sided scanner with endorsement printer. <strong>Check</strong>s can be entered into the Excella with an<br />
automatic feeder or by a separate manual feed for single checks. The Excella reads the MICR<br />
character set (E13B or CMC7 fonts) on the front face and bottom of a check and scans both sides<br />
of the check in a single pass, producing high-quality, grayscale or black/white images (color<br />
images are offered as an option) in the most common file formats used in the industry. The<br />
characters and the image are then transmitted to a Host device.<br />
Excella will communicate with the Host system using a USB 2.0 or Ethernet interface.<br />
Figure 1-1. Excella <strong>Check</strong> <strong>Reader</strong> and Dual-Sided Scanner<br />
1
Excella MICR <strong>Check</strong> <strong>Reader</strong><br />
CONFIGURATIONS<br />
The current configuration is as follows:<br />
Part Number Description<br />
22310102 MICR Excella, USB/Ethernet<br />
FEATURES<br />
The following is a list of features of the Excella <strong>Reader</strong>:<br />
• Reads E13B and CMC7 MICR fonts<br />
• Captures front and back images of check in a single pass<br />
• Endorsement printer prints horizontal message on back of the check<br />
• Endorsement message is programmable<br />
• Message height: 1/8” consisting of 12 pixels<br />
• Resolution: 200 dpi (scaling to 100 dpi); black/white and grayscale images<br />
• Image compression: CCITT G4 or JPEG<br />
• Image files: TIFF 6.0, JFIF with EXIF tags, BMP<br />
• Optional image storage memory available with multi-media memory cards installed at the<br />
factory<br />
• <strong>Manual</strong> feed - single check<br />
• Automatic feeder with capacity for up to 70 documents<br />
• Output hopper/stacker with capacity for up to 70 documents<br />
• USB 2.0 High Speed (USB 1.1 compatible)<br />
• Ethernet 10/100 Base-T<br />
• Smart cable management<br />
• Express <strong>Check</strong> Processing Mode (requires USB 2.0)<br />
• Dynamic Virtual Endorsement<br />
2
Section 1. Overview<br />
ACCESSORIES<br />
Accessories available for the Excella <strong>Reader</strong> include:<br />
• Host Interface Cable (See Table 1-1)<br />
• Power Supply, 24 VDC Regulated, Switcher 5.5 x 2.1 mm, Right Angle Plug<br />
• Sample <strong>Check</strong>s, Part Number 96530005<br />
• Cleaning Swabs, P/N 97200078<br />
• Print Cartridge, P/N 93600132<br />
CABLES<br />
The cables and power supply available are as follows:<br />
Table 1-1. Excella Cables and Power Supply<br />
Part Number Description<br />
22310301 Cable Assy, USB A – USB B Right Angle, 8’<br />
22310302 Cable Assy, Ethernet RJ45P A/A, 8’<br />
22310303 Cable Assy, RS232 PC DB9F–RJ6P Right Angle, 8’<br />
22310304 Cable Assy, Ethernet (Crossover) RJ45P/RJ45P<br />
Right Angle 8'<br />
71100001 Cable, Power Cord-AC, US 18/3 Blade Non-Polarized,<br />
IEC C7<br />
64300098 Power Supply, 24 VDC Regulated, Switcher,<br />
5.5 x 2.1 mm, Right Angle Plug<br />
3
Excella MICR <strong>Check</strong> <strong>Reader</strong><br />
SPECIFICATIONS<br />
Table 1-2 lists the specifications for the Excella <strong>Reader</strong>.<br />
Table 1-2. Specifications<br />
OPERATING<br />
<strong>Reference</strong> Standards ANSI X9.27<br />
Power Input<br />
24 VDC, 2.5 Amps<br />
Document Size<br />
4"x 8.5" Maximum<br />
Document Processing Speed<br />
Printer/Cartridge<br />
Image Resolution:<br />
20 to 35 documents per minute (Variation depends on image format)<br />
40 to 50 documents per minute (Express Mode)<br />
200 dpi (scaling to 100 dpi); Black/white and grayscale images (color<br />
images are offered as an option)<br />
Image compression:<br />
<strong>Check</strong> Feed and Hoppers:<br />
MICR fonts supported<br />
Interface Options<br />
Dimensions<br />
Weight<br />
CCITT G4 or JPEG<br />
<strong>Manual</strong> feed of a single check<br />
Automatic feeder with capacity for up to 70 documents<br />
Output hopper/stacker with capacity for up to 70 documents<br />
E13-B<br />
CMC-7<br />
RS-232,<br />
USB 2.0, USB 1.1 compatible<br />
Ethernet 100 Base-T,<br />
MECHANICAL<br />
L 13 ¼ inches x W 7 ½ inches; H 7 inches<br />
3.59 lbs.<br />
4
SECTION 2. INSTALLATION<br />
The installation for the Excella <strong>Check</strong> <strong>Reader</strong> is described below.<br />
REQUIREMENTS<br />
The following items are required for the Installation:<br />
• Excella, <strong>Check</strong> <strong>Reader</strong> and Dual-Sided Scanner, P/N 22310001<br />
• USB Interface Cable (see Cabling below) and/or<br />
• Ethernet Interface Cable (see Cabling below)<br />
• Power Supply, 24 VDC Regulated, Switcher, 5.5 x 2.1 mm, Right Angle Plug, P/N 64300098<br />
(see Cabling below)<br />
• Customer Supplied <strong>Check</strong>s or <strong>MagTek</strong>’s Sample <strong>Check</strong>s, P/N 96530005<br />
DEVICE DESCRIPTION<br />
Figure 2-1 shows the top view of Excella and lists features used for installation and operation.<br />
Figure 2-1. Top View, Excella Features<br />
5
Excella MICR <strong>Check</strong> <strong>Reader</strong><br />
INSTALLATION SUMMARY<br />
This is a summary of the major installation steps for Excella:<br />
1. Unpack Excella<br />
2. Install ink cartridge (the cartridge is shipped uninstalled)<br />
3. Install API/Demo software (CD provided by <strong>MagTek</strong>)<br />
4. Connect interface cable (USB or Ethernet) and power cable to Excella<br />
5. Connect power cord to AC wall outlet<br />
6. Connect interface cable to PC<br />
UNPACKING<br />
Note<br />
For more details see additional information in this section.<br />
<strong>Check</strong> the list under “Requirements” above and the packing sheet to insure all items have been<br />
received.<br />
The Printer/Cartridge is shipped separately and must be unpacked. Remove all packing material<br />
(such as tape and tabs), and prepare to install the Printer/Cartridge first.<br />
INSTALLING OR REPLACING THE PRINTER/CARTRIDGE<br />
To install or replace the Printer/Cartridge, refer to Figure 2-2.<br />
6
Section 2. Installation<br />
Figure 2-2. Installing or Replacing the Printer/Cartridge<br />
1. Pull the Printer/Cartridge cover open to expose the Printer/Cartridge as shown in<br />
the left bubble.<br />
2. Push the Printer/Cartridge Tab down as indicated in the right bubble.<br />
5. Remove the cartridge by pulling the handle on the Printer/Cartridge up.<br />
6. Replace the Printer/Cartridge by inserting it into position shown in the illustration.<br />
7. Close the Tab holding the Printer/Cartridge in position.<br />
8. Close the Printer/Cartridge cover.<br />
OPENING THE UNIT<br />
The Outside Entry Guide, the Outside Exit Guide and the Printer/Cartridge Cover, shown in<br />
Figure 2-1, can be opened to provide access to the check path and both scan bars. Open the unit<br />
as described below:<br />
7
Excella MICR <strong>Check</strong> <strong>Reader</strong><br />
1. Open the Outside Entry Guide by placing the thumb on the Indent and the finger(s)<br />
on the Tab as shown in Figure 2-3 and squeezing, and then gently pull the Guide<br />
open.<br />
Figure 2-3. Opening the Entry and Exit Guides<br />
2. Open the Outside Exit Guide, in the same manner, by placing the thumb on the<br />
Indent and the finger(s) on the Tab, and squeezing and then gently pull the Guide<br />
open.<br />
3. Open the Printer/Cartridge Cover by pulling the Cover from the Inside Guide as<br />
shown in Figure 2-4.<br />
Figure 2-4. Separating the Cover from the Outside Entry Guide<br />
8
Section 2. Installation<br />
CLOSING THE UNIT<br />
If the Entry Access Guide or the Exit Access Guide has been opened, close the access guide as<br />
described below:<br />
1. Push to close the access guide (Entry Access Guide or Exit Access Guide) to its normal<br />
operating position (as show in Figure 2-5).<br />
2. If the printer cover is open on the Entry Access Guide, first close the printer cover and then<br />
close the access guide as described in step 1 above.<br />
3. Push down on the tab of the access guide (as shown in Figure 2-5). If the tab was not latched,<br />
a “click” sound will be heard as feedback to indicate the access guide is securely closed.<br />
4. The LED indicator will flash if the access guide is improperly closed (see Table 2-4).<br />
Note<br />
Improperly closed access guides can affect MICR reading and image quality.<br />
Figure 2-5. Closing the Unit<br />
CABLE CONNECTIONS<br />
The cable connections are shown in Figure 2-6.<br />
9
Excella MICR <strong>Check</strong> <strong>Reader</strong><br />
Figure 2-6. Cable Connections<br />
CABLING<br />
Available cabling is as follows:<br />
• USB – A-plug, 4-pin, right angle, P/N 22310301 shown in Figure 2-7 with pin list in<br />
Table 2-1<br />
• Ethernet – RJ 45P, 8-pin, right angle, P/N 22310302 shown in Figure 2-8 with pin list in<br />
Table 2-2<br />
• Ethernet Cross-Over – RJ 45P, 8-pin, right angle, P/N 22310304 shown in Figure 2-8<br />
with pin list in Table 2-3<br />
• Power Supply and Cords – Power Supply, Input 100-240 VAC, 1.5A, 60-50 Hz, P/N<br />
64300098 and<br />
Power Cord-AC – US 3 Blade Non-Pol, IEC C7, P/N 71100001 shown in Figure 2-9<br />
10
Figure 2-7. Cabling, USB, 4-pin, Right Angle, P/N 22310301<br />
Section 2. Installation<br />
Table 2-1. USB Pin List<br />
USB Cable Pin List<br />
USB B Plug, Right Angle Signal Name USB A Plug<br />
1 5V 1<br />
2 - Data 2<br />
3 + Data 3<br />
4 Gnd 4<br />
Shell (Braid Shield)<br />
Shell (Braid Shield)<br />
Figure 2-8. Cabling, Ethernet, 8-pin RJ45P, Right Angle, P/N 22310302 or 22310304<br />
Table 2-2. Ethernet Cable Pin List, P/N 22310302<br />
Ethernet Pin List<br />
8-pin RJ Plug, Right Angle Signal Name 8-Pin RJ Plug<br />
1 Transmit + 1<br />
2 Transmit - 2<br />
3 Receive + 3<br />
4 NC NC 4 NC<br />
5 NC NC 5 NC<br />
6 Receive - 6<br />
7 NC NC 7 NC<br />
8 NC NC 8 NC<br />
NC = No Connection<br />
11
Excella MICR <strong>Check</strong> <strong>Reader</strong><br />
Table 2-3. Ethernet Crossover Cable Pin List, P/N 22310304<br />
Ethernet Pin List<br />
8-pin RJ Plug, Right Angle Signal Name 8-Pin RJ Plug<br />
1 Transmit + 3<br />
2 Transmit - 6<br />
3 Receive + 1<br />
4 NC NC 4 NC<br />
5 NC NC 5 NC<br />
6 Receive - 2<br />
7 NC NC 7 NC<br />
8 NC NC 8 NC<br />
NC = No Connection<br />
Figure 2-9. Power Supply and Cords. P/N 64300098 and 71100001<br />
LED INDICATORS<br />
The LED indicators are shown in Figure 2-10. All three LEDs are able to show three colors:<br />
green, red, or amber.<br />
Each LED indicator has been assigned a specific reporting function (see Table 2-4 below):<br />
• Front LED: reports MICR read status<br />
• Middle LED: reports path status<br />
• Rear LED: reports unit status<br />
12
Section 2. Installation<br />
Figure 2-10. LED Indicators<br />
Front LED<br />
(MICR status)<br />
Middle LED<br />
(Path status)<br />
Table 2-4. LED Indicators<br />
Rear LED<br />
(Unit Status)<br />
Description<br />
Amber Amber Amber Unit is initializing<br />
Green Green Green Power on, everything is OK<br />
X X Flash amber Initializing network connection<br />
Flash red X X After check read: MICR read error<br />
Flash green X X After check read: good MICR read<br />
Flash red/green X X MICR noise detected (if enabled): relocate unit<br />
X Amber X Entry or Exit access guide unlatched (if feature<br />
is installed): close and latch access guides<br />
X Flash red X Paper jam: remove jam and hit operator button<br />
to clear<br />
13
Excella MICR <strong>Check</strong> <strong>Reader</strong><br />
14
SECTION 3. OPERATION AND MAINTENANCE<br />
This section contains powering, operating, and maintenance procedures. Ensure the Excella is<br />
installed and cabling and power are connected as described in Section 2.<br />
POWER UP<br />
Plug the power supply, P/N 64300098P/N, and cord 71100001, into wall power, and press the<br />
start button. The green LED closest to the front of the unit should light.<br />
TILT-DOWN CHECK STOP<br />
The Tilt-Down <strong>Check</strong> Stop, shown in Figure 2-1, is used for both single and multiple check<br />
feed. For business size checks (long), place the Tilt Stop in the down position. For personal size<br />
checks (short), place the Tilt Stop in the up position. (See Appendix B for check sizes.)<br />
OPERATOR BUTTON<br />
The Operator Button is commonly used to communicate to the PC application that an<br />
unexpected condition or error has been cleared and Excella is ready to go again. For example, if<br />
there is paper jam, the Middle LED will flash red. After the paper jam is cleared, the user must<br />
press the Operator Button to resume the check reading/scanning operation.<br />
OPERATION<br />
<strong>Check</strong>s may be entered manually (one check at a time) or automatically (up to 70 checks at a<br />
time). Consult Section 2, Figure 2-1, for locations of the components described here.<br />
15
Excella MICR <strong>Check</strong> <strong>Reader</strong><br />
Single <strong>Check</strong> – <strong>Manual</strong> Feed<br />
For single checks perform the following steps:<br />
1. With the front of the check facing the center of the unit and the MICR line closer to<br />
the bottom, feed the check into the <strong>Manual</strong> Single Feed Input Slot, as shown in<br />
Figure 3-1.<br />
Figure 3-1. <strong>Check</strong> Orientation - Insertion<br />
2. The check then winds around the Printer/Cartridge where a programmable<br />
endorsement is printed horizontally on the check.<br />
3. The face and back of the check are then scanned at the two Scan Bars.<br />
4. Next, the <strong>Check</strong> Deflector guides the check into the Exit Hopper.<br />
16
Section 3. Operation and Maintenance<br />
Multiple <strong>Check</strong>s – Automatic Feed<br />
The Automatic Feed Input Hopper can hold up to 70 checks. Separate the checks by fanning<br />
as indicated in Figure 3-2 and stack as shown in Figure 3-3.<br />
Proceed as follows:<br />
Figure 3-2. Separate <strong>Check</strong>s by Fanning<br />
1. Stack the checks in the Automatic Feed Input Hopper as shown in Figure 3-3.<br />
2. Slide the deck forward to the Loading Zone Marker so that all leading edges are within<br />
the length of the loading zone as shown in Figure 3-3.<br />
3. The checks will follow the same path as the single (manually entered) checks.<br />
17
Excella MICR <strong>Check</strong> <strong>Reader</strong><br />
CLEANING<br />
Figure 3-3. Stacking <strong>Check</strong>s in Input Hopper<br />
Consult Section 2, Figure 2-1, for locations of the components described here.<br />
Clean the outside of the Excella <strong>Reader</strong> unit with a soft, damp cloth and wipe with a dry cloth.<br />
Open the unit. When the unit is open, as shown in Figure 3-4, check the path for debris. Clean<br />
with a soft, damp cloth and wipe with a dry cloth.<br />
Caution<br />
To avoid damaging the read head, do not get the inside of the<br />
check path wet.<br />
18
Section 3. Operation and Maintenance<br />
Printer<br />
Figure 3-4. Opening the Unit for Cleaning<br />
The Printer/Cartridge should be taken out when cleaned. See Section 2, Installing or Replacing<br />
the Printer/Cartridge. There are two methods of cleaning the nozzles on the<br />
Printer/Cartridge, dry wiping and damp wiping. Use the dry wiping method first, and if more<br />
cleaning is required, use the damp wiping method. Figure 3-5 shows the Ink Cartridge.<br />
Dry Wiping Nozzles<br />
Figure 3-5. Cleaning the Ink Cartridge<br />
Gently wipe the nozzle plate area with a clean, lint-free cloth.<br />
Caution<br />
Do not wipe ink over the electrical contact area.<br />
19
Excella MICR <strong>Check</strong> <strong>Reader</strong><br />
Damp Wiping Nozzles<br />
Perform the following steps:<br />
1. Dampen a clean, lint-free cloth with water.<br />
2. Hold the dampened cloth or tissue in contact with the nozzles for a few<br />
seconds.<br />
3. Then gently wipe the nozzle plate.<br />
Caution<br />
Do not wipe the electrical contact area.<br />
4. If ink remains on the nozzle plate, wipe again with a clean dry cloth.<br />
Scan Bars and Card Path<br />
<strong>Check</strong> the Excella paper path to ensure there is no build-up of ink or paper debris, and clean. To<br />
clean the Scan Bars, use the Cleaning Swab, P/N 97200078, as shown in Figure 3-6.<br />
Clearing the <strong>Check</strong> Path<br />
Figure 3-6. Cleaning Scan Bars<br />
Clear debris or remove a check from the path as follows:<br />
1. Open both Outside Entry and Exit Guides as shown in Figure 3-7.<br />
2. Clear debris or pull out the checks from the path.<br />
3. Examine the check path to ensure there is no additional debris, dust or other<br />
extraneous material in the path.<br />
20
Section 3. Operation and Maintenance<br />
Figure 3-7. Clearing Debris or Removing <strong>Check</strong>s<br />
21
Excella MICR <strong>Check</strong> <strong>Reader</strong><br />
22
APPENDIX A. BUILT-IN WEB PAGE<br />
OVERVIEW<br />
Excella is a web appliance and it offers several functions and features in a built-in Web page<br />
accessible through a Web browser. For example, if Excella’s active device IP address is<br />
192.168.1.2, type the “http://192.168.1.2” in your web browser to access Excella’s web page.<br />
This appendix provides a general description of the Web page and the available functions and<br />
features.<br />
STATUS<br />
The Status Page, Figure A-1, provides device information plus operational statistics.<br />
Figure A-1. Excella Status Page<br />
23
Excella MICR <strong>Check</strong> <strong>Reader</strong><br />
MAINTENANCE<br />
The Maintenance Page, Figure A-2, provides status and counters that can be useful to define<br />
maintenance service programs for Excella. Also, the device’s clock can be set on this page.<br />
CALIBRATE<br />
Figure A-2. Maintenance Page<br />
Scanner calibration is performed at the factory, and subsequent calibrations are NOT required<br />
under normal operating conditions. For rare situations where calibration may be required, please<br />
call the Help Desk for assistance to perform calibration using the Calibrate Page.<br />
24
Appendix A. Built-In Web Page<br />
UPDATE FIRMWARE<br />
The Update Firmware Page, Figure A-3, is used to download new firmware to the Excella device.<br />
Firmware for Excella is provided in a file with the “.mef” extension.<br />
Figure A-3. Update Firmware Page<br />
Using the Update Firmware page, Figure A-3, follow these instructions to download new<br />
firmware:<br />
1. Click on the "Browse" button to locate and select the firmware file (e.g., mx160j.mef).<br />
2. Click on the "Update" button.<br />
25
Excella MICR <strong>Check</strong> <strong>Reader</strong><br />
3. The update process will take several minutes (watch progress bar at the bottom of the<br />
screen).<br />
Caution<br />
Do not turn off power to Excella during the update process. If power is turned off,<br />
Excella will hang up and the unit may have to be returned to the factory.<br />
4. When completed, the "Firmware Update" message will appear with information as follows:<br />
Filename = mx160j.mef<br />
Size = 413816 bytes<br />
Upgrade completed<br />
5. At this time, cycle the power of Excella (Off/On).<br />
26
Appendix A. Built-In Web Page<br />
CONFIGURATION<br />
The Configuration Pages, Figures A-4, A-5, A-6 and A-7 offer options to setup the Network,<br />
Ethernet, and USB configurations. Additionally, an option is provided to save and restore device<br />
(Figure A-8) configurations. A general description for all the options follows.<br />
Network Configuration Tab<br />
Device Name<br />
Figure A-4. Network Configuration Tab<br />
The Excella device name provided to the DHCP server (the network server must be setup<br />
appropriately to use this option). This name must be unique for each Excella device on the<br />
network. The default factory value is “EX” followed by the unit’s S/N (e.g. EX-A03LEY9).<br />
27
Excella MICR <strong>Check</strong> <strong>Reader</strong><br />
HTTP Port<br />
The default value is “80”. Use this option to change the HTTP port value.<br />
“Cancel Changes” Button<br />
Click on this button to cancel the current settings being displayed on this page.<br />
“Save Settings” Button<br />
Click on this button to save the current settings to the Excella device.<br />
Ethernet Configuration Tab<br />
28<br />
Figure A-5. Ethernet Configuration Tab
Appendix A. Built-In Web Page<br />
MAC Address<br />
The MAC (Media Access Control) address uniquely identifies each Excella device. This number<br />
is assigned at the factory and cannot be changed.<br />
IP Address<br />
This is Excella’s device IP address on the network. Use this option to change the IP address<br />
value. The default factory value is 192.168.10.100.<br />
Subnet Mask<br />
Use this option to change the Subnet Mask value. The default factory value is 255.255.255.0.<br />
Gateway<br />
Use this option to change the Gateway value. The default factory value is 0.0.0.0<br />
IP Source<br />
• Select the “Fixed” option if the values will be set manually using this page.<br />
• Select the “DHCP” option if the Network server will dynamically assign these values (i.e. the<br />
values on this page will be ignored). The server must be configured appropriately to use<br />
DHCP.<br />
“Cancel Changes” Button<br />
Click on this button to cancel the current settings being displayed on this page.<br />
“Save Settings” Button<br />
Click on this button to save the current settings to the Excella device.<br />
29
Excella MICR <strong>Check</strong> <strong>Reader</strong><br />
USB Configuration Tab<br />
Figure A-6. USB Configuration Tab<br />
IP Address<br />
This is Excella’s device IP address. Use this option to change the IP address value. The default<br />
factory value is 192.168.1.2.<br />
Subnet Mask<br />
Use this option to change the Subnet Mask value. The default factory value is 255.255.255.0.<br />
30
Appendix A. Built-In Web Page<br />
Gateway<br />
Use this option to change the Gateway value. The default factory value is 0.0.0.0<br />
IP Source<br />
• Select “RNDIS”, the default option, if the values will be provided by the PC to which Excella<br />
is being connected to (i.e., the values on this page will be ignored). It is recommended to run<br />
the “ExcellaUSBConfig” utility (See Appendix B) on the PC to set these values when the<br />
“RNDIS” option is selected.<br />
• Select the “Fixed” option if the values will be set manually using this page.<br />
“Cancel Changes” Button<br />
Click on this button to cancel the current settings being displayed on this page.<br />
“Save Settings” Button<br />
Click on this button to save the current settings to the Excella device.<br />
31
Excella MICR <strong>Check</strong> <strong>Reader</strong><br />
System Configuration Tab<br />
Express Enabled for MagUSB Only<br />
Figure A-7. System Configuration Tab<br />
Use this option to toggle between the Normal and Gateway Express <strong>Check</strong> Mode<br />
Note: When the Express Mode is enabled, greater throughput (approximately 45 documents per<br />
minute) is possible. However, dynamic check printing is not available when this mode is<br />
utilized.<br />
32
Appendix A. Built-In Web Page<br />
MICR EMF Noise Detect<br />
This option should always be off.<br />
Save/Restore Configuration Tab<br />
“Select Config File” Box<br />
Figure A-8. Save/Restore Configuration Tab<br />
This option is used in conjunction with the “Restore” button. Use the “Browse” button to locate<br />
and select a previously saved config file, then click on “Restore” to activate the options saved in<br />
the Config file.<br />
33
Excella MICR <strong>Check</strong> <strong>Reader</strong><br />
Save Config to PC<br />
Click on the “Backup” button to save ALL current configuration options to a Config file on the<br />
PC. The default filename is “excella_config.ecg”.<br />
Reset Config to Factory Defaults<br />
Click on the “Reset to Default” button to restore ALL default factory settings.<br />
RESET DEVICE<br />
This option is a quick and convenient way to reset the device. A device reset must be performed<br />
for new configurations to take effect and become active. During the reset operation, the device is<br />
not available and the standard message “The page cannot be displayed” will be shown. This<br />
message can be ignored.<br />
34
OVERVIEW<br />
APPENDIX B. USB CONFIGURATION UTILITY<br />
<strong>MagTek</strong>’s “ExcellaUSBConfig” utility (Figure B-1) is used to configure Excella for the USB<br />
interface ONLY. The utility will automatically select and configure IP address for the PC and<br />
Excella.<br />
Note<br />
ExcellaUSBConfig must be run to establish<br />
a connection between the PC and Excella.<br />
After Excella API/Demo has been installed, ExcellaUSBConfig can be found on the following<br />
directory: C:\Program Files\Magtek\Excella Demo.<br />
Figure B-1. ExcellaUSBConfig Utility Screen<br />
35
Excella MICR <strong>Check</strong> <strong>Reader</strong><br />
IP ADDRESS SETUP<br />
To run the ExcellaUSBConfig utility and setup the necessary IP addresses, use the following<br />
instructions:<br />
1. Run the “ExcellaUSBConfig” utility.<br />
2. For “Network Device ID”, use the default “USB\VID_0801&PID_2230\123”.<br />
3. For “Excella Device”, use the default “EXCELLA_USB”.<br />
4. Click on the “Search” button to automatically assign a valid IP address for the PC Side and<br />
Device Side; the boxes for these IP addresses will be automatically filled in.<br />
5. For “Subnet Mask”, enter a new Subnet Mask or use the default: 255.255.255.0.<br />
7. Click on “Apply”.<br />
8. Click on “OK”.<br />
9. Close the utility.<br />
Note<br />
For most applications, ignore the options “Display Network<br />
Binding Information” and “Command Line Options”.<br />
36
APPENDIX C. CHECK READING<br />
The characters printed on the bottom line of commercial and personal checks are special. They are printed with<br />
magnetic ink to meet specific standards. These characters can be read by a Excella <strong>Reader</strong> at higher speeds and<br />
with more accuracy than manual data entry. Two MICR character sets are used worldwide; they are: E13-B and<br />
CMC-7. The E13-B set is used in the US, Canada, Australia, United Kingdom, Japan, India, Mexico,<br />
Venezuela, Colombia, and the Far East. The CMC-7 set is used in France, Spain, other Mediterranean<br />
countries, and most South American countries.<br />
E13-B CHARACTER SET<br />
The MICR font character set E13-B includes digits 0 through 9 and four symbols. The numbers found on U.S.<br />
checks are of the E13-B character set. The numbers and symbols of E13-B are as follows:<br />
Transit symbol<br />
Dash Symbol<br />
On-Us Symbol<br />
Amount Symbol<br />
CMC-7 CHARACTER SET<br />
The numbers and symbols of the CMC-7 character set are as follows:<br />
SI SII SIII SIV S5<br />
37
Excella MICR <strong>Check</strong> <strong>Reader</strong><br />
The nonnumeric CMC-7 characters are translated by the Excella <strong>Reader</strong> as shown in Table C-1.<br />
Table C-1. CMC-7 Nonnumeric Characters<br />
CMC-7 Character<br />
SI<br />
SII<br />
SIII<br />
SIV<br />
SV<br />
<strong>MICRImage</strong> <strong>Reader</strong><br />
Output<br />
A<br />
B<br />
C<br />
D<br />
E<br />
CHECK LAYOUTS<br />
Personal checks with MICR fields are shown in Figure C-1. Business checks are shown in Figure C-2. The<br />
digits 1 through 4 in the illustrations are described below under MICR Fields.<br />
6.00”<br />
2.75”<br />
1 2 3<br />
Figure C-1. Personal <strong>Check</strong>s<br />
38
Appendix C. USB Configuration<br />
8.75”<br />
3.67”<br />
4<br />
1 2 3<br />
Figure C-2. Business <strong>Check</strong>s<br />
MICR FIELDS<br />
The numbers 1 through 4 refer to the numbers below the checks on the illustration and represent the 4 MICR<br />
fields.<br />
1-Transit Field<br />
The Transit field is a 9-digit field bracketed by two Transit symbols. The field is subdivided as follows:<br />
• Digits 1-4<br />
• Digits 5-8<br />
• Digit 9<br />
Federal Reserve Routing Number<br />
Bank ID Number (American Banking Association)<br />
<strong>Check</strong> Digit<br />
39
Excella MICR <strong>Check</strong> <strong>Reader</strong><br />
2-On-Us Field<br />
The On-Us field is variable, up to 19 characters (including symbols). Valid characters are digits, spaces, dashes,<br />
and On-Us symbols. The On-Us field contains the account number and may also contain a serial number<br />
(<strong>Check</strong> number) and/or a transaction code. Note that an On-Us symbol must always appear to the right of the<br />
account number.<br />
3-Amount Field<br />
The Amount field is a 10-digit field bracketed by Amount symbols. The field is always zero-filled to the left.<br />
4-Auxiliary On-Us Field<br />
The Auxiliary On-Us field is variable, 4-10 digits, bracketed by two On-Us symbols. This field is not present<br />
on personal checks. On business checks, this field contains the check serial number.<br />
40
APPENDIX D. LICENSE AND COPYRIGHT<br />
The following documentation, license agreements, and copyright acknowledgments require no action on the part of the consumer and are included to comply with various disclosure requirements governing the use of<br />
components in the firmware development of Excella.<br />
GOAHEAD WEBSERVER<br />
Copyright (c) GoAhead Software Inc., 1995-2000. All Rights Reserved.<br />
eCos PUBLIC LICENSE<br />
Copyright (C) 1998, 1999, 2000, 2001, 2002, 2003 Red Hat, Inc.<br />
Copyright (C) 2002, 2003 John Dallaway<br />
Copyright (C) 2002, 2003 Nick Garnett<br />
Copyright (C) 2002, 2003 Jonathan Larmour<br />
Copyright (C) 2002, 2003 Andrew Lunn<br />
Copyright (C) 2002, 2003 Gary Thomas<br />
Copyright (C) 2002, 2003 Bart Veer<br />
eCos is free software; you can redistribute it and/or modify it under the terms of the GNU General Public<br />
License as published by the Free Software Foundation; either version 2 or (at your option) any later version.<br />
eCos is distributed in the hope that it will be useful, but WITHOUT ANY WARRANTY; without even the<br />
implied warranty of MERCHANTABILITY or FITNESS FOR A PARTICULAR PURPOSE. See the GNU<br />
General Public License for more details.<br />
You should have received a copy of the GNU General Public License along with eCos; if not, write to the<br />
free Software Foundation, Inc., 59 Temple Place, Suite 330, Boston, MA 02111-1307 USA.<br />
As a special exception, if other files instantiate templates or use macros or inline functions from this file, or<br />
you compile this file and link it with other works to produce a work based on this file, this file does not by<br />
itself cause the resulting work to be covered by the GNU General Public License. However the source code<br />
for this file must still be made available in accordance with section (3) of the GNU General Public License.<br />
This exception does not invalidate any other reasons why a work based on this file might be covered by the<br />
GNU General Public License.<br />
GNU GENERAL PUBLIC LICENSE<br />
Version 2, June 1991<br />
Copyright (C) 1989, 1991 Free Software Foundation, Inc 59 Temple Place, Suite 330, Boston, MA 02111-<br />
1307 USA<br />
Everyone is permitted to copy and distribute verbatim copies of this license document, but changing it is not<br />
allowed.<br />
Preamble<br />
The licenses for most software are designed to take away your freedom to share and change it. By contrast,<br />
the GNU General Public License is intended to guarantee your freedom to share and change free software -<br />
to make sure the software is free for all its users. This General Public License applies to most of the Free<br />
Software Foundation's software and to any other program whose authors commit to using it. (Some other<br />
Free Software Foundation software is covered by the GNU Library General Public License instead.) You<br />
can apply it to your programs, too.<br />
When we speak of free software, we are referring to freedom, not price. Our General Public Licenses are<br />
designed to make sure that you have the freedom to distribute copies of free software (and charge for this<br />
service if you wish), that you receive source code or can get it if you want it, that you can change the<br />
software or use pieces of it in new free programs; and that you know you can do these things.<br />
To protect your rights, we need to make restrictions that forbid anyone to deny you these rights or to ask<br />
you to surrender the rights. These restrictions translate to certain responsibilities for you if you distribute<br />
copies of the software, or if you modify it.<br />
For example, if you distribute copies of such a program, whether gratis or for a fee, you must give the<br />
recipients all the rights that you have. You must make sure that they, too, receive or can get the source<br />
code. And you must show them these terms so they know their rights.<br />
We protect your rights with two steps: (1) copyright the software, and (2) offer you this license which gives<br />
you legal permission to copy, distribute and/or modify the software.<br />
Also, for each author's protection and ours, we want to make certain that everyone understands that there is<br />
no warranty for this free software. If the software is modified by someone else and passed on, we want its<br />
recipients to know that what they have is not the original, so that any problems introduced by others will not<br />
reflect on the original authors' reputations.<br />
Finally, any free program is threatened constantly by software patents. We wish to avoid the danger that<br />
redistributors of a free program will individually obtain patent licenses, in effect making the patents. We wish<br />
to avoid the danger that redistributors of a free effect making the program proprietary.<br />
To prevent this, we have made it clear that any patent must be licensed for everyone's free use or not<br />
licensed at all.<br />
The precise terms and conditions for copying, distribution and modification follow. he precise terms and<br />
conditions for copying, distribution and modification follow.<br />
GNU GENERAL PUBLIC LICENSE<br />
TERMS AND CONDITIONS FOR COPYING, DISTRIBUTION AND MODIFICATION<br />
0. This License applies to any program or other work which contains a notice placed by the copyright holder<br />
saying it may be distributed under the terms of this General Public License. The "Program", below, refers to<br />
any such program or work, and a "work based on the Program" means either the Program or any derivative<br />
work under copyright law: that is to say, a work containing the Program or a portion of it, either verbatim or<br />
with modifications and/or translated into another language. (Hereinafter, translation is included without<br />
limitation in the term "modification".) Each licensee is addressed as "you".<br />
Activities other than copying, distribution and modification are not covered by this License; they are outside<br />
its scope. The act of running the Program is not restricted, and the output from the Program is covered only<br />
if its contents constitute a work based on the Program (independent of having been made by running the<br />
Program). Whether that is true depends on what the Program does.<br />
1. You may copy and distribute verbatim copies of the Program's source code as you receive it, in any<br />
medium, provided that you conspicuously and appropriately publish on each copy an appropriate copyright<br />
notice and disclaimer of warranty; keep intact all the notices that refer to this License and to the absence of<br />
any warranty; and give any other recipients of the Program a copy of this License along with the Program.<br />
You may charge a fee for the physical act of transferring a copy, and you may at your option offer warranty<br />
protection in exchange for a fee.<br />
2. You may modify your copy or copies of the Program or any portion of it, thus forming a work based on<br />
the Program, and copy and distribute such modifications or work under the terms of Section 1 above,<br />
provided that you also meet all of these conditions:<br />
a) You must cause the modified files to carry prominent notices stating that you changed the files and<br />
the date of any change.<br />
b) You must cause any work that you distribute or publish, that in whole or in part contains or is<br />
derived from the Program or any part thereof, to be licensed as a whole at no charge to all third parties<br />
under the terms of this License.<br />
c) If the modified program normally reads commands interactively when run, you must cause it, when<br />
started running for such interactive use in the most ordinary way, to print or display an announcement<br />
including an appropriate copyright notice and a notice that there is no warranty (or else, saying that<br />
you provide a warranty) and that users may redistribute the program under these conditions, and<br />
telling the user how to view a copy of this License. (Exception: if the Program itself is interactive but<br />
does not normally print such an announcement, your work based on the Program is not required to<br />
print an announcement.)<br />
These requirements apply to the modified work as a whole. If identifiable sections of that work are not<br />
derived from the Program, and can be reasonably considered independent and separate works in themselves,<br />
then this License, and its terms, do not apply to those sections when you distribute them as separate works.<br />
But when you distribute the same sections as part of a whole which is a work based on the Program, the<br />
distribution of the whole must be on the terms of this License, whose permissions for other licensees extend<br />
to the entire whole, and thus to each and every part regardless of who wrote it.<br />
Thus, it is not the intent of this section to claim rights or contest your rights to work written entirely by you;<br />
rather, the intent is to exercise the right to control the distribution of derivative or collective works based on<br />
the Program.<br />
In addition, mere aggregation of another work not based on the Program with the Program (or with a work<br />
based on the Program) on a volume of a storage or distribution medium does not bring the other work under<br />
the scope of this License.<br />
3. You may copy and distribute the Program (or a work based on it, under Section 2) in object code or<br />
executable form under the terms of Sections 1 and 2 above provided that you also do one of the following:<br />
a) Accompany it with the complete corresponding machine-readable source code, which must be<br />
distributed under the terms of Sections 1 and 2 above on a medium customarily used for software<br />
interchange; or,<br />
b) Accompany it with a written offer, valid for at least three years, to give any third party, for a charge<br />
no more than your cost of physically performing source distribution, a complete machine-readable<br />
copy of the corresponding source code, to be distributed under the terms of Sections 1 and 2 above on<br />
a medium customarily used for software interchange; or,<br />
c) Accompany it with the information you received as to the offer to distribute corresponding source<br />
code. (This alternative is allowed only for noncommercial distribution and only if you received the<br />
program in object code or executable form with such an offer, in accord with Subsection b above.)<br />
The source code for a work means the preferred form of the work for making modifications to it. For an<br />
executable work, complete source code means all the source code for all modules it contains, plus any<br />
associated interface definition files, plus the scripts used to control compilation and installation executable.<br />
However, as a special exception, the source code distributed need not include anything that is normally<br />
distributed (in either source or binary form) with the major components (compiler, kernel, and so on) of the<br />
operating system on which the executable runs, unless that component itself accompanies the executable.<br />
If distribution of executable or object code is made by offering access to copy from a designated place, then<br />
offering equivalent access to copy the source code from the same place counts as distribution of the source<br />
code, even though third parties are not compelled to copy the source along with the object code.<br />
4. You may not copy, modify, sublicense, or distribute the Program except as expressly provided under this<br />
License. Any attempt otherwise to copy, modify, sublicense or distribute the Program is void, and will<br />
automatically terminate your rights under this License. However, parties who have received copies, or<br />
rights, from you under this License will not have their licenses terminated so long as such parties remain in<br />
full compliance.<br />
5. You are not required to accept this License, since you have not signed it. However, nothing else grants<br />
you permission to modify or distribute the Program or its derivative works. These actions are prohibited by<br />
law if you do not accept this License. Therefore, by modifying or distributing the Program (or any work<br />
based on the Program), you indicate your acceptance of this License to do so, and all its terms and<br />
conditions for copying, distributing or modifying the Program or works based on it.<br />
41
6. Each time you redistribute the Program (or any work based on the Program), the recipient automatically<br />
receives a license from the original licensor to copy, distribute or modify the Program subject to these terms<br />
and conditions. You may not impose any further restrictions on the recipients' exercise of the rights granted<br />
herein. You are not responsible for enforcing compliance by third parties to this License.<br />
7. If, as a consequence of a court judgment or allegation of patent infringement or for any other reason (not<br />
limited to patent issues), conditions are imposed on you (whether by court order, agreement or otherwise)<br />
that contradict the conditions of this License, they do not excuse you from the conditions of this License. If<br />
you cannot distribute so as to satisfy simultaneously your obligations under this License and any other<br />
pertinent obligations, then as a consequence you may not distribute the Program at all. For example, if a<br />
patent license would not permit royalty-free redistribution of the Program by all those who receive copies<br />
directly or indirectly through you, then the only way you could satisfy both it and this License would be to<br />
refrain entirely from distribution of the Program.<br />
If any portion of this section is held invalid or unenforceable under any particular circumstance, the balance<br />
of the section is intended to apply and the section as a whole is intended to apply in other circumstances.<br />
It is not the purpose of this section to induce you to infringe any patents or other property right claims or to<br />
contest validity of any such claims; this section has the sole purpose of protecting the integrity of the free<br />
software distribution system, which is implemented by public license practices. Many people have made<br />
generous contributions to the wide range of software distributed through that system in reliance on<br />
consistent application of that system; it is up to the author/donor to decide if he or she is willing to distribute<br />
software through any other system and a licensee cannot impose that choice.<br />
This section is intended to make thoroughly clear what is believed to be a consequence of the rest of this<br />
License.<br />
8. If the distribution and/or use of the Program is restricted in certain countries either by patents or by<br />
copyrighted interfaces, the original copyright holder who places the Program under this License may add an<br />
explicit geographical distribution limitation excluding those countries, so that distribution is permitted only<br />
in or among countries not thus excluded. In such case, this License incorporates the limitation as if written in<br />
the body of this License.<br />
9. The Free Software Foundation may publish revised and/or new versions of the General Public License<br />
from time to time. Such new versions will be similar in spirit to the present version, but may differ in detail<br />
to address new problems or concerns.<br />
Each version is given a distinguishing version number. If the Program specifies a version number of this<br />
License which applies to it and "any later version", you have the option of following the terms and<br />
conditions either of that version or of any later version published by the Free Software Foundation. If the<br />
Program does not specify a version number of this License, you may choose any version ever published by<br />
the Free Software Foundation.<br />
10. If you wish to incorporate parts of the Program into other free programs whose distribution conditions<br />
are different, write to the author to ask for permission. For software which is copyrighted by the Free<br />
Software Foundation, write to the Free Software Foundation; we sometimes make exceptions for this. Our<br />
decision will be guided by the two goals of preserving the free status of all derivatives of our free software<br />
and of promoting the sharing and reuse of software generally.<br />
NO WARRANTY<br />
11. BECAUSE THE PROGRAM IS LICENSED FREE OF CHARGE, THERE IS NO WARRANTY FOR<br />
THE PROGRAM, TO THE EXTENT PERMITTED BY APPLICABLE LAW. EXCEPT WHEN<br />
OTHERWISE STATED IN WRITING THE COPYRIGHT HOLDERS AND/OR OTHER PARTIES<br />
PROVIDE THE PROGRAM "AS IS" WITHOUT WARRANTY OF ANY KIND, EITHER EXPRESSED<br />
OR IMPLIED, INCLUDING, BUT NOT LIMITED TO, THE IMPLIED WARRANTIES OF<br />
MERCHANTABILITY AND FITNESS FOR A PARTICULAR PURPOSE. THE ENTIRE RISK AS TO<br />
THE QUALITY AND PERFORMANCE OF THE PROGRAM IS WITH YOU. SHOULD THE<br />
PROGRAM PROVE DEFECTIVE, YOU ASSUME THE COST OF ALL NECESSARY SERVICING,<br />
REPAIR OR CORRECTION.<br />
12. IN NO EVENT UNLESS REQUIRED BY APPLICABLE LAW OR AGREED TO IN WRITING<br />
WILL ANY COPYRIGHT HOLDER, OR ANY OTHER PARTY WHO MAY MODIFY AND/OR<br />
REDISTRIBUTE THE PROGRAM AS PERMITTED ABOVE, BE LIABLE TO YOU FOR DAMAGES,<br />
INCLUDING ANY GENERAL, SPECIAL, INCIDENTAL OR CONSEQUENTIAL DAMAGES<br />
ARISING OUT OF THE USE OR INABILITY TO USE THE PROGRAM (INCLUDING BUT NOT<br />
LIMITED TO LOSS OF DATA OR DATA BEING RENDERED INACCURATE OR LOSSES<br />
SUSTAINED BY YOU OR THIRD PARTIES OR A FAILURE OF THE PROGRAM TO OPERATE<br />
WITH ANY OTHER PROGRAMS), EVEN IF SUCH HOLDER OR OTHER PARTY HAS BEEN<br />
ADVISED OF THE POSSIBILITY OF SUCH DAMAGES.<br />
END OF TERMS AND CONDITIONS<br />
How to Apply These Terms to Your New Programs<br />
If you develop a new program, and you want it to be of the greatest possible use to the public, the best way<br />
to achieve this is to make it free software which everyone can redistribute and change under these terms. To<br />
do so, attach the following notices to the program. It is safest to attach them to the start of each source file<br />
to most effectively convey the exclusion of warranty; and each file should have at least the "copyright" line<br />
and a pointer to where the full notice is found.<br />
Notes:<br />
43