DAZ-TA Pro
DAZ-TA Pro
DAZ-TA Pro

You also want an ePaper? Increase the reach of your titles
YUMPU automatically turns print PDFs into web optimized ePapers that Google loves.
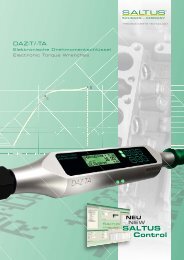
Operating Instructions<br />
<strong>DAZ</strong>-<strong>TA</strong> <strong>Pro</strong><br />
Electronic torque wrench with angle measurement<br />
without a reference arm<br />
<strong>DAZ</strong>-<strong>TA</strong> <strong>Pro</strong><br />
Measuring range<br />
1% in accordance<br />
with DIN 6789<br />
<strong>DAZ</strong>-<strong>TA</strong> 50 1 - 50 Nm 5 - 50 Nm<br />
<strong>DAZ</strong>-<strong>TA</strong> 100 2 - 100 Nm 10 - 100 Nm<br />
<strong>DAZ</strong>-<strong>TA</strong> 250 2 - 250 Nm 25 - 250 Nm<br />
<strong>DAZ</strong>-<strong>TA</strong> 350 5 - 350 Nm 35 - 350 Nm<br />
<strong>DAZ</strong>-<strong>TA</strong> 500 10 - 500 Nm 50 - 500 Nm<br />
<strong>DAZ</strong>-<strong>TA</strong> 800 20 - 800 Nm 80 - 800 Nm<br />
<strong>DAZ</strong>-<strong>TA</strong> X Customer specified<br />
SALTUS-WERK Max Forst GmbH<br />
Schaberger Str. 49-53<br />
42659 Solingen/Germany<br />
Tel: +49 (0)212 5960 220<br />
Fax: +49 (0)212 5960 222<br />
Email: tools@saltus.de<br />
http: http://www.saltus-werk.de/<br />
Change level: 02/07 Version<br />
8000.15.2<br />
Page: 1 / 56
Operating Instructions<br />
<strong>DAZ</strong>-<strong>TA</strong> <strong>Pro</strong><br />
I. Contents<br />
1. Layout<br />
1.1 Safety instructions<br />
1.2 Technical specifications<br />
1.3 Display<br />
1.4 Functions of the LEDs<br />
1.5 Display messages<br />
1.6 Keypad<br />
1.7 Menu structure/overview<br />
2. Operation<br />
2.1.0 Switching on<br />
2.2.0 Standard display<br />
2.3.0 Reading display<br />
2.4.0 Navigating between various joints<br />
3.0.0.0 Main menu: Start/password protection/navigating through the menu<br />
3.1.0.0 Main menu: Entering presets: Adding a new joint with its presets<br />
3.2.0.0 Main menu: Joint<br />
3.2.1.0 Main menu: Joint: Edit<br />
3.2.1.1 Main menu: Joint: Edit: Joint data<br />
3.2.2.0 Main menu: Joint: Explanation of the measuring methods<br />
3.2.2.1 Main menu: Joint: Measuring method: Torque/angle-controlled measurement<br />
3.2.2.2 Main menu: Joint: Measuring method: Torque measurement<br />
3.2.2.3 Main menu: Joint: Measuring method: Track<br />
3.2.2.4 Main menu: Joint: Measuring method: Prevail torque measurement<br />
3.2.2.5 Main menu: Joint: Measuring method: Loosening<br />
3.2.2.6 Main menu: Joint: Measuring method: Torque and/or angle measurement<br />
3.2.2.7 Main menu: Joint: Measuring method: Yield strength detection<br />
3.2.3.0 Main menu: Joint: Delete<br />
3.2.4.0 Main menu: Joint: Print all<br />
3.3.0.0 Main menu: Tightening sequence<br />
3.3.1.0 Main menu: Tightening sequence: Create<br />
3.3.1.1 Main menu: Tightening sequence: Create: Sequence name<br />
3.3.1.2 Main menu: Tightening sequence: Create: Sequence programming step<br />
3.3.2.0 Main menu: Tightening sequence: Select<br />
3.4.0.0 Main menu: Memory<br />
3.4.1.1 Main menu: Memory: Clearing the memory<br />
3.4.1.2 Main menu: Memory: Print memory<br />
3.5.0.0 Main menu: Angle zeroing<br />
3.6.0.0 Main menu: Angle stability control<br />
3.7.0.0 Main menu: Settings<br />
3.7.1.0 Main menu: Settings: Tool data<br />
Change level: 02/07 Version<br />
8000.15.2<br />
Page: 2 / 56
Operating Instructions<br />
<strong>DAZ</strong>-<strong>TA</strong> <strong>Pro</strong><br />
3.7.1.1 Main menu: Settings: Tool data: Extension<br />
3.7.1.2 Main menu: Settings: Tool data: Bending<br />
3.7.1.3 Main menu: Settings: Tool data: Dynamic snug<br />
3.7.1.4 Main menu: Settings: Tool data: Max. angle rate<br />
3.7.1.5 Main menu: Settings: Tool data: Tightening time<br />
3.7.1.6 Main menu: Settings: Tool data: Tool ID<br />
3.7.2.0 Main menu: Settings: ID code/product name<br />
3.7.3.0 Main menu: Settings: Autoprint/auto-zero balance<br />
3.7.4.0 Main menu: Settings: Advance warning point<br />
3.7.5.0 Main menu: Settings: Measuring graph/pitch behaviour at yield point<br />
3.7.6.0 Main menu: Settings: Time<br />
3.7.7.0 Main menu: Settings: Date<br />
3.7.8.0 Main menu: Settings: Tool detection (optional)<br />
3.7.9.0 Main menu: Settings: Advanced settings<br />
3.7.9.1 Main menu: Settings: Advanced settings: Wrench number<br />
3.7.9.2 Main menu: Settings: Advanced settings: Unit<br />
3.7.9.3 Main menu: Settings: Advanced settings: Language<br />
3.7.9.4 Main menu: Settings: Advanced settings: Turn-off time<br />
3.7.9.5 Main menu: Settings: Advanced settings: RS232/V.24<br />
3.7.9.6 Main menu: Settings: Advanced settings: Reset<br />
3.7.10.0 Main menu: Settings: Calibration settings<br />
3.7.10.1 Main menu: Settings: Calibration settings: Torque calibration<br />
3.7.10.2 Main menu: Settings: Calibration settings: Angle calibration<br />
3.7.10.3 Main menu: Settings: Calibration settings: Calibrating an extension<br />
3.7.10.4 Main menu: Settings: Calibration settings: Calibration date<br />
3.7.10.5 Main menu: Settings: Calibration settings: Calibration counter<br />
3.7.10.6 Main menu: Settings: Calibration settings: Mechanical overload<br />
3.7.10.7 Main menu: Settings: Calibration settings: Flash update<br />
3.8.0.0 Main menu: Information<br />
3.9.0.0 Main menu: Statistics<br />
4. Power supply<br />
4.1 Charging the battery<br />
4.2 Changing the battery<br />
5. Data transfer<br />
5.1 Transferring data to the printer<br />
5.2 Transferring data to and from a PC<br />
6. Service<br />
7. Important notes<br />
7.1 Disclaimer<br />
7.2 Trade marks<br />
7.3 Restrictions on use<br />
7.4 Warranty notes<br />
7.5 Service notes<br />
7.6 Form for service notes<br />
APENDIX: Enquiry form for customer-specific tool development<br />
Change level: 02/07 Version<br />
8000.15.2<br />
Page: 3 / 56
Operating Instructions<br />
<strong>DAZ</strong>-<strong>TA</strong> <strong>Pro</strong><br />
1. Layout<br />
1.1 Safety instructions<br />
torque wrench, please observe the following points:<br />
To ensure safe working with your SALTUS®<br />
- This torque wrench is a tightening tool which allows a defined torque to be applied to<br />
fasteners and may only be used by authorised staff after the appropriate training.<br />
- To guarantee accurate readings and to prevent accidents, the torque wrench must be<br />
gripped firmly by the handle - and only the handle - at all times while it is being used.<br />
- Before using the tool, check that it shows no signs of damage and only use perfect tools.<br />
Never use damaged tools!<br />
- The electronic components used in conjunction with this tool must be operated extremely<br />
carefully and in compliance with legal provisions for accident prevention.<br />
- Only apply force to the wrench up to the maximum rated value. Overloading the wrench<br />
can cause it to rupture (danger of personal injury).<br />
- Do not use a torque wrench to loosen seized bolts and rusty screws because there is<br />
considerable risk of damage to the wrench.<br />
- Make sure the torque wrench is never exposed to fluids and do not allow foreign bodies to<br />
penetrate the tool. Otherwise, the torque wrench may be damaged.<br />
- Observe the maximum tightening torques recommended by the manufacturers of the<br />
fasteners.<br />
- Do not apply pressure to the display because this might damage it.<br />
Change level: 02/07 Version<br />
8000.15.2<br />
Page: 4 / 56
Operating Instructions<br />
<strong>DAZ</strong>-<strong>TA</strong> <strong>Pro</strong><br />
1.2 Technical specifications<br />
The SALTUS® <strong>TA</strong> Series torque wrenches conform with EU Directive 2002/95/EC (RoHS Directive).<br />
Measuring range: <strong>DAZ</strong>-<strong>TA</strong> 50 1 - 50 Nm 9 x 12 ± 1% for 5 – 50 Nm<br />
<strong>DAZ</strong>-<strong>TA</strong> 100 2 - 100 Nm 9 x 12 ± 1% for 10 – 100 Nm<br />
<strong>DAZ</strong>-<strong>TA</strong> 250 2 - 250 Nm 14 x 18 ± 1% for 25 – 250 Nm<br />
<strong>DAZ</strong>-<strong>TA</strong> 350 5 - 350 Nm 14 x 18 ± 1% for 35 – 350 Nm<br />
<strong>DAZ</strong>-<strong>TA</strong> 500 10 - 500 Nm 14 x 18 ± 1% for 50 – 500 Nm<br />
<strong>DAZ</strong>-<strong>TA</strong> 800 20 - 800 Nm 14 x 18 ± 1% for 80 – 800 Nm<br />
Zero balance:<br />
Automatic<br />
Measuring accuracy: Torque (Nm): max. deviation ±1% in accordance with DIN 6789<br />
angle (DEG) : max. deviation ±1% at 6°/s over 360° = 1 r.p.m.<br />
by analogy with VDI/VDE 2648<br />
Resolution:<br />
0,01 Nm<br />
0.01° (DEG)<br />
Angle rate:<br />
Measuring methods:<br />
Torque display:<br />
LED display:<br />
Status messages:<br />
Memory:<br />
from 1 °/s to 150 °/s (adjustable)<br />
M0 = Torque / angle (N)<br />
M1 = torque (D)<br />
M2 = Analogue/track mode (25 readings /s via RS232) (tightening curve storage)<br />
(A)<br />
M3 = prevail torque (tightening curve storage) (B;PT;FT)<br />
M4 = loosening (U)<br />
M5 = Either/or mode (torque - and/or angle measurement) (O)<br />
M6 = Yield strength detection (tightening curve storage) (S)<br />
LCD graphics display<br />
2 RGB LEDs (upper LED = torque, lower LED = angle)<br />
Min. and max. values displayed by 2 RGB LEDs (red, green & blue)<br />
and display message, with acoustic signal & vibration alarm as an<br />
option<br />
4000 readings,<br />
Tightening curve storage with 100 readings /s<br />
(from the last 5 tightening curves with 1200 pairs of readings each)<br />
Tool detection:<br />
Optional for 14x18 as automatic (5) or interactive method<br />
Tool management: Five with separate extension, bending compensation, dynamic snug<br />
point, tightening speed and tightening time details.<br />
Joints: 50<br />
Sequences:<br />
50 with a max. total of 50 joints each<br />
User levels: 3<br />
Power supply:<br />
3 x 1.2V rechargeable cells (NiMH AA 2450 mAh) for 8 hours'<br />
operation, interchangeable<br />
Mains adaptor/charging cradle: 12 V / 700 mAh<br />
Operating temperature: +10 to +40 °C<br />
Storage temperature: -10 to +50 °C<br />
Dimensions: <strong>DAZ</strong>-<strong>TA</strong> 50 53 x 36 x 396 mm (approx. 890 g)<br />
<strong>DAZ</strong>-<strong>TA</strong> 100 53 x 36 x 396 mm (approx. 890 g)<br />
<strong>DAZ</strong>-<strong>TA</strong> 250 53 x 36 x 420 mm (approx. 1000 g)<br />
<strong>DAZ</strong>-<strong>TA</strong> 350 53 x 36 x 580 mm (approx. 1600 g)<br />
<strong>DAZ</strong>-<strong>TA</strong> 500 53 x 36 x 736 mm (approx. 3080 g)<br />
<strong>DAZ</strong>-<strong>TA</strong> 800 53 x 36 x 1237 mm (approx. 5810 g)<br />
Interface: RS 232<br />
Change level: 02/07 Version<br />
8000.15.2<br />
Page: 5 / 56
Operating Instructions<br />
<strong>DAZ</strong>-<strong>TA</strong> <strong>Pro</strong><br />
1.3 Display<br />
Standard display<br />
1.4 Functions of the LEDs<br />
Snug point reached in torque/angle (N) measuring mode<br />
Torque: (blue) snug point reached<br />
Angle: (off) not yet reached<br />
Preset reached (OK) in torque/angle (N) measuring mode<br />
Torque: (green) OK<br />
Angle: (green) OK<br />
Torque exceeded (not OK) in torque/angle (N) measuring mode<br />
Torque: (red) Not OK<br />
Angle: (green) OK<br />
Torque and angle exceeded (not OK) in torque/angle (N) measuring mode<br />
Torque: (red) Not OK<br />
Angle: (red) Not OK<br />
Change level: 02/07 Version<br />
8000.15.2<br />
Page: 6 / 56
Operating Instructions<br />
<strong>DAZ</strong>-<strong>TA</strong> <strong>Pro</strong><br />
NOK<br />
Nm<br />
Max Nm<br />
Deviation<br />
Target Nm = (Max Nm +Min Nm)/2<br />
OK<br />
Min Nm<br />
advance warning Nm = 80% Set Nm<br />
LED Nm<br />
snug point<br />
0°<br />
snug point<br />
advance warning Nm = 80% Set Nm<br />
Min °<br />
Target ° = (Max ° +Min °)/2<br />
Max °<br />
LED °<br />
OK<br />
NOK<br />
TORQUE LED Nm:<br />
Upper LED flashes blue:<br />
Upper LED shows steady blue:<br />
Upper LED flashes green:<br />
Upper LED shows steady green:<br />
Upper LED shows steady red:<br />
TIGHTENING ANGLE LED°:<br />
Lower LED flashes blue:<br />
Lower LED shows steady blue:<br />
Lower LED flashes green:<br />
Lower LED shows steady green:<br />
Lower LED shows steady red:<br />
Snug point reached<br />
Advance warning point attained<br />
Min. torque attained (OK)<br />
Preset torque attained (OK)<br />
Max. torque attained (Not OK)<br />
Snug point attained (start angle measurement)<br />
Advance angle warning point attained<br />
Min. angle attained (OK)<br />
Preset angle attained (OK)<br />
Max. angle attained (Not OK)<br />
Change level: 02/07 Version<br />
8000.15.2<br />
Page: 7 / 56
Operating Instructions<br />
<strong>DAZ</strong>-<strong>TA</strong> <strong>Pro</strong><br />
1.5 Display messages<br />
DISPLAY MESSAGES:<br />
Check Calibr.! CC1 Wrench overloaded. Check calibration before reusing.<br />
Check Calibr.! CC2 Calibration counter/date has been exceeded. Check<br />
calibration before reusing.<br />
Tare angle!<br />
The angle sensor's zero balance is working.<br />
<strong>TA</strong>RA<br />
The angle sensor's zero balance is working. (charging cradle)<br />
Hold still!<br />
The wrench was moved during the angle zeroing process.<br />
Release!<br />
Force is being applied - please do not apply force to the<br />
wrench.<br />
Memory full!<br />
The corresponding memory is full.<br />
Memory empty!<br />
The corresponding memory is empty.<br />
Blocked!<br />
The wrench is blocked if the link to the computer, for<br />
example, is active.<br />
Printing!<br />
The wrench is currently transferring data to a peripheral<br />
device.<br />
Power off!<br />
The wrench is switching off.<br />
No stats!<br />
The system could not calculate any statistics.<br />
No PT!<br />
The system could not calculate prevail torque.<br />
No YP!<br />
The system could not calculate the yield point.<br />
ERROR MESSAGES - upper and lower LEDs flash red:<br />
Existing screw!<br />
An existing joint (DDT) has been detected (Not OK)<br />
Max. angle rate!<br />
Max. angle rate (MVA) exceeded (Not OK)<br />
ERROR MESSAGES:<br />
EEprom init<br />
Default values were reset after a flash update.<br />
EEP failed<br />
The setting data are corrupt.<br />
ADC system<br />
AD converter is faulty.<br />
Code memory<br />
<strong>Pro</strong>gram memory and wrench software are corrupt.<br />
RAM memory CPU memory faulty<br />
Oscillator<br />
The oscillator is operating outside the permissible<br />
specifications.<br />
Sensor<br />
Automatic zero balance has failed.<br />
Power-up RESET! The wrench has been reset (data have been lost) and default<br />
values have been reinstated (refer to RESET).<br />
1.6 Keypad<br />
1.7 Menu structure/overview<br />
ON<br />
OFF<br />
ON OFF-Key<br />
PRINT<br />
Print-Key<br />
-0-<br />
Zero - Key<br />
SET<br />
SET-Key<br />
Up<br />
Down<br />
Change level: 02/07 Version<br />
8000.15.2<br />
Page: 8 / 56
Operating Instructions<br />
<strong>DAZ</strong>-<strong>TA</strong> <strong>Pro</strong><br />
3.0.0.0<br />
Enter Setpoint<br />
3.1.0.0<br />
Target Force<br />
Target Angle<br />
Deviation<br />
Denotation<br />
default:<br />
tool= t1<br />
mode = M0<br />
Angle/Torque<br />
Bolts presettings<br />
3.2.0.0<br />
Selection<br />
bolts settings<br />
0-50<br />
Print all<br />
Edit<br />
copy<br />
delete<br />
add<br />
change<br />
3.2.4.0<br />
3.2.1.0<br />
3.2.3.0<br />
MIN Force<br />
MAX Force<br />
snug point<br />
MIN Angle<br />
MAX Angle<br />
rotation<br />
priority<br />
measure mode<br />
rehit detection<br />
tool<br />
<strong>Pro</strong>cess<br />
sequence<br />
3.3.0.0<br />
Print<br />
Select<br />
delete<br />
create<br />
3.3.2.0<br />
3.3.1.0<br />
select of<br />
batchsequence 1-50<br />
Denotation<br />
enter of batchsequence 1-<br />
50<br />
select<br />
steps<br />
1-50<br />
swap<br />
add<br />
delete<br />
MAINMENUE<br />
Memory 3.4.0.0<br />
Angle Tare<br />
3.5.0.0<br />
Statistics<br />
Angle stability<br />
3.6.0.0<br />
Setup<br />
3.7.0.0<br />
Information<br />
3.8.0.0<br />
visual data<br />
manual compensation<br />
Number<br />
Filter: Joint<br />
Filter: ID<br />
X = 3 or 4<br />
visual stability<br />
tool set<br />
ID Code<br />
Autom.Print<br />
time<br />
date<br />
calibration settings<br />
delete<br />
print<br />
adjustment<br />
select<br />
tool t1-t5<br />
Edit<br />
time for Autoprint<br />
advance warn. 3.7.4.0 value in %<br />
gradient 3.7.5.0 value in %<br />
tool recognition<br />
3.7.8.0<br />
Extra Setup<br />
3.7.1.0<br />
3.7.2.0<br />
3.7.3.0<br />
3.7.6.0<br />
3.7.7.0<br />
3.7.9.0<br />
3.7.10.0<br />
Calculation:<br />
Standard deviation<br />
Cm value<br />
Cmk value<br />
time<br />
date<br />
disable/off<br />
usermode<br />
automatic<br />
wrench No.<br />
unit<br />
time / date<br />
no. of bolts / tool iD<br />
batterystatus / no. of stored values<br />
language 3.7.9.3 english,french,german<br />
turn off time 3.7.9.4<br />
RS232/V.24 3.7.9.5<br />
Reset<br />
3.4.1.1<br />
3.4.1.2<br />
3.7.9.1<br />
3.7.9.2<br />
3.7.9.6<br />
Flashupdate<br />
torque calib. 3.7.10.1<br />
angle calib. 3.7.10.2<br />
Extension 3.7.10.3<br />
calib. Date 3.7.10.4<br />
calib. counter 3.7.10.5<br />
Extension 3.7.1.1<br />
Bending<br />
Dynamic FGP<br />
max. rate of angle<br />
working time<br />
Denotation 3.7.1.6<br />
automatic control<br />
from tool t1-t5 based on<br />
bolt setting 1-5<br />
wrench no.<br />
unit<br />
shut down time<br />
baudrate<br />
restore default<br />
userlevel low<br />
userlevel middle<br />
Change level: 02/07 Version<br />
8000.15.2<br />
Page: 9 / 56
Operating Instructions<br />
<strong>DAZ</strong>-<strong>TA</strong> <strong>Pro</strong><br />
2. Operation<br />
2.1.0 Switching on<br />
Turn on the wrench by pressing the ON/OFF switch for 1 sec. The wrench will perform a<br />
self-test including a zero balance and angle zeroing and is ready for use after the zeroing<br />
message has been displayed. Angle zeroing should be performed while the wrench is still<br />
in its cradle or, if it is not, the wrench must not be moved at all. When the wrench is in its<br />
cradle, zeroing is performed automatically every 60 s (Tara), during which the keypad is<br />
blocked. After zeroing has completed, the display will show the current reading 0.00 Nm,<br />
the unit of measure (e.g. Nm), the current joint, the direction of rotation (R or L), the<br />
current measuring mode (M0 = torque/angle, M1 = torque, M2 = track , M3 = prevail<br />
torque, M4 = loosen, M5 = torque and/or angle, M6 = yield strength detection) and the<br />
current sequence.<br />
Display after switching on:<br />
<strong>DAZ</strong>-<strong>TA</strong> <strong>Pro</strong><br />
Fw. Rel. 8000.15.1<br />
SN: 127796<br />
5s<br />
Version and serial number (for 5 s)<br />
Message:<br />
Tare angle<br />
Zero balance/angle zeroing (on start-up approx. 60 s)<br />
During this procedure the wrench must not be moved at all and must be left in its<br />
charging cradle.<br />
2.2.0 Standard display<br />
Joint<br />
Direction of rotation<br />
Measuring mode<br />
Sequence name<br />
INTERN<br />
21:58<br />
R<br />
M0<br />
0.00 Nm<br />
Wrench is now ready for use.<br />
Time<br />
Change level: 02/07 Version<br />
8000.15.2<br />
Page: 10 / 56
Operating Instructions<br />
<strong>DAZ</strong>-<strong>TA</strong> <strong>Pro</strong><br />
2.3.0 Reading display<br />
Joint<br />
Direction of rotation<br />
INTERN<br />
21:58<br />
R<br />
18.32 o<br />
Time<br />
Angle bracket<br />
Torque<br />
Sequence name 20.10<br />
Bending compensation /<br />
Tightening time<br />
The wrench is currently measuring, use the Print button to stop the measurement and<br />
store the data. To do so, the wrench must be released.<br />
2.4.0 Navigating between various joints<br />
Press the UP/DOWN selector keys while in the standard display and select the required<br />
joint option. Up to 50 different joints can be preset and pressing the SET button briefly<br />
displays the data for the currently selected joint:<br />
Joint name<br />
Min. tque. Max. tque.<br />
Min. angle Max. angle<br />
# 0 INTERN<br />
15.0 25.0 15.0<br />
25° 35° 0°<br />
clockwise W1 *<br />
Snug point<br />
Preangle<br />
Direction of rotation Tools (W1 – W5)<br />
Priority<br />
3.0.0.0 Main menu: Start/password protection/navigating through the menu<br />
Access the main menu as described below to make or modify appropriate settings,<br />
depending on your user access level.<br />
Press the SET button for approx. 2 s to access the setup menu<br />
You will be prompted to enter a security code once after start-up:<br />
Enter CODE:<br />
x<br />
SET : Clockw<br />
ESC : Ok -0-: Clr<br />
Use the UP/DOWN selector keys to enter the appropriate code/PIN (user levels: Operator<br />
= 123 (read only) or Foreman = 456 (read/write))<br />
User level: Setter/QA = XXXX (calibration menu/write/read))<br />
SET button to move on to next value or zero button to clear the display.<br />
Note: The selected user level is not deactivated until the torque wrench is switched<br />
off.<br />
Change level: 02/07 Version<br />
8000.15.2<br />
Page: 11 / 56
Operating Instructions<br />
<strong>DAZ</strong>-<strong>TA</strong> <strong>Pro</strong><br />
Enter CODE:<br />
123X<br />
SET : Clockw<br />
ESC : Ok -0-: Clr<br />
After entering the next number, press the SET button again, and return to the main menu<br />
by pressing the ON/OFF button:<br />
Main menu:<br />
Information<br />
Enter preset<br />
Joint<br />
To select menu options<br />
To confirm your selection<br />
To leave the menu option<br />
To leave the setup menu<br />
use the UP / DOWN keys to select an option<br />
press the SET button<br />
press the ON/OFF button<br />
press the ON/OFF button<br />
Of course, you may use our software to make and adjust settings and to programme the<br />
wrench quickly and easily. Contact us or download a demo version from our website:<br />
http://www.saltus-werk.de/.<br />
Change level: 02/07 Version<br />
8000.15.2<br />
Page: 12 / 56
Operating Instructions<br />
<strong>DAZ</strong>-<strong>TA</strong> <strong>Pro</strong><br />
3.1.0.0 Main menu: Entering presets: Adding a new joint with its presets<br />
Activate the main menu as described at Point 3.0.0.0 (menu option Enter presets) and<br />
press the SET button, then use the UP/DOWN selector keys to adjust the parameter as<br />
required and then press the SET button to move on to the next number.<br />
Main menu:<br />
Information<br />
Enter preset<br />
Joint<br />
If the message: "Memory full!" appears, the maximum number of joints has been<br />
reached and you will have to delete one or more joints before you can proceed.<br />
Tightening torque preset:<br />
TORQUE PRESET:<br />
20.0 Nm<br />
Min: 2.0 Max: 250.0<br />
Tightening angle preset:<br />
PRESET ANGLE:<br />
30°<br />
Min: 1 Max: 1200<br />
Tolerance:<br />
DEVIATION:<br />
10 %<br />
Min: 1 Max: 100<br />
Name:<br />
Name:<br />
NEWX<br />
SET : Clockw<br />
ESC : Ok -0-: Clr<br />
Joint:<br />
# 14 NEW<br />
22.0 220.0 20.0<br />
27° 33° 0°<br />
clockwise W1 *<br />
Press the UP/DOWN selector keys while in<br />
this display to adjust the name (max. 15<br />
characters) and use the ON/OFF button to<br />
leave the display.<br />
Change level: 02/07 Version<br />
8000.15.2<br />
Measuring mode: Torque/angle-controlled<br />
measurement<br />
Tools: W1<br />
Snug point = torque preset<br />
Minimum torque: preset + tolerance<br />
Maximum torque: Limit of torque range<br />
Minimum angle: preset - tolerance<br />
Maximum angle: preset + tolerance<br />
Direction of rotation: clockwise<br />
Page: 13 / 56<br />
Priority: High (*)<br />
Preangle: 0° no detection of an existing joint
Operating Instructions<br />
<strong>DAZ</strong>-<strong>TA</strong> <strong>Pro</strong><br />
Press the ON/OFF button twice to return the wrench to the current joint where it will be<br />
ready to make readings using the above measuring mode and direction of rotation.<br />
If you need to modify any of the displayed parameters again, select the "joint" menu<br />
option. Select a joint and press the SET button, then , under Edit, you will be able to edit<br />
this joint again, see Point 2.2.1.0.<br />
3.2.0.0 Main menu: Joint<br />
Activate the main menu as described at Point 3.0.0.0 and select the Joint menu option,<br />
press the SET button.<br />
Main menu:<br />
Enter preset<br />
Joint<br />
Tightening sequence<br />
Joint name<br />
Min. tque. Max. tque.<br />
Min. angle Max. angle<br />
# 0 INTERN<br />
15.0 25.0 15.0<br />
25° 35° 0°<br />
Snug point<br />
Preangle<br />
Direction of rotation Tools (W1 – W5)<br />
clockwise W1 *<br />
Priority<br />
Press the UP/DOWN selector keys while in this display to select the required settings. Up<br />
to 50 different joints can be preset and pressing the SET button briefly displays the data<br />
for the currently selected joint.<br />
3.2.1.0 Main menu: Joint: Edit<br />
Activate the main menu as described at Point 3.2.0.0 and select a joint, press the SET<br />
button.<br />
SCREW (N) MENU:<br />
Print all<br />
Edit<br />
Add<br />
Change level: 02/07 Version<br />
8000.15.2<br />
Page: 14 / 56
Operating Instructions<br />
<strong>DAZ</strong>-<strong>TA</strong> <strong>Pro</strong><br />
3.2.1.1 Main menu: Joint: Edit: Joint data<br />
Activate the settings menu as described at Point 3.2.1.0 and press the SET button, then<br />
use the UP/DOWN selector keys (within the displayed min. and max. limits) to adjust the<br />
parameter as required and then press the SET button to move on to the next number.<br />
Minimum torque:<br />
TORQUE MIN:<br />
15.0 Nm<br />
Min: 2.0 Max: 25.0<br />
Maximum torque:<br />
TORQUE MAX:<br />
25.0 Nm<br />
Min: 15.0 Max: 220.0<br />
Snug point:<br />
SNUG POINT DFF:<br />
15.0 Nm<br />
Min: 2.0 Max: 25.0<br />
Minimum angle:<br />
MIN ANGLE:<br />
25°<br />
Min: 2.0 Max: 35<br />
Maximum angle:<br />
MAX ANGLE:<br />
35°<br />
Min: 25 Max: 1200<br />
Direction of rotation/direction of tightening:<br />
sequences)<br />
Direction of rotation:<br />
Anticlockwise<br />
clockwise<br />
Measuring mode:<br />
Priority: (for processing<br />
Priority:<br />
Low ’ # ’<br />
High ’ * ’<br />
Detection of existing joint:<br />
Measuring mode:<br />
yield point (YP)<br />
Angle/torque<br />
Torque<br />
PREANGLE MEAS.<br />
5°<br />
Min: 1 Max: 15<br />
See Point 3.2.2.0<br />
M0 Angle/torque: Torque/angle-controlled measurement<br />
M1 Torque:<br />
Torque measurement<br />
M2 Track: Free measurement, 25 values /s<br />
M3 Prevail torque: Measuring prevail torque<br />
M4 Loosen:<br />
Torque measurement at lowest value<br />
M5 Either Or:<br />
Torque and/or angle measurement<br />
M6 Yield point:<br />
Yield strength detection<br />
Change level: 02/07 Version<br />
8000.15.2<br />
.<br />
Refer to lower figure: If the snug point is reached within<br />
the preangle (e.g. 5°), the wrench will show "Existing<br />
joint" (DDT)<br />
(Joint Not OK).<br />
Page: 15 / 56
Operating Instructions<br />
<strong>DAZ</strong>-<strong>TA</strong> <strong>Pro</strong><br />
Nm<br />
30<br />
40<br />
38.14<br />
25<br />
35<br />
32.44<br />
30<br />
20<br />
Maximum<br />
angle for<br />
rehit detection<br />
Minimum<br />
27<br />
rehit detection<br />
N<br />
28<br />
25<br />
15<br />
20<br />
15<br />
10<br />
snug point<br />
10<br />
5<br />
5<br />
snug point<br />
00<br />
5°<br />
0° 3.8°<br />
0°<br />
Min °<br />
15.2°<br />
0,00 4,94 8,73 11,59 13,94 16,25 19,09 22,28 24,87 27,91<br />
configuration:<br />
angle for rehit detection: 5°<br />
0,53,79<br />
stored values :<br />
27 0 0 10 N 38.14 Nm 3.8° 30.0 40.0 10° 20° 15.0 15.08.2006 15:15:13 Nok 1 SALTUS<br />
28 0 0 10 N 32.22 Nm 15.2° 30.0 40.0 10° 20° 15.0 15.08.2006 15:15:33 Ok 1 SALTUS<br />
Max °<br />
Tools:<br />
Tools:<br />
W5<br />
W1<br />
W2<br />
See Point: 3.7.1.0 Creating tool data<br />
Press the UP/DOWN selector keys while in this display to adjust the settings as required<br />
and press the SET button briefly to confirm the entry.<br />
Change level: 02/07 Version<br />
8000.15.2<br />
Page: 16 / 56
Operating Instructions<br />
<strong>DAZ</strong>-<strong>TA</strong> <strong>Pro</strong><br />
3.2.2.0 Main menu: Joint: Explanation of the measuring methods<br />
3.2.2.1 Main menu: Joint: Measuring method: Torque/angle-controlled measurement<br />
M0 Measuring method: Torque/angle-controlled measurement (N) default<br />
This measuring method measures the peak torque and angle values in the prescribed<br />
torquing direction. Once the snug point has been reached, angle measurement begins.<br />
The stored data record contains the following code: N.<br />
3.2.2.2 Main menu: Joint: Measuring method: Torque measurement<br />
M1 Measuring method: Torque measurement (D)<br />
This measuring method measures the peak torque value in the prescribed torquing<br />
direction. The stored data record contains the following code: D.<br />
3.2.2.3 Main menu: Joint: Measuring method: Track<br />
M2 Measuring method: Track measurement (A)<br />
This measuring method displays the current torque and angle values in the prescribed<br />
torquing direction. Once the snug point has been reached, angle measurement begins.<br />
From the beginning of the wrench's measuring range, it will poll 25 readings (angle/force)<br />
per second via the RS232 interface. Press the Print button to stop this mode. The<br />
stored data record (peak values) contains the following code: A.<br />
In this measuring method, a tightening curve memory is filled with 100 measured pairs of<br />
readings per second (maximum duration is 12 s per curve), this is then used as a ring<br />
storage system (max. 5 curves). Each new reading deletes the oldest stored reading.<br />
Change level: 02/07 Version<br />
8000.15.2<br />
Page: 17 / 56
Operating Instructions<br />
<strong>DAZ</strong>-<strong>TA</strong> <strong>Pro</strong><br />
3.2.2.4 Main menu: Joint: Measuring method: Prevail torque measurement<br />
M3 Measuring method: Prevail torque (B,P,F)<br />
300<br />
295<br />
Nm<br />
pre-set 270.0 Nm<br />
290<br />
287.35<br />
L<br />
285<br />
Maximum<br />
283.61<br />
E<br />
280<br />
275<br />
276.03<br />
Minimum<br />
W<br />
270<br />
265<br />
260<br />
snug point<br />
0°<br />
Min °<br />
4.65°<br />
Max °<br />
0,02<br />
0,23<br />
0,48<br />
0,68<br />
1,01<br />
1,38<br />
1,71<br />
2,12<br />
2,44<br />
2,73<br />
3,02<br />
3,36<br />
3,74<br />
4,16<br />
4,55<br />
4,94<br />
5,02<br />
store values of dynamic torque audit method:<br />
66 0 0 1 L 287.35 Nm 1.19° 275.0 285.0 1° 6° 240.0 29.01.2007 09:14:15 Nok 1 SALTUS<br />
67 0 0 1 W 276.03 Nm 2.96° 275.0 285.0 1° 6° 240.0 29.01.2007 09:14:15 Ok 1 SALTUS<br />
68 0 0 1 E 283.61 Nm 4.65° 275.0 285.0 1° 6° 240.0 29.01.2007 09:14:15 Ok 1 SALTUS<br />
This measuring method determines the breakaway torque (B) , prevail torque (P) and the<br />
end torque (E). Autoprint must be activated for this function and preangle/bending<br />
compensation should both be 0°. From the snug point on (240 Nm), the graph is recorded<br />
and the minimum torque value (275 Nm) must be exceeded. On the basis of the preset<br />
parameters, an existing joint is deliberately exceeded by e.g. 5° and the upper tolerance<br />
level at the final torque achieved is monitored. Each value (L, PT, FT) is separately<br />
evaluated: in this example, torque (breakaway torque) shows RED initially and then goes<br />
GREEN at the end of the measurement because the final torque is OK. Three data<br />
records are stored under the following codes: B, P and F. In this measuring method, a<br />
tightening curve memory is filled with 100 measured pairs of readings per second<br />
(maximum duration is 12 s per curve), this is then used as a ring storage system (max. 5<br />
curves). Each new reading deletes the oldest stored reading.<br />
Change level: 02/07 Version<br />
8000.15.2<br />
Page: 18 / 56
Operating Instructions<br />
<strong>DAZ</strong>-<strong>TA</strong> <strong>Pro</strong><br />
Example:<br />
PT: 276.03 Nm<br />
4.65° BAT: 287.35<br />
FT: 283.61<br />
PT = prevail torque<br />
BAT = breakaway torque<br />
FT = final torque<br />
3.2.2.5 Main menu: Joint: Measuring method: Loosening<br />
M4 Measuring method: Loosening (U)<br />
This measuring method measures the smallest torque reading and the largest angle in the<br />
prescribed torquing direction. Once the snug point has been reached, angle measurement<br />
begins. Here, the joint is loosened by a defined tightening angle and the loosening torque<br />
recorded. The stored data record contains the following code: U.<br />
3.2.2.6 Main menu: Joint: Measuring method: Torque and/or angle measurement<br />
M5 Measuring method: Torque/angle-controlled measurement (O)<br />
This measuring method measures the peak torque and angle values in the prescribed<br />
torquing direction. Once the snug point has been reached, angle measurement begins.<br />
The stored data record contains the following code: O. The measurement is OK if at least<br />
one condition (Min. < torque or tightening angle < Max.) is met during the measurement.<br />
Change level: 02/07 Version<br />
8000.15.2<br />
Page: 19 / 56
Operating Instructions<br />
<strong>DAZ</strong>-<strong>TA</strong> <strong>Pro</strong><br />
3.2.2.7 Main menu: Joint: Measuring method: Yield strength detection<br />
M6 Measuring method is yield strength detection (S)<br />
50<br />
Nm<br />
40<br />
Maximum<br />
40.25<br />
37.24<br />
M8 8.8<br />
S<br />
gradient<br />
E<br />
30<br />
Minimum<br />
20<br />
snug point<br />
10<br />
snug point<br />
0°<br />
18.2°<br />
35.0°<br />
0<br />
0,00 10,26 16,25 23,49 30,98 41,82 52,94 63,02<br />
stored values for the yield point S:<br />
23 0 0 15 S 37.24 Nm 18.2° 30.0 45.0 15° 40° 15.0 14.08.2006 14:19:16 Ok 1 SALTUS<br />
24 0 0 15 E 40.25 Nm 35.0° 30.0 45.0 15° 40° 15.0 14.08.2006 14:19:17 Ok 1 SALTUS<br />
In this mode, the torque existing at the point where the yield point (S) is exceeded and the<br />
final torque (FT) are calculated. Autoprint must be activated for this function and<br />
preangle/bending compensation should both be 0°. From the snug point on, the graph is<br />
recorded and the minimum torque value must be exceeded. If the pitch as defined at Point<br />
3.7.5.0 drops (e.g. to 50%), 2 data records are stored with these codes: S and E.<br />
In this measuring method, a tightening curve memory is filled with 100 measured pairs of<br />
readings per second (maximum duration is 12 s per curve), this is then used as a ring storage<br />
system (max. 5 curves). Each new reading deletes the oldest stored reading.<br />
Min °<br />
Max °<br />
Change level: 02/07 Version<br />
8000.15.2<br />
YP: 37.24 Nm<br />
35.0° FT: 40.25<br />
Page: 20 / 56
Operating Instructions<br />
<strong>DAZ</strong>-<strong>TA</strong> <strong>Pro</strong><br />
3.2.3.0 Main menu: Joint: Delete<br />
Activate the main menu as described at Point 3.2.0.0 and select a joint, press the SET<br />
button.<br />
SCREW (N) MENU:<br />
Replace<br />
Delete<br />
Print all<br />
The selected joint is deleted.<br />
Note: The internal joint 0 cannot be deleted.<br />
3.2.4.0 Main menu: Joint: Print all<br />
Activate the main menu as described at Point 3.2.0.0 and select the Joint menu option.<br />
SCREW (N) MENU:<br />
Delete<br />
Print all<br />
Edit<br />
This outputs all the joints via the RS232 interface.<br />
Output:<br />
0 15.0 25.0 25 35 6.0 R * 0 0 1 INTERN<br />
1 25.0 40.0 3 10 20.0 R * 3 0 2 PREVAIL TORQUE<br />
2 20.0 40.0 10 20 18.0 R * 0 3 1 BOLT1/MITVO<br />
3 20.0 40.0 10 20 18.0 R * 0 0 2 BOLT2/MITVO<br />
4 20.0 30.0 0 0 20.0 R * 1 3 1 PRETIGHT/NM<br />
5 20.0 40.0 10 20 20.0 R * 0 0 2 FINAL TQ/ANGLE<br />
6 4.0 110.0 1 360 2.0 R * 2 0 5 ANALOG/TRACK<br />
3.3.0.0 Main menu: Tightening sequence<br />
Activate the main menu as described at Point 3.2.0.0 and select the Tightening<br />
sequences menu option.<br />
Main menu:<br />
Joint<br />
Tightening sequence<br />
Memory<br />
Change level: 02/07 Version<br />
8000.15.2<br />
Page: 21 / 56
Operating Instructions<br />
<strong>DAZ</strong>-<strong>TA</strong> <strong>Pro</strong><br />
3.3.1.0 Main menu: Tightening sequence: Create<br />
Activate the main menu as described at Point 3.3.0.0 and select the Create menu option,<br />
press the SET button.<br />
SEQUENCE MENU:<br />
Select<br />
Create<br />
Delete<br />
3.3.1.1 Main menu: Tightening sequence: Create: Sequence name<br />
Activate the settings menu as described at Point 3.3.1.0.<br />
Name:<br />
NEWSEQ X<br />
SET : Clockw<br />
ESC : Ok -0-: Clr<br />
Press the UP/DOWN selector keys while in this<br />
display to adjust the settings as required and<br />
press the ON/OFF button to confirm the entry.<br />
Change level: 02/07 Version<br />
8000.15.2<br />
Page: 22 / 56
Operating Instructions<br />
<strong>DAZ</strong>-<strong>TA</strong> <strong>Pro</strong><br />
3.3.1.2 Main menu: Tightening sequence: Create: Sequence programming step<br />
Activate the settings menu as described at Point 3.3.1.1.<br />
ENTER MACROSEQ.:<br />
Step: # 1/50<br />
BOLT1/MITVO X<br />
Press the UP/DOWN selector keys while in<br />
this display to make the required selection<br />
and press the SET button to add the joint.<br />
ENTER MACROSEQ.:<br />
Step: # 2/50<br />
LOOSEN<br />
Complete the data entry by pressing the<br />
ON/OFF button.<br />
BOLT1/MI# 1 17:39<br />
R<br />
M0 0.00 Nm<br />
NEWSEQ<br />
The wrench is in Joint 1 (Bolt 1) and in the<br />
new sequence (NEWSEQ).<br />
Change level: 02/07 Version<br />
8000.15.2<br />
Page: 23 / 56
Operating Instructions<br />
<strong>DAZ</strong>-<strong>TA</strong> <strong>Pro</strong><br />
3.3.2.0 Main menu: Tightening sequence: Select<br />
Activate the main menu as described at Point 3.3.0.0 and select the Select menu option,<br />
press the SET button.<br />
SEQUENCE MENU:<br />
Print sequ.<br />
Select<br />
Create<br />
SELECT MACROSEQ.:<br />
# 1 SEQUENCE1<br />
Press the UP/DOWN selector keys while in<br />
this display to make the required selection<br />
and press the SET button to activate the<br />
corresponding tightening sequence.<br />
# 1 SEQUENCE1<br />
Step: # 4/50<br />
LOOSEN<br />
Press the UP/DOWN selector keys while in<br />
this display to view all the steps making up<br />
this sequence, press the ON/OFF button to<br />
activate the corresponding tightening<br />
sequence.<br />
Change level: 02/07 Version<br />
8000.15.2<br />
Page: 24 / 56
Operating Instructions<br />
<strong>DAZ</strong>-<strong>TA</strong> <strong>Pro</strong><br />
3.4.0.0 Main menu: Memory<br />
Activate the main menu as described at Point 3.0.0.0 and select the Memory menu<br />
option.<br />
Main menu:<br />
Tightening sequence<br />
Memory<br />
Tare angle<br />
# 2 0/13 n Not OK<br />
388.93 Nm 29.91°<br />
< 18.00 27.00<br />
> 22.00 33.00<br />
Press the UP/DOWN selector keys while in this display to select the required data record.<br />
The wrench can store up to 4000 readings. Once the memory is full, the oldest reading in<br />
the memory is deleted and the display shows this message: "Memory full!" (ring storage).<br />
3.4.1.1 Main menu: Memory: Clearing the memory<br />
Activate the main menu as described at Point 3.0.0.0 and select the Memory menu<br />
option.<br />
Main menu:<br />
Tightening sequence<br />
Memory<br />
Tare angle<br />
# 2 0/13 n Not OK<br />
388.93 Nm 29.91°<br />
< 18.00 27.00<br />
> 22.00 33.00<br />
Press the Zero button while in this display to<br />
delete the entire contents of the memory.<br />
DELETE<br />
No<br />
Yes<br />
A<br />
Press the SET button and opt for "Yes" to complete the delete process.<br />
Change level: 02/07 Version<br />
8000.15.2<br />
Page: 25 / 56
Operating Instructions<br />
<strong>DAZ</strong>-<strong>TA</strong> <strong>Pro</strong><br />
3.4.1.2 Main menu: Memory: Print memory<br />
Activate the main menu as described at Point 3.0.0.0 and select the Memory menu<br />
option.<br />
Main menu:<br />
Tightening sequence<br />
Memory<br />
Tare angle<br />
# 2 0/13 n Not OK<br />
388.93 Nm 29.91°<br />
< 18.00 27.00<br />
> 22.00 33.00<br />
Message:<br />
Printing!<br />
Press the Print button while in this display to<br />
print the entire contents of the memory.<br />
3.5.0.0 Main menu: Angle zeroing<br />
Activate the main menu as described at Point 3.0.0.0 and select the Angle tare option,<br />
press the SET button to activate the angle zeroing function.<br />
Main menu:<br />
Memory<br />
Tare angle<br />
Angle stability<br />
Message:<br />
Tare angle<br />
If the wrench is not in the charging cradle, this option initiates a manual angle zeroing<br />
process.<br />
The wrench must not be moved at all during this zeroing action.<br />
The process takes approx. 60 s.<br />
Note: When the wrench is in place in the charging cradle, angle zeroing (<strong>TA</strong>RA) is automatically<br />
performed.<br />
INTERN 13:32<br />
R<br />
<strong>TA</strong>RA 0.00 Nm<br />
If the wrench is in its charging cradle, the<br />
angle zeroing process takes place<br />
automatically as a background process.<br />
The wrench is ready for use at any time.<br />
During this process, the setup menu is<br />
blocked.<br />
Change level: 02/07 Version<br />
8000.15.2<br />
Page: 26 / 56
Operating Instructions<br />
<strong>DAZ</strong>-<strong>TA</strong> <strong>Pro</strong><br />
3.6.0.0 Main menu: Angle stability control<br />
Activate the main menu as described at Point 3.0.0.0 and select the Angle stability menu<br />
option.<br />
Main menu:<br />
Tare angle<br />
Angle stability<br />
Settings<br />
The integrated sensor is sensitive to<br />
temperature fluctuations. These<br />
fluctuations can be checked and adjusted<br />
here e.g. in laboratory or continuous<br />
operation without a charging cradle.<br />
Angle stability<br />
± 0 0.1°<br />
Press the UP/DOWN selector keys while<br />
in this display to adjust the sensitivity of<br />
the sensor. This action requires the<br />
highest level of access rights (setter/QA).<br />
3.7.0.0 Main menu: Settings<br />
Activate the main menu as described at Point 3.0.0.0 and select the Settings menu<br />
option.<br />
Main menu:<br />
Tare angle<br />
Settings<br />
Information<br />
Change level: 02/07 Version<br />
8000.15.2<br />
Page: 27 / 56
Operating Instructions<br />
<strong>DAZ</strong>-<strong>TA</strong> <strong>Pro</strong><br />
3.7.1.0 Main menu: Settings: Tool data<br />
Activate the settings menu as described at Point 3.7.0.0 and select the Tools menu<br />
option.<br />
SETTING MENU:<br />
Calibr.settings<br />
Tools<br />
ID Code<br />
Press the UP/DOWN selector keys to select the required tool presettings. Up to five<br />
different tools can be preset and press the SET button briefly to move from one<br />
parameter to the next: extension, bending, preangle, dynamic snug and angle rate.<br />
Tool ID(1)1<br />
Dynamic<br />
snug (FGP)<br />
Extension (25)<br />
Tightening time<br />
#1 FBD8258<br />
75% > 90°/s<br />
25.0 mm 0.011°/Nm<br />
30s<br />
Angle rate<br />
Bending<br />
3.7.1.1 Main menu: Settings: Tool data: Extension<br />
EXTENSION:<br />
25.0 mm<br />
Min: .0 Max: 200.0<br />
Here, the corresponding extension = tool length (L) is entered.<br />
With the <strong>DAZ</strong>-<strong>TA</strong> 9 x 12, the default length is 17.5 mm,<br />
With the <strong>DAZ</strong>-<strong>TA</strong> 14 x 18 and higher, the default length is 25.0 mm,<br />
L<br />
L [mm]<br />
<strong>DAZ</strong>-T(A) 50 17,5<br />
<strong>DAZ</strong>-T(A) 100 17,5<br />
<strong>DAZ</strong>-T(A) 250<br />
<strong>DAZ</strong>-T(A) 350<br />
<strong>DAZ</strong>-T(A) 500<br />
<strong>DAZ</strong>-T(A) 800<br />
25<br />
25<br />
25<br />
25<br />
Note: If the extension deviates, the calibration should be checked.<br />
Change level: 02/07 Version<br />
8000.15.2<br />
Page: 28 / 56
Operating Instructions<br />
<strong>DAZ</strong>-<strong>TA</strong> <strong>Pro</strong><br />
3.7.1.2 Main menu: Settings: Tool data: Bending<br />
BENDING:<br />
0.011° /Nm<br />
Min: .000 Max: .500<br />
Here, it is important to enter the corresponding inherent bending of the wrench and tool<br />
(e.g.: 1.1° at 100 Nm = 0.011 °/Nm). This value is used in the joint data later for dynamic<br />
bending compensation.<br />
3.7.1.3 Main menu: Settings: Tool data: Dynamic snug<br />
DYNAM.SNUG POINT:<br />
0.95<br />
Min: .01 Max: 1.00<br />
Here, we enter the corresponding dynamic snug as a percentage. When retorquing, 95%<br />
of the last torque must be attained so that angle measurement can restart.<br />
3.7.1.4 Main menu: Settings: Tool data: Max. angle rate<br />
Max. Angle rate:<br />
120 °/s<br />
Min: 1 Max: 150<br />
Here, the corresponding value is stored as degrees per second.<br />
If this tightening speed is exceeded, both LED’s will flash red and the joint is classed as<br />
Not OK (Nok).<br />
3.7.1.5 Main menu: Settings: Tool data: Tightening time<br />
TIGHTENING TIME:<br />
30 S<br />
Min: 0 Max: 99<br />
The corresponding tightening time per second is stored here.<br />
If this time limit is exceeded, the data is auto-printed.<br />
Change level: 02/07 Version<br />
8000.15.2<br />
Page: 29 / 56
Operating Instructions<br />
<strong>DAZ</strong>-<strong>TA</strong> <strong>Pro</strong><br />
3.7.1.6 Main menu: Settings: Tool data: Tool ID<br />
TOOL ID<br />
FBD8258<br />
SET : Clockw<br />
ESC : Ok -0-: Clr<br />
Enter any required name - however if tool detection is activated, this should be the code<br />
for the tool to be detected.<br />
#1 FBD8258<br />
75% > 90°/s<br />
25.0 mm 0.011°/Nm<br />
30s<br />
Use the UP/DOWN selector keys to select a different tool and pressing the SET button<br />
briefly enables it to be edited.<br />
3.7.2.0 Main menu: Settings: ID code/product name<br />
Activate the settings menu as described at Point 3.7.0.0 and select the ID Code menu<br />
option.<br />
Enter a suitable, meaningful name (max. 20 characters), and this will appear at the end of<br />
each data record.<br />
SETTING MENU:<br />
Tools<br />
ID Code<br />
Autom.Print<br />
ID Code:<br />
Station232<br />
SET : Clockw<br />
ESC : Ok -0-: Clr<br />
e.g.: Worker's name, product number,<br />
operation, production location etc.<br />
Change level: 02/07 Version<br />
8000.15.2<br />
Page: 30 / 56
Operating Instructions<br />
<strong>DAZ</strong>-<strong>TA</strong> <strong>Pro</strong><br />
3.7.3.0 Main menu: Settings: Autoprint/auto-zero balance<br />
Activate the settings menu as described at Point 3.7.0.0 and select the Autom.Print menu<br />
option.<br />
The <strong>DAZ</strong>-<strong>TA</strong> provides the choice of automatic printing and storage functions. After<br />
successful reading or torquing, there will automatically be a zero balance. To this end, the<br />
operator only has to release the wrench. When releasing the wrench, ensure the<br />
corresponding minimum conditions are met (e.g. reading < 2.0 Nm).<br />
After that, the <strong>DAZ</strong>-<strong>TA</strong> automatically transmits the current reading to the PC or printer via<br />
the RS 232 interface and stores the reading in the wrench's memory. After transmission<br />
and storage, the wrench automatically resets itself to 0.0 and it is then ready for the next<br />
job.<br />
SETTING MENU:<br />
ID Code<br />
Autom.Print<br />
Advance warning point<br />
AUTOPRINT (s):<br />
OFF<br />
0.5 _<br />
1<br />
Select using the UP/DOWN selector keys and press the SET button to confirm the<br />
selection.<br />
e.g.: 0.5 = approx. 0.5 s = (OFF – 0.5 – 1 – 1.5)<br />
3.7.4.0 Main menu: Settings: Advance warning point<br />
Activate the settings menu as described at Point 3.7.0.0 and select the advance warning<br />
point menu option.<br />
SETTING MENU:<br />
Autom.Print<br />
Advance warning point<br />
Measuring curve<br />
ADVANCE WARNING<br />
POINT:<br />
80 %<br />
Min: 50 Max: 95<br />
The advance warning point is stored as a percentage. For example: 80%, advance<br />
warning will occur at 80% of the preset (Nm and angle) and the corresponding LED will<br />
light up a steady blue.<br />
Change level: 02/07 Version<br />
8000.15.2<br />
Page: 31 / 56
Operating Instructions<br />
<strong>DAZ</strong>-<strong>TA</strong> <strong>Pro</strong><br />
3.7.5.0 Main menu: Settings: Measuring graph/pitch behaviour at yield point<br />
Activate the settings menu as described at Point 3.7.0.0 and select the Measuring curve<br />
menu option.<br />
SETTING MENU:<br />
Advance warning point<br />
Measuring curve<br />
Time<br />
GRADIENT:<br />
0.50<br />
Min: .10 Max: 1.00<br />
Here, the percentage for the gradient dip is stored (gradient resulting from torque/angle).<br />
For example: 50%, this means that when the gradient (NM/angle) dips by 50% (=0.50), the<br />
yield strength detection is initiated.<br />
3.7.6.0 Main menu: Settings: Time<br />
Activate the settings menu as described at Point 3.7.0.0 and select the Time menu<br />
option.<br />
SETTING MENU:<br />
Measuring curve<br />
Time<br />
Date<br />
MINUTES:<br />
30<br />
Min: 0 Max: 59<br />
HOURS:<br />
14<br />
Min: 0 Max: 23<br />
e.g.: 14:30:00<br />
Change level: 02/07 Version<br />
8000.15.2<br />
Page: 32 / 56
Operating Instructions<br />
<strong>DAZ</strong>-<strong>TA</strong> <strong>Pro</strong><br />
3.7.7.0 Main menu: Settings: Date<br />
Activate the settings menu as described at Point 3.7.0.0 and select the Date menu option.<br />
DAY:<br />
8<br />
Min: 1 Max: 31<br />
SETTING MENU:<br />
Time<br />
Date<br />
Tool detection<br />
MONTH:<br />
7<br />
Min: 1 Max: 12<br />
3.7.8.0 Main menu: Settings: Tool detection (optional)<br />
YEAR:<br />
6<br />
Min: 0 Max: 99<br />
e.g.: 08.07.2006<br />
Activate the settings menu as described at Point 3.7.0.0 and select the Tool detection<br />
menu option.<br />
Caution! The tool detection function can only work if your torque wrench is equipped<br />
with that option.<br />
SETTING MENU:<br />
Date<br />
Tool detection<br />
Adv. settings<br />
TOOL MODE:<br />
OFF<br />
User mode<br />
Automatic<br />
Select using the UP/DOWN selector keys and press the SET button to confirm the<br />
selection. Select the OFF option to deactivate the function. The User mode option<br />
activates the interactive tool detection system - all joints are available in this mode. Select<br />
the Automatic option to activate automatic tool detection. This causes tools to be<br />
allocated automatically: tool W1 to joint 1 through to tool W5 to joint 5.<br />
Change level: 02/07 Version<br />
8000.15.2<br />
Page: 33 / 56
Operating Instructions<br />
<strong>DAZ</strong>-<strong>TA</strong> <strong>Pro</strong><br />
Example of tool detection in user mode without tool:<br />
Required tool (GET)<br />
Currently detected<br />
tool (ACT)<br />
new<br />
Tools:<br />
GET: W1 FBD8258<br />
ACT: <br />
The NEW joint is included in the selection and this joint requires Tool W1, designation<br />
FBD8258. The wrench will not be ready for use again until the correct tool (W1) has been<br />
attached.<br />
3.7.9.0 Main menu: Settings: Advanced settings<br />
Activate the settings menu as described at Point 3.7.0.0 and select the Extra setup menu<br />
option.<br />
SETTING MENU:<br />
Tool detection<br />
Adv. settings<br />
Calibration settings<br />
3.7.9.1 Main menu: Settings: Advanced settings: Wrench number<br />
Activate the advanced settings menu as described at Point 3.7.9.0 and select the Wrench<br />
no. menu option.<br />
Here, you can enter any number (max. 12 characters) which will then appear in the data<br />
record.<br />
ADVANCE MENU:<br />
Reset<br />
Wrench no.<br />
Unit<br />
WRENCH NO:<br />
5018<br />
SET : Clockw<br />
ESC : Ok -0-: Clr<br />
Change level: 02/07 Version<br />
8000.15.2<br />
Page: 34 / 56
Operating Instructions<br />
<strong>DAZ</strong>-<strong>TA</strong> <strong>Pro</strong><br />
3.7.9.2 Main menu: Settings: Advanced settings: Unit<br />
Activate the advanced settings menu as described at Point 3.7.9.0 and select the Unit<br />
menu option.<br />
ADVANCE MENU:<br />
Wrench no.<br />
Unit<br />
Language<br />
Unit:<br />
kgcm<br />
Nm<br />
cNm<br />
Select using the UP/DOWN selector keys and press the SET button to confirm the<br />
selection.<br />
e.g.: Nm (Nm, cNm, lbft, , lbfi, ozf, kgf cm, kgf m)<br />
Note: If the unit is changed on the wrench, the data for the joint will not be<br />
converted.<br />
3.7.9.3 Main menu: Settings: Advanced settings: Language<br />
Activate the advanced settings menu as described at Point 3.7.9.0 and select the<br />
Language menu option.<br />
ADVANCE MENU:<br />
Unit<br />
Language<br />
Turn-off time<br />
Language:<br />
Français<br />
Deutsch<br />
English<br />
Select using the UP/DOWN selector keys and press the SET button to confirm the<br />
selection.<br />
e.g.: German (German, French, English)<br />
Change level: 02/07 Version<br />
8000.15.2<br />
Page: 35 / 56
Operating Instructions<br />
<strong>DAZ</strong>-<strong>TA</strong> <strong>Pro</strong><br />
3.7.9.4 Main menu: Settings: Advanced settings: Turn-off time<br />
Activate the advanced settings menu as described at Point 3.7.9.0 and select the Turnoff<br />
time menu option.<br />
ADVANCE MENU:<br />
Language<br />
Turn-off time<br />
RS232/V.24<br />
TURN-OFF TIME:<br />
0 min<br />
Min: 0 Max: 60<br />
Use the UP/DOWN selector keys to set the required turn-off time and press the SET<br />
button to confirm the setting.<br />
e.g.: Default setting = 0 min (production operation)<br />
Note: If the wrench is used in conjunction with the cradle, automatic turn-off is not<br />
required.<br />
3.7.9.5 Main menu: Settings: Advanced settings: RS232/V.24<br />
Activate the advanced settings menu as described at Point 3.7.9.0 and select the<br />
RS232/V.24 menu option.<br />
ADVANCE MENU:<br />
Turn-off time<br />
RS232/V.24<br />
Reset<br />
BAUDRATE:<br />
9600<br />
19200<br />
300<br />
Select using the UP/DOWN selector keys and press the SET button to confirm<br />
the selection. The modified settings will not take effect until the wrench is switched<br />
off and on again.<br />
e.g.: Default = 19200 baud (300 – 19200 baud)<br />
Change level: 02/07 Version<br />
8000.15.2<br />
Page: 36 / 56
Operating Instructions<br />
<strong>DAZ</strong>-<strong>TA</strong> <strong>Pro</strong><br />
3.7.9.6 Main menu: Settings: Advanced settings: Reset<br />
Activate the advanced settings menu as described at Point 3.7.9.0 and select the Reset<br />
menu option.<br />
ADVANCE MENU:<br />
RS232/V.24<br />
Reset<br />
Wrench no.<br />
DELETE:<br />
Yes<br />
No<br />
Select using the UP/DOWN selector keys and press the SET button to confirm the<br />
selection. If you select the Yes option, the default values will be restored. (This<br />
deactivates autoprint, keypad lock, turn-off time; S<strong>TA</strong>TUS OUTPUT and sequence mode)<br />
Default setting:<br />
Extension<br />
= depends on type of wrench<br />
Start measuring<br />
= depends on type of wrench<br />
Advance warning point = 80%<br />
Default setting for internal joint:<br />
TORQUE MIN: = 30.0<br />
TORQUE MAX: = 40.0<br />
Minimum angle = 25%<br />
Maximum angle = 35%<br />
Snug point = 25.0<br />
Direction of rotation = Clockwise<br />
Priority = *<br />
Measuring mode<br />
= M0 (torque / angle)<br />
Tool = W1<br />
3.7.10.0 Main menu: Settings: Calibration settings<br />
Activate the settings menu as described at Point 3.7.0.0 and select the Calibr. Settings<br />
menu option.<br />
Note: The calibration menu is only accessible if you entered the appropriate code<br />
under Point 3.0.0.0.<br />
SETTING MENU:<br />
Adv. settings<br />
Calibration settings<br />
Tools<br />
CALIBRATION MENU:<br />
Flash update<br />
Calib. torque<br />
Calib.angle<br />
Select by using the UP/DOWN selector keys.<br />
Change level: 02/07 Version<br />
8000.15.2<br />
Page: 37 / 56
Operating Instructions<br />
<strong>DAZ</strong>-<strong>TA</strong> <strong>Pro</strong><br />
3.7.10.1 Main menu: Settings: Calibration settings: Torque calibration<br />
Activate the settings menu as described at Point 3.7.10.0 and select the Torque calibrate<br />
menu option.<br />
Before attempting to calibrate the wrench, ensure that the correct extension has<br />
been entered under 3.7.10.3 and use the Saltus software to back up the original<br />
calibration settings (factory settings) first.<br />
Caution! Press the SET button to activate the calibration mode.<br />
CALIBRATION MENU:<br />
Flash update<br />
Calib. torque<br />
Calib.angle<br />
Calib. torque:<br />
CP 5 1<br />
Use the UP/DOWN selector keys to select the calibration point.<br />
The wrench should be inspected at regular intervals. If the actual values no longer tally<br />
with the presets within the required tolerances, the wrench will need calibrating and<br />
adjusting .<br />
The <strong>DAZ</strong>-<strong>TA</strong> allows you to adjust the wrench up to 5 points in a negative or positive<br />
direction.<br />
IMPOR<strong>TA</strong>NT: At the minimum, calibration points CP 5 and CP -5 must be set.<br />
The display will then show:<br />
Calib. torque:<br />
CP 5 1<br />
Calib. torque:<br />
CP 5 0<br />
After you have activated the calibration mode, use the UP/DOWN selector keys to select<br />
the calibration point you wish to calibrate (CP 5, CP 4 etc.)<br />
Note that the highest calibration values must be set for points CP5 and CP -5.<br />
Example: <strong>DAZ</strong>-<strong>TA</strong> 100<br />
CP 5 100 Nm<br />
CP 4<br />
60 Nm<br />
CP 3<br />
CP 2<br />
CP 1<br />
CP -1<br />
CP -2<br />
CP -3<br />
CP -4<br />
20 Nm<br />
15 Nm<br />
10 Nm<br />
10 Nm<br />
15 Nm<br />
20 Nm<br />
60 Nm<br />
CP -5 100 Nm<br />
Note: Calibration in accordance with DIN EN ISO 6789 only requires you to set<br />
calibration points C5P and C5N.<br />
Change level: 02/07 Version<br />
8000.15.2<br />
Page: 38 / 56
Operating Instructions<br />
<strong>DAZ</strong>-<strong>TA</strong> <strong>Pro</strong><br />
Next, apply a known torque e.g. 200 Nm (<strong>DAZ</strong>-<strong>TA</strong>2) to the wrench. When you have<br />
reached your known value of 200 Nm, confirm by pressing the SET button. The wrench<br />
will save this load automatically and the display will show the preset:<br />
Calib. torque:<br />
CP 5 9587<br />
TORQUE PRESET:<br />
194.2 Nm<br />
Min: 2.0 Max: 220.0<br />
Use the UP/DOWN selector keys to set the current known value /preset (e.g. 194.2 Nm)<br />
for the load in Nm in the wrench.<br />
Preset<br />
(Current reading on the tester) :<br />
After setting, confirm the value by pressing the SET button.<br />
The wrench can now be released.<br />
If you wish to continue by calibrating additional points, you can select the next point using<br />
the UP/DOWN selector keys. Otherwise, press the ON/OFF button to return to the<br />
measuring mode where you can begin the next measurement with the calibrated wrench.<br />
When running the tests, check to see if:<br />
ACT= PRESET within a tolerance of 1% (196.3 – 204.3)<br />
Display <strong>DAZ</strong>-<strong>TA</strong>:<br />
Tester display:<br />
TEST 250 17:07<br />
R<br />
M1 200.77 Nm<br />
Change level: 02/07 Version<br />
8000.15.2<br />
Page: 39 / 56
Operating Instructions<br />
<strong>DAZ</strong>-<strong>TA</strong> <strong>Pro</strong><br />
3.7.10.2 Main menu: Settings: Calibration settings: Angle calibration<br />
Activate the settings menu as described at Point 3.7.10.0 and select the Calibr. angle<br />
menu option.<br />
Caution! The M0 measuring mode (torque/angle) must be activated. Press the SET<br />
button to activate the angle calibration mode, and ensure this process is correctly<br />
completed.<br />
CALIBRATION MENU:<br />
Calib. torque<br />
Calib.angle<br />
Extension<br />
Calibr. angle<br />
360.1°<br />
Next, rotate the wrench through one full circle (360°). When you have reached 360°,<br />
confirm this fact by pressing the SET button. The wrench will save this value automatically<br />
and the display will show: approx. 360 ° +/- 0.5°.<br />
Use the ON/OFF button to leave this menu option.<br />
3.7.10.3 Main menu: Settings: Calibration settings: Calibrating an extension<br />
Activate the settings menu as described at Point 3.7.10.0 and select the Extension menu<br />
option.<br />
CALIBRATION MENU:<br />
Calib.angle<br />
Extension<br />
Calib. date<br />
EXTENSION:<br />
25.0 mm<br />
Min: .0 Max: 200.0<br />
Enter here the corresponding calibration extension = tool length.<br />
9 x 12, the default is 17.5 mm.<br />
With the <strong>DAZ</strong>-<strong>TA</strong> 14 x 18, the default is 25.0 mm.<br />
With the <strong>DAZ</strong>-<strong>TA</strong><br />
See illustration under 3.7.1.1<br />
Note: If the calibration extension is to be changed, it is essential to perform a<br />
complete recalibration: see Point 3.7.10.1<br />
Change level: 02/07 Version<br />
8000.15.2<br />
Page: 40 / 56
Operating Instructions<br />
<strong>DAZ</strong>-<strong>TA</strong> <strong>Pro</strong><br />
3.7.10.4 Main menu: Settings: Calibration settings: Calibration date<br />
Activate the settings menu as described at Point 3.7.10.0 and select the Calibr. Date<br />
menu option.<br />
CALIBRATION MENU:<br />
Extension<br />
Calib. date<br />
Calib. counter<br />
YEAR:<br />
7<br />
Min: 0 Max: 99<br />
MONTH:<br />
6<br />
Min: 1 Max: 12<br />
Enter here the date for the next scheduled test. In this example, if the wrench is switched<br />
on after 1 June 2007, the user will see this message: "Check calibration"<br />
Message:<br />
Check Calibr.!<br />
CC: 2<br />
Press the ON/OFF button to override the message and continue working.<br />
The message is deactivated when the calibration date is changed.<br />
3.7.10.5 Main menu: Settings: Calibration settings: Calibration counter<br />
Besides Point 3.7.10.4 (Calibration date), it is possible to set a counter for all the joints<br />
tightened.<br />
Activate the settings menu as described at Point 3.7.10.0 and select the Calibr. Counter<br />
menu option.<br />
CALIBRATION MENU:<br />
Calib. date<br />
Calib. counter<br />
Flash update<br />
COUNTER:<br />
30<br />
Min: 1 Max: 5000<br />
Set the point at which you wish to be reminded of the next check. The preset<br />
counter/cycle counts down every 100th reading (30 * 100 = 3000 readings) until zero is<br />
reached. In this example, if the wrench is switched on after that, the user will see this<br />
message: Check Calibr.!<br />
Change level: 02/07 Version<br />
8000.15.2<br />
Page: 41 / 56
Operating Instructions<br />
<strong>DAZ</strong>-<strong>TA</strong> <strong>Pro</strong><br />
Message:<br />
Check Calibr.!<br />
CC: 2<br />
Press the ON/OFF button to override the message and continue working. The message is<br />
deactivated when the calibration counter is reset.<br />
3.7.10.6 Main menu: Settings: Calibration settings: Mechanical overload<br />
If a joint measurement takes place outside the measuring range (actual torque ≥ max. limit<br />
of measuring range + 10% e.g. 275 Nm with the <strong>DAZ</strong>-<strong>TA</strong> 250 2-250 Nm), then this<br />
message appears on the display and the counter is reset.<br />
Message 'CC' appears after the direction of rotation on the display and remains visible<br />
until the wrench is switched off.<br />
CC = overload<br />
INTERN 14:39<br />
R CC<br />
M0 0.00 Nm<br />
Important note:<br />
After an overload, the wrench should be subjected to a thorough<br />
inspection and, if necessary, recalibrated.<br />
Message:<br />
Check Calibr.!<br />
CC: 1<br />
Press the ON/OFF button to override the message and continue working.<br />
The message is deactivated when the calibration counter is reset.<br />
Change level: 02/07 Version<br />
8000.15.2<br />
Page: 42 / 56
Operating Instructions<br />
<strong>DAZ</strong>-<strong>TA</strong> <strong>Pro</strong><br />
3.7.10.7 Main menu: Settings: Calibration settings: Flash update<br />
Activate the settings menu as described at Point 3.7.10.0 and select the Flash update<br />
menu option.<br />
Caution! Firmware updates can only be performed by SALTUS.<br />
CALIBRATION MENU:<br />
Calib. counter<br />
Flash update<br />
Calib. torque<br />
Load programme<br />
Yes<br />
No<br />
Only possible with additional flash software<br />
from SALTUS. Press the SET button and<br />
select the "No" option to abort the process<br />
without updating.<br />
3.8.0.0 Main menu: Information<br />
Activate the main menu as described at Point 3.0.0.0 and select the Information menu<br />
option.<br />
Main menu:<br />
Settings<br />
Information<br />
Enter preset<br />
14:35 08/06/2006<br />
Joint: 14<br />
Battery: 10 MEM: 12<br />
TID : FBD8258<br />
Joint:<br />
Total number of joints (max. 50)<br />
Battery:<br />
Battery status (1 = empty, 10= full)<br />
MEM/memory:<br />
Number of stored readings<br />
TID/tool ID:<br />
Tool detected<br />
Change level: 02/07 Version<br />
8000.15.2<br />
Page: 43 / 56
Operating Instructions<br />
<strong>DAZ</strong>-<strong>TA</strong> <strong>Pro</strong><br />
3.9.0.0 Main menu: Statistics<br />
Use the Statistics option to call up a subsequent statistical analysis of joints processed.<br />
Activate the main menu as described at Point 3.0.0.0 and select the Statistics menu<br />
option.<br />
Main menu:<br />
Memory<br />
Statistics<br />
Tare angle<br />
The following parameters can be entered here for calculating statistics.<br />
Number of readings to be used for the calculation.<br />
NUMBER:<br />
Min:10<br />
25<br />
max:4000<br />
Joint to be evaluated:<br />
S<strong>TA</strong>T. JOINT:<br />
60.0 Nm ± 1%<br />
ON/OFF: Esc<br />
SET: OK<br />
Tightening mode:<br />
S<strong>TA</strong>T. IDENTIFIER:<br />
D<br />
ON/OFF: Esc<br />
SET: OK<br />
0-: n Normal (torque and angle)<br />
1: D Torque<br />
2: a Analogue/track<br />
3: PT Prevail torque<br />
4: U Loosen/unfix<br />
5: O Either/or<br />
6-: S yield point (YP)<br />
7-: L Breakaway torque<br />
8-: FT final torque<br />
Change level: 02/07 Version<br />
8000.15.2<br />
Page: 44 / 56
Operating Instructions<br />
<strong>DAZ</strong>-<strong>TA</strong> <strong>Pro</strong><br />
X value:<br />
X value:<br />
3<br />
Min:1<br />
max:10<br />
X value determines whether the process or<br />
machine capability is to be calculated<br />
(range is 1 to 10, default: 3)<br />
Setting determines whether only "good" joints or also "bad" joints are to be included.<br />
ONLY OK’s<br />
No<br />
Yes<br />
No = Evaluate OK and NOT OK data records<br />
Yes = Evaluate only OK data records<br />
After all the entries have been made, the wrench will automatically display the results of<br />
the calculation:<br />
0,4%<br />
# 25 torque<br />
std.dv 0.050 0.000<br />
cm/p 4.021 0.000<br />
cmk/pk 3.147 0.000<br />
Standard deviation = 0.050<br />
Cm value = 4.021<br />
Cmk value = 3.147<br />
Deviation in %<br />
Abweichung %<br />
0,3%<br />
0,2%<br />
0,1%<br />
0,0%<br />
-0,1%<br />
1 2 3 4 5 6 7 8 9 10 11 12 13 14 15 16 17 18 19 20 21 22 23 24 25<br />
-0,2%<br />
-0,3%<br />
-0,4%<br />
2424-9909005<br />
Press the ON/OFF button to return to the main menu.<br />
Change level: 02/07 Version<br />
8000.15.2<br />
Page: 45 / 56
Operating Instructions<br />
<strong>DAZ</strong>-<strong>TA</strong> <strong>Pro</strong><br />
4. Power supply<br />
The torque wrench will run for 8 hours on 3 x 1.2V NiMH AA 2450 mAh rechargeable<br />
cells. When it is not in use, please replace the torque wrench in its charging cradle and<br />
ensure that it makes contact with the charger contacts.<br />
0h<br />
Charge battery!<br />
1....………10<br />
2h<br />
Charge battery!<br />
1...................10<br />
If the wrench is switched off, this<br />
message will appear. The progress bar<br />
shows the current battery status (1-10).<br />
If the battery is completely drained, it will<br />
take approx. 30 min. until status 1 is<br />
attained.<br />
This charging process has completed and<br />
the progress bar shows status 10, while at<br />
the bottom left the total charging time in<br />
hours is displayed (2 hours).<br />
Change level: 02/07 Version<br />
8000.15.2<br />
Page: 46 / 56
Operating Instructions<br />
<strong>DAZ</strong>-<strong>TA</strong> <strong>Pro</strong><br />
4.1 Charging the battery<br />
If, during a measuring operation, the symbol "BAT" appears in the bottom right-hand<br />
corner of the display,<br />
BOLT1/MI# 1 17:39<br />
R<br />
M0 0.00 Nm<br />
NEWSEQ<br />
BAT<br />
the torque wrench has to be recharged in the charging cradle. If the battery is completely<br />
flat, recharging will take approx. 10–12 hours. A normal charge will take approx. 1-2 hours.<br />
During the charging process (with the wrench switched off), the progress bar will be seen<br />
on the display. The charge control monitors the recharging process and switches off the<br />
charger when the battery is fully charged.<br />
If the wrench is in the charging cradle but switched on, the message "Tara" appears on<br />
the display.<br />
INTERN<br />
13:32<br />
R<br />
<strong>TA</strong>RA<br />
0.00 Nm<br />
If the wrench is in its charging cradle, the angle<br />
zeroing process takes place automatically as a<br />
background process.<br />
The wrench is ready for use at any time.<br />
During this process, the main menu is blocked.<br />
.<br />
IMPOR<strong>TA</strong>NT: Only use the cradle supplied with the wrench!<br />
4.2 Changing the battery<br />
First, switch the wrench off by pressing the ON/OFF button for several seconds.<br />
To change the cells, remove the lid at the end of the handle and replace the 3<br />
rechargeable batteries(Type: 1.2V NiMH AA 2450 mAh). Your measuring data, history,<br />
sequences, joints and time data will be retained for the duration of the battery change<br />
(approx. 10 min). Calibration and tool data are stored in such a way that they are retained<br />
irrespective of the power supply. .<br />
Important notes:<br />
- NEVER turn on the torque wrench without batteries in place as otherwise the stored data<br />
may be irretrievably lost = reset (sequences, joints, date and time)<br />
-<br />
Change level: 02/07 Version<br />
8000.15.2<br />
Page: 47 / 56
Operating Instructions<br />
<strong>DAZ</strong>-<strong>TA</strong> <strong>Pro</strong><br />
- Leaking batteries and cells can cause damage to torque wrenches. If you intend not to<br />
use the torque wrench for a longer period, remove the cells.<br />
-<br />
- Replace battery cells if you notice they are becoming weaker. When you change cells,<br />
replace all of them together and use replacements of the same kind.<br />
-<br />
- Dispose of old batteries in accordance with legal waste disposal regulations. Do not<br />
dispose of them with household rubbish.<br />
5. Data transfer<br />
5.1 Transferring data to the printer<br />
You can transfer data records directly from the torque wrench to a printer or PC. For this<br />
function, any printer or PC with a serial port and a data memory will suffice.<br />
First, it is necessary to set the torque wrench and the printer to the same communications<br />
settings. Set both to the same baud rate. The factory setting for the <strong>DAZ</strong>-<strong>TA</strong> is 19200<br />
baud. If you wish to change this, proceed as described at Point 3.7.9.5.<br />
When the printer or PC is connected, you can then transmit each data record by pressing<br />
the Print button. At the same time, the wrench is reset to zero, the same as if you press<br />
the zero button, and is then ready for the next job.<br />
Every data record contains the following data in this order:<br />
Sample of a data record:<br />
725 2 1 2 N 31.53 Nm 16.27 20.00 40.00 10.00 20.00 18.00 07/06/2006 18:38:45 Ok 8008 W0LT2123456<br />
Data record 725<br />
Sequence 2<br />
Step 1<br />
Joint 2<br />
Measuring mode<br />
N = Normal (torque and tightening angle) - refer to markings<br />
Torque 31.53<br />
Unit<br />
Nm<br />
Angle bracket 16.27°<br />
Min. 20.0<br />
Max. 40.0<br />
Min. angle 10.0<br />
Max. angle 20.0<br />
Snug point 18.0<br />
Date 07.06.2006<br />
Time 18:38:45<br />
Status OK refer to status messages<br />
Wrench number 8008<br />
Identity<br />
W0LT2123456<br />
Measuring mode: 0 = torque/angle Code in data record: n<br />
1 = Torque D<br />
2 = Track a<br />
3 = Prevail torque L,W,E<br />
4 = loosen U<br />
5 = Torque and/or angle measurement O<br />
6 = Yield point S<br />
Status messages:<br />
OK<br />
Good (OK) (depends on measuring mode!)<br />
Not OK Reject (Not OK)<br />
DDT<br />
Existing joint detected (Not OK)<br />
MVA Maximum angle rate exceeded (Not OK)<br />
Change level: 02/07 Version<br />
8000.15.2<br />
Page: 48 / 56
Operating Instructions<br />
<strong>DAZ</strong>-<strong>TA</strong> <strong>Pro</strong><br />
Identification:<br />
n<br />
D<br />
a<br />
PT<br />
U<br />
O<br />
S<br />
L<br />
FT<br />
Normal (torque and angle)<br />
Torque<br />
Analogue/track<br />
Prevail torque<br />
Loosen/unfix<br />
Torque and/or angle measurement<br />
Yield point (YP)<br />
Breakaway torque<br />
Final torque<br />
5.2 Transferring data to and from a PC<br />
As described at Point 5.1, you can transfer data to a PC rather to the printer.<br />
You will need a data transfer cable and corresponding software. The SALTUS <strong>DAZ</strong>-<strong>TA</strong><br />
software is available free-of-charge as a download from www.saltus-werk.de under<br />
Service Software.<br />
First, it is necessary to set the torque wrench and the computer to the same<br />
communications settings. Set both to the same baud rate. The factory setting for the <strong>DAZ</strong>-<br />
<strong>TA</strong> is 19200 baud. If you wish to change this, proceed as described at Point 3.7.9.5.<br />
When the wrench is connected to the PC, you can transmit each data record to the<br />
computer software by pressing the Print button. At the same time, the wrench is reset to<br />
zero, the same as if you press the zero button, and is then ready for the next job.<br />
In addition, the Saltus software enables you to perform all the settings for the wrench<br />
online and to read out the calibration details for storage on a data storage medium.<br />
6. Service<br />
If you have any queries about working with any of our torque wrenches, we will pleased to<br />
assist you.<br />
SALTUS-WERK Max Forst GmbH<br />
Schaberger Str. 49-53<br />
42659 Solingen, Germany<br />
Tel: +49 (0)212 5960 220<br />
Fax: +49 (0)212 5960 222<br />
Email: tools@saltus.de<br />
http: http://www.saltus-werk.de/<br />
Change level: 02/07 Version<br />
8000.15.2<br />
Page: 49 / 56
Operating Instructions<br />
<strong>DAZ</strong>-<strong>TA</strong> <strong>Pro</strong><br />
7. Important notes<br />
7.1 Disclaimer<br />
SALTUS-Werk Max Forst GmbH has taken every effort to ensure that the details contained in this<br />
Manual are correct at the moment of publication. However SALTUS ® reserves the right to modify<br />
the technical specifications or functions of its own products, to cease production of a product or to<br />
cease providing support for a product without prior notice of any kind to customers. Customers<br />
are required to ensure that the information on which they base decisions is valid. SALTUS ®<br />
cannot accept any liability for any damage or injury sustained in the use of its products. SALTUS ®<br />
does not grant licences to use its patents or any other proprietary rights, intellectual property<br />
rights or the rights of Third Parties. Customers are responsible for ensuring that their systems in<br />
which SALTUS ® products are integrated comply with the appropriate legal provisions.<br />
7.2 Trade marks<br />
SALTUS ® is a registered trademark of SALTUS-Werk Max Forst GmbH. All other trademarks,<br />
registered trademarks and product names mentioned here are the sole property of their<br />
respective owners.<br />
7.3 Restrictions on use<br />
SALTUS ® products are not approved for use with life-support or lifesaving equipment or other<br />
equipment which, in the event of a failure of that equipment, may lead to considerable danger to<br />
the life and limb of the user. SALTUS ® products are also not approved for use as an integral part<br />
of life-support or lifesaving equipment or other equipment which, in the event of a failure of those<br />
products, may lead to a failure or malfunction in that life-support equipment. SALTUS ® customers<br />
who use these products for such applications or resell them for use in such applications are<br />
deemed to be acting at their own risk and undertake to hold SALTUS ® free of any claims for<br />
damages resulting from the sales of such a product for an unsuitable purpose or from the<br />
unsuitable application.<br />
By using SALTUS ® products, users are agreeing to be bound by these terms & conditions.<br />
7.4 Warranty notes<br />
SALTUS ® grants 12 months' warranty on its torque wrenches based on single-shift operation and<br />
use. The warranty is deemed to be adapted accordingly if the tool is used in multi-shift operation.<br />
Caution!<br />
Unauthorised opening of the housing or inappropriate use, will cause the guarantee or<br />
warranty to become void.<br />
Change level: 02/07 Version<br />
8000.15.2<br />
Page: 50 / 56
Operating Instructions<br />
<strong>DAZ</strong>-<strong>TA</strong> <strong>Pro</strong><br />
7.5 Service notes<br />
In the event that the product has to be returned to SALTUS® , the entire unit (consisting of the<br />
torque wrench, rechargeable cells, cradle, mains adaptor etc.) must be returned to enable the<br />
matter to be processed by SALTUS® in the shortest possible time.<br />
In addition, it is important to attach a detailed failure or service report, preferably using the<br />
SALTUS® service form, which is available direct from us or can be copied from the Appendix of<br />
this manual.<br />
Alternatively, the form can be downloaded from our website under "Downloads" (www.saltuswerk.de/service_downloads_text.html).<br />
Change level: 02/07 Version<br />
8000.15.2<br />
Page: 51 / 56
Operating Instructions<br />
<strong>DAZ</strong>-<strong>TA</strong> <strong>Pro</strong><br />
SALTUS-WERK Max Forst GmbH<br />
Schaberger Str. 49 - 53<br />
42659 Solingen, Germany<br />
Telephone: +49 212 5960 – 220<br />
Facsimile: +49 212 5960 – 222<br />
Internet: www.saltus-werk.de<br />
email: tools@saltus.de<br />
Customer<br />
Date:<br />
Company:<br />
Department:<br />
Name:<br />
Street address:<br />
Postcode / town<br />
Telephone:<br />
Fax:<br />
E-mail:<br />
Service - electronic torque wrenches<br />
(Please complete as many details as possible. If we have any queries, we will contact you without delay).<br />
Model…………………………… Manufacturer SALTUS ………………………..<br />
(Manufacturer of third-party tool)<br />
Calibration date………………….. Serial number ……………………<br />
Date of invoice………………..<br />
Number of cutouts………………………<br />
per Day Shift Week<br />
Maximum load………… Nm<br />
Service - Calibration - Repair<br />
No visual signal for OK and/or Not OK joints (LEDs)<br />
No charge display/battery does not charge Cannot be switched on<br />
Some or all keys do not function<br />
Display incomplete, unreadable<br />
No OK and/or Not OK signal via radio Displayed readings are outside tolerance /<br />
(calibration)<br />
No reading in display<br />
No acoustic signal for OK and/or Not OK joints<br />
(beep)<br />
Error message in display ("Err", "OFFS",…): No wireless data transmission<br />
Software update<br />
No data transfer vie induction interface<br />
German Calibration Service (DKD)<br />
No data transfer via interface in handle<br />
calibration<br />
Scheduled calibration<br />
No data transfer via interface in base<br />
External damage:<br />
Miscellaneous defects:<br />
Description of error:<br />
Error is immediate/permanent<br />
Error occurs under the following circumstances:<br />
Error is intermittent<br />
Quotation required Yes No<br />
If the repair costs exceed € ................ or ……… % of the value of a new<br />
tool, please quote us for a new wrench.<br />
(Please delete as appropriate)<br />
Change level: 02/07 Version<br />
8000.15.2<br />
Page: 52 / 56
Operating Instructions<br />
<strong>DAZ</strong>-<strong>TA</strong> <strong>Pro</strong><br />
Change level: 02/07 Version<br />
8000.15.2<br />
Page: 53 / 56
Operating Instructions<br />
<strong>DAZ</strong>-<strong>TA</strong> <strong>Pro</strong><br />
SALTUS-WERK Max Forst GmbH<br />
Schaberger Str. 49 - 53<br />
42659 Solingen, Germany<br />
Telephone: +49 212 5960 – 220<br />
Facsimile: +49 212 5960 – 222<br />
Internet: www.saltus-werk.de<br />
email: tools@saltus.de<br />
Type of tool<br />
(please tick, refer also<br />
to Appendix I: List of<br />
options)<br />
Sender<br />
Date:<br />
Company:<br />
Department:<br />
Name:<br />
Street address:<br />
Postcode / town<br />
Telephone:<br />
Fax:<br />
E-mail:<br />
Enquiry form for customer-specific tool development<br />
Please fill in all the details you can. If we have any queries, we will contact you without delay.<br />
Flexible head<br />
spanner<br />
Socket insert<br />
Screwdriver<br />
Extension<br />
Adapter<br />
Torque wrench<br />
Options and variants<br />
Reduction piece<br />
Combined tool<br />
Holder<br />
Bit<br />
Other:<br />
Quantity<br />
(Qty. steps)<br />
Preferred<br />
deadline<br />
Applicatio<br />
n<br />
Manual<br />
Powered<br />
Drive<br />
(please tick)<br />
DIN 3121 (square) DIN 3126 (hex) Other<br />
1/4" 3/8" 1/2" 5/8" 3/4" 1" C6.3 E6.3 C8 E11.2<br />
Hex Surface Drive TORX®<br />
Multipoint-head XZN<br />
Other:<br />
Take-off<br />
Outer inside Outer inside Outer Inner<br />
Spanner size<br />
Overall length mm Material Hardness HRC<br />
Dimensions<br />
Max. diameter at drive end Max. diameter at take-off end Working depth<br />
Tightening torque Nm Angle Degrees Min.<br />
Torque<br />
Nm<br />
Max.<br />
Torque<br />
Nm<br />
Particular details<br />
Permanent<br />
magnet<br />
Springloaded<br />
magnet<br />
Ejector<br />
<strong>Pro</strong>tective coating<br />
(e.g. <strong>Pro</strong>tefan, VDE insulation<br />
etc.)<br />
Other<br />
Comments (e.g. your<br />
drawing no., product<br />
no., particular delivery<br />
instructions etc.).<br />
Please use extra sheet,<br />
Appendix II, for<br />
drawings/sketches.<br />
Change level: 02/07 Version<br />
8000.15.2<br />
Page: 54 / 56
Operating Instructions<br />
<strong>DAZ</strong>-<strong>TA</strong> <strong>Pro</strong><br />
SALTUS-WERK Max Forst GmbH<br />
Schaberger Str. 49 - 53<br />
42659 Solingen, Germany<br />
Telephone: +49 212 5960 – 220<br />
Facsimile: +49 212 5960 – 222<br />
Internet: www.saltus-werk.de<br />
email: tools@saltus.de<br />
Sender<br />
Date:<br />
Company:<br />
Department:<br />
Name:<br />
Street address:<br />
Postcode / town<br />
Telephone:<br />
Fax:<br />
E-mail:<br />
Appendix I: List of options<br />
Flexible head spanner Socket Screwdriver<br />
Extension Adapter Reduction<br />
piece<br />
Holder<br />
Bit<br />
Torque wrench<br />
Simply tick the type of tool you need and enter the dimensions if you already know them.<br />
L: d1: Drive:<br />
L1: d2: Take-off:<br />
t: d3:<br />
Explanation: L = length d = diameter t = depth<br />
Change level: 02/07 Version<br />
8000.15.2<br />
Page: 55 / 56
Operating Instructions<br />
<strong>DAZ</strong>-<strong>TA</strong> <strong>Pro</strong><br />
SALTUS-WERK Max Forst GmbH<br />
Schaberger Str. 49 - 53<br />
42659 Solingen, Germany<br />
Telephone: +49 212 5960 – 220<br />
Facsimile: +49 212 5960 – 222<br />
Internet: www.saltus-werk.de<br />
email: tools@saltus.de<br />
Sender<br />
Date:<br />
Company:<br />
Department:<br />
Name:<br />
Street address:<br />
Postcode / town<br />
Telephone:<br />
Fax:<br />
E-mail:<br />
Appendix II: Extra sheet for sketches<br />
Change level: 02/07 Version<br />
8000.15.2<br />
Page: 56 / 56