Sun Fire X4100 and Sun Fire X4200 Installation Guide
Sun Fire X4100 and Sun Fire X4200 Installation Guide
Sun Fire X4100 and Sun Fire X4200 Installation Guide

You also want an ePaper? Increase the reach of your titles
YUMPU automatically turns print PDFs into web optimized ePapers that Google loves.
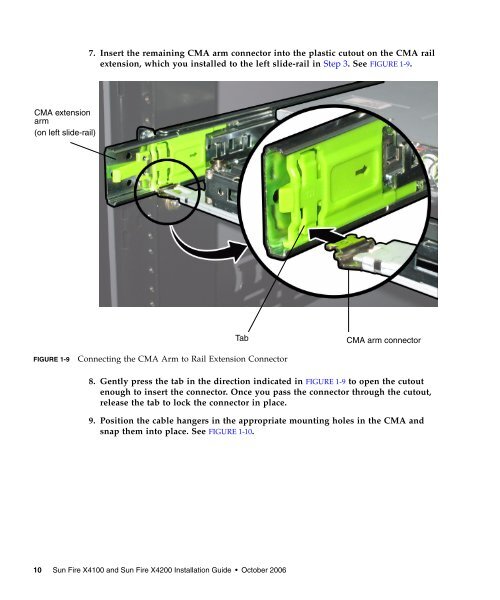
7. Insert the remaining CMA arm connector into the plastic cutout on the CMA rail<br />
extension, which you installed to the left slide-rail in Step 3. See FIGURE 1-9.<br />
CMA extension<br />
arm<br />
(on left slide-rail)<br />
Tab<br />
CMA arm connector<br />
FIGURE 1-9<br />
Connecting the CMA Arm to Rail Extension Connector<br />
8. Gently press the tab in the direction indicated in FIGURE 1-9 to open the cutout<br />
enough to insert the connector. Once you pass the connector through the cutout,<br />
release the tab to lock the connector in place.<br />
9. Position the cable hangers in the appropriate mounting holes in the CMA <strong>and</strong><br />
snap them into place. See FIGURE 1-10.<br />
10 <strong>Sun</strong> <strong>Fire</strong> <strong>X4100</strong> <strong>and</strong> <strong>Sun</strong> <strong>Fire</strong> <strong>X4200</strong> <strong>Installation</strong> <strong>Guide</strong> • October 2006