Likewise Open Installation and Administration Guide - Purple Rage
Likewise Open Installation and Administration Guide - Purple Rage
Likewise Open Installation and Administration Guide - Purple Rage
Create successful ePaper yourself
Turn your PDF publications into a flip-book with our unique Google optimized e-Paper software.
5. Follow the instructions in the installer.<br />
4.6. Install the Agent on a Mac Computer<br />
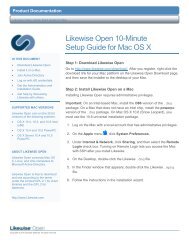
To install the <strong>Likewise</strong> agent on a computer running Mac OS X, you must have administrative privileges on the Mac. <strong>Likewise</strong> supports Mac OS X 10.4<br />
or later.<br />
1. Obtain the <strong>Likewise</strong> agent installation package for your Mac from <strong>Likewise</strong> Software <strong>and</strong> place it on your desktop.<br />
Important: On an Intel-based Mac, install the i386 version of the .dmg package. On a Mac that does not have an Intel chip, install the powerpc<br />
version of the .dmg package. On Mac OS X 10.6 (Snow Leopard), you must use the 10.6 universal installation package.<br />
2. Log on the Mac with a local account.<br />
3. On the Apple menu , click System Preferences.<br />
4. Under Internet & Network, click Sharing, <strong>and</strong> then select the Remote Login check box. Turning on Remote Login lets you access the Mac with<br />
SSH after you install <strong>Likewise</strong>.<br />
5. On the Mac computer, go to the Desktop <strong>and</strong> double-click the <strong>Likewise</strong> .dmg file.<br />
6. In the Finder window that appears, double-click the <strong>Likewise</strong> .mpkg file.<br />
7. Follow the instructions in the installation wizard.<br />
When the wizard finishes installing the package, you are ready to join the Mac computer to an Active Directory domain.<br />
4.7. Install the Agent on a Mac in Unattended Mode<br />
The <strong>Likewise</strong> comm<strong>and</strong>-line tools can remotely deploy the shell version of the <strong>Likewise</strong> agent to multiple Mac OS X computers, <strong>and</strong> you can automate<br />
the installation of the agent by using the installation comm<strong>and</strong> in unattended mode.<br />
The comm<strong>and</strong>s in this procedure require administrative privileges.<br />
Important: For Intel-based Macs, use the i386 version of the .dmg installer; for example: <strong>Likewise</strong>Enterprise-6.1.0.3628-i386.dmg. For Macs<br />
that do not have Intel chips, use the powerpc version of the .dmg installer; for example: <strong>Likewise</strong>Enterprise-6.1.0.3628-powerpc.dmg<br />
The procedure below assumes you are installing the agent on an i386 Mac; if you are installing on a powerpc, replace the i386 installer with the powerpc<br />
installer.<br />
1. Use SSH to connect to the target Mac OS X computer <strong>and</strong> then use SCP to copy the .dmg installation file to the desktop of the Mac or to a<br />
location that can be accessed remotely. The rest of this procedure assumes that you copied the installation file to the desktop.<br />
2. On the target Mac, open Terminal <strong>and</strong> then use the hdiutil mount comm<strong>and</strong> to mount the .dmg file under Volumes:<br />
/usr/bin/hdiutil mount Desktop/<strong>Likewise</strong>Enterprise-6.1.0.3628-i386.dmg<br />
3. Execute the following comm<strong>and</strong> to open the .mpkg volume:<br />
/usr/bin/open Volumes/<strong>Likewise</strong>Enterprise-6.1.0.3628-i386<br />
4. Execute the following comm<strong>and</strong> to install the agent:<br />
sudo installer -pkg /Volumes/<strong>Likewise</strong>Enterprise-6.1.0.3628-i386/<strong>Likewise</strong>Enterprise-6.1.0.3628-i386.mpkg -<br />
target LocalSystem<br />
Note: For more information about the installer comm<strong>and</strong>, in Terminal execute the following comm<strong>and</strong>:<br />
man installer<br />
5. To join the domain, execute the following comm<strong>and</strong> in the Terminal, replacing domainName with the FQDN of the domain that you want to join<br />
<strong>and</strong> joinAccount with the user name of an account that has privileges to join computers to the domain:<br />
sudo /opt/likewise/bin/domainjoin-cli join domainName joinAccount<br />
Example: sudo /opt/likewise/bin/domainjoin-cli join likewisedemo.com Administrator<br />
Terminal prompts you for two passwords: The first is for a user account on the Mac that has admin privileges; the second is for the user account in<br />
Active Directory that you specified in the join comm<strong>and</strong>.<br />
Note: You can also add the password for joining the domain to the comm<strong>and</strong>, but <strong>Likewise</strong> recommends against this approach because another<br />
user could view <strong>and</strong> intercept the full comm<strong>and</strong> that you are running, including the password:<br />
sudo /opt/likewise/bin/domainjoin-cli join domainName joinAccount joinPassword<br />
Example: sudo /opt/likewise/bin/domainjoin-cli join likewisedemo.com Administrator YourPasswordHere<br />
4.8. Installing the Agent in Solaris Zones<br />
Solaris Zones are a virtualization technology created by Sun Microsystems to consolidate servers. Primarily used to isolate an application, Solaris Zones<br />
act as isolated virtual servers running on a single operating system, making each application in a collection of applications seem as though it is running<br />
on its own server. A Solaris Container combines system resource controls with the virtual isolation provided by zones.<br />
Every zone server contains a global zone that retains visibility <strong>and</strong> control in any installed non-global zones. By default, the non-global zones share<br />
certain directories, including /usr, which are mounted read-only. The shared directories are writable only for the global zone.<br />
By default, installing <strong>Likewise</strong> in the global zone results in it being installed in all the non-global zones. You can, however, control the target of the<br />
installation by using the following options of the SFX installer:


