Service Manual
Service Manual
Service Manual

Create successful ePaper yourself
Turn your PDF publications into a flip-book with our unique Google optimized e-Paper software.
Guide sleeves<br />
Com putenzed i g n it ion syste ms<br />
60<br />
]..<br />
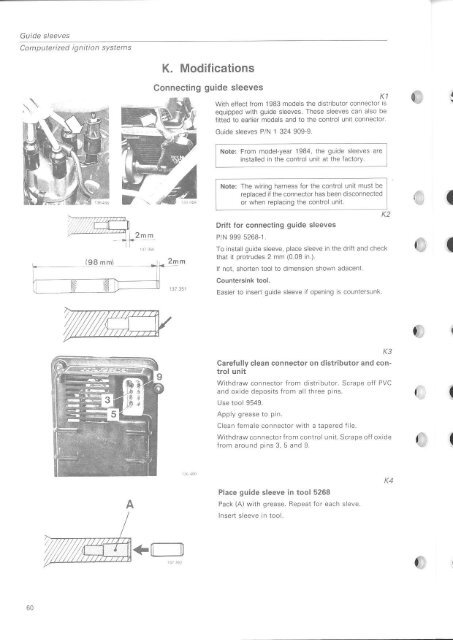
K. Modif ications<br />
Connecting guide sleeves<br />
2mm<br />
+tt-tr<br />
K1<br />
With eifeci from 1983 models lhe dislributor connector is<br />
equipped with gulde sleeves. These sleeves can also be<br />
fitted to eadier models and to the conlrol unit conneclor.<br />
Guide sleeves P/N 1 324 909-9.<br />
Note: From modelyear 1984. the guide sleeves are<br />
installed in the control unit at lhe taclory.<br />
Note: The wiing harness for lhe control unil musl be<br />
rcplaced il the connector has been disconnected<br />
or when replacing the control unrt.<br />
K2<br />
Orill lor connecling guide sleeves<br />
P/N 999 5268-1.<br />
To install guide sleeve, place sleeve in the drift and check<br />
that it protrudes 2 mm (0.08 in.)<br />
f nol, shone. loollo drrenson sl'own adacenl<br />
Easier lo insert guide sleeve it opening s countersunk.<br />
K3<br />
Caretully clean connector on distribulor and control<br />
unit<br />
Withdraw connector from distribulor. Scrape off PVC<br />
and oxide deposits from all lhree pins.<br />
Use tool 9549.<br />
Apply grease to pin.<br />
Clean female connector with a tapered file.<br />
Withdraw connector from control unit. Scrape off oxide<br />
from around pins 3, 5 and L<br />
Place guide sleevein<br />
tool 5268<br />
Pack (A) with grease. Repeat for each sleve<br />
Inse( sleeve in tool,<br />
K4<br />
o<br />
j<br />
I<br />
I