Instruction manual - VACOped
Instruction manual - VACOped
Instruction manual - VACOped

You also want an ePaper? Increase the reach of your titles
YUMPU automatically turns print PDFs into web optimized ePapers that Google loves.
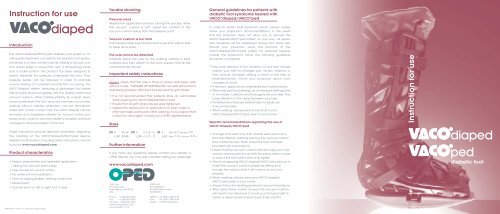
<strong>Instruction</strong> for use<br />
Introduction<br />
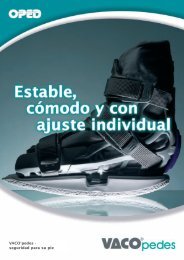
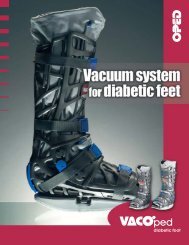
The VACO ® diaped/VACO ® ped diabetic foot system is an<br />
orthopedic treatment concept for the diabetic foot syndrome<br />
similar to a total contact cast. By utilizing a vacuum cushion<br />
(bean bag) in conjunction with a dampening insole<br />
and a rocker bottom, the product has been designed to<br />
evenly distribute the pressure underneath the foot. Thus,<br />
pressure peaks can be reduced in order to promote<br />
wound healing or to prevent wounds from occurring. The<br />
VACO ® diaped system, featuring a lightweight but stable<br />
lattice frame structure together with the before mentioned<br />
vacuum cushion, offers cast-like stability. As a result, shear<br />
forces underneath the foot, as would normally occur when<br />
walking without cast-like protection, can be diminished.<br />
Unlike with a total contact cast, the VACO ® diaped can be<br />
removed and reapplied instantly for wound control purposes<br />
and in order to accommodate for possible structural<br />
changes to the bone system of the foot.<br />
Trouble shooting<br />
Pressure areas<br />
Repeat the application process. During the process, while<br />
the vacuum cushion is soft, adjust the content of the<br />
vacuum cushion away from the pressure point.<br />
Vacuum cushion is too hard<br />
Pull colored valve ring forward and move from side to side<br />
to allow air to enter.<br />
The sole cannot be attached<br />
Carefully bend the sole so the walking surface is bent<br />
outward and then attach to the boot. Inspect that all the<br />
connectors are secure.<br />
Important safety instructions<br />
Always check that the sole is firmly in place and never walk<br />
without a sole – DANGER OF SLIPPING! Do not walk without front<br />
shell being properly attached and secured by girth straps.<br />
• It is not recommended that patients drive an automobile<br />
while wearing the VACO ® diaped/VACO ® ped.<br />
• Ensure that all girth straps are securely tightened.<br />
• Inspect the device prior to application for tears, holes or<br />
other damage, particularly after washing. If you suspect that<br />
a device is damaged, contact your OPED representative.<br />
Sizes<br />
General guidelines for patients with<br />
diabetic foot syndrome treated with<br />
VACO ® diaped/VACO ® ped<br />
In order to obtain best treatment results, please closely<br />
follow your physician’s recommendations. In the event<br />
that the physician does not allow you to remove the<br />
VACO ® diaped/VACO ® ped system on your own, all necessary<br />
measures will be addressed during your office visit.<br />
Should your physician allow the removal of the<br />
VACO ® diaped/VACO ® ped system for personal hygiene<br />
outside the physician’s office, the following guidelines<br />
should be considered:<br />
• Pay close attention to the condition of your feet. Visually<br />
inspect your feet for changes such as skin irritations or<br />
new wounds (consider utilizing a mirror or the help of<br />
relatives/friends). Inform your physician about such<br />
changes at once!<br />
• If relevant, apply doctor prescribed skin care products.<br />
• When allowed foot bathing, do not exceed bathing time<br />
of 3 minutes. Carefully and thoroughly dry your feet. Pay<br />
close attention to the areas between your toes.<br />
• Professional (medically skilled) help for pedicure<br />
is recommended.<br />
• When walking, always wear shoes and/or your<br />
VACO ® diaped/VACO ® ped, even in your home.<br />
Specific recommendations regarding the use of<br />
VACO ® diaped/VACO ® ped<br />
<strong>Instruction</strong> for use<br />
These instructions provide general information regarding<br />
the handling of the VACO ® diaped/VACO ® ped device.<br />
Additional information, including video instructions, can be<br />
found at www.vacodiaped.com.<br />
Product characteristics<br />
• Rapid, pressure-free and reversible application<br />
utilizing the vacuum technology<br />
• Easy access for wound control<br />
• For ankle joint immobilization<br />
• Normal walking-pattern utilizing rocker sole<br />
• Radiolucent<br />
• Can be worn on left or right foot, 2 sizes<br />
WM-TEDA-01-1-EN, © by artraction design 05/05<br />
EU S 35-39<br />
L/M 39-46<br />
Further information<br />
If you have any questions, please contact your retailer or<br />
OPED directly. You may also consider visiting our webpage:<br />
www.vacodiaped.com<br />
OPED Inc.<br />
47 Loring Drive<br />
Framingham, MA 01702<br />
USA<br />
Phone +1/508/879 0762<br />
Fax +1/508/879 0769<br />
Toll free +1/866/447 0601<br />
contact@opedinc.com<br />
www.opedinc.com<br />
UK S 2 1/2 - 6 US S Men 5-7, Women 7-9<br />
L/M 6 1/2 - 11 L/M Men 7-13, Women 9-11+<br />
OPED AG<br />
Sumpfstraße 5<br />
CH-6312 Steinhausen<br />
Switzerland<br />
Telefon: +41 (0)41/748 53 35<br />
Fax: +41 (0)41/748 53 40<br />
E-Mail: contact@oped.ch<br />
• Change and wash your liner at least every second or<br />
third day (Before washing, remove the vacuum cushion<br />
from inside the liner. Note: a second liner has been<br />
provided with the product.)<br />
• Ensure that the vacuum cushion remains rigid; you may<br />
need to re-evacuate the air with the pump every couple<br />
of days if the liner loses some of its rigidity.<br />
• Prior to re-applying VACO ® diaped/VACO ® ped: be sure to<br />
make the vacuum cushion pliable by letting air in<br />
through the valve so that it will contour to your foot<br />
properly.<br />
• When walking, always wear your VACO ® diaped/<br />
VACO ® ped, even in your home.<br />
• Always follow the treating physician’s recommendations.<br />
• After about three months of wear, the vacuum cushion<br />
will need to be replaced. Consult your foot specialist to<br />
obtain a replacement liner kit every three months.<br />
diabetic foot
Application procedure I<br />
Valve functions<br />
Insert spreader (1)<br />
Change insole<br />
Bean bag becomes soft:<br />
Pull valve rim, then bend<br />
valve gently sideways<br />
guiding line<br />
Open valve on vacuum cushion (see also valve functions)<br />
and remove the front shell. Place foot in inner boot and<br />
close Velcro tabs. Then insert foot with inner boot in shell.<br />
Application procedure II<br />
Bean bag fixed in place:<br />
Push down the valve rim<br />
and use the pump<br />
Make sure that the valve is open, place the cushions flat<br />
and evenly fill out the contents.<br />
When getting the vacuum cushion back into the liner,<br />
please assure that all wings are inserted properly.<br />
Evacuating the vacuum cushion will make insertion easier.<br />
Close the zipper all the way.<br />
Attaching and changing the sole<br />
In cases of a severely swollen ankle, the spreader creates<br />
more space in the rear (dorsal) shell.<br />
• Attach spreader (as illustrated) to the guiding line<br />
on the dorsal shell<br />
• Press the center of the spreader inwards with both<br />
hands and assure that the spreader clicks into place<br />
Remove used insole.<br />
Insert the new insole with hard, dark side face downwards<br />
in the cast. Adjust the lateral grooves of the insole with the<br />
lattice frame.<br />
Close valve cap<br />
Cleaning<br />
1.)<br />
2.)<br />
Remove spreader (2)<br />
Rigid shell and straps<br />
Can be washed in a dishwasher-style washing machine at<br />
up to 95°C ( ~ 200°F). Please assure that vacuum cushion,<br />
velour cloth liner and sole have been removed before.<br />
Shell system should be closed and secured with straps.<br />
Put on front shell and close straps. The recommended<br />
sequence is as shown in the diagram. For optimum adjustment,<br />
patients who are allowed weight bearing should<br />
take a few steps and then re-adjust the tension of the straps.<br />
Application procedure III<br />
Attach the vacuum pump to the valve stem and<br />
evacuate the air. The vacuum cushion will feel hard to the<br />
touch. Remove pump and close valve cap. Check and if<br />
necessary re-adjust the tension of the straps.<br />
Exchange of velour liner<br />
Opening<br />
for valve<br />
The vacuum cushion is place inside a velour liner similar to<br />
a pillow inside a case. To get it out, open the zipper in the<br />
back and pull out the vacuum cushion.<br />
Removal: Pull down both levers at the same time to<br />
unlock (1) and the push the sole toward the back to<br />
remove (2).<br />
2.)<br />
Replacement: Do not depress side levers when replacing<br />
sole. Align the raised plastic barbs on the foot sole to the<br />
open slots of the boot. Push the sole forward and an<br />
audible click will be heard. Inspect that all the connectors<br />
are secured.<br />
1.)<br />
• Press the locking spring inwards on one side with the<br />
thumb, keeping the index and middle fingers on<br />
the outer edge of the spreader<br />
• Repeat this procedure on the other side<br />
• Remove spreader<br />
Note: In the US, the ankle spreader is sold separately.<br />
Velour cloth liner<br />
These liners are machine washable at 60°C/140°F (please<br />
close Velcro tabs first). For hygienic reasons, each patient is<br />
given two new velour cloth covers. Velour cloth liners are<br />
intended for single-patient use.<br />
Vacuum cushion<br />
The cushion can be cleaned with soap and water.<br />
Check for damage<br />
Prior to the application, inspect the device for tears,<br />
holes, cracks and other damages. If such damages are<br />
detected, the affected piece or the entire system needs to<br />
be replaced.<br />
Storage<br />
In a dry, dust-free place at 5° - 25°C (41°F – 77° F)