Follow-up treatment booklet foor - VACOped
Follow-up treatment booklet foor - VACOped
Follow-up treatment booklet foor - VACOped
- No tags were found...

Create successful ePaper yourself
Turn your PDF publications into a flip-book with our unique Google optimized e-Paper software.
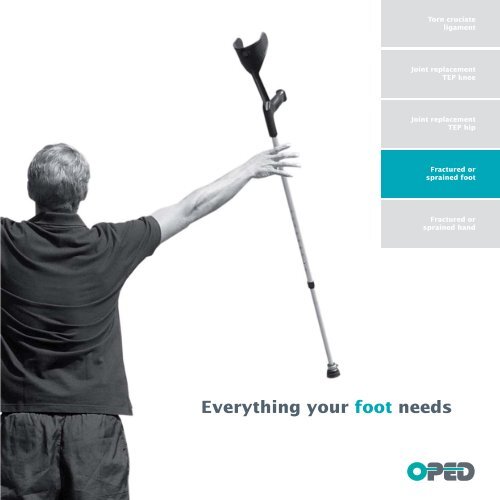
Torn cruciateligamentJoint replacementTEP kneeJoint replacementTEP hipFractured orsprained footFractured orsprained handEverything your foot needs
Our feetWhat makes you susceptible?They do what we want them to: They lift <strong>up</strong>,lower themselves, stretch out. And over thecourse of a lifetime they carry us more than160,000 km.A large proportion of bone fractures are causedby the exertion of external forces, in caraccidents, during sport activity or falls duringleisure or work time.Our feet are miracles of nature, and ingeniousall-rounders. We can run, walk and jump withthem. They carry our bodies and help to stopand move them. Some of us take over 5 millionstrides each year - no, not someone like amarathon runner. We cover this distance justwith normal everyday activity.All that can change within a tenth of a second.One trip, one fall, an accident - and everythingthat was taken for granted before suddenly nolonger functions.In everyday situations, uneven floors, stairs orsidewalk edges often hide potential dangers.If the force exerted from outside is largerthan the bone elasticity, the bone will fracture.Depending on the strength, direction andspeed of the force being exerted, the fracturemay be simple or more complicated.
Anatomie of the footFibulaShin-bone (tibia)SyndesmosisAchilles tendonOuter ankle(malleolus)LateralligamentsHeel boneUpper ankleAnkle bone (talus)Navicular bone(naviculare)Metatarsal(Metatarsals)Toe bones(phalangeal bonesof the foot)
Fractures to the foot and ankleInjuries to the foot and ankle are among themost frequent injuries of all. Since more thana quarter of the bones in the human body arelocated in the feet, such injuries are veryvaried and often involve the joints in-between.Ankle/outer malleolusBetween 40,000 and 50,000 fractures of the<strong>up</strong>per ankle occur each year in Germany.This is 10 percent of all fractures. They usuallyoccur through indirect trauma (twisting), andless often through direct trauma.A fracture of the outer malleolus is, along withknee injuries, one of the most frequent sportsinjuries. Elderly people suffer more often thanyoung people from a fracture of the outerankle.Fracture of the outer malleolus is caused bythe foot becoming twisted. In most cases theligaments of the ankle are also affected.Typical signs of a fractured ankle are strongpain when there is pressure or movement, aswell as swelling, and sometimes visiblebruising above the inner and outer malleolus.FeetThe main causes of a fracture to the foot arean accident on an uneven surface, a fall or asports injury.Jumps from a height, such as from a ladder,may result in a sprain or a fracture of theheel bone.
Distortion / SprainTorn Achilles tendonA sprain or distortion occurs when the jointstructures are pushed against each other. Thisdisplacement occurs when a force is appliedwhich pushes apart the joint surfaces morethan normal. But this displacement is only temporary.Once the application of force ends, thejoint structures return to their initial position.Pains and swelling are the typical signs of adistortion. Pulling apart the joint surfaces forjust a short time can cause considerable injuryto the joint capsule and to the ligament apparatus.Symptoms can vary, depending on theseverity of the injury.The classic Achilles tendon r<strong>up</strong>ture is usuallycaused by damage from overload in dynamicsports activity.As a consequence, an Achilles tendon r<strong>up</strong>tureis suffered most frequently by those involvedin active sports. There is a predominance ofinjuries in men between the ages of 30 and 50who actively pursue sport.When the Achilles tendon is torn, this is anindirect trauma, which feels like a blow orkick against the heel. Often the patient feels asharp pain, as if stabbed with a knife, whichis often accompanied by a loud bang. At thepoint of the tear a bump can initially be felt,and standing on the toes is no longer possible.The most common tear site (90% of cases) inspontaneous r<strong>up</strong>tures is the so-called tendon,which is located some 2-4 cm above the connectionon the heel bone.
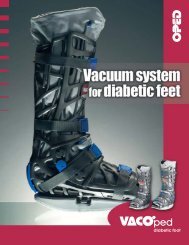
Diagnosis and <strong>treatment</strong>The description of how the accident happenedprovides the physician with the first cluesabout the injuries. A precise diagnosis is usuallymade only after theX-ray examination.Depending on the type and location of thefracture, the physician selects the appropriate<strong>treatment</strong> method. In the past, fractures wereimmobilized for lengthy periods with a plastercast. Now the bone parts are often fixed withscrews, plates and then protected withVACO®ped. The advantage of the current approachis that it takes less time before the patientcan put weight on and mobilize theinjured body part.In this case, only VACO®ped (previously aplaster cast) is applied. The splint immobilizesthe foot or the joint for the next few weeks.If a conservative <strong>treatment</strong> is not possible,surgery must be performed. After surgery, thefoot is also immobilized with VACO®ped.Surgery or not – you, yourself, can do anumber of things to ensure that the healingprocess is fast and successful.A conservative <strong>treatment</strong>, that is without surgery,is only to be recommended if the anatomyof the foot is not impaired or altered.
Your steps towards recoveryPHASE 1 PHASE 2 PHASE 3 PHASE 4Surgery is over -but you are stillrec<strong>up</strong>erating!The first step is alwaysthe hardest,but it gets easier!The biggest hurdlehas been overcome– it's time to getback to normal!I can be activeagain – if I want to!
How tofind yourway in thisbrochure
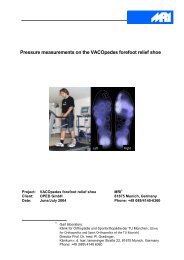
Behandlungsrichtlinienin Zusammenarbeit mit Prof. Dr. N. Haas,Unfall- und Wiederherstellungschirurgie Charité Berlin Unfall- und WiederherstellungschirurgieBehandlungswoche 1 2 3 4 5 6 7 8 9 10Weber A-10°0° 0°0°+10°Weber Boperativ-10°0°0°+10°Weber C/Maisonneuve-10°0°0°+10°Pilon-TibialBelastungssteigerung nachRöntgenbefund-10°-10°0°+10°+10°CalcaneusBelastungssteigerung nachoperativRöntgenbefund-10°-10°0°+10°+10°CalcaneusBelastungssteigerung nachkonservativRöntgenbefund-10°0°0°+10°MetatarsalVACO-pedes0°0° LaufsohleJones Fraktur-10°0°0°+10°HalluxVACO-pedes0°EntlastungssohleArthrodeseBelastungssteigerung nachUSGRöntgenbefund-10°-10°0°+10°+10°ArthrodeseBelastungssteigerung nachOSGRöntgenbefund0°0°Achillessehneoperativ/konservativ30° 15° 15°Entlastung/SohlenkontaktLagerungLagerungim VACOsplintTeilbelastungVollbelastungImmobilisierung0°/15°/30° mit 0°, 15° oder 30° Fix-Adapter(dorsal und ventral)OPED GmbHOrthopädische ProdukteMühlbachweg 2 . D-83626 ValleyTel. 0 80 20 / 90 79-0 . Fax 0 80 20 / 90 79-99e-mail:mail@oped.de . www.oped.de0°-10°+10°PhysiotherapieBeweglichkeit-10°+10° Freigabe OSG mit ROM-Adapter(dorsal und ventral)Description of each of the phasesPHASE xObjectivePhasesIn the following weeks you will pass through various phasesduring rehabilitation. You can find these here.DurationYour physician willrecommend to youthe order, durationand frequency of themeasures in yourindividual <strong>treatment</strong>plan.ObjectiveEach phase of the rehabilitation program contains differentobjectives.You can see here which objective you can reach in therespective phase.MeasureThere are appropriate measures to help you when you aimfor these objectives.MeasureYou can read here which measures will help you to achievethe objective more quickly.WM-BHRL-15-3
PHASE 1Surgery is over -but you are stillrec<strong>up</strong>erating!
PHASE 1Surgery is over - but you are still rec<strong>up</strong>erating!ObjectivePain reliefReduction inswellingWound healingYour objectives in this phase:· Pain relief· Reduction in swelling· Wound healingThe period after surgery is considered by thephysician to be very crucial, because patientstend to overload the foot in this phase.Apart from the exercise phases, you shouldrest the leg concerned in the first few daysafter surgery.Keep your leg elevated and use the measuresto relieve swelling and pain. Please also readthe following pages concerning this.MeasureAvoid getting <strong>up</strong> and walking around frequently,as well as sitting for a long time withthe legs hanging down. Because this leads toan increase in swelling and pain again, whichcan delay the rehabilitation.For this reason, you should slow down untilthe second phase begins - about 10 days afterthe OP / injury."The winner is decided at the finishing line,not in the first few meters…“.
PHASE 1Objective"Boys don't cry" - you probably remember thissaying from your childhood. But after surgeryit is usually not sensible to "endure" the pain.If the body feels pain, the muscles restrictcertain movements and thus "lock" joints,which can lead to problems later on.For this reason you should not be afraid oftaking pain-killers for a short phase aftersurgery. This will help to prevent chronicfibromyalgia from developing. Ask yourphysician for a preparation suitable for you.Caution Danger of thrombosis!If you notice the following signs, contact aphysician immediately! The progression ofthrombosis can be fatal!· Muscle aches and pain in the calves· Complaints increase when standing,decrease when lying down· Increased veinous markings of the surfaceveins (bypass circulation), especially on thefront of the shin· Feeling overly warm· Stretched, glossy skin· Pressure pain in the calves(Lowenberg sign)· Pain in the calves when lifting foot(Hohmann sign)Pain refiefMeasureDrugsIn addition, drugs are also used to inhibitinflammation and to stabilize the mineraland electrolyte balance.
PHASE 1Surgery is over - but you are still rec<strong>up</strong>erating!ObjectivePain reliefCold reduces nerve activity, which causes painrelief. Limited cold stimulation of <strong>up</strong> to 5 minutescauses a narrowing of the vessels and aslight rise in blood pressure.Important to know: ice does not reduce swelling- it only stops it from occurring or fromincreasing. But it does have an anti-inflammatoryeffect and relieves acute pain.Cooling - but not ice-cold! This is the principleof the so-called cryotherapy, which is used torelieve pain. And this is how it works: Thetemperature that is applied to the skin shouldbe between 6 and 8 °C (hot ice), and thisshould not be applied for more than 12 minutes.Then 3 minutes of room temperature isrequired. This change should be made severaltimes.For this reason you can use ice selectivelyafter loads or to reduce pain.The necessary cooling can be achieved withicy water, but also with appliances that keepthe water at the optimal cooling temperature.Some appliances combine cooling with pulsatingcompression.MeasureThis method has proven to be especiallyeffective.CryotheraphyHot ice
PHASE 1ObjectiveThe lymphatic backflow is still disr<strong>up</strong>ted aftersurgery. This means: the body cannot yetregulate the tissue fluids "normally", so thatswellings may occur, especially after loads.Reduction inswellingYou should often put your feet <strong>up</strong> duringbreaks. This helps to reduce the pressure thatexists in the tissue concerned. This can simplybe done with cushions, but also by usingbraces, and best in combination with slightmovement.With the help of the lymph vessels, tissue fluidfrom the soft tissue is transported away andinto the blood vessels. If the lymph system isdisr<strong>up</strong>ted in its function, body fluids maycollect in the tissue and swelling may occur(edema).Lymph drainage is an appropriate means ofrestoring the balance that has been disr<strong>up</strong>ted.Lymph drainage also stimulates the immunesystem.An appropriately trained therapist can stimulatelymph drainage. Alternatively, there areappliance systems that use compressionsleeves to stimulate lymph drainage.MeasurePutting feet <strong>up</strong>Lymph drainage
BehandlungswocheWeber AWeber BoperativWeber C/MaisonneuvePilon-TibialCalcaneusoperativCalcaneuskonservativMetatarsalJones FrakturHalluxArthrodeseUSGArthrodeseOSGAchillessehneoperativ/konservativEntlastung/SohlenkontaktTeilbelastungVollbelastungOPED GmbHOrthopädische ProdukteMühlbachweg 2 . D-83626 ValleyTel. 0 80 20 / 90 79-0 . Fax 0 80 20 / 90 79-99e-mail:mail@oped.de . www.oped.de1 2 3 4 5 6 7 8 9 100° 0°0°0°0°0°0°0°0°0°0°0°0°-10°+10°0°0°VACO-pedesEntlastungssohle0°0°VACO-pedes0° Laufsohle30° 15° 15°LagerungLagerungim VACOsplintImmobilisierung0°/15°/30° mit 0°, 15° oder 30° Fix-Adapter(dorsal und ventral)-10°+10°-10°+10°-10°+10°-10°+10°-10°+10°-10°+10°-10°+10°0°0°Belastungssteigerung nachRöntgenbefund-10°+10°Belastungssteigerung nachRöntgenbefund-10°+10°Belastungssteigerung nachRöntgenbefund-10°+10°-10°+10°Unfall- und WiederherstellungschirurgieBelastungssteigerung nachRöntgenbefundBelastungssteigerung nachRöntgenbefundPhysiotherapieBeweglichkeit-10°+10° Freigabe OSG mit ROM-Adapter(dorsal und ventral)PHASE 1Surgery is over - but you are still rec<strong>up</strong>erating!ObjectiveStabilizationMobilizationWith VACO®ped you have received a modernmedical device to help you in your dailyactivities. We would like to give you some tipsto help you in the handling of VACO®ped andto speed <strong>up</strong> your recovery. You can find moredetailed information on usage in the usermanual.A vacuum cushion ensures an optimal fit tothe shape of your foot and ankle. If irritatingpressure points should develop, or the cushionno longer fits, you can re-adjust the vacuumcushion (see user manual Chapter: Valvefunctions).MeasureVACO®pedAdjusting the ankle joint position and releasingthe hinges to enable mobility can be done withthe help of the yellow key and the adapters(user manual Chapter: Assembling theAdapter).The timeline these adjustments for weightbearing and physical therapy has been setforth by your physician. Be sure to discuss thedetails of your protocol you’re your doctor.Behandlungsrichtlinienin Zusammenarbeit mit Prof. Dr. N. Haas,Unfall- und Wiederherstellungschirurgie Charité BerlinYou can find much more information, aswell as a video user manual, atwww.vacoped.com.Fig. Treatment guidelinesWM-BHRL-15-3
PHASE 1ObjectiveWounds heal in different ways. The healingprocess and the scar formation associated withthis is dependent on one's age and personalconstitution, on the localization and degree ofseverity of the tissue injury, as well as on the<strong>treatment</strong> and care.Skin with poorer circulation, which is thin anddry, will require longer to heal, but will healwith less scar formation. Younger people tendto produce more tissue than necessary whenthey have injuries. Because of this, larger andthicker scars often subsequently occur. Aselective scar <strong>treatment</strong> can prevent this.In the first weeksafter surgery thescars should beleft alone. Underno circumstancesshould youscratch thescab off.It is best if thisfalls off on itsown. But you can also gently remove thescab with a special wound-cleansing agent.Only when the wound is closed and wellhealedshould you take care o fit yourself.Keep the tissue around the wound s<strong>up</strong>plethrough damp compresses and an ointment.Wound healingMeasureScar careThrough scar care, you will not only achievebetter cosmetic results. The tissue around theclosed wound will become more elastic andalso more load-resistant.Every open wound (as long as there is noconnective tissue occlusion through new skingrowth) represents an infection risk. Thereforethe wound should always be covered with abandage to prevent it from getting dirty.The wound should be prevented from contactwith water during daily hygiene routines.Use a washcloth or cover the wound with awatertight bandage. You can even take ashower in comfort.
PHASE 1Surgery is over - but you are still rec<strong>up</strong>erating!ObjectiveLoadWalkingWalking with crutches requires some practiceat the beginning. Here are some tips to helpyou cope better:3-point walk with crutchesThe height of the crutches should be adjustedindividually. The handle height should beadjusted so that it is at the height of the wristswhen standing <strong>up</strong> straight and holding thehands down to the sides.1Starting pointMeasureGait training2Place the two lower arm s<strong>up</strong>ports one steplength in front of you, the injured leg shouldalso move forwards (root of foot at about thelevel of the line connecting the two s<strong>up</strong>ports).3Move your weight onto the s<strong>up</strong>ports and setyour healthy leg one step in front of theinjured leg.Make sure that you roll over correctly!Then move your weight to the good leg andrepeat the process, as shown in Figures2 and 3.
PHASE 1ObjectiveWalking with crutches requires some practiceat the beginning. Here are some tips to helpyou cope better:Going <strong>up</strong> stairsLoadWalkingPut your good leg one step higher, then placethe crutch and the injured leg next to the legalready put forwards.Going down stairsFirst put the crutches, together with your affectedleg, one step lower. Only then shouldyou place your good leg on the same step.MeasureGait training
PHASE 2Surgery is over -but you are stillrec<strong>up</strong>erating!
PHASE 2Surgery is over - but you are still rec<strong>up</strong>erating!ObjectiveStrenghtEnduranceMeasurePhase 2 begins some 10 days after your surgeryor injury. You should wait at least untilthe stitches have been removed.Your objectives in this phase:· Retaining the mobility of healthy jointsOn the following pages you will find gymnasticsexercises that you can do at home in theearly phase after surgery. The load-bearingcapacity is different for every patient anddepends on the constitution and general levelof fitness, among other factors. This is whythere are no specific repeat details for mostof the exercises.It is important that you exercise for at leasthalf an hour each day. Do each exercise forabout one minute. After a short pause, repeatthe sequence of exercises two to three times.The following basic rules apply for all theexercises in this brochure:· If you are in pain, stop the exercise immediately!Then try out a different exercise ortake a break. If you are unsure whether theexercise is suitable for you, ask yourphysician or physiotherapist.· The exercises have been chosen so thatother joints and muscles in the entire mobilitychain are also exercised. This isimportant in restoring harmonic movementsequences.· Always start your phase 2 training sessionswith coordination exercises, since thesemust be performed at full concentration.You can then perform strength andendurance training.
PHASE 2ObjectiveScar massageThe massage is followed by stroking gentlyand broadly over the scar and the surroundingtissue.Wound healingFig. latticefence massageThe application of appropriate active ingredientscan reduce the occurrence of scars toa considerable degree. The active ingredientscontained in scar ointments, such as allantoin,dexpanthenol and urea, make the tissue softand s<strong>up</strong>ple. A number of healing ointmentsalso contain ionized trace elements andelectrolytes, which s<strong>up</strong>port the healingprocess of the skin and reduce scar formation.A scar massage causes strong blood circulationin the area of the scar and the dissolutionor loosening of adhesions in the connectivetissue.The massage strokes described below shouldbe carried out quickly and about 5-10 timeseach:Start by moving around the scar tissue, asillustrated above. Then make diagonal strokeswith one finger in a "mesh pattern" (like latticefencing) across the scar tissue. This is done intwo stages: First massage all parallel runningdiagonal lines in one direction (repeat eachstroke 5-10 times). After this, massage thelines that cross in the other direction(see figure).You can apply such an ointment just a fewdays after the wound has closed. This helpsto prevent an ugly scar from forming.But existing scars can also be treated. Theactive ingredients work directly on the scartissue and stimulate regeneration back to anormal skin structure.Apply the ointment or gel to fresh scars 1-3times per day. Massage the ointment gentlywith your fingertips from the center of the scarto the outside, until it has fully penetrated theskin.Visible success will only be achieved, however,if you continue the <strong>treatment</strong> consistently overa period of <strong>up</strong> to six months.MeasureScar massage
PHASE 2Surgery is over - but you are still rec<strong>up</strong>erating!ObjectiveStrenghtEnduranceThe interaction of hip and kneePlace yourself in the all fours position on atraining mat. S<strong>up</strong>port yourself here withyour lower arms rather than your hands.Lift <strong>up</strong> the affected leg and simultaneouslystretch it <strong>up</strong>wards. Stretch it out as far as youcan, so that knee and hip are fully stretched.Make sure that your pelvis remains horizontaland parallel to the floor, and does not twist.Leg and spinal column form a slanting line<strong>up</strong>wards. Try and prevent your back frombecoming too hollow.MeasureStrengtheningexerciseStop stretching and move your leg slowly backagain, but keep it above the floor.Repeat this movement a number of times,without putting your foot
PHASE 2ObjectiveStrenghtExercise for stretching andstrengthening the hipsEnduranceTo go a step beyond the previous exercise,you can use an elastic training band, as shownin the illustration..MeasureStrengtheningexercise
PHASE 2Surgery is over - but you are still rec<strong>up</strong>erating!ObjectiveStrenghtEnduranceExercise for stretching andstrengthening the hipsLie on a training mat, prop <strong>up</strong> your head.The unaffected leg lies at a slight angle on thefloor. Attach an elastic training band to theother foot (with VACO®ped) so that your legis pulled slightly forwards.The band can be attached to a table leg orattached to the door frame with a specialanchor under the door.MeasurePull the elastic band with the outstretched leg<strong>up</strong>wards and at the same time slightly backwards.The toes should point to the front whendoing this.StrengtheningexerciseThen move your leg back again, but keep itabove the floor.Repeat the exercise several times. You cangradually increase the number of repetitions.A few training sessions for your good leg willcertainly do it no harm.
PHASE 2ObjectiveStrenghtThe interaction of hip and kneeLie on your back with arms outstretched nextto your <strong>up</strong>per body. Raise your buttocks andstretch the leg with the VACO®ped forwardsinto the air.EnduranceNow move the raised leg with the kneetowards your head and back again. The legis bent here and then stretched out again.Try and keep the pelvis in a stable position.Repeat the movement sequence several times.After a short rest, do the exercise again.MeasureStrengtheningexercise
PHASE 2Surgery is over - but you are still rec<strong>up</strong>erating!ObjectiveStrenghtEnduranceStrengthening the quadricepsAttach an elastic training band using a specials<strong>up</strong>port on the <strong>up</strong>per edge of the door.Pull the band with the relevant leg back so thathip and knee are fully stretched.Move only the leg when doing this. Try andkeep the <strong>up</strong>per body as still as possible.MeasureStrengtheningexercise
PHASE 2ObjectiveStrenghtStrengthening the rear side of the thighsSit down in a sturdy chair (not an office chairor other types of movable seats).EnduranceHold the seating surface tight with both hands.The affected leg is attached to the trainingband and stretched forwards.Now bend your leg until your foot is on thefloor. Slowly stop resisting the pull of thetraining band until your leg is stretched outagain.Repeat this a few times using smooth movements.You can also do this exercise with your goodleg.MeasureStrengtheningexercise
PHASE 2Surgery is over - but you are still rec<strong>up</strong>erating!ObjectiveStrenghtEnduranceStrengthening the rear side of the thighsLie on your stomach on a training mat. S<strong>up</strong>portyour forehead with your hands, so thatyour head does not need to turn.Attach the elastic training band to a table legor door frame using a special anchor.Pull the band with the affected leg <strong>up</strong>wards bybending the leg.Let your leg fall slowly down again. Avoid anyjerking movements when doing this.MeasureThis exercise can also be done with both legs.Strengtheningexercise
PHASE 2ObjectiveStrenghtMobilization of the lumbar-pelviship regionEnduranceWalking with crutches can lead to muscletension in the lumbar-pelvis-hip region, whichcauses back pain in many patients.This exercise can help you to avoid tension, orbe of help if you are in pain.Bend the leg with the VACO®ped <strong>up</strong>wards.With the opposite hand, move it slowlydownwards on the mat, as shown in Figure 2.Remain in this position for a few seconds beforerepeating the exercise.It is important here that the shoulder and armon the other side remain on the floor.If possible, turn your head as well in the oppositedirection.MeasureStrengtheningexerciseThis will stretch the whole region from thelumbar to the hips. To vary the stretching, youcan place the leg at different angles. This willmake the exercise even more effective.Do this exercise on both sides as well.
PHASE 2Surgery is over - but you are still rec<strong>up</strong>erating!ObjectiveMobilityRump Stabilization with gymnastic ballKneel down on a training mat and lay your<strong>up</strong>per body on a gymnastic ball. Attach atraining band with two handles to a tableleg or the underside of the door.Now with both arms simultaneously, pull thetraining band as far back as possible. Yourhands should now be at about the same levelas your ear lobes.MeasureAllow your arms to be pulled by the band andmove your arms back to the front. Try to holdyour arms slightly bent when doing this, ratherthan completely stretched.Strengtheningexercise
PHASE 2ObjectiveStrenghtRump stabilization lying on your stomachLie on your stomach on a training mat andslightly raise your <strong>up</strong>per body. Your headshould be bent down slightly, and you shouldkeep your neck straight if possible.EnduranceNow also slightly raise your arms, which arebent sideways. Try to keep your hands slightlyhigher than your elbows when doing this.Move your raised arms to and fro, as shown inthe illustration. Your feet should remain on thefloor as you do this.Perform this movement continually for at least30 seconds before lowering your arms and<strong>up</strong>per body. After a short rest, repeat the exerciseonce or twice.MeasureStrengtheningexercise
PHASE 2Surgery is over - but you are still rec<strong>up</strong>erating!ObjectiveStrenghtEnduranceVariations on rump stabilizationlying on your stomachVariation 1:Once you have mastered the basic exercise,you can heighten the training effect by exercisingwith weights. Two plastic bottles can beused for this, for example, which you initiallyfill with a little, and later with more water.MeasureStrengtheningexerciseVariation 2:Here you move your arms in opposite directions.While you push one arm forwards, pullthe other one back. As in the basic exercise,arms, head and <strong>up</strong>per body are slightly raisedduring theentire sequence of the movement.Your feet should remain on the floor.
PHASE 3The biggest hurdlehas been overcome –it's time to get backto normal!
PHASE 3The biggest hurdle has been overcome – it's time to get back to normal!ObjectiveIncreasing theload to fullcapacityImproving thegeneralconditionThe critical phase has been overcome. You arenow faced with the following objectives:· Step-by-step increase of the load until youcan walk freely.· Improvement of your general conditionand mobility. Training, performed right fromthe beginning, is increased continuously.You will feel increasingly assured in yourmovements.Measure
PHASE 3ObjectiveYou should take a few days when transferringto walking without crutches.You can discard your crutches once you canwalk normally, without limping. At the beginningyou should only attempt short stretches(e.g. in your home) without crutches. As youbecome more assured you can walk longerstretches without crutches.If you feel very unsure at the beginning, justturn the crutches around, hold them in front ofyou in your hands, and use them as walkingsticks. This increases the load without removings<strong>up</strong>port entirely.Walking with just one crutch is not recommended,since it delays a "limp-free" gait. Youshould therefore use both s<strong>up</strong>ports until youcan walk without any s<strong>up</strong>port.Full loadMeasureGait training
PHASE 3The biggest hurdle has been overcome – it's time to get back to normal!ObjectivePain reliefReduction ofswellingYou should immediately reduce the load on theleg if pain, swelling and/or a warming of thetissue surrounding the joint should occur orincrease.If these symptoms occur after the load, youshould react immediately withA cottage cheese compress reducesswelling, is anti-inflammatory, relievespain and is pleasantly cooling.· Spread the cottage cheese about 0.5 cmthick on a compress or a cloth and cover the<strong>treatment</strong> area liberally. To avoid infection itis essential to cover the wound with a watertightbandage.· The cottage cheese should be cool but notice cold and left to soak in for about 15minutes or until it has become warm/dry· Repeat if necessaryMeasureOintmentCryotherapyQuark compress· 15 to 45 min. of cryotherapy(for selective use of cold forpain relief. see phase 1).· Ointment dressing· Cottage cheese compress
PHASE 3ObjectiveEMS is the abbreviation for electrical musclestimulation, a therapy to restore normalmuscle function after immobility or injury.Gentle electrical impulses cause the rigidmuscles to contract (tighten), thus helpingthem to gain more strength.If you use this method, make sure that theelectrodes are correctly attached, as shown inthe figure.With an appropriate electrotherapy deviceyou can also strengthen other weak muscles inyour body, loosen muscle tension or relievepain using the TENS program (see Phase 1).Strengthening the lateral lowerleg muscle (peroneus)The lateral lower leg muscles (peroneus) havethe task of maintaining the stability of theankle and preventing it from twisting inwards.After an injury to the ankle these muscles losetheir reflex-like capacity to contract and a largepart of their strength. For this reason it makessense to specifically train the peroneus muscleusing EMS equipment.StrenghtEnduranceMeasureElectrotherapy(EMS procedure)
PHASE 3The biggest hurdle has been overcome – it's time to get back to normal!ObjectiveStrengthEnduranceMobilityStrengthening exercise withgymnastic ballLie on your back in front of a wall so that thereis space for the gymnastic ball between yourfeet and the wall.With your affected foot, press the ball lightlyagainst the wall, as illustrated in the firstdrawing.Now roll the ball <strong>up</strong> and down against the wallas illustrated in the second drawing.MeasureStabilizationand balancingexerciseExercise with strong and even pressure onthe ball. Once you can do the exercise youcan increase the pressure applied. This can beincreased until your pelvis is raised from thefloor, which additionally trains your physicalcoordination.
PHASE 3ObjectiveStrengthening and stabilization exercisewith training bandAttach the elastic training band to somethingat a medium height, such as a door handle orin the door frame. Sit on a chair with yourgood leg closest to the anchor point.Make sure that your knees are always pointingforwards so that your toes, knee and hip remainon the same axis.StrengthEndurancePull the band past your body with both hands,from one side to the other and back again. Tryto keep the movement smooth and avoid anyjerking movement. Sit still while doing this andonly move your <strong>up</strong>per body.The best way to check your movements is toexercise in front of a mirror.As a variation of the exercise you can later sitthe other way round, so that the traction pullsfrom the other side. This increases the load onyour leg. To make it more difficult, do the exercisesitting on a gymnastic ball.MeasureStabilizationand balancingexercise
PHASE 3The biggest hurdle has been overcome – it's time to get back to normal!ObjectiveMobilityStretching the thigh musclesFront of thigh and hip extensor muscleStand in a walking position, with the affectedleg to the back. Keep your <strong>up</strong>per body straightand push your hips forwards. The knee of yourstanding leg moves forward when you do this,the other leg remains as stretched as possible.Inner side of thighMeasureStretchingexerciseYou should stand on your good leg. The movementis in the direction of the arrow, until youfeel a clear stretch on the inside of your thigh.Maintain this stretch for a few seconds.Rear side of thighYou already know this exercise from phase1. Place the leg with the VACO®ped onto theseat of a chair. Lean your <strong>up</strong>per body forwardsuntil you can feel the rear of the thigh stretching.Keep your back slightly hollowed.
PHASE 3ObjectiveStrengthStrengthening the posterior musculatureFor this exercise you need a robust chair andan elastic training band. Attach one end ofthe band to the back of the chair and the otherend to your VACO®ped. Stand behind the chairas illustrated.EnduranceStand with your good leg on the training band.With the other leg, pull the band to the sideand slightly to the rear.Try and keep the <strong>up</strong>per body still and straightwhen doing this. Extend your leg outward andthen back a number of times, without touchingthe floor.MeasureStretchingexercise
PHASE 3The biggest hurdle has been overcome – it's time to get back to normal!ObjectiveStrengthEnduranceRump stabilizationAttach your training band at a mediumheight to the door. Sit on a gymnastic balland s<strong>up</strong>port yourself with both legs firmly onthe floor. You should hold the two ends of thetraining band at about eye height.Now pull the two ends of the band with yourelbows bent at this height, and with both armsheld out behind you as far as you can. Yourback should go into a slightly hollow position.Make sure that you do not pull <strong>up</strong> your shoulders.Also try and keep your wrists quitestraight.MeasureStretchingexerciseThen let the band pull your hands back andthey will return to the starting position. Increasethe number of times you repeat theexercise, depending on your state of strengthand endurance.
PHASE 3ObjectiveMobilizationTo ease the transition to the next phase whenyou will no longer need your VACO®ped, it isrecommended to utilize the ROM feature ofyour VACO®ped.The ROM adapter activates the hinges on theVACO®ped and allows you to walk withcontrolled range of motion.Through this your joints will slowly get used tonormal movement again. Releasing the clips toenable mobility can often take place very earlyon, depending on the type of injury and the<strong>treatment</strong>. Ask your physician when you canmake this switch.Step 1:Remove the front adapterMeasureStep 2:Replace the rear FIX adapterwith the ROM adapterSwitching theadapters on theVACO®ped
PHASE 4I can be activeagain – if I want to!
PHASE 4I can be active again – if I want to!ObjectiveCoordinationProprioceptionProprioception is another term for the feelingof movement or deep sensitivity - that is, theinteraction of the senses for posture, movementand force.Proprioception enables us to perceive theposition (sense of place) and the movements(kinestesia) of joints and limbs. It is also anestimation of the necessary muscle power(sense of force) to maintain or change positions.It is therefore the requirement for coordinatedmovements and motoric reflexes.If your motion sensors tell your brain that thesurface on which you are standing is very slippery(e.g. ice), your leg muscles will create adifferent tension (you will move differently)than on a firm surface. If the pain and mechanoreceptorsreport that there is a disorder/injuryin the joint (such as after an accident oran operation), this causes a restriction inmovement. Your leg feels stiff and inflexible.With the following exercises you can maintainor restore your capacity for movement.MeasureThis movement control can be disr<strong>up</strong>ted by variousfactors, such as injuries to the nerves,damage to the mobility apparatus (especiallyto joints, tendons, ligaments, muscles), and byimmobility that persists for a long time.But this will only work if you train regularly -preferably on a daily basis.But how does this control of movementsfunction?
PHASE 4ObjectiveA trauma, or surgery, results in certain receptorsno longer functioning or being removedentirely.This disr<strong>up</strong>ts the interaction between thecentral nervous system and the muscles. Thesame thing occurs with immobility. The longerthe joint is kept immobile, the greater thedisr<strong>up</strong>tion.Receptors are special nerve cells which recordstimulations and pass these on to the centralnervous system. Each receptor is responsiblefor specific information. All this information isprocessed in the central nervous system and isused as the basis for reactions to disr<strong>up</strong>tion inour bodies.CoordinationProprioceptionConsequence: The readiness of the muscles toreact is reduced. Movements, balancing abilityand the coordinative ability of the body nolonger function as smoothly as normal.Through selective coordinative training,your body can learn to compensate for thesedeficits. The remaining receptors take overadditional tasks here. In this way the readinessof the muscles to react can be restored.MeasureCoordinativetraining
PHASE 4I can be active again – if I want to!ObjectiveCoordinationProprioceptionPrinciple of coordinative training (mainlystabilization and balance exercises):· Always begin your training session withcoordination exercises. Begin the exercises slowly and carry themout as exactly as possible.· Exercise conscientiously and with fullconcentration. Move <strong>up</strong> from simple to more difficultmovement requirements.· End the exercise if you notice that you aregetting tired and can no longer fullyconcentrate. Move on to the next degree of difficultyonly when you have mastered the moresimple level.Measure
PHASE 4ObjectiveCoordinationMobilization oft he anklewith the rocker boardProprioceptionThis exercise helps to provide your ankle onthe affected leg with more mobility.Move the rocker board to the left and rightwith your foot. Practice first in a sitting position,and later standing in a walking position(the good leg is standing on the floor). Makesure that the movement does not cause anypain in the ankle.MeasureMobilizationtraining
PHASE 4I can be active again – if I want to!ObjectiveCoordinationProprioceptionFoot-ABCSit on a table so that your foot has no contactwith the ground. Now write the alphabet withthe affected foot. You can improve mobilityin this way.MeasureMobilizationtraining
PHASE 4ObjectiveCoordinationIncreasing exercise for stance stabilizationand balancing exercisesIn coordinative training, especially for stancestabilization, a wide range of variations arepossible. Each variation means an increase inthe training effect. Please observe the followingprinciples when doing this: Exercise with bare feet.board horizontal - rocker board forwards/backwards - rocker board side to side -rocker board tilted - balance disc.). Practicefirst in a walking position (healthy leg on thefloor, see figure), later with both legs on theboard. Advanced students can also try itstanding with one leg on the rocker board. Step <strong>up</strong> the exercises slowly, from simpleto more difficult movement requirements.Start, for example, with both legs on thefloor, and increase the load by practicing ina walking position, later on one leg, andfinally on the rocker board. Practice on less and less stable surfaces(stable floor to start with - then seesaw Step <strong>up</strong> from exercises with much information(in front of mirror) to exercise formswith less and less information (withoutmirror - looking straight ahead - one eyeclosed - both eyes closed). Increase the requirements only when youhave fully mastered an exercise.MeasureCoordinativetraining
PHASE 4I can be active again – if I want to!ObjectiveCoordinationStabilization exercise with gymnastic ball Practice first with your good leg in front,then change to the leg that has beenoperated on.Always perform the coordination exercises atthe beginning of the training session with fullconcentration - strength and endurance exercisesalways after these. Move your leg in this exercise so that theknee is always pointing straight in front.At the beginning, s<strong>up</strong>port your knee slightlywith the hands, and later take your handsaway.MeasureStabilizationand balancingexercise
PHASE 4ObjectiveCoordinationLeg axis training for a more stable stanceFor this exercise you need a rocker boardwith the tilting axis right/left. Here you mayuse your crutches for stability. As soon asyou feel safe you can just discard the s<strong>up</strong>ports.To start with you can lessen the tilting movementsby using a training mat or foam material.MeasureStabilizationand balancingexercise
PHASE 4I can be active again – if I want to!ObjectiveCoordinationStance stabilization with tractionfrom the frontStart this exercise with both legs on the floorwithout a rocker board.Make sure that: the knees are slightly bent,the back is straight or slightly hollowed.Keep your arms stretched sideways andslightly forwards. Pull the elastic trainingband slowly backwards, as shown in the figure,and then move your arms evenly to thefront.Step <strong>up</strong> the exercise according to the rules ofcoordinative training. Practice first with bothlegs on the floor, then in a walking position,and later in a walking position with rockerboard and finally with both feet on the board(with tilting axis forwards/backwards).MeasureStabilizationand balancingexercise
PHASE 4ObjectiveCoordinationStance stabilization on the seesaw boardProprioceptionIncrease the exercises on the seesaw boardstep by step, as is the intention of coordinativetraining.Practice first standing with both feet on theseesaw board, then standing in a walkingposition (s<strong>up</strong>port yourself slightly with thetoes of the rear foot) and finally standingon one leg.MeasureStabilizationand balancingexercise
PHASE 4I can be active again – if I want to!ObjectiveImprovement ineveryday motoractivityTransitionto specifictrainingRecovering "full use" of the leg is the objectiveof the entire rehabilitation phase. You should"feel fit" again and manage all movementswithout restriction. This is not restricted just tothe leg that has been operated on, but refersto all your body.The principal objective of phase 4 is thereforeto further develop strength and endurance, sothat the resilience of the foot increases.Be aware of your body's reactions and adjustthe load accordingly.If you feel just as fit as before your injury, thenyou have achieved your final objective.Building this strength <strong>up</strong> is a slow but continuousprocess. Increase the exercise units stepby step, from short loads to longer trainingsessions.Measure
PHASE 4ObjectiveStrengthStance stabilization with tractionfrom the frontCoordinationYou can do this exercise on both sides, that is,use the affected leg as the standing leg.Keep the <strong>up</strong>per body straight and slightly inclinedforwards. Try and stretch out the pullingleg backwards.If you have difficulty balancing at the beginning,you can s<strong>up</strong>port yourself on the walluntil you can stand safely on one leg.A further variation on this exercise with arocker board can be found at the end of thistraining phase.MeasureStabilizationand balancingexercise
PHASE 4I can be active again – if I want to!ObjectiveStrengthCoordinationStance stabilization with sidewaystraction – standing leg at frontThis also involves standing firmly on one leg,this time with traction from the side.The elastic training band can be attachedwith a s<strong>up</strong>port at a low height at the door.Your standing leg is on the "door side".Stretch the other leg slightly backwards and attachthe training band to it. Now pull the bandoutwards as far as you can and then move itslowly back to the starting point.Make sure with the standing leg that the toes,knees and hips form a straight line. The kneeis slightly bent.MeasureStabilizationand balancingexercise
PHASE 4ObjectiveStrengthStance stabilization with sidewaystraction – standing leg behindCoordinationIn this exercise your pulling leg is on the "doorside", where your training band is attached. Atthe beginning, keep the training band as closeas possible to the standing leg (low rotationalforce). When your muscles have become stronger,pull the band in front of the standing leg,or beyond it (larger rotational force).In this exercise you should ensure in particularthat your standing leg remains firm - the kneemust not move inwards.You can also do this exercise, like all those inphase 4, on both sides.MeasureStabilizationand balancingexercise
PHASE 4I can be active again – if I want to!ObjectiveStrengthCoordinationStrengthening the calf musclesIf you can put a full load on your leg again,stand on the balls of your feet on some stairs.Hold on to the staircase or the wall with bothhands.Now move slowly down with your heels untilyou feel tightness in your calf muscles. Thenpush yourself <strong>up</strong>wards on your toes.Repeat this exercise 15 to 20 times.MeasureStabilizationand balancingexercise
PHASE 4ObjectiveStrengthStance stabilization on anunstable surfaceCoordinationAs already mentioned, this is a progressionfrom the first exercise in this chapter.With the rocker board with the tilting axis forwards/backwards, your coordination ability isoptimally exercised.If you can master this exercise on both sides,the coordinative training of the past few weekshas been worthwhile. Your body is again incontrol of the most important movementsequences for a safe stance – perhaps evenbetter than before your injury.MeasureStabilizationand balancingexercise
PHASE 4I can be active again – if I want to!ObjectiveStrengthEnduranceYou can now venture to tackle sports activitiesagain. But for the time being you should onlydo activities that you can do well, and movementsthat can be well controlled.Stop doing a sport if you feel tired or unfit.In this condition your muscles will have adelayed reaction to stabilization requirements.Problematic:· Sudden changes of direction· Unpredictable players/opponents orcontact sports· Load requirements with sudden stoppingand lots of jumpingMeasureSportsactivities
PHASE 4ObjectiveStrengthEnduranceMeasureSportsactivities
www.fuss-reha.infoWM-INVP-20-2-EN, © www.artraction.de, 11/08Now it’s <strong>up</strong> to you...let yourself be helped!OPED GmbHMedizinpark 183626 Valley/OberlaindernGermanyFon +49 (0)8024 / 60 81 82-10Fax +49 (0)8024 / 60 81 82-99mail@oped.dewww.oped.deOPED AGHinterbergstrasse 266330 ChamSwitzerlandFon +41 (0)41/ 748 53 35Fax +41 (0)41/ 748 53 40contact@oped.chwww.oped.chSchutzgebühr: € 9,90