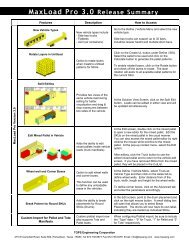
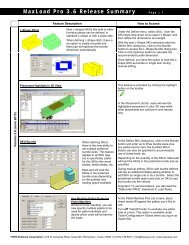
Interfacing with Artios CAD - TOPS - Packaging Software
Interfacing with Artios CAD - TOPS - Packaging Software
Interfacing with Artios CAD - TOPS - Packaging Software

Create successful ePaper yourself
Turn your PDF publications into a flip-book with our unique Google optimized e-Paper software.
<strong>TOPS</strong> Pro and <strong>Artios</strong> <strong>CAD</strong> Integration<br />
<strong>TOPS</strong> Pro software works in conjunction <strong>with</strong> the <strong>Artios</strong> <strong>CAD</strong> software to transfer data between the two<br />
software to make the design process smoother and easier for the users.<br />
The data transfer can be done in different ways:<br />
1. Transfer box and pallet data from a Unitload calculation in <strong>TOPS</strong> Pro to <strong>Artios</strong> <strong>CAD</strong><br />
2. Complete workflow of data between <strong>TOPS</strong> Pro and <strong>Artios</strong> <strong>CAD</strong> starting from <strong>Artios</strong><br />
3. Send <strong>Artios</strong> <strong>CAD</strong> die cut layout to <strong>TOPS</strong> Pro for Palletization<br />
4. Box information from <strong>Artios</strong> <strong>CAD</strong> to <strong>TOPS</strong> Pro for palletization<br />
Note: The menus and screenshots shown in this document might be slightly different from the actual<br />
ones <strong>with</strong> different versions of <strong>Artios</strong><br />
1. Box / Pallet Info from <strong>TOPS</strong> Pro to <strong>Artios</strong> for Box design<br />
Minimum <strong>Software</strong> Requirements: <strong>TOPS</strong> Pro 6.5, Esko <strong>Artios</strong> version 12<br />
Note: If <strong>TOPS</strong> Pro is not set as the palletization software in Esko <strong>Artios</strong> <strong>CAD</strong>, please refer to<br />
Appendix I in this document.<br />
Steps involved:<br />
a. Start Shipcase -> Pallet analysis in Tops and calculate to view results.<br />
b. Choose the desired solution.<br />
c. Click the Toolbar button, “Interface – Esko <strong>Artios</strong>”.<br />
d. Choose to send the Box details only or the Box details <strong>with</strong> the Unitload details from the<br />
dialog:<br />
e. Click the Export button in the above dialog to invoke Esko <strong>Artios</strong> <strong>with</strong> the box dimensions.<br />
f. <strong>Artios</strong> <strong>CAD</strong> opens up <strong>with</strong> the 2D view of the box standard.<br />
g. Convert the 2D image to 3D to see the full image of the box sent from Tops<br />
<strong>TOPS</strong> SOFTWARE CORP • 275 W Campbell Road, Suite 600, Richardson, TX 75080 • 972.739.8677 • www.topseng.com • tech@topseng.com
h. If the option “Box and Pallet” was chosen the 3d Image of the Unitload can be seen selecting<br />
the menu, Palletization-> Palletize design<br />
2. Complete <strong>Artios</strong> to Tops Workflow for Palletization<br />
This feature will allow the user to create a box in <strong>Artios</strong> <strong>CAD</strong> and invoke <strong>TOPS</strong> Pro for<br />
palletization. <strong>TOPS</strong> Pro will then pass the information back to <strong>Artios</strong> <strong>CAD</strong> to render a 3D image<br />
of the selected solution in <strong>Artios</strong> <strong>CAD</strong>.<br />
Minimum <strong>Software</strong> Requirements: <strong>TOPS</strong> Pro 6.5, Esko <strong>Artios</strong> version 12<br />
Note: If <strong>TOPS</strong> Pro is not set as the palletization software in Esko <strong>Artios</strong> <strong>CAD</strong>, please refer to<br />
Appendix I in this document.<br />
The process starts from <strong>Artios</strong> <strong>CAD</strong> <strong>with</strong> the box design, steps involved:<br />
a. Create a box standard in <strong>Artios</strong><strong>CAD</strong><br />
b. Convert the box to 3D image<br />
c. Fold the flaps of the box.<br />
d. From the 3D folded image of the box, invoke TopsPro for palletization from the Menu,<br />
Palletization->Palletize design<br />
e. Choose the Tops Pallet to use for the design<br />
<strong>TOPS</strong> SOFTWARE CORP • 275 W Campbell Road, Suite 600, Richardson, TX 75080 • 972.739.8677 • www.topseng.com • tech@topseng.com
f. After the pallet is chosen, the rest of the parameters are selected from the screen below:<br />
The “Fill and palletize” option can be used to calcuate shipcase sizes for the selected <strong>Artios</strong> Box<br />
as a primary pack. With this option selected, <strong>TOPS</strong> Pro will create a Primary (Green carton) -><br />
Ship case (Yellow shipper) -> Pallet solution<br />
When Tops receives this data from <strong>Artios</strong>, it calculates the Unitload solutions <strong>with</strong> the<br />
parameters passed and displays the solution list. This information will have to send back to<br />
<strong>Artios</strong><strong>CAD</strong> to complete the workflow process.<br />
<strong>TOPS</strong> SOFTWARE CORP • 275 W Campbell Road, Suite 600, Richardson, TX 75080 • 972.739.8677 • www.topseng.com • tech@topseng.com
Steps involved:<br />
a. Click OK to invoke <strong>TOPS</strong> Pro for the Unitload calculation.<br />
b. Select the required solution in <strong>TOPS</strong> Pro and Save.<br />
c. Choose the Toolbar button, “Interface – Esko <strong>Artios</strong>”<br />
d. You will be prompted to save the analysis if you have not done so already. <strong>TOPS</strong> Pro will<br />
then close and return to <strong>Artios</strong><strong>CAD</strong> to display the Pallet Pattern.<br />
3. <strong>Artios</strong><strong>CAD</strong> Die Cut Layout to <strong>TOPS</strong> Pro for Palletization<br />
The die-cuts created in <strong>Artios</strong><strong>CAD</strong> can be palletized using <strong>TOPS</strong> Pro <strong>with</strong> this new feature.<br />
Minimum <strong>Software</strong> Requirements: <strong>TOPS</strong> Pro 6.5, Esko <strong>Artios</strong> version 12<br />
Note: If <strong>TOPS</strong> Pro is not set as the palletization software in Esko <strong>Artios</strong> <strong>CAD</strong>, please refer to<br />
Appendix I in this document.<br />
Steps involved:<br />
a. Create a Die Cut Manufacturing<br />
layout for the box in <strong>Artios</strong><strong>CAD</strong><br />
b. Invoke <strong>TOPS</strong> Pro for palletization<br />
from the Menu, Palletization-<br />
>Palletize design…<br />
c. Click OK to invoke <strong>TOPS</strong> Pro to<br />
display the pallet pattern as<br />
below.<br />
<strong>TOPS</strong> SOFTWARE CORP • 275 W Campbell Road, Suite 600, Richardson, TX 75080 • 972.739.8677 • www.topseng.com • tech@topseng.com
4. Box data from <strong>Artios</strong> <strong>CAD</strong> to <strong>TOPS</strong> Pro for Palletization<br />
Minimum <strong>Software</strong> Requirements: <strong>TOPS</strong> Pro 5.03, Esko <strong>Artios</strong> – all versions<br />
Note: If location of <strong>TOPS</strong> Pro installation is not set in the default settings in Esko <strong>Artios</strong> <strong>CAD</strong>,<br />
please refer to Appendix II in this document.<br />
A box design created in <strong>Artios</strong> <strong>CAD</strong> can be sent to <strong>TOPS</strong> Pro for palletization <strong>with</strong> just the basic<br />
box size info.<br />
Steps involved:<br />
a. From <strong>Artios</strong> <strong>CAD</strong>, select the Export to <strong>TOPS</strong> menu option (Outputs->Palletization-><strong>TOPS</strong>).<br />
b. Enter the thickness for length, width and height and the Style to be used in <strong>TOPS</strong> in the interface<br />
as seen below. Click OK on the subsequent screens to launch <strong>TOPS</strong> Pro.<br />
<strong>TOPS</strong> SOFTWARE CORP • 275 W Campbell Road, Suite 600, Richardson, TX 75080 • 972.739.8677 • www.topseng.com • tech@topseng.com
c. Login <strong>TOPS</strong> Pro under any user name.<br />
d. A message box appears asking if you would like pass the current carton design from <strong>Artios</strong> <strong>CAD</strong><br />
into <strong>TOPS</strong> Pro as an erected box or as knockdown. Select Box for a shipper to pallet analysis or<br />
KnockDown for a knockdown carton analysis.<br />
The dimension will be imported accordingly based on this selection.<br />
e. Next, a Dialog will prompt for an Analysis name to use for the imported carton in an analysis;<br />
you may use any name here and hit Ok button.<br />
f. At the Set Up Box Parameters dialog box, you can select the following options regarding the<br />
carton data from <strong>Artios</strong> <strong>CAD</strong>:<br />
• To import the carton as a Primary (green carton) or Shipcase (yellow shipper).<br />
• Specify the box style for the imported carton at the <strong>TOPS</strong> Style drop list. The style is<br />
normally preselected if it’s included in the <strong>Artios</strong> output data.<br />
• Enable the “Add to Database” checkbox to add this carton to the database.<br />
• Specify a design template to use for the analysis using the existing carton.<br />
Templates:<br />
• Standard Bundled Templates – KnockDowns will be bundled<br />
• Standard Bundled Templates – KnockDowns will be placed in shipcase<br />
• Custom Template – Open “Open Analysis” dialog box to select a pre-defined analysis<br />
template<br />
• New Analysis – placed KnockDown in Bundles, pallet and then into a truck<br />
NOTE: The analysis is setup using a predefined template / default values. Contact <strong>TOPS</strong><br />
<strong>Software</strong> if you would like to know how to change this template / default values.<br />
<strong>TOPS</strong> SOFTWARE CORP • 275 W Campbell Road, Suite 600, Richardson, TX 75080 • 972.739.8677 • www.topseng.com • tech@topseng.com
For Box Import:<br />
For KnockDown Import:<br />
g. <strong>TOPS</strong> Pro will then perform an analysis using the <strong>Artios</strong> data.<br />
h. Once the analysis is calculated you may then perform a KD (knock down) analysis for this box<br />
by clicking on the “KD” button on the tool bar.<br />
i. Then <strong>TOPS</strong> will perform and KD analysis.<br />
j. Use the “Combine Report” to get single page printout <strong>with</strong> both the KD and Box/erected analysis<br />
on it.<br />
<strong>TOPS</strong> SOFTWARE CORP • 275 W Campbell Road, Suite 600, Richardson, TX 75080 • 972.739.8677 • www.topseng.com • tech@topseng.com
One-time Setup in <strong>Artios</strong> <strong>CAD</strong> required for the <strong>Artios</strong>-Tops Integration<br />
Appendix I<br />
Set up Tops as the default Palletization software for <strong>Artios</strong> <strong>CAD</strong><br />
Steps involved:<br />
a. Click Options -> Defaults and dialog will pop up. Select User defaults<br />
b. On the right side do “Right Click” or (Edit -> New Defaults).<br />
c. From the list select “Startup defaults”.<br />
d. Expand the new node and locate “Pallet Applications” and double click on it.<br />
e. In a new dialog select <strong>TOPS</strong> Pro (see image below).<br />
f. Click OK.<br />
g. Click File-> Save and Yes to overwrite all user defaults.<br />
h. You should now be set for <strong>TOPS</strong>.<br />
<strong>TOPS</strong> SOFTWARE CORP • 275 W Campbell Road, Suite 600, Richardson, TX 75080 • 972.739.8677 • www.topseng.com • tech@topseng.com
Appendix II<br />
To initiate the integration of <strong>TOPS</strong> Pro from <strong>Artios</strong>, the defaults should be set in <strong>Artios</strong> so that it<br />
points to the correct install of <strong>TOPS</strong> Pro.<br />
Steps involved:<br />
a. Choose Options menu in <strong>Artios</strong> and select Defaults under it. This should open up the default<br />
selection dialog.<br />
b. Under Shared defaults, go to the section Outputs-><strong>Artios</strong>->Palletization-><strong>TOPS</strong> as shown<br />
below.<br />
c. Double click on the <strong>TOPS</strong> icon to set the details.<br />
d. Click on the Advanced tab. The WITH OUTCM.OUTPUT should have the current install of<br />
<strong>TOPS</strong> Pro <strong>with</strong> full path and INI information <strong>with</strong>in single quotes.<br />
Example: '"C:\Program Files\<strong>TOPS</strong>APPS\6.01\<strong>TOPS</strong>PRO\topspro.exe"<br />
-ini=C:\PROGRA~1\<strong>TOPS</strong>APPS\6.01\<strong>TOPS</strong>PRO\topspro.ini'<br />
<strong>TOPS</strong> SOFTWARE CORP • 275 W Campbell Road, Suite 600, Richardson, TX 75080 • 972.739.8677 • www.topseng.com • tech@topseng.com
e. Select the Directories tab and make sure that the Plot File section has the option Fixed<br />
Filename checked. The filename and directory can have the default values.<br />
f. Click OK and save the defaults.<br />
<strong>TOPS</strong> SOFTWARE CORP • 275 W Campbell Road, Suite 600, Richardson, TX 75080 • 972.739.8677 • www.topseng.com • tech@topseng.com