TOPS Pro Tutorial - TOPS - Packaging Software
TOPS Pro Tutorial - TOPS - Packaging Software
TOPS Pro Tutorial - TOPS - Packaging Software

You also want an ePaper? Increase the reach of your titles
YUMPU automatically turns print PDFs into web optimized ePapers that Google loves.
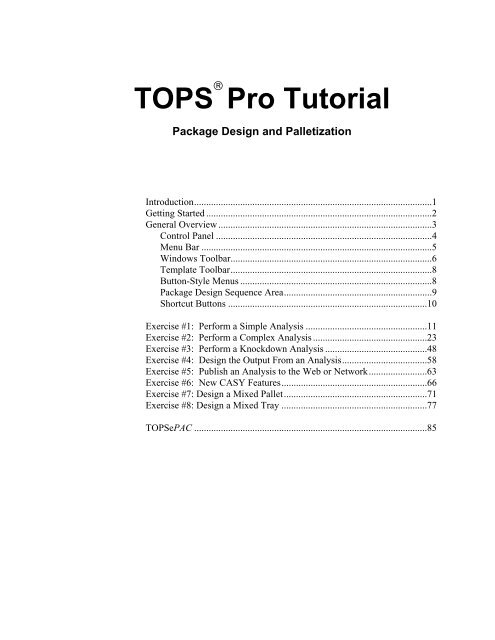
<strong>TOPS</strong> ® <strong>Pro</strong> <strong>Tutorial</strong>Package Design and PalletizationIntroduction..................................................................................................1Getting Started .............................................................................................2General Overview ........................................................................................3Control Panel .........................................................................................4Menu Bar ...............................................................................................5Windows Toolbar...................................................................................6Template Toolbar...................................................................................8Button-Style Menus ...............................................................................8Package Design Sequence Area.............................................................9Shortcut Buttons ..................................................................................10Exercise #1: Perform a Simple Analysis ..................................................11Exercise #2: Perform a Complex Analysis ...............................................23Exercise #3: Perform a Knockdown Analysis ..........................................48Exercise #4: Design the Output From an Analysis...................................58Exercise #5: Publish an Analysis to the Web or Network........................63Exercise #6: New CASY Features............................................................66Exercise #7: Design a Mixed Pallet...........................................................71Exercise #8: Design a Mixed Tray ............................................................77<strong>TOPS</strong>ePAC ................................................................................................85
<strong>TOPS</strong> ® <strong>Pro</strong> <strong>Tutorial</strong>IntroductionThanks for your interest in the <strong>TOPS</strong> <strong>Pro</strong> Demonstration (Demo) software.<strong>TOPS</strong> <strong>Pro</strong> is designed to meet the most advanced needs of the packagingprofessional. However, this tutorial is designed to give a generaloverview of the primary functions of the software. The tutorial does notexplore the full range of the <strong>TOPS</strong> <strong>Pro</strong> software capabilities, but isdesigned only as a basic tutorial that walks you through the core of thesystem. Getting Started: Walks you through the process of installing the<strong>TOPS</strong> <strong>Pro</strong> demo software and logging into the system. Exercise #1: Perform a Simple Analysis: Walks you through onhow to find the optimal solution for loading shipcases onto a pallet. Exercise #2: Perform a Complex Analysis: Walks you through ananalysis to find the optimal solution for loading bottles into a carton,into a shipcase, onto a pallet and onto a truck. You’ll also use theCASY (Create A Shape Yourself) system to design a custom-shapedcan and tray. Exercise #3: Perform a Knockdown Analysis: Walks you througha knockdown analysis to find the optimal solution for loadingknockdown (collapsed) boxes onto a pallet. Exercise #4: Design the Output from an Analysis: Walks youthrough the process of designing what information will go into yourprinted output and what that output will look like. Exercise #5: Publish an Analysis to the Web or Network: Walksyou through the process of publishing an analysis to the Web or to alocal network, where other people can view the analysis. Exercise #6: New CASY Features: Gives an overview of the newprimary shapes and shape functions in CASY. Exercise #7: Design a Mixe Pallet: Walks you through on how tocreate a mixed pallet. Exercise #8: Design a Mixed Tray: Walks you through on how tocreate a mixed pallet.<strong>TOPS</strong> <strong>Pro</strong> <strong>Tutorial</strong> 1
If you experience problems or difficulties while using the <strong>TOPS</strong> <strong>Pro</strong>software, please call the <strong>TOPS</strong> Technical Support Department or your<strong>TOPS</strong> sales representative at (972) 739-8677.Getting StartedThis section of the tutorial walks you through the installation process andgets you logged into the system. To install the <strong>TOPS</strong> <strong>Pro</strong> demo software,follow these instructions:1. Start Windows.2. Insert the <strong>TOPS</strong> <strong>Pro</strong> CD into your CD-ROM drive.Note: For more information on installing the software, please refer tothe installation sheet included with the software package.Follow the instructions on the screen until the installation is complete.3. Double-click on the <strong>TOPS</strong> for Windows DEMO icon.System Response: The User Login panel appears, as pictured below.4. Select the user group you belong to and click on the Login button.System Response: The Control Panel appears, as pictured on page 4.Congratulations! At this point, the installation is complete and you'velogged on. Now you're ready to go to work with <strong>TOPS</strong> <strong>Pro</strong>. First, we'llwalk through a General Overview, where you'll get acquainted with theControl Panel and the layout of the system.After you're familiar with the primary elements, then we'll walk throughsome real-world packaging analyses. These exercises will demonstratethe ease and flexibility with which <strong>TOPS</strong> <strong>Pro</strong> generates a number ofdetailed solutions for the packing professional.2 <strong>TOPS</strong> User Guide Supplement and <strong>Tutorial</strong>
General OverviewBefore you start using <strong>TOPS</strong> <strong>Pro</strong>, let's get acquainted with the primaryfeatures and functions of <strong>TOPS</strong> <strong>Pro</strong>, as listed below: Control Panel: The primary window in the system that allows you toselect the type of analysis you want to perform, the stages to be used inthe analysis, and the dimensions of each stage. Menu Bar: <strong>Pro</strong>vides a number of pull-down menus that allow you toperform common tasks such as setting print parameters, changinglanguages and defining stages in an analysis. Windows Toolbar: Contains a number of icons that allow you toperform standard, commonly used functions. Template Toolbar: Contains a number of buttons that give you easyaccess to analysis templates set up in the system. Button-Style Menus: Allow you to set up a Package DesignSequence, in which you select the various stages to be used in ananalysis. Package Design Sequence Area: The area on the screen in whichyou define a series of stages that comprise an analysis. For example,you might set up a sequence in which you analyze how to best loadshipcases onto a pallet. Shortcut Buttons: Allow you to view solution panels for an analysisrecord or calculate solutions for an analysis.Let's discuss these features in more detail.<strong>TOPS</strong> <strong>Pro</strong> <strong>Tutorial</strong> 3
Control PanelWhen you login to the system, the Control Panel appears, as picturedbelow. The Control Panel contains all the primary features of the system:Menu Bar, Windows Toolbar, Template Toolbar, Package DesignSequence Area, Button-Style Menus and Shortcut Buttons.Menu BarPackage Design Sequence AreaWindowsToolbarTemplateToolbarButton-Style MenusShortcut ButtonsThe Control Panel is the primary panel in the system. It is the workingarea from which you will select the type of analysis you want to perform,select the stages to be used in the analysis and define the dimensions ofeach stage.4 <strong>TOPS</strong> User Guide Supplement and <strong>Tutorial</strong>
Menu BarThe Menu Bar, pictured below, provides a number of drop-down menus.These menus provide options that allow you to perform common tasks,many of which are duplicated on the Button Bar and Shortcut Buttons.The list below gives a brief description of the eight menus on the MenuBar: File Menu: Allows you to create new records, open existing records,save records and set up print parameters. Edit Menu: Allows you to copy text and images to the Windowsclipboard, as well as work with secondary pallet patterns. View Menu: Allows you to view graphic images in a number offormats: 3-D, front, side, split screen, quad screen and others. Define Menu: Allows you to define parameters for new products,cartons, shipcases, pallets, vehicles, etc. Tools Menu: Allows you to revise your <strong>TOPS</strong> <strong>Pro</strong> configuration, thelanguage used in <strong>TOPS</strong> <strong>Pro</strong> (<strong>TOPS</strong> <strong>Pro</strong> is used worldwide), stackingstrength parameters, color selections, etc. Export Menu: Allows you to export different types of graphic files(.bmp, .tiff, .jpeg), analyses, product reports, etc. Supervisor Menu: Allows you to perform supervisor functions suchas login/logout tasks, access approval and denial, template setup, etc. Help Menu: Allows you to display Help information for all featuresand functions in the system.<strong>TOPS</strong> <strong>Pro</strong> <strong>Tutorial</strong> 5
Windows ToolbarThe Windows Toolbar, pictured below, contains a number of icons thatallow you to perform standard, routine functions.The table below and on the next page outlines each icon in the Toolbarand its corresponding purpose.Windows ToolbarThis Icon...Allows You To Do ThisNew Analysis: Clears the Package Design Sequencearea and allows you to start a new analysis.New Based on Predefined Template: Opens the OpenAnalysis dialog box and allows you to select apredefined analysis template.Open: Opens the Open Analysis dialog box and allowsyou to select an analysis.Save: Saves the analysis.Print: Prints the analysis.Previous: Takes you to the previous step in the PackageDesign Sequence for an analysis.Next: Takes you to the next step in the Package DesignSequence for an analysis. If there is no next step, thisicon takes you back to the Package Design Sequence.Cancel to Package Design Sequence: Cancels out ofthe active analysis and takes you back to the PackageDesign Sequence area, where you can start over.Design CASY Primary Package: Opens the CASYPrimary Package Screen.6 <strong>TOPS</strong> User Guide Supplement and <strong>Tutorial</strong>
Windows Toolbar (cont.)This Icon...Allows You To Do ThisDesign CASY Shipping Case/Tray: Opens the CASYShipping Case/Tray Screen.Mix<strong>Pro</strong> Mixed Pallet Editor: Opens the Mix<strong>Pro</strong> MixedPallet Editor, used to create mixed pallets.Mix<strong>Pro</strong> Mixed Tray Editor: Opens the Mix<strong>Pro</strong> MixedTray Editor, used to create mixed trays.Modify Primary Pack Parameters: Opens theparameters dialog box for the appropriate primarypackage (bottle, can, etc.) in the Analysis View.Modify Intermediate Pack Parameters: Opens theparameters dialog box for the appropriate intermediatepacker (, etc.) in the Analysis View.Modify Shipcase Parameters: Opens the ShipcaseParameters dialog box in the Analysis View.Modify Unitload Parameters: Opens the UnitloadParameters dialog box in the Analysis View.Modify Vehicle Parameters: Opens the VehicleParameters dialog box in the Analysis View.Switch to Related KD Analysis: Not currently active.Switch to Related Box Analysis: Not currently active.Show CASY: Serves as a toggle switch to turn on or offthe CASY graphics display.Stacking Strength: Opens the Stacking Strength dialogbox.All Stages Enhanced View: Opens an All View panewith all stages of an analysis in the Analysis View.Flying Toolbar: Serves as a toggle switch to turn on oroff the Flying Toolbar.<strong>TOPS</strong> <strong>Pro</strong> <strong>Tutorial</strong> 7
The Windows Toolbar provides a direct link to the parameters dialogboxes. In previous releases of <strong>TOPS</strong>, if you were in the middle of ananalysis and needed to modify parameters for a shipcase, for example, youhad to cancel out of the analysis, go back to the Package Design SequenceArea and access the dialog box from there.Now, the Toolbar has icons that take you directly to the parameters dialogbox for primary packages, intermediate packers, shipcases, unitloads andvehicles. You can modify those parameters without losing your place inthe analysis process.Template ToolbarThe Template Toolbar, pictured below, gives you easy access to analysistemplates set up in the system.Notice the first button in the toolbar to theleft. This template button shows four stagesof an analysis: Can/Cylinder-Shipcase-Pallet-Vehicle.If you click on this button, <strong>TOPS</strong> <strong>Pro</strong>automatically inserts the correspondingicons in the Package Design Sequence Area.As you set up the stages that make up ananalysis, <strong>TOPS</strong> <strong>Pro</strong> allows you to save theanalysis as a template and add it to theTemplate Toolbar. For more information,please refer to “Exercise 1: Perform aSimple Analysis.”Button-Style MenusThe Button-Style Menus, pictured below, allow you to set up a PackageDesign Sequence with the various stages to be used in an analysis.8 <strong>TOPS</strong> User Guide Supplement and <strong>Tutorial</strong>
As you can see, there are six Button-Style Menus, each of whichrepresents a stage of an analysis and has a corresponding icon. In thefigure above, the six active stages are bulk, film bag, carton, shipper,pallet and truck.Each menu contains a list of items that allow you to define the stages of ananalysis with any combination of items you need. To select an item, clickon that item in the list, then click on the button at the top of the list. Asyou select each stage, the corresponding icon will appear in the PackageDesign Sequence Area of the Control Panel. To remove an icon from thatarea, simply click on the button again.Note: Be aware that there are a few duplications in the button-stylemenus that should be clarified. Carton Icons: There are two Carton icons. The Box Carton icon(green) displays the Carton Parameters dialog box. The IntermediatePack Carton icon (blue) displays the Intermediate Pack Parametersdialog box. Tray Icons: There are two Tray icons. The Intermediate Pack Trayicon (blue) displays the Intermediate Pack Parameters dialog box. TheShipper Tray icon (yellow) displays the Shipcase Parameters dialogbox. Bag Icons: There are two Bag icons. The Film Bag icon (green) andthe Shipper Bag icon (yellow) both display the Bag Parameters dialogbox. However, you'll use the first Film Bag icon to design a bag thatcontains a product. You'll use the Shipper Bag icon to put a bag onto apallet. Bottle Icons: There are two Bottle icons. The Bottle icon (green) andthe Shipper Bottle icon (yellow) both display the Bottle Parametersdialog box. However, you'll use the first Bottle icon to design a bottlethat goes into a shipcase. You'll use the Shipper Bottle icon to designa bottle that goes onto a pallet.Package Design Sequence AreaThe Package Design Sequence Area is the area on your screen in whichyou define a series of stages selected to perform an analysis. For example,let's say you selected six stages from the Button-Style Menus: bulk, bag,carton, shipper, pallet and truck. The corresponding icons will appear inthe Package Design Sequence Area, as pictured here.<strong>TOPS</strong> <strong>Pro</strong> <strong>Tutorial</strong> 9
The icons you see in this figure are often referred to, respectively, as theBulk Parameters icon, the Bag Parameters icon, the Carton Parametersicon, the Shipper Parameters icon, the Unitload Parameters icon and theTransit Vehicle Parameters icon.This represents a Package Design Sequence in which you'll find the bestsolution for this analysis: bulk product into a bag, into a carton, into ashipcase, onto a pallet and into a truck.Next, when you click on any of these icons, a dialog box will appear andallow you to define the parameters of that particular stage in the sequence.For example, when you click on the Bottle icon, the Bottle Parametersdialog box appears, and you'll tell the system precisely how your bottlesare designed in terms of dimensions, weight, shape, etc.Shortcut ButtonsThe Shortcut Buttons, as pictured below, allow you to view and calculatesolutions for an analysis.Let's briefly define these shortcut buttons: View Button: Allows you to display and view the solution panels(Analysis View) for a selected analysis. This function becomes activeonly after an analysis has been completed. Calc Button: Allows you to calculate solutions for an analysis. Afteryou've selected all the stages for the analysis and defined parametersfor each stage, the Calc button tells the system to generate all possiblesolutions for the analysis, given the data you entered.If you click on the Calc button and your analysis is incomplete – youforgot to enter a necessary detail – <strong>TOPS</strong> <strong>Pro</strong> automatically displaysthe appropriate dialog box and prompts you to enter the missing data.If you've simply made changes to the analysis, the system allows youto look over the changes you made before you continue.10 <strong>TOPS</strong> User Guide Supplement and <strong>Tutorial</strong>
Exercise #1: Perform a SimpleAnalysisIn this exercise, you'll perform a very simple analysis: carton into ashipcase onto a pallet. This analysis is considered simple because itinvolves only three stages – carton, shipcase and pallet.Objective: Find the optimal solution for loading cartons into shipcasesand onto a pallet.In this analysis, the various stages have these general characteristics: Each carton measures 6 inches long, 2 inches wide and 4 inches high. Each shipcase measures 12 inches long, 10 inches wide and 8 incheshigh. Each shipcase weighs 25 pounds. You’ll use three pallet types to calculate a solution – GMA (Notched),Europallet and GMA (Metric-Block). The pallet measures 48 inchesby 40 inches. The load of shipcases will not exceed 60 inches high. The load of shipcases will not exceed 9,999 pounds. The load of shipcases will not exceed four layers.To perform this analysis, you'll start from the Control Panel and workthrough four simple sets of procedures, in this order:1. Define the Package Design Sequence.2. Save the Package Design Sequence as a template.3. Define the carton parameters.4. Define the shipcase parameters.5. Select pallet types and define the unitload (pallet) parameters.6. Generate possible solutions, make a decision and save the analysis to afolder.7. Email the Stacking Strength Board Combo List.8. Send the analysis to Microsoft Word.<strong>TOPS</strong> <strong>Pro</strong> <strong>Tutorial</strong> 11
Step 1: Define the Package Design SequenceTo define the Package Design Sequence, start from the Control Panel andfollow these instructions:1. Click on the Carton button.2. Click on the Shipper button.3. Click on the Pallet button.System Response: The Carton, Shipper and Pallet icons appear in thePackage Design Sequence area of the panel, as pictured below.Step 2: Save the Package Design Sequence as aTemplateThe shipcase-to-pallet sequence is a routine analysis that you’ll performfrequently. <strong>TOPS</strong> <strong>Pro</strong> allows you to save this analysis as a template andadd it to the Template Toolbar.To save the Package Design Sequence as a template, follow theseinstructions:1. Go to the Menu Bar and open the File Menu.2. From the File Menu, click on the Save As Template option.System Response: The Analysis Save As dialog box appears, aspictured below.3. In the Description field, enter the name of the new template (e.g.,Carton-Shipcase-Pallet).12 <strong>TOPS</strong> User Guide Supplement and <strong>Tutorial</strong>
4. Click on the OK button.System Response: <strong>TOPS</strong> <strong>Pro</strong> saves the new template to the databaseand adds it to the Template Toolbar. The next time you want toperform this analysis, you’ll simply go to the Template Toolbar andclick on the template button for the analysis.Note: To display the Template Toolbar on the Control Panel, go tothe Configuration dialog box and select the Display Template Buttonsoption.Step 3: Define Carton ParametersTo define your carton parameters, follow these instructions:1. Click on the Carton icon in the Package Design Sequence Area.System Response: The Carton Parameters dialog box appears, aspictured below.2. Use the following fields to define the carton parameters. Use the Tabkey to move from field to field. Carton: Select Fixed. Length: Enter 6. Width: Enter 2. Height: Enter 4. Vertical: Check the box to the right of the Height field.As you enter parameters, a Graphic Online Display (g.o.d.) featureappears in the bottom, right of the panel. This feature shows how thecarton will look as you change dimensions. This feature allows you tovisually inspect your work and correct flaws as you go along.3. After completing the shipcase parameters, click on OK.System Response: <strong>TOPS</strong> <strong>Pro</strong> stores your carton parameters tomemory and redisplays the Control Panel.<strong>TOPS</strong> <strong>Pro</strong> <strong>Tutorial</strong> 13
Step 4: Define Shipcase ParametersTo define your shipcase parameters, follow these instructions:1. Click on the Shipper icon in the Package Design Sequence Area.System Response: The Shipcase Parameters dialog box appears, aspictured below.This dialog box allows you to define parameters of the shipcase in a veryprecise, thorough manner. In addition to the general dimensions outlinedin the objective of this analysis, you'll also define these parameters: The flute type is a C flute. Shipcase dimensions are measured from the outside. The 8-inch height is the dimension vertical to the pallet.2. Use the following fields to define the shipcase parameters. Use theTab key to move from field to field. Flute: Use the default (C Flute). Dimensions: Use the default (Outside). Length: Enter 12. Width: Enter 10. Height: Enter 8. Case: Enter 25. Vertical: Check the box to the right of the Height/Slack field.As you enter parameters, a Graphic Online Display (g.o.d.) featureappears in the bottom, right portion of the panel and shows how theshipcase will look as you change dimensions. This feature allows you tovisually inspect your work and correct flaws as you go along.3. After completing shipcase parameters, click on OK.System Response: <strong>TOPS</strong> <strong>Pro</strong> stores your shipcase parameters tomemory and redisplays the Control Panel.14 <strong>TOPS</strong> User Guide Supplement and <strong>Tutorial</strong>
Step 5: Select Pallet Types and Define Unitload(Pallet) ParametersTo select the pallet types to be used, follow these instructions:1. Click on the Pallet icon in the Package Design Sequence Area.System Response: The UnitLoad Parameters dialog box appears, aspictured below.2. Select the Multi Pallets option, then click on the Select Pallets button.System Response: The Select Items dialog box appears, as picturedbelow.Notice that the dialog box is divided into two windows: The window on the left (Available Pallets) includes a list of palletstyles available to be used in the calculation. The window on the right (Selected Pallets) includes a list of palletstyles that have been selected to be used in the calculation. (The GMA(Notched) pallet is selected by default.)<strong>TOPS</strong> <strong>Pro</strong> <strong>Tutorial</strong> 15
In this exercise, you’ll select three pallet styles to be included in thecalculation – GMA (Notched), Europallet and GMA (Metric-Block). TheGMA (Notched) pallet is already selected by default.3. Click on the Europallet style.4. Click on the Add button.System Response: <strong>TOPS</strong> <strong>Pro</strong> adds the Europallet style to theSelected Pallets window.5. Click on the GMA (Metric-Block) style.6. Click on the Add button.System Response: <strong>TOPS</strong> <strong>Pro</strong> adds the GMA (Metric-Block) style tothe Selected Pallets window.At this point, the Selected Pallets window includes three pallet styles –GMA (Notched), Europallet and GMA (Metric-Block).7. When your pallet selections are complete, click on OK.System Response: <strong>TOPS</strong> <strong>Pro</strong> stores the selected pallet styles tomemory and redisplays the UnitLoad Parameters dialog box.This dialog box allows you to define the parameters of the load to beplaced on your pallet – i.e., the particulars of how the shipcases will beloaded onto the pallet. For the purposes of this demo, we'll only use ahandful of these options.Remember in the objective of this analysis, the pallet is a standard GMA(notched) pallet, which measures 48 inches by 40 inches, and the load ofshipcases will not exceed a height of 60 inches high, a weight of 9,999pounds or more than four layers of shipcases. In addition to thesemeasures, we'll also define these parameters: The maximum overhang of the load is 1 inch long and 1 inch wide. The maximum underhang of the load is 15 inches long and 15 incheswide8. Use the following fields to define the shipcase parameters: Maximum Height: Click on the field and enter 60. Maximum Weight: Use the default (9999). Maximum Layers: Click on the field and enter 4. Maximum Overhang/Length: Use the default (1). Maximum Overhang/Width: Use the default (1). Maximum Underhang/Length: Use the default (15). Maximum Underhang/Width: Use the default (15).16 <strong>TOPS</strong> User Guide Supplement and <strong>Tutorial</strong>
9. After completing the unitload parameters, click on OK.System Response: <strong>TOPS</strong> <strong>Pro</strong> stores your unitload parameters tomemory and redisplays the Control Panel.Step 6: Generate Possible Solutions, Make aDecision and Save the Analysis to a FolderTo generate the possible solutions for this analysis, follow theseinstructions:1. Click on the Calc button.System Response: <strong>TOPS</strong> <strong>Pro</strong> uses the defined parameters – carton,shipcase and unitload – and generates all possible solutions for theanalysis. <strong>TOPS</strong> <strong>Pro</strong> displays the Analysis View, which is comprisedof three panes, as pictured below.This Analysis View is organized into three panes: Shipcase Solution View Pane: This pane, in the top, left portion ofthe screen, displays a graphic of what the selected shipcase solutionlooks like – i.e., how the cartons have been loaded into the shipcases.For example, in Figure 23 above, the graphic corresponds to Solution1, which is highlighted in the Shipcase Solution List. If you selectSolution 5 in the Shipcase Solution List, the Shipcase Solution Viewpane displays a graphic for Solution 5, and so on. Unitload Solution View Pane: This pane, in the top, right portion ofthe screen, displays a graphic of the selected unitload solution – i.e.,how the shipcases have been loaded onto the pallet.<strong>TOPS</strong> <strong>Pro</strong> <strong>Tutorial</strong> 17
Solution List Pane: This pane, at the bottom of the screen, displays alist of the best 50 (if there are 50) solutions generated for the analysis,along with a variety of basic information for each solution.The Solution List corresponds to the active Solution View pane. If theShipcase Solution View pane is active, the Solution List showsshipcase solutions. If the Unitload Solution View pane is active, theSolution List shows unitload solutions.2. Select a shipcase solution, then click on the Next button.System Response: The Analysis View redisplays, as pictured here.In addition to the Solution View pane and Solution List pane, notice athird pane, the Statistics View pane. This pane, in the top, right portion ofthe screen, displays detailed statistics for the selected unitload solution.3. Select a unitload solution.4. Click on the Save icon to save the analysis record.System Response: The Analysis Save As dialog box appears, aspictured below.18 <strong>TOPS</strong> User Guide Supplement and <strong>Tutorial</strong>
Notice three things about this dialog box: The Description field allows you to save the analysis with a specifictitle. The Folder field provides a drop-down box with a list of folders. Youcan save the analysis into any of these folders; Main Folder is thedefault. The window below the Folder field displays a list of foldersand analyses that have been saved to a selected folder. The New Folder button allows you to create a new folder and add it tothe database.5. In the Description field, enter the name of this analysis.6. To create a new folder, click on the New Folder button.System Response: The New Folder dialog box appears, as picturedbelow.7. Enter the name of the new folder (e.g., John Smith).8. Click on the OK button.System Response: <strong>TOPS</strong> <strong>Pro</strong> saves the new folder to the databaseand redisplays the Analysis Save As dialog box. The new folder (JohnSmith) is now listed as part of the Main Folder.9. To save the analysis to the John Smith folder, click on the John Smithfolder.10. Click on the OK button.System Response: <strong>TOPS</strong> <strong>Pro</strong> saves the analysis to the selected folder.Revise Parameters for an AnalysisTo revise any parameters for an analysis that has not yet been generated(you've not yet clicked on the Calc button), follow these instructions:1. Click on the appropriate icon in the Toolbar.2. Use the dialog box to make the necessary changes.To revise any parameters for an analysis that has already been generated,follow these instructions:<strong>TOPS</strong> <strong>Pro</strong> <strong>Tutorial</strong> 19
1. Click on the appropriate icon in the Toolbar.2. Use the dialog box to make the necessary changes.3. Click on the Calc button.System Response: <strong>TOPS</strong> <strong>Pro</strong> uses your changes to generate a new setof solutions.Step 7: Email the Stacking Strength Board ComboList<strong>TOPS</strong> <strong>Pro</strong> Version 5.X allows you to access the Stacking Strength BoardCombo List from an analysis and email it to other users. To use thisfeature, start from the Analysis View and follow these instructions:1. From the Windows Toolbar, click on the Stacking Strength button –.System Response: The Stacking Strength dialog box appears, aspictured below.2. Define stacking strength parameters on the dialog box.Note: For detailed instructions, please contact <strong>TOPS</strong> <strong>Pro</strong> TechnicalSupport.3. After completing the stacking strength parameters, click on the OKbutton.System Response: The Stacking Strength Results Screen appears, aspictured on the next page.20 <strong>TOPS</strong> User Guide Supplement and <strong>Tutorial</strong>
4. Go to the Windows Toolbar and open the Tools Menu.5. Select the Email Stacking Strength option.System Response: <strong>TOPS</strong> <strong>Pro</strong> automatically launches your emailapplication, converts the Stacking Strength Board Combo List to anHTML file and attaches it to the email.6. Send the email to the appropriate users.System Response: <strong>TOPS</strong> <strong>Pro</strong> closes the email application and returnsyou to the Stacking Strength Results Screen.Step 8: Send the Analysis to Microsoft Word<strong>TOPS</strong> <strong>Pro</strong> Version 5.X includes a feature that uses a Word template toconvert an analysis directly to a Microsoft Word file. Each template isdefined by a number of items – <strong>Pro</strong>duct, Intermediate Pack, Shipcase andUnitload – and a number of views – 3D, Plan, Side and Front. <strong>TOPS</strong> <strong>Pro</strong>uses these templates to retrieve specific information from an analysis andpresent that information in the form of a Word document.Note: <strong>TOPS</strong> <strong>Pro</strong> provides a template – Simple.dot – from which you cancreate your own custom Word templates. For instructions, please contact<strong>TOPS</strong> Technical Support.To send an analysis to Word, start from the Analysis View and followthese instructions:1. Go to the Windows Toolbar and open the Export Menu.2. Select the Send to Word option.System Response: The About M<strong>TOPS</strong> dialog box appears, aspictured on the next page.<strong>TOPS</strong> <strong>Pro</strong> <strong>Tutorial</strong> 21
3. Select a template from the Template window.4. Click on the OK button.System Response: <strong>TOPS</strong> <strong>Pro</strong> launches Microsoft Word and uses theselected template to create a Word file. When Word opens, the activedocument consists of information from the analysis, based on theselected template.22 <strong>TOPS</strong> User Guide Supplement and <strong>Tutorial</strong>
Exercise #2: Perform a ComplexAnalysisThe second analysis you'll perform is more complex and involves morestages, but <strong>TOPS</strong> <strong>Pro</strong> makes it an easy process. Suppose you work for anoil change service company and need to determine the best way topackage oil cans, put them on pallets and ship them via truck.Note: Because these oil cans are shaped more like bottles, we’ll use bottleparameters and refer to the cans as bottles.Objective: Find the optimal solution for loading bottles into a carton, intoa shipcase, onto a pallet and onto a truck.In this analysis, the various stages have these general characteristics: The bottles are contained in six-packs. Each six-pack unit sits in a tray with dividers. Each shipcase contains four six-packs. The pallet is a standard pallet. The truck is a standard truck.To perform this analysis, you'll start from the Control Panel and workthrough eight simple sets of procedures, in this order:1. Define the Package Design Sequence.2. Define the bottle parameters.3. Define the intermediate pack tray parameters.Note: Be aware that two types of trays are available – theintermediate pack tray (blue icon) and the shipcase tray (yellow icon).4. Define the shipcase parameters.5. Define the unitload (pallet) parameters.6. Define the transit vehicle (truck) parameters.7. Generate possible solutions and make a decision.8. Design custom styles for the bottles and trays to dress up the display.<strong>TOPS</strong> <strong>Pro</strong> <strong>Tutorial</strong> 23
Step 1: Define the Package Design SequenceTo define the Package Design Sequence, start from the Control Panel andfollow these instructions:1. Click on the New button to clear any work from the Control Panel.2. In the Carton list, click on Bottle.System Response: The Carton icon changes to a Bottle icon.3. Click on the Bottle button.4. In the Intermediate Packer list (blue icon), click on Tray.System Response: The Packer icon changes to a Tray icon.5. Click on the Tray button.6. Click on the Shipper button.7. Click on the Pallet button.8. Click on the Truck button.System Response: The Bottle, Tray, Shipper, Pallet and Truck iconsappear in the Package Design Sequence Area, as pictured below.Step 2: Define Bottle ParametersTo define your bottle parameters, follow these instructions:1. Click on the Bottle icon in the Package Design Sequence.System Response: The Bottle Parameters dialog box appears, aspictured below.24 <strong>TOPS</strong> User Guide Supplement and <strong>Tutorial</strong>
2. Use the following fields to define the specific bottle parameters. Usethe Tab key to move from field to field. Body Shape: Select Rectangular. Body Length: Enter 4.25. Body Width: Enter 2.63. Neck Diameter: Enter 0.7. Height: Enter 9. Neck Height: Enter 1. Shoulder Height: Enter 2.0. Vertical: Check the box to the right of the Height field.Notice that as you enter the bottle parameters, the g.o.d. feature illustrateshow the bottle will look with each added dimension. This feature allowsyou to visually inspect your work and correct any flaws as you go along.3. After completing the bottle parameters, click on OK.System Response: <strong>TOPS</strong> <strong>Pro</strong> stores your bottle parameters tomemory and redisplays the Control Panel.Step 3: Define Intermediate Pack Tray ParametersTo define your intermediate pack tray parameters, follow theseinstructions:1. Click on the Tray icon in the Package Design Sequence Area.System Response: The Intermediate Pack Parameters dialog boxappears, as pictured below.2. Use the following fields to define the specific tray parameters. Use theTab key to move from field to field.<strong>TOPS</strong> <strong>Pro</strong> <strong>Tutorial</strong> 25
Case: Use the default (New). Style: Select Tray (Shrink Wrap). Flute: Use the default (F Flute). Sizing: Select Values. Values: Enter 6.Note: At this point, we don't know the dimensions of the tray, so wewon't enter any values for length, etc. Instead, we'll select New in theCase field, which directs <strong>TOPS</strong> <strong>Pro</strong> to design a tray with thedimensions to accommodate whatever number of bottles are placedinside it.Note: The Sizing field gives you two options: (1) define a range ofbottles to place in a tray or (2) define a set value of bottles to place in atray. Because your bottles are arranged in six-pack units, a set value,we'll select Values in the Sizing field and enter 6 in the Values field.3. You want the tray to have six-pack dividers, so click on the Dividersbutton.System Response: The Dividers dialog box appears, as picturedbelow.4. Use the following field to define the specific divider parameters: Style: Select (A) 2-Way Cell.5. After defining divider parameters, click on OK.System Response: <strong>TOPS</strong> <strong>Pro</strong> stores your dividers parameters tomemory and redisplays the Intermediate Pack Parameters dialog box.6. After completing the tray parameters, click on OK.System Response: <strong>TOPS</strong> <strong>Pro</strong> stores your tray parameters to memoryand redisplays the Control Panel.26 <strong>TOPS</strong> User Guide Supplement and <strong>Tutorial</strong>
Step 4: Define Shipcase ParametersTo define your shipcase parameters, follow these instructions:1. Click on the Shipper icon in the Package Design Sequence Area.System Response: The Shipcase Parameters dialog box appears, aspictured below.2. Use the following fields to define the shipcase parameters. Use theTab key to move from field to field. Style: Use the default [RSC (FEFCO 0201)]. Flute: Use the default (C Flute). Case: Use the default (New).Note: At this point, we don't know the dimensions of the box, so wewon't enter values for length, etc. Instead, we'll select New in the Casefield, which directs <strong>TOPS</strong> <strong>Pro</strong> to design a shipcase with thedimensions to accommodate whatever number of trays are placedinside it. Sizing: Select Values. Values: Enter 4.Note: The Sizing field gives you two options: (1) define a range oftrays to place in a shipcase or (2) define a set value of trays to place ina shipcase. We know we want four six-packs (trays) per case, which isa set value, so we'll select Values in the Sizing field and enter 4 in theValues field.3. After completing the shipcase parameters, click on OK.System Response: <strong>TOPS</strong> <strong>Pro</strong> stores your shipcase parameters tomemory and redisplays the Control Panel.<strong>TOPS</strong> <strong>Pro</strong> <strong>Tutorial</strong> 27
Shipcase Database OptionAs you work through analyses and create various types of shipcases,<strong>TOPS</strong> <strong>Pro</strong> allows you to save those shipcases to a shipcase database.Rather than enter shipcase parameters with each new analysis, this featureallows you to use shipcases already defined in the system.Notice two things on the Shipcase Parameters dialog box: The Case feature includes a Database option, which activates theDatabase feature just below. The Database feature tells <strong>TOPS</strong> <strong>Pro</strong> to automatically use shipcasesalready set up and stored in the shipcase database. The Databasefeature has two options:− All: Tells <strong>TOPS</strong> <strong>Pro</strong> to consider all shipcases saved to thedatabase when it calculates solutions.− Multiple: Opens the Select Items dialog box and allows you toselect specific shipcases to be used in calculating solutions.To use the Multiple option, follow these instructions:1. Click on the Multiple button.System Response: The Select Items dialog box appears, as picturedbelow.Notice two things about this dialog box: The window on the left shows a list of shipcases available to be usedin the calculation. The window on the right shows a list of shipcases that have beenselected to be used in the calculation.2. Select a shipcase to be used in the analysis.28 <strong>TOPS</strong> User Guide Supplement and <strong>Tutorial</strong>
3. Click on the Add button.System Response: <strong>TOPS</strong> <strong>Pro</strong> adds the selected shipcase to thewindow on the right.4. Repeat steps 2 and 3 for each shipcase to be used in the analysis.Note: To use all shipcases, click on the Add All button.To remove a shipcase from the right-hand window, select the shipcaseand click on the Remove button. To remove all shipcases from theright-hand window, click on the Remove All button.5. After selecting the shipcases, click on the OK button.System Response: <strong>TOPS</strong> <strong>Pro</strong> stores the selected shipcases to memoryand redisplays the Shipcase Parameters dialog box.Step 5: Define the Unitload (Pallet) ParametersTo define your unitload (pallet) parameters, follow these instructions:1. Click on the Pallet icon in the Package Design Sequence Area.System Response: The UnitLoad Parameters dialog box appears, aspictured below.2. Use the default values to define the specific pallet parameters. Use theTab key to move from field to field.Note: Be aware that you can define the dimensions for a non-standardpallet by using the New Pallet feature.3. After completing the unitload parameters, click on OK.System Response: <strong>TOPS</strong> <strong>Pro</strong> stores your unitload parameters tomemory and redisplays the Control Panel.<strong>TOPS</strong> <strong>Pro</strong> <strong>Tutorial</strong> 29
Step 6: Define Truck ParametersTo define truck parameters, follow these instructions:1. Click on the Truck icon in the Package Design Sequence Area.System Response: The Vehicle Parameters dialog box appears, aspictured below.2. Use the default values to define the truck parameters:Note: Like the pallets, you can define the dimensions for a nonstandardtruck by using the New Vehicle feature.3. After completing the truck parameters, click on OK.System Response: <strong>TOPS</strong> <strong>Pro</strong> stores your truck parameters to memoryand redisplays the Control Panel.Step 7: Generate Possible Solutions and Make aDecisionThis step works a little bit differently than in the carton-shipcase-palletscenario. <strong>TOPS</strong> <strong>Pro</strong> generates solutions in the same way, but in the firstscenario, there were two decisions to make in the final analysis – whichshipcase and unitload solutions are the best way to go.In this analysis – bottle-tray-shipcase-pallet-truck – more stages meanthere are more decisions to make. In this analysis, you'll make a series ofdecisions that take you from one stage in the Package Design Sequence tothe next. One decision affects the next decision, which affects the nextdecision, and so on. We'll walk through the process one step at a time.To generate the possible solutions for this analysis, follow theseinstructions:1. Click on the Calc button.System Response: <strong>TOPS</strong> <strong>Pro</strong> uses the defined parameters – bottle,tray, shipcase, pallet and truck – and generates all possible solutions30 <strong>TOPS</strong> User Guide Supplement and <strong>Tutorial</strong>
for the analysis. <strong>TOPS</strong> <strong>Pro</strong> displays the Analysis View, as picturedbelow.Let's look at these three panes one at a time: Intermediate Pack Solution View: This pane, in the top, left portionof the screen, displays a graphic of a selected packer solution – i.e.,how the tray is designed and utilized. If you select another packersolution, this graphic will change accordingly. Shipcase Solution View: This pane, in the top, right portion of thescreen, displays a graphic of the shipcase that corresponds to theselected packer solution – how the shipcase is designed and utilized.The Shipcase Solution View is driven by the selected packer solutionand changes in conjunction with the packer solution graphic.For example, if you select Solution 2 from the Packer Solution List,the packer solution graphic redisplays to reflect the Solution 2 values.At the same time, the Shipcase Solution View graphic redisplays toreflect Solution 2. For this analysis, we’ll focus on Solution 1. Packer Solution List: This pane, at the bottom of the screen, displaysa list of all packer solutions generated for the analysis. In thisexample, <strong>TOPS</strong> <strong>Pro</strong> has generated two packer solutions.2. Select a packer solution.3. Click on the Next button – – in the Toolbar.System Response: <strong>TOPS</strong> <strong>Pro</strong> redisplays the Analysis View with threenew panes, as pictured on the next page.<strong>TOPS</strong> <strong>Pro</strong> <strong>Tutorial</strong> 31
As you can see, <strong>TOPS</strong> <strong>Pro</strong> has proceeded to the next step in the analysis.We've completed the packer stage of the analysis; now we're ready towork with the shipcase solutions, which in turn affect the unitload options.Let's briefly outline these three panes: Shipcase Solution View: This pane displays a graphic of a selectedshipcase solution – how the shipcase is designed and utilized. UnitLoad Solution View: This pane displays a graphic of theunitload that corresponds to the selected shipcase solution. It showshow the unitload is designed and utilized. Shipcase Solution List: This pane displays a list of all shipcasesolutions generated for the analysis. In this example, <strong>TOPS</strong> <strong>Pro</strong> hasgenerated five shipcase solutions.4. Select a shipcase solution. We’ll go with Solution 1 here.5. Click on the Next button – – in the Toolbar.System Response: <strong>TOPS</strong> <strong>Pro</strong> redisplays the Analysis View with threenew panes, as pictured on the next page.32 <strong>TOPS</strong> User Guide Supplement and <strong>Tutorial</strong>
Again, <strong>TOPS</strong> <strong>Pro</strong> has proceeded to the next step in the analysis. We'vecompleted the shipcase stage of the analysis; now we're ready to workwith the unitload solutions, which in turn affect the truck options.Let's briefly outline these three panes: UnitLoad Solution View: This pane displays a graphic of a selectedunitload solution – how the unitload is designed and utilized. Vehicle Solution View: This pane displays a graphic of the truck loadthat corresponds to the selected unitload solution. It shows how thetruck load is designed and utilized. UnitLoad Solution List: This pane displays a list of all the unitloadsolutions generated for the analysis. In this example, <strong>TOPS</strong> <strong>Pro</strong> hasgenerated two unitload solutions.6. Select the first unitload solution.7. Click on Next in the Vehicle View pane.System Response: <strong>TOPS</strong> <strong>Pro</strong> redisplays the Analysis View with threenew panes, as pictured on the next page.<strong>TOPS</strong> <strong>Pro</strong> <strong>Tutorial</strong> 33
Again, <strong>TOPS</strong> <strong>Pro</strong> has proceeded to the next step in the analysis. We'vecompleted the unitload stage of the analysis; now we're ready to work withthe vehicle solutions, which will complete the analysis.Let's briefly outline these three panes: Vehicle Solution View: This pane displays a graphic of a selectedtruck solution – how the truck load is designed and utilized. Vehicle Statistics View: This pane displays detailed statistics for aselected vehicle solution. Vehicle Solution List: This pane displays a list of all the trucksolutions generated for the analysis. In this example, <strong>TOPS</strong> <strong>Pro</strong> hasgenerated 20 unitload solutions.8. Select a vehicle solution.9. Click on the Save button to save the analysis record.At this point, now that the analysis is complete, you might want toprint a hard copy of the information generated for the solution. We'lltalk about the printing function in the section, "Design the Output froman Analysis."Make a Decision Using the Quad ViewAs the term suggests, the Quad View divides the Analysis View into fourpanes as opposed to three. In this exercise, we'll work through the samebottle-tray-carton-pallet-truck analysis using the Quad View.Note: The Quad View is available only for analyses with four or morestages.34 <strong>TOPS</strong> User Guide Supplement and <strong>Tutorial</strong>
To generate the possible solutions for this analysis, using the Quad View,follow these instructions:1. Click on the Calc button.System Response: <strong>TOPS</strong> <strong>Pro</strong> uses the defined parameters – bottle,tray, shipcase, pallet and truck – and generates all possible solutions.<strong>TOPS</strong> <strong>Pro</strong> displays the Analysis View with three panes.2. Go to the Menu Bar and open the View menu.3. Select Quad Screen.System Response: The Analysis View redisplays with four panes, aspictured below.As you can see, <strong>TOPS</strong> <strong>Pro</strong> begins with the first stage in the analysis – thepacker stage – and proceeds in order of the Package Design Sequence.Let's briefly outline each of these four panes: Intermediate Pack Solution View: This pane, in the top, left portionof the screen, displays a graphic view of a packer solution. Shipcase Solution View: This pane, in the top, right portion of thescreen, displays a graphic view of a shipcase solution. This solutioncorresponds to the active packer solution. UnitLoad Solution View: This pane, in the bottom, left portion of thescreen, displays a graphic view of a unit (pallet) load solution. Thissolution corresponds to the active shipcase solution.<strong>TOPS</strong> <strong>Pro</strong> <strong>Tutorial</strong> 35
Packer Solution List: This pane, in the bottom, right portion of thescreen, displays a list of all the packer solutions generated for theanalysis. In this example, <strong>TOPS</strong> <strong>Pro</strong> has generated four packersolutions.Notice that each pane has a vertical scroll bar at the right edge of the pane.At each end of the scroll bar is an arrow – a down arrow at the top of thebar and an up arrow at the bottom of the bar. These up and down arrowsallow you to display a graphic view of each solution for an stage.For example, notice that in the Intermediate Pack pane, the title bar of thepane indicates that this is the first of four packer solutions (1 of 4). If youclick on the down arrow on the scroll bar, the Intermediate Pack pane willredisplay with a graphic view of the second of the four packer solutions.From there, if you click on the up arrow, the first solution will redisplay.4. From the Intermediate Pack pane, use the up and down arrows toselect a unitload solution. You can also select a solution from thePacker List. We’ll go with Solution 1.5. Click on the Next button in the Toolbar.System Response: <strong>TOPS</strong> <strong>Pro</strong> stores the packer solution to memoryand redisplays the Analysis View with new panes, as pictured below.Again, <strong>TOPS</strong> <strong>Pro</strong> has proceeded to the next step in the analysis. We'vecompleted the packer stage; <strong>TOPS</strong> <strong>Pro</strong> now displays panes for theremaining stages of the analysis: Shipcase View UnitLoad View Vehicle View Shipcase List36 <strong>TOPS</strong> User Guide Supplement and <strong>Tutorial</strong>
6. From the Shipcase View pane, use the up and down arrows to select ashipcase solution. You can also select a solution from the ShipcaseList. We’ll go with Solution 1.7. Click on the Next button in the Toolbar.System Response: <strong>TOPS</strong> <strong>Pro</strong> stores the shipcase solution to memoryand redisplays the Analysis View with new panes, as pictured below.Again, <strong>TOPS</strong> <strong>Pro</strong> has proceeded to the next step in the analysis. We'vecompleted the shipcase stage; <strong>TOPS</strong> <strong>Pro</strong> now displays panes for theremaining stages of the analysis: UnitLoad View Vehicle View UnitLoad List8. From the UnitLoad View pane, use the up and down arrows to select aunitload solution. You can also select a solution from the UnitloadList. We’ll go with Solution 1.9. Click on the Next button in the Toolbar.System Response: <strong>TOPS</strong> <strong>Pro</strong> stores the unitload solution to memoryand redisplays the Analysis View with new panes, as pictured on thenext page.<strong>TOPS</strong> <strong>Pro</strong> <strong>Tutorial</strong> 37
Again, <strong>TOPS</strong> <strong>Pro</strong> has proceeded to the next step in the analysis. We'vecompleted the unitload stage; <strong>TOPS</strong> <strong>Pro</strong> now displays panes for theremaining stage of the analysis: Vehicle Solution View Vehicle Statistics View Vehicle Solutions List10. From the Vehicle View pane, use the up and down arrows to select avehicle solution. You can also select a solution from the Vehicle List.We’ll go with Solution 1.11. Click on the Next button in the Toolbar.System Response: <strong>TOPS</strong> <strong>Pro</strong> stores the vehicle solution to memoryand redisplays the Control Panel.Step 8: Design Custom Styles for the Bottles andTrays to Dress Up the Display.In this last step, we’ll design custom styles for the bottles and trays todress up the on-screen display. Instead of generic bottles and trays, we’llgive them a more realistic design. We’ll make a generic bottle look likean oil can and give the tray a large display area on the front side. We’lldesign these custom styles using the Create A Shape Yourself (CASY)system.Design a Custom-Shaped BottleTo design a custom-shaped bottle to make it look like an oil can, startfrom the Control Panel and follow these instructions:38 <strong>TOPS</strong> User Guide Supplement and <strong>Tutorial</strong>
1. Click on the CASY Primary Package icon – – in the Toolbar.System Response: The CASY Primary Package Screen appears, aspictured below.2. Use your mouse to click on the left edge of the work unit (on the left)and mark off four distinct sections, as pictured below.Notice that the display unit shows four clearly defined sections.3. One by one, click on each marker on the left edge of the work unit anddrag it toward the center of the unit; leave the last marker (flushbottom) where it is. Use the figure on the next page as a guide.When you drag a marker from the left, the point on the opposite sidemoves toward the center as well to give the figure symmetry. Thisdefines the overall shape of the sections that comprise the oil can.<strong>TOPS</strong> <strong>Pro</strong> <strong>Tutorial</strong> 39
When you’ve moved the markers, the work unit should look similar tothe one pictured below.4. At this point, you can fine-tune the shapes of each section of the oilcan if you wish. In this exercise, we’ll go with the default primaryshape (Round) for each section of the oil can. The can should looklike the one pictured on the next page.Note: <strong>TOPS</strong> <strong>Pro</strong> allows you to select a primary shape for a selectedsection of a work unit. Right-click on a section of the work unit, thenuse the small menu to select a Primary Shape.5. Next, we'll position the spout off-center, flush to the right side of theoil can. Click on the center marker for the spout section and drag it tothe right; use the figure below as a guide. When you’ve dragged thefirst section flush right, the work unit will redisplay as pictured on thenest page.40 <strong>TOPS</strong> User Guide Supplement and <strong>Tutorial</strong>
6. Notice that in Figure 50 above, there’s a disjointed space where thespout section meets the neck section of the can; it needs a smoothertransition. CASY allows you to smoothly transition from one sectionto another when one section is off-center.Right-click in the neck (second) section on the work unit.System Response: The small menu appears.Select the Primary Shape option.System Response: The submenu appears.Select the TransTop option.System Response: The work unit redisplays with the spout and necksections of the can joined seamlessly together, as pictured below.<strong>TOPS</strong> <strong>Pro</strong> <strong>Tutorial</strong> 41
At this point, the design is complete. If you want, you can assign colorsand bitmaps to individual sections of the can.7. If you’re satisfied with the oil can, name it and save it to the database.In this exercise, we’ll name it OILCAN. As you work with primarypacks, the oil can will be included in the list of CASY-style options.Design a Custom-Shaped TrayTo design a custom-shaped tray, start from the Control Panel and followthese instructions:1. Click on the CASY Shipcase/Tray icon – – in the Toolbar.System Response: The CASY Shipcase/Tray Screen appears, aspictured below.2. When the CASY Shipcase/Tray Screen opens, the front side of the unitis active by default, so we’ll work with that side first. The front needssix markers along its top edge, which we’ll use to design the displaywindow. The top left and top right corners serve as two of themarkers.One by one, click on each marker on the top edge of the tray toposition the other four markers. The work unit, with six markersacross the top edge, should look like the one pictured on the next page.42 <strong>TOPS</strong> User Guide Supplement and <strong>Tutorial</strong>
3. For markers 3 and 4, drag the markers downward; use the figure belowas a guide. When you’ve moved these markers into the right positions,the work unit should look like the one pictured below.4. Now that the display window on the front side of the tray is complete,repeat the same process to design a display window for the back sideof the tray.5. On the left and right sides of the tray, we want to create holes to serveas handles for the tray. To create a hole in the left side of the tray,click on the Left icon on the Toolbar.System Response: The CASY Shipcase/Tray Screen redisplays withwork unit representing the left side of the tray.<strong>TOPS</strong> <strong>Pro</strong> <strong>Tutorial</strong> 43
6. Right-click inside the work unit.System Response: A small menu appears.Select the Create Hole option.System Response: The system inserts a box, which represents thehole, on the face of the work unit.Resize the box (hole) to the appropriate size and move it near the topedge of the work unit. The left side of the tray should look similar tothe one pictured below.7. Now that the hole on the left side of the tray is complete, repeat thesame process to design a hole for the right side.8. CASY allows you to select and insert a bitmap onto any side of thetray. To insert a bitmap, select a side (front, back, left or right) tomake it active.Right-click inside the work unit.System Response: The small menu appears.Select the Insert Bitmap option.System Response: A dialog box appears with a list of bitmap files.Select the bitmap file you want to insert and click on the Open button.System Response: The system inserts the selected bitmap onto theactive side of the tray. You can resize the bitmap as you like and dragit to any position on the active side.In this exercise, we’ll insert a <strong>TOPS</strong> bitmap on the left and right sidesof the tray. After all the design elements are complete, the tray shouldlook similar to the one pictured on the next page.44 <strong>TOPS</strong> User Guide Supplement and <strong>Tutorial</strong>
9. If you’re satisfied with all the elements of the tray, be sure to give it aname and save it to the database. In this exercise, we’ll name itTRAY001. Now, when you’re working with intermediate packers,this tray style will be available in the list of CASY-style options.Display CASY Styles in the AnalysisAs you’re working through an analysis, <strong>TOPS</strong> <strong>Pro</strong> gives you the capabilityto display your work using the custom-shaped bottles, trays, etc. youdesigned with the CASY system. Let’s go back to the analysis and thefirst Analysis View in the process, as pictured below.<strong>TOPS</strong> <strong>Pro</strong> <strong>Tutorial</strong> 45
To display CASY designs in the analysis, follow these instructions:1. Click on the Show CASY icon – – in the Toolbar.System Response: This turns on the Show CASY mode.2. Click on the Modify Primary Pack Parameters icon in the Toolbar.System Response: The Bottle Parameters dialog box appears.3. From the CASY Style drop-down list, select OILCAN.TPR, which isthe file that represents your oil can.4. Click on OK.System Response: The Analysis View redisplays with the genericbottles now shown as CASY oil cans, as pictured below.5. Click on the Modify InterPack Parameters icon in the Toolbar.System Response: The Intermediate Pack Parameters dialog boxappears.6. From the CASY Style drop-down list, select TRAY001.TSC, which isthe file that represents your tray for display.7. Click on OK.System Response: The Analysis View redisplays with the generictrays now shown as CASY die-cut trays, as pictured on the next page.46 <strong>TOPS</strong> User Guide Supplement and <strong>Tutorial</strong>
At this point, the exercise is complete.<strong>TOPS</strong> <strong>Pro</strong> <strong>Tutorial</strong> 47
Exercise #3: Perform a KnockdownAnalysisOne frequently used analysis is the knockdown (KD) analysis, in which abox has been collapsed flat. In a KD analysis, you'll usually take a bundleof collapsed boxes and load them onto a pallet. The dimensions of the boxhave obviously changed. <strong>TOPS</strong> <strong>Pro</strong> allows you to account for theknockdown by entering the dimensions of a box after it has been collapsedflat.Note: The Knockdown button, located on the Carton Parameters dialogbox, will automatically calculate these dimensions for you. However, theKnockdown button is used only for RSC-style boxes.Objective: Find the optimal solution for loading bundles of collapsedboxes onto a pallet after one or more boxes have been collapsed.In this analysis, the various stages have these general characteristics: Each KD carton (box) measures 16.75 inches long, 14.5 inches wideand 0.5 inches high. Each bundle is configured as a shipcase that contains 20, 25 or 30collapsed boxes. The pallet is non-standard, which means you'll design a new pallettailored to your needs.To perform this analysis, you'll start from the Control Panel and workthrough four simple sets of procedures, in this order:1. Define the Package Design Sequence.2. Define the carton (KD box) parameters.Note: Be aware that two types of cartons are available – the boxcarton (green icon) and the intermediate pack carton (blue icon).3. Define the shipcase (bundle) parameters.4. Define the unitload (pallet) parameters.5. Generate possible solutions and make a decision.48 <strong>TOPS</strong> User Guide Supplement and <strong>Tutorial</strong>
Step 1: Define the Package Design SequenceTo define the Package Design Sequence, start from the Control Panel andfollow these instructions:1. Click on the New button to clear any work from the Control Panel.2. Click on the Box Carton (green icon) button.3. Click on the Shipper button.4. Click on the Pallet button.System Response: The Carton, Shipper and Pallet icons appear in thePackage Design Sequence area of the panel, as pictured below.Step 2: Define Carton (KD Box) ParametersTo define your carton (KD box) parameters, follow these instructions:1. Click on the Box Carton icon in the Package Design Sequence Area.System Response: The Carton Parameters dialog box appears, aspictured below.This dialog box allows you to enter parameters for a collapsed box.2. Use the following fields to define the KD box parameters. Use theTab key to move from field to field. Length: Enter 16.75. Width: Enter 14.5. Height: Enter 0.5.<strong>TOPS</strong> <strong>Pro</strong> <strong>Tutorial</strong> 49
3. After completing the carton parameters, click on OK.System Response: <strong>TOPS</strong> <strong>Pro</strong> stores your carton parameters tomemory and redisplays the Control Panel.Step 3: Define Shipcase (Bundle) ParametersTo define your shipcase (bundle) parameters, follow these instructions:1. Click on the Shipper icon in the Package Design Sequence Area.System Response: The Shipcase Parameters dialog box appears, aspictured below.This dialog box allows you to define the parameters of your shipcase in avery precise, thorough manner. In addition to the general dimensionsoutlined in the objective of this analysis, you'll also define theseparameters: The shipcase is a new case. The style is bundle (invisible). Shipcase dimensions are measured from the outside. For sizing purposes, maximum cartons along the length, width anddepth of the shipcase are 1, 1 and 100, respectively.2. Use the following fields to define the shipcase parameters. Use theTab key to move from field to field. Case: Use the default (New). Style: Select Bundle (Invisible). Dimensions: Use the default (Outside). Vert: Use the default (Height). Sizing: Select Values. Values: Enter 20, 25 and 30.50 <strong>TOPS</strong> User Guide Supplement and <strong>Tutorial</strong>
3. Click on the Options button.System Response: The Shipcase Options dialog box appears, aspictured below.This dialog box allows you to further define the sizing of the shipcase(bundle).4. Use the following fields to define the sizing of the shipcase: Max Cartons along Length/Cartons: Enter 1. Max Cartons along Width/Cartons: Enter 1. Max Cartons along Height/Cartons: Enter 100.5. After completing the sizing parameters, click on OK.System Response: <strong>TOPS</strong> <strong>Pro</strong> stores your sizing parameters tomemory and redisplays the Shipcase Parameters dialog box.6. After completing the shipcase parameters, click on OK.System Response: <strong>TOPS</strong> <strong>Pro</strong> stores your shipcase parameters tomemory and redisplays the Control Panel.Step 4: Define Unitload (Pallet) ParametersIn this exercise, let's assume that your bottling company needs to sendpalletized knockdowns to another location. Your company uses a unique,non-standard pallet not included in the <strong>TOPS</strong> database. Therefore, we'lluse <strong>TOPS</strong> <strong>Pro</strong> to create a unique pallet with the following characteristics: The pallet measures 50 by 50 inches, and has a height of 5 inches. The pallet weighs 65 pounds. The pallet is a stringer pallet with flush alignment and single-faceconstruction.<strong>TOPS</strong> <strong>Pro</strong> <strong>Tutorial</strong> 51
The deck board dimensions are standard for a stringer pallet. The pallet has a maximum overhang of 3 inches along the height andwidth.To define your unitload (pallet) parameters, follow these instructions:1. Click on the Pallet icon.System Response: The UnitLoad Parameters dialog box appears, aspictured below.2. Use the following fields to define maximum overhang: Maximum Overhang Length: Enter 3. Maximum Overhang Width: Enter 3.3. Click on the New Pallet button.System Response: The Define Pallet dialog box appears, as below.52 <strong>TOPS</strong> User Guide Supplement and <strong>Tutorial</strong>
Notice that the Define Pallet dialog box allows you to design your palletin a very precise manner: The Style options allow you to select the type of pallet you want tobuild. The Size options allow you to enter the length, width, height andweight of the pallet. The Deck Boards options allow you to enter dimensions of thepallet's deck boards, how much space is between the deck boards, howhigh, how many, etc.4. Use the following fields to define the pallet parameters. Use the Tabkey to move from field to field. Style: Use the default (Stringer). Alignment: Use the default (Flush). Description: Enter Test Pallet. Construction: Use the default (Single Face). Length: Enter 50. Width: Enter 50. Height: Enter 5. Weight: Enter 65. Outside deck board width: Use the default (7). Number of inside deck: Use the default (5). Inside deck board width: Use the default (5). Deck board height: Use the default (1). Stringer Width: Use the default (2).5. After completing the pallet parameters, click on OK.System Response: <strong>TOPS</strong> <strong>Pro</strong> stores your pallet parameters tomemory and redisplays the UnitLoad Parameters dialog box.At this point, let's say you want all the knockdowns oriented the sameway on the pallet – a one-block pattern. (In a two-block pattern, theknockdowns are oriented in two ways, and so on.) Because you wantto see only a one-block solution, you need to tell <strong>TOPS</strong> <strong>Pro</strong> toeliminate all other possibilities.6. Click on the Options button.System Response: The UnitLoad Options dialog box appears, aspictured on the next page.<strong>TOPS</strong> <strong>Pro</strong> <strong>Tutorial</strong> 53
Notice a couple of things about the UnitLoad Options dialog box: The Pattern Styles section provides a list of all types of patterns youmight want to see. To select a pattern style, you click on the box nextto that style, and an "" marks that style as selected. To de-select apattern style, click on the box again, and the box is cleared. When you select a pattern style, the g.o.d. window in the bottom, rightcorner of the screen displays a visual of what the selected pattern stylelooks like.7. You want to see only a one-block pattern, so select 1 Block. If you seeany options marked with a "" as selected, and be sure to de-selectthose options.8. Click on OK.System Response: <strong>TOPS</strong> <strong>Pro</strong> stores your unitload options to memoryand redisplays the UnitLoad Parameters dialog box.9. If all your unitload parameters are correct, click on OK.System Response: <strong>TOPS</strong> <strong>Pro</strong> stores your unitload parameters tomemory and redisplays the Control Panel.54 <strong>TOPS</strong> User Guide Supplement and <strong>Tutorial</strong>
Step 5: Generate Possible Solutions and Make aDecisionTo generate the possible solutions for this analysis, follow theseinstructions:1. Click on the Calc button.System Response: <strong>TOPS</strong> <strong>Pro</strong> uses the defined parameters – carton,shipcase and unitload – and generates all possible solutions for theanalysis. <strong>TOPS</strong> <strong>Pro</strong> displays the Analysis View with three differentpanes, as pictured below.Let's look at these three panes one at a time: Shipcase Solution View: This pane, in the top, left portion of thescreen, displays a graphic of what a selected shipcase solution lookslike – i.e., how the collapsed boxes are bundled. If you select anothersolution from the Shipcase Solution List, this graphic will changeaccordingly. UnitLoad Solution View: This pane, in the top, right portion of thescreen, displays a graphic of the unitload that corresponds to theselected shipcase solution. It shows how the bundles are configuredon the pallet. The UnitLoad Solution View is driven by the selectedshipcase solution and changes in conjunction with the ShipcaseSolution View.For example, if you select Solution 2 from the Shipcase Solution List,the Shipcase Solution View will redisplay to reflect the Solution 2values. At the same time, the UnitLoad Solution View will redisplayto reflect Solution 2.<strong>TOPS</strong> <strong>Pro</strong> <strong>Tutorial</strong> 55
Shipcase Solution List: This pane, at the bottom of the screen,displays a list of all shipcase solutions generated for the analysis. Inthis example, <strong>TOPS</strong> <strong>Pro</strong> has generated three shipcase solutions.Select a shipcase solution.2. Click on the Next button in the Toolbar.System Response: <strong>TOPS</strong> <strong>Pro</strong> redisplays the Analysis View with threenew panes, as pictured below.Notice that <strong>TOPS</strong> <strong>Pro</strong> has proceeded to the next step in the analysis.We've completed the shipcase stage of the analysis; now we're ready towork with the unitload solutions, which will complete the analysis.All three panes work in conjunction with one another. Let's briefly outlinethese three panes: UnitLoad Solution View: This pane displays a graphic of what aselected unitload solution looks like – i.e., how the knockdowns areloaded onto the pallet. UnitLoad Statistics View: This pane displays detailed statistics for aselected solution. UnitLoad Solution List: This pane displays a list of all the solutionsgenerated for the analysis. For this analysis, <strong>TOPS</strong> <strong>Pro</strong> has generatedtwo solutions for the given shipcase and unitload parameters.For each solution, this pane displays 15 items of basic information –case weight, volume, vertical dimension, etc. – which appear in 15columns across the pane.4. Select a unitload solution.56 <strong>TOPS</strong> User Guide Supplement and <strong>Tutorial</strong>
5. Click on OK in the UnitLoad View pane.System Response: <strong>TOPS</strong> <strong>Pro</strong> redisplays the Control Panel.6. Click on the Save button to save the analysis record.At this point, now that the analysis is complete, you might want to print ahard copy of the information generated for the solution. We'll talk aboutthe printing function in the next section, "Design the Output From anAnalysis."<strong>TOPS</strong> <strong>Pro</strong> <strong>Tutorial</strong> 57
Exercise #4: Design the Output Froman AnalysisThe <strong>TOPS</strong> <strong>Pro</strong> software provides much flexibility in the way you designand print analysis output. After you've decided on your solutions, you'reready to print a hard copy that shows the information that went into youranalysis.You'll design the layout of the printout, then decide what type ofinformation will be included and how that information will be presented(different graphical views, statistics, etc.). In this exercise, we'll designthe output to have the following characteristics: The output will have a Quad Split page layout. The heading will read "Exercise #2: Complex Analysis." The four areas of the printout will show graphics of the Case 3D View,the Unitload Plan View, the UnitLoad Dual Plan and the Vehicle 3DView. The bottom of the printout will show sample text.To design the output for an analysis, you'll start from the Control Paneland work through two simple sets of procedures, in this order:1. Define print parameters.2. Add text or images to the printed output.Step 1: Define Print ParametersTo define print parameters, start from the Control Panel and follow theseinstructions:1. Open the analysis record you created for Exercise #2: Perform aComplex Analysis.2. Go to the Menu Bar and open the File menu.3. Select Print Preview, then select Analysis.System Response: The Print Parameters dialog box appears, aspictured on the next page.58 <strong>TOPS</strong> User Guide Supplement and <strong>Tutorial</strong>
Let's take a brief overview of the Print Parameters dialog box: The Page Layout section allows you to select one of eight possiblepage layouts:The Full Page layout allows you to select only one area of theanalysis to print.The Horizontal Split and Vertical Split layouts allow you to selecttwo areas of the analysis to print.The 3 Way Bottom, 3 Way Top, 3 Way Left and 3 Way Rightlayouts allow you to select three areas of the analysis to print.The Quad Split layout allows you to select four areas of the analysisto print. The Heading field allows you to enter the text of the heading that youwant to appear at the top of the printout. The Areas 1, 2, 3 and 4 fields allow you to select the area(s) of theanalysis from which you want to print information.Note: Be aware that the number of areas available to select fromdepends on the page layout you selected. For example, if you selectedthe Horizontal Split layout, which contains two sections, you'll be ableto select from only two areas. The Notes field allows you to enter the text of any notes that you wantto appear at the bottom of the printout.<strong>TOPS</strong> <strong>Pro</strong> <strong>Tutorial</strong> 59
The Show Additional Notes fields allow you to enter informationsuch as Label Format, Test Weight and Package Quantity.4. Use the following fields to enter print parameters. Use the Tab key tomove from field to field. Page Layout: Select Quad Split. Heading: Enter "Exercise #2: Complex Analysis." Area 1: Select Case 3D View. Area 2: Select Unitload Plan View. Area 3: Select UnitLoad Dual Plan. Area 4: Select Vehicle 3D View. Notes: For exercise purposes, enter the following text: "This iswhere you'll enter any text you want to appear at the bottom ofyour printout."5. If all your print parameters are correct, click on OK.System Response: <strong>TOPS</strong> <strong>Pro</strong> displays the Print Preview panel, aspictured below.Notice the following things about the Print Preview panel: The heading reads "Exercise #2: Complex Analysis" and includestoday's date. The heading also includes a title, if you specified a title. Area 1 displays a graphic of the Case 3D View. Area 2 displays a graphic of the Unitload Plan View.60 <strong>TOPS</strong> User Guide Supplement and <strong>Tutorial</strong>
Area 3 displays a graphic of the UnitLoad Dual Plan. Area 4 displays a graphic of the Vehicle 3D View. At the bottom of the printout, the Notes section displays the sampletext you entered. The Zoom button allows you to magnify the panel and get a closer,more detailed look at the output. The Print button sends the output to the printer. The Email button allows you to send the analysis report to anotherperson via email.6. To print the output, click on the Print button.System Response: <strong>TOPS</strong> <strong>Pro</strong> sends the print preview output to theprinter.Step 2: Add Text or Images to Printed OutputAfter you've designed and generated your analysis output, <strong>TOPS</strong> <strong>Pro</strong>allows you to add text or graphic images to the output before you print it.This is a very easy process that allows you to customize and enhance theoutput's presentation.To add text and images to the output, start from the Print Preview paneland follow these instructions:1. Click on the Zoom button.System Response: <strong>TOPS</strong> <strong>Pro</strong> magnifies the Print Preview panel.2. Click on the area of the output where you want to enter text.System Response: <strong>TOPS</strong> <strong>Pro</strong> displays a four-cornered entry fieldwith the cursor positioned inside the field. Notice that you can "drag"the entry field to any position on the screen.3. In this exercise, enter text as follows: In the first quad (top left), click above the graphic and enter thistext: "Bottles into a Case." In the second quad (top right), click above the graphic and enterthis text: " Cases on a Pallet – Plan View." In the third quad (bottom left), click above the graphic and enterthis text: "Cases on a Pallet – Rotated Layers." In the fourth quad (bottom right), click above the graphic and enterthis text: "Loaded Pallets on a Truck."<strong>TOPS</strong> <strong>Pro</strong> <strong>Tutorial</strong> 61
4. Drag the text fields so that they're centered at the top of each quad,above the graphics.Now that you've entered your text, suppose you want to add a graphicimage to the fourth quad (bottom right).5. Go to the Menu Bar and open the Edit Menu.6. Select Paste Pict From File.System Response: The Select File dialog box appears, as picturedbelow.Notice that this dialog box displays a list of bitmap files.7. Select the tops.bmp file and click on OK.System Response: The Print Preview panel redisplays with theselected <strong>TOPS</strong> bitmap file inserted into the output.8. Drag the image to the bottom, right corner of the fourth quad.9. If all your text and graphics are correct, click on the Print button.System Response: <strong>TOPS</strong> <strong>Pro</strong> sends the analysis output to the printer.For a hard copy of this output, see the last page of this <strong>Tutorial</strong> Guide.10. Click on the Close button.System Response: <strong>TOPS</strong> <strong>Pro</strong> asks if you want to save your changes.11. Click on Yes.System Response: <strong>TOPS</strong> <strong>Pro</strong> prompts you to enter a filename to besaved.12. Enter the name of this file and click on OK.System Response: <strong>TOPS</strong> <strong>Pro</strong> redisplays the Control Panel.62 <strong>TOPS</strong> User Guide Supplement and <strong>Tutorial</strong>
Exercise #5: Publish an Analysis tothe Web or Network<strong>TOPS</strong> <strong>Pro</strong> allows you to publish the results of an analysis to the Web or toa local network, thus allowing other people to view the analysis. With thePublish Analysis feature, analyses are collected into albums, which arecreated by the user to logically organize one or more analyses.To publish an analysis to the Web or network, start from the Control Paneland follow these instructions:1. Go to the Menu Bar and open the File Menu.2. Select the Publish Analysis option, then select either the To Web or ToNetwork option.System Response: The Publisher dialog box appears in one of twoforms, as pictured below.<strong>TOPS</strong> <strong>Pro</strong> <strong>Tutorial</strong> 63
The Publisher dialog box is organized into the following sections: Publish <strong>Pro</strong>file: A profile contains one or more selected analyses; theprofile is published to the Web or network. This section allows you tocreate a new profile or select an existing profile, as well as specifywhether the profile is published to the Web or local network. Site: Allows you to specify the location to which the profile will bepublished.− With the Web/Internet option selected, the Site section promptsyou to enter information for Address, Remote Path, User Nameand Password.− With the Local Network option selected, the Site section promptsyou to enter a destination path. Album: Allows you to create a new album or select an existing albumto which the selected analysis will be stored. Analysis: Allows you to select and add one or more analyses to bepublished as part of the profile. File Transfer Status: Displays a list of FTP transactions (whenpublishing a profile to the Web).3. In the <strong>Pro</strong>file Name field, use the drop-down list to select the profilethat will be used to publish the analysis.Note: To create a new profile, click on the New <strong>Pro</strong>file button andenter the name of the new profile in the <strong>Pro</strong>file Name field.64 <strong>TOPS</strong> User Guide Supplement and <strong>Tutorial</strong>
To remove a profile, select the profile from the drop-down list, thenclick on the Remove <strong>Pro</strong>file button.4. In the Site section, enter information for one of two options:− If publishing to the Web, enter the Address, Remote Path, UserName and Password.Note: The Show Options button displays three additionalWeb/Internet-related fields.− If publishing to a local network, browse for and select the path.Note: For specific Site information, please contact your ITDepartment.5. After entering Site information, click on the Connect button.System Response: <strong>TOPS</strong> <strong>Pro</strong> establishes a connection to thespecified site, then populates the Album section with a list of existingalbums stored on the site.6. In the Album section, select the existing album that contains theanalysis to be published.Note: To create a new album, click on the New Album button andenter the name of the new profile in the <strong>Pro</strong>file Name field.To remove an album from the site, select the album from the list, thenclick on the Remove Album button.7. In the Analysis section, go to the “Available for Publishing” list, selectthe analysis you want to publish, then click on the Add button. Repeatthis step for each analysis you want to add to the profile.Note: To remove an analysis from the profile, select the analysis inthe “Existing Analysis is Selected” list and click on the Removebutton.System Response: <strong>TOPS</strong> <strong>Pro</strong> retrieves images from the selectedanalysis, converts the images to XML and HTML files, and sends thefiles to the server.Note: When publishing to the Web, <strong>TOPS</strong> <strong>Pro</strong> displays a log of FTPtransactions in the File Transfer Status window. If there is an errorpublishing to the Web, this log provides information that mightidentify the problem.8. To save the profile, click on the Save <strong>Pro</strong>file button.System Response: <strong>TOPS</strong> <strong>Pro</strong> saves the profile, including all Siteinformation, to the database.<strong>TOPS</strong> <strong>Pro</strong> <strong>Tutorial</strong> 65
Exercise #6: New CASY FeaturesThe CASY function now includes two new primary shapes – RoundRectangle and Trigger Top – and five new shape functions – Match Top,Match Bottom, Match Both, Pinch Top and Pinch Bottom.New Primary Shape – Round RectangleThe Round Rectangle can be used to design containers like an ice creambox. Start from the CASY Primary Package Screen and follow theseinstructions:1. Right-click inside the work unit.System Response: A small menu appears.2. Select the Primary Shape option, then select the Round Rectangleoption.System Response: The work unit in the Edit View Display Areaconverts to a Round Rectangle shape, as pictured below.New Primary Shape – Trigger TopThe Trigger Top can be used to design containers like a Windex bottle.Start from the CASY Primary Package Screen and follow theseinstructions:1. Click on the edge of the work unit to create a section marker. (To usethe Trigger Top shape, the work unit must have a top section and abottom section.)2. Right-click inside the top section of the work unit.System Response: A small menu appears.3. Select the Primary Shape option, and then select the Trigger Topoption.System Response: The cylinder in the Edit View Display Areaconverts to a Trigger Top shape, as pictured on the next page.66 <strong>TOPS</strong> User Guide Supplement and <strong>Tutorial</strong>
New Shape Function – Match TopThe Match Top function makes the top of one section conform to theshape of the section directly above it. For example, in the figure belowthe work unit has a rectangular bottom section and a round top section.1. Right-click on the bottom section of the work unit.System Response: A small menu appears.2. Select the Shape Function option, then select the Match Top function.System Response: In the bottom section of the work unit, the topportion of the rectangle becomes rounded to match the section aboveit, as pictured below.<strong>TOPS</strong> <strong>Pro</strong> <strong>Tutorial</strong> 67
New Shape Function – Match BottomThe Match Bottom function makes the bottom of one section conform tothe shape of the section directly below it. For example, in the figurebelow the work unit has a rectangular top section and a round bottomsection.1. Right-click on the top section of the work unit.System Response: A small menu appears.2. Select the Shape Function option, then select the Match Bottomfunction.System Response: In the top section of the work unit, the bottomportion of the rectangle becomes rounded to match the section belowit, as pictured below.New Shape Function – Match BothThe Match Both function transforms both the top and bottom portions of awork unit section. For example, the figure below shows a work unit withthree sections – a round top, an oval middle and a rectangular bottom.The Match Both function will transform the oval middle section to matchboth the round top section and the rectangular section.68 <strong>TOPS</strong> User Guide Supplement and <strong>Tutorial</strong>
1. Right-click on the middle section of the work unit.System Response: A small menu appears.2. Select the Shape Function option, then select the Match Both function.System Response: The oval (middle) becomes rounded where itmeets the round top; the oval (middle) takes on a rectangle shapewhere it meets the rectangular bottom, as pictured below.New Shape Function – Pinch TopThe Pinch Top function transforms a section of any shape and gives its topedge a pinched shape. The Pinch Top function is useful for designingtubes of gel, sunscreen, etc. In the figure below the work unit has a roundtop section.1. Right-click on the top section of the work unit.System Response: A small menu appears.2. Select the Shape Function option, then select the Pinch Top function.System Response: The work unit transforms with a pinched top, aspictured below.<strong>TOPS</strong> <strong>Pro</strong> <strong>Tutorial</strong> 69
New Shape Function – Pinch BottomThe Pinch Bottom function transforms a section of any shape and gives itsbottom edge a pinched shape. The Pinch Bottom function is useful fordesigning tubes of toothpaste, etc. In the figure below the work unit has around bottom section.1. Right-click on the bottom section of the work unit.System Response: A small menu appears.2. Select the Shape Function option, then select the Pinch Bottomfunction.System Response: The work unit transforms with a pinched bottom,as pictured below.70 <strong>TOPS</strong> User Guide Supplement and <strong>Tutorial</strong>
Exercise #6: Design a Mixed Pallet<strong>TOPS</strong> <strong>Pro</strong> features a module known as Mix<strong>Pro</strong> Pallet, which allows you todesign a pallet for display with any number of different size boxes. In thisexercise, we're loading a pallet for shipment to a warehouse store, wherethe pallet will be displayed directly on a busy aisle. This mixed palletload includes several shipcases of snack foods – 15 cases of chocolatebars, 32 cases of peanut bars and 30 cases corn chips, all of which havedifferent shipcase dimensions.To design a pallet for display, you'll start from the Control Panel and workthrough four simple sets of procedures, in this order:1. Select and define a pallet.2. Create new shipcases.3. Add the shipcases to the pick list.4. Define the unitload (pallet) parameters.Step 1: Select and Define a PalletTo select and define a pallet, start from the Control Panel and follow theseinstructions:1. Go to the Toolbar and click on the Mix<strong>Pro</strong> Pallet Design Editor icon –.System Response: The Mix<strong>Pro</strong> Screen appears, as pictured below.2. Click on the Pallet button.System Response: The Pallet Parameters dialog box appears, aspictured on the next page.<strong>TOPS</strong> <strong>Pro</strong> <strong>Tutorial</strong> 71
3. Use the following fields to define the pallet parameters: Pallet: Use the default (GMA [Notched]). Length Overhang: Use the default (0). Width Overhang: Use the default (0). Maximum Height (Including Pallet): Enter 56. Weight: Use the default (0).Step 2: Create New ShipcasesSuppose you want to load some specific type shipcases, but they're notincluded in the shipcase list. Mix<strong>Pro</strong> allows you to create new shipcasesto meet your needs. To create new shipcases, follow these instructions:1. Look at the shipcase list and decided which items you want to loadonto the pallet. In this exercise, we want the mixed pallet load toinclude chocolate bars, peanut bars and corn chips.Notice that the initial shipcase list does not include any of these items.In this case, Mix<strong>Pro</strong> allows you to create new shipcases for theseitems.To create a new shipcase, click on the New button.System Response: The Define Shipcase dialog box appears, aspictured below.72 <strong>TOPS</strong> User Guide Supplement and <strong>Tutorial</strong>
2. Use the following fields to define the three shipcases:Chocolate Bars Shipcase Shipcase: Enter Chocolate Bars. Length: Enter 16. Width: Enter 12. Height: Enter 10.Peanut Bars Shipcase Shipcase: Enter Peanut Bars. Length: Enter 12. Width: Enter 6. Height: Enter 12.Corn Chips Shipcase Shipcase: Enter Corn Chips. Length: Enter 10. Width: Enter 9. Height: Enter 10.System Response: The Mix<strong>Pro</strong> Screen redisplays with the name ofthe new shipcase included in the shipcase list.Step 3: Add Shipcases to the Pick ListOnce your shipcase list is complete, you're ready to add items to the picklist. The pick list allows you to select items for loading onto the pallet.To add shipcases to the pick list, follow these instructions:1. Select an item from the shipcase list and click on the Add button, ordouble-click on the item.System Response: Mix<strong>Pro</strong> adds the selected item to the pick list.2. Repeat this step for each item you want to select to the pick list –chocolate bars, peanut bars and corn chips.Step 4: Load Cases Onto the PalletTo load cases onto the pallet, follow these instructions:1. From the pick list, double-click on an item to be loaded onto the pallet.In this exercise, we’ll select the chocolate bars first.System Response: A graphic of the selected shipcase appears in theg.o.d. (graphic online display) window, located in upper left corner ofthe data display window, as pictured on the next page.<strong>TOPS</strong> <strong>Pro</strong> <strong>Tutorial</strong> 73
2. To load the item onto the pallet, click on the image of the shipcase inthe g.o.d. window and drag it onto the pallet.System Response: The system copies an image of the shipcase to thepallet area, as pictured below.In the figure above, you can see that the shipcase is sitting a few inchesfrom the closest edge of the pallet. We want the case to sit flush in the topleft corner of the pallet. The Snap feature allows you to position theshipcase flush against any part of the pallet you choose.3. Click on the red X to activate the Snap feature, then click on the button. Click on the shipcase and drag it to the top left corner of thepallet.System Response: The shipcase moves flush into the corner of thepallet.74 <strong>TOPS</strong> User Guide Supplement and <strong>Tutorial</strong>
4. We've loaded the first of 15 cases of chocolate bars onto the pallet. Tocomplete the unitload, follow these guidelines:Tips for Working with Cases on a Pallet To add a second case to the pallet, hold down the Shift key and clickon the first shipcase. To place the second case on top of the first case,Shift and click on top of the first case. To place the second case to theside of the first case, Shift and click on the side of the first case. If you’ve loaded a column, row or layer of cases on the pallet, you canadd another column, row or layer with one click. For example, to adda layer of cases, hold down the Shift key and click on the top of thefirst layer. The system adds another layer on top of the first layer. Toremove a layer of cases, hold down the Alt and Shift keyssimultaneously and click on the layer. To remove (or delete) one or more cases from the pallet, click on thecase(s) and drag it off the backside of the pallet (to the left). Thecase(s) completely disappear from the display.To temporarily remove one or more cases from the pallet – you wantto load it back later – click on the case(s) and drag it off the front sideof the pallet (to the right). The case(s) remain in view on the display. Use the Layer button to have Mix<strong>Pro</strong> calculate optional patterns forthe selected shipcase.Using these guidelines, continue to load cases until you’ve loaded 15cases of chocolate bars to the pallet, forming a wall along the backside ofthe pallet. Your unitload will look similar to the one pictured below.<strong>TOPS</strong> <strong>Pro</strong> <strong>Tutorial</strong> 75
5. To begin adding the next item onto the pallet (the peanut bars), selectit from the pick list. The case pictured in the g.o.d. window changes tothe newly selected case.Complete the mixed pallet load until the unitload contains thefollowing items: 15 cases of chocolate bars 32 cases of peanut bars 30 cases of corn chipsWhen you’ve finished loading the three different shipcases, theunitload will look similar to the unitload pictured below.6. Now that all the shipcases are loaded onto the pallet, you can now usethe alignment buttons to position the unitload on the pallet as you like– to the top, bottom, left, right, etc. You can also display the labels onthe various shipcases.Note: The Mix<strong>Pro</strong> alignment feature works a little differently than in<strong>TOPS</strong>. In Mix<strong>Pro</strong>, the alignment moves the entire load; you cannotselect individual cases to align.7. When your mixed pallet load is aligned the way you want it, you’reready to work with the Print Preview feature, tailor the report the wayyou like, then print it.8. Before closing the Mix<strong>Pro</strong> feature, be sure to give this mixed palletfile a name and save the file.76 <strong>TOPS</strong> User Guide Supplement and <strong>Tutorial</strong>
Exercise #8: Design a Mixed Tray<strong>TOPS</strong> <strong>Pro</strong> features a module known as Mix<strong>Pro</strong> Tray, which allows you todesign a mixed-product tray for display with different size packages in thetray. For example, suppose you’re loading trays to be displayed in agrocery store, where the tray will be displayed directly on a busy aisle.In this exercise, the mixed tray includes several different items of nutritionsupplements – cans of protein powder, bottles of Gatorade and energybars, all of which have different product dimensions. Mix<strong>Pro</strong> Tray allowsyou to easily load and place all types of packages onto a tray. These trayscan then be saved and used in Mix<strong>Pro</strong> Pallet to create a mixed pallet fordisplay.To design a pallet for display, you'll start from the Control Panel and workthrough four simple sets of procedures, in this order:1. Select and define a tray.2. Create new packages.3. Add the packages to the pick list.4. Load the items onto the tray.Step 1: Select and Define a TrayTo select and define a tray, start from the Control Panel and follow theseinstructions:1. Go to the Toolbar and click on the Mix<strong>Pro</strong> Tray Design Editor icon –.System Response: The Mix<strong>Pro</strong> Tray Editor appears, as pictured here.<strong>TOPS</strong> <strong>Pro</strong> <strong>Tutorial</strong> 77
Notice the following features on the Mix<strong>Pro</strong> Tray Editor: Shipcase Button: Allows you to select a tray template. Package List: Displays a list of packages (or objects) that you canadd to the pick list for loading onto the tray. Add Button: Moves a selected item from the package list to the picklist. Delete Button: Deletes a selected item from the package list. New Button: Opens the Define Package Info dialog box and allowsyou to create a new package/object. Use this function if the packagelist does not include the package you need. Remove Button: Removes a selected package from the pick list. Modify Button: Opens the Define Package Info dialog box, whichallows you to modify a newly created package/object.Note: The Modify function applies only to packages created inMix<strong>Pro</strong> Tray. You cannot modify packages created in <strong>TOPS</strong> <strong>Pro</strong>.Also, you cannot modify a package that’s already placed onto the tray. Pick List: Displays a list of packages you’ve selected from thepackage list. These packages can be loaded onto the tray. The picklist also tracks the following information for each type of package:number of packages, length, width and height. Tray Display Window: Displays an image of the tray and allows youto drag packages onto the tray. Snap Toolbar: Allows you to move the assortment of packages flushto any corner or side of the tray.In this exercise, we’ll create a mixed tray that consists of the followingArmorAll products: ArmorAll spray bottles ArmorAll cloth packetsThe first step in this process is to create a new tray designed to hold theseproducts. We’ll design the tray based on a template designed in CASY.From the Mix<strong>Pro</strong> Tray Editor, follow these instructions:2. Click on the Shipcase button.System Response: The Select ShipCase dialog box appears, aspictured on the next page.78 <strong>TOPS</strong> User Guide Supplement and <strong>Tutorial</strong>
2. From the Select Shipcase dialog box, click on the New button.System Response: The Define Shipcase dialog box appears, aspictured below.3. Use the following fields to define the tray parameters: Shipcases: Enter ArmorAll. Length: Enter 16. Width: Enter 12. Height: Enter 15.4. After completing the tray parameters, click on OK.System Response: The Define Shipcase dialog box closes. TheSelect Shipcase dialog box re-appears with the parameters for the newtray.5. From the Select Shipcase dialog box, click on OK.System Response: Mix<strong>Pro</strong> saves the new tray to the database.(Mix<strong>Pro</strong> saves the tray as a shipcase.) The Mix<strong>Pro</strong> Tray Editor reappears,as pictured below, with the new tray name (ArmorAll)displayed next to the Shipcase button.<strong>TOPS</strong> <strong>Pro</strong> <strong>Tutorial</strong> 79
Step 2: Create New Packages.Look at the package list and decide which items you want to place ontothe tray. In this exercise, we want the mixed tray to include ArmorAllspray bottles and cloth packets. Notice that the initial package list doesnot include any of these items. In this case, Mix<strong>Pro</strong> allows you to createnew packages for these items. Follow these instructions:1. From the Mix<strong>Pro</strong> Tray Editor, click on the New button.System Response: The Define Package Info dialog box appears, aspictured on the next page.2. Use the following fields to define the ArmorAll spray bottle: Style: Use the drop-down box to select a tray template (in thisexercise, hairsp.tpr). Name: Enter ArmorAll Spray. Length: Enter 4. Width: Enter 4. Height: Enter 10.80 <strong>TOPS</strong> User Guide Supplement and <strong>Tutorial</strong>
If you want, you can also define a label for each package and assignthe case a specific color.3. After completing the package dimensions, click on OK.System Response: Mix<strong>Pro</strong> saves the new package to the database.The Mix<strong>Pro</strong> Tray Editor re-appears with the name of the new packageincluded in the package list.4. Repeat steps 2 and 3 to create the ArmorAll Cloth Packets. Use thesedimensions: Style: Use the drop-down box to select a tray template (in thisexercise, 2alarm1.tpr). Name: Enter ArmorAll Cloth. Length: Enter 8. Width: Enter 1. Height: Enter 10.Step 3: Add the Packages to the Pick List.In order to place a package onto the tray, you have to move it from thepackage list to the pick list. To move an item to the pick list, follow theseinstructions:1. Select an item from the package list and click on the Add button.System Response: The system inserts the selected item into the picklist. A graphic of the selected package appears in the g.o.d. (graphiconline display) window, located in upper left corner of the data displaywindow, as pictured below.<strong>TOPS</strong> <strong>Pro</strong> <strong>Tutorial</strong> 81
Note: To change the orientation of the package – for example, position iton its side or on its end – click on the face of the package you want to facethe floor. Click on the top of the package to rotate 90 degrees.Step 4: Load the Items onto the Tray.1. To load an item onto the tray, click on the image of the item and dragit onto the tray.System Response: The system copies an image of the item to the trayarea.Repeat this step until the tray contains six ArmorAll spray bottles.When you’ve done this, the screen will look similar to the one picturedbelow.2. Repeat step 1 to place 12 ArmorAll Cloth Packets onto the tray. Whenyou’ve loaded the tray with spray bottles and cloth packets, your traywill look similar to the tray pictured below.82 <strong>TOPS</strong> User Guide Supplement and <strong>Tutorial</strong>
3. If the ArmorAll tray is the way you want it, open the File menu andselect the Save As option.System Response: The Save As dialog box appears, as picturedbelow.4. Select a location where the file will be saved. In the File name field,enter the name of the mixed tray (ArmorAll).5. Click on the Save button.System Response: Mix<strong>Pro</strong> saves the tray to the database.Tips for Working with Packages on a Tray To add a second package to the tray, hold down the Shift key and clickon the first package. To place the second package on top of the first,Shift and click on top of the first package. To place the secondpackage to the side of the first, Shift and click on the side of the firstpackage. If you’ve loaded a column, row or layer of packages on the tray, youcan add another column, row or layer with one click. For example, toadd a layer of packages, hold down the Shift key and click on the topof the first layer. The system adds another layer on top of the firstlayer. To remove a layer of packages, hold down the Alt and Shiftkeys simultaneously and click on the layer. To remove (or delete) one or more packages from the tray, click on thepackage(s) and drag it off the backside of the tray (to the left). Thepackage(s) completely disappear from the display.To temporarily remove one or more packages from the tray – you wantto load it back later – click on the package(s) and drag it off the frontside of the tray (to the right). The package(s) remain in view on thedisplay.<strong>TOPS</strong> <strong>Pro</strong> <strong>Tutorial</strong> 83
Right-click to display a small menu that allows you to position apackage on the tray in a number of directions. The first menu providesthe following functions:− Hgt Vertical− Len Vertical− Wid VerticalFor the height, length and width vertical functions, you have fouradditional functions:− Face Forward− Face Left− Face Back− Face RightUsing these guidelines, continue to load packages until you’ve loaded asmany spray bottles as you want to the tray.84 <strong>TOPS</strong> User Guide Supplement and <strong>Tutorial</strong>
<strong>TOPS</strong>ePAC ®<strong>TOPS</strong>ePAC ® is a web-based application that allows users to bring packagedesign and stacking strength analysis on the road, performing the taskanytime, anywhere, on any platform using an internet browser.In addition to package design portability and assurance that products areoptimized for shipping, <strong>TOPS</strong>ePAC ® provides the following benefits: Lower Total Cost of Ownership: No software to install or maintain.Reduces IT support costs and enables you to stay up to date with thelatest version of <strong>TOPS</strong>ePAC ® . Better Data Management: Central location for storing all data withno distance or WAN limitations. Easier to Manage: Maintain and manage software configurations anddefault data at a single point. Value Added Customer Service: Sales reps can perform packagedesign and palletization in seconds – all this in front of the customer! Easy Sharing of Data: Give customers and other departments viewonlyaccess to the data. Integration: Analysis and solution data in XML format can be easilyintegrated with your in-house, web-based systems. Compatibility: Compatible with all operating systems.<strong>TOPS</strong>ePAC ® is an optional add-on available to <strong>TOPS</strong> ® <strong>Pro</strong> users with anetwork license and MVP subscription. It is also available independentlywith a minimum number of license purchase.To receive more information on <strong>TOPS</strong>ePAC ® or set up a trial account,please contact <strong>TOPS</strong> ® sales team at 972-739-8677 or email us atinfo@topseng.com.<strong>TOPS</strong> <strong>Pro</strong> <strong>Tutorial</strong> 85