
You also want an ePaper? Increase the reach of your titles
YUMPU automatically turns print PDFs into web optimized ePapers that Google loves.
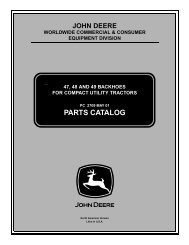
4000 Series Compact Utility<br />
Tractor Attachments<br />
<strong>TECHNICAL</strong><br />
<strong>MANUAL</strong><br />
John Deere<br />
Worldwide Commercial and<br />
Consumer Equipment Division<br />
TM1763 (Jul99)<br />
LithoinU.S.A
47 and 48 Backhoes;<br />
54, 60 and 72-Inch Mid Mount Rotary Mowers;<br />
450, 550, 660, 670 and 680 Hydraulic Tillers;<br />
31B Post Hole Digger;<br />
74 and 84 Front Blades;<br />
26 and 51-Inch Brooms;<br />
47 and 59 Snowblowers;<br />
261 and 271 Rear-Mounted Rotary Mowers
INTRODUCTION<br />
This technical manual is written for an experienced<br />
technician and contains sections that are specifically for<br />
this product. It is a part of a total product support<br />
program.<br />
Safety<br />
Specifications and<br />
Information<br />
The manual is organized so that all the information on a<br />
particular system is kept together. The order of grouping<br />
is as follows:<br />
• Table of Contents<br />
• Specifications<br />
• Component Location<br />
• System Schematic<br />
• Theory of Operation<br />
• Troubleshooting Chart<br />
• Diagnostics<br />
• Tests & Adjustments<br />
• Repair<br />
Note:<br />
Depending on the particular section or system<br />
being covered, not all of the above groups may<br />
be used.<br />
Backhoes<br />
Rotary Mowers<br />
Rotary Tillers<br />
Post Hole Digger<br />
Blades<br />
Each section will be identified with a symbol rather than a<br />
number. The groups and pages within a section will be<br />
consecutively numbered.<br />
We appreciate your input on this manual. To help, there<br />
are postage paid post cards included at the back. If you<br />
find any errors or want to comment on the layout of the<br />
manual please fill out one of the cards and mail it back to<br />
us.<br />
Rotary Brooms<br />
Snowblowers<br />
All information, illustrations and<br />
specifications in this manual are based on<br />
the latest information available at the time of<br />
publication. The right is reserved to make<br />
changes at any time without notice.<br />
COPYRIGHT © 1999<br />
Deere & Co.<br />
John Deere Worldwide Commercial and<br />
Consumer Equipment Division<br />
Horicon, WI<br />
All rights reserved<br />
Miscellaneous<br />
6/22/99 1-1
SAFETY<br />
RECOGNIZE SAFETY INFORMATION<br />
HANDLE FLUIDS SAFELY-AVOID<br />
FIRES<br />
Be Prepared For Emergencies<br />
This is the safety-alert symbol. When you see this<br />
symbol on your machine or in this manual, be alert to<br />
the potential for personal injury.<br />
TS227<br />
Follow recommended precautions and safe servicing<br />
practices.<br />
Understand Signal Words<br />
A signal word—DANGER, WARNING, or CAUTION—is<br />
used with the safety-alert symbol. DANGER identifies<br />
the most serious hazards.<br />
DANGER or WARNING safety signs are located near<br />
specific hazards. General precautions are listed on<br />
CAUTION safety signs. CAUTION also calls attention<br />
to safety messages in this manual.<br />
REPLACE SAFETY SIGNS<br />
TS291<br />
When you work around fuel, do not smoke or work near<br />
heaters or other fire hazards.<br />
Store flammable fluids away from fire hazards. Do not<br />
incinerate or puncture pressurized containers.<br />
Make sure machine is clean of trash, grease, and<br />
debris.<br />
Do not store oily rags; they can ignite and burn<br />
spontaneously.<br />
Be prepared if a fire starts.<br />
Keep a first aid kit and fire extinguisher handy.<br />
Keep emergency numbers for doctors, ambulance<br />
service, hospital, and fire department near your<br />
telephone.<br />
TS201<br />
Replace missing or damaged safety signs. See the<br />
machine operator’s manual for correct safety sign<br />
placement.<br />
1-2 6/22/99
SAFETY<br />
USE CARE AROUND HIGH-<br />
PRESSURE FLUID LINES<br />
Avoid High-pressure Fluids<br />
USE SAFE SERVICE PROCEDURES<br />
Wear Protective Clothing<br />
Wear close fitting clothing and safety equipment<br />
appropriate to the job.<br />
Prolonged exposure to loud noise can cause<br />
impairment or loss of hearing. Wear a suitable hearing<br />
protective device such as earmuffs or earplugs to<br />
protect against objectionable or uncomfortable loud<br />
noises.<br />
Operating equipment safely requires the full attention<br />
of the operator. Do not wear radio or music<br />
headphones while operating machine.<br />
Escaping fluid under pressure can penetrate the skin<br />
causing serious injury.<br />
Avoid injury from escaping fluid under pressure by<br />
stopping the engine and relieving pressure in the<br />
system before disconnecting or connecting hydraulic or<br />
other lines. Tighten all connections before applying<br />
pressure.<br />
Search for leaks with a piece of cardboard. Protect<br />
hands and body from high pressure fluids.<br />
If an accident occurs, see a doctor immediately. Any<br />
fluid injected into the skin must be surgically removed<br />
within a few hours or gangrene may result. Doctors<br />
unfamiliar with this type of injury should reference a<br />
knowledgeable medical source. Such information is<br />
available from Deere & Company Medical Department<br />
in Moline, Illinois, U.S.A.<br />
Avoid Heating Near Pressurized<br />
Fluid Lines<br />
TS953<br />
Flammable spray can be generated by heating near<br />
pressurized fluid lines, resulting in severe burns to<br />
yourself and bystanders. Do not heat by welding,<br />
soldering, or using a torch near pressurized fluid lines<br />
or other flammable materials. Pressurized lines can be<br />
accidentally cut when heat goes beyond the immediate<br />
flame area.<br />
Service Machines Safely<br />
Tielonghairbehindyourhead.Donotwearanecktie,<br />
scarf, loose clothing, or necklace when you work near<br />
machine tools or moving parts. If these items were to<br />
get caught, severe injury could result.<br />
Remove rings and other jewelry to prevent electrical<br />
shorts and entanglement in moving parts.<br />
Use Proper Tools<br />
TS228<br />
Use tools appropriate to the work. Makeshift tools and<br />
procedures can create safety hazards. Use power tools<br />
only to loosen threaded parts and fasteners. For<br />
loosening and tightening hardware, use the correct size<br />
tools. DO NOT use U.S. measurement tools on metric<br />
fasteners. Avoid bodily injury caused by slipping<br />
wrenches. Use only service parts meeting John Deere<br />
specifications.<br />
6/22/99 1-3
SAFETY<br />
Park Machine Safely<br />
TS230<br />
Before working on the machine:<br />
1. Lower all equipment to the ground.<br />
2. Stop the engine and remove the key.<br />
3. Disconnect the battery ground strap.<br />
4. Hang a “DO NOT OPERATE” tag in operator<br />
station.<br />
Support Machine Properly And Use<br />
Proper Lifting Equipment<br />
Using High Pressure Washers<br />
Directing pressurized water at electronic/electrical<br />
components or connectors, bearings, hydraulic seals,<br />
fuel injection pumps or other sensitive parts and<br />
components may cause product malfunctions. Reduce<br />
pressure and spray at a 45 to 90 degree angle.<br />
Illuminate Work Area Safely<br />
Illuminate your work area adequately but safely. Use a<br />
portable safety light for working inside or under the<br />
machine. Make sure the bulb is enclosed by a wire<br />
cage. The hot filament of an accidentally broken bulb<br />
can ignite spilled fuel or oil.<br />
Work In Ventilated Area<br />
TS229<br />
If you must work on a lifted machine or attachment,<br />
securely support the machine or attachment.<br />
Do not support the machine on cinder blocks, hollow<br />
tiles, or props that may crumble under continuous load.<br />
Do not work under a machine that is supported solely<br />
by a jack. Follow recommended procedures in this<br />
manual.<br />
Lifting heavy components incorrectly can cause severe<br />
injury or machine damage. Follow recommended<br />
procedure for removal and installation of components<br />
in the manual.<br />
Work In Clean Area<br />
Engine exhaust fumes can cause sickness or death. If<br />
it is necessary to run an engine in an enclosed area,<br />
remove the exhaust fumes from the area with an<br />
exhaust pipe extension.<br />
If you do not have an exhaust pipe extension, open the<br />
doors and get outside air into the area.<br />
Remove Paint Before Welding Or<br />
Heating<br />
Avoid potentially toxic fumes and dust. Hazardous<br />
fumes can be generated when paint is heated by<br />
welding, soldering, or using a torch. Do all work outside<br />
or in a well ventilated area. Dispose of paint and<br />
solvent properly. Remove paint before welding or<br />
heating: If you sand or grind paint, avoid breathing the<br />
dust. Wear an approved respirator. If you use solvent or<br />
paint stripper, remove stripper with soap and water<br />
before welding. Remove solvent or paint stripper<br />
containers and other flammable material from area.<br />
Allow fumes to disperse at least 15 minutes before<br />
welding or heating.<br />
Before starting a job:<br />
1. Clean work area and machine.<br />
2. Make sure you have all necessary tools to do your<br />
job.<br />
3. Have the right parts on hand.<br />
4. Read all instructions thoroughly; do not attempt<br />
shortcuts.<br />
1-4 6/22/99
SAFETY<br />
AVOID INJURY FROM ROTATING<br />
BLADES, AUGERS AND PTO<br />
SHAFTS<br />
Dispose of Waste Properly<br />
Improperly disposing of waste can threaten the<br />
environment and ecology. Potentially harmful waste<br />
used with John Deere equipment include such items as<br />
oil, fuel, coolant, brake fluid, filters, and batteries. Use<br />
leakproof containers when draining fluids. Do not use<br />
food or beverage containers that may mislead<br />
someone into drinking from them. Do not pour waste<br />
onto the ground, down a drain, or into any water<br />
source. Inquire on the proper way to recycle or dispose<br />
of waste from your local environmental or recycling<br />
center, or from your John Deere dealer.<br />
LIVE WITH SAFETY<br />
Keep hands and feet away while machine is running.<br />
Shut off power to service, lubricate or remove mower<br />
blades, augers or PTO shafts.<br />
HANDLE CHEMICAL PRODUCTS<br />
SAFELY<br />
Before returning machine to customer, make sure<br />
machine is functioning properly, especially the safety<br />
systems. Install all guards and shields.<br />
Direct exposure to hazardous chemicals can cause<br />
serious injury. Potentially hazardous chemicals used<br />
with John Deere equipment include such items as<br />
lubricants, coolants, paints, and adhesives.<br />
A Material Safety Data Sheet (MSDS) provides specific<br />
details on chemical products: physical and health<br />
hazards, safety procedures, and emergency response<br />
techniques. Check the MSDS before you start any job<br />
using a hazardous chemical. That way you will know<br />
exactly what the risks are and how to do the job safely.<br />
Then follow procedures and recommended equipment.<br />
6/22/99 1-5
SAFETY<br />
1-6 6/22/99
SPECIFICATIONS<br />
CONTENTS<br />
CONTENTS<br />
Page<br />
SPECIFICATIONS........................................... 3<br />
BACKHOE SPECIFICATIONS. . . . . . . . . . . . . . . . . . . . . . . . . . . . . . . . . . . . . . . . . . . 3<br />
MOWERS ..........................................................3<br />
ROTARY TILLER SPECIFICATIONS. . . . . . . . . . . . . . . . . . . . . . . . . . . . . . . . . . . . . . 3<br />
POST HOLE DIGGER SPECIFICATIONS . . . . . . . . . . . . . . . . . . . . . . . . . . . . . . . . . 3<br />
FRONT BLADE SPECIFICATIONS . . . . . . . . . . . . . . . . . . . . . . . . . . . . . . . . . . . . . . . 3<br />
ROTARYBROOMSPECIFICATIONS.....................................4<br />
SNOWBLOWERSPECIFICATIONS......................................4<br />
ATTACHMENTUSE...................................................4<br />
O-RINGSEALSERVICERECOMMENDATIONS .................. 5<br />
FACE SEAL FITTINGS WITH INCH STUD ENDS TORQUE . . . . . . . . . . . . . . . . . . . 5<br />
FACE SEAL FITTINGS WITH METRIC STUD ENDS TORQUE. . . . . . . . . . . . . . . . . 6<br />
O-RING FACE SEAL FITTINGS . . . . . . . . . . . . . . . . . . . . . . . . . . . . . . . . . . . . . . . . . 7<br />
O-RINGBOSSFITTINGS..............................................7<br />
INCHFASTENERTORQUEVALUES ........................... 8<br />
METRICFASTENERTORQUEVALUES......................... 9<br />
LUBRICANTS............................................. 10<br />
HYDROSTATICTRANSMISSION&HYDRAULICOIL.......................10<br />
ALTERNATIVELUBRICANTS..........................................10<br />
LUBRICANTSTORAGE..............................................10<br />
CHASSISGREASE—NORTHAMERICA.................................11<br />
CHASSISGREASE—EUROPE ........................................11<br />
6/22/99 2-1
NOTES<br />
SPECIFICATIONS<br />
2-2 6/22/99
SPECIFICATIONS & INFORMATION<br />
SPECIFICATIONS<br />
SPECIFICATIONS<br />
BACKHOE SPECIFICATIONS<br />
Dimensions:<br />
Circuit Relief Valve Setting<br />
Boom and Dipperstick<br />
47Backhoe..............................19980±690kPa(2600±100psi)<br />
48Backhoe..............................19980±690kPa(2600±100psi)<br />
Shim Sizes<br />
47 and 48 Backhoe . . . . . .1.02 mm (0.04 in.), 0.51 mm (0.02 in.), 0.25 mm (0.01 in.)<br />
MOWERS<br />
All Mid-Mount Mowers<br />
54InchDeckBladeBoltTorque.......................57-84N•m(42-62lb-ft)<br />
60/72InchDeckBladeBoltTorque...................102-123N•m(75-91lb-ft)<br />
3-Point Hitch Rear Mount Mowers<br />
BladeBoltTorque................................102-123N•m(75-91lb-ft)<br />
261and272Mounting ..........................................Category1<br />
261and272PTOSpeed...........................................540rpm<br />
ROTARY TILLER SPECIFICATIONS<br />
Models......................................... 450,550,660,670and680<br />
ChainFreePlay.......................................... 10mm(0.375in.)<br />
PTOSpringClutchAdjustment..................28.9-29.5mm(1.137-1.161in.)<br />
GearBacklash(AllModels).......................0.2-0.6mm(0.008-0.023in.)<br />
ChainCaseOilLevel(approx)(AllModels) ....................... 0.85L(28oz)<br />
GearOilLevel(approx)(AllModels)............................0.40L(13.5oz)<br />
GearCaseGrease .................... JohnDeereGL-5 ® Gear Oil-SAE 80W-90<br />
POST HOLE DIGGER SPECIFICATIONS<br />
Model ............................................................ 31B<br />
DriveType.........................................................PTO<br />
PTOrpm(maximum)..............................................540rpm<br />
Augerrpm(maximum) ............................................170rpm<br />
Backlash....................................0.1-0.56mm(0.004-0.022in.)<br />
Endplay.......................................................... none<br />
TransportationClearance ............................... 20-25cm(8-10in.)<br />
Weight(lessauger)..........................................77kg(170lbs)<br />
FRONT BLADE SPECIFICATIONS<br />
LiftCylinderLockNut .................................... 272N·m(200lb-ft)<br />
6/22/99 2-3
SPECIFICATIONS<br />
SPECIFICATIONS & INFORMATION<br />
ROTARY BROOM SPECIFICATIONS<br />
GearBoxBacklash.............................0.2-0.6mm(0.008-0.023in.)<br />
InputShaftEndplay..................................................zero<br />
SNOWBLOWER SPECIFICATIONS<br />
InputShaftEndPlay(maximum............................0.08mm(0.003in.)<br />
Blower Case Shaft<br />
EndPlay ................................0.025-0.15mm(0.001-0.006in.)<br />
Backlash..................................0.15-0.4mm(0.006-0.016in.)<br />
Gear Box and Blower Case Grease Capacity<br />
59 .....................................................0.4L(13.5oz)<br />
Blower Gear Case Half<br />
SocketHeadCapScrews............................... 26N•m(228lb-in.)<br />
CapScrews............................................ 41N•m(34lb-ft)<br />
ATTACHMENT USE<br />
ATTACHMENT 4100 4200 4300 4400 4500 4600<br />
Backhoes:<br />
Model 47<br />
Backhoe Model 48<br />
Mowers, Mid-Mount Rotary:<br />
54-inch mid mower<br />
60-inch mid mower<br />
72-inch mid mower<br />
Mowers, 3-Point Hitch:<br />
261 60-inch<br />
272 72-inch<br />
Tillers:<br />
450 50-inch<br />
550 50-inch<br />
660 60-inch<br />
670 70-inch<br />
680 80-inch<br />
N<br />
N<br />
Y<br />
Y<br />
N<br />
Y<br />
Y<br />
Y<br />
Y<br />
N<br />
N<br />
N<br />
Y<br />
N<br />
N<br />
Y<br />
Y<br />
Y<br />
Y<br />
N<br />
Y<br />
N<br />
N<br />
N<br />
Post Hole Digger:<br />
31B Y Y Y Y Y Y<br />
Blades, Front:<br />
74 54-inch, 60-inch, 66-inch<br />
84 84-inch<br />
Rotary Brooms:<br />
51<br />
26<br />
Snowblowers:<br />
47-inch<br />
59-inch<br />
N 2<br />
N<br />
Y<br />
N<br />
Y<br />
N<br />
Y<br />
N<br />
N<br />
Y<br />
Y<br />
Y<br />
1 Tractor has too much horsepower for equipment.<br />
2 54-Inch blade is available for use on 4100 tractor. Blade is separate from Model 75 54-inch blade.<br />
Y<br />
Y<br />
N<br />
Y<br />
Y<br />
Y<br />
Y<br />
N<br />
Y<br />
Y<br />
N<br />
N<br />
Y<br />
N<br />
N<br />
Y<br />
N<br />
Y<br />
Y<br />
Y<br />
N<br />
Y<br />
Y<br />
Y<br />
Y<br />
N<br />
Y<br />
Y<br />
N<br />
N<br />
Y<br />
N<br />
N<br />
Y<br />
N<br />
Y<br />
N<br />
Y<br />
N<br />
N<br />
Y<br />
Y<br />
Y<br />
N<br />
Y<br />
Y<br />
Y<br />
Y<br />
N<br />
Y<br />
N<br />
N<br />
N<br />
N<br />
N<br />
Y<br />
N<br />
N<br />
Y<br />
Y<br />
Y<br />
N<br />
N 1<br />
Y<br />
Y<br />
Y<br />
N<br />
Y<br />
N<br />
N<br />
N<br />
N<br />
2-4 6/22/99
SPECIFICATIONS & INFORMATION<br />
O-RING SEAL SERVICE RECOMMENDATIONS<br />
O-RING SEAL SERVICE RECOMMENDATIONS<br />
FACE SEAL FITTINGS WITH INCH STUD ENDS TORQUE<br />
Stud End<br />
Tube Nut<br />
Stud Straight and Tube Nut<br />
Bulkhead Union and Bulkhead Locknut<br />
Locknut<br />
Stud End<br />
90 Adjustable Stud Elbow<br />
Swivel Nut<br />
Tube Nut<br />
90 Swivel Elbow and Tube Nut<br />
Nominal Tube O.D./Hose I.D. Face Seal Tube/Hose End O-ring Stud Ends<br />
Metric<br />
Tube<br />
O.D.<br />
Inch Tube O.D.<br />
Thread Size<br />
Tube Nut/<br />
Swivel Nut<br />
Torque<br />
Bulkhead<br />
Locknut<br />
Torque<br />
Thread<br />
Size<br />
Straight Fitting or<br />
Locknut Torque<br />
mm<br />
Dash<br />
Size<br />
in. mm in. N•m lb-ft N•m lb-ft in. N•m lb-ft<br />
-3 0.188 4.76 3/8-24 8 6<br />
6 -4 0.250 6.35 9/16-18 16 12 12 9 7/16-20 12 9<br />
8 -5 0.312 7.94 1/2-20 16 12<br />
10 -6 0.375 9.52 11/16-16 24 18 24 18 9/16-18 24 18<br />
12 -8 0.500 12.70 13/16-16 50 37 46 34 3/4-16 46 34<br />
16 -10 0.625 15.88 1-14 69 51 62 46 7/8-14 62 46<br />
-12 0.750 19.05 1-3/16-12 102 75 102 75 1-1/16-12 102 75<br />
22 -14 0.875 22.22 1-3/16-12 102 75 102 75 1-3/16-12 122 90<br />
25 -16 1.000 25.40 1-7/16-12 142 105 142 105 1-5/16-12 142 105<br />
32 -20 1.25 31.75 1-11/16-12 190 140 190 140 1-5/8-12 190 140<br />
38 -24 1.50 38.10 2-12 217 160 217 160 1-7/8-12 217 160<br />
NOTE: Torque tolerance is +15% / –20%.<br />
6/22/99 2-5
O-RING SEAL SERVICE RECOMMENDATIONS<br />
SPECIFICATIONS & INFORMATION<br />
FACE SEAL FITTINGS WITH METRIC STUD ENDS TORQUE<br />
Stud End<br />
Tube Nut<br />
Groove For Metric Identification<br />
Stud Straight and Tube Nut<br />
Bulkhead Union and Bulkhead Locknut<br />
Groove For Metric<br />
Identification<br />
Locknut<br />
Stud End<br />
90 Adjustable Stud Elbow<br />
Swivel Nut<br />
Tube Nut<br />
90 Swivel Elbow and Tube Nut<br />
Nominal Tube O.D./Hose<br />
I.D.<br />
Face Seal Tube/Hose End<br />
O-ring Stud Ends, Straight Fitting or<br />
Locknut<br />
Metric<br />
Tube<br />
O.D.<br />
Inch Tube O.D.<br />
Thread<br />
Size<br />
Hex<br />
Size<br />
Tube Nut/<br />
Swivel<br />
Nut<br />
Torque<br />
Bulkhead<br />
Locknut<br />
Torque<br />
Thread<br />
Size<br />
Hex<br />
Size<br />
Steel or<br />
Gray Iron<br />
Torque<br />
Aluminum<br />
Torque<br />
mm<br />
Dash<br />
Size<br />
in. mm in. mm N•m lb-ft N•m lb-ft mm mm N•m lb-ft N•m lb-ft<br />
6 -4 0.250 6.35 9/16-18 17 16 12 12 9 M12X1.5 17 21 15.5 9 6.6<br />
8 -5 0.312 7.94<br />
M14X1.5 19 33 24 15 11<br />
10 -6 0.375 9.52 11/16-16 22 24 18 24 18 M16X1.5 22 41 30 18 13<br />
12 -8 0.500 12.70 13/16-16 24 50 37 46 34 M18X1.5 24 50 37 21 15<br />
16 -10 0.625 15.88 1-14 30 69 51 62 46 M22X1.5 27 69 51 28 21<br />
-12 0.750 19.05 1-3/16-12 36 102 75 102 75 M27X2 32 102 75 46 34<br />
22 -14 0.875 22.22 1-3/16-12 36 102 75 102 75 M30X2 36<br />
25 -16 1.000 25.40 1-7/16-12 41 142 105 142 105 M33X2 41 158 116 71 52<br />
28 M38X2 46 176 130 79 58<br />
32 -20 1.25 31.75 1-11/16-12 50 190 140 190 140 M42X2 50 190 140 85 63<br />
38 -24 1.50 38.10 2-12 60 217 160 217 160 M48X2 55 217 160 98 72<br />
NOTE: Torque tolerance is +15% / –20%.<br />
2-6 6/22/99
SPECIFICATIONS & INFORMATION<br />
O-RING SEAL SERVICE RECOMMENDATIONS<br />
O-RING FACE SEAL FITTINGS<br />
.<br />
Sealing Surface<br />
Special Nut<br />
Special Washer<br />
Angle Fitting<br />
O-Ring<br />
Sealing Surface<br />
1. Inspect the fitting sealing surfaces. They must be<br />
free of dirt or defects.<br />
2. Inspect the O-ring. It must be free of damage or<br />
defects.<br />
3. Lubricate O-rings and install into groove using<br />
petroleum jelly to hold in place.<br />
4. Push O-ring into the groove with plenty of<br />
petroleum jelly so O-ring is not displaced during<br />
assembly.<br />
5. Index angle fittings and tighten by hand pressing<br />
joint together to insure O-ring remains in place.<br />
6. Tighten fitting or nut to torque value shown on the<br />
chart per dash size stamped on the fitting. Do not<br />
allow hoses to twist when tightening fittings.<br />
O-RING BOSS FITTINGS<br />
1. Inspect boss O-ring boss seat. It must be free of dirt<br />
and defects. If repeated leaks occur, inspect for<br />
defects with a magnifying glass. Some raised<br />
defects can be removed with a slip stone.<br />
Groove<br />
O-Ring<br />
3. For angle fittings, loosen special nut and push<br />
special washer against threads so O-ring can be<br />
installed into the groove of fitting.<br />
4. Turn fitting into the boss by hand until special<br />
washer or washer face (straight fitting) contacts<br />
boss face and O-ring is squeezed into its seat.<br />
5. To position angle fittings, turn the fitting counterclockwise<br />
a maximum of one turn.<br />
6. Tighten straight fittings to torque value shown on<br />
chart. For angle fittings, tighten the special nut to<br />
value shown in the chart while holding body of<br />
fitting with a wrench.<br />
STRAIGHT FITTING OR SPECIAL NUT TORQUE<br />
Thread<br />
Size<br />
N•m<br />
Torque a<br />
lb-ft<br />
Number<br />
of Flats b<br />
3/8-24 UNF 8 (6) 2<br />
7/16-20 UNF 12 (9) 2<br />
1/2-20 UNF 16 (12) 2<br />
9/16-18 UNF 24 (18) 2<br />
3/4-16 UNF 46 (34) 2<br />
7/8-14 UNF 62 (46) 1-1/2<br />
1-1/16-12 UN 102 (75) 1<br />
1-3/16-12 UN 122 (90) 1<br />
1-5/16-12 UN 142 (105) 3/4<br />
1-5/8-12 UN 190 (140) 3/4<br />
2. Put hydraulic oil or petroleum jelly on the O-ring.<br />
Place electrical tape over the threads to protect O-<br />
ring from nicks. Slide O-ring over the tape and into<br />
the groove of fitting. Remove tape.<br />
1-7/8-12 UN 217 (160) 1/2<br />
a. Torque tolerance is ± 10 percent.<br />
b. To be used if a torque wrench cannot be used.<br />
After tightening fitting by hand, put a mark on nut or<br />
boss; then tighten special nut or straight fitting the<br />
number of flats shown.<br />
6/22/99 2-7
INCH FASTENER TORQUE VALUES<br />
SPECIFICATIONS & INFORMATION<br />
INCH FASTENER TORQUE VALUES<br />
SAE<br />
Grade<br />
and Head<br />
Markings<br />
No Marks<br />
1or2 b<br />
5 5.1 5.2<br />
8 8.2<br />
SAE<br />
Grade<br />
and Nut<br />
Markings<br />
No Marks<br />
2<br />
5<br />
8<br />
TS1162<br />
Grade 1 Grade 2 b Grade 5, 5.1 or 5.2 Grade 8 or 8.2<br />
Lubricated a Dry a Lubricated a Dry a Lubricated a Dry a Lubricated a Dry a<br />
SIZE N•m lb-ft N•m lb-ft N•m lb-ft N•m lb-ft N•m lb-ft N•m lb-ft N•m lb-ft N•m lb-ft<br />
1/4 3.7 2.8 4.7 3.5 6 4.5 7.5 5.5 9.5 7 12 9 13.5 10 17 12.5<br />
5/16 7.7 5.5 10 7 12 9 15 11 20 15 25 18 28 21 35 26<br />
3/8 14 10 17 13 22 16 27 20 35 26 44 33 50 36 63 46<br />
7/16 22 16 28 20 35 26 44 32 55 41 70 52 80 58 100 75<br />
1/2 33 25 42 31 53 39 67 50 85 63 110 80 120 90 150 115<br />
9/16 48 36 60 45 75 56 95 70 125 90 155 115 175 130 225 160<br />
5/8 67 50 85 62 105 78 135 100 170 125 215 160 215 160 300 225<br />
3/4 120 87 150 110 190 140 240 175 300 225 375 280 425 310 550 400<br />
7/8 190 140 240 175 190 140 240 175 490 360 625 450 700 500 875 650<br />
1 290 210 360 270 290 210 360 270 725 540 925 675 1050 750 1300 975<br />
1-1/8 470 300 510 375 470 300 510 375 900 675 1150 850 1450 1075 1850 1350<br />
1-1/4 570 425 725 530 570 425 725 530 1300 950 1650 1200 2050 1500 2600 1950<br />
1-3/8 750 550 950 700 750 550 950 700 1700 1250 2150 1550 2700 2000 3400 2550<br />
1-1/2 1000 725 1250 925 990 725 1250 930 2250 1650 2850 2100 3600 2650 4550 3350<br />
DO NOT use these hand torque values if a different torque value or tightening procedure is given for a specific<br />
application. Torque values listed are for general use only and include a ±10% variance factor. Check tightness of<br />
fasteners periodically. DO NOT use air powered wrenches.<br />
Shear bolts are designed to fail under predetermined loads. Always replace shear bolts with identical grade.<br />
Fasteners should be replaced with the same grade. Make sure fastener threads are clean and that you properly<br />
start thread engagement. This will prevent them from failing when tightening.<br />
When bolt and nut combination fasteners are used, torque values should be applied to the NUT instead of the bolt<br />
head.<br />
Tighten toothed or serrated-type lock nuts to the full torque value.<br />
a “Lubricated” means coated with a lubricant such as engine oil, or fasteners with phosphate and oil coatings.<br />
“Dry” means plain or zinc plated (yellow dichromate - Specification JDS117) without any lubrication.<br />
b “Grade 2” applies for hex cap screws (not hex bolts) up to 152 mm (6-in.) long. “Grade 1” applies for hex<br />
cap screws over 152 mm (6-in.) long, and for all other types of bolts and screws of any length.<br />
Reference: JDS—G200.<br />
2-8 6/22/99
SPECIFICATIONS & INFORMATION<br />
METRIC FASTENER TORQUE VALUES<br />
METRIC FASTENER TORQUE VALUES<br />
Property<br />
Class<br />
and<br />
Head<br />
Markings<br />
4.8<br />
4.8<br />
4.8<br />
8.8 9.8<br />
8.8 9.8<br />
8.8 9.8<br />
10.9<br />
12.9<br />
10.9<br />
12.9<br />
10.9 12.9 12.9<br />
Property<br />
Class<br />
and<br />
Nut<br />
Markings<br />
5<br />
5<br />
5 10<br />
10 10<br />
10<br />
10<br />
10<br />
12<br />
12<br />
12<br />
TS1163<br />
Class 4.8 Class 8.8 or 9.8 Class 10.9 Class 12.9<br />
Lubricated a Dry a Lubricated a Dry a Lubricated a Dry a Lubricated a Dry a<br />
SIZE N•m lb-ft N•m lb-ft N•m lb-ft N•m lb-ft N•m lb-ft N•m lb-ft N•m lb-ft N•m lb-ft<br />
M6 48 3.5 6 4.5 9 6.5 11 8.5 13 9.5 17 12 15 11.5 19 14.5<br />
M8 12 8.5 15 11 22 16 28 20 32 24 40 30 37 28 47 35<br />
M10 23 17 29 21 43 32 55 40 63 47 80 60 75 55 95 70<br />
M12 40 29 50 37 75 55 95 70 110 80 140 105 130 95 165 120<br />
M14 63 47 80 60 120 88 150 110 175 130 225 165 205 150 260 109<br />
M16 100 73 125 92 190 140 240 175 275 200 350 225 320 240 400 300<br />
M18 135 100 175 125 260 195 330 250 375 275 475 350 440 325 560 410<br />
M20 190 140 240 180 375 275 475 350 530 400 675 500 625 460 800 580<br />
M22 260 190 330 250 510 375 650 475 725 540 925 675 850 625 1075 800<br />
M24 330 250 425 310 650 475 825 600 925 675 1150 850 1075 800 1350 1000<br />
M27 490 360 625 450 950 700 1200 875 1350 1000 1700 1250 1600 1150 2000 1500<br />
M30 675 490 850 625 1300 950 1650 1200 1850 1350 2300 1700 2150 1600 2700 2000<br />
M33 900 675 1150 850 1750 1300 2200 1650 2500 1850 3150 2350 2900 2150 3700 2750<br />
M36 1150 850 1450 1075 2250 1650 2850 2100 3200 2350 4050 3000 3750 2750 4750 3500<br />
DO NOT use these hand torque values if a different torque value or tightening procedure is given for a specific<br />
application. Torque values listed are for general use only and include a ±10% variance factor. Check tightness of<br />
fasteners periodically. DO NOT use air powered wrenches.<br />
Shear bolts are designed to fail under predetermined loads. Always replace shear bolts with identical grade.<br />
Fasteners should be replaced with the same grade. Make sure fastener threads are clean and that you properly<br />
start thread engagement. This will prevent them from failing when tightening.<br />
When bolt and nut combination fasteners are used, torque values should be applied to the NUT instead of the bolt<br />
head.<br />
Tighten toothed or serrated-type lock nuts to the full torque value.<br />
a “Lubricated” means coated with a lubricant such as engine oil, or fasteners with phosphate and oil coatings.<br />
“Dry” means plain or zinc plated (yellow dichromate - Specification JDS117) without any lubrication.<br />
Reference: JDS—G200.<br />
6/22/99 2-9
LUBRICANTS<br />
SPECIFICATIONS & INFORMATION<br />
LUBRICANTS<br />
HYDROSTATIC TRANSMISSION &<br />
HYDRAULIC OIL<br />
Use the appropriate oil viscosity based on these air<br />
temperature ranges. Operating outside of these<br />
recommended oil air temperature ranges may cause<br />
premature hydrostatic transmission or hydraulic system<br />
failures.<br />
IMPORTANT: Mixing of LOW VISCOSITY HY–<br />
GARD® and HY–GARD® oils is permitted. DO<br />
NOT mix any other oils in this transmission. DO<br />
NOT use engine oil or “Type F” (Red) Automatic<br />
Transmission Fluid in this transmission.<br />
The following John Deere transmission and hydraulic<br />
oil is PREFERRED:<br />
• LOW VISCOSITY HY–GARD®—JDM J20D.<br />
The following John Deere oil is also recommended if<br />
above preferred oil is not available:<br />
• HY–GARD®—JDM J20C.<br />
the following publications to recommend the proper oil<br />
for your customers:<br />
• Module DX,ANTI in JDS–G135;<br />
• Section 530, Lubricants & Hydraulics, of the John<br />
Deere Merchandise Sales Guide;<br />
• Lubrication Sales Manual PI7032.<br />
ALTERNATIVE LUBRICANTS<br />
Conditions in certain geographical areas outside the<br />
United States and Canada may require different<br />
lubricant recommendations than these printed in this<br />
manual or the operator's manual. Consult with your<br />
John Deere Dealer, or Sales Branch to obtain the<br />
alternative lubricant recommendations.<br />
LUBRICANT STORAGE<br />
This machine can operate at top efficiency only if clean<br />
lubricants are used.<br />
Use clean containers to handle all lubricants. Store<br />
them in an area protected from dust, moisture, and<br />
other contamination. Store drums on their sides.<br />
Other oils may be used if above recommended John<br />
Deere oils are not available, provided they meet one of<br />
the following specifications:<br />
• John Deere Standard JDM J20D;<br />
• John Deere Standard JDM C.<br />
JDM J20D<br />
JDM J20C<br />
PREFERRED<br />
AIR TEMPERATURE<br />
M58275<br />
John Deere Dealers: You may want to cross-reference<br />
2-10 6/22/99
SPECIFICATIONS & INFORMATION<br />
LUBRICANTS<br />
CHASSIS GREASE—NORTH<br />
AMERICA<br />
IMPORTANT: ONLY use a quality grease in this<br />
application. DO NOT mix any other greases in<br />
this application. DO NOT use any BIO–GREASE<br />
in this application.<br />
The following John Deere greases are PREFERRED:<br />
• MOLY HIGH-TEMPERATURE EP GREASE®—<br />
JDM J25C, NLGI Grade 2;<br />
• HIGH-TEMPERATURE EP GREASE®—JDM<br />
J13E4, NLGI Grade 2.<br />
Other greases may be used if above preferred John<br />
Deere greases are not available, provided they meet<br />
one of the following specifications:<br />
• John Deere Standard JDM J25C, NLGI Grade 2;<br />
• John Deere Standard JDM J13E4, NLGI Grade 2.<br />
IMPORTANT: If minimum air temperature should<br />
fall below -20 °C (-4 °F), the grease must be<br />
heated to at least five degrees above the lower<br />
limit before start-up or components may be<br />
damaged.<br />
John Deere Dealers: You may want to cross-reference<br />
the following publications to recommend the proper<br />
grease for your customers:<br />
• Module DX,GREA1 in JDS–G135;<br />
• Section 530, Lubricants & Hydraulics, of the<br />
John Deere Merchandise Sales Guide;<br />
• the Lubrication Sales Manual PI7032.<br />
CHASSIS GREASE—EUROPE<br />
IMPORTANT: ONLY use a quality grease in this<br />
application. DO NOT mix any other greases in<br />
this application. DO NOT use any BIO–GREASE<br />
in this application.<br />
The following John Deere grease is PREFERRED:<br />
• GREASE–GARD—JDM J25C, NLGI Grade 2.<br />
Other greases may be used if above preferred John<br />
Deere grease is not available, provided they meet the<br />
following specifications:<br />
• John Deere Standard JDM J25C, NLGI Grade 2.<br />
IMPORTANT: If minimum air temperature should<br />
fall below -10 °C (14 °F), the grease must be<br />
heated to at least five degrees above the lower<br />
limit before start-up or components may be<br />
damaged.<br />
John Deere Dealers: You may want to cross-reference<br />
the following publications to recommend the proper<br />
grease for your customers:<br />
• Module DX,GREA1 in JDS–G135;<br />
• Section 530, Lubricants & Hydraulics, of the<br />
John Deere Merchandise Sales Guide.<br />
JDM J25C<br />
NLGI Grade 2<br />
JDM J13E4<br />
NLGI Grade 2<br />
JDM J25C<br />
NLGI Grade 2<br />
AIR TEMPERATURE<br />
M58275<br />
AIR TEMPERATURE<br />
M58275<br />
6/22/99 2-11
LUBRICANTS<br />
SPECIFICATIONS & INFORMATION<br />
2-12 6/22/99
BACKHOES<br />
CONTENTS<br />
CONTENTS<br />
Page<br />
SPECIFICATIONS........................................... 3<br />
TORQUESPECIFICATIONS............................................4<br />
SPECIAL OR ESSENTIAL TOOLS . . . . . . . . . . . . . . . . . . . . . . . . . . . . . . . . . . . . . . . 4<br />
OTHERMATERIALS..................................................4<br />
BACKHOECOMPONENTLOCATION........................... 5<br />
47BOOM...........................................................5<br />
48BOOM...........................................................6<br />
THEORYOFOPERATION.................................... 7<br />
CONTROLVALVES...................................................7<br />
LOADCHECKVALVES................................................7<br />
MAIN SYSTEM RELIEF VALVE . . . . . . . . . . . . . . . . . . . . . . . . . . . . . . . . . . . . . . . . . 7<br />
CIRCUITRELIEFANDANTI-CAVITATIONCHECKVALVES...................7<br />
RESTRICTORS......................................................7<br />
BACKHOEHYDRAULICSYSTEM.......................................8<br />
TROUBLESHOOTING ....................................... 9<br />
DIAGNOSTICS............................................ 12<br />
TESTSANDADJUSTMENTS ................................ 13<br />
CIRCUITRELIEFVALVETESTS .......................................13<br />
MAIN SYSTEM RELIEF VALVE TEST . . . . . . . . . . . . . . . . . . . . . . . . . . . . . . . . . . . 13<br />
RESTRICTOR INSPECTION . . . . . . . . . . . . . . . . . . . . . . . . . . . . . . . . . . . . . . . . . . 14<br />
ROCKSHAFTHEIGHTADJUSTMENT(4200/4300/4400)....................15<br />
ROCKSHAFTHEIGHTADJUSTMENT(4500/4600) ........................15<br />
REPAIR.................................................. 16<br />
SYSTEM RELIEF VALVE INSPECTION . . . . . . . . . . . . . . . . . . . . . . . . . . . . . . . . . . 16<br />
SPOOLREMOVAL ..................................................17<br />
SPOOLASSEMBLY .................................................17<br />
LOADCHECKVALVESINSPECTION ...................................18<br />
DIPPERSTICK CIRCUIT RELIEF VALVE INSPECTION. . . . . . . . . . . . . . . . . . . . . . 18<br />
ANTI-CAVITATIONVALVEINSPECTION.................................18<br />
BOOM CIRCUIT RELIEF VALVE INSPECTION . . . . . . . . . . . . . . . . . . . . . . . . . . . . 18<br />
ASSEMBLE VALVE HOUSING . . . . . . . . . . . . . . . . . . . . . . . . . . . . . . . . . . . . . . . . . 19<br />
VALVE LINKAGE INSPECTION . . . . . . . . . . . . . . . . . . . . . . . . . . . . . . . . . . . . . . . . 20<br />
VALVEHOUSINGINSTALLATION ......................................22<br />
CYLINDERREMOVALANDINSTALLATION ..............................22<br />
CYLINDERREPAIR ........................................ 25<br />
BOOM AND DIPPERSTICK CYLINDERS DISASSEMBLY AND<br />
REPAIR—47BACKHOE ...........................................25<br />
BUCKET CYLINDERS DISASSEMBLY AND REPAIR — 47 BACKHOE . . . . . . . . . 26<br />
STABILIZER CYLINDER DISASSEMBLY AND REPAIR—47 BACKHOE. . . . . . . . . 27<br />
SWING CYLINDER DISASSEMBLY AND REPAIR—47 BACKHOE. . . . . . . . . . . . . 28<br />
BUCKET, BOOM, AND DIPPERSTICK CYLINDERS<br />
DISASSEMBLY AND REPAIR—48 BACKHOE . . . . . . . . . . . . . . . . . . . . . . . . . . . 29<br />
STABILIZER CYLINDERS DISASSEMBLY AND REPAIR—48 BACKHOE . . . . . . . 30<br />
SWING CYLINDERS DISASSEMBLY AND REPAIR—48 BACKHOE . . . . . . . . . . . 31<br />
6/22/99 3-1
NOTES<br />
BACKHOES<br />
3-2 6/22/99
BACKHOES<br />
SPECIFICATIONS<br />
SPECIFICATIONS<br />
Hydraulic Pump Flow Rate Capacity<br />
4100Tractor ........................27.66L/min(7.3gpm),Engineat2650rpm<br />
4200Tractor .........................27.6L/min(7.3gpm),Engineat2600rpm<br />
4300Tractor .........................31.4L/min(8.3gpm),Engineat2600rpm<br />
4400Tractor .........................31.4L/min(8.3gpm),Engineat2600rpm<br />
4500Tractor .........................37.5L/min(9.9gpm),Engineat2600rpm<br />
4600Tractor ........................39.0L/min(10.3gpm),Engineat2700rpm<br />
Hydraulic Pump Working Pressure<br />
4100Tractor ........................16671kPa(2418psi),Engineat2650rpm<br />
4200Tractor ........................14650kPa(2125psi),Engineat2600rpm<br />
4300Tractor ........................17235kPa(2500psi),Engineat2600rpm<br />
4400Tractor ........................17235kPa(2500psi),Engineat2600rpm<br />
4500Tractor ........................17235kPa(2500psi),Engineat2600rpm<br />
4600Tractor ........................17235kPa(2500psi),Engineat2700rpm<br />
Main System Relief Valve<br />
TestEngineSpeed ........................................................1500rpm<br />
Pressure<br />
47Backhoe............................... 15515[14480min.]kPa(2250[2100min.]psi)<br />
48Backhoe................................17580[16550min]kPa(2550[2400min.]psi)<br />
Circuit Relief Valve Setting<br />
Boom and Dipperstick<br />
47Backhoe........................................19980±690kPa(2600±100psi)<br />
48Backhoe........................................19980±690kPa(2600±100psi)<br />
Shim Sizes<br />
47 and 48 Backhoe . . . . . . . . . . . . . . 1.02 mm (0.04 in.), 0.51 mm (0.02 in.), (0.254 mm (0.01 in.)<br />
Restrictor Orifice ID<br />
Boom<br />
47Backhoe.........................................1.575mm(0.062in.)<br />
48Backhoe..........................................1.88mm(0.074in.)<br />
Swing<br />
47Backhoe.........................................1.397mm(0.055in.)<br />
48Backhoe..........................................1.88mm(0.074in.)<br />
Stabilizer<br />
47Backhoe.........................................1.575mm(0.062in.)<br />
48Backhoe..........................................1.88mm(0.074in.)<br />
Internal Valve Leakage (Maximum acceptable limit)<br />
Stabilizer Circuit . . . . . . . . . . . . . . . . . . . . . . . . . . . . . . . . . .12 mL/min (0.73 cu in./min)<br />
LiftCircuit(withreliefandcheck) .....................22mL/min(1.34cuin./min)<br />
6/22/99 3-3
SPECIFICATIONS<br />
BACKHOES<br />
Cylinder Drop Rate<br />
(Rod movement maximum acceptable limit from transport position)<br />
LiftCylinderDropRate-47..........................14.48mm/min(.57in./min)<br />
LiftCylinderDropRate-48...........................9.15mm/min(.36in./min)<br />
Stabilizer Cylinder Drop Rate - 47. . . . . . . . . . . . . . . . . . . . . . 8.64 mm/min (.34 in./min)<br />
Stabilizer Cylinder Drop Rate - 48. . . . . . . . . . . . . . . . . . . . . . 5.85 mm/min (.23 in./min)<br />
Stabilizer Cylinder Retract Rate - 47. . . . . . . . . . . . . . . . . . . . 5.85 mm/min (.23 in./min)<br />
Stabilizer Cylinder Retract Rate - 48. . . . . . . . . . . . . . . . . . . . 3.81 mm/min (.15 in./min)<br />
TORQUE SPECIFICATIONS<br />
47 Backhoe<br />
BoomandDipperStickCylinderLockNut .................... 353N•m(260lb-ft)<br />
BucketCylinderLockNut ................................. 271N•m(200lb-ft)<br />
Stabilizer Cylinder Lock Nut . . . . . . . . . . . . . . . . . . . . . . . . . . . . . . . 190 N•m (140 lb-ft)<br />
SwingCylinderLockNut.................................. 271N•m(200lb-ft)<br />
48 Backhoe<br />
BoomandDipperStickCylinderLockNut .................... 353N•m(260lb-ft)<br />
BucketCylinderLockNut ................................. 353N•m(260lb-ft)<br />
Stabilizer Cylinder Lock Nut . . . . . . . . . . . . . . . . . . . . . . . . . . . . . . . 353 N•m (260 lb-ft)<br />
SwingCylinderLockNut.................................. 353N•m(260lb-ft)<br />
SPECIAL OR ESSENTIAL TOOLS<br />
NOTE: Order tools according to information given in the U.S. SERVICE-GARD Catalog or in the<br />
European Microfiche Tool Catalog (MTC).<br />
RECOMMENDED TOOLS<br />
Number Name Use<br />
D01018AA Hydraulic Hand Pump Used to test circuit relief valve pressure.<br />
JTO70145 Hydraulic Test Gauge 0-<br />
20685 kPa (0-3000 psi)<br />
Used to check main and circuit relief valve pressure.<br />
OTHER MATERIALS<br />
Number Name Use<br />
592 / TY9375 LOCTITE ® General Purpose Thread Sealant Seal pipe plugs<br />
LOCTITE ® is a registered trademark of the Loctite Corp.<br />
3-4 6/22/99
BACKHOES<br />
BACKHOE COMPONENT LOCATION<br />
BACKHOE COMPONENT LOCATION<br />
47 BOOM<br />
Dipperstick<br />
Dipperstick<br />
Cylinder<br />
Boom Cylinder<br />
Bucket Cylinder<br />
Stabilizer<br />
Cylinder<br />
MODEL 47 MODEL 47<br />
MODEL 48<br />
6/22/99 3-5
BACKHOE COMPONENT LOCATION<br />
BACKHOES<br />
48 BOOM<br />
Dipperstick<br />
Dipperstick<br />
Cylinder<br />
Boom Cylinder<br />
Bucket Cylinder<br />
Swing<br />
Cylinder<br />
MODEL 47<br />
MODEL 48<br />
MODEL 47<br />
MODEL 48<br />
3-6 6/22/99
BACKHOES<br />
THEORY OF OPERATION<br />
THEORY OF OPERATION<br />
CONTROL VALVES<br />
The hydraulic control valve consists of individual valve<br />
sections stacked side-by-side with a continuous open<br />
center for all tractors. All sections have a self centering<br />
spool that directs pressure to one of the hydraulic<br />
cylinders.<br />
The open center systems have a main system relief<br />
valve that protects the whole backhoe hydraulic system<br />
from sharp pressure shocks. It is adjustable by adding<br />
or removing shims but should not be adjusted to a<br />
higher or lower value than recommended. In addition,<br />
two of the individual circuits are protected by circuit<br />
relief valves that are adjustable, but again, they should<br />
not be adjusted to a value that is higher or lower than<br />
recommended.<br />
RESTRICTORS<br />
Restrictors are installed in both ports of the swing valve<br />
section, the IN port of the boom valve section, and the<br />
IN port of the stabilizer section.<br />
The restrictor is a one-way orifice that acts to slow or<br />
dampen return oil flow to the valve section. This<br />
provides for smooth operation when the boom is<br />
lowered or when it is swung from side-to-side. Pressure<br />
oil flows around the restrictor and is not affected by the<br />
orifice.<br />
LOAD CHECK VALVES<br />
Each valve section is equipped with load check valves.<br />
These check valves prevent reverse fluid flow if supply<br />
pressure were lost (The engine stopped running). This<br />
feature would prevent opposite direction movement of<br />
an implement should supply pressure be lost.<br />
MAIN SYSTEM RELIEF VALVE<br />
High pressure can be generated by continuing to<br />
operate a function after its cylinder has reached its<br />
limit. When pressure reaches system relief valve<br />
pressure, the valve opens, diverting inlet oil to the<br />
return oil passage and the rockshaft housing.<br />
CIRCUIT RELIEF AND ANTI-<br />
CAVITATION CHECK VALVES<br />
Circuit relief and anti-cavitation check valves are<br />
included in boom, and dipperstick valve sections.<br />
During some operations, when the valve spool is in a<br />
neutral position, a sudden external force against the<br />
bucket will cause a pressure increase in the head end<br />
of the cylinder. To relieve that pressure and avoid<br />
damage to the valve section, the circuit relief valve<br />
opens and allows oil flow to the return oil passage.<br />
When the circuit relief valve opens to relieve pressure<br />
in the head end of the cylinder, a void is created in the<br />
rod end (no incoming oil, valve section in neutral). Oil in<br />
the return oil passage unseats the anti-cavitation check<br />
valve ball and fills the void in the rod end.<br />
6/22/99 3-7
THEORY OF OPERATION<br />
BACKHOES<br />
BACKHOE HYDRAULIC SYSTEM<br />
NOTE: Model 48 backhoe swing system shown.<br />
Bucket<br />
Dipperstick<br />
Left or Right<br />
Stabilizer<br />
Boom<br />
LH<br />
Swing<br />
RH<br />
Swing<br />
(Open Center Only)<br />
Power Beyond<br />
Circuit Relief<br />
Restrictor<br />
Orifice<br />
Anti-Cavitation<br />
Check Valve<br />
Load Check<br />
Valve<br />
In<br />
Restrictor<br />
Orifice<br />
Main System Relief<br />
Out<br />
Anti-Cavitation<br />
Check Valve<br />
Circuit Relief<br />
LH<br />
Swing<br />
RH<br />
Swing<br />
Model 47 Backhoe<br />
Swing System<br />
3-8 6/22/99
No hydraulic pressure <br />
Improper hose connection <br />
Oil bypassing in cylinder <br />
Hydraulic system malfunction <br />
Control not positioned full open <br />
Load check valve leaking <br />
Worn valve section <br />
Engine speed too slow <br />
BACKHOES<br />
TROUBLESHOOTING<br />
TROUBLESHOOTING<br />
Check or<br />
Solution<br />
Problem or<br />
Symptom<br />
Backhoe will not<br />
operate<br />
Backhoe loses<br />
power<br />
Loss of power in<br />
any one cylinder<br />
Loss of power in<br />
boom or dipperstick<br />
only<br />
Loss of power in<br />
swing cylinders<br />
only<br />
Cannot obtain full<br />
swing<br />
Slow operation<br />
Spongy, jerking<br />
operation<br />
Boom, dipperstick<br />
or bucket cylinders<br />
drop under load<br />
when valve is<br />
neutral<br />
Low oil level/wrong viscosity/<br />
air in system<br />
<br />
Excessive back pressure,<br />
check for restriction between<br />
outlet and reservoir<br />
<br />
System relief valve<br />
malfunctioning<br />
Loose or leaking connectors/<br />
hoses (see Miscellaneous Sec.)<br />
<br />
<br />
Pinched/restricted hydraulic<br />
hoses (see Miscellaneous Sec.)<br />
<br />
Circuit relief valve<br />
malfunctioning<br />
Anti-cavitation check valve/ball<br />
stuck or not seating properly<br />
<br />
<br />
Bent piston rod or swing<br />
linkage interference<br />
<br />
<br />
<br />
<br />
Foreign material in backhoe<br />
valve swing restrictor orifices<br />
<br />
6/22/99 3-9
Paint on spool or scored spool <br />
TROUBLESHOOTING<br />
BACKHOES<br />
TROUBLESHOOTING CONTINUED<br />
Check or<br />
Solution<br />
Problem or<br />
Symptom<br />
Load drops or<br />
settles<br />
Spool sticking,<br />
can’t be pushed in<br />
or won’t return to<br />
neutral<br />
Work port leakage<br />
Backhoe control<br />
valve leaks around<br />
spool<br />
Boom cylinder<br />
locks up, may raise<br />
the first time<br />
Backhoe stabilizers<br />
will not hold rear of<br />
tractor off ground<br />
Oil leaking from<br />
differential housing<br />
vent<br />
System is dumping<br />
pressure to relief<br />
when pushing dirt<br />
in hole<br />
Oil leaking passed spool into<br />
spool cap<br />
Broken return spring<br />
Bent spool<br />
Cylinder leaking<br />
Loose/leaking connectors<br />
Load check valve failure<br />
Worn valve section<br />
Hydraulic oil contaminated<br />
Misaligned control valve<br />
linkage<br />
Relief valve cartridge seals bad<br />
Spool to bore fit too tight<br />
<br />
<br />
<br />
<br />
<br />
<br />
<br />
<br />
<br />
<br />
Valve body distorted (improper<br />
mounting)<br />
<br />
Positioner assembly out of<br />
alignment due to “bumping” of<br />
positioner end<br />
<br />
<br />
Oil viscosity too heavy<br />
Spool and section seal dry<br />
(stored too long without use)<br />
<br />
Improper assembly after rebuild<br />
<br />
Excessive clearance between<br />
spool and bore of casting.<br />
Spool and casting worn due to<br />
heavy use or by contaminants<br />
introduced into spool area.<br />
<br />
<br />
<br />
3-10 6/22/99
BACKHOES<br />
TROUBLESHOOTING<br />
Check or<br />
Solution<br />
Problem or<br />
Symptom<br />
Load drops or<br />
settles<br />
Spool sticking,<br />
can’t be pushed in<br />
or won’t return to<br />
neutral<br />
Work port leakage<br />
Backhoe control<br />
valve leaks around<br />
spool<br />
Boom cylinder<br />
locks up, may raise<br />
the first time<br />
Backhoe stabilizers<br />
will not hold rear of<br />
tractor off ground<br />
Oil leaking from<br />
differential housing<br />
vent<br />
System is dumping<br />
pressure to relief<br />
when pushing dirt<br />
in hole<br />
Oil viscosity too low caused<br />
excessive heat in hydraulic<br />
system<br />
<br />
Cracked/broken lines between<br />
valve cylinder ports and<br />
cylinder<br />
<br />
Valve spool not properly<br />
centered when returned to<br />
neutral position<br />
<br />
Nose seals or body seals on<br />
circuit relief valve damaged<br />
<br />
Circuit relief pressure setting<br />
too low<br />
<br />
Wrong spool in bore, free flow<br />
or motor spool<br />
<br />
Excessive pressure at spool<br />
seal retainer<br />
<br />
Boom valve circuit has O-Ring<br />
or internal parts of hydraulic<br />
hose wedged in boom valve<br />
orifice<br />
<br />
Stabilizers are not designed to<br />
support the weight of the<br />
tractor, use stabilizers to<br />
support and level tractor only<br />
<br />
Moisture in oil<br />
<br />
Heat, drain and replace oil with<br />
John Deere low viscosity HY-<br />
GARD ® , replace filter and clean<br />
sump screen<br />
<br />
Boom strength is designed for<br />
vertical digging not horizontal<br />
swing, if pressure tests are<br />
good the backhoe is<br />
functioning normally.<br />
<br />
6/22/99 3-11
DIAGNOSTICS<br />
BACKHOES<br />
DIAGNOSTICS<br />
NOTE: To determine maximum efficiency of each system, the cylinders must be operated to the full extent of their<br />
travel and the amount of time it takes to travel from one extreme to the other must be measured and<br />
compared to the rated cycle time given in the Specification Section. If the cycle time is more or less than<br />
the rated cycle time, a component or components are malfunctioning and in need of repair or adjustment.<br />
Test Conditions:<br />
• Engine running at specified RPM (See page 3-3.)<br />
• Park brake on<br />
• Auxiliary hydraulics on and system capable of<br />
operating at full system pressure.<br />
(See Tractor specifications)<br />
• Hydraulic oil at normal operating temperature<br />
• Boom and swing locks removed<br />
• Machinery parked on level ground<br />
Test/Check Point Normal If Not Normal<br />
1. Boom up* Circuit operates smoothly and meets<br />
system cycle specification<br />
2. Boom down* Circuit operates smoothly and meets<br />
system cycle specification<br />
3. Dipperstick in Circuit operates smoothly and meets<br />
system cycle specification<br />
4. Dipperstick out Circuit operates smoothly and meets<br />
system cycle specification<br />
5. Bucket open Circuit operates smoothly and meets<br />
system cycle specification<br />
6. Bucket closed Circuit operates smoothly and meets<br />
system cycle specification<br />
7. Swing left to right Circuit operates smoothly and meets<br />
system cycle specification<br />
8. Swing right to left Circuit operates smoothly and meets<br />
system cycle specification<br />
9. Stabilizer up Circuit operates smoothly and meets<br />
system cycle specification<br />
10. Stabilizer down Circuit operates smoothly and meets<br />
system cycle specification<br />
See main system relief valve test.<br />
See circuit relief valve test<br />
See main system relief valve test.<br />
See circuit relief valve test<br />
See main system relief valve test.<br />
See circuit relief valve test<br />
See main system relief valve test.<br />
See circuit relief valve test<br />
See main system relief valve test.<br />
See main system relief valve test.<br />
See main system relief valve test.<br />
See main system relief valve test.<br />
See main system relief valve test.<br />
See main system relief valve test.<br />
* Arm extended, bucket in closed position, ground level to full boom extension<br />
3-12 6/22/99
BACKHOES<br />
TESTS AND ADJUSTMENTS<br />
TESTS AND ADJUSTMENTS<br />
CIRCUIT RELIEF VALVE TESTS<br />
Test Port<br />
Dipperstick<br />
CAUTION<br />
To avoid movement of boom and serious injury:<br />
Install boom and swing lock pins.<br />
Equipment:<br />
• D01018AA Hydraulic Hand Pump<br />
• JTO70145 Hydraulic Test Gauge 0-20 685 kPa<br />
(0-3000 psi)<br />
M94991<br />
Test Port<br />
Boom<br />
Circuit Relief<br />
Boom<br />
Procedure:<br />
Circuit Relief<br />
Dipperstick<br />
5. Install test hose from a hand pump with a<br />
0—20 685 kPa (0—3000 psi) pressure gauge.<br />
6. Observe gauge as pressure is applied.<br />
Specifications:<br />
47 Backhoe . . . . . . 17 925 ± 690 kPa (2600 ±100 psi)<br />
48 Backhoe . . . . . . 17 925 ± 690 kPa (2600 ±100 psi)<br />
Results:<br />
7. If tests indicate valve relief pressure must be<br />
adjusted, add or subtract shims. Shims are<br />
available in 1.02 mm (0.04 in.), 0.51 mm (0.02<br />
in.), and 0.254 mm (0.01 in.) sizes.<br />
M94990<br />
1. Operate backhoe for 5 to 10 minutes to heat<br />
hydraulic oil to operating temperature of 38 – 43° C<br />
(100 – 110° F).<br />
2. Safely park the tractor on a level surface. Shut off<br />
the engine.<br />
3. Operate all control levers to relieve system<br />
pressure.<br />
4. Remove hose from circuit relief valve.<br />
MAIN SYSTEM RELIEF VALVE TEST<br />
CAUTION<br />
To avoid movement of boom and serious injury:<br />
Install boom and swing lock pins.<br />
Equipment:<br />
• JTO70145 Hydraulic Test Gauge 0-20685 kPa (0 –<br />
3000 psi)<br />
Procedure:<br />
1. Operate backhoe for 5 to 10 minutes to heat<br />
hydraulic oil to operating temperature of 38–43°C<br />
(100 – 110°F).<br />
2. Operate engine at 1500 rpm.<br />
3. Use a T-fitting to install a 0–20685kPa(0–3000<br />
psi) pressure gauge in test port.<br />
6/22/99 3-13
TESTS AND ADJUSTMENTS<br />
BACKHOES<br />
Main System<br />
Relief Valve<br />
valve section and in port of the boom valve<br />
section. Note also that the restrictor is installed<br />
with the spring side out.<br />
3. Check for plugged or damaged orifice and missing<br />
or damaged spring. Replace as necessary.<br />
RESTRICTOR ID<br />
47 48<br />
Boom<br />
1.575 mm<br />
(0.062 in.)<br />
1.880 mm<br />
(0.074 in.)<br />
Test Port<br />
M94990<br />
4. Move boom function operating lever to its limit in<br />
either direction.<br />
5. Observe gauge as pressure is applied.<br />
Swing<br />
Stabilizer<br />
1.397 mm<br />
(0.055 in.)<br />
1.575 mm<br />
(0.062 in.)<br />
1.880 mm<br />
(0.074 in.)<br />
1.880 mm<br />
(0.074 in.)<br />
Specifications:<br />
47Backhoe.........15510[14480minimum]kPa<br />
...................(2250[2100minimum]psi)<br />
48Backhoe.........17580[16550minimum]kPa<br />
...................(2550[2400minimum]psi)<br />
Results:<br />
6. If tests indicate valve relief pressure must be<br />
adjusted, add or subtract shims. Shims are<br />
available in 1.02 mm (0.04 in.), 0.51 mm (0.02<br />
in.), and 0.254 mm (0.01 in.) sizes.<br />
RESTRICTOR INSPECTION<br />
Restrictor<br />
Boom Valve<br />
Swing Valve<br />
M77724<br />
1. Remove inlet and outlet elbows from valve sections.<br />
2. Note location of restrictors in both ports and swing<br />
3-14 6/22/99
BACKHOES<br />
TESTS AND ADJUSTMENTS<br />
ROCKSHAFT HEIGHT ADJUSTMENT<br />
(4200/4300/4400)<br />
ROCKSHAFT HEIGHT ADJUSTMENT<br />
(4500/4600)<br />
Reason:<br />
To ensure that lift arms raise to maximum lift height<br />
without engaging relief valve.<br />
This adjustment is made when tractor lift arms do not<br />
lift high enough to allow backhoe to be easily secured<br />
with L-pins.<br />
Reason:<br />
To ensure that lift arms raise to maximum lift height<br />
without engaging relief valve.<br />
This adjustment is made when tractor lift arms do not<br />
lift high enough to allow backhoe to be easily secured<br />
with L-pins.<br />
Procedure:<br />
1. Position tractor on a level surface and set park<br />
brake.<br />
2. Shift transmission to NEUTRAL.<br />
3. Position lift control lever in the full forward (down)<br />
position and provide enough weight on lift arms to<br />
allow self lowering.<br />
4. Start engine.<br />
5. Move lift control lever to full raise position (back).<br />
Measure at<br />
Center of Pin<br />
Procedure:<br />
1. Position tractor on a level surface and set park<br />
brake.<br />
2. Shift transmission to NEUTRAL position.<br />
3. Position both lift control lever and draft sensing<br />
control lever at full forward (down) position and<br />
provide enough weight on lift arms to allow self<br />
lowering.<br />
4. Start engine.<br />
5. Move lift control lever (outer) to full raise position<br />
(back).<br />
Measure at<br />
Center of Pin<br />
450±3 mm<br />
(17.7±0.12 in.)<br />
Lift Arm<br />
Position<br />
Feedback<br />
Rod<br />
Measure at<br />
TopofPTO<br />
Shield<br />
M95008<br />
Rubber Bumper<br />
Lift Arm<br />
Position<br />
Feedback<br />
Rod<br />
450±3 mm<br />
(17.7±0.12 in.)<br />
NOTE: Make sure the PTO shield is in place, and is in<br />
good condition before performing adjustment.<br />
Make sure rubber bumper is in place on PTO<br />
shield.<br />
6. Using a tape measure, measure from the top of the<br />
PTO shield to the center of the pin in end of lift<br />
arm. Lift arm should raise to 350±3mm(13.8±<br />
0.12 in.) as shown, without engaging the relief<br />
valve.<br />
7. If specification is not met, lengthen the lift arm<br />
position feedback rod to increase, or shorten to<br />
reduce the maximum height until within<br />
specification. The relief valve should not engage.<br />
M91326<br />
Hook Tape Measure<br />
IntoTopEdgeofSlot<br />
6. Using a tape measure hooked into top edge of slot<br />
in left PTO shield, measure to center of pin in end<br />
6/22/99 3-15
REPAIR<br />
BACKHOES<br />
ofliftarm.Liftarmshouldraiseto450 ± 3 mm<br />
(17.7 ± 0.12 in.) as shown, without engaging the<br />
relief valve.<br />
7. If specification is not met, shorten the lift arm<br />
position feedback rod to increase, or lengthen to<br />
reduce the maximum height until within<br />
specification. The relief valve should not engage.<br />
REPAIR<br />
SYSTEM RELIEF VALVE<br />
INSPECTION<br />
Procedure:<br />
Spring<br />
Shims<br />
Poppet<br />
Relief Valve Housing<br />
M77723<br />
1. Remove inlet/outlet housing from valve assembly.<br />
2. Remove relief valve housing and disassemble<br />
valve.<br />
3. Check for broken spring or damaged poppet.<br />
Replace valve if necessary.<br />
4. Use valve seal kit to replace all seals, washers, and<br />
O-Rings.<br />
5. 47 Backhoe: Install same number and size of<br />
shims that were removed to maintain 14 480 –<br />
15 515 kPa (2100 – 2250 psi) relief pressure.<br />
6. 48 Backhoe: Install same number and size of<br />
shims that were removed to maintain 16 550 –<br />
17 580 kPa (2400 – 2550 psi) relief pressure.<br />
7. If tests indicate valve relief pressure must be<br />
adjusted, add or subtract shims. Shims are<br />
available in 1.02 mm (0.04 in.), 0.51 mm (0.02<br />
in.), and 0.254 mm (0.01 in.) sizes.<br />
3-16 6/22/99
BACKHOES<br />
REPAIR<br />
SPOOL REMOVAL<br />
Procedure:<br />
NOTE:<br />
Spools in the six valve sections are identical.<br />
However, each spool MUST be installed in the<br />
valve section from which it was removed.<br />
4. Remove seal plate retainer, seal retainer, washer<br />
and O-ring.<br />
5. Carefully slide spool from valve section.<br />
SPOOL ASSEMBLY<br />
Procedure:<br />
O-Ring<br />
Spool Wiper<br />
Top Retainer Plate<br />
Seal Retainer<br />
O-Ring<br />
Spool<br />
Screws<br />
Wiper<br />
Retainer Plate<br />
Washer<br />
Washer<br />
Spring<br />
Spring<br />
Retainer<br />
Seal Retainer<br />
Spring Retainers<br />
Cap<br />
Screw<br />
M78203<br />
1. Remove cap.<br />
NOTE: Spring is compressed.<br />
2. Hold opposite end of spool and remove screw and<br />
lock washer.<br />
3. Remove collar, spring retainers, spring, seal<br />
retainer, washer and O-ring.<br />
Spring<br />
Spring Retainer Cup<br />
O-Ring<br />
Spool<br />
Washer<br />
Spring Retainers<br />
Screws<br />
Cap<br />
O-Ring<br />
Seal Retainer<br />
M78204<br />
1. Thoroughly clean spool in solvent and air dry.<br />
2. Lubricate spool and valve section bore with<br />
hydraulic oil. Carefully slide spool into section.<br />
3. Assemble spool components as shown.<br />
Spring<br />
Screws<br />
Spring Retainers<br />
Retainer<br />
Screw<br />
Washer<br />
Seal Retainer<br />
Spool Wiper<br />
NOTE: Replace all washers, backup rings and O-<br />
Rings.<br />
Wiper Retainer Plate<br />
M94989<br />
Top Retainer Plate<br />
6/22/99 3-17
REPAIR<br />
BACKHOES<br />
LOAD CHECK VALVES INSPECTION<br />
Procedure:<br />
Valve Plug<br />
ANTI-CAVITATION VALVE<br />
INSPECTION<br />
Procedure:<br />
Poppet<br />
Spring<br />
O-Ring<br />
Poppet<br />
Spring<br />
Plug<br />
NOTE:<br />
All six valve sections are equipped with load<br />
check valves.<br />
1. Check poppets, springs and seats for damage.<br />
Replace assembly as necessary.<br />
2. Use seal kit to replace O-rings and back-up rings.<br />
3. Tighten to 27 N•m (20 lb-ft).<br />
DIPPERSTICK CIRCUIT RELIEF<br />
VALVE INSPECTION<br />
M77721<br />
1. Be sure ball is free in retainer.<br />
2. Reinstall assembly with all new O-rings and backup<br />
rings from seal kit.<br />
BOOM CIRCUIT RELIEF VALVE<br />
INSPECTION<br />
Procedure:<br />
Ball Retainer<br />
Ball<br />
O-Ring<br />
M77719<br />
Spring<br />
Shim<br />
Plug<br />
Poppet<br />
Spring<br />
Cartridge<br />
Plug<br />
Poppet<br />
Spring<br />
Cartridge<br />
O-Ring<br />
Poppet<br />
M77720<br />
O-Ring<br />
Poppet<br />
1. Check parts for damage and contaminants.<br />
Replace complete assembly, if necessary.<br />
2. If not replaced, assemble with all new O-rings and<br />
back-up rings.<br />
3. Tighten cartridge to 27 N•m (20 lb-ft).<br />
4. Tighten plug to 19 N•m (168 lb-in.).<br />
NOTE:<br />
Install the same number and size shims that<br />
were removed. DO NOT change relief valve<br />
setting.<br />
1. Check parts for damage and contaminants.<br />
Replace complete assembly if necessary.<br />
2. If not replaced, assemble with new O-rings and<br />
back-up rings.<br />
3. Tighten cartridge to 27 N•m (20 lb-ft).<br />
4. Tighten plug to 19 N•m (168 lb-in.).<br />
NOTE:<br />
Spring<br />
M77718<br />
Install the same number of shims that were<br />
removed. DO NOT change relief valve setting.<br />
3-18 6/22/99
BACKHOES<br />
REPAIR<br />
ASSEMBLE VALVE HOUSING<br />
New Version—Closed Center and Load Sense<br />
Procedure:<br />
IMPORTANT: Two different types of section seals<br />
and different configurations for open center and<br />
closed center systems are utilized in the control<br />
valve. Valves manufactured prior to April 1991<br />
utilize O-rings with a cross section (thickness)<br />
of 0.070 in. Valves manufactured after April 1,<br />
1991 utilize O-rings with a cross section of 0.103<br />
in. The dimensions of the seal grooves<br />
determines what seal is correct for a particular<br />
valve section or cover.<br />
Included in the seal kit are both types of seals,<br />
therefore several (5), will not be used.<br />
New and old style valve sections may be<br />
intermixed. However, the proper O-rings will<br />
have to be used for each section.<br />
.924 ID .924 ID<br />
.799 ID<br />
Used for<br />
Load Sense<br />
.799 ID .237 ID<br />
New Version—Right Covers, Utility Sections and<br />
Mid-Inlets<br />
Old version—All Styles<br />
.926 ID<br />
.926 ID .926 ID<br />
.926 ID<br />
.801 ID<br />
.926 ID .926 ID<br />
End<br />
Spool Clevis<br />
.801 ID<br />
O-Ring<br />
New Version—Open Center<br />
Inlet/Outlet<br />
.924 ID .799 ID .924 ID<br />
Bucket<br />
Dipperstick<br />
RH Stabilizer<br />
LH Stabilizer<br />
Boom<br />
Port A<br />
.924 ID<br />
Swing<br />
M77716<br />
1. Install three long studs through end plate.<br />
2. Continue to stack each valve section in correct<br />
order.<br />
3. Be sure that all spool clevises and "A" ports are at<br />
the top of the assembly.<br />
4. Install new O-rings between each valve section. Be<br />
sure they remain in place when sections are<br />
installed.<br />
5. Install inlet/outlet housing. Replace nuts and tighten<br />
to 43 N•m (32 lb-ft).<br />
6/22/99 3-19
REPAIR<br />
BACKHOES<br />
NOTE: Measure ID of restrictor ports to make certain<br />
they are within the specifications. (See<br />
“RESTRICTOR INSPECTION” on page 14.)<br />
6. Install restrictors into correct valve section ports.<br />
7. Install connectors in valve section ports.<br />
VALVE LINKAGE INSPECTION<br />
1. Check pivots , tie rod ends, brackets, ball joints, and<br />
bushings for excessive wear. Excessive wear can<br />
affect operating sensitivity. Replace as necessary.<br />
2. Install linkage on spool clevis ends. Be sure pins<br />
with cotter pins, and hardware are in place.<br />
3. Install stabilizer control levers.<br />
Stabilizer<br />
Control Lever<br />
Ball Joints<br />
Tie Rods<br />
Ball Joints<br />
Spool<br />
Clevis Ends<br />
MODEL 47<br />
M94878<br />
3-20 6/22/99
BACKHOES<br />
REPAIR<br />
Stabilizer<br />
Control Lever<br />
Ball Joints<br />
Tie Rods<br />
Ball Joints<br />
Spool<br />
Clevis Ends<br />
MODEL 48<br />
M94879<br />
6/22/99 3-21
REPAIR<br />
BACKHOES<br />
VALVE HOUSING INSTALLATION<br />
CAUTION<br />
A B C D E F G<br />
Valve housing weighs approximately 27 kg (60<br />
lb); installation may require hoist or more than<br />
one person.<br />
H<br />
I<br />
J<br />
K<br />
L<br />
M<br />
N<br />
M94990<br />
MODEL 47<br />
M94880<br />
Port A (upper)<br />
Port B (lower)<br />
A—Bucket (Rod End) H—Bucket (Head End)<br />
B—Dipperstick (Head End) I—Dipperstick (Rod End)<br />
C—RH Stabilizer (Head End) J—RH Stabilizer (Rod End)<br />
D—LH Stabilizer (Head End) K—LH Stabilizer (Rod End)<br />
E—Boom (Rod End) L—Boom (Head End)<br />
F—Swing*<br />
M—Swing<br />
G—Outlet<br />
N—Inlet<br />
*Model 47—RH Swing Cylinder (Base End)<br />
*Model 48—LH Swing Control (Rod End)<br />
4. Install inlet, outlet, and cylinder hoses to the<br />
appropriate connectors.<br />
5. Install valve cover.<br />
6. Install rear shroud.<br />
7. Make operational checks. Note any leaking<br />
connections and tighten.<br />
MODEL 48<br />
M94881<br />
1. Attach valve housing at attaching points.<br />
2. Connect RH and LH joystick linkages with<br />
hardware.<br />
3. Connect RH and LH stabilizer control rods using<br />
pins, washers, and cotter pins.<br />
CYLINDER REMOVAL AND<br />
INSTALLATION<br />
BOOM CYLINDER<br />
Removal:<br />
1. Position tractor with enough clearance to<br />
completely extend the boom, dipperstick and<br />
bucket.<br />
2. Lower stabilizers with light pressure on the ground.<br />
3-22 6/22/99
BACKHOES<br />
REPAIR<br />
B<br />
B<br />
A<br />
M94995<br />
3. Fully retract both the bucket and dipperstick<br />
cylinders.<br />
4. Lower the boom until it has light pressure on the<br />
ground.<br />
5. Remove cylinder pin retaining bolt and cylinder pin<br />
(A)onbaseendofcylinder.<br />
6. Activate the boom control lever to retract the<br />
cylinder and slowly draw it out of the of the boom<br />
mast. Do not pinch hoses while retracting the<br />
cylinder.<br />
7. Shut the engine off and activate the boom control<br />
lever in both directions to relieve any pressure.<br />
8. Mark and remove hoses.<br />
9. Remove cylinder pin retaining bolt and cylinder pin<br />
(B) on rod end of cylinder and remove cylinder.<br />
Installation:<br />
1. Connect hoses to the ports as marked.<br />
2. Slide base end of cylinder into boom mast.<br />
3. Align cylinder mounting hole and insert base<br />
cylinder pin and retaining capscrew (A).<br />
4. Activate the boom control lever to extend the<br />
cylinder slowly out to align the rod end mounting<br />
hole.<br />
5. Install the rod end cylinder pin and retaining<br />
capscrew (B).<br />
2. Shut the engine off and activate the dipperstick<br />
control lever in both directions to relieve any<br />
pressure.<br />
3. Mark and remove hoses.<br />
4. Remove base end (A) and then the rod end (B)<br />
cylinder mounting pins and remove cylinder.<br />
Assemble in reverse order.<br />
A<br />
M94996<br />
DIPPER CYLINDER<br />
Removal:<br />
1. Lower stabilizers with light pressure on the ground.<br />
BUCKET CYLINDER<br />
Removal:<br />
1. Lower stabilizers with light pressure on the ground.<br />
6/22/99 3-23
REPAIR<br />
BACKHOES<br />
pressure.<br />
4. Mark and remove hoses.<br />
5. Remove rod end (A) and then the base cylinder<br />
mounting pins (B) and remove cylinder.<br />
B<br />
Assemble<br />
Assemble in reverse order.<br />
A<br />
SWING CYLINDER(S)<br />
Removal:<br />
1. Position tractor with enough clearance to<br />
completely swing the boom extending the cylinder<br />
to be removed.<br />
2. Lower stabilizers with light pressure on the ground.<br />
M94997<br />
2. Swing bucket down to where it looks balanced<br />
below the dipperstick mast.<br />
3. Shut the engine off and activate the bucket control<br />
lever in both directions to relieve any pressure.<br />
4. Mark and remove hoses.<br />
5. Remove rod end (A) and then the base cylinder<br />
mounting pins (B) and remove cylinder.<br />
A<br />
B<br />
Install in reverse order.<br />
STABILIZER CYLINDER(S)<br />
Removal:<br />
1. Position tractor with enough clearance to<br />
completely extend the stabilizers.<br />
M94999<br />
3. Fully extend the swing cylinder to be removed.<br />
4. Shut the engine off and activate the swing control<br />
lever in both directions to relieve any pressure.<br />
5. Remove cylinder rod end (A) retaining pin.<br />
6. Mark and remove hoses.<br />
7. Remove base cylinder mounting pin (B) (Model 47)<br />
or retaining plate (Model 48) and remove swing<br />
cylinder.<br />
Install in reverse order.<br />
A<br />
B<br />
M94998<br />
2. Lower stabilizers with light pressure on the ground.<br />
3. Shut the engine off and activate the stabilizer<br />
control lever in both directions to relieve any<br />
3-24 6/22/99
BACKHOES<br />
CYLINDER REPAIR<br />
CYLINDER REPAIR<br />
BOOM AND DIPPERSTICK CYLINDERS DISASSEMBLY AND<br />
REPAIR — 47 BACKHOE<br />
Lock Nut<br />
Wear Ring<br />
U-Cup Seal<br />
Back-up Ring<br />
Piston<br />
Step Seal<br />
O-Ring<br />
Gland<br />
Rod Wiper<br />
Lock Nut<br />
Rod<br />
One Piece Piston<br />
Note Location of 45°<br />
Chamfer on Piston<br />
for Assembly<br />
Wear Ring<br />
Step Seal<br />
U-Cup Seal<br />
Rod Wiper<br />
Gland<br />
O-Ring<br />
Back-Up Ring<br />
M94882<br />
1. Replace wear rings, wipers, all seals, O-rings, and backup rings.<br />
2. Inspect rod for straightness, nicks, and scratches.<br />
3. Lubricate all parts in hydraulic oil during assembly.<br />
4. Tighten lock nut to 353 N•m (260 lb-ft).<br />
5. Pressure test at 24 132 kPa (3500 psi) for leakage.<br />
6/22/99 3-25
CYLINDER REPAIR<br />
BACKHOES<br />
BUCKET CYLINDERS DISASSEMBLY AND REPAIR — 47 BACKHOE<br />
Piston<br />
O-Ring<br />
Gland<br />
Rod Wiper<br />
Lock Nut<br />
Rod Seal<br />
Back-up Ring<br />
Gland Nut<br />
Lock Nut<br />
Rod<br />
One Piece Piston<br />
Note Location of 45°<br />
Chamfer on Piston<br />
for Assembly<br />
Gland<br />
Rod Wiper<br />
Gland Nut<br />
O-Ring<br />
Back-Up Ring<br />
Rod Seat<br />
M94883<br />
1. Replace wear rings, wipers, all seals, O-rings, and backup rings.<br />
2. Inspect rod for straightness, nicks, and scratches.<br />
3. Lubricate all parts in hydraulic oil during assembly.<br />
4. Tighten lock nut to 271 N•m (200 lb-ft).<br />
5. Pressure test at 20 684 kPa (3000 psi) for leakage.<br />
3-26 6/22/99
BACKHOES<br />
CYLINDER REPAIR<br />
STABILIZER CYLINDER DISASSEMBLY AND REPAIR—47 BACKHOE<br />
Lock Nut<br />
Piston<br />
O-Ring<br />
Back-up Ring<br />
Back-up Ring<br />
O-Ring<br />
Back-up Ring<br />
O-Ring<br />
Back-up Ring<br />
Rod Wiper<br />
Retaining Ring<br />
Gland<br />
Back-up Ring<br />
(2 used)<br />
O-Ring<br />
Cylinder Wall<br />
O-Ring<br />
O-Ring<br />
Piston<br />
Rod<br />
Lock Nut<br />
Back-up Ring<br />
Gland<br />
Rod Wiper<br />
Retaining Ring<br />
O-Ring<br />
O-Ring<br />
Back-up Ring<br />
M78166<br />
1. Replace all wipers, seals, O-rings and backup rings.<br />
2. Inspect rod for straightness, nicks, and scratches.<br />
3. Replace retaining ring.<br />
4. Lubricate all parts in hydraulic oil during assembly.<br />
5. Tighten lock nut to 190 N•m (140 lb-ft).<br />
6. Pressure test at 13 789 kPa (2000 psi) for leakage.<br />
6/22/99 3-27
CYLINDER REPAIR<br />
BACKHOES<br />
SWING CYLINDER DISASSEMBLY AND REPAIR—47 BACKHOE<br />
Piston<br />
Wear Ring<br />
Back-up Ring<br />
Lock Nut<br />
O-Ring<br />
O-Ring<br />
Gland<br />
Rod Wiper<br />
O-Ring<br />
Rod Seal<br />
Retaining Ring<br />
Retaining Ring<br />
Piston<br />
Wear Ring<br />
Rod Wiper<br />
O-Ring<br />
Rod<br />
Lock Nut<br />
O-Ring<br />
Gland<br />
O-Ring<br />
Rod Seal<br />
Back-up Ring<br />
M94884<br />
1. Replace wipers, seals, O-rings, and backup rings.<br />
2. Inspect rod for straightness, nicks, and scratches.<br />
3. Lubricate all parts in hydraulic fluid during assembly.<br />
4. Tighten lock nut to 271 N•m (200 lb-ft).<br />
5. Pressure test at 20 684 kPa (3000 psi) for leakage.<br />
3-28 6/22/99
BACKHOES<br />
CYLINDER REPAIR<br />
BUCKET, BOOM, AND DIPPERSTICK CYLINDERS<br />
DISASSEMBLY AND REPAIR—48 BACKHOE<br />
Wear Ring<br />
Step Seal<br />
Lock Nut<br />
Piston<br />
U-Cup Seal<br />
Gland<br />
Rod Wiper<br />
O-Ring<br />
Back-up Ring<br />
Lock Nut<br />
Rod<br />
One Piece Piston<br />
Note Location of 45°<br />
Chamfer on Piston<br />
for Assembly<br />
Wear Ring<br />
Step Seal<br />
U-Cup Seal<br />
Rod Wiper<br />
Gland<br />
O-Ring<br />
Back-Up Ring<br />
M94882<br />
1. Replace all wear rings, wipers, O-rings, and backup rings.<br />
2. Inspect rod for straightness, nicks, and scratches.<br />
3. Lubricate all parts in hydraulic oil during assembly.<br />
4. Tighten lock nut to 353 N•m (260 lb-ft).<br />
5. Pressure test for leakage at 24 132 kPa (3500 psi).<br />
6/22/99 3-29
CYLINDER REPAIR<br />
BACKHOES<br />
STABILIZER CYLINDERS DISASSEMBLY AND REPAIR—48 BACKHOE<br />
Lock Nut<br />
Piston<br />
O-Ring<br />
Back-up Ring<br />
Gland<br />
O-Ring<br />
Back-up Ring<br />
Rod Wiper<br />
Retaining Ring<br />
Lock Nut<br />
O-Rings<br />
One Piece Piston<br />
Retaining Ring<br />
Rod<br />
Note Location of 45°<br />
Chamfer on Piston<br />
for Assembly<br />
Gland<br />
Back-Up Ring<br />
M94885<br />
1. Replace wipers, O-rings, backup rings, and retaining ring.<br />
2. Inspect rod for straightness, nicks, and scratches.<br />
3. Lubricate all parts with hydraulic fluid during assembly.<br />
4. Tighten lock nut to 353 N•m (260 lb-ft).<br />
5. Pressure test for leakage 20 684 kPa (3000 psi).<br />
3-30 6/22/99
BACKHOES<br />
CYLINDER REPAIR<br />
SWING CYLINDERS DISASSEMBLY AND REPAIR—48 BACKHOE<br />
Wear Ring<br />
Step Seal<br />
U-Cup Seal<br />
Lock Nut<br />
Piston<br />
Rod Wiper<br />
O-Ring<br />
Back-up Ring<br />
Gland<br />
Lock<br />
Nut<br />
One Piece Piston<br />
Rod<br />
Note Location of<br />
45° Chamfer on<br />
Piston for Assembly<br />
Wear Ring<br />
Step Seal<br />
U-Cup Seal<br />
Rod Wiper<br />
Gland<br />
O-Ring<br />
Back-Up Ring<br />
M94886<br />
1. Replace all wear rings, wipers, O-rings, and backup rings.<br />
2. Inspect rod for straightness, nicks, and scratches.<br />
3. Lubricate all parts with hydraulic oil during assembly.<br />
4. Tighten lock nut to 353 N•m (260 lb-ft).<br />
5. Pressure test for leakage a 24 132 kPa (3500 psi).<br />
6/22/99 3-31
CYLINDER REPAIR<br />
BACKHOES<br />
3-32 6/22/99
ROTARY MOWERS<br />
CONTENTS<br />
CONTENTS<br />
Page<br />
SPECIFICATIONS........................................... 3<br />
TORQUESPECIFICATIONS............................................4<br />
LUBRICANTS.......................................................4<br />
OTHERMATERIALS..................................................4<br />
GEARCASE............................................... 5<br />
MIDMOUNTMOWERS ...............................................5<br />
MODEL261AND272MOWERS........................................5<br />
SPINDLES,DRIVEBELTSANDPOWERSHAFTS................. 7<br />
SPINDLES..........................................................7<br />
SPINDLESTYPICALCROSS-SECTIONVIEW.............................9<br />
DRIVEBELTS......................................................14<br />
SERVICINGDRIVEBELT60AND72INCHMOWERS......................14<br />
POWERSHAFTS....................................................15<br />
6/22/99 4-1
CONTENTS CONTINUED<br />
ROTARY MOWERS<br />
Page<br />
4-2 6/22/99
ROTARY MOWERS<br />
SPECIFICATIONS<br />
SPECIFICATIONS<br />
Mid-Mount Mowers<br />
54-Inch Mower<br />
CuttingWidth.............................................137.2cm(54in.)<br />
NumberofBlades..................................................... 3<br />
Spindles ................................................ 20mm(0.75in.)<br />
Weight.................................................... 85kg(190lb)<br />
GearCaseGreaseVolume.......................................0.5L(1pt)<br />
End Play<br />
InputShaft...................................0.0-0.06mm(0.0-0.002in.)<br />
OutputShaft .................................0.0-0.03mm(0.0-0.001in.)<br />
60-Inch Mower<br />
CuttingWidth.............................................152.4cm(60in.)<br />
NumberofBlades..................................................... 3<br />
Spindles ................................................25.4mm(1.0in.)<br />
Weight................................................... 147kg(325lb)<br />
GearCaseGreaseVolume(Mid-mountMower).....................240ml(8oz)<br />
GearCaseGreaseVolume(3-pointHitchMower......................0.5L(1pt)<br />
End Play<br />
InputShaft...................................0.0-0.06mm(0.0-0.002in.)<br />
OutputShaft .................................0.0-0.03mm(0.0-0.001in.)<br />
72-Inch Mower<br />
CuttingWidth........................................... 184.9cm(72.8in.)<br />
NumberofBlades..................................................... 3<br />
Spindles ................................................25.4mm(1.0in.)<br />
Weight................................................... 203kg(448lb)<br />
GearCaseGreaseVolume.......................................0.5L(1pt)<br />
End Play<br />
InputShaft...................................0.0-0.06mm(0.0-0.002in.)<br />
OutputShaft .................................0.0-0.03mm(0.0-0.001in.)<br />
3-Point Hitch Rear Mount Mowers<br />
261and272Mounting ..........................................Category1<br />
261and272PTOSpeed...........................................540rpm<br />
261 Mower<br />
CuttingWidth............................................ 152cm(60in.)<br />
CuttingHeight......................................51-152mm(2-6in.)<br />
NumberofBlades................................................... 3<br />
Belt .......................................................B-Section<br />
Weight................................................. 168kg(370lb)<br />
272 Mower<br />
CuttingWidth...........................................185cm(72.8in.)<br />
CuttingHeight......................................51-127mm(2-5in.)<br />
NumberofBlades................................................... 3<br />
Belt .......................................................B-Section<br />
Weight................................................. 232kg(510lb)<br />
6/25/99 4-3
SPECIFICATIONS<br />
ROTARY MOWERS<br />
TORQUE SPECIFICATIONS<br />
1/4In.DiameterPipePlugs ....................... 14-25N•m(120-216lb-in.)<br />
Breather(1/8diameterpipeplugs)..................... 7-10N•m(60-90lb-in.)<br />
BladeBoltTorque,54InchDeck ......................57-84N•m(42-62lb-ft)<br />
Blade Bolt Torque 60/72 Inch Deck . . . . . . . . . . . . . . . . . . 102 - 123 N•m (75 - 91 lb-ft)<br />
LUBRICANTS<br />
GearCaseGrease .................... JohnDeereGL-5 ® Gear Oil-SAE 80W-90<br />
OTHER MATERIALS<br />
Number Name Use<br />
592 / TY9375 LOCTITE ® F General Purpose Thread<br />
Sealant<br />
Seal pipe plugs<br />
LOCTITE ® is a registered trademark of the Loctite Corp.<br />
4-4 6/25/99
ROTARY MOWERS<br />
GEAR CASE<br />
GEAR CASE<br />
MID MOUNT MOWERS<br />
NOTE:<br />
The gear case assemblies for the 4100 CUT<br />
mid - mount mowers have no serviceable<br />
components. If any component is worn or<br />
damaged, replace the gear case assembly.<br />
The gear case assemblies for the 4200 - 4600<br />
CUT mid - mount mowers have no serviceable<br />
internal components. If any component is worn<br />
or damaged, replace the gear case assembly.<br />
1. Inspect case for cracks.<br />
2. Inspect shafts for wear and straightness.<br />
3. Check shafts for excessive end play.<br />
MODEL 261 AND 272 MOWERS<br />
Disassembly and Inspection:<br />
NOTE: Gear case may differ slightly from the drawing<br />
shown below.<br />
1. Remove the gear case from the mower deck.<br />
2. Inspect the housing for cracks.<br />
3. Remove the cover from the gear case.<br />
4. Inspect cover for wear or damage.<br />
5. Remove the input shaft assembly from the gear<br />
case.<br />
6. Inspect the bevel gear for chipped, worn or broken<br />
teeth.<br />
7. Inspect shaft for wear and straightness. Check the<br />
keyway of the shaft for wear or damage.<br />
8. Remove and inspect the shaft key.<br />
Adapter<br />
Breather<br />
Shim<br />
Bearing<br />
Seal<br />
Bearing<br />
Cover<br />
Pipe Plug<br />
Shaft Key<br />
Screw<br />
(6 used)<br />
Shim Gasket<br />
Shim<br />
Bevel Gear<br />
Output Shaft<br />
Pinion<br />
Input Shaft<br />
Bearing<br />
Spacer<br />
Shim<br />
Snap Ring<br />
Shim<br />
Bearing<br />
Seal<br />
Snap Ring<br />
M78220<br />
6/25/99 4-5
GEAR CASE<br />
ROTARY MOWERS<br />
9. Inspect bearings for wear or galling.<br />
10. Remove output seal from gear case.<br />
11. Remove snap ring, bearing, and spacer from output<br />
shaft.<br />
12. Remove snap ring from gear case.<br />
13. Remove output shaft from housing.<br />
14. Remove the bearing from the shaft.<br />
15. Inspect shaft for wear and straightness. Inspect the<br />
pinion gear for chipped, worn or broken teeth.<br />
16. Inspect bearings for wear or galling.<br />
Bushing<br />
Shims<br />
Bearing<br />
Snap Ring<br />
Assembly:<br />
M78251<br />
NOTE: Gear case may differ slightly from procedures<br />
shown.<br />
Bearing<br />
6. Install shim, bearing and snap ring in output pinion<br />
shaft (picture does not show pinion gear).<br />
7. Place bushing on shaft.<br />
8. Install remaining bearing, shim (depending on gear<br />
case), and snap ring on shaft. If output shaft uses<br />
a nut, tighten until there is no end play 1.1 N•m (10<br />
lb-in. ) rolling drag torque.<br />
Bearing Cup<br />
Gaskets<br />
Bevel<br />
Gear<br />
M78249<br />
1. Install gear on input shaft end with keyway. Gear<br />
teeth should face toward the turned shoulder of<br />
shaft.<br />
2. Line up keyways in gear and shaft. Install key from<br />
hubsideofgear.<br />
3. Install shim, then bearing on shaft so it is seated<br />
against turned shoulder of shaft.<br />
M78252<br />
9. Press bearing cup into cover.<br />
10. Place gasket on cover. Align holes in gasket with<br />
holes in cover.<br />
Bearing<br />
Bearing Cup<br />
Seal<br />
M78250<br />
4. Install shim on other end of input shaft.<br />
5. Install remaining bearing on shaft.<br />
M78253<br />
4-6 6/25/99
ROTARY MOWERS<br />
SPINDLES, DRIVE BELTS AND POWERSHAFTS<br />
11. Coat outside edge of a new oil seal with permatex<br />
or an equivalent. Coat lips of oil seal with grease.<br />
Press oil seal into bore in case.<br />
12. Press bearing cup into case (if applicable).<br />
Cap<br />
Cap Screws<br />
(8 used)<br />
13. Install input shaft assembly in gear case. Secure in<br />
place with 8 cap screws. Tighten to 30.8 N•m (22<br />
lb-ft). Endplay should be zero. When zero end play<br />
has been attained remove one gasket.<br />
Seal<br />
M78259<br />
and backlash. After proper adjustment is<br />
attained, remove end cap and holder hardware<br />
and apply Loctite or equivalent on threads.<br />
Reinstall hardware and tighten.<br />
18. Fill case with 0.5 L (1 pint) John Deere GL-5 ® Gear<br />
Oil-SAE 80W-90 or equivalent (Mil-L-2105C) to<br />
pipe plug level. Apply LOCTITE ® 592 pipe sealant<br />
with teflon to plug. Tighten plug to 20-24N•m<br />
(180 - 216 lb-in.), and pipe plugs (breather) to 7-<br />
10 N•m (60 - 90 lb-in.).<br />
19. See power shaft section for additional procedures.<br />
IMPORTANT: Vent (breather) must be open. If vent<br />
(breather) is closed, oil will be forced out seals<br />
causing gear box to leak.<br />
SPINDLES, DRIVE BELTS AND<br />
POWERSHAFTS<br />
SPINDLES<br />
Removal:<br />
M78258<br />
Pinion Output<br />
Shaft<br />
14. Install pinion output gear shaft assembly in gear<br />
case.<br />
15. Coat lips of a new oil seal with grease. Place a thin<br />
coat of permatex or equivalent on outside cage<br />
edge of oil seal. Press oil seal into case until flush.<br />
16. Hold one of the shafts so it cannot turn or move.<br />
17. Turn or move the other shaft so backlash on the<br />
gear set can be observed. Add or remove gaskets<br />
to get proper backlash (shims can also be added<br />
or removed).<br />
A<br />
M39722<br />
1. Open the latches (A) and remove the belt shields.<br />
IMPORTANT: 261 series gear case backlash 0.13 -<br />
0.35 mm (0.005 - 0.014 in.) 2.75 in. pin radius; 3.0<br />
in. pin radius, output shaft preload (without oil<br />
seal) 1.7 - 5.2 lb-in., input shaft no preload, no<br />
end play, max thrust clearance 0.20 mm (0.008<br />
in).<br />
Bearing preload and gear backlash is<br />
determined by the quantity of gaskets required<br />
between cover and housing and shims<br />
(depending on gear case) on the input and<br />
output shaft. Gaskets and shims are available<br />
from service parts to properly adjust gear set<br />
6/25/99 4-7
SPINDLES, DRIVE BELTS AND POWERSHAFTS<br />
ROTARY MOWERS<br />
M35758<br />
2. Loosen belt and remove stop.<br />
M39729<br />
5. Put a block of wood between mower blade and<br />
deck.<br />
6. Remove cap screw, washer, blade, and anti-wrap<br />
cup (if equipped).<br />
A<br />
A<br />
M37328<br />
M43683<br />
NOTE:<br />
To remove center spindle assembly, the gear<br />
box assembly must be removed. Otherwise go<br />
to Step 5.<br />
3. Remove belt from sheaves.<br />
4. Remove lock nuts and washers (A). Remove lock<br />
nuts and cap screws (B). Remove gear box<br />
assembly with PTO shaft.<br />
B<br />
7. Remove nuts and carriage bolts.<br />
8. Remove ring (A). Remove spindle assembly from<br />
mower deck.<br />
Installation:<br />
Installation is the reverse of removal.<br />
<br />
CAUTION<br />
Blades are sharp. When you handle blades, wear<br />
gloves, or wrap a shop cloth around blade.<br />
4-8 6/25/99
ROTARY MOWERS<br />
SPINDLES, DRIVE BELTS AND POWERSHAFTS<br />
SPINDLES TYPICAL CROSS-SECTION VIEW<br />
Grease Fitting<br />
Shaft<br />
Nut<br />
Sheave<br />
Key<br />
Seal (used on later units)<br />
Upper Bearing<br />
Bushing (used on later units)<br />
Snap Ring<br />
(2 used)<br />
Spacer<br />
Housing<br />
Snap Ring<br />
Lower Bearing<br />
Hub<br />
Blade<br />
Cap Screw<br />
Washer<br />
M37428<br />
6/25/99 4-9
SPINDLES, DRIVE BELTS AND POWERSHAFTS<br />
ROTARY MOWERS<br />
Disassembly:<br />
IMPORTANT: The sheave is an interference fit to<br />
the shaft in some applications. Use caution<br />
during disassembly and assembly to avoid<br />
damage to the sheave and/or the spindle. It may<br />
be necessary to use a suitable press to remove<br />
and install the sheave.<br />
Spindles are all similar, but may differ slightly<br />
from procedures shown.<br />
M37331<br />
4. Loosen sheave. Be careful not to bend flanges.<br />
NOTE:<br />
The 60-inch mower has a two-bladed fan<br />
included (not shown).<br />
M37329<br />
1.Clamplowerhubofspindleassemblyinavise.<br />
2. Remove grease fitting.<br />
B<br />
A<br />
M37454<br />
5. Remove sheave. Remove key (A) and bushing (B).<br />
M37330<br />
3. Remove nut.<br />
M37333<br />
6. Press shaft from housing.<br />
NOTE: Lower bearing and spacer may come out with<br />
shaft: if they don’t, move the spacer to one side<br />
4-10 6/25/99
ROTARY MOWERS<br />
SPINDLES, DRIVE BELTS AND POWERSHAFTS<br />
and press bearing out—press against inner<br />
bearing ring surface only.<br />
M37337<br />
M37334<br />
11. Use a 1-1/2-in. driver disk to remove upper bearing<br />
and seal. Be sure disk does not press on snap<br />
ring.<br />
7. Remove spacer.<br />
M37338<br />
8. Remove bearing using a knife-edge puller.<br />
M37335<br />
12. Remove snap rings.<br />
13. Clean inside of housing with solvent. Be sure to<br />
remove all metal shavings and grit.<br />
14. Check for wear or damage in bearing seating<br />
areas; replace, if required.<br />
M37339<br />
9. Inspect shaft for excessive wear or damage. If shaft<br />
or hub is not worn or damaged, it is not necessary<br />
to separate.<br />
10. To separate, hold shaft in a soft-jaw vise and<br />
remove hub.<br />
6/25/99 4-11
SPINDLES, DRIVE BELTS AND POWERSHAFTS<br />
ROTARY MOWERS<br />
Assembly:<br />
(sealed on one side only). Be sure bearing seal<br />
faces up.<br />
IMPORTANT: Always install new bearings and<br />
seals when servicing spindles.<br />
M37341<br />
M37336<br />
5. Press bearing against snap ring using a 1-15/16 in.<br />
disk.<br />
1. Clean threads on shaft and hub using clean and<br />
cure primer. Apply thread lock and sealer (medium<br />
strength) on threads. Install hub on shaft. Tighten<br />
to 163 N•m (120 lb-ft).<br />
M37342<br />
6. Apply John Deere Multi-Purpose Grease or<br />
equivalent to area between snap rings.<br />
M37338<br />
2. Install snap rings.<br />
M37343<br />
M37340<br />
7. Put spacer against lower bearing. Be sure there is<br />
enoughgreasetoholdspacercenteredinbore.<br />
3. Pack both bearings with John Deere Multi-Purpose<br />
Grease or equivalent.<br />
4. Turn housing bottom-side up to install lower bearing<br />
4-12 6/25/99
ROTARY MOWERS<br />
SPINDLES, DRIVE BELTS AND POWERSHAFTS<br />
M37344<br />
8. Turn housing top-side-up to install upper nonsealed<br />
bearing. Press bearing against spacer,<br />
using the correct size driver. Support both the<br />
inner and outer rings of both upper and lower<br />
bearings.<br />
M37347<br />
11. Turn spindle over to install top seal. Press seal flush<br />
with rim of housing, using a 1-7/8 in. OD pipe for a<br />
driver.<br />
A<br />
M37348<br />
12. Coat outer surface of bushing with grease before<br />
you install it with notch (A) toward bearing.<br />
A<br />
M37345<br />
B<br />
A<br />
9. Put housing bottom-side-up on a press plate with a<br />
1-1/16 in. hole or gap (A) so upper bearing is<br />
centered over hole or gap (A).<br />
10. Look inside spindle to be sure spacer aligns with<br />
bearings inside housing and hole or gap of press<br />
plate, then install hub and shaft assembly. Press<br />
shaft through both bearings and spacer until hub<br />
stops against lower bearing (B).<br />
M37455<br />
13.Installkey(A).Besurekey(A)isseatedtoprevent<br />
metal shavings from contaminating bearings.<br />
NOTE:<br />
The 60-inch mower has a two-bladed fan<br />
included (not shown).<br />
6/25/99 4-13
SPINDLES, DRIVE BELTS AND POWERSHAFTS<br />
ROTARY MOWERS<br />
14. Install sheave with welded side of hub away from<br />
bearing.<br />
before installing a new belt.<br />
Inspection:<br />
Inspect the drive belt for the following: wear spots,<br />
lumps or swells, and frayed edges.<br />
NOTE: If belt is frayed on the edges, it may not require<br />
replacement. Trim frayed edges off belt and<br />
check performance before replacing it.<br />
M37350<br />
15. Hold spindle assembly in a vise by the lower hub to<br />
install nut. Tighten nut to 163 N•m (120 lb-ft).<br />
16. Turn casting on spindle to check for free spin.<br />
IMPORTANT: Never use cleaning solvents or belt<br />
dressings on belts. Solvents and belt dressings<br />
cause deterioration and shorten belt life.<br />
Replacement:<br />
1. Remove drive shaft and disconnect lift arms from<br />
mower deck.<br />
A<br />
M39722<br />
M37329<br />
17. Install grease fitting.<br />
18. Fill spindle housing completely with John Deere<br />
Multi-Purpose grease or equivalent.<br />
1. Open the latches (A) and remove the belt shields.<br />
DRIVE BELTS<br />
SERVICING DRIVE BELT 60 AND 72<br />
INCH MOWERS<br />
NOTE: Generic belt routing shown, actual routing will<br />
be shown on the inside of the belt cover for the<br />
mower deck.<br />
IMPORTANT: RECORD POSITION OF BELT PRIOR<br />
TO REMOVAL. Unusual belt wear can be caused<br />
by damaged sheaves or dirt build-up in sheave<br />
grooves. Always check for the cause of a<br />
damaged belt and repair or replace the defective<br />
part. Always replace bent or nicked sheaves<br />
2. Remove belt covers and loosen idler bumper.<br />
M39729<br />
4-14 6/25/99
ROTARY MOWERS<br />
SPINDLES, DRIVE BELTS AND POWERSHAFTS<br />
3. Loosen belt and remove stop.<br />
4. Use a pry bar to move lever and release belt<br />
tensiononsheave.<br />
Disassembly:<br />
1. Pull the halves of power shaft apart.<br />
<br />
CAUTION<br />
Retaining Ring<br />
Be careful when removing belt from sheave. If<br />
fingers are pinched between sheave and belt,<br />
personal injury can result.<br />
Idler sheave is under very strong spring tension.<br />
Releaseslowlytopreventpersonalinjury.<br />
5. Remove belt from sheave. Slowly release lever.<br />
6. Remove sheave and gear case assembly.<br />
7. Replace belt.<br />
8. Install gear case assembly. Tighten cap screws to<br />
55 N•m (40 lb-ft).<br />
9. Install belt and spindle sheave. Tighten spindle<br />
sheave cap screws to 164 N•m (120 lb-ft).<br />
10. Position belt on sheave as depicted in exploded<br />
view. See OPERATORS <strong>MANUAL</strong> for differences.<br />
11. Adjust bumper to just touch idler lever.<br />
2. Pry retaining ring out of groove.<br />
Shield<br />
M85017<br />
POWERSHAFTS<br />
Retaining Ring<br />
Nylon Bearing<br />
M85018<br />
NOTE: The power shaft depicted is used on the 272<br />
rotary mower. Actual power shaft may differ<br />
from the one depicted.<br />
Removal:<br />
3. Slide shield off shaft.<br />
4. Spread ends of nylon bearing and remove from<br />
shaft.<br />
5. Slip retaining ring off shaft.<br />
Cap Screw<br />
Nylon Bearing<br />
M85019<br />
M85016<br />
Power Shaft Joint<br />
6. Press in on nylon bearing to remove it from shield.<br />
Grease Fitting<br />
Retaining Ring<br />
1. Remove lock nut and cap screw.<br />
2. Remove power shaft joint from gear case shaft.<br />
Grease Fitting<br />
Spider Assembly<br />
M85020<br />
6/25/99 4-15
SPINDLES, DRIVE BELTS AND POWERSHAFTS<br />
ROTARY MOWERS<br />
7. Remove grease fittings from shaft.<br />
8. Place shaft in a vice. Remove 4 retaining rings from<br />
yoke.<br />
9. Drive U-joint out of yoke by using a rubber hammer.<br />
Retaining Ring<br />
IMPORTANT: During assemble be careful not to<br />
bend or distort retaining rings. Tap them lightly<br />
in place with a hammer and punch.<br />
15. Remove retaining rings.<br />
16. Support yoke in a vise and drive U-joint out of yoke<br />
with a rubber hammer.<br />
Assembly:<br />
Assemble power shaft in reverse order of disassembly.<br />
Lubricate grease fittings every 25 hours with a handtype<br />
grease gun.<br />
10. Pry retaining ring out of groove<br />
.<br />
Shield<br />
M85021<br />
Nylon Bearing<br />
Retaining Ring<br />
IMPORTANT: One or two strokes from the grease<br />
gun is sufficient. If fittings are over lubricated,<br />
seals will be damaged and dirt will enter<br />
bearings causing parts failure.<br />
Installation:<br />
Cap Screw<br />
M85022<br />
11. Slide shield off shaft.<br />
12. Spread ends of nylon bearing and remove from<br />
shaft.<br />
13. Slide retaining ring off shaft.<br />
M85024<br />
Coupler<br />
NOTE: Apply Never-Seez lubricant on gear case shaft.<br />
Be sure key is in gear case shaft.<br />
Grease Fitting<br />
Retaining Ring<br />
Spider<br />
1. Align keyway in power shaft coupler with key in gear<br />
case shaft and slide coupler onto shaft.<br />
IMPORTANT: Ifspringpinisusedtosecurepower<br />
shaftitmustbesafetywired.<br />
Retaining Ring<br />
M85023<br />
2. Install cap screw and lock nut through hole in<br />
coupler and shaft.<br />
3. Tighten lock nut to 47 N•m (35 lb-ft).<br />
14. Remove grease fitting.<br />
4-16 6/25/99
ROTARY TILLERS<br />
CONTENTS<br />
CONTENTS<br />
Page<br />
SPECIFICATIONS........................................... 3<br />
TORQUESPECIFICATIONS............................................3<br />
LUBRICANTS.......................................................3<br />
OTHERMATERIALS..................................................3<br />
TESTSANDADJUSTMENTS ................................. 4<br />
450SIDEDRIVECHAINADJUSTMENT..................................4<br />
550,660,670&680SIDEDRIVECHAINADJUSTMENT.....................4<br />
550,660,670&680PTOCLUTCHADJUSTMENT..........................5<br />
REPAIR................................................... 6<br />
450GEARCASEREMOVALANDINSTALLATION ..........................6<br />
450PTOCLUTCH....................................................9<br />
550GEARCASEREMOVALANDINSTALLATION .........................10<br />
660,670&680GEARCASEREMOVALANDINSTALLATION................14<br />
ROTOR BEARING REPLACEMENT . . . . . . . . . . . . . . . . . . . . . . . . . . . . . . . . . . . . . 17<br />
6/22/99 5-1
NOTES<br />
ROTARY TILLERS<br />
5-2 6/22/99
ROTARY TILLERS<br />
SPECIFICATIONS<br />
SPECIFICATIONS<br />
ChainFreePlay.......................................... 10mm(0.375in.)<br />
PTOSpringClutchAdjustment..................28.9-29.5mm(1.137-1.161in.)<br />
GearBacklash(AllModels).......................0.2-0.6mm(0.008-0.023in.)<br />
ChainCaseOilLevel(approx)(AllModels) ....................... 0.85L(28oz)<br />
GearOilLevel(approx)(AllModels)............................0.40L(13.5oz)<br />
TORQUE SPECIFICATIONS<br />
All Models<br />
ChainAdjustmentBoltJamNut .............................. 48N•m(35lb-ft)<br />
Filler Pipe Plug . . . . . . . . . . . . . . . . . . . . . . . . . . . . . . . . . . . . . . . . . . 10 N•m (89 lb-in.)<br />
GearCaseMounting....................................... 75N•m(55lb-ft)<br />
IdlertoHousingCapScrews................................. 48N•m(35lb-ft)<br />
PTOClutchGuard....................................... 12N•m(106lb-in.)<br />
RotortoSpindleCapScrews ................................ 75N•m(55lb-ft)<br />
TinestoRotorMountingPlates............................... 48N•m(35lb-ft)<br />
450<br />
GearCaseEndCapsandHub............................... 48N•m(35lb-ft)<br />
550<br />
JackshaftTube ........................................... 48N•m(35lb-ft)<br />
ShaftNut-BevelGear ................................... 179N•m(132lb-ft)<br />
ShaftNut-Sprocket ..................................... 300N•m(221lb-ft)<br />
660, 670 and 680<br />
JackshaftTube ........................................... 48N•m(35lb-ft)<br />
ShaftNut-BevelGear ................................... 260N•m(192lb-ft)<br />
ShaftNut-Sprocket ..................................... 300N•m(221lb-ft)<br />
LUBRICANTS<br />
GearCaseGrease .................... JohnDeereGL-5 ® Gear Oil-SAE 80W-90<br />
OTHER MATERIALS<br />
Number Name Use<br />
592 / TY9375 LOCTITE ® FGeneral Purpose Thread Sealant Seal pipe plugs<br />
LOCTITE ® is a registered trademark of the Loctite Corp.<br />
6/25/99 5-3
TESTS AND ADJUSTMENTS<br />
ROTARY TILLERS<br />
TESTS AND ADJUSTMENTS<br />
450 SIDE DRIVE CHAIN<br />
ADJUSTMENT<br />
The side drive chain should be tensioned periodically<br />
to compensate for wear.<br />
1. Place the tiller on a hard level surface on the<br />
support stand so that the tines are not in contact<br />
with the surface.<br />
8. Repeat steps 3 - 6 two more times. DO NOT tighten<br />
bolt if travel is greater than "X" + 1/4 in. on the<br />
second or third time through.<br />
9. Hold adjustment bolt in place and tighten jam nut<br />
and tighten to 48 N•m (35 lb-ft).<br />
Specification:<br />
JamNut......................<br />
48N•m(35lb-ft)<br />
550, 660, 670 & 680 SIDE DRIVE<br />
CHAIN ADJUSTMENT<br />
The side drive chain should be tensioned periodically<br />
to compensate for wear.<br />
1. Place the tiller on a hard level surface on its support<br />
stand so that tines are not in contact with the<br />
surface.<br />
2. Remove the filler plug.<br />
B<br />
A<br />
M47308<br />
B<br />
2. Loosen jam nut (A).<br />
3. Tighten adjustment bolt (B) by hand until tight.<br />
4. Secure PTO input shaft so it cannot turn.<br />
5. Rock rotor tine shaft and measure travel of tine.<br />
A<br />
C<br />
X<br />
+ 1/4 in.<br />
M94962<br />
M47677<br />
3. Using a screwdriver through the filler hole (A),<br />
measure the amount of deflection from the chain.<br />
4. The free movement should be 10 mm (0.375 in.).<br />
5. Tighten or loosen the adjustment bolt (B) until the<br />
dimension is obtained.<br />
6. Hold adjustment bolt in place and tighten jam nut<br />
(C) to 48 N•m (35 lb-ft).<br />
6. Loosen bolt (B) until a minimum rotation of tines is<br />
"X" + 1/4 in.<br />
7. Release PTO and rotate rotor shaft a minimum of<br />
180 degrees.<br />
Specification:<br />
ChainFreePlay ...............10mm(0.375in.)<br />
JamNut...................... 48N•m(35lb-ft)<br />
5-4 6/25/99
ROTARY TILLERS<br />
550, 660, 670 & 680 PTO CLUTCH ADJUSTMENT<br />
550, 660, 670 & 680 PTO CLUTCH<br />
ADJUSTMENT<br />
The side drive chain should be tensioned periodically<br />
to compensate for wear.<br />
1. Place the tiller on a hard level surface on its support<br />
stand so that tines are not in contact with the<br />
surface.<br />
2. Remove the PTO shaft from the tiller.<br />
3. Measure the length of the springs (A) on the PTO<br />
clutch plate.<br />
28.9 - 29.5 mm (1.137 - 1.161 in.)<br />
A<br />
4. Adjust each locknut to obtain a measurement of<br />
28.9 - 29.5 mm (1.137 - 1.161 in.).<br />
5. Install PTO shaft.<br />
6/25/99 5-5
REPAIR<br />
ROTARY TILLERS<br />
REPAIR<br />
450 GEAR CASE REMOVAL AND<br />
INSTALLATION<br />
Removal:<br />
1. Position the tiller on a level surface. Set support<br />
stand.<br />
2. Remove the top cover from the PTO guard.<br />
3. Remove the PTO shaft from the gear box.<br />
4. Remove the PTO guard from the front of the gear<br />
box.<br />
5. Remove the four cap screws holding the gear box to<br />
the tiller frame (two located on the back of the gear<br />
box and two located on the front bottom of the gear<br />
box).<br />
6. Pull the gear box away from the jackshaft while<br />
lifting out of the mounting brackets.<br />
7. Inspect housing for cracks or leaks.<br />
8. Position the gear box with the output shaft up.<br />
9. Remove the four cap screws holding the output<br />
shaft cover to the gear box case.<br />
10. Drain the gear oil.<br />
11. Remove the other eight cap screws holding the<br />
othertwocoverstothegearboxcase.<br />
12. Using a brass drift punch, inserted into the output<br />
shaft spline end, drive the output shaft out of the<br />
gear box case.<br />
13. Pull the input shaft out of the front of the gear box<br />
case.<br />
14. Inspect bearings for wear.<br />
15. Inspect gears for chipped, worn or broken teeth.<br />
16. Inspect shafts for wear and straightness.<br />
17. Inspect bearing caps for wear or galling.<br />
18. Inspect end caps for cracks or distortion.<br />
19. Replace parts as required when assembling gear<br />
case.<br />
Gasket<br />
Input Shaft<br />
End Cap<br />
Shims<br />
Snap Ring<br />
Seal<br />
Bearing<br />
Bearing<br />
Seal<br />
Bearing<br />
Hub<br />
Shims<br />
Output<br />
Shaft<br />
Gasket<br />
Plug<br />
Case<br />
Seal<br />
Shims<br />
Bearing<br />
Gasket<br />
End Cap<br />
M78318<br />
5-6 6/25/99
ROTARY TILLERS<br />
450 GEAR CASE REMOVAL AND INSTALLATION<br />
Assembly:<br />
4. Press roller bearing on output gear.<br />
Roller Bearing<br />
Cup<br />
IMPORTANT: Put a coating of oil or grease on lips<br />
of oil seal to prevent damage during installation.<br />
5. Gear case requires shims on both sides of output<br />
shaft gear, then bearings are pressed on. Press<br />
seals in end caps.<br />
M78327<br />
1. Press roller bearing cup into gear case end cap or<br />
hub.<br />
IMPORTANT: Bolt torques are for fasteners as<br />
supplied lightly oiled or zinc plated. The given<br />
values can not be used if fasteners are greased.<br />
.<br />
Bearing<br />
Shim(s)<br />
Bearing<br />
Shim(s)<br />
Input Shaft<br />
Roller<br />
Bearing<br />
M78322<br />
2. Press roller bearing on end of input shaft.<br />
Input<br />
Shaft<br />
Snap<br />
Ring<br />
Shim(s)<br />
Bearing<br />
Seal<br />
Gear<br />
Roller Bearing<br />
M78329<br />
3. Insert input shaft into hub the press remaining<br />
bearing on shaft, install shims and snap ring,<br />
install seal after checking end play and backlash.<br />
Roller Bearing<br />
Shaft Nut<br />
Output Shaft<br />
M94958<br />
6. Install input shaft assembly in gear case.<br />
7. Bolt end cover and gasket to case with four cap<br />
screws. Tighten to 48 N•m (35 lb-ft).<br />
8. Install shim(s) on input shaft. Install snap ring in<br />
gear housing. Gear case bearings should have no<br />
end play, no preload. Add or remove shims as<br />
necessary.<br />
IMPORTANT: Put a coating of oil or grease on lips<br />
of oil seal to prevent damage during installation.<br />
Output Gear<br />
M78321<br />
9. Install input shaft seal in gear case. Install this seal<br />
so that the lip with the spring around it is to the<br />
inside.<br />
6/25/99 5-7
450 GEAR CASE REMOVAL AND INSTALLATION ROTARY TILLERS<br />
NOTE: Bearing preload and gear backlash is<br />
determined by the thickness of shims required<br />
on input shaft. 450 requires shims on output<br />
shaft also. Turn shafts and check bearing<br />
preload and gear backlash. Gear case<br />
bearings should have no end play, no preload.<br />
Output shaft (jackshaft) should have a slight<br />
preload, less than 0.68 N•m (6.016 lb-in.).<br />
There should be a slight drag on the bearings<br />
and backlash should not exceed 0.2-0.6 mm<br />
(0.008 - 0.023 in.).<br />
Spring Pin<br />
Dial Indicator<br />
1/2-Inch<br />
Shaft<br />
M78192<br />
10. To check backlash hold the gearbox so it will not<br />
move, then place dial indicator 1⁄2 -inchabove<br />
shaft and turn shaft back and forth.<br />
Installation:<br />
1. Install gearbox and tighten cap screws to 75 N•m<br />
(55 lb-ft).<br />
2. Fill gear case to vent hole with John Deere GL-5 ®<br />
Gear Oil-SAE 80W-90 or equivalent.<br />
3. Apply Loctite 592 pipe sealant with teflon to pipe<br />
plug.Tightenpipeplugto10 N•m (89 lb-in.).<br />
4. Grease chain with 3790 molybdenumdisulfate or<br />
graphite every 50 hours.<br />
Specification:<br />
Gear Case End Caps and Hub . . . 48 N•m (35 lb-ft)<br />
GearCaseMounting ........... 75N•m(55lb-ft)<br />
Filler Pipe Plug . . . . . . . . . . . . . . . . 10 N•m (89 lb-in.)<br />
PTOClutchGuard ............12N•m(106lb-in.)<br />
GearOilLevel(approx)...........0.40L(13.5oz)<br />
5-8 6/25/99
ROTARY TILLERS<br />
450 PTO CLUTCH<br />
450 PTO CLUTCH<br />
Disassembly:<br />
1. Remove snap ring, back-up ring, lock collar, spring,<br />
balls (3) and back-up ring.<br />
2. Tighten nuts on thrust plate until belleville springs<br />
are compressed.<br />
3. With a hammer and punch, bend tabs in housing<br />
away from belleville springs, remove all parts from<br />
housing.<br />
Assembly:<br />
1. Ensure all parts are free of grease and oil. Install<br />
friction discs, hub and thrust plate assembly as<br />
shown.<br />
2. Using a hammer and punch, bend tabs in to retain<br />
the belleville springs, loosen the nuts on the thrust<br />
plate assembly to the end of the studs. DO NOT<br />
remove nuts.<br />
Apply a small amount of grease to balls to hold them in<br />
place while assembling the rest of the components.<br />
Install back-up ring, spring, balls (3).<br />
Ring<br />
Housing<br />
Friction Disc<br />
Hub<br />
Friction Disc<br />
Thrust Plate<br />
Belleville Springs<br />
Back-up Ring<br />
Spring<br />
Ball (3)<br />
Lock Collar<br />
Back-up Ring<br />
Snap Ring<br />
M78283<br />
6/25/99 5-9
550 GEAR CASE REMOVAL AND INSTALLATION ROTARY TILLERS<br />
550 GEAR CASE REMOVAL AND<br />
INSTALLATION<br />
Removal:<br />
1. Position the tiller on the support stand on a level<br />
surface.<br />
2. Remove the PTO shield from the tiller.<br />
3. Remove the PTO shaft from the gear box.<br />
4. Loosen the chain case drain plug. Tip the tiller back<br />
so that the drain plug is to the bottom of the chain<br />
case cover.<br />
5. Place a shallow drain pan 7.6 cm, (3 in.) under the<br />
drainplugandremovethepluganddraingearoil.<br />
6. Remove the chain tightener lock nut and cap screw.<br />
7. When fully drained remove the chain case cover.<br />
8. Wedge a block of wood between the tines and the<br />
tiller housing.<br />
9. Remove both the upper and lower chain sprocket<br />
retaining nuts.<br />
10. As an assembly, slide the two sprockets and chain<br />
off of the jackshaft and rotor shaft.<br />
11. Remove the four cap screws holding the jackshaft<br />
housing to the tiller side frame.<br />
12. Tip the tiller back up onto its support stand.<br />
13. Remove the four cap screws holding the gear box<br />
to the tiller frame (two located on the back of the<br />
gear box and two located on the front of the gear<br />
box).<br />
14. Pull the gear box and jackshaft up and away from<br />
the tiller.<br />
Roller<br />
Bearing<br />
Input<br />
Shaft<br />
13 Tooth<br />
Gear<br />
Roller<br />
Bearing<br />
Plug<br />
Pipe Plug<br />
Cap Screw<br />
Spacer<br />
Snap Ring<br />
O-Ring<br />
Seal<br />
Shaft Nut<br />
Shim<br />
Lock Washer<br />
23 Tooth<br />
Gear<br />
Tube<br />
Housing<br />
Jackshaft<br />
Jackshaft<br />
Output<br />
Shaft<br />
Roller<br />
Bearing<br />
Seal<br />
O-Ring<br />
Roller<br />
Bearing<br />
Chain Sprocket<br />
9Tooth<br />
Snap Ring<br />
Retaining Nut<br />
Lock Washer<br />
(SN 008172 -) Do not use<br />
Shaft Lock Washers<br />
M78319<br />
5-10 6/25/99
ROTARY TILLERS<br />
550 GEAR CASE REMOVAL AND INSTALLATION<br />
15. Drain the gear oil.<br />
shaft assembly, then remaining bearing cup.<br />
Disassembly:<br />
.<br />
Roller Bearing<br />
O-Ring<br />
Snap Ring<br />
Roller Bearing<br />
Cup<br />
Jackshaft<br />
Housing<br />
Cutaway view inside<br />
550 gear case<br />
M78327<br />
Output<br />
Shaft<br />
.<br />
1. Press roller bearing cup into gear case.<br />
Shim(s)<br />
Roller<br />
Bearing<br />
Input Shaft<br />
Snap<br />
Ring<br />
Spacer<br />
Seal<br />
Input Shaft<br />
M78317<br />
Roller<br />
Bearing<br />
1. Remove snap ring holding output jackshaft into<br />
gear case.<br />
2. Pull jackshaft and jackshaft housing out of gear<br />
case.<br />
3. Remove O-ring from gear case.<br />
4. Remove the seal from the PTO input shaft.<br />
5. Remove the snap ring, spacer and shim(s) holding<br />
the input shaft into the gear case.<br />
6. Remove the input shaft and bearings.<br />
7. Inspect housing for cracks or leaks.<br />
8. Inspect bearings for wear.<br />
9. Inspect gears for chipped, worn or broken teeth.<br />
10. Inspect shafts for wear and straightness.<br />
11. Inspect bearing caps for wear or galling.<br />
12. Inspect end caps for cracks or distortion.<br />
13. Replace parts as required when assembling gear<br />
case.<br />
Assembly:<br />
IMPORTANT: The gear case contains roller bearing<br />
cups that should be pressed into the case. Make<br />
sure end bearing cup is inserted first, then input<br />
M78322<br />
2. Press roller bearing on end of input shaft.<br />
Gear<br />
Roller Bearing<br />
M78329<br />
3. Slide gear on shaft and press remaining roller<br />
bearing on input shaft.<br />
6/25/99 5-11
550 GEAR CASE REMOVAL AND INSTALLATION ROTARY TILLERS<br />
Roller Bearing<br />
Shaft Nut<br />
Roller Bearing<br />
O-Ring<br />
Snap Ring<br />
Jackshaft<br />
Housing<br />
Output Gear<br />
M78321<br />
4. Press roller bearing on output gear.<br />
IMPORTANT: Bolt torques are for fasteners as<br />
supplied lightly oiled or zinc plated. The given<br />
values can not be used if fasteners are greased.<br />
Output<br />
Shaft<br />
5. Slide gear assembly on output shaft and secure<br />
with shaft nut. Tighten to 179 N•m (132 lb-ft).<br />
6. Install seal in jackshaft tube housing (lip towards<br />
gear) and insert gear output shaft assembly in<br />
output jackshaft tube housing.<br />
23 Tooth<br />
Bevel Gear<br />
Bearing<br />
Seal<br />
Jackshaft<br />
Output<br />
Shaft<br />
Shaft Nut<br />
Lock Washer<br />
Shaft Nut<br />
O-Ring<br />
Bearing<br />
Chain Sprocket<br />
9tooth<br />
Lock Washer<br />
Tube<br />
Jackshaft<br />
Snap Ring<br />
O-Ring<br />
M94966<br />
Snap<br />
Ring<br />
Spacer<br />
Seal<br />
Shim (s)<br />
Input Shaft<br />
550 Gear Case Depicted<br />
Roller<br />
Bearing<br />
M78317<br />
10. Install input shaft assembly in gear case.<br />
11. Install shim(s) on input shaft. Install spacer and<br />
snap ring in gear housing. Gear case bearings<br />
should have no end play, no preload. Add or<br />
remove shims as necessary. If there is no end play,<br />
backlash should be within limits. If end play is<br />
measured, gear(s) are worn out of tolerance.<br />
NOTE: Bearing preload and gear backlash is<br />
determined by the thickness of shims required<br />
on input shaft. Gear case bearings should<br />
have no end play, no preload. Output shaft<br />
(jackshaft) should have a slight preload (less<br />
than 0.68 N•m (6.016 lb-in.). There should be a<br />
slight drag on the bearings and backlash<br />
should not exceed 0.2-0.6 mm (0.008 - 0.023<br />
in.).<br />
7. Install O-rings in gear case of output opening.<br />
8. Install jackshaft output gear assembly into gear<br />
case.<br />
9. Install snap ring to hold jackshaft assembly in place.<br />
5-12 6/25/99
ROTARY TILLERS<br />
550 GEAR CASE REMOVAL AND INSTALLATION<br />
Spring Pin<br />
Dial Indicator<br />
adjust, See “550, 660, 670 & 680 SIDE DRIVE<br />
CHAIN ADJUSTMENT” on page 4.<br />
NOTE: Oil leakage (mist) from hole in shaft is normal.<br />
Hole is a vent for chain case, if excessive,<br />
check case oil level for over full. Check gearbox<br />
seal for leakage.<br />
1/2-Inch<br />
Shaft<br />
M78192<br />
Specification:<br />
GearCaseMounting ........... 75N•m(55lb-ft)<br />
JackshaftTube.................48N•m(35lb-ft)<br />
ShaftNutBevelGear..........179N•m(132lb-ft)<br />
ShaftNutSprocket............300N•m(221lb-ft)<br />
FillerPipePlug................10N•m(89lb-in.)<br />
PTOClutchGuard ............12N•m(106lb-in.)<br />
Chain Case Oil Level (approx) . . . . . . 0.85 L (28 oz)<br />
Gear Oil Level (approx) . . . . . . . . . . .0.40 L (13.5 oz)<br />
12. To check backlash hold the gearbox so it will not<br />
move, then place dial indicator 1⁄2 inchabove<br />
shaft and turn shaft back and forth.<br />
IMPORTANT: Put a coating of oil or grease on lips<br />
of oil seal to prevent damage during installation.<br />
13. Install input shaft seal in gear case (sprung lip<br />
towards gear case).<br />
Installation:<br />
1. Mount gear case and jackshaft assembly onto tiller<br />
frame.<br />
2. Install the four cap screws holding the gear box to<br />
the tiller frame and tighten to 75 N•m (55 lb-ft).<br />
3. Install the four cap screws holding the jackshaft<br />
tube housing to the tiller side frame and tighten to<br />
48 N•m (35 lb-ft).<br />
4. As an assembly, install the upper and lower chain<br />
sprockets and chain onto the jackshaft and rotor<br />
shaft.<br />
5. Install shaft nut, wedge a board between the tines<br />
and tiller housing, and tighten to 300 N•m<br />
(221 lb-ft).<br />
6. Install chain case gasket and cover. Tighten cap<br />
screws to 48 N•m (35 lb-ft).<br />
7. Fill gear case to vent hole with John Deere GL-5 ®<br />
Gear Oil-SAE 80W-90 or equivalent.<br />
8. Fill chain case with approximately 0.85 L (28 oz) of<br />
John Deere GL-5 ® Gear Oil-SAE 80W-90 or<br />
equivalent.<br />
9. Apply Loctite 592 pipe sealant with teflon to all pipe<br />
plugs. Tighten pipe plug to 10 N•m (89 lb-in.).<br />
10. Install chain tension cap screw and locknut and<br />
6/25/99 5-13
660, 670 & 680 GEAR CASE REMOVAL AND INSTALLATION ROTARY TILLERS<br />
660, 670 & 680 GEAR CASE<br />
REMOVAL AND INSTALLATION<br />
Removal:<br />
1. Position the tiller on the support stand on a level<br />
surface. Set support stand.<br />
2. Remove upper 3-point hitch bracket assembly.<br />
3. Remove the PTO shield from the tiller.<br />
4. Remove the PTO shaft from the gear box.<br />
5. Loosen the chain case drain plug. Tip the tiller back<br />
so that the drain plug is to the bottom of the chain<br />
case cover.<br />
6. Place a shallow drain pan 7.6 cm, (3 in.) under the<br />
drain plug. Remove the plug and drain gear oil.<br />
7. Remove the chain tightener lock nut and cap screw.<br />
8. When fully drained remove the chain case cover.<br />
9. Wedge a block of wood between the tines and the<br />
tiller housing.<br />
Seal<br />
Snap Ring<br />
13 Tooth<br />
Bevel Gear<br />
Dipstick<br />
Drain Plug<br />
Shim<br />
Bearing<br />
Input<br />
Shaft<br />
23 Tooth<br />
Bevel Gear<br />
Bearing<br />
Gasket<br />
Output<br />
Jackshaft<br />
Ring<br />
Seal<br />
Bearing<br />
Shaft Nut<br />
Gasket<br />
Cover<br />
Gasket<br />
Shaft Nut<br />
Gasket<br />
Jackshaft<br />
Housing<br />
Tube<br />
Bearing<br />
11-Tooth<br />
Chain Sprocket<br />
M94965<br />
5-14 6/25/99
ROTARY TILLERS<br />
660, 670 & 680 GEAR CASE REMOVAL AND INSTALLATION<br />
A<br />
14. Remove the four cap screws (A) holding the gear<br />
box to the tiller frame. There are two located on<br />
each side of the gear box.<br />
15. Pull the gear box and jackshaft up and away from<br />
the tiller.<br />
16.Drainthegearoilfromthegearbox.<br />
17. Mark the location of the jackshaft housing tube to<br />
the gear box case for assemble later (B).<br />
18. Remove eight cap screws (C) holding output<br />
jackshaft into gear case.<br />
23 Tooth<br />
Bevel Gear<br />
Drain Plug<br />
Bearing<br />
Bearing<br />
Gasket<br />
B<br />
Seal<br />
Shaft Nut<br />
Ring<br />
M94963<br />
10. Remove both the upper (A) and lower (B) chain<br />
sprocket retaining nuts.<br />
11. As an assembly, slide the two sprockets and chain<br />
off of the jackshaft and rotor shaft.<br />
12. Remove the six cap screws holding the jackshaft<br />
housing to the tiller side frame.<br />
13. Tip the tiller back up onto its support stand.<br />
A<br />
B<br />
C<br />
Output<br />
Jackshaft<br />
Jackshaft<br />
Housing Tube<br />
Gasket<br />
Cover<br />
M94957<br />
19. Pull jackshaft and jackshaft housing out of gear<br />
case.<br />
20. Remove the seal from the PTO input shaft.<br />
21. Remove the snap ring and shim(s) holding the input<br />
shaft into the gear case.<br />
22. Remove the four cap screws holding the cover, and<br />
remove the cover.<br />
23. Using a brass drift punch if needed remove the<br />
input shaft and bearings through the rear of the<br />
gear box.<br />
24. Inspect housing for cracks or leaks.<br />
25. Inspect bearings for wear.<br />
26. Inspect gears for chipped, worn or broken teeth.<br />
27. Inspect shafts for wear and straightness.<br />
28. Inspect bearing caps for wear or galling.<br />
29. Inspect end caps for cracks or distortion.<br />
30. Replace parts as required when assembling gear<br />
case.<br />
A<br />
M94961<br />
6/25/99 5-15
660, 670 & 680 GEAR CASE REMOVAL AND INSTALLATION ROTARY TILLERS<br />
Assembly:<br />
.<br />
Roller Bearing<br />
Roller Bearing<br />
Input Shaft<br />
Input Shaft<br />
Snap<br />
Ring<br />
Roller<br />
Bearing<br />
M94970<br />
1. Press roller bearing on end of input shaft.<br />
2. Slide gear on shaft and press remaining roller<br />
bearing on input shaft.<br />
Roller Bearing<br />
Gear<br />
Roller Bearing<br />
M78322<br />
M78329<br />
Shaft Nut<br />
Seal<br />
Shim (s)<br />
5. Install input shaft assembly in gear case through<br />
the back cover opening.<br />
6. Install shim(s) on input shaft. Install snap ring in<br />
gear housing. Gear case bearings should have no<br />
end play, no preload. Add or remove shims as<br />
necessary. If there is no end play, backlash should<br />
be within limits. If end play is measured, gear(s)<br />
are worn out of tolerance.<br />
NOTE: Bearing preload and gear backlash is<br />
determined by the thickness of shims required<br />
on input shaft. Gear case bearings should<br />
have no end play, no preload. Output shaft<br />
(jackshaft) should have a slight preload (less<br />
than 0.68 N•m (6.016 lb-in.). There should be a<br />
slight drag on the bearings and backlash<br />
should not exceed 0.2-0.4 mm (0.008 - 0.016<br />
in.).<br />
IMPORTANT: Put a coating of oil or grease on lips<br />
of oil seal to prevent damage during installation.<br />
Output Gear<br />
3. Press roller bearing on output gear.<br />
M78321<br />
7. Install input shaft seal in gear case (sprung lip<br />
towards gear case).<br />
8. Install spacer ring and seal in jackshaft tube<br />
housing (lip towards gear) and insert gear output<br />
shaft assembly in output jackshaft tube housing.<br />
IMPORTANT: Bolt torques are for fasteners as<br />
supplied lightly oiled or zinc plated. The given<br />
values can not be used if fasteners are greased.<br />
4. Slide gear assembly on output shaft and secure<br />
with shaft nut. Tighten to 260 N•m (192 lb-ft).<br />
5-16 6/25/99
ROTARY TILLERS<br />
ROTOR BEARING REPLACEMENT<br />
Shaft Nut<br />
Lock Washer<br />
O-Ring<br />
11. Install Chain tension cap screw and locknut and<br />
adjust, See “ROTOR BEARING REPLACEMENT”<br />
on page 17.<br />
23 Tooth<br />
Bevel Gear<br />
Bearing<br />
Seal<br />
Jackshaft<br />
Output<br />
Shaft<br />
Tube<br />
Jackshaft<br />
Snap Ring<br />
O-Ring<br />
Bearing<br />
NOTE: Oil leakage (mist) from hole in shaft is normal.<br />
Hole is a vent for chain case, if excessive,<br />
check chain case oil level for over full. Check<br />
gearbox seal in jackshaft housing tube for<br />
leakage.<br />
Specification:<br />
GearCaseMounting ........... 75N•m(55lb-ft)<br />
JackshaftTube.................48N•m(35lb-ft)<br />
ShaftNutBevelGear..........260N•m(192lb-ft)<br />
ShaftNutSprocket............300N•m(221lb-ft)<br />
FillerPipePlug................10N•m(89lb-in.)<br />
PTOClutchGuard ............12N•m(106lb-in.)<br />
Chain Case Oil Level (approx) . . . . . . 0.85 L (28 oz)<br />
Gear Oil Level (approx) . . . . . . . . . . .0.40 L (13.5 oz)<br />
Retaining Nut<br />
Chain Sprocket<br />
9tooth<br />
Lock Washer<br />
M94966<br />
9. Install jackshaft output gear assembly into gear<br />
case.<br />
10. Install eight cap screws holding jackshaft tube<br />
assembly to gear box case and tighten to 48 N•m<br />
(35 lb-ft).<br />
ROTOR BEARING REPLACEMENT<br />
1. Tip the tiller on its back so that tines are not in<br />
contact with the surface.<br />
Installation:<br />
1. Mount gear case and jackshaft assembly onto tiller<br />
frame.<br />
2. Install the four cap screws holding the gear box to<br />
the tiller frame and tighten to 75 N•m (55 lb-ft).<br />
3. Install the six cap screws holding the jackshaft tube<br />
housing to the tiller side frame and tighten to<br />
48 N•m (35 lb-ft).<br />
4. As an assembly, install the upper and lower chain<br />
sprockets and chain onto the jackshaft and rotor<br />
shaft.<br />
5. Install shaft nuts, wedge a board between the tines<br />
and tiller housing, and tighten to 300 N•m (221 lbft).<br />
6. Install chain case gasket and cover. Tighten cap<br />
screws to 48 N•m (35 lb-ft).<br />
7. Fill gear case to mark on dipstick with John Deere<br />
GL-5 ® Gear Oil-SAE 80W-90 or equivalent.<br />
8. Dipstick should be marked to indicate proper oil<br />
level, if not scribe a mark 11.1 mm (0.437 in.) from<br />
the end of the dipstick.<br />
9. Fill chain case with approximately 0.85 L (28 oz) of<br />
John Deere GL-5 ® Gear Oil-SAE 80W-90 or<br />
equivalent.<br />
10. Apply Loctite 592 pipe sealant with teflon to all pipe<br />
plugs. Tighten pipe plug to 10 N•m (89 lb-in.).<br />
2. Wedge a block of wood between the tines and the<br />
tiller housing. Remove the four cap screws (A)<br />
holding the rotor shaft assembly to the spindle.<br />
A<br />
M94960<br />
6/25/99 5-17
ROTOR BEARING REPLACEMENT<br />
ROTARY TILLERS<br />
8. Inspect both the O-ring (E) and the shaft seal (F) for<br />
wear or damage.<br />
9. Replace bearing, O-ring, and seal as needed.<br />
10. Assemble the idler bearing package in reverse<br />
order.<br />
B<br />
G<br />
I<br />
J<br />
H<br />
K<br />
M94971<br />
3. Remove the four carriage bolts (B) holding the rotor<br />
shaft and idler bearing package to the tiller<br />
housing.<br />
4. Slide rotor assembly out of tiller housing.<br />
D<br />
C<br />
M94972<br />
11. Remove the snap ring (G) holding the bearing in<br />
the tiller housing bore.<br />
12. Press the spindle (H) out of the bearing and<br />
housing.<br />
13. Press the bearing (I) and seal (J) from the inside<br />
out of the housing bore.<br />
14. Inspect both the O-ring (K) and the shaft seal (J) for<br />
wear or damage.<br />
15. Replace bearing, O-ring, and seal as needed.<br />
16. Assemble the spindle and bearing package in<br />
reverse order.<br />
M94967<br />
5. Remove the snap rings holding the bearing to the<br />
shaft (C) and the bearing into the bearing mount<br />
(D).<br />
6. Using a bearing puller, pull the bearing and<br />
mounting block off the shaft as an assembly.<br />
7. Press the bearing out of the mounting block.<br />
Specification:<br />
RotortoSpindle............... 75N•m(55lb-ft)<br />
IdlertoHousing................48N•m(35lb-ft)<br />
E<br />
F<br />
M94968<br />
5-18 6/25/99
POST HOLE DIGGER<br />
CONTENTS<br />
CONTENTS<br />
Page<br />
SPECIFICATIONS........................................... 3<br />
MODEL31BPOSTHOLEDIGGER......................................3<br />
TORQUESPECIFICATIONS............................................3<br />
OTHERMATERIALS..................................................3<br />
REPAIR................................................... 4<br />
GEAR CASE INSPECTION. . . . . . . . . . . . . . . . . . . . . . . . . . . . . . . . . . . . . . . . . . . . . 4<br />
GEARBOXREMOVALANDINSTALLATION...............................5<br />
GEAR BOX DISASSEMBLY . . . . . . . . . . . . . . . . . . . . . . . . . . . . . . . . . . . . . . . . . . . . 6<br />
GEARBOXASSEMBLY ...............................................9<br />
6/22/99 6-1
NOTES<br />
POST HOLE DIGGER<br />
6-2 6/22/99
POST HOLE DIGGER<br />
SPECIFICATIONS<br />
SPECIFICATIONS<br />
MODEL 31B POST HOLE DIGGER<br />
Dimensions:<br />
DriveType.........................................................PTO<br />
PTOrpm(maximum)..............................................540rpm<br />
Augerrpm(maximum) ............................................170rpm<br />
Backlash....................................0.1-0.56mm(0.004-0.022in.)<br />
Endplay.......................................................... none<br />
Capacity:<br />
GearCase....................................................1.9L(2qt)<br />
BoomHookLift(maximum)..................................567kg(1250lbs)<br />
TORQUE SPECIFICATIONS<br />
AugerBlades............................................. 70N•m(52lb-ft)<br />
AugerPoint...................................................HandTight<br />
AugerMountingCollar..................................... 110N•m(80lb-ft)<br />
YoketoBoom .......................................... 240N•m(175lb-ft)<br />
MountingPins.......................................... 240N•m(175lb-ft)<br />
LegStorage.............................................. 85N•m(62lb-ft)<br />
PTOSetscrew.......................................... 17N•m(156lb-in.)<br />
PTOSetscrewLockNut .................................... 27N•m(20lb-ft)<br />
PTOShearBolt......................................... 17N•m(156lb-in.)<br />
Shield/InputCoverMountingCapScrew ....................... 44N•m(33lb-ft)<br />
SupportStandBracketMountingCapScrew.................... 44N•m(33lb-ft)<br />
HandleMountingCapScrew............................... 25N•m(216lb-in.)<br />
HandleMountingU-Bolt .................................. 25N•m(216lb-in.)<br />
GearCaseTopCover...................................... 44N•m(33lb-ft)<br />
VentPlug.............................................. 18N•m(162lb-in.)<br />
DrainPlug............................................. 18N•m(162lb-in.)<br />
OTHER MATERIALS<br />
Number Name Use<br />
592 / TY9375 LOCTITE ® General Purpose Thread Sealant Seal pipe plugs<br />
John Deere Corn Head Lubricant NLGI Grade 0<br />
Case lubricant<br />
LOCTITE ® is a registered trademark of the Loctite Corp.<br />
6/22/99 6-3
REPAIR<br />
POST HOLE DIGGER<br />
REPAIR<br />
GEAR CASE INSPECTION<br />
Procedure:<br />
1. Inspect housing for cracks.<br />
2. Inspect bearings for wear.<br />
3. Inspect gears for chipped, worn or broken teeth.<br />
4. Inspect shafts for wear and straightness.<br />
5. Inspect bearing caps for wear or galling.<br />
6. Inspect end caps for cracks or distortion.<br />
7. Replace parts as required when assembling gear<br />
case.<br />
Cap Screw<br />
Breather<br />
Plug<br />
Lock Washer<br />
Cotter Pin<br />
Pivot Pin<br />
Shim Gasket(s)<br />
Housing Cap<br />
Bearing and Race<br />
Output Gear<br />
(35 teeth)<br />
Pipe Plug<br />
Shaft Key<br />
Gear Housing<br />
Output Shaft<br />
Bearing and Race<br />
Input Pinion<br />
(11 teeth)<br />
Bearing and Race<br />
Shaft Seal<br />
Shim Gasket(s)<br />
Input Cover<br />
Bearing and Race<br />
Shaft Seal<br />
Washer<br />
Lock Washer<br />
Cap Screw<br />
M99985<br />
6-4 6/22/99
POST HOLE DIGGER<br />
GEAR BOX REMOVAL AND INSTALLATION<br />
GEAR BOX REMOVAL AND<br />
INSTALLATION<br />
Removal:<br />
G<br />
K<br />
I<br />
A<br />
J<br />
H<br />
M99987<br />
6. Pivot the auger (G) outward while lowering the gear<br />
box (H) and boom (I) to the ground.<br />
7. Remove the two cap screws (J) securing the auger<br />
(G) to the gear box output shaft (K) and slide the<br />
auger off of the shaft.<br />
M99986<br />
1. Turn the PTO shaft until the shear bolt is aligned<br />
with the access hole (A) in the shield and remove<br />
the bolt.<br />
2. Turn the PTO shaft until the setscrew is aligned with<br />
the access hole in the shield, then loosen the jam<br />
nut and remove the setscrew.<br />
3. Remove the PTO shaft.<br />
L<br />
M<br />
E<br />
C<br />
F<br />
M99988<br />
8. Remove the cotter pin (L) from one end of the gear<br />
box pivot pin (M).<br />
B<br />
D<br />
M99989<br />
I<br />
4. Remove the U-bolt (B) and cap screw (C) holding<br />
the guide handle (D) to the support stand bracket<br />
(E).<br />
5. Using suitable lifting device, raise the gear box and<br />
auger assembly high enough to remove the<br />
support stands (F).<br />
M<br />
M99990<br />
6/22/99 6-5
GEAR BOX DISASSEMBLY<br />
POST HOLE DIGGER<br />
9. Lift slightly on the boom (I) and remove the gear box<br />
pivot pin (M).<br />
Installation is in reverse order of removal.<br />
GEAR BOX DISASSEMBLY<br />
1. Clean any dirt or debris from the outside of the gear<br />
box. Wash in solvent if needed.<br />
2. Place one of the auger coupler bolts in the hole<br />
closest to the gear box case and thread the nut on<br />
threetofourturns.<br />
This will prevent the output shaft assembly from<br />
falling out of the gear box case and grease being<br />
spilled out of the output shaft bore while pouring<br />
the grease out.<br />
J<br />
J<br />
A<br />
G<br />
M99991<br />
IMPORTANT: Never use bolts (J) that protrude from<br />
the auger (G) mounting collar. The bolt head and<br />
nut are to be recessed to provide a smooth<br />
surface.<br />
C<br />
B<br />
M99993<br />
IMPORTANT: When removing cover, be careful not<br />
to damage shims.<br />
O<br />
N<br />
P<br />
3. Remove the six cap screws (A) and lock washers<br />
securingthetopcover(B)tothecase(C).<br />
4. Carefully and evenly pry the cover up and off of the<br />
case. Use care not to damage the shim gaskets.<br />
5. Using a suitable container, pour out grease.<br />
M99992<br />
IMPORTANT: Be sure setscrew (N) and jam nut (O)<br />
as well as the shear bolt (P) are installed when<br />
attaching the PTO shaft to the gear box.<br />
Specifications:<br />
AugerMountingCollar .........110N•m(80lb-ft)<br />
PTOSetscrew................17N•m(156lb-in.)<br />
PTOSetscrewJamNut..........27N•m(20lb-ft)<br />
PTOShearBolt...............17N•m(156lb-in.)<br />
Handle Mounting Cap Screw. . . . 25 N•m (216 lb-in.)<br />
Handle Mounting U-Bolt . . . . . . . 25 N•m (216 lb-in.)<br />
C<br />
M99994<br />
6. With the grease removed, remove the bolt from the<br />
upper hole in the output shaft.<br />
E<br />
D<br />
6-6 6/22/99
POST HOLE DIGGER<br />
GEAR BOX DISASSEMBLY<br />
7. Remove the four cap screws (D) and lock washers<br />
securing the support stand bracket (E) to the gear<br />
case (C).<br />
I<br />
H<br />
M99996<br />
IMPORTANT: When removing cover, be careful not<br />
to damage shims.<br />
M99995<br />
10. Carefully and evenly pry the cover and shaft<br />
assembly (H) out and away from the case. Use<br />
care not to damage the shim gaskets (I).<br />
8. Pull the output shaft and gear assembly out of the<br />
gear case.<br />
J<br />
F<br />
M99998<br />
11. Clean any rust or scale off of the input shaft (J) and<br />
push the shaft to the inside and out of the cover.<br />
G<br />
M99997<br />
9. Remove the four cap screws (F), lock washers, and<br />
flat washers that secure the PTO shield (G) and<br />
the input shaft cover to the gear case.<br />
6/22/99 6-7
GEAR BOX DISASSEMBLY<br />
POST HOLE DIGGER<br />
M<br />
K<br />
MX0501<br />
M99999<br />
14. Press the output shaft seal (M) through and out of<br />
the gear case using a tool that will apply pressure<br />
to the outer edges of the seal.<br />
15. If the race is nicked or galled and needs to be<br />
replaced, use a small punch and carefully tap the<br />
race to the inside and out of the gear case similar<br />
tothemethodusedfortheinputcover.<br />
12. Press the input shaft seal (K) through and out of the<br />
cover using a tool that will apply pressure to the<br />
outer edges of the seal.<br />
O<br />
B<br />
L<br />
L<br />
MX0503<br />
MX0502<br />
13. If the race is nicked or galled and needs to be<br />
replaced, use a small punch and carefully tap the<br />
race (L) to the inside and out of the cover.<br />
16. If the bearing race (L) in the top cover (B) is<br />
damaged and needs to be replaced, Use a pry bar<br />
to lift the race evenly out of the bore.<br />
17. Use care not to damage the shims (O) used to<br />
control backlash.<br />
6-8 6/22/99
POST HOLE DIGGER<br />
GEAR BOX ASSEMBLY<br />
Q<br />
P<br />
R<br />
U<br />
V<br />
S<br />
MX0505<br />
18. Inspect the input shaft gear (P) for broken teeth or<br />
wear.<br />
19. Inspect the shaft surface (Q) were the shaft seal<br />
ridestobesuretherearenonicksorburrs.<br />
20. If the shaft or gear teeth are damaged, replace the<br />
input shaft.<br />
21. If the bearings need to be replaced, use a bearing<br />
splitter to separate the bearings from the input<br />
shaft.<br />
MX0504<br />
24.Ifthetopbearing(U)orgear(R)needtobe<br />
replaced, support the shoulder (V) of the gear in a<br />
press and press the gear and the bearing off the<br />
shaft as a set.<br />
25. Support the lower bearing (S) on the shoulder of<br />
the bearing and press it off of the shaft.<br />
R<br />
S<br />
GEAR BOX ASSEMBLY<br />
Procedure:<br />
1. Press the lower bearing onto the output shaft until<br />
firmly seated with the wide end of the taper on the<br />
bearing toward the seat.<br />
B<br />
MX0506<br />
22. Inspect the output shaft gear and bearing assembly<br />
for broken teeth or wear.<br />
23. Inspect the shaft surface where the shaft seal rides<br />
to be sure there are no nicks or burrs.<br />
T<br />
A<br />
C<br />
MX0508<br />
2. Press the gear (A) and top bearing (B) on to the<br />
output shaft (C) until firmly seated with the gear<br />
6/22/99 6-9
GEAR BOX ASSEMBLY<br />
POST HOLE DIGGER<br />
teeth facing down and the wide end of the taper on<br />
the bearing toward the gear.<br />
E<br />
D<br />
I<br />
H<br />
MX0509<br />
F<br />
MX0505<br />
6. Press the input shaft seal (I) into the cover (H) until<br />
flush with the outer surface.<br />
3. Press the bearings onto the input pinion shaft (D)<br />
until firmly seated.<br />
4. Be sure to place the large bearing (E) on the long<br />
shaft end and the small bearing (F) on the short<br />
shaft end of the input shaft.<br />
J<br />
K<br />
MX0501<br />
7. Press a new shaft seal (J) into the gear case (K)<br />
until flush to the inside edge of the case.<br />
8. If the bearing race was removed, press the race into<br />
the gear case from the inside until firmly seated.<br />
G<br />
M<br />
H<br />
MX0507<br />
5. Press bearing race (G) into input cover (H) until<br />
firmly seated.<br />
K<br />
L<br />
M99995<br />
6-10 6/22/99
POST HOLE DIGGER<br />
GEAR BOX ASSEMBLY<br />
9. Lightly coat the output shaft (L) with grease and<br />
slide the output shaft and gear assembly (M) in to<br />
the gear case (H). Use care not to damage the<br />
seal during installation.<br />
R<br />
O<br />
H<br />
M99996<br />
N<br />
M99994<br />
13.Placetheshimgasket(s)(R)onthecover(H)and<br />
insert the input shaft assembly in to the gear case.<br />
Rotate the shaft slightly during installation to align<br />
the teeth of the gears.<br />
10. Install the support stand bracket (N) and secure<br />
with the four cap screws and lock washers (O).<br />
11. Tighten the cap screws to 44 N•m (33 lb-ft).<br />
T<br />
P<br />
H<br />
Q<br />
S<br />
M99997<br />
MX0510<br />
12. Lightly coat the input shaft (P) with grease and slide<br />
the input shaft and gear assembly (Q) in to the<br />
cover (H). Use care not to damage the seal during<br />
installation.<br />
14. Install the PTO shield (S) over the input shaft cover<br />
and secure with the four cap screws, lock washers,<br />
and flat washers (T).<br />
15. Using an alternating pattern tighten the cap screws<br />
to 44 N•m (33 lb-ft).<br />
6/22/99 6-11
GEAR BOX ASSEMBLY<br />
POST HOLE DIGGER<br />
U<br />
W<br />
Spring Pin<br />
Dial Indicator<br />
X<br />
1/2-Inch<br />
Auger Drive Shaft<br />
V<br />
M78192<br />
MX0503<br />
16. Place the same number and thickness shims (U) in<br />
the bore for the race and press the race (V) in until<br />
it is firmly seated.<br />
17. Lightly coat the seal surface (W) with grease. Then<br />
coat each shim gasket with a light film of grease to<br />
help hold it in place and position them on the top<br />
cover (X).<br />
22. Hold the gearbox so it will not move, then place dial<br />
indicator 1⁄2 - inch above shaft and turn shaft<br />
back and forth. Backlash should be 0.1-0.25mm<br />
(0.004 - 0.010 in.). If tolerance is lower, add shims.<br />
If tolerance is greater, remove shims as required.<br />
23. Fill case with 1.9 L (2 qt) John Deere Corn Head<br />
Lubricant NLGI Grade 0.<br />
24. Apply Loctite 592 pipe sealant with teflon to pipe<br />
plug. Tighten pipe plug to 18 N•m (162 lb-in.).<br />
25. Install the gearbox in the reverse order of removal.<br />
See “GEAR BOX REMOVAL AND INSTALLATION”<br />
on page 5.<br />
Y<br />
<br />
CAUTION<br />
To prevent possible bodily injury, make sure the<br />
setscrew and jam nut is in place at the end of the<br />
PTO driven shaft.<br />
K<br />
M99993<br />
18. Set the top cover (X) in place on the gear case (K)<br />
and install six cap screws and lock washers (Y).<br />
19. Using an alternating pattern carefully tighten the<br />
cap screws to 20 N•m (15 lb-ft).<br />
20. Turn the input shaft back and forth to be sure it is<br />
not binding.<br />
21. Using an alternating pattern tighten to a final torque<br />
of 44 N•m (33 lb-ft).<br />
X<br />
After assembly and installation of the complete<br />
posthole digger, start the tractor and operate the digger<br />
for six minutes. Shut off the tractor; then check the<br />
digger for loose bolts, heated bearings, or other<br />
irregularities.<br />
Specifications:<br />
Shield/Input Cover . . . . . . . . . . . . . . 44 N•m (33 lb-ft)<br />
GearCaseTopCover............44N•m(33lb-ft)<br />
VentPlug....................18N•m(162lb-in.)<br />
DrainPlug...................18N•m(162lb-in.)<br />
Backlash.........0.1-0.25mm(0.004-0.010in.)<br />
GearCaseGreaseCapacity .......... 1.9L(2qt)<br />
6-12 6/22/99
BLADES<br />
CONTENTS<br />
CONTENTS<br />
Page<br />
SPECIFICATIONS........................................... 3<br />
TORQUESPECIFICATIONS............................................3<br />
OTHERMATERIALS..................................................3<br />
REPAIR................................................... 4<br />
74AND84ANGLECYLINDER..........................................4<br />
74AND84LIFTCYLINDER............................................4<br />
6/22/99 7-1
NOTES<br />
BLADES<br />
7-2 6/22/99
BLADES<br />
SPECIFICATIONS<br />
SPECIFICATIONS<br />
Models....................................................... 74and84<br />
Cutting Widths:<br />
Model 74 Moldboards . . . . . . . . . . . . . 137.2, 152.4 and 167.6 cm (54, 60 and 66 in.)<br />
Model84Moldboard.....................................213.4cm(84in.)<br />
Weight:<br />
54Inch........................................ 206-208kg(206-208lb)<br />
60Inch........................................ 212-214kg(468-473lb)<br />
66Inch........................................ 217-219kg(480-485lb)<br />
84Inch................................................. 328kg(725lb)<br />
Blade Height:<br />
Model74(withouttopextension) .......................... 457mm(18.0in.)<br />
Model84(withouttopextension) ......................... 501mm(19.75in.)<br />
TORQUE SPECIFICATIONS<br />
LiftCylinderLockNut ....................................<br />
272N·m(200lb-ft)<br />
OTHER MATERIALS<br />
Number Name Use<br />
271 / TY9371 LOCTITE ® High Strength Thread Sealant Lift cylinder lock nuts<br />
M79292 MPG-2 ® Multipurpose EP Grease Shaft and bearing lubrication<br />
LOCTITE ® is a registered trademark of the Loctite Corp.<br />
6/22/99 7-3
REPAIR<br />
BLADES<br />
REPAIR<br />
74 AND 84 ANGLE CYLINDER<br />
1. Inspect piston rod for straightness.<br />
2. Replace all seals and rod wiper. Lubricate all parts<br />
in hydraulic oil before assembly.<br />
74AND84LIFTCYLINDER<br />
1. Inspect piston rod for straightness.<br />
2. Replace all seals, O-rings, backup rings and rod<br />
wiper. Lubricate all parts in hydraulic oil before<br />
assembly.<br />
Apply Loctite #271 to lock nut and tighten to 272 N·m<br />
(200 lb-ft).<br />
3. Pressure test at 20 684 kPa (3000 psi) for leakage.<br />
IMPORTANT: When assembling the gland into the<br />
assembly, use care not to cut the O-ring on the<br />
groove for the retaining ring.<br />
ANGLE CYLINDER<br />
Cylinder<br />
Retainer<br />
Seal<br />
Piston<br />
Rod<br />
Piston<br />
Seal<br />
Retainer<br />
M78238<br />
LIFT CYLINDER<br />
Gland Nut<br />
Back-up Ring<br />
O-Ring<br />
Back-up Ring<br />
Piston<br />
O-Ring<br />
O-Ring<br />
Back-up Ring<br />
Gland<br />
O-Ring<br />
Rod Wiper<br />
Retainer<br />
Rod<br />
M78239<br />
7-4 6/22/99
ROTARY BROOMS<br />
CONTENTS<br />
CONTENTS<br />
Page<br />
SPECIFICATIONS........................................... 3<br />
TORQUESPECIFICATIONS............................................3<br />
OTHERMATERIALS..................................................3<br />
COMPONENTLOCATION.................................... 4<br />
MOUNTINGCOMPONENTS–26BROOM................................4<br />
BRUSH ASSEMBLY – 26 BROOM . . . . . . . . . . . . . . . . . . . . . . . . . . . . . . . . . . . . . . . 5<br />
BRUSH ASSEMBLY – 51 BROOM . . . . . . . . . . . . . . . . . . . . . . . . . . . . . . . . . . . . . . . 6<br />
GEARBOX–51BROOM..............................................7<br />
TESTSANDADJUSTMENTS ................................. 8<br />
26DRIVECHAINADJUSTMENT........................................8<br />
REPAIR................................................... 8<br />
26GEARBOXREMOVALANDINSTALLATION.............................8<br />
26 GEAR BOX DISASSEMBLY AND ASSEMBLY. . . . . . . . . . . . . . . . . . . . . . . . . . . 15<br />
BRUSH BEARING REPLACEMENT . . . . . . . . . . . . . . . . . . . . . . . . . . . . . . . . . . . . . 18<br />
26 PTO MOUNTING BRACKET DISASSEMBLY AND ASSEMBLY . . . . . . . . . . . . . 22<br />
6/30/99 8-1
NOTES<br />
ROTARY BROOMS<br />
8-2 6/30/99
ROTARY BROOMS<br />
SPECIFICATIONS<br />
SPECIFICATIONS<br />
Models................................................... 51-Inchand26<br />
Dimensions:<br />
51-InchBroomDiameter...................................45.7cm(18in.)<br />
51-InchBroomClearingWidth .............................129.5cm(51in.)<br />
Model26BroomDiameter .................................66.0cm(26in.)<br />
Model26BroomClearingWidth............................144.8cm(57in.)<br />
GearBoxBacklash.............................0.2-0.6mm(0.008-0.023in.)<br />
InputShaftEndplay..................................................zero<br />
TORQUE SPECIFICATIONS<br />
BearingFlanges .......................................15.5N•m(138lb-in.)<br />
BearingSetScrews.....................................11.5N•m(102lb-in.)<br />
BreatherPlug ........................................... 10N•m(90lb-in.)<br />
BrushRetainerPlate....................................11.5N•m(102lb-in.)<br />
ChainAdjusterJamNut .................................15.5N•m(138lb-in.)<br />
ChainCaseCover......................................11.5N•m(102lb-in.)<br />
DrainPlug............................................. 18N•m(160lb-in.)<br />
GearBoxMounting...................................... 27N•m(240lb-in.)<br />
GearCaseCovers....................................... 24N•m(216lb-in.)<br />
MountingBracket ....................................... 27N•m(240lb-in.)<br />
PivotBushingRetainer..................................11.5N•m(102lb-in.)<br />
PivotRollerCapScrews.................................11.5N•m(102lb-in.)<br />
PTOShearBolt..........................................4.5N•m(53lb-in.)<br />
SprocketSetScrews....................................11.5N•m(102lb-in.)<br />
SprocketHubSetScrews................................15.5N•m(138lb-in.)<br />
SupportStand.........................................15.5N•m(138lb-in.)<br />
OTHER MATERIALS<br />
Number Name Use<br />
592 / TY9375 LOCTITE ® General Purpose Thread Sealant Seal pipe plugs<br />
M79292 MPG-2 ® Multipurpose EP Grease Shaft and bearing lubrication<br />
John Deere GL-5 Oil<br />
Gear box lubricant<br />
LOCTITE ® is a registered trademark of the Loctite Corp.<br />
MPG-2 ® is a registered trademark of DuBois USA.<br />
6/30/99 8-3
COMPONENT LOCATION<br />
ROTARY BROOMS<br />
COMPONENT LOCATION<br />
MOUNTING COMPONENTS – 26 BROOM<br />
PTO Drive<br />
Shaft<br />
Clevis Pin<br />
Lift Cylinder<br />
Mounting Latch<br />
Hairpin<br />
Cap Screw<br />
Hairpin<br />
Clevis Pin<br />
Hairpin<br />
Clevis Pin<br />
Mounting Frame<br />
Weldment<br />
Coupler Cap<br />
Swing Cylinder<br />
Grease Fitting<br />
Pivot Box<br />
Weldment<br />
Hydraulic Hose<br />
Coupler Cap<br />
Clevis Pin<br />
Clevis Pin<br />
Cotter Pin<br />
Hydraulic Hose<br />
M99670<br />
Pivot Tube and<br />
Caster Weldment<br />
Grease<br />
Fitting<br />
Spacer<br />
Flanged<br />
Bearing<br />
Lynch Pin<br />
Nylock Nut<br />
Roller<br />
Shoulder<br />
Bolt<br />
Gear Box<br />
Flanged<br />
Bearing<br />
Spacer<br />
Lock Washer<br />
Spindle<br />
Cap Screw<br />
Shear Bolt<br />
Axle Bolt<br />
Nylock Nut<br />
Axle Bushing<br />
Caster<br />
M99671<br />
8-4 6/30/99
ROTARY BROOMS<br />
COMPONENT LOCATION<br />
BRUSH ASSEMBLY – 26 BROOM<br />
Key<br />
0.25x0.25x2.0in.<br />
Retaining Ring<br />
Drive Shaft Shield<br />
Drive Shaft<br />
Set<br />
Screw<br />
Sprocket<br />
11 Tooth<br />
Bearing<br />
Flange<br />
Retaining<br />
Ring<br />
Spacer<br />
Washer<br />
Bearing<br />
Broom Frame<br />
Brush<br />
Adjustment<br />
Screw<br />
Brush<br />
Adjustment<br />
Knob<br />
Hair Pin<br />
Pivot<br />
Bushing<br />
Stand Tube<br />
Clevis Pin<br />
Bushing<br />
Retainer<br />
Plate<br />
Bearing<br />
Bearing<br />
Flange<br />
Stand Holder<br />
Bearing<br />
#50 Chain<br />
Idler Slide<br />
Chain Guide<br />
Tapered<br />
Hub<br />
Sprocket<br />
36 Tooth<br />
Bearing<br />
Flange<br />
Hair Pin<br />
Spacer<br />
Washer<br />
Brush<br />
Retainer<br />
Plate<br />
Brush<br />
Chain<br />
Cover<br />
Brush Core<br />
Weldment<br />
Adjustment<br />
Bolt<br />
Key<br />
0.25x0.25x1.0in.<br />
Retaining<br />
Ring<br />
M99721<br />
6/30/99 8-5
COMPONENT LOCATION<br />
ROTARY BROOMS<br />
BRUSH ASSEMBLY – 51 BROOM<br />
Cap Screw<br />
Flange Housing<br />
Ball Bearing<br />
Flange Housing<br />
Locking Collar<br />
Lock Washer<br />
Nut<br />
Frame<br />
Bushing<br />
Fork<br />
Lock Pin<br />
Lock Nut<br />
Bolt<br />
Ball Bearing<br />
Flange Housing<br />
Flange<br />
Housing<br />
Locking Collar<br />
Locking Washer<br />
Nut<br />
Cap Screw<br />
Lock Nut<br />
Cap Screw<br />
Cap Screw<br />
Gear Box<br />
Bushing<br />
Shaft<br />
Wheel<br />
Lock Nut<br />
Cap Screw<br />
Key<br />
Plate<br />
Nut<br />
Lock Washer<br />
Stand<br />
Lock Nut<br />
Brush<br />
Retainer<br />
Plate<br />
Pin<br />
Cap Screw<br />
Lock Nut<br />
Brush Core<br />
Weldment<br />
Cap Screw<br />
Brush<br />
Retainer<br />
Plate<br />
Brush<br />
Spacer<br />
Brush<br />
8-6 6/30/99
ROTARY BROOMS<br />
COMPONENT LOCATION<br />
GEAR BOX – 51 BROOM<br />
Shim<br />
Bearing Cone<br />
Bearing Cup<br />
Shaft<br />
Snap Ring Shim<br />
Seal<br />
Bearing Cup<br />
Bearing Cone<br />
Seal<br />
Snap RIng<br />
Pressure Relief Fitting<br />
Snap Ring<br />
Plug<br />
Pipe Plug<br />
Snap Ring<br />
Seal<br />
Sleeve<br />
Shim<br />
Bearing Cup<br />
Bearing Cone<br />
Thrust Washer<br />
Gear<br />
Thrust Washer<br />
Bearing Cone<br />
Key<br />
Bearing Cup<br />
Shim<br />
Gasket<br />
Lock Washer<br />
Cover<br />
Cap Screw<br />
6/30/99 8-7
TESTS AND ADJUSTMENTS<br />
ROTARY BROOMS<br />
TESTS AND ADJUSTMENTS<br />
26 DRIVE CHAIN ADJUSTMENT<br />
Purpose:<br />
The drive chain should be tensioned periodically to<br />
compensate for wear.<br />
Procedure:<br />
1. Place the broom on a hard level surface on the<br />
support stands so that the bristles are not in<br />
contact with the surface.<br />
REPAIR<br />
26 GEAR BOX REMOVAL AND<br />
INSTALLATION<br />
Removal:<br />
1. Position the broom on a level surface. Set support<br />
stands.<br />
C<br />
A<br />
B<br />
M99646<br />
Area Enlarged<br />
Below<br />
M99636<br />
2. Mark and remove the base end (A) and rod end (B)<br />
hydraulic hoses from the from the swing cylinder<br />
(C). Plug the cylinder ports and cap the hose end<br />
to prevent dirt from entering the ports.<br />
E<br />
A<br />
C<br />
B<br />
M99637<br />
2. Loosen jam nut (A).<br />
3. Tighten adjustment bolt (B) by hand until tight.<br />
4. Loosen the adjustment bolt 6-8 turns.<br />
5. Hold adjustment bolt in place and tighten jam nut<br />
and tighten to 15.5 N•m (138 lb-in.).<br />
D<br />
M99647<br />
3. Remove the retaining ring (D) and clevis pin (E)<br />
from the base end of the swing cylinder (C).<br />
Specification:<br />
JamNut...................<br />
15.5N•m(138lb-in.)<br />
8-8 6/30/99
ROTARY BROOMS<br />
REPAIR<br />
F<br />
8. Center the pivot box (K) on the pivot tube (L) so that<br />
the extension from the ratchet wrench will allow<br />
access to the drive shaft shear bolt (M).<br />
9. Remove the shear bolt and slide the drive shaft (N)<br />
off of the gear box input shaft.<br />
10. Remove the two pivot retaining bolts (O) and slide<br />
the pivot box (K) off of the pivot tube (L).<br />
Q<br />
G<br />
H<br />
M99635<br />
Q<br />
4. Remove the cotter pins from the upper (F) and<br />
lower (G) swing hinge pins.<br />
5. While lifting up on the mounting frame weldment (H)<br />
removetheupperandlowerswinghingepins.<br />
6. Slide the mounting frame weldment off of the drive<br />
shaft and swing cylinder.<br />
P<br />
R<br />
M99636<br />
C<br />
J<br />
11. Loosen the chain adjustment bolt (P).<br />
12.Removethesixchaincasecovercapscrews(Q)<br />
and remove the chain case cover (R).<br />
I<br />
M99648<br />
S<br />
7. Remove the retaining ring (I) and clevis pin (J) from<br />
therodendoftheswingcylinder(C).<br />
T<br />
M<br />
M99651<br />
O<br />
O<br />
13. Remove the chain tensioner slide block (S).<br />
14. Center the chain connector link (T) on the bottom<br />
span between the two gears.<br />
15. Remove the connector link and chain assembly.<br />
N<br />
L<br />
K<br />
M99649<br />
6/30/99 8-9
REPAIR<br />
ROTARY BROOMS<br />
Y<br />
AC<br />
X<br />
V<br />
AB<br />
M99659<br />
U<br />
M99650<br />
16. Remove the retaining ring (U) from the end of the<br />
output shaft.<br />
17. Loosen the two set screws (V) and remove the<br />
drive sprocket (W), key (X) and spacer washer (Y).<br />
W<br />
20. Mark the location (AB) of the sheet metal screw<br />
(AC) on both pieces of the output shaft guard for<br />
installation later.<br />
21. Remove the sheet metal screw and slide the two<br />
pieces together for clearance during removal.<br />
AF<br />
AD<br />
AE<br />
Z<br />
AG<br />
M99661<br />
M99652<br />
18. Remove the retaining ring (Z) from the gear box<br />
end of the output shaft.<br />
AA<br />
22. Pull the output shaft (AD) completely out of the<br />
bearing (AE).<br />
23. Remove the three carriage bolts (AF) holding the<br />
bearing flange (AG) and bearing in place.<br />
AI<br />
AH<br />
Drive Out<br />
M99663<br />
M99658<br />
19. Using a brass punch, drive the output shaft (AA)<br />
out of the gear box.<br />
24. Remove both pivot bushing retainers (AH) and the<br />
pivot bushings (AI).<br />
25. Remove the clevis pin holding the broom<br />
adjustment weldment to the brush shroud.<br />
26. Remove the caster and pivot tube weldment away<br />
from and off of the broom frame.<br />
8-10 6/30/99
ROTARY BROOMS<br />
REPAIR<br />
AK<br />
AJ<br />
AL<br />
M99660<br />
2. Install the eight cap screws (A) and tighten to 27<br />
N•m (240 lb-in.).<br />
3. Position gear box level and refill the gear box with<br />
JohnDeereGL-5gearoiltodrainpluglevel.<br />
4. Apply Loctite 592 pipe sealant with teflon to the<br />
threads and install the drain plug (B) to 18 N•m<br />
(160 lb-in.) and the breather (C) to 10 N•m (90 lbin.).<br />
5. Place the caster and pivot tube weldment into the<br />
broom frame.<br />
27. Remove the drain plug (AJ) from the back of the<br />
gear box and tip the assembly back and drain the<br />
gear oil out of the gear box.<br />
28. Remove the breather plug (AK) from the top of the<br />
gear box.<br />
29. Remove the eight cap screws (AL) (four on top and<br />
four on the bottom) holding the gear box into the<br />
pivot tube weldment.<br />
D<br />
F<br />
E<br />
M99663<br />
6. Align the pivot holes and insert the pivot bushings<br />
(D).<br />
7. Position the bushing retainers (E) into the bushing<br />
grooves (F). Secure with M6 cap screw and tighten<br />
to 11.5 N•m (102 lb-in.).<br />
8. Install the broom adjustment weldment and fasten<br />
with clevis pin and hair pin.<br />
Bearing Flange<br />
Bearing Flange<br />
M99662<br />
30. Pull the gear box out the back of the pivot tube<br />
weldment.<br />
Bearing<br />
Installation:<br />
1. Slide the gear box into the pivot tube weldment.<br />
B<br />
M99664<br />
C<br />
A<br />
9. Install the bearing and bearing flange into the<br />
broom frame with the bearing sleeve to the inside<br />
of the broom frame.<br />
M99660<br />
6/30/99 8-11
REPAIR<br />
ROTARY BROOMS<br />
retaining ring groove (K).<br />
I<br />
G<br />
H<br />
J<br />
M<br />
L<br />
M99661<br />
10. Install the three carriage bolts (G) finger tight until<br />
after the output shaft (H) is installed in the gear<br />
box.<br />
11. Position the output shaft guard (I) in place between<br />
the pivot bushing and the outer bearing.<br />
M99652<br />
14. Rotate the shaft until the keyway (L) is aligned and<br />
install the 6.35mmx6.35mmx50.8mm<br />
(0.25in.x0.25in.x2.0in.)key into the keyway.<br />
15. Install the retaining ring (M) and then tap the shaft<br />
(J)backtothegearboxuntiltheretainingringis<br />
lightly seated against the bearing.<br />
J<br />
In<br />
O<br />
P<br />
M99665<br />
N<br />
M99659<br />
12. Slide the longer machined end of the output shaft<br />
(J) into the bearing and thought the guard and into<br />
the gear box.<br />
16. Using the marks created earlier (N), align the screw<br />
hole in the shaft guard and securely install the<br />
sheet metal screw (O).<br />
17. Tighten the three nuts (P) for the bearing flange<br />
carriage bolts to 15.5 N•m (138 lb-in.).<br />
J<br />
K<br />
Q<br />
S<br />
M99658<br />
13. Insert the output shaft (J) into the gear box until it is<br />
through the gear box far enough to clear the<br />
T<br />
R<br />
M99650<br />
8-12 6/30/99
ROTARY BROOMS<br />
REPAIR<br />
18. Slide the spacer washer (Q) and drive sprocket (R)<br />
onto the shaft.<br />
19. Insert the 6.35 mm x 6.35 mm x 25.4 mm<br />
(0.25in.x0.25in.x1.0in.)key (S) into the<br />
keyway.<br />
20. Install the retaining ring (T) onto the output shaft.<br />
AA<br />
Q<br />
AA<br />
Y<br />
Z<br />
M99636<br />
R<br />
M99666<br />
21. Position the sprocket (R) and washer (Q) against<br />
the bearing and tighten the set screws (U) to 11.5<br />
N•m (102 lb-in.).<br />
U<br />
25. Install the chain case cover (Y). While positioning<br />
the chain case cover, guide the outer pivot of the<br />
chain tensioner slide block into the pivot hole (Z) in<br />
the cover.<br />
26. Tighten the six M6 cap screws (AA) to 11.5 N•m<br />
(102 lb-in.).<br />
27. Adjust the chain tension. See “26 DRIVE CHAIN<br />
ADJUSTMENT”onpage8.<br />
X<br />
AB<br />
W<br />
V<br />
AC<br />
M99669<br />
M99651<br />
22. Wrap the chain around both sprockets being sure<br />
that the teeth are fully engaged.<br />
23. Pull the slack in the chain to the bottom center of<br />
the chain and install the chain connector link (V).<br />
24. Position the chain tensioner slide block (W) under<br />
the chain and into the inner pivot hole (X).<br />
28. Coat the inner surface (AB) of the pivot box (AC)<br />
with a light layer of MOLY HIGH TEMPERATURE<br />
EP GREASE.<br />
6/30/99 8-13
REPAIR<br />
ROTARY BROOMS<br />
32. Slide the yoke onto the input shaft of the gear box<br />
until the shear bolt is aligned with and will fit<br />
through the retaining hole.<br />
33. Install the nylock nut and tighten to 4.5 N•m<br />
(53 lb-in.).<br />
AE<br />
AC<br />
AI<br />
AJ<br />
AD<br />
M99667<br />
AK<br />
M99648<br />
29. Slide the pivot box (AC) over the pivot tube (AD)<br />
and secure with the two shoulder bolt and roller<br />
assemblies (AE). Tighten to 11.5 N•m (102 lb-in.).<br />
34. Install the swing cylinder rod end (AI) and clevis pin<br />
(AJ). Secure with retaining ring (AK).<br />
AF<br />
AM<br />
AH<br />
AG<br />
M99668<br />
30. Lightly coat the input shaft (AF) of the gear box with<br />
a thin layer of Moly High Temperature EP Grease.<br />
31. Insert the shear bolt (AG) into the drive shaft yoke<br />
(AH) until flush on the inside bore.<br />
AH<br />
AG<br />
AN<br />
AL<br />
M99635<br />
35. Slide the mounting frame weldment (AL) over the<br />
drive shaft and swing cylinder.<br />
36. Hold the mounting frame weldment into position<br />
and install the upper (AM) and lower (AN) swing<br />
hinge pins. Secure with new cotter pins.<br />
M99649<br />
8-14 6/30/99
ROTARY BROOMS<br />
REPAIR<br />
AP<br />
AO<br />
26 GEAR BOX DISASSEMBLY AND<br />
ASSEMBLY<br />
Disassembly:<br />
1. Remove the gear box from the broom frame. See<br />
“26 GEAR BOX REMOVAL AND INSTALLATION”<br />
on page 8.<br />
AQ<br />
B<br />
M99647<br />
A<br />
37. Install the clevis pin (AO) for the base (AP) of the<br />
swing cylinder and secure with retaining ring (AQ).<br />
M99692<br />
2. Remove the four cap screws (A) holding the input<br />
shaft cover assembly (B) to the gear case.<br />
D<br />
AS<br />
AT<br />
M99646<br />
38. Using the marking created earlier, install the base<br />
end hose (AS) and the rod end hose (AT) into the<br />
swing cylinder.<br />
C<br />
Specifications:<br />
Gear Box Mounting . . . . . . . . . . . 27 N•m (240 lb-in.)<br />
DrainPlug...................18N•m(160lb-in.)<br />
BreatherPlug.................10N•m(90lb-in.)<br />
Pivot Bushing Retainer . . . . . . 11.5 N•m (102 lb-in.)<br />
BearingFlanges............ 15.5N•m(138lb-in.)<br />
Sprocket Set Screws . . . . . . . . 11.5 N•m (102 lb-in.)<br />
ChainCaseCover .......... 11.5N•m(102lb-in.)<br />
Pivot Roller Cap Screws . . . . . 11.5 N•m (102 lb-in.)<br />
ShearBolt................... 4.5N•m(53lb-in.)<br />
E<br />
M99693<br />
3. Lift the input shaft cover assembly out of the gear<br />
case.<br />
4. Inspect the bevel gear (C) for chipped or damaged<br />
teeth.<br />
5. Check the gasket (D) and O-ring (E) for damage.<br />
6. Turn the shaft and check the bearing for smooth<br />
operation.<br />
7. If needed, place the cover in a press and press the<br />
bearing and shaft assembly out of the cover.<br />
Support the cover on the inner casting ridge (F)<br />
F<br />
6/30/99 8-15
REPAIR<br />
ROTARY BROOMS<br />
and not on the mounting flange. Press carefully on<br />
the end of the shaft and press the bearing to the<br />
inside of the cover.<br />
G<br />
the gear case.<br />
13. Inspect the bevel gear for chipped or damaged<br />
teeth.<br />
14. Turn the shaft and check the bearing for smooth<br />
operation.<br />
15. Check the bearing race (M) in the cover for nicks or<br />
scoring.<br />
N<br />
M99693<br />
M99694<br />
8. Remove the inner and outer retaining rings (G) from<br />
the input shaft and press the input shaft out of the<br />
bearing. Support the bearing by the inner race<br />
while pressing the shaft out.<br />
9. Remove the four cap screws holding the right side<br />
output shaft cover to the gear case.<br />
10. Pull cover off of gear case.<br />
I<br />
H<br />
16.Usingabearingsplittertosupportthebearings(N),<br />
press the shaft out of the bearing.<br />
17. When replacing the bearings, press new bearing<br />
onto the output shaft until firmly seated against the<br />
bearing seat.<br />
N<br />
M99696<br />
Assembly:<br />
J<br />
IMPORTANT: Put a coating of oil or grease on lips<br />
of oil seal and O-rings to prevent damage during<br />
installation.<br />
K<br />
M99697<br />
B<br />
11. Inspect the shaft seal (H), O-ring (I), gasket (J), and<br />
bearing race (K) for damage. Replace as needed.<br />
M<br />
A<br />
M99698<br />
L<br />
M99698<br />
18. Install the output shaft (A) into the gear case until<br />
the oil seal is properly around the shaft and the<br />
bearing is firmly seated into the bearing race (B).<br />
12. Pull the cross shaft and bearing assemble (L) out of<br />
8-16 6/30/99
ROTARY BROOMS<br />
REPAIR<br />
D<br />
23. Install the gasket shim(s) (F) and O-ring (G) on the<br />
input shaft cover.<br />
24. Install the input shaft cover assembly. While<br />
installing the cover assembly it may be necessary<br />
to turn the input shaft so that the gears will<br />
properly mess and allow the cover to be fully<br />
seated.<br />
25. Install the four cap screws and tighten to 24 N•m<br />
(216 lb-in.)<br />
26. Check the input shaft for end play and backlash.<br />
C<br />
M99697<br />
19. Install gasket shim(s) (C) and O-ring (D) on both<br />
output shaft covers. Gear case bearings should<br />
have no end play, no preload. Add or remove<br />
shims as necessary. If there is no end play,<br />
backlash should be within limits.<br />
20. Install the four cap screws on each cover and<br />
tighten to 24 N•m (216 lb-in.)<br />
NOTE: Bearing preload and gear backlash is<br />
determined by the thickness of shims required<br />
on the covers. Gear case bearings should have<br />
no end play, no preload. There should be a<br />
slight drag on the bearings and backlash<br />
should not exceed 0.2-0.6 mm (0.008 - 0.023<br />
in.).<br />
Pin<br />
Dial Indicator<br />
E<br />
1/2-Inch<br />
M99693<br />
M99694<br />
Shaft<br />
M78192<br />
21. Press the bearing into the input shaft cover until it is<br />
firmly seated against the bearing shoulder.<br />
22. Press the input shaft into the bearing until it is firmly<br />
seated against the shoulder and install the<br />
retaining rings (E).<br />
F<br />
27. To check backlash hold the gearbox so it will not<br />
move, then place dial indicator 1⁄2 inchabove<br />
shaft and turn shaft back and forth.<br />
IMPORTANT: Put a coating of oil or grease on lips<br />
of oil seal to prevent damage during installation.<br />
28. Install input shaft seal in gear case (sprung lip<br />
towards gear case).<br />
29. Install the gear box into the broom pivot and caster<br />
frame weldment. See “26 GEAR BOX REMOVAL<br />
AND INSTALLATION” on page 8.<br />
G<br />
M99693<br />
Specification:<br />
Backlash..........0.2-0.6mm(0.008-0.023in.)<br />
Endplay.................................zero<br />
GearCaseCovers ............24N•m(216lb-in.)<br />
6/30/99 8-17
REPAIR<br />
ROTARY BROOMS<br />
BRUSH BEARING REPLACEMENT<br />
Disassembly:<br />
3. Remove the six chain case cover M6 cap screws<br />
(C) and remove the chain case cover (D).<br />
A<br />
E<br />
B<br />
RH Side<br />
M99636<br />
F<br />
M99651<br />
4. Remove the chain tensioner slide block (E).<br />
5. Center the chain connector link (F) on the bottom<br />
span between the two gears.<br />
6. Remove the connector link and chain assembly.<br />
I<br />
A<br />
J<br />
LH Side<br />
M99702<br />
K<br />
H<br />
1. Place the broom on a hard level surface on the<br />
support stands (A) so that the bristles are not in<br />
contact with the surface.<br />
2. Loosen the chain adjustment bolt (B).<br />
H<br />
G<br />
M99705<br />
C<br />
7. Remove the retaining ring (G) and two set screws<br />
(H) holding the brush sprocket (I) to the sprocket<br />
hub (J).<br />
C<br />
D<br />
M99636<br />
8-18 6/30/99
ROTARY BROOMS<br />
REPAIR<br />
I<br />
K<br />
N<br />
O<br />
M99706<br />
J<br />
M99703<br />
8. Screw one of the set screws into the separator hole<br />
(K) on the sprocket (I) and sprocket hub (J). This<br />
will push the sprocket off of the sprocket hub.<br />
11. Remove the three carriage bolts (N) holding the<br />
chain side broom bearing and mounting flange to<br />
the frame.<br />
12. Loosen the two set screws securing (O) the bearing<br />
to the broom shaft.<br />
Q<br />
L<br />
P<br />
M<br />
M99704<br />
9. Place a block under the frame on the chain side of<br />
the broom to support the broom frame when the<br />
support stand is removed.<br />
10. Remove the two carriage bolt (L) mounting the<br />
support stand (M) to the frame.<br />
M99708<br />
13. On the idler side of the broom, loosen the two set<br />
screws (P) holding the broom shaft to the bearing.<br />
14. Remove the two carriage bolts (Q) holding the<br />
bearing assembly to the frame.<br />
6/30/99 8-19
REPAIR<br />
ROTARY BROOMS<br />
C<br />
B<br />
D<br />
M99712<br />
M99711<br />
15. Lift the drive side of the broom out of the frame and<br />
remove the bearing and bearing flanges.<br />
3. Install the drive side bearing and bearing flange<br />
assembly (B) with the bearing collar (C) toward the<br />
brushes (D).<br />
Assembly:<br />
E<br />
G<br />
A<br />
F<br />
M99706<br />
M99710<br />
1. Install the idler side bearing and bearing flanges (A)<br />
finger tight.<br />
2. Insert the idler end of the broom shaft into the idler<br />
side bearing and slide through until it contacts the<br />
shaft shoulder.<br />
4. Lift the broom weldment and bearing package into<br />
the frame and install the three bearing flange<br />
carriage bolts (E) and tighten to 15.5 N•m<br />
(138 lb-in.).<br />
5. Slide the broom assembly so that it is tight against<br />
the drive side bearing (F) and tighten the two set<br />
screws (G) to 11.5 N•m (102 lb-in.).<br />
6. Tighten the carriage bolts on the idler side bearing<br />
flange to 15.5 N•m (138 lb-in.).<br />
7. Center the idler side shaft in the bearing and tighten<br />
the idler side set screws to 11.5 N•m<br />
(102 lb-in.).<br />
8-20 6/30/99
ROTARY BROOMS<br />
REPAIR<br />
K<br />
L<br />
J<br />
I<br />
R<br />
Q<br />
P<br />
H<br />
M99704<br />
8. Install the drive side support stand (H) and tighten<br />
the two carriage bolts (I) to 15.5 N•m (138 lb-in.).<br />
9. Slide the spacer washer (J), sprocket (K) and<br />
sprocket hub (L) onto the broom shaft.<br />
M99651<br />
13. Wrap the chain around both sprockets being sure<br />
that the teeth are fully engaged.<br />
14. Pull the slack in the chain to the bottom center of<br />
the chain and install the chain connector link (P).<br />
15. Position the chain tensioner slide block (Q) under<br />
the chain and into the inner pivot hole (R).<br />
K<br />
L<br />
M<br />
U<br />
O<br />
O<br />
U<br />
S<br />
N<br />
M99705<br />
T<br />
M99636<br />
10. Align the keyway slots (M) and install the key.<br />
11. With the sprocket hub pushed tight against the<br />
bearing, install the retaining ring (N) and set<br />
screws (O).<br />
12. The set screws will pull the sprocket (K) onto the<br />
sprocket hub (L). While the sprocket is pulling<br />
tighter onto the sprocket hub, the sprocket hub is<br />
also being tightened around the shaft.<br />
16. Install the chain case cover (S). While positioning<br />
the chain case cover, guide the outer pivot of the<br />
chain tensioner slide block into the pivot (T) hole in<br />
the cover.<br />
17. Tighten the six M6 cap screws (U) to 11.5 N•m<br />
(102 lb-in.).<br />
18. Adjust the chain tension. See “26 DRIVE CHAIN<br />
ADJUSTMENT”onpage8.<br />
Specifications:<br />
BrushRetainerPlate........ 11.5N•m(102lb-in.)<br />
BearingFlanges............ 15.5N•m(138lb-in.)<br />
SprocketSetScrews........ 11.5N•m(102lb-in.)<br />
SupportStand ............. 15.5N•m(138lb-in.)<br />
Sprocket Hub Set Screws . . . . 15.5 N•m (138 lb-in.)<br />
Chain Case Cover . . . . . . . . . . 11.5 N•m (102 lb-in.)<br />
6/30/99 8-21
REPAIR<br />
ROTARY BROOMS<br />
26 PTO MOUNTING BRACKET<br />
DISASSEMBLY AND ASSEMBLY<br />
I<br />
Disassembly:<br />
A<br />
G<br />
H<br />
C<br />
I<br />
M99715<br />
B<br />
1. Pull the locking collar (A) back and hold while<br />
sliding the PTO drive shaft (B) off of the front<br />
mount transfer shaft (C).<br />
F<br />
M99714<br />
4. Loosen the set screw (G) on each bearing lock<br />
collar. Twist the bearing lock collar about a quarter<br />
turn and slide to the middle of the shaft.<br />
5. Remove the transfer shaft (H) from the bearings.<br />
Use a plastic or rawhide mallet or brass punch if<br />
needed to drive the transfer shaft out of the<br />
bearings.<br />
6. Remove the six, (three for each bearing) bearing<br />
mounting flange cap screws (I) and remove the<br />
bearings.<br />
7. Inspect the bearings for smooth operation and<br />
replace as needed.<br />
Assembly:<br />
D<br />
F<br />
D<br />
C<br />
E<br />
M99713<br />
A<br />
2. Place a locating mark (D) on the tractor frame and<br />
mounting bracket for alignments during<br />
installation.<br />
3. Support the front mounting bracket (E) and remove<br />
the four cap screws (F) securing the mounting<br />
bracket to the tractor frame and remove the<br />
mounting bracket.<br />
B<br />
M99716<br />
1. Install each bearing and mounting flange assembly<br />
(A) into the mounting bracket (B) with the bearing<br />
collar (C) to the inside of the bracket.<br />
2. Install the six mounting cap screws (D) finger tight<br />
only.<br />
8-22 6/30/99
ROTARY BROOMS<br />
REPAIR<br />
K<br />
C<br />
E<br />
E<br />
F<br />
B<br />
M99718<br />
M99720<br />
3. As the transfer shaft is being installed, position<br />
each bearing lock collar (E) on the shaft so that the<br />
lock shoulder (F) will fit over the bearing collar (C).<br />
J<br />
B<br />
5.Holdthetransfershaft(B)inplaceandslidethe<br />
bearing lock collar (E) over the bearing collar. You<br />
may need to rotate the lock collar until it will slide<br />
over the bearing collar.<br />
6. With the lock collar over the bearing collar, rotate<br />
the lock collar about a quarter turn until it has<br />
wedged tight over the bearing collar.<br />
7. Tighten the set screw (K) to 11.5 N•m (102 lb-in.).<br />
8.Repeatsteps5-7fortheotherbearing.<br />
G<br />
I<br />
H<br />
M99719<br />
4. Using a straight edge (G), install the transfer shaft<br />
(H) until the machined edge (I) is flush with the<br />
outside surface (J) of the back of the mounting<br />
bracket (B).<br />
M99717<br />
9. With the transfer shaft installed and locked into<br />
place, center the bearings within the mounting<br />
bracket bore and tighten the six bearing flange<br />
mounting cap screws to 15.5 N•m (138 lb-in.).<br />
6/30/99 8-23
REPAIR<br />
ROTARY BROOMS<br />
N<br />
M<br />
N<br />
L<br />
M99713<br />
10. Position the mounting bracket (L) into the frame so<br />
that the location mark (M) is aligned.<br />
11. Install the four mounting cap screws (N) and tighten<br />
to 27 N•m (240 lb-in.).<br />
O<br />
Q<br />
P<br />
M99714<br />
12. Pull back and hold the locking collar (O) while<br />
sliding the PTO drive shaft (P) onto the transfer<br />
shaft (Q).<br />
Specifications:<br />
BearingSetScrews......... 11.5N•m(102lb-in.)<br />
BearingFlanges............ 15.5N•m(138lb-in.)<br />
MountingBracket.............27N•m(240lb-in.)<br />
8-24 6/30/99
SNOWBLOWERS<br />
CONTENTS<br />
CONTENTS<br />
Page<br />
SPECIFICATIONS........................................... 3<br />
TORQUESPECIFICATIONS............................................3<br />
LUBRICANTS.......................................................3<br />
OTHERMATERIALS..................................................3<br />
COMPONENTLOCATION.................................... 4<br />
47CHUTECONTROL.................................................4<br />
59CHUTECONTROL.................................................5<br />
REPAIR................................................... 6<br />
47GEARCASE......................................................6<br />
59GEARCASE......................................................6<br />
59 GEAR ASSEMBLY:. . . . . . . . . . . . . . . . . . . . . . . . . . . . . . . . . . . . . . . . . . . . . . . . . 8<br />
59 MAIN GEAR CASE INSPECTION . . . . . . . . . . . . . . . . . . . . . . . . . . . . . . . . . . . . 10<br />
ROTORANDFANREMOVALANDINSTALLATION............... 13<br />
FANORCOUPLERREPLACEMENT....................................15<br />
ROTOR ASSEMBLY INSTALLATION . . . . . . . . . . . . . . . . . . . . . . . . . . . . . . . . . . . . 15<br />
ROTOR BEARING REPLACEMENT . . . . . . . . . . . . . . . . . . . . . . . . . . . . . . . . . . . . . 16<br />
6/22/99 9-1
NOTES<br />
SNOWBLOWERS<br />
9-2 6/22/99
SNOWBLOWERS<br />
SPECIFICATIONS<br />
SPECIFICATIONS<br />
Models.......................................................47and59<br />
Dimensions:<br />
47and59Auger......................................... 40.6cm(16in.)<br />
InputShaftEndPlay(maximum........................... 0.076mm(0.003in.)<br />
Blower Case Shaft<br />
EndPlay................................0.025-0.15mm(0.001-0.006in.)<br />
Backlash..................................0.15-0.4mm(0.006-0.016in.)<br />
Gear Box and Blower Case Grease Capacity<br />
59..................................................... 0.4L(13.5oz)<br />
Weight:<br />
47.....................................................110kg(240lb)<br />
59.....................................................201kg(450lb)<br />
TORQUE SPECIFICATIONS<br />
Blower Gear Case Half<br />
SocketHeadCapScrews................................26N•m(228lb-in.)<br />
CapScrews ............................................41N•m(34lb-ft)<br />
GearBoxCoverCapScrews.......................20-24N•m(180-216lb-in.)<br />
GearCaseMountingCapScrews........................... 47.5N•m(35lb-ft)<br />
PipePlug..............................................18N•m(160lb-in.)<br />
LUBRICANTS<br />
GearCaseGrease.....................JohnDeereGL-5 ® Gear Oil-SAE 80W-90<br />
OTHER MATERIALS<br />
Number Name Use<br />
592 / TY9375 LOCTITE ® General Purpose Thread Sealant Seal pipe plugs<br />
M79292 MPG-2 ® Multipurpose EP Grease Shaft and bearing lubrication<br />
John Deere GL-5 ® Gear Oil-SAE 80W-90<br />
Fill gear case<br />
LOCTITE ® is a registered trademark of the Loctite Corp.<br />
MPG-2 ® is a registered trademark of DuBois USA.<br />
6/22/99 9-3
COMPONENT LOCATION<br />
SNOWBLOWERS<br />
COMPONENT LOCATION<br />
47 CHUTE CONTROL<br />
Shield<br />
Screw<br />
Cap Screw<br />
Screw<br />
Cap Screw<br />
Washer<br />
Bracket<br />
Idler<br />
Spacer<br />
Internal Half<br />
Coupling<br />
Cap<br />
Idler<br />
Spacer<br />
Hose<br />
Elbow Fitting<br />
O-Ring<br />
Union Fitting<br />
O-Ring<br />
Cap Screw<br />
Hydraulic Cylinder<br />
Bracket<br />
Washer<br />
Lock Nut<br />
Washer<br />
Lock Nut<br />
Washer<br />
Lock Nut<br />
MX0559<br />
9-4 6/22/99
SNOWBLOWERS<br />
59 CHUTE CONTROL<br />
59 CHUTE CONTROL<br />
Pulley<br />
Washer<br />
Spacer<br />
Pulley<br />
Spacer<br />
Washer<br />
Lock Nut<br />
Cover<br />
Pulley<br />
Pulley<br />
Washer<br />
Pulley<br />
Cable<br />
Cap Screw<br />
Strap<br />
Strap<br />
Bolt<br />
Cap Screw<br />
Hydraulic Cylinder Tube Guide<br />
O-Ring<br />
Fitting<br />
O-Ring<br />
Fitting<br />
O-Ring<br />
O-Ring<br />
Washer<br />
Lock Nut<br />
Lock Washer<br />
Bolt<br />
Washer<br />
Nut<br />
O-Ring<br />
Cap<br />
Fitting<br />
Fitting<br />
Hose<br />
Fitting Adaptor<br />
Quick Coupler<br />
6/22/99 9-5
REPAIR<br />
SNOWBLOWERS<br />
REPAIR<br />
47 GEAR CASE<br />
Inspection :<br />
1. Inspect housing for cracks.<br />
2. Inspect bearings for wear.<br />
3. Inspect gears for chipped, worn or broken teeth.<br />
4. Inspect shafts for wear and straightness.<br />
5. Inspect bearing caps for wear or galling.<br />
6. Inspect end caps for cracks or distortion.<br />
7. Replace parts as required when assembling gear<br />
case.<br />
59 GEAR CASE<br />
Inspection:<br />
1. Inspect housing for cracks.<br />
2. Inspect bearings for wear.<br />
3. Inspect gears for chipped, worn or broken teeth.<br />
4. Inspect shafts for wear and straightness.<br />
5. Inspect bearing caps for wear or galling.<br />
6. Inspect end caps for cracks or distortion.<br />
7. Replace parts as required when assembling gear<br />
case.<br />
Blower Fan<br />
Lock Nut<br />
Cap Screw<br />
Screw<br />
Arm<br />
Lock Nut<br />
Seal<br />
Snap Ring<br />
Shim*<br />
Screw<br />
Bracket<br />
Set Screw<br />
Shaft Key<br />
Bearing<br />
Cone<br />
Bearing<br />
Cup<br />
Snap Ring<br />
Bearing Cup<br />
Bearing Cone<br />
Pinion Shaft<br />
Housing<br />
Seal<br />
Plug<br />
Shaft Key<br />
Shim*<br />
Cap Screw<br />
Seal<br />
Hub<br />
Bearing<br />
Bevel Gear<br />
Bearing<br />
Shaft<br />
Pipe Plug<br />
Cover<br />
Shim*<br />
*Shim - Order Kit<br />
MX0560<br />
Shaft Key<br />
47 GEAR CASE<br />
9-6 6/22/99
SNOWBLOWERS<br />
59 GEAR CASE<br />
Blower Fan<br />
Snap Ring<br />
Plate<br />
Key<br />
Cap Screw<br />
Cap Screw<br />
Input Shaft<br />
Shim<br />
Seal<br />
Snap Ring<br />
Bearing Cup<br />
Seal<br />
Bearing<br />
Shaft Key<br />
Bearing Cup<br />
Bearing<br />
Lock Washer<br />
Cap Screw<br />
Breather<br />
Snap Ring<br />
Nut<br />
Bearing Cup<br />
Output Shaft Bearing<br />
Seal<br />
Cover<br />
Gasket<br />
Snap Ring<br />
Worm Gear<br />
Snap Ring<br />
Pipe<br />
Plug<br />
Worm Gear Drive<br />
Snap Ring<br />
Bearing<br />
Shaft Key<br />
Bearing Cup<br />
Snap Ring<br />
Cap<br />
Pipe Plug<br />
59 GEAR CASE<br />
M77779<br />
6/22/99 9-7
59 GEAR ASSEMBLY: SNOWBLOWERS<br />
59 GEAR ASSEMBLY:<br />
Snap Rings<br />
Snap Rings<br />
M77735<br />
M77734<br />
1. Install snap rings.<br />
M77731<br />
4. Place key in input shaft. Align slot in worm gear with<br />
key and tap into place with soft faced hammer.<br />
5. Install retaining ring with D-05327ST retaining ring<br />
pliers.<br />
Bearing Cup<br />
Bearing<br />
M77736<br />
Bearing<br />
M77737<br />
M77732<br />
2. Press bearing cups into case until they bottom out<br />
against snap rings.<br />
IMPORTANT: Do not press on bearing cage.<br />
6. Press bearing on plain end of input shaft until<br />
bottomed on retaining ring.<br />
7. Clean burrs off shaft and install bearing.<br />
8. Put bearing cup over bearing (plain end).<br />
M77733<br />
M77738<br />
3. Press oil seals into case until they are flush with flat<br />
surface of case.<br />
9. Press bearing cup into case until press plate<br />
bottoms against input shaft.Remove press plate<br />
and use thin wall pipe with large enough diameter<br />
9-8 6/22/99
SNOWBLOWERS<br />
59 GEAR ASSEMBLY:<br />
to clear bearing. Press bearing cup until below<br />
snap ring groove.<br />
17. Turn input shaft and set gear teeth in worm gear.<br />
Snap Ring<br />
Snap Ring<br />
M77745<br />
M77739<br />
10. Install snap ring with snap ring pliers.<br />
11. Turn input shaft to seat bearings in cups. Push and<br />
pull input shaft to check for excessive end play.<br />
Use a dial indicator to measure end play.<br />
Maximum end play is 0.076 mm (0.003 in.). Ifend<br />
play exceeds this tolerance remove snap ring and<br />
install shim under snap rings.<br />
18. Press bearing cup into cover far enough to install<br />
retaining ring.<br />
19. Install snap ring.<br />
20. Press new seal into cover until flush with end<br />
Bearing<br />
Bearing Cup<br />
Gasket<br />
M77746<br />
M77741<br />
M77742<br />
21. Install bearing on shaft.<br />
22. Install new gasket.<br />
23. Slip cover over shaft.<br />
12.Presscapincaseuntilflushwithsurface.<br />
13. Put bearing cup in case.<br />
Pipe Plug<br />
Output Shaft<br />
Input Shaft<br />
M77743<br />
M77744<br />
14. Install retaining ring in groove on output shaft with<br />
JDT-1 retaining ring pliers.<br />
15.Putkeyinshaftandslidegearoverkey.<br />
16. Grease an oil seal and insert shaft through case<br />
and oil seal.<br />
Cap Screws<br />
M77747<br />
24.Securecoverwithfourcapscrews.Tightento20-<br />
24 N•m (180-216 lb-in.).<br />
25. Add 0.4L(13.5oz)of John Deere GL-5 ®<br />
Gear Oil-SAE 80W-90.<br />
26. Apply loctite 592 pipe sealant with teflon to pipe<br />
plugs. Tighten pipe plugs to 18 N•m (160 lb-in.).<br />
6/22/99 9-9
59 MAIN GEAR CASE INSPECTION SNOWBLOWERS<br />
59 MAIN GEAR CASE INSPECTION<br />
1. Inspect housing for cracks.<br />
2. Inspect bearings for wear.<br />
3. Inspect gears for chipped, worn or broken teeth.<br />
4. Inspect shafts for wear and straightness.<br />
5. Inspect bearing caps for wear or galling.<br />
6. Inspect end caps for cracks or distortion.<br />
7. Replace parts as required when assembling gear<br />
case.<br />
Snap Ring<br />
Bearing Cup<br />
Bearing Cone<br />
Cap Screw<br />
Helical Gear<br />
Input<br />
Shaft Key<br />
Bearing Cup<br />
Bearing Cone<br />
Seal<br />
Nut<br />
Housing<br />
Snap Ring<br />
Seal<br />
Lock Nut<br />
Snap Ring<br />
Cap<br />
Screw<br />
Bearing<br />
Cone<br />
Bearing<br />
Cup<br />
Nut<br />
Bearing<br />
Cup<br />
Snap Ring<br />
Cap Screw<br />
Helical Gear<br />
Output<br />
Cap Screw<br />
Cap<br />
Pipe Plug<br />
Bolt<br />
Shim<br />
Housing<br />
Lock Washer<br />
Nut<br />
M78268<br />
9-10 6/22/99
SNOWBLOWERS<br />
59 MAIN GEAR CASE INSPECTION<br />
Assembly:<br />
1. Clean sealing adhesive off both gear case halves<br />
before assembly. Wash parts in cleaning solvent<br />
and dry them.<br />
Bearing<br />
M77750<br />
6. Press bearing on short end of small gear input shaft<br />
until bearing bottoms against gear shoulder. Do<br />
not press against bearing cage.<br />
M77748<br />
2. Press bearing cups far enough into each case half<br />
so snap rings can be installed.<br />
Bearing<br />
Gear<br />
M77751<br />
7. Press bearing on long end of small gear input shaft.<br />
M77749<br />
3. Install snap rings in slot behind cups in each case<br />
half. Invert case half and press bearing cup tight<br />
against snap ring.<br />
Bearing<br />
Short End<br />
Gear<br />
NOTE: Some gear cases may have a shim under snap<br />
ring. If a shim was removed on disassembly,<br />
reinstall it to maintain correct end play.<br />
4. Press oil seals into each case half.<br />
5. Apply RTV sealant around outside edge of each<br />
cap. Press cap into each case half.<br />
Long End<br />
M77752<br />
8. Press bearing on short end of large gear shaft until<br />
bottomed against gear.<br />
9. Press bearing on long end of large gear shaft until<br />
bottomed against gear.<br />
6/22/99 9-11
59 MAIN GEAR CASE INSPECTION SNOWBLOWERS<br />
should be 0.025 - 0.15 mm (0.001 - 0.006 in.).<br />
Shims<br />
Sealant<br />
M77753<br />
10. Put gear shaft and bearing assemblies in case half.<br />
11. Apply RTV sealant evenly around sealing surface of<br />
each case half.<br />
Socket Head Screws<br />
M77755<br />
14. If necessary disassemble gear case and add or<br />
remove shims to get correct end play.<br />
IMPORTANT: Backlash is 0.15 - 0.4 mm (0.006 -<br />
0.016 in.), rolling drag torque 1.736 - 8.68 lb-in.<br />
Backlash is adjusted by added or removing<br />
shims.<br />
15. When end play and backlash are within limits, fill<br />
gear case with 0.4L(13.5oz)of John Deere<br />
GL-5 ® Gear Oil.<br />
16. Apply loctite 592 pipe sealant with teflon to pipe<br />
plugs. Torque pipe plugs to 18 N•m (160 lb-in.).<br />
17. Reinstall gear case and power shaft (make sure<br />
key is installed in gear case shaft). Install cap<br />
screw and elastic lock nut (no specified torque).<br />
18. Tighten main gear case to snowblower housing<br />
bolts to 47.5 N•m (35 lb-ft).<br />
Cap Screws<br />
M77754<br />
12. Put gear case halves together and install two<br />
socket head screws and cap screws. Tighten<br />
socket head screws to 26 N•m (228 lb-in.).<br />
Tighten cap screws to 41 N•m (34 lb-ft).<br />
M77756<br />
13. Check input and output shaft end play. End play<br />
9-12 6/22/99
SNOWBLOWERS<br />
ROTOR AND FAN REMOVAL AND INSTALLATION<br />
ROTORANDFANREMOVALAND<br />
INSTALLATION<br />
Bearing<br />
Flight<br />
Flight<br />
Cotter Pin<br />
Flanged Housing<br />
Nut<br />
Bearing<br />
Spacer<br />
Bolt<br />
Locking<br />
Collar<br />
Bearing<br />
Washer<br />
Bushing<br />
Cap Screw<br />
Pin<br />
Lock Nut<br />
Bushing<br />
Washer<br />
Lubrication Fitting<br />
Procedure:<br />
1. Remove rotor assembly<br />
Bolt<br />
M85003<br />
Cap Screws<br />
2. Remove cap screws and lock washers securing<br />
support to worm gear case.<br />
M85006<br />
3. Remove three flanged bolts securing rotor to each<br />
side of housing.<br />
4. Remove rotor by pulling and lifting it forward out of<br />
housing.<br />
5. Remove bearings, shear coupling<br />
and flighting.<br />
6/22/99 9-13
ROTOR AND FAN REMOVAL AND INSTALLATION<br />
SNOWBLOWERS<br />
Cotter Pin<br />
Shear Bolt<br />
12. Replace flighting bearings.<br />
Bearing<br />
M85007<br />
Locking Collar<br />
Set Screw<br />
6. Loosen locking collar set screw. Loosen locking<br />
collar from bearing by tapping it counterclockwise<br />
with a punch and hammer. Remove flanged and<br />
bearing and locking collar.<br />
7. Remove cotter pin and drilled pin.<br />
8. Remove shear bolt and coupling.<br />
M85009<br />
13. Remove bearing with a slide hammer puller on<br />
each end of flighting.<br />
Flighting<br />
M85007<br />
9. Slide or pull flighting off drive shaft.<br />
10. Replace fan or coupling plate and reinstall<br />
assembly.<br />
11. Tighten nut on cap screw securing fan coupling to<br />
gear case shaft.<br />
Bearing<br />
M85010<br />
14. Press new bearing flush to end of flighting shaft.<br />
9-14 6/22/99
SNOWBLOWERS<br />
FAN OR COUPLER REPLACEMENT<br />
FAN OR COUPLER REPLACEMENT<br />
ROTOR ASSEMBLY INSTALLATION<br />
Procedure:<br />
1. Remove rotor from housing. See (Remove Rotor<br />
Assembly).<br />
Cap Screw<br />
Procedure:<br />
Cotter Pin<br />
Shear Bolt<br />
Locking Collar<br />
M85013<br />
M85011<br />
2. Remove cap screw and pull fan assembly off gear<br />
case shaft. Be careful not to lose key in shaft.<br />
1. Install shear coupling and shear bolt. Tighten nut on<br />
shear bolt only enough to draw couplings together.<br />
Do not overtighten nut.<br />
2. Install drilled pin and cotter pin. Spread ends of<br />
cotter pin.<br />
3. Install locking collar and bearing and flange<br />
assembly.<br />
Cap Screws<br />
Cap Screw<br />
M85012<br />
3. Remove three cap screws and lock washers<br />
securingfantocouplingplate.Removefanfrom<br />
coupling plate.<br />
M85014<br />
Cap Screws<br />
4. Put rotor assembly in support slot. Install cap<br />
screws and lock washers. Leave cap screws loose<br />
until final assembly.<br />
6/22/99 9-15
ROTOR BEARING REPLACEMENT<br />
SNOWBLOWERS<br />
Locking Collar<br />
Spacer<br />
M85015<br />
Bolt<br />
5. Install spacer between housing and flange<br />
assembly.<br />
6. Install three carriage bolts, lock washers and nuts.<br />
Leave nuts loose on bolts on one end of rotor until<br />
other assembly is installed on other end of rotor.<br />
Then tighten nuts on bolts on both assemblies.<br />
7. Tighten locking collar onto bearing. Then tighten set<br />
screw in locking collar.<br />
8.TightencapscrewsinstalledinStep4.<br />
ROTOR BEARING REPLACEMENT<br />
Procedure:<br />
1. Remove rotor from housing.<br />
Bearing<br />
Set Screw<br />
M85005<br />
2. Loosen set screw in locking collar. Loosen locking<br />
collar by tapping it counterclockwise with a punch<br />
and hammer.<br />
3. Remove old bearing from shaft with flanges.<br />
Separate flanges and install new bearing. Slide<br />
bearing and flange assembly back on shaft.<br />
Reinstall rotor assembly in housing.<br />
4. Turn locking collar on bearing. Tighten locking collar<br />
by tapping it clockwise with a hammer and punch.<br />
5. Tighten set screw in locking collar.<br />
9-16 6/22/99
MISCELLANEOUS<br />
CONTENTS<br />
CONTENTS<br />
Page<br />
HOSES&FITTINGS......................................... 3<br />
SELECTINGHOSES..................................................3<br />
HOSEFAILURES ....................................................3<br />
HOSEROUTING.....................................................4<br />
HOSEINSTALLATION.................................................5<br />
6/22/99 10 - 1
NOTES<br />
MISCELLANEOUS<br />
10 - 2 6/22/99
MISCELLANEOUS<br />
HOSES & FITTINGS<br />
HOSES & FITTINGS<br />
SELECTING HOSES<br />
The following chart will help you to select the proper<br />
hose for any pressure application. Find the size of the<br />
hose you need and read across to the system working<br />
pressure nearest your application. If you find it in<br />
column 1, use a single braid hose. If in column 2, use a<br />
double wire braid hose, or in column 3 use a spiral wire<br />
hose.<br />
Hose size<br />
Inches<br />
1<br />
Single<br />
wire braid<br />
NOTE: Small diameter hoses are capable of handling<br />
higher pressures than large diameter hoses of<br />
thesameconstruction.<br />
HOSE FAILURES<br />
2<br />
Double<br />
wire braid<br />
3<br />
Spiral<br />
wire<br />
1/4” 3000 psi 5000 psi ~<br />
3/8” 2250 psi 4000 psi 5000 psi<br />
1/2” 2000 psi 3500 psi 4000 psi<br />
5/8” 1750 psi 2750 psi ~<br />
3/4” 1500 psi 2250 psi 3000 psi<br />
1” 800 psi 1875 psi 3000 psi<br />
1 1/4” 600 psi 1625 psi 3000 psi<br />
1 1/2” 500 psi 1250 psi 3000 psi<br />
2” 350 psi 1125 psi 2500 psi<br />
When hoses fail prematurely, look for: cracking or<br />
splitting, pin hole leaks, improper hose length, rubbing,<br />
heat, twisting, wrong hose selection, wrong fittings, or<br />
improper routing.<br />
CRACKING OR SPLITTING of the outer cover is<br />
common and does not always mean the hose is ruined.<br />
The depth of the break is what is important. This<br />
should be watched for regularly on high-pressure<br />
circuits.<br />
PIN HOLE LEAKS are often hard to detect. But a small<br />
leak can add up over a period of time., and can also<br />
create fire and skin puncture hazards (see Safety<br />
Section).<br />
IMPROPER HOSE LENGTH can mean that a short<br />
hose is stretched under pressure or a too long one is<br />
exposed to hazards from moving parts. Either way the<br />
hose is likely to be damaged.<br />
RUBBING wears out hose covers, weakens the<br />
reinforcement layers and so wears out the hose<br />
prematurely. Clamp, use hose guards, or bracket hoses<br />
so that they won’t rub.<br />
HEAT from engine exhaust system and radiator can<br />
damage hoses. Be sure all hoses are routed away from<br />
hot parts or at least are bracketed against contact, and<br />
shielded against radiated heat.<br />
TWISTING can restrict the flow of oil and also damage<br />
the hose. Bending or flexing is part of hose design;<br />
twisting is not. The most common cause of twisting<br />
happens when one end of the hose is improperly<br />
connected to a moving part. To correct this, clamp the<br />
hose at the point where it starts twisting, dividing the<br />
motion of the hoses into two planes. If some twisting<br />
cannot be avoided, allow as much free hose as<br />
possible. When connecting a hose, hold it to avoid<br />
twisting as you tighten the end fittings.<br />
WRONG HOSE SELECTION happens when hoses are<br />
used that are of the wrong size or pressure rating. See<br />
the chart on SELECTING HOSES in this section.<br />
Remember, Don’t Economize! Selecting the wrong<br />
hose can cause many of the failures listed above.<br />
WRONG FITTINGS occur when replacements are not<br />
matchedtothehosesinsizeandstyle.<br />
COLLAPSED SUCTION HOSE is another type of<br />
breakdown, seemingly simple. But it is possible that the<br />
inner layer of rubber of the suction hose will, when it<br />
starts to deteriorate, collapse inward, completely<br />
sealing off flow, without showing any outer signs of<br />
collapse. A noisy pump, lack of pressure, “spongy”<br />
action, or no action at all are indications of a collapsed<br />
suction tube.<br />
INNER LINING FAILURE of a pressure hose can result<br />
in the same symptoms as a collapsed suction hose.<br />
The inner lining can become torn and fill up like a<br />
balloon inside the hose from the pressurized fluid. This<br />
condition can completely seal off the fluid from<br />
hydraulic motors, cylinders etc.<br />
IMPROPER ROUTING is the No. 1 cause of hose<br />
failure. Included here are twisting and abrasion, but<br />
also sharp bends, hoses that are too long or too short,<br />
use of too many fittings, and wrong-way connections.<br />
Since there are so many possible causes, care must be<br />
taken to find the right remedy to this problem. Study the<br />
examples of correct and incorrect hose routing on the<br />
following page.<br />
6/22/99 10 - 3
HOSES & FITTINGS<br />
MISCELLANEOUS<br />
HOSE ROUTING<br />
Incorrect<br />
Correct<br />
Avoid Taut Hose<br />
Incorrect<br />
Avoid Loops<br />
Correct<br />
Incorrect<br />
Correct<br />
Incorrect<br />
Correct<br />
Avoid Twisting<br />
Avoid Rubbing<br />
Incorrect<br />
Incorrect<br />
Correct<br />
Correct<br />
Avoid Heat<br />
Avoid Sharp Bends<br />
M78280<br />
10 - 4 6/22/99
MISCELLANEOUS<br />
HOSES & FITTINGS<br />
HOSE INSTALLATION<br />
Correct<br />
Incorrect<br />
M78281<br />
Use the above examples to identify and correct<br />
improperly installed hoses.<br />
6/22/99 10 - 5
HOSES & FITTINGS<br />
MISCELLANEOUS<br />
10 - 6 6/22/99
4000 SERIES CUT’S ATTCHMENTS INDEX<br />
A<br />
AlternativeLubricants .................... 2-10<br />
AttachmentsUseTable.................... 2-4<br />
B<br />
BackhoeRepair ........................ 3-16<br />
Backhoes<br />
Anti-cavitation Check Valves . . . . . . . . . . . . 3-7<br />
Anti-cavitation Valve Inspection . . . . . . . . . 3-18<br />
Boom Circuit Relief Valve Inspection . . . . . 3-18<br />
CircuitReliefValves ................... 3-7<br />
ComponentLocation .................. 3-5<br />
CrossoverReliefValves ................ 3-7<br />
CylinderRepair...................... 3-25<br />
Diagnostics ......................... 3-12<br />
Dipperstick Circuit Relief Valve Inspection . 3-18<br />
HydraulicPumpFlowRates ............. 3-3<br />
LoadCheckValveInspection ........... 3-18<br />
LoadCheckValves.................... 3-7<br />
MainSystemReliefValve............... 3-7<br />
Restrictor Orifice ID (Boom, Swing & Stabilizer)<br />
3-3<br />
Restrictors .......................... 3-7<br />
Rockshaft<br />
Lift Arms Height Adjustment (4200/4300/4400)<br />
......................... 3-15<br />
Lift Arms Height Adjustment (4500/4600) 3-15<br />
SpoolAssembly ..................... 3-17<br />
SpoolRemoval ...................... 3-17<br />
SystemReliefValve,47&48 ........... 3-16<br />
Tests and Adjustments<br />
Rockshaft Arms Lift Height Adjustment (4200/<br />
4300/4400) ............... 3-15<br />
Rockshaft Arms Lift Height Adjustment (4500/<br />
4600) .................... 3-15<br />
ValveHousingAssembly .............. 3-19<br />
ValveLinkage ....................... 3-20<br />
Blades<br />
AngleCylinder ....................... 7-4<br />
LiftCylinder.......................... 7-4<br />
C<br />
Component Location<br />
Backhoes ........................... 3-5<br />
ValveLinkage ................... 3-20<br />
Snowblower<br />
ChuteControl..................9-4, 9-5<br />
MountingComponents.............. 9-4<br />
F<br />
Face Seal Fittings<br />
InchStudsEndsTorque ................2-5<br />
MetricStudsEndsTorque ..............2-6<br />
H<br />
Hydraulic Hoses<br />
Installation .........................11-5<br />
Routing ............................11-4<br />
Selection...........................11-3<br />
HydraulicOil ...........................2-10<br />
HydraulicSchematic,Backhoe ..............3-8<br />
Hydraulic System Schematic, Backhoe . . . . . . . 3-7<br />
L<br />
Lubricants<br />
Grease-Europe .....................2-11<br />
Grease-NorthAmerica ...............2-11<br />
Storage ............................2-10<br />
O<br />
O-Ring<br />
BossFittings .........................2-7<br />
FaceSealFittings.....................2-7<br />
P<br />
Post Hole Diggers<br />
GearBoxAssembly(31B) ..............6-9<br />
GearBoxDisassembly(31B) ............6-6<br />
Power Shaft<br />
Snowblowers .......................9-12<br />
R<br />
Rotary Brooms<br />
Repair ..............................8-8<br />
Rotary Mowers 50, 60, 72 & 76-Inch<br />
GearOil .........................5-3, 9-3<br />
Rotary Tillers<br />
Backlash(450,550&660) ..............5-8<br />
End play (450, 550 & 660) . . . . . 5-8, 5-12, 5-16<br />
Gear Oil (450, 550 & 660) . . . . . 5-8, 5-13, 5-17<br />
S<br />
Snowblowers<br />
ComponentLocation ..................9-4<br />
Endplay ............................9-9<br />
GearOil ....................9-3, 9-9, 9-12<br />
Rotor&Fan ........................9-13<br />
6/30/99 INDEX - 1
INDEX<br />
4000 SERIES CUT’S ATTCHMENTS<br />
RotorandFan....................... 9-13<br />
Specifications ........................... 2-3<br />
Lubricants<br />
ChassisGrease-Europe........... 2-11<br />
Chassis Grease - North America . . . . . 2-11<br />
HydraulicOil.....................2-10<br />
O-Ring<br />
BossFittings ..................... 2-7<br />
FaceSealFittings ................. 2-7<br />
O-Ring Seal<br />
Face Seal Fittings<br />
InchStudEndsTorque .......... 2-5<br />
Metric Stud Ends Torque . . . . . . . . . 2-6<br />
RestrictorOrificeIDs .................. 3-3<br />
TorqueValues,InchFastener ........... 2-8<br />
Torque Values, Metric Fastener . . . . . . . . . . 2-9<br />
T<br />
Tests and Adjustments<br />
Backhoes .......................... 3-13<br />
Rockshaft Arms Lift Height (4200/4300/4400) 3-15<br />
Rockshaft Arms Lift Height (4500/4600) . . . 3-15<br />
RotaryBrooms ....................... 8-8<br />
Theory of Operation<br />
Backhoes ........................... 3-7<br />
Theory of Operation, Backhoe . . . . . . . . . . .5-4, 5-6<br />
Torque Values<br />
Face Seal Fittings with Inch Stud Ends . . . . 2-5<br />
Face Seal Fittings with Metric Stud Ends . . . 2-6<br />
InchFastener ........................ 2-8<br />
MetricFastener....................... 2-9<br />
Troubleshooting<br />
Backhoes ........................... 3-9<br />
V<br />
ValveHousing,Backhoe.................. 3-22<br />
INDEX - 2 6/30/99