TraumaCad Admin Guide - Voyant Health
TraumaCad Admin Guide - Voyant Health
TraumaCad Admin Guide - Voyant Health

You also want an ePaper? Increase the reach of your titles
YUMPU automatically turns print PDFs into web optimized ePapers that Google loves.
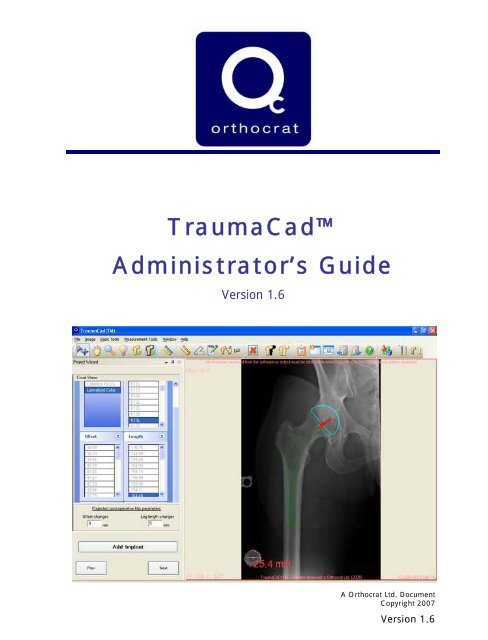
<strong>TraumaCad</strong><br />
<strong>Admin</strong>istrator’s <strong>Guide</strong><br />
Version 1.6<br />
A Orthocrat Ltd. Document<br />
Copyright 2007<br />
Version 1.6
2<br />
Important Notice<br />
<strong>TraumaCad</strong> <strong>Admin</strong>istrator’s <strong>Guide</strong><br />
Important Notice<br />
Copyright and Trademark Notices<br />
All contents of this document are Copyright 2007 Orthocrat Ltd.<br />
All rights reserved. <strong>TraumaCad</strong> is a trademark of Orthocrat Ltd. The trademarks, logos<br />
and service marks displayed on this document are the property of Orthocrat Ltd. or other<br />
third parties. Users are not permitted to use these trademarks, logos and service marks<br />
without the prior written consent of Orthocrat Ltd., or such third parties as may own them.<br />
Limited License<br />
Orthocrat Ltd. hereby gives license to review these documents solely for non-commercial<br />
use within your organization, provided that you do not modify the content of the documents<br />
and provided any copies made retain all copyright and other proprietary notices contained<br />
therein. The information provided in these documents is permitted solely to users to provide<br />
information in support of Orthocrat Ltd. products. No other use of the information provided<br />
hereunder is authorized.<br />
Nothing contained herein shall be construed as conferring by implication, estoppels or<br />
otherwise any license or right under any patent or trademark of Orthocrat Ltd. or any third<br />
party. Except as expressly provided above, nothing contained herein shall be construed as<br />
conferring any license or right under any Orthocrat Ltd. or third party copyright.<br />
Limitation of Liability<br />
Information provided on this document is provided "AS IS" and is provided without<br />
warranty of any kind, either expressed or implied, including, without limitation, warranties<br />
of merchantability, fitness for a particular purpose, and non-infringement. Orthocrat Ltd.<br />
uses reasonable efforts to include accurate and timely information on this website and<br />
periodically updates the information without notice. However, Orthocrat Ltd. makes no<br />
warranties or representations as to the accuracy or completeness of such information, and<br />
Orthocrat Ltd. assumes no liability or responsibility for errors or omissions in the content of<br />
this documents. Your use of these documents is AT YOUR OWN RISK. Under no<br />
circumstances and under no legal theory or provision shall Orthocrat Ltd. be liable to you or<br />
any other person for any direct, indirect, special, incidental, exemplary or consequential<br />
damages arising from your access to, or use of, these documents.<br />
Product information is subject to change without notice. Changes, if any, will be<br />
incorporated in new editions of publications provided in these documents. Orthocrat Ltd.<br />
retains the right to make improvements and/or changes in the products and/or the programs<br />
described in the publications and information provided on these documents at any time and<br />
without prior notice. Mention of non-Orthocrat Ltd. products or services is for information<br />
purposes only and constitutes neither an endorsement nor a recommendation of such<br />
products or services.
Important Notice<br />
<strong>TraumaCad</strong> <strong>Admin</strong>istrator’s <strong>Guide</strong><br />
3<br />
Third-Party Information<br />
These documents may contain information of parties other than Orthocrat Ltd. Such<br />
information is provided for your convenience and reference only. The said information is not<br />
under the control of Orthocrat Ltd., and Orthocrat Ltd. is not responsible for the contents of<br />
such information. The inclusion of this information does not imply any association with their<br />
operators or any endorsement of the said third parties by Orthocrat Ltd.<br />
Microsoft is a registered trademark of Microsoft Corporation, Agfa is a registered trademark<br />
of Agfa-Gevaert Group and Sectra is a registered trademark of Sectra Radisoft AB.<br />
Disclaimer<br />
This software is intended as a decision support system for persons who have received<br />
appropriate medical training, and should not be used as a sole basis for making clinical<br />
decisions pertaining to patient diagnosis, care, or management. All information derived from<br />
the software must be clinically reviewed regarding its plausibility before use in treating<br />
patients. Any deviation of the application of medical information from the program, other<br />
than the original design or intended use thereof, is not advised and is considered a misuse of<br />
the software product. For additional guidance, see published studies.<br />
0344<br />
This device complies with the Requirements of the 93/42/EEC Directive Concerning<br />
Medical Devices.<br />
Authorized representative address:<br />
CEpartner4U B.V.<br />
Nijverheidsstraat 5<br />
2624 BA Delft<br />
The Netherlands<br />
Phone: +31 15 257 6682<br />
Fax: +31 15 257 6683
4<br />
Table of Contents<br />
<strong>TraumaCad</strong> <strong>Admin</strong>istrator’s <strong>Guide</strong><br />
Table of<br />
Contents<br />
About This <strong>Guide</strong> .............................................................................................6<br />
Contacting Us ...................................................................................................7<br />
Safety Symbols..................................................................................................7<br />
Chapter 1, Introducing the <strong>TraumaCad</strong> Server................ 9<br />
What is the <strong>TraumaCad</strong> Server?................................................................9<br />
Chapter 2, Getting Started with the <strong>TraumaCad</strong> Server11<br />
<strong>TraumaCad</strong> Server Setup Workflow .......................................................11<br />
System Requirements.....................................................................................13<br />
<strong>TraumaCad</strong> Server Requirements............................................................13<br />
<strong>TraumaCad</strong> Client Requirements ............................................................15<br />
Preparing for Installation..............................................................................16<br />
Installing the <strong>TraumaCad</strong> Server.............................................................17<br />
Verifying Proper Operation ..........................................................................23<br />
Chapter 3, Configuring the <strong>TraumaCad</strong> Server ............. 29<br />
Configuring the PACS Servers .....................................................................30<br />
Configuring DICOM Properties ...................................................................32<br />
Configuring Logging......................................................................................35<br />
Reading Log Files...........................................................................................37
Table of Contents<br />
<strong>TraumaCad</strong> <strong>Admin</strong>istrator’s <strong>Guide</strong><br />
5<br />
Download/Update Templates........................................................................ 39<br />
During the Downloading Process ............................................................... 40<br />
Completion of the Downloading Process ................................................... 43<br />
Downloading Templates............................................................................. 44<br />
Templates Updating Service......................................................................... 46<br />
Chapter 4, Configuring Security Settings .............................49<br />
Turning Off Anonymous Access Authentication in IIS.............................. 50<br />
Adding the Network Service User................................................................ 54<br />
Adding the Active Directory Group............................................................. 57<br />
Testing Security Settings............................................................................... 59<br />
Chapter 5, Scaling X-Rays......................................................61<br />
Theory of Operation ................................................................................... 63<br />
Chapter 6, Troubleshooting the <strong>TraumaCad</strong> Server.......65<br />
DICOM Connectivity from/to <strong>TraumaCad</strong> Server ................................ 66<br />
<strong>TraumaCad</strong> and Philips Sectra PACS..................................................... 67<br />
<strong>TraumaCad</strong> and Agfa PACS.................................................................... 69<br />
<strong>TraumaCad</strong> Client Installation ................................................................ 71<br />
Disabling the Internet Explorer Popup Blocker.......................................... 71<br />
Defining the <strong>TraumaCad</strong> Server as a Trusted Site.................................. 72<br />
<strong>TraumaCad</strong> ActiveX Debug Mode........................................................... 74<br />
Enabling <strong>TraumaCad</strong> Logging for Diagnostic Purposes ....................... 75<br />
Templates Issues............................................................................................ 76<br />
Checking Template Availability................................................................. 77<br />
Viewing <strong>TraumaCad</strong> Server Logs .......................................................... 78<br />
Requests for New Templates ........................................................................ 81<br />
Using Medical Tools ...................................................................................... 81
6<br />
About This <strong>Guide</strong><br />
<strong>TraumaCad</strong> <strong>Admin</strong>istrator’s <strong>Guide</strong><br />
About This<br />
<strong>Guide</strong><br />
<strong>TraumaCad</strong> is intended for surgeons who are performing preoperative<br />
evaluation and planning for orthopedic procedures.<br />
This guide is intended for <strong>TraumaCad</strong> system administrators. It describes<br />
the initial installation and setup stages of the <strong>TraumaCad</strong> server and how<br />
to perform ongoing configuration modifications when required.<br />
This guide contains the following chapters:<br />
• Chapter 1, Introducing the <strong>TraumaCad</strong> Server, page 9, describes<br />
the purpose of the <strong>TraumaCad</strong> server and the <strong>TraumaCad</strong> DICOM<br />
workflow.<br />
• Chapter 2, Getting Started with the <strong>TraumaCad</strong> Server, page 11,<br />
describes the process of getting the <strong>TraumaCad</strong> server up and<br />
running.<br />
• Chapter 3, Configuring the <strong>TraumaCad</strong> Server, page 29,<br />
describes how to configure the <strong>TraumaCad</strong> server using the control<br />
panel.<br />
• Chapter 4, Configuring Security Settings, page 49, describes how to<br />
configure <strong>TraumaCad</strong> security settings so that each time a<br />
<strong>TraumaCad</strong> client is launched it requests an authorized user name<br />
and password.<br />
• Chapter 5, Scaling X-Rays, page 61, describes how to use the scaling<br />
sphere for X-ray calibration.<br />
• Chapter 6, Troubleshooting the <strong>TraumaCad</strong> Server, page 65,<br />
describes how to troubleshoot problems that may arise.
Contacting Us<br />
<strong>TraumaCad</strong> <strong>Admin</strong>istrator’s <strong>Guide</strong><br />
7<br />
Contacting Us<br />
USA Office<br />
173 S. Portland Ave.<br />
Floor 3<br />
Brooklyn, NY 11217, USA<br />
Telephone 1-877-2111-804<br />
Fax 1-801-881-5239<br />
Sales@traumacad.com<br />
Israeli Office<br />
35 Efal St, 12th floor<br />
Petah-Tikva, 49511, Israel<br />
US Toll free number: 866-717-0272<br />
UK Toll free number: 0800-404-8204<br />
International Telephone +972-3-9290929<br />
International Fax +972-3-9236413<br />
Support@<strong>TraumaCad</strong>.com<br />
Safety Symbols<br />
!<br />
The following symbols are used throughout the documentation. Please pay<br />
particular attention at specific points in a procedure when one of the<br />
following messages appears.<br />
WARNING!<br />
A WARNING! denotes a hazard. It calls attention to a procedure that, if not<br />
correctly performed or adhered to, could result in injury or loss of life. Do not<br />
proceed beyond a warning note until the indicated conditions are fully understood<br />
and met.<br />
NOTE:<br />
Notes provide pertinent information to help obtain optimum performance from the<br />
program.<br />
IMPORTANT:<br />
Denotes important information to which you should adhere.
8<br />
Safety Symbols<br />
<strong>TraumaCad</strong> <strong>Admin</strong>istrator’s <strong>Guide</strong><br />
This page is intentionally left blank.
Introducing the <strong>TraumaCad</strong> Server<br />
<strong>TraumaCad</strong> <strong>Admin</strong>istrator’s <strong>Guide</strong><br />
9<br />
3Chapter 1<br />
Introducing the<br />
<strong>TraumaCad</strong> Server<br />
What is the <strong>TraumaCad</strong> Server?<br />
The following describes the purpose of the <strong>TraumaCad</strong> server and the<br />
<strong>TraumaCad</strong> DICOM workflow.<br />
The <strong>TraumaCad</strong> server centralizes access to the archived PACS DICOM<br />
images in order to enable the orthopedic surgeon to seamlessly perform<br />
preoperative planning. The <strong>TraumaCad</strong> server enables them to find<br />
(C-FIND), retrieve (C-MOVE) and commit (C-STORE) DICOM images<br />
from and to a PACS server, as follows:<br />
2<br />
Image Queries (C-Find)<br />
3<br />
1 4<br />
HTTP / HTTPS<br />
Image Retrievals (C-Move)<br />
5<br />
Send Images (C-SEND / C-Store)<br />
<strong>TraumaCad</strong> TM Clients<br />
Optional Firewall<br />
<strong>TraumaCad</strong> TM Sever<br />
PACS Server
10<br />
Introducing the <strong>TraumaCad</strong> Server<br />
<strong>TraumaCad</strong> <strong>Admin</strong>istrator’s <strong>Guide</strong><br />
► The following describes the <strong>TraumaCad</strong> DICOM<br />
workflow:<br />
1 A user of the <strong>TraumaCad</strong> client application requests to query or<br />
retrieve a DICOM image.<br />
2 This request is made through the <strong>TraumaCad</strong> server which performs<br />
the query (C-FIND) or retrieval (C-MOVE) on behalf of the<br />
<strong>TraumaCad</strong> client. The session number is retained in the server’s<br />
session table.<br />
3 The <strong>TraumaCad</strong> server receives the image information or the images<br />
from the PACS server and forwards them to the <strong>TraumaCad</strong> client<br />
for templating though the HTTP port (port 80) or HTTPS (port 443).<br />
4 When the user requests to do so, the <strong>TraumaCad</strong> client requests the<br />
<strong>TraumaCad</strong> server to commit (C-STORE) the templated image to the<br />
PACS.<br />
5 The <strong>TraumaCad</strong> server forwards this request to the PACS and<br />
delivers the files to it.<br />
NOTE:<br />
No medical data is stored on the <strong>TraumaCad</strong> server. The <strong>TraumaCad</strong><br />
server disconnects from the client after 30 seconds of inactivity on the client<br />
application. The images are deleted from the server’s memory cache and the<br />
session table holding the session number is cleared.
Getting Started with the <strong>TraumaCad</strong> Server<br />
<strong>TraumaCad</strong> <strong>Admin</strong>istrator’s <strong>Guide</strong><br />
11<br />
4Chapter 2<br />
Getting Started<br />
with the<br />
<strong>TraumaCad</strong><br />
Server<br />
<strong>TraumaCad</strong> Server Setup Workflow<br />
The process of getting the <strong>TraumaCad</strong> server up and running is as follows:<br />
Step 1<br />
Verifying System<br />
Requirements<br />
Step 2<br />
Preparing for Installation<br />
Step 3<br />
Installing the<br />
<strong>TraumaCad</strong> Server<br />
Step 4<br />
Configuring the<br />
<strong>TraumaCad</strong> Server<br />
Step 5<br />
Verifying Proper <strong>TraumaCad</strong><br />
Server Operation<br />
Step 6<br />
Configuring Security Settings<br />
[Optional]<br />
Step 7<br />
Installing <strong>TraumaCad</strong> Clients
12<br />
Getting Started with the <strong>TraumaCad</strong> Server<br />
<strong>TraumaCad</strong> <strong>Admin</strong>istrator’s <strong>Guide</strong><br />
Step 1: Verifying System Requirements: Verify that the machine on<br />
which the <strong>TraumaCad</strong> server will be installed and the machines on which<br />
the <strong>TraumaCad</strong> clients will be installed meet the requirements listed in<br />
the System Requirements section on page 13.<br />
Step 2: Preparing for Installation: Before installing the <strong>TraumaCad</strong><br />
server, follow the instructions in the Preparing for Installation section on<br />
page 16.<br />
Step 3: Installing the <strong>TraumaCad</strong> Server: Install the <strong>TraumaCad</strong><br />
server software, as described in the Installing the <strong>TraumaCad</strong> Server<br />
section on page 17.<br />
Step 4: Configuring the <strong>TraumaCad</strong> Server: Configure the<br />
<strong>TraumaCad</strong> server, as described in Chapter 3, Configuring the<br />
<strong>TraumaCad</strong> Server on page 29.<br />
The first two sections of this chapter (Configuring the PACS Servers<br />
and Configuring DICOM Properties) must be configured before the<br />
server can operate.<br />
All other settings are installed with defaults that will enable you to work<br />
comfortably.<br />
Step 5: Verifying Proper <strong>TraumaCad</strong> Server Operation: Check that<br />
at least one <strong>TraumaCad</strong> client can connect to the <strong>TraumaCad</strong> server<br />
and that it can query, retrieve and commit images from and to the PACS, as<br />
described in the Verifying Proper Operation section on page 23.<br />
Step 6: Configuring Security Settings: [Optional] Configure<br />
<strong>TraumaCad</strong> security settings so that each time a <strong>TraumaCad</strong> client is<br />
launched it requests an authorized user name and password, as described in<br />
the Chapter 4, Configuring Security Settings section on page 49.<br />
Step 7: Installing <strong>TraumaCad</strong> Clients: <strong>TraumaCad</strong> Clients can now<br />
be installed.
Getting Started with the <strong>TraumaCad</strong> Server<br />
<strong>TraumaCad</strong> <strong>Admin</strong>istrator’s <strong>Guide</strong><br />
13<br />
System Requirements<br />
The following describes the requirements for the <strong>TraumaCad</strong> server,<br />
below, and the <strong>TraumaCad</strong> client, as described on page 15.<br />
!<br />
<strong>TraumaCad</strong> Server<br />
Requirements<br />
IMPORTANT:<br />
Before installing the <strong>TraumaCad</strong> server, please verify that all prerequisite<br />
software components are installed and that the minimum hardware requirements<br />
are met, as described below.<br />
This section assumes that the reader is familiar with basic Windows 2003<br />
server administration.<br />
To install the <strong>TraumaCad</strong> Server, you must be logged-on as a user<br />
with administrative privileges.<br />
Software Server Requirements<br />
• Windows 2003 Server standard edition (English only).<br />
• MS Internet Information Services (IIS) 6.<br />
• MS windows update (including all the patches and hot fixes available).<br />
• Microsoft ASP.NET.<br />
• Microsoft .NET Framework v1.1 or higher.<br />
• IE version 6 Service Pack 1 (or above).<br />
• I386 directory from the installation CD.<br />
• VCN, PCAnywhere or MS Terminal (recommended for remote<br />
diagnostics).<br />
• If the IIS server requires an SSL certificate, then this certificate must be<br />
installed on the <strong>TraumaCad</strong> server prior to its installation.
14<br />
Getting Started with the <strong>TraumaCad</strong> Server<br />
<strong>TraumaCad</strong> <strong>Admin</strong>istrator’s <strong>Guide</strong><br />
Hardware Server Requirements<br />
Minimal Server Hardware Requirements<br />
• Pentium 4 or Xeon® (3 GHz or faster)<br />
• 512 MB RAM or more<br />
• Hard Drive:<br />
• Up to 85 MB for the software<br />
• Up to 800 MB for digital templates<br />
• Permanent Internet connection<br />
• 1024x768 screen resolution<br />
• Open internet access to http://ortho-cad.com/Templates (for automatic<br />
templates library updates)<br />
Recommended Server Hardware Requirements<br />
• At least two processors of<br />
• Intel Xeon® (3.0GHz)<br />
• Dual-Core AMD Opteron (2.8Ghz)<br />
• 2-4GB RAM<br />
• Hard Drive (OS in mirror):<br />
• Up to 85 MB for the software<br />
• Up to 2 GB for digital templates<br />
• Permanent Internet connection<br />
• 1024x768 screen resolution<br />
• Open internet access to http://ortho-cad.com/Templates (for automatic<br />
templates library updates)
Getting Started with the <strong>TraumaCad</strong> Server<br />
<strong>TraumaCad</strong> <strong>Admin</strong>istrator’s <strong>Guide</strong><br />
15<br />
<strong>TraumaCad</strong> Client Requirements<br />
! IMPORTANT:<br />
Before installing <strong>TraumaCad</strong> on a client, please verify that all prerequisite<br />
software components are installed and that the minimum hardware requirements<br />
are met, as described below.<br />
This section assumes that the reader is familiar with basic Windows XP<br />
administration. To install <strong>TraumaCad</strong> client, you must be logged-on as a<br />
user with administrative privileges.<br />
Software Client Requirements<br />
• Windows XP professional 32-bit (English only*)<br />
• Windows XP Professional SP2 (English only)<br />
• MS windows update (including all the patches and hot fixes available)<br />
• Microsoft .NET Framework v1.1 SP1<br />
• IE version 6 Service Pack 1 (or above)<br />
• I386 directory from the installation CD<br />
• VCN, PCAnywhere or MS Terminal (recommended for remote<br />
diagnostics)<br />
*Note: For non-English installations, please contact <strong>TraumaCad</strong> support<br />
(support@traumacad.com).<br />
Hardware Client Requirements<br />
Minimal Client Hardware Requirements<br />
• Pentium 4 (2.4 GHz or faster)<br />
• 512 MB RAM or more<br />
• Hard Drive:<br />
• Up to 25 MB for the software<br />
• Up to 500 MB for digital templates (cache directory)<br />
• Permanent Internet connection<br />
• 1024x768 screen resolution<br />
Recommended Client Hardware Requirements<br />
• Pentium 4 or Xeon (3 GHz or faster)<br />
• 1024-2048 MB RAM or more
16<br />
Getting Started with the <strong>TraumaCad</strong> Server<br />
<strong>TraumaCad</strong> <strong>Admin</strong>istrator’s <strong>Guide</strong><br />
Preparing for Installation<br />
Before installing the <strong>TraumaCad</strong> server, perform the following:<br />
• Verify that the system on which the <strong>TraumaCad</strong> server is to be<br />
installed complies with all system requirements as specified in the<br />
System Requirements section on page 13.<br />
• If you want the <strong>TraumaCad</strong> server application to run using SSL, then<br />
you must install an SSL certificate on the machine before installing the<br />
<strong>TraumaCad</strong> server application.<br />
If you decide that you want the <strong>TraumaCad</strong> server application to run<br />
using SSL after the <strong>TraumaCad</strong> server application has already been<br />
installed, the <strong>TraumaCad</strong> server must be uninstalled and then<br />
reinstalled.<br />
• Before installing <strong>TraumaCad</strong> server, define <strong>TraumaCad</strong> as a<br />
DICOM node in your PACS server and supply the configuration details<br />
to the <strong>TraumaCad</strong> support representative and/or the implementation<br />
engineer as follows:<br />
• IP address of <strong>TraumaCad</strong> server<br />
• Application Entity (AE) Title of <strong>TraumaCad</strong> Server<br />
• Port to be used for DICOM traffic (C-FIND, C-MOVE, C-STORE)<br />
• Please visit the following URL in order to check the connectivity of the<br />
<strong>TraumaCad</strong> server computer to our online licensing server:<br />
http://ortho.securelm.net/LicenseIssueWs/IssueService.asmx<br />
If a list of services is displayed, it means that the <strong>TraumaCad</strong> server<br />
can connect to our server.<br />
If this list is not displayed, it means that the <strong>TraumaCad</strong> server<br />
computer is not connected to the Internet, or that the firewall/proxy in<br />
your organization is blocking this connection. In this case, contact your<br />
system administrator to enable this connection.<br />
Also, please email the log file (typically under C:\Program\<br />
Files\OrthoCad\<strong>TraumaCad</strong>\SecureLM.log) to<br />
Support@<strong>TraumaCad</strong>.com.
Getting Started with the <strong>TraumaCad</strong> Server<br />
<strong>TraumaCad</strong> <strong>Admin</strong>istrator’s <strong>Guide</strong><br />
17<br />
Installing the <strong>TraumaCad</strong> Server<br />
NOTE:<br />
Installation and configuration of the <strong>TraumaCad</strong> server must be performed<br />
before installing <strong>TraumaCad</strong> clients.<br />
Before installing the <strong>TraumaCad</strong> server, make sure that you have<br />
followed the instructions provided in the System Requirements section on<br />
page 13 and the Preparing for Installation section on page 16.<br />
► To install <strong>TraumaCad</strong>:<br />
1 Make sure that you have the latest <strong>TraumaCad</strong> server installation<br />
program provided by the <strong>TraumaCad</strong> support team. This can be<br />
downloaded from the web through a link provided by the<br />
<strong>TraumaCad</strong> support team or from a CD supplied in the<br />
<strong>TraumaCad</strong> installation package.<br />
2 Launch the <strong>TraumaCad</strong> installation program. The following window<br />
appears after a few moments:
18<br />
Getting Started with the <strong>TraumaCad</strong> Server<br />
<strong>TraumaCad</strong> <strong>Admin</strong>istrator’s <strong>Guide</strong><br />
3 Click Next and then accept the terms of the license agreement in the<br />
window that follows.<br />
4 Click Next and then Next again to display the following window:<br />
If you would like to work with the IIS server through SSL, then this<br />
certificate must be installed on the <strong>TraumaCad</strong> server prior to its<br />
installation.<br />
If it is, then check the Use SSL checkbox and proceed to the next step<br />
below.<br />
If you want to work with the IIS server through SSL and this certificate<br />
has not yet been installed on the <strong>TraumaCad</strong> server, then stop<br />
installation by clicking Cancel until the installer closes (by clicking<br />
Yes in the Are you sure you would like to stop the installation<br />
message window, install the certificate, and restart the installation<br />
process from the beginning).
Getting Started with the <strong>TraumaCad</strong> Server<br />
<strong>TraumaCad</strong> <strong>Admin</strong>istrator’s <strong>Guide</strong><br />
19<br />
5 Click Next to display the following window:<br />
6 Click Install and wait up to several minutes while the following<br />
window is displayed:
20<br />
Getting Started with the <strong>TraumaCad</strong> Server<br />
<strong>TraumaCad</strong> <strong>Admin</strong>istrator’s <strong>Guide</strong><br />
The following two icons should appear on your desktop:<br />
<strong>TraumaCad</strong> Server<br />
Control Panel<br />
<strong>TraumaCad</strong> Server<br />
DICOM Logs<br />
• <strong>TraumaCad</strong> Server Control Panel: provides the web pages<br />
through which you can configure the <strong>TraumaCad</strong> server, as<br />
described in Chapter 3, Configuring the <strong>TraumaCad</strong> Server on<br />
page 29.<br />
• <strong>TraumaCad</strong> DICOM Logs: provides a log of all the DICOM<br />
communication between the <strong>TraumaCad</strong> server and the PACS, as<br />
described in the Reading Log Files section on page 37.<br />
7 Click Finish.
Getting Started with the <strong>TraumaCad</strong> Server<br />
<strong>TraumaCad</strong> <strong>Admin</strong>istrator’s <strong>Guide</strong><br />
21<br />
8 The Online Activation window is displayed, as shown below:<br />
9 Paste or type the activation key that was received from the<br />
<strong>TraumaCad</strong> support team by email or that is printed on the<br />
<strong>TraumaCad</strong> server installation box, into the Activation Key field<br />
and click the Activate Online button.<br />
Its format is similar to x-xxxx-xxxx-xxxx-xxxx.<br />
! IMPORTANT:<br />
During this stage, the <strong>TraumaCad</strong> server must be connected to the<br />
Internet to enable online license activation.
22<br />
Getting Started with the <strong>TraumaCad</strong> Server<br />
<strong>TraumaCad</strong> <strong>Admin</strong>istrator’s <strong>Guide</strong><br />
10 Click OK to display the control panel, as shown below:<br />
11 A message appears in red at the top of this window to indicate that two<br />
initial configuration steps must be performed before the <strong>TraumaCad</strong><br />
server can function properly.<br />
!<br />
IMPORTANT:<br />
Make sure to perform the following two procedures before trying to use<br />
<strong>TraumaCad</strong> TM .<br />
• Configuring the PACS Servers, as described in the Configuring<br />
the PACS Servers section on page 30.<br />
• Configuring DICOM Properties, as described in the Configuring<br />
DICOM Properties section on page 32.
Getting Started with the <strong>TraumaCad</strong> Server<br />
<strong>TraumaCad</strong> <strong>Admin</strong>istrator’s <strong>Guide</strong><br />
23<br />
Verifying Proper Operation<br />
After you have installed and configured the <strong>TraumaCad</strong> server, you<br />
should check that at least one <strong>TraumaCad</strong> client can connect to the<br />
<strong>TraumaCad</strong> server and that it can query, retrieve and commit from and to<br />
the PACS. An example procedure for doing this is provided below.<br />
NOTE:<br />
You should also verify that each workstation on which a <strong>TraumaCad</strong> client will<br />
be installed meets the requirements listed in the <strong>TraumaCad</strong> Client<br />
Requirements section on page 15.<br />
► To prepare a <strong>TraumaCad</strong> client:<br />
1 Use Internet Explorer to access the <strong>TraumaCad</strong> server home page.<br />
The address is:<br />
http: //< <strong>TraumaCad</strong> server IP address>/tcwservice/index.aspx<br />
When a workstation accesses the <strong>TraumaCad</strong> server for the first<br />
time, the following window is displayed:<br />
2 Click Install to download and install the <strong>TraumaCad</strong> client ActiveX<br />
control package to this workstation.
24<br />
Getting Started with the <strong>TraumaCad</strong> Server<br />
<strong>TraumaCad</strong> <strong>Admin</strong>istrator’s <strong>Guide</strong><br />
3 Click the Start Here button to install the <strong>TraumaCad</strong> client. After<br />
installation, the <strong>TraumaCad</strong> window opens, as shown below:<br />
4 Verify that the PACS server that you defined as described in the<br />
Configuring the PACS Servers section on page 30 appears as a radio<br />
button at the top middle of the window.<br />
5 Verify that the address of the <strong>TraumaCad</strong> server appears in the title<br />
bar of the window.
Getting Started with the <strong>TraumaCad</strong> Server<br />
<strong>TraumaCad</strong> <strong>Admin</strong>istrator’s <strong>Guide</strong><br />
25<br />
6 Query the PACS for patient information by clicking the Query button.<br />
7 Retrieve an image from the PACS by double-clicking a patient name in<br />
the list. One or more images should appear as thumbnails on the left, as<br />
shown below:
26<br />
Getting Started with the <strong>TraumaCad</strong> Server<br />
<strong>TraumaCad</strong> <strong>Admin</strong>istrator’s <strong>Guide</strong><br />
8 Commit an image to the PACS by:<br />
• Selecting an orientation (AP or Lat, Left or Right) and clicking the<br />
button. The image then opens in the main view and the<br />
Calibration window appears on the left, as shown below:<br />
• Click the Skip Calibration button.<br />
• Click the Text Annotation tool and type in a textual<br />
annotation.<br />
• Click OK and the annotation will appear on the image.<br />
• Click Next and choose any procedure.
Getting Started with the <strong>TraumaCad</strong> Server<br />
<strong>TraumaCad</strong> <strong>Admin</strong>istrator’s <strong>Guide</strong><br />
27<br />
• Click Next until you see a window similar to the following:<br />
• Click the Commit button. The following message indicates that the<br />
image was successfully committed to the PACS.<br />
If any of these processes do not work, then:<br />
• Check the PACS configuration on the <strong>TraumaCad</strong> server by<br />
verifying the correctness of the PACS IP address, AE titles and ports.<br />
• Check the <strong>TraumaCad</strong> server configuration on the PACS by<br />
verifying the correctness of the <strong>TraumaCad</strong> server IP address, AE<br />
titles and ports.<br />
• Restart the IIS on the <strong>TraumaCad</strong> server and test the workstation<br />
again.
28<br />
Getting Started with the <strong>TraumaCad</strong> Server<br />
<strong>TraumaCad</strong> <strong>Admin</strong>istrator’s <strong>Guide</strong><br />
This page was intentionally left blank.
Configuring the <strong>TraumaCad</strong> Server<br />
<strong>TraumaCad</strong> <strong>Admin</strong>istrator’s <strong>Guide</strong><br />
29<br />
5Chapter 3<br />
Configuring the<br />
<strong>TraumaCad</strong><br />
Server<br />
About This Chapter<br />
This chapter contains the following sections:<br />
• Configuring the PACS Servers, page 30<br />
• Configuring DICOM Properties, page 32<br />
• Configuring Logging, page 35<br />
• Reading Log Files, page 37<br />
• Download/Update Templates, page 39<br />
• Templates Updating Service, page 46
30<br />
Configuring the <strong>TraumaCad</strong> Server<br />
<strong>TraumaCad</strong> <strong>Admin</strong>istrator’s <strong>Guide</strong><br />
Configuring the PACS Servers<br />
This step describes how to configure the <strong>TraumaCad</strong> server to connect to<br />
the PACS servers in order to access DICOM images.<br />
► To configure the connection to the PACS servers:<br />
1 Click the button to display the following window:<br />
2 Click on the Add Server button to display a table as shown below:
Configuring the <strong>TraumaCad</strong> Server<br />
<strong>TraumaCad</strong> <strong>Admin</strong>istrator’s <strong>Guide</strong><br />
31<br />
3 Define a PACS server to which the <strong>TraumaCad</strong> server can connect<br />
by filling in the following fields. Double-click a field to edit it.<br />
Each row represents a single PACS. You can define more than one<br />
PACS by filling in one per row, as follows:<br />
• Server Name: PACS server name.<br />
• Application Entity Title: PACS AE title.<br />
• PACS Query System Port: This is the port used to query and<br />
retrieve images from the PACS (C-FIND and C-MOVE).<br />
• Server IP Address: The IP address of the PACS server.<br />
• DICOM Send Port: This is the port used for committing images to<br />
the PACS (C-STORE).<br />
4 Click Save Settings after you enter each row.
32<br />
Configuring the <strong>TraumaCad</strong> Server<br />
<strong>TraumaCad</strong> <strong>Admin</strong>istrator’s <strong>Guide</strong><br />
Configuring DICOM Properties<br />
This step describes how to configure the <strong>TraumaCad</strong> server as a DICOM<br />
node. It determines the way that the <strong>TraumaCad</strong> server interacts with the<br />
PACS systems.<br />
► To configure DICOM properties:<br />
1 Click the button to display the following window:<br />
2 Fill out the Local DICOM Properties, as follows:<br />
• DICOM Server Port: This is the port number to be used to query<br />
(C-FIND), retrieve (C-MOVE) and commit (C-STORE) from/to the<br />
PACS from <strong>TraumaCad</strong>.<br />
• Local Application Entity: <strong>TraumaCad</strong> Application Entity in the<br />
PACS.
Configuring the <strong>TraumaCad</strong> Server<br />
<strong>TraumaCad</strong> <strong>Admin</strong>istrator’s <strong>Guide</strong><br />
33<br />
3 If you only defined one PACS server in the Configuring the PACS<br />
Servers section, as described on page 30, then this PACS server<br />
automatically appears in the Default Server Settings area in the<br />
Default QR Server and the Default Send Server fields. In this case,<br />
skip to Step 4.<br />
If you defined more than one PACS server in the Configuring the<br />
PACS Servers section, as described on page 30, then you can specify<br />
which PACS server is used for each type of operation:<br />
• In the Default QR Server dropdown field, select the PACS server to<br />
be used by default for querying and retrieving (C-FIND and C-<br />
RETREIVE) to/from the PACS.<br />
• In the Default Send Server dropdown field, select the PACS server<br />
to be used by default for sending (C-STORE) to the PACS.<br />
In this case, you must select the Default PACS radio button, which<br />
indicates that the system will use the servers specified in the Default<br />
QR Server and the Default Send Server fields.<br />
In the example below, the configuration on the left shows the definition<br />
of a single PACS server, and the configuration on the right shows the<br />
definition of different PACS servers.<br />
A Single PACS Server<br />
Different PACS Servers
34<br />
Configuring the <strong>TraumaCad</strong> Server<br />
<strong>TraumaCad</strong> <strong>Admin</strong>istrator’s <strong>Guide</strong><br />
4 Fill out the <strong>TraumaCad</strong> Workstation Properties, as follows:<br />
• Allow Import of DICOM files on the workstations: Check this<br />
option to specify that the Import Image button is available on the<br />
<strong>TraumaCad</strong> workstations. This button enables the users to import<br />
images from another source, such as: a CD, digital camera and so on.<br />
• Enable queries on the workstations: Check this option to specify<br />
that the Query button is available on the <strong>TraumaCad</strong><br />
workstations. This button enables the users to find patients according<br />
to criteria that they specify, such as: Last Name, patient ID, Study<br />
Date and so on.<br />
• Committing Images to: Please refer to Step 3 in the Configuring<br />
the PACS Servers section, as described on page 30, for a description<br />
of this field.<br />
• Commit as Modality: Specify the modality type of the system. If<br />
this field is left blank, then the original modality type of the image is<br />
retained. An example of the usage of this field is when a hospital<br />
would like to indicate that preoperative planning information was<br />
added as an additional series. In this case, you might enter<br />
Orthopedic Templating (OT) in this field.<br />
• Skip auto-calibration feature: Check this option to specify that the<br />
automatic calibration feature that is used in <strong>TraumaCad</strong><br />
workstations is disabled.<br />
• Metal Ball Diameter: Enter the diameter of the calibration metal<br />
ball (if applicable). The default is 1" inch (2.54mm).<br />
5 Click Save Settings to save all these settings to the <strong>TraumaCad</strong><br />
server.<br />
NOTE:<br />
After you have completed this step and the Configuring the PACS Servers step,<br />
as described on page 30, the red message that was shown on page 22 should<br />
disappear.
Configuring the <strong>TraumaCad</strong> Server<br />
<strong>TraumaCad</strong> <strong>Admin</strong>istrator’s <strong>Guide</strong><br />
35<br />
Configuring Logging<br />
This step describes how to configure the <strong>TraumaCad</strong> server logging<br />
options.<br />
► To configure the <strong>TraumaCad</strong> server logging options:<br />
1 Click the button to display the following window:<br />
2 Check the Log events and messages option to enable logging on the<br />
<strong>TraumaCad</strong> server. This option is selected by default, and we<br />
recommend that it remain checked.<br />
3 In the Log files folder field, specify the directory in which to store the<br />
log.
36<br />
Configuring the <strong>TraumaCad</strong> Server<br />
<strong>TraumaCad</strong> <strong>Admin</strong>istrator’s <strong>Guide</strong><br />
4 Check one or more relevant options in the Define logging level area in<br />
order to specify the depth and type of information that is logged by the<br />
<strong>TraumaCad</strong> server, as follows. The default option is Warning. We<br />
recommend that you leave these settings as they are.<br />
• Debug: For internal use by <strong>TraumaCad</strong> support representatives.<br />
• Config: Logs configuration updates and errors.<br />
• Warning: Logs system warnings. This is the default.<br />
• Verbose: Logs the maximum amount of information about each<br />
action and problem.<br />
• Info: Logs general system actions.<br />
• Exception: Logs serious system problems.<br />
IMPORTANT:<br />
!<br />
If you detect a problem in the system, we recommend that you check all the<br />
logging options described above and then repeat the action that caused the<br />
problem. Afterwards, send the log file by email to Support@<strong>TraumaCad</strong>.com<br />
5 Click Save Settings to save all these settings to the <strong>TraumaCad</strong><br />
server.
Configuring the <strong>TraumaCad</strong> Server<br />
<strong>TraumaCad</strong> <strong>Admin</strong>istrator’s <strong>Guide</strong><br />
37<br />
Reading Log Files<br />
This section describes how to view the log files, which can be used for<br />
troubleshooting purposes.<br />
► To view log files:<br />
Click the<br />
following:<br />
button to display a window similar to the<br />
Each row in the window represents a separate log file. A log file is started<br />
each new day and each time the <strong>TraumaCad</strong> server is restarted.<br />
NOTE:<br />
Typically, the <strong>TraumaCad</strong> server should be restarted at least once a month.
38<br />
Configuring the <strong>TraumaCad</strong> Server<br />
<strong>TraumaCad</strong> <strong>Admin</strong>istrator’s <strong>Guide</strong><br />
The display of the logs shows the following columns:<br />
• Log File Name: The name of the log file. The name of each log file is<br />
in the noted format according to the day on which it was recorded.<br />
• Last Activity At: The date and time of the last activity logged in this<br />
file.<br />
• Created At: The date and time of the first activity logged in this file.<br />
• Display: Provides a link that you can click to view the log entries in<br />
this log file. The following types of logs are recorded by the<br />
<strong>TraumaCad</strong> server:<br />
• T.C.AuditTrail.YYYYMMDD.log: This log shows the auditing of<br />
user actions in the system.<br />
• TCTemplatesService.YYYYMMDD.log: This log shows the<br />
template updates and update problems on the <strong>TraumaCad</strong> server.
Configuring the <strong>TraumaCad</strong> Server<br />
<strong>TraumaCad</strong> <strong>Admin</strong>istrator’s <strong>Guide</strong><br />
39<br />
• TCWService.YYYYMMDD.log: This log shows the actions of the<br />
main web service of the <strong>TraumaCad</strong> server. Usually, this log will<br />
contain error messages and warnings.<br />
• Download: Click to download the log file to your computer in order to<br />
provide it to <strong>TraumaCad</strong> support if needed.<br />
Download/Update Templates<br />
This section describes the processing of downloading and updating the<br />
latest templates to the <strong>TraumaCad</strong> server. This process is activated in<br />
order to download and update the latest templates from the Orthocrat online<br />
database to your local <strong>TraumaCad</strong> server’s templates library, so that they<br />
can be served to the <strong>TraumaCad</strong> workstations.<br />
It is activated in the following cases:<br />
• Automatically after installation, and this process may take a few hours.<br />
• Manually on an as-needed basis, as described in the Downloading<br />
Templates section on page 44. This option is typically used when the<br />
<strong>TraumaCad</strong> server is not continuously connected to the Internet. To<br />
use this option, connect to the Internet, download and then disconnect.<br />
• According to a schedule, as described in the Templates Updating<br />
Service section on page 46.
40<br />
Configuring the <strong>TraumaCad</strong> Server<br />
<strong>TraumaCad</strong> <strong>Admin</strong>istrator’s <strong>Guide</strong><br />
During the Downloading Process<br />
This process is activated automatically after installation and may take a few<br />
hours. During this time, do not access the templates page in the control<br />
panel.<br />
While the <strong>TraumaCad</strong> server is downloading, the following message is<br />
displayed:<br />
• The TCTemplatesService is currently updating the local templates<br />
library. Please try again later (updating may take a few hours).<br />
• The TCTemplatesService is currently updating the templates library.<br />
You cannot access this page while the service is downloading.<br />
• Please try again later or click here.<br />
Because of the fact that this process may take up to several hours, you may<br />
want to see how this process is progressing.
Configuring the <strong>TraumaCad</strong> Server<br />
<strong>TraumaCad</strong> <strong>Admin</strong>istrator’s <strong>Guide</strong><br />
41<br />
► To view the downloading progress:<br />
1 Right-click My Computer and select Manage from the popup menu.<br />
2 Under the System Tools branch, select Event Viewer and then<br />
Templates Service, to display a window similar to the following:<br />
The <strong>TraumaCad</strong> templates library currently contains approximately<br />
16,000 templates, which are downloaded in packages. Each<br />
successfully downloaded template package appears in the Event<br />
Viewer as a Success Audit event.<br />
You can press F5 to see that more Success Audit event rows appear.
42<br />
Configuring the <strong>TraumaCad</strong> Server<br />
<strong>TraumaCad</strong> <strong>Admin</strong>istrator’s <strong>Guide</strong><br />
3 You can double-click an event to display a window describing the<br />
event, as shown below:<br />
!<br />
IMPORTANT:<br />
If you suspect that a specific template should appear in the <strong>TraumaCad</strong><br />
workstation and it does not, you can open this window to see if there are<br />
any TCTemplatesService event Warnings or Errors. If there are, you may<br />
want to display more information about this event by double-clicking it as<br />
described above and sending the event log to <strong>TraumaCad</strong> support, if<br />
needed.
Configuring the <strong>TraumaCad</strong> Server<br />
<strong>TraumaCad</strong> <strong>Admin</strong>istrator’s <strong>Guide</strong><br />
43<br />
Completion of the Downloading<br />
Process<br />
► To verify that the downloading process is complete:<br />
1 Right-click My Computer and select Manage from the popup menu.<br />
2 Under the System Tools branch, select Event Viewer and then<br />
Templates Service.<br />
3 If the downloading process is complete, one or more<br />
Information events will appear at the top of the window, as shown<br />
below. Double-click one of them. If you see a description that says:<br />
Templates indexing process ended successfully…<br />
Then the process has completed.
44<br />
Configuring the <strong>TraumaCad</strong> Server<br />
<strong>TraumaCad</strong> <strong>Admin</strong>istrator’s <strong>Guide</strong><br />
Downloading Templates<br />
► To download templates:<br />
1 The process of downloading templates is started automatically after<br />
installation or can be started by clicking the<br />
button. The following window is then displayed:<br />
This window lists the templates that are stored locally on the<br />
<strong>TraumaCad</strong> server. The following describes the legend at the bottom<br />
of the window:<br />
Black Downloaded Template: Templates that were downloaded and<br />
are already stored on the <strong>TraumaCad</strong> server and are up to date.<br />
Blue Not Downloaded Template: Templates that are not downloaded<br />
to the <strong>TraumaCad</strong> server and are available for downloading.<br />
Red Expired Template: Templates that are stored locally and for<br />
which a newer version exists and is available for downloading.
Configuring the <strong>TraumaCad</strong> Server<br />
<strong>TraumaCad</strong> <strong>Admin</strong>istrator’s <strong>Guide</strong><br />
45<br />
2 In the Templates Local Path field, specify the path to which the<br />
templates will be saved. This value should not be changed without first<br />
consulting with a <strong>TraumaCad</strong> support representative.<br />
NOTE:<br />
At least 1GB of space must be available on the local drive.<br />
3 You can use the Filter Templates View field to filter the view of<br />
templates that are displayed. To do so, enter any text string, such as the<br />
name of a manufacturer in this field and then click the<br />
button.<br />
4 Select the templates that you want to download by using the buttons at<br />
the bottom of the window or checking the check boxes in the window<br />
and click .<br />
Downloading Templates Window Buttons<br />
The following describes the four buttons that appear at the bottom of this<br />
window:<br />
• Select Expired Templates: Check this button to select<br />
all the templates that are stored locally and for which a newer version<br />
exists and is available for downloading.<br />
• Select Undownloaded Templates: Check this button<br />
to select all the templates that are not downloaded to the <strong>TraumaCad</strong><br />
server and are available for downloading.<br />
• Select None: Check this button to unselect all the selected<br />
templates in this window.<br />
• Download Selected Items: Select the templates<br />
that you want to download using the buttons described above and then<br />
click this button to download them to the <strong>TraumaCad</strong> server.
46<br />
Configuring the <strong>TraumaCad</strong> Server<br />
<strong>TraumaCad</strong> <strong>Admin</strong>istrator’s <strong>Guide</strong><br />
Templates Updating Service<br />
This section describes how to define a schedule for updating the templates<br />
on your local <strong>TraumaCad</strong> server from the Orthocrat online database<br />
server.<br />
► To update templates:<br />
1 Click the button to display a window similar to<br />
the following:<br />
The Templates Service Status area indicates whether this service is<br />
active. The service should be active at all times, except when the site<br />
has no internet connection. While the service is stopped, no errors are<br />
documented in the Event Viewer, which was described in the previous<br />
pages.
Configuring the <strong>TraumaCad</strong> Server<br />
<strong>TraumaCad</strong> <strong>Admin</strong>istrator’s <strong>Guide</strong><br />
47<br />
2 In the Service preferences area, you can start, stop or pause this<br />
service. Stopping the service while it is running may take a few<br />
minutes. Once you stop it, it remains stopped until the <strong>TraumaCad</strong><br />
TCTemplateService is restarted.<br />
3 In the Schedule area, select the day of the week on which this process<br />
should start and the time range within which it should start (we<br />
recommend to select night hours).<br />
NOTE:<br />
Please allow enough time for the template download process to complete,<br />
which usually takes a few hours.<br />
4 Click Save Settings to save all these settings to the <strong>TraumaCad</strong><br />
server.<br />
!<br />
IMPORTANT:<br />
If you have a problem downloading templates or a template does not appear<br />
on the <strong>TraumaCad</strong> workstation, try to resolve it by clicking the Index<br />
Template Now button and check if this has solved the problem. This<br />
process may take several minutes.
48<br />
Configuring the <strong>TraumaCad</strong> Server<br />
<strong>TraumaCad</strong> <strong>Admin</strong>istrator’s <strong>Guide</strong><br />
This page is intentionally left blank.
Configuring Security Settings<br />
<strong>TraumaCad</strong> <strong>Admin</strong>istrator’s <strong>Guide</strong><br />
49<br />
6Chapter 4<br />
Configuring<br />
Security Settings<br />
This step is optional. You can use it to configure <strong>TraumaCad</strong> security<br />
settings so that each time a <strong>TraumaCad</strong> client application is launched, it<br />
requests an authorized user name and password, as shown below:
50<br />
Configuring Security Settings<br />
<strong>TraumaCad</strong> <strong>Admin</strong>istrator’s <strong>Guide</strong><br />
Turning Off Anonymous Access<br />
Authentication in IIS<br />
Turn off anonymous access authentication in IIS for the TCWAuth.asmx<br />
file under TCWLicense, as follows:<br />
► To turn off anonymous access authentication in IIS:<br />
1 Open the IIS Manager.<br />
2 Right-click TCWAuth.asmx and select Properties from the menu.<br />
The TCWAuth.asmx Properties window is displayed.<br />
3 In the File Security tab, click the Edit button. The Authentication<br />
Methods window is displayed.<br />
• Uncheck the Enable anonymous access checkbox.<br />
• Verify that the .NET Passport authentication checkbox is<br />
unchecked.<br />
• Click OK to exit this window and then OK again in the<br />
TCWAuth.asmx window.
Configuring Security Settings<br />
<strong>TraumaCad</strong> <strong>Admin</strong>istrator’s <strong>Guide</strong><br />
51<br />
4 Open the TCWLicense folder under IIS<br />
(c:\inetpub\wwwroot\TCWLicense) and set the security options for the<br />
TCWAuth.asmx file, as follows:<br />
5 Right-click TCWAuth.asmx at c:\Inetpub\wwwroot\TCWLicense<br />
and select Properties from the menu. The TCWAuth.asmx Properties<br />
window is displayed.
52<br />
Configuring Security Settings<br />
<strong>TraumaCad</strong> <strong>Admin</strong>istrator’s <strong>Guide</strong><br />
6 In the Security tab, click the Advanced button. The Advanced Security<br />
Settings for TCWAuth.asmx window is displayed:<br />
7 Uncheck the Allow inheritable permissions… checkbox. The<br />
following window is then displayed:
Configuring Security Settings<br />
<strong>TraumaCad</strong> <strong>Admin</strong>istrator’s <strong>Guide</strong><br />
53<br />
8 Click the Copy button and then OK. The TCWAuth.asmx Properties<br />
window is then displayed showing the same users group (without<br />
inheritable permissions), as shown below:<br />
9 Make sure that the following users/groups have the following<br />
permissions:<br />
• The <strong>Admin</strong>istrators group has Full Control permissions.<br />
• NETWORK SERVICE (in IIS V.6) or ASPNET (in IIS V.5) has<br />
Read. More details are provided on this subject in the section that<br />
follows.<br />
• The desired group (local group or an Active Directory group) has<br />
Modify, Read & Execute, Read and Write permissions. More<br />
details are provided on this subject in the section that follows.
54<br />
Configuring Security Settings<br />
<strong>TraumaCad</strong> <strong>Admin</strong>istrator’s <strong>Guide</strong><br />
Adding the Network Service User<br />
► To add a network service user:<br />
1 Open the IIS Manager.<br />
2 Right-click TCWAuth.asmx and select Properties from the menu.<br />
The TCWAuth.asmx Properties window is displayed.<br />
3 In the File Security tab, click the Add button. The following window<br />
appears:<br />
4 Click the Locations button to display a window similar to the<br />
following:
Configuring Security Settings<br />
<strong>TraumaCad</strong> <strong>Admin</strong>istrator’s <strong>Guide</strong><br />
55<br />
5 Select your local computer name and click OK to display the following<br />
window:<br />
6 In the Enter the object names to select area, type NETWORK<br />
SERVICE and click the Check Names button to find the network<br />
service user locally on the <strong>TraumaCad</strong> server. It appears all<br />
capitalized and underlined when it is found.<br />
NOTE:<br />
This network service user is found locally on the <strong>TraumaCad</strong> server and<br />
not in the Active Directory of the organization.
56<br />
Configuring Security Settings<br />
<strong>TraumaCad</strong> <strong>Admin</strong>istrator’s <strong>Guide</strong><br />
7 Click OK to return to the TCWAuth.asmx Properties window in which<br />
you will now see that the NETWORK SERVICE user has been added,<br />
as shown below:
Configuring Security Settings<br />
<strong>TraumaCad</strong> <strong>Admin</strong>istrator’s <strong>Guide</strong><br />
57<br />
Adding the Active Directory Group<br />
Add the Active Directory group which specifies the groups of users<br />
allowed to access the <strong>TraumaCad</strong> application by clicking the Add button.<br />
► To add the Active Directory Group:<br />
1 In the Select Users or Groups window, click the Locations button to<br />
display a window similar to the following:<br />
2 Select the location of the Active Directory and click OK.<br />
3 In the Select Users or Groups window, in the Enter the object names<br />
to select area, type the name of the Active Directory and click the<br />
Check Names button.<br />
4 Once the name appears underlined, it can be assigned the following<br />
permission by checking the appropriate check boxes: Modify, Read &<br />
Execute, Read and Write.
58<br />
Configuring Security Settings<br />
<strong>TraumaCad</strong> <strong>Admin</strong>istrator’s <strong>Guide</strong><br />
5 Select the other user groups in the Group or user name area and click<br />
the Remove button, so that only the new <strong>TraumaCad</strong> group, the<br />
<strong>Admin</strong>istrators group and the network service user remain in the<br />
window (similar to the following).
Configuring Security Settings<br />
<strong>TraumaCad</strong> <strong>Admin</strong>istrator’s <strong>Guide</strong><br />
59<br />
Testing Security Settings<br />
► To test that the security settings operate properly:<br />
1 Log on to a domain computer using a non-authorized user.<br />
2 Open <strong>TraumaCad</strong> home page<br />
(http://<br />
3 When prompted for a user name and password, enter a non-authorized<br />
user name for the <strong>TraumaCad</strong> application in the credentials window<br />
and click OK. The <strong>TraumaCad</strong> client should not be opened.<br />
4 Then enter an authorized user name for the <strong>TraumaCad</strong> application<br />
in the credentials window and click OK. The <strong>TraumaCad</strong> client<br />
should open.<br />
5 In <strong>TraumaCad</strong> audit trail log, which is typically located on<br />
<strong>TraumaCad</strong> server at the C:\LOG directory, verify that the<br />
credentials appear of the user marked in the open <strong>TraumaCad</strong>.
60<br />
Configuring Security Settings<br />
<strong>TraumaCad</strong> <strong>Admin</strong>istrator’s <strong>Guide</strong><br />
This page is intentionally left blank.
Scaling X-Rays<br />
<strong>TraumaCad</strong> <strong>Admin</strong>istrator’s <strong>Guide</strong><br />
61<br />
7Chapter 5<br />
Scaling X-Rays<br />
In order to enable automatic calibration of images in <strong>TraumaCad</strong>, all you<br />
need to do is to place the scaling sphere on the same plane as the bone<br />
during image acquisition. This means that the bone and the sphere should<br />
be the same distance from the x-ray plate and the x-ray source. An example<br />
is shown below:
62<br />
Scaling X-Rays<br />
<strong>TraumaCad</strong> <strong>Admin</strong>istrator’s <strong>Guide</strong><br />
The following shows an example of a calibrated image in <strong>TraumaCad</strong>:
Scaling X-Rays<br />
<strong>TraumaCad</strong> <strong>Admin</strong>istrator’s <strong>Guide</strong><br />
63<br />
Theory of Operation<br />
This section describes the theory of how the scaling sphere resolves the<br />
calibration problems inherent in x-rays.<br />
Reading this section is not mandatory.<br />
Direct linear measurements cannot be taken from plain x-rays because of<br />
the unknown magnification factor inherent in the x-ray taking process.<br />
X-rays are generated at a point source and radiate out in a divergent beam<br />
from that point. The beam is directed through the person or object to be<br />
imaged and then the shadow is recorded on the x-ray sensitive plate, some<br />
distance behind the object.<br />
There are two ways of determining the magnification factor.<br />
• To identify the distance from the source of the x-rays to the object and<br />
the distance from the source to the x-ray plate.<br />
• To include an object of known size or a radio opaque ruler in the plane<br />
of interest.<br />
Scaling Sphere<br />
Orthocrat’s scaling sphere employs the second method. It provides a scale<br />
for plain x-rays, CR and DR, such as are commonly used in orthopedics.<br />
The bone and sphere should therefore be the same distance from the x-ray<br />
plate and the x-ray source.<br />
When an x-ray image is scaled using a ruler or simple object, it is<br />
impossible to verify whether the scale was placed in the correct plane at the<br />
time of acquisition. The advantage of the sphere is that it is threedimensional<br />
and its diameter is constant from any angle that the x-ray may<br />
be taken.
64<br />
Scaling X-Rays<br />
<strong>TraumaCad</strong> <strong>Admin</strong>istrator’s <strong>Guide</strong><br />
This page was intentionally left blank.
Troubleshooting the <strong>TraumaCad</strong> Server<br />
<strong>TraumaCad</strong> <strong>Admin</strong>istrator’s <strong>Guide</strong><br />
65<br />
8Chapter 6<br />
Troubleshooting<br />
the <strong>TraumaCad</strong><br />
Server<br />
About This Chapter<br />
This chapter provides several sections, each of which describes how to<br />
troubleshoot a different element of the <strong>TraumaCad</strong> server configuration.<br />
This chapter contains the following sections:<br />
• DICOM Connectivity from/to <strong>TraumaCad</strong> Server, page 66<br />
• <strong>TraumaCad</strong> and Philips Sectra PACS, page 67<br />
• <strong>TraumaCad</strong> and Agfa PACS, page 69<br />
• <strong>TraumaCad</strong> Client Installation, page 71<br />
• <strong>TraumaCad</strong> ActiveX Debug Mode, page 74<br />
• Enabling <strong>TraumaCad</strong> Logging for Diagnostic Purposes, page 75<br />
• Templates Issues, page 76<br />
• Requests for New Templates, page 81<br />
• Using Medical Tools, page 81
66<br />
Troubleshooting the <strong>TraumaCad</strong> Server<br />
<strong>TraumaCad</strong> <strong>Admin</strong>istrator’s <strong>Guide</strong><br />
Existing customers can access the <strong>TraumaCad</strong> support portal which<br />
contains additional solutions to various problems. In order to obtain a<br />
username and password for the Orthocrat support portal, please contact<br />
<strong>TraumaCad</strong> support (support@traumacad.com).<br />
You will then get an email containing the support portal link, user<br />
name and password.<br />
DICOM Connectivity from/to<br />
<strong>TraumaCad</strong> Server<br />
In order to check that the <strong>TraumaCad</strong> server is connected to the PACS, a<br />
test can be performed using a Telnet command.<br />
► To check that the <strong>TraumaCad</strong> server is connected to the<br />
PACS:<br />
1 Open a command line window.<br />
2 Type: telnet PACS_SERVER_IP PACS_SERVER_PORT, as shown<br />
below:<br />
An empty window should be displayed. An example is shown below:
Troubleshooting the <strong>TraumaCad</strong> Server<br />
<strong>TraumaCad</strong> <strong>Admin</strong>istrator’s <strong>Guide</strong><br />
67<br />
If a window similar to the one shown below is displayed, verify that the<br />
PACS details of the <strong>TraumaCad</strong> configuration are correct and that a<br />
DICOM node on the PACS was configured with the <strong>TraumaCad</strong><br />
details.<br />
<strong>TraumaCad</strong> and Philips Sectra<br />
PACS<br />
As Sectra PACS supports several transfer syntaxes. In order to support<br />
<strong>TraumaCad</strong>’s transfer syntax, a registry entry must be inserted on<br />
<strong>TraumaCad</strong> server:<br />
► To support <strong>TraumaCad</strong>’s transfer syntax:<br />
1 Open Notepad.exe on the <strong>TraumaCad</strong> server.<br />
2 Copy the segment shown below from this document into Notepad:<br />
Windows Registry Editor Version 5.00<br />
[HKEY_LOCAL_MACHINE\SOFTWARE\Medical Connections]<br />
[HKEY_LOCAL_MACHINE\SOFTWARE\Medical<br />
Connections\DicomObjects]<br />
"Log"=dword:00000001<br />
"LogLevel"=dword:0000003f<br />
"LogLocation"="C:\\Log"<br />
[HKEY_LOCAL_MACHINE\SOFTWARE\Medical<br />
Connections\DicomObjects\TransferSyntax]<br />
@="1.2.840.10008.1.2"
68<br />
Troubleshooting the <strong>TraumaCad</strong> Server<br />
<strong>TraumaCad</strong> <strong>Admin</strong>istrator’s <strong>Guide</strong><br />
Notepad should appear, as follows:<br />
3 In Notepad, select Save As from the File menu.<br />
4 Type Sectra_PACS+Registry.reg and save the file.<br />
5 Close Notepad and double-click the file. A message is displayed asking<br />
you to approve the action.<br />
6 Click OK.<br />
7 Reboot the <strong>TraumaCad</strong> server and test using query and retrieve from<br />
one of the <strong>TraumaCad</strong> workstations.
Troubleshooting the <strong>TraumaCad</strong> Server<br />
<strong>TraumaCad</strong> <strong>Admin</strong>istrator’s <strong>Guide</strong><br />
69<br />
<strong>TraumaCad</strong> and Agfa PACS<br />
As Agfa PACS supports several transfer syntaxes. In order to support<br />
<strong>TraumaCad</strong>’s transfer syntax, a registry entry must be inserted on<br />
<strong>TraumaCad</strong> server.<br />
► To support <strong>TraumaCad</strong>’s transfer syntax:<br />
1 Open Notepad.exe on the <strong>TraumaCad</strong> server.<br />
2 Copy the segment shown below from this document into Notepad:<br />
Windows Registry Editor Version 5.00<br />
[HKEY_LOCAL_MACHINE\SOFTWARE\Medical Connections]<br />
[HKEY_LOCAL_MACHINE\SOFTWARE\Medical<br />
Connections\DicomObjects]<br />
"Log"=dword:00000001<br />
"LogLevel"=dword:0000003f<br />
"LogLocation"="C:\\Log"<br />
[HKEY_LOCAL_MACHINE\SOFTWARE\Medical<br />
Connections\DicomObjects\TransferSyntax]<br />
@="1.2.840.10008.1.2.1 1.2.840.10008.1.2<br />
1.2.840.10008.1.2.4.57 1.2.840.10008.1.2.4.70"<br />
Notepad should appear, as follows:
70<br />
Troubleshooting the <strong>TraumaCad</strong> Server<br />
<strong>TraumaCad</strong> <strong>Admin</strong>istrator’s <strong>Guide</strong><br />
3 In Notepad, select Save As from the File menu.<br />
4 Type AGFA_PACS_Registry.reg and save the file.<br />
5 Close Notepad and double-click the file. A message is displayed asking<br />
you to approve the action.<br />
6 Click OK.<br />
7 Reboot the <strong>TraumaCad</strong> server and test using query and retrieve from<br />
one of <strong>TraumaCad</strong> workstations.
Troubleshooting the <strong>TraumaCad</strong> Server<br />
<strong>TraumaCad</strong> <strong>Admin</strong>istrator’s <strong>Guide</strong><br />
71<br />
<strong>TraumaCad</strong> Client Installation<br />
<strong>TraumaCad</strong> application (client side) is comprised of two elements:<br />
• <strong>TraumaCad</strong> ActiveX control<br />
• <strong>TraumaCad</strong> Client application<br />
The following must be performed before installing the <strong>TraumaCad</strong><br />
application as a client for the first time:<br />
• Disabling the Internet Explorer Popup Blocker, as described below<br />
• Defining the <strong>TraumaCad</strong> Server as a Trusted Site, as described<br />
on page 72<br />
Disabling the Internet Explorer<br />
Popup Blocker<br />
In order to install the ActiveX component of the <strong>TraumaCad</strong> server, the<br />
Internet Explorer popup blocker must be disabled.<br />
► To disable the Internet Explorer popup blocker:<br />
1 Open Internet Explorer.<br />
2 From the Application menu, select Tools and then Pop-up Blocker.<br />
3 Click Turn Off Pop-up Blocker, as shown below:
72<br />
Troubleshooting the <strong>TraumaCad</strong> Server<br />
<strong>TraumaCad</strong> <strong>Admin</strong>istrator’s <strong>Guide</strong><br />
Defining the <strong>TraumaCad</strong> Server<br />
Home Page as a Trusted Site<br />
The <strong>TraumaCad</strong> server home page URL must be placed in the Internet<br />
Explorer Trusted Sites page.<br />
► To define the <strong>TraumaCad</strong> Server as a Trusted Site:<br />
1 Open Internet Explorer.<br />
2 From the Application menu, select Tools and then Internet Options.<br />
3 In the Internet Options window, select the Security tab and then click<br />
Trusted Sites, as shown below:
Troubleshooting the <strong>TraumaCad</strong> Server<br />
<strong>TraumaCad</strong> <strong>Admin</strong>istrator’s <strong>Guide</strong><br />
73<br />
4 Click the Sites button to display the Trusted Sites window, as shown<br />
below:<br />
5 In the Add this website to the zone field, type in the URL of the<br />
<strong>TraumaCad</strong> server, and click the Add button.<br />
6 Approve these entries by clicking OK twice.
74<br />
Troubleshooting the <strong>TraumaCad</strong> Server<br />
<strong>TraumaCad</strong> <strong>Admin</strong>istrator’s <strong>Guide</strong><br />
<strong>TraumaCad</strong> ActiveX Debug Mode<br />
The <strong>TraumaCad</strong> ActiveX control has a debug mode to enable the system<br />
administrator to make sure that the client workstation meets the software<br />
prerequisites, as described in the <strong>TraumaCad</strong> Client Requirements<br />
section on page 15.<br />
If you have any failures during client installation, turn on the Active X<br />
debug mode.<br />
In order to initiate this mode, type the following URL in the client internet<br />
explorer: http://TraumacadServerIP/TCWservice/index.aspx?debug=1<br />
The ActiveX then returns a popup window for each step of the client<br />
installation process (some of which are shown below). From these<br />
windows, you may be able to determine the specific error that you are<br />
facing in the event of such an error.
Troubleshooting the <strong>TraumaCad</strong> Server<br />
<strong>TraumaCad</strong> <strong>Admin</strong>istrator’s <strong>Guide</strong><br />
75<br />
Enabling <strong>TraumaCad</strong> Logging for<br />
Diagnostic Purposes<br />
<strong>TraumaCad</strong> client has built-in logging abilities, which are disabled by<br />
default. To enable logging, apply the required registry key, as described<br />
below.<br />
► To enable the logging capabilities of the <strong>TraumaCad</strong><br />
client:<br />
1 Close the <strong>TraumaCad</strong> client, if it is opened.<br />
2 Open Notepad.exe on the client on which to start logging.<br />
3 Copy the segment shown below from this document into Notepad:<br />
Windows Registry Editor Version 5.00<br />
[HKEY_LOCAL_MACHINE\SOFTWARE\Orthocrat\<strong>TraumaCad</strong>]<br />
"Log"=dword:00000001<br />
"LogLevel"=dword:1000<br />
"LogFolder"="d:\\TMP"<br />
Notepad should appear as follows:<br />
Please make sure that the D:\TMP directory exists on the client and<br />
change accordingly.<br />
4 In Notepad, select Save As from the File menu.<br />
5 Type Enable_TC_log.reg and save the file.
76<br />
Troubleshooting the <strong>TraumaCad</strong> Server<br />
<strong>TraumaCad</strong> <strong>Admin</strong>istrator’s <strong>Guide</strong><br />
6 Close Notepad and double-click the file. A message is displayed asking<br />
you to approve the action.<br />
7 Click OK.<br />
8 Reboot the <strong>TraumaCad</strong> client and perform a Query and a Retrieve<br />
test.<br />
9 Once the tests have been completed, please navigate to X:\LOG.<br />
X represents the directory in which the files will be located, as shown<br />
in the registry key, described above.<br />
10 Zip all the logs and send them to Support@<strong>TraumaCad</strong>.com with a<br />
detailed message describing the error that you have witnessed in<br />
<strong>TraumaCad</strong>.<br />
Templates Issues<br />
If one of your surgeons complains that a specific template cannot be found<br />
on a <strong>TraumaCad</strong> client, you may use one of the following options to<br />
verify that the template was downloaded from <strong>TraumaCad</strong> properly:<br />
• Checking Template Availability, page 77<br />
• Viewing <strong>TraumaCad</strong> Server Logs, page 78<br />
If these do not rectify the problem, then make a template request to<br />
<strong>TraumaCad</strong>’s templates team, as described in the Requests for New<br />
Templates section on page 81
Troubleshooting the <strong>TraumaCad</strong> Server<br />
<strong>TraumaCad</strong> <strong>Admin</strong>istrator’s <strong>Guide</strong><br />
77<br />
Checking Template Availability<br />
The first option that you should try is to check if the template is available.<br />
► To check the availability of a template:<br />
1 Open <strong>TraumaCad</strong> client on one of the workstations.<br />
2 In the <strong>TraumaCad</strong> application, from the Help menu select,<br />
Templates Version Info, a window similar to the following is<br />
displayed:
78<br />
Troubleshooting the <strong>TraumaCad</strong> Server<br />
<strong>TraumaCad</strong> <strong>Admin</strong>istrator’s <strong>Guide</strong><br />
Viewing <strong>TraumaCad</strong> Server<br />
Logs<br />
The next thing to try is to view the logs on the <strong>TraumaCad</strong> server. This<br />
can be done in several ways. The first way to try is to view the event log.<br />
► To view the event log:<br />
1 Login into <strong>TraumaCad</strong> server using RDP/VNC.<br />
2 Open the Windows Event Viewer and navigate to the templates service<br />
log.<br />
3 Various information messages and some success audit messages will<br />
probably be shown. These indicate that the template downloading<br />
service has downloaded templates and updated the template library.
Troubleshooting the <strong>TraumaCad</strong> Server<br />
<strong>TraumaCad</strong> <strong>Admin</strong>istrator’s <strong>Guide</strong><br />
79<br />
If error messages also appear:<br />
• Check that the <strong>TraumaCad</strong> server has a functioning Internet<br />
connection to Orthocrat’s online database at:<br />
ortho-cad.com/Templates<br />
• Make sure that the templates directory exists at:<br />
c:\inetpub\wwwroot\TCWservice\Templates<br />
• Restart the Templates service in the Windows Services console by<br />
performing the following:<br />
• Right-click my computer.<br />
• Select the Manage option.<br />
• Expand the Services and Application branch of the tree.<br />
• Click the Services branch. In the window that appears, look for<br />
TCtemplates Service and make sure that its status is Started.<br />
• Restart the TCTemplatesService service, by clicking the<br />
Restart Service button.
80<br />
Troubleshooting the <strong>TraumaCad</strong> Server<br />
<strong>TraumaCad</strong> <strong>Admin</strong>istrator’s <strong>Guide</strong><br />
If the service still returns errors in the Event Log viewer,<br />
perform the following:<br />
• Stop the IIS.<br />
• Stop the TCTemplates service.<br />
• Navigate to c:\inetpub\wwwroor\TCWservice\Templates<br />
and delete the following files:<br />
• fullDataSet.xml<br />
• destinationDataset.xml<br />
• .txt<br />
• SyncIndex.oti<br />
• index.oti<br />
• Start the IIS.<br />
• Start the TCTemplates service, and monitor the Templates<br />
Service event log for progress.
Troubleshooting the <strong>TraumaCad</strong> Server<br />
<strong>TraumaCad</strong> <strong>Admin</strong>istrator’s <strong>Guide</strong><br />
81<br />
Requests for New Templates<br />
After checking to see that a required template is not available in<br />
<strong>TraumaCad</strong>, please access our online form in our support section on our<br />
website at www.traumacad.com and fill out a template request. This request<br />
will receive a high priority.<br />
You may also email our support team at Support@<strong>TraumaCad</strong>.com, with<br />
the following details, in order to create a template request:<br />
• Account name<br />
• Contact person on site<br />
• Templates manufacturer name<br />
• Template name<br />
• Procedure<br />
In both cases, creating a template may take between 2-4 weeks (and is<br />
dependent on receiving the manufacturer’s digital files).<br />
Using Medical Tools<br />
<strong>TraumaCad</strong> user’s guide, which describes all the tools that are available<br />
in the application, is available for download in the support section on our<br />
website at www.traumacad.com.
82<br />
Troubleshooting the <strong>TraumaCad</strong> Server<br />
<strong>TraumaCad</strong> <strong>Admin</strong>istrator’s <strong>Guide</strong><br />
This page was intentionally left blank.