CRACKING RAY TUBES - Cracked Ray Tube
CRACKING RAY TUBES - Cracked Ray Tube
CRACKING RAY TUBES - Cracked Ray Tube

You also want an ePaper? Increase the reach of your titles
YUMPU automatically turns print PDFs into web optimized ePapers that Google loves.
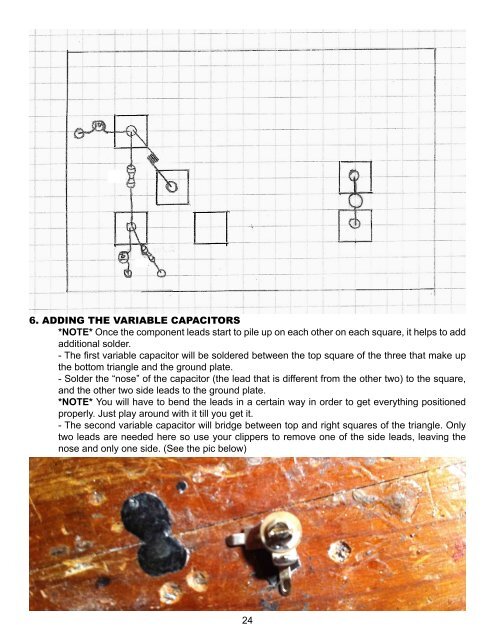
6. ADDING THE VARIABLE CAPACITORS<br />
*NOTE* Once the component leads start to pile up on each other on each square, it helps to add<br />
additional solder.<br />
- The first variable capacitor will be soldered between the top square of the three that make up<br />
the bottom triangle and the ground plate.<br />
- Solder the “nose” of the capacitor (the lead that is different from the other two) to the square,<br />
and the other two side leads to the ground plate.<br />
*NOTE* You will have to bend the leads in a certain way in order to get everything positioned<br />
properly. Just play around with it till you get it.<br />
- The second variable capacitor will bridge between top and right squares of the triangle. Only<br />
two leads are needed here so use your clippers to remove one of the side leads, leaving the<br />
nose and only one side. (See the pic below)<br />
24