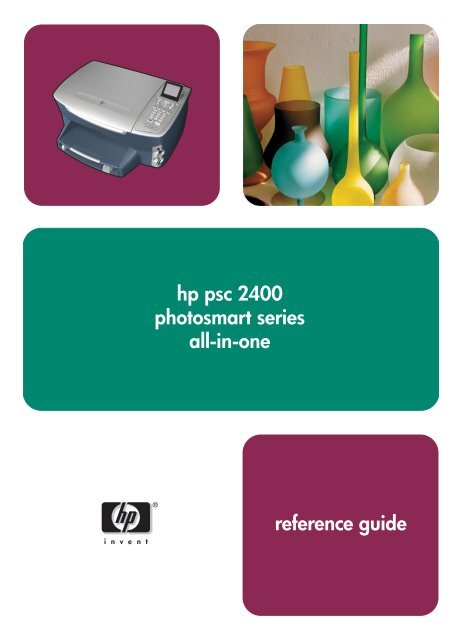
hp psc 2400 photosmart series all-in-one reference guide
hp psc 2400 photosmart series all-in-one reference guide
hp psc 2400 photosmart series all-in-one reference guide

Create successful ePaper yourself
Turn your PDF publications into a flip-book with our unique Google optimized e-Paper software.
<strong>hp</strong> <strong>psc</strong> <strong>2400</strong><br />
<strong>photosmart</strong> <strong>series</strong><br />
<strong>all</strong>-<strong>in</strong>-<strong>one</strong><br />
<strong>reference</strong> <strong>guide</strong>
<strong>hp</strong> <strong>psc</strong> <strong>2400</strong><br />
<strong>photosmart</strong> <strong>series</strong><br />
<strong>all</strong>-<strong>in</strong>-<strong>one</strong>
© Copyright Hewlett-Packard<br />
Company 2003<br />
All rights are reserved. No part of the<br />
document may be photocopied,<br />
reproduced, or translated to another<br />
language without the prior written<br />
consent of Hewlett-Packard Company.<br />
This product <strong>in</strong>corporates Adobe’s<br />
PDF technology, which conta<strong>in</strong>s an<br />
implementation of LZW licensed<br />
under U.S. Patent 4,558,302.<br />
Portions Copyright © 1989-2003<br />
Palomar Software Inc. The HP PSC<br />
<strong>2400</strong> Series <strong>in</strong>cludes pr<strong>in</strong>ter driver<br />
technology licensed from Palomar<br />
Software, Inc. www.palomar.com<br />
Copyright © 1999-2003 Apple<br />
Computer, Inc.<br />
Apple, the Apple logo, Mac, Mac<br />
logo, Mac<strong>in</strong>tosh, and Mac OS are<br />
trademarks of Apple Computer, Inc.,<br />
registered <strong>in</strong> the U.S. and other<br />
countries.<br />
Publication number: Q3083-90207<br />
First edition: July 2003<br />
Pr<strong>in</strong>ted <strong>in</strong> U.S.A., Germany,<br />
S<strong>in</strong>gapore, or Malaysia.<br />
W<strong>in</strong>dows ® , W<strong>in</strong>dows NT ® ,<br />
W<strong>in</strong>dows ME ® , W<strong>in</strong>dows XP ® , and<br />
W<strong>in</strong>dows 2000 ® are U.S.-registered<br />
trademarks of Microsoft Corporation.<br />
Intel ® and Pentium ® are registered<br />
trademarks of Intel Corporation.<br />
notice<br />
Adobe and the Acrobat<br />
logo are either registered<br />
trademarks or trademarks<br />
of Adobe Systems<br />
Incorporated <strong>in</strong> the United<br />
States and/or other<br />
countries.<br />
The <strong>in</strong>formation conta<strong>in</strong>ed <strong>in</strong> this<br />
document is subject to change without<br />
notice and should not be construed as<br />
a commitment by the Hewlett-Packard<br />
Company.<br />
Hewlett-Packard assumes no<br />
responsibility for any errors<br />
that may appear <strong>in</strong> this<br />
document, nor does it make<br />
expressed or implied warranty<br />
of any k<strong>in</strong>d with regard to this<br />
material, <strong>in</strong>clud<strong>in</strong>g, but not<br />
limited to, the implied<br />
warranties of merchantability<br />
and fitness for a particular<br />
purpose.<br />
The Hewlett-Packard Company sh<strong>all</strong><br />
not be liable for <strong>in</strong>cidental or<br />
consequential damages <strong>in</strong> connection<br />
with, or aris<strong>in</strong>g out of the furnish<strong>in</strong>g,<br />
performance, or use of this document<br />
and the program material which it<br />
describes.<br />
Note: Regulatory <strong>in</strong>formation can be<br />
found <strong>in</strong> the technical<br />
<strong>in</strong>formation chapter of this <strong>guide</strong>.<br />
It is not lawful <strong>in</strong> many places to make<br />
copies of the follow<strong>in</strong>g items. When <strong>in</strong><br />
doubt, check with a legal<br />
representative first.<br />
• Governmental paper or<br />
documents:<br />
- Passports<br />
- Immigration papers<br />
- Selective service papers<br />
- Identification badges, cards, or<br />
<strong>in</strong>signias<br />
• Governmental stamps:<br />
- Postage stamps<br />
- Food stamps<br />
• Checks or drafts drawn on<br />
Governmental agencies<br />
• Paper currency, traveler’s checks,<br />
or m<strong>one</strong>y orders<br />
• Certificates of deposit<br />
• Copyrighted works<br />
safety <strong>in</strong>formation<br />
Warn<strong>in</strong>g! To prevent<br />
fire or shock hazard, do<br />
not expose this product<br />
to ra<strong>in</strong> or any type of<br />
moisture.<br />
Always follow basic safety<br />
precautions when us<strong>in</strong>g this product to<br />
reduce risk of <strong>in</strong>jury from fire or<br />
electric shock.<br />
Warn<strong>in</strong>g! Potential<br />
shock hazard<br />
1 Read and understand <strong>all</strong><br />
<strong>in</strong>structions <strong>in</strong> the Setup Poster.<br />
2 Use only a grounded electrical<br />
outlet when connect<strong>in</strong>g the<br />
device to a power source. If you<br />
do not know whether the outlet is<br />
grounded, check with a qualified<br />
electrician.<br />
3 Observe <strong>all</strong> warn<strong>in</strong>gs and<br />
<strong>in</strong>structions marked on the<br />
product.<br />
4 Unplug this product from w<strong>all</strong><br />
outlets before clean<strong>in</strong>g.<br />
5 Do not <strong>in</strong>st<strong>all</strong> or use this product<br />
near water or when you are wet.<br />
6 Inst<strong>all</strong> the product securely on a<br />
stable surface.<br />
7 Inst<strong>all</strong> the product <strong>in</strong> a protected<br />
location where no <strong>one</strong> can step<br />
on or trip over the l<strong>in</strong>e cord, and<br />
where the l<strong>in</strong>e cord will not be<br />
damaged.<br />
8 If the product does not operate<br />
norm<strong>all</strong>y, see the onl<strong>in</strong>e<br />
Troubleshoot<strong>in</strong>g help.<br />
9 No operator-serviceable parts<br />
<strong>in</strong>side. Refer servic<strong>in</strong>g to<br />
qualified service personnel.<br />
10 Use <strong>in</strong> a well-ventilated area.
contents<br />
1 <strong>hp</strong> <strong>psc</strong> overview . . . . . . . . . . . . . . . . . . . . . . . . . . . . . . . . . . . . . 1<br />
the <strong>hp</strong> <strong>psc</strong> <strong>2400</strong> <strong>series</strong> at a glance . . . . . . . . . . . . . . . . . . . . . . . . . . 2<br />
front panel overview. . . . . . . . . . . . . . . . . . . . . . . . . . . . . . . . . . . . . 3<br />
menu overview . . . . . . . . . . . . . . . . . . . . . . . . . . . . . . . . . . . . . . . . 5<br />
use the <strong>hp</strong> director software to do more with your <strong>hp</strong> <strong>psc</strong> . . . . . . . . . . . 6<br />
2 load orig<strong>in</strong>als and load paper . . . . . . . . . . . . . . . . . . . . . . . . . . 11<br />
load an orig<strong>in</strong>al. . . . . . . . . . . . . . . . . . . . . . . . . . . . . . . . . . . . . . . 11<br />
load paper . . . . . . . . . . . . . . . . . . . . . . . . . . . . . . . . . . . . . . . . . . 12<br />
load envelopes . . . . . . . . . . . . . . . . . . . . . . . . . . . . . . . . . . . . . . . 14<br />
load 4 by 6 <strong>in</strong>ch (10 by 15 cm) photo paper . . . . . . . . . . . . . . . . . . 15<br />
load postcards or Hagaki cards. . . . . . . . . . . . . . . . . . . . . . . . . . . . 15<br />
recommended papers. . . . . . . . . . . . . . . . . . . . . . . . . . . . . . . . . . . 16<br />
load other types of paper <strong>in</strong> the <strong>in</strong>put tray. . . . . . . . . . . . . . . . . . . . . 16<br />
set the paper type . . . . . . . . . . . . . . . . . . . . . . . . . . . . . . . . . . . . . 17<br />
set the paper size. . . . . . . . . . . . . . . . . . . . . . . . . . . . . . . . . . . . . . 18<br />
avoid jams . . . . . . . . . . . . . . . . . . . . . . . . . . . . . . . . . . . . . . . . . . 19<br />
3 use a photo memory card . . . . . . . . . . . . . . . . . . . . . . . . . . . . . 21<br />
what is a memory card? . . . . . . . . . . . . . . . . . . . . . . . . . . . . . . . . . 21<br />
<strong>in</strong>sert a memory card and save the files to your computer . . . . . . . . . . 22<br />
pr<strong>in</strong>t photos from a proof sheet . . . . . . . . . . . . . . . . . . . . . . . . . . . . 23<br />
set photo pr<strong>in</strong>t options . . . . . . . . . . . . . . . . . . . . . . . . . . . . . . . . . . 26<br />
pr<strong>in</strong>t photos directly from a memory card . . . . . . . . . . . . . . . . . . . . . 28<br />
view photos <strong>in</strong> a slide show. . . . . . . . . . . . . . . . . . . . . . . . . . . . . . . 31<br />
share digital photos through <strong>hp</strong> <strong>in</strong>stant share. . . . . . . . . . . . . . . . . . . 32<br />
use the <strong>hp</strong> photo & imag<strong>in</strong>g g<strong>all</strong>ery . . . . . . . . . . . . . . . . . . . . . . . . . 33<br />
4 use the copy features . . . . . . . . . . . . . . . . . . . . . . . . . . . . . . . . 35<br />
overview. . . . . . . . . . . . . . . . . . . . . . . . . . . . . . . . . . . . . . . . . . . . 35<br />
copy a two-page black-and-white document . . . . . . . . . . . . . . . . . . . 37<br />
make a 4 by 6 <strong>in</strong>ch (10 by 15 cm) borderless copy of a photo . . . . . . 38<br />
make multiple copies of the same orig<strong>in</strong>al . . . . . . . . . . . . . . . . . . . . . 40<br />
copy a 4 by 6 <strong>in</strong>ch (10 by 15 cm) photo onto a full-size page. . . . . . . 41<br />
copy a photo several times on <strong>one</strong> page. . . . . . . . . . . . . . . . . . . . . . 43<br />
resize an orig<strong>in</strong>al to fit onto letter paper . . . . . . . . . . . . . . . . . . . . . . 44<br />
copy a washed-out orig<strong>in</strong>al . . . . . . . . . . . . . . . . . . . . . . . . . . . . . . . 46<br />
copy a document that has been faxed several times . . . . . . . . . . . . . . 46<br />
enhance light areas of your copy . . . . . . . . . . . . . . . . . . . . . . . . . . . 47<br />
make a poster . . . . . . . . . . . . . . . . . . . . . . . . . . . . . . . . . . . . . . . 48<br />
prepare a color t-shirt transfer . . . . . . . . . . . . . . . . . . . . . . . . . . . . . 49<br />
stop copy<strong>in</strong>g . . . . . . . . . . . . . . . . . . . . . . . . . . . . . . . . . . . . . . . . . 50<br />
v
contents<br />
5 use the scan features . . . . . . . . . . . . . . . . . . . . . . . . . . . . . . . . .51<br />
scan an orig<strong>in</strong>al . . . . . . . . . . . . . . . . . . . . . . . . . . . . . . . . . . . . . . .51<br />
stop scann<strong>in</strong>g . . . . . . . . . . . . . . . . . . . . . . . . . . . . . . . . . . . . . . . . .53<br />
6 use the fax features . . . . . . . . . . . . . . . . . . . . . . . . . . . . . . . . . .55<br />
send a fax . . . . . . . . . . . . . . . . . . . . . . . . . . . . . . . . . . . . . . . . . . .55<br />
receive a fax. . . . . . . . . . . . . . . . . . . . . . . . . . . . . . . . . . . . . . . . . .59<br />
set the fax header . . . . . . . . . . . . . . . . . . . . . . . . . . . . . . . . . . . . . .61<br />
enter text . . . . . . . . . . . . . . . . . . . . . . . . . . . . . . . . . . . . . . . . . . . .62<br />
pr<strong>in</strong>t reports . . . . . . . . . . . . . . . . . . . . . . . . . . . . . . . . . . . . . . . . . .62<br />
set up speed dial<strong>in</strong>g . . . . . . . . . . . . . . . . . . . . . . . . . . . . . . . . . . . .64<br />
control resolution and contrast. . . . . . . . . . . . . . . . . . . . . . . . . . . . . .65<br />
set fax options . . . . . . . . . . . . . . . . . . . . . . . . . . . . . . . . . . . . . . . . 67<br />
repr<strong>in</strong>t the faxes <strong>in</strong> memory. . . . . . . . . . . . . . . . . . . . . . . . . . . . . . . .70<br />
stop fax<strong>in</strong>g . . . . . . . . . . . . . . . . . . . . . . . . . . . . . . . . . . . . . . . . . . .71<br />
7 pr<strong>in</strong>t from your computer . . . . . . . . . . . . . . . . . . . . . . . . . . . . . . 73<br />
pr<strong>in</strong>t from a software application . . . . . . . . . . . . . . . . . . . . . . . . . . . .73<br />
set pr<strong>in</strong>t options. . . . . . . . . . . . . . . . . . . . . . . . . . . . . . . . . . . . . . . . 74<br />
stop a pr<strong>in</strong>t job . . . . . . . . . . . . . . . . . . . . . . . . . . . . . . . . . . . . . . .75<br />
8 order supplies . . . . . . . . . . . . . . . . . . . . . . . . . . . . . . . . . . . . . .77<br />
order media . . . . . . . . . . . . . . . . . . . . . . . . . . . . . . . . . . . . . . . . . .77<br />
order pr<strong>in</strong>t cartridges . . . . . . . . . . . . . . . . . . . . . . . . . . . . . . . . . . .77<br />
9 ma<strong>in</strong>ta<strong>in</strong> your <strong>hp</strong> <strong>psc</strong> . . . . . . . . . . . . . . . . . . . . . . . . . . . . . . . . . 79<br />
clean the glass . . . . . . . . . . . . . . . . . . . . . . . . . . . . . . . . . . . . . . . .79<br />
clean the lid back<strong>in</strong>g . . . . . . . . . . . . . . . . . . . . . . . . . . . . . . . . . . . .79<br />
clean the exterior. . . . . . . . . . . . . . . . . . . . . . . . . . . . . . . . . . . . . . .80<br />
work with pr<strong>in</strong>t cartridges . . . . . . . . . . . . . . . . . . . . . . . . . . . . . . . .80<br />
restore factory defaults . . . . . . . . . . . . . . . . . . . . . . . . . . . . . . . . . .89<br />
set the power save time . . . . . . . . . . . . . . . . . . . . . . . . . . . . . . . . . .89<br />
set the prompt delay time . . . . . . . . . . . . . . . . . . . . . . . . . . . . . . . . .90<br />
10 get <strong>hp</strong> <strong>psc</strong> support . . . . . . . . . . . . . . . . . . . . . . . . . . . . . . . . . . .91<br />
get support and other <strong>in</strong>formation from the Internet . . . . . . . . . . . . . . .91<br />
<strong>hp</strong> customer support . . . . . . . . . . . . . . . . . . . . . . . . . . . . . . . . . . . .91<br />
prepare your <strong>hp</strong> <strong>psc</strong> for shipment . . . . . . . . . . . . . . . . . . . . . . . . . . .94<br />
<strong>hp</strong> distribution center . . . . . . . . . . . . . . . . . . . . . . . . . . . . . . . . . . . .96<br />
11 warranty <strong>in</strong>formation . . . . . . . . . . . . . . . . . . . . . . . . . . . . . . . . . 97<br />
duration of limited warranty . . . . . . . . . . . . . . . . . . . . . . . . . . . . . . .97<br />
warranty service . . . . . . . . . . . . . . . . . . . . . . . . . . . . . . . . . . . . . . .97<br />
warranty upgrades . . . . . . . . . . . . . . . . . . . . . . . . . . . . . . . . . . . . .97<br />
return<strong>in</strong>g your <strong>hp</strong> <strong>psc</strong> for service . . . . . . . . . . . . . . . . . . . . . . . . . . . .98<br />
hewlett-packard limited global warranty statement . . . . . . . . . . . . . . . .98<br />
12 technical <strong>in</strong>formation . . . . . . . . . . . . . . . . . . . . . . . . . . . . . . . .101<br />
system requirements . . . . . . . . . . . . . . . . . . . . . . . . . . . . . . . . . . . .101<br />
paper specifications. . . . . . . . . . . . . . . . . . . . . . . . . . . . . . . . . . . .102<br />
pr<strong>in</strong>t specifications. . . . . . . . . . . . . . . . . . . . . . . . . . . . . . . . . . . . .104<br />
vi<br />
<strong>hp</strong> <strong>psc</strong> <strong>2400</strong> <strong>series</strong>
pr<strong>in</strong>t marg<strong>in</strong> specifications. . . . . . . . . . . . . . . . . . . . . . . . . . . . . . . 104<br />
copy specifications. . . . . . . . . . . . . . . . . . . . . . . . . . . . . . . . . . . . 105<br />
fax specifications . . . . . . . . . . . . . . . . . . . . . . . . . . . . . . . . . . . . . 106<br />
photo memory card specifications . . . . . . . . . . . . . . . . . . . . . . . . . 106<br />
scan specifications . . . . . . . . . . . . . . . . . . . . . . . . . . . . . . . . . . . . 107<br />
physical specifications . . . . . . . . . . . . . . . . . . . . . . . . . . . . . . . . . 107<br />
power specifications. . . . . . . . . . . . . . . . . . . . . . . . . . . . . . . . . . . 107<br />
environmental specifications . . . . . . . . . . . . . . . . . . . . . . . . . . . . . 107<br />
additional specifications . . . . . . . . . . . . . . . . . . . . . . . . . . . . . . . . 107<br />
environmental product stewardship program . . . . . . . . . . . . . . . . . . 108<br />
regulatory notices . . . . . . . . . . . . . . . . . . . . . . . . . . . . . . . . . . . . 109<br />
declaration of conformity . . . . . . . . . . . . . . . . . . . . . . . . . . . . . . . 114<br />
13 fax setup . . . . . . . . . . . . . . . . . . . . . . . . . . . . . . . . . . . . . . . . 115<br />
how to tell if the <strong>in</strong>structions <strong>in</strong> this chapter apply to you . . . . . . . . . . 115<br />
how to choose the right fax setup for your office. . . . . . . . . . . . . . . . 116<br />
select your fax setup case from this table. . . . . . . . . . . . . . . . . . . . . 118<br />
case A: separate fax l<strong>in</strong>e (no voice c<strong>all</strong>s received) . . . . . . . . . . . . . . 119<br />
case B: fax<strong>in</strong>g with a dist<strong>in</strong>ctive r<strong>in</strong>g service on the same l<strong>in</strong>e . . . . . . 119<br />
case C: shared voice/fax l<strong>in</strong>e . . . . . . . . . . . . . . . . . . . . . . . . . . . . 121<br />
case D: fax l<strong>in</strong>e shared with PC modem (no voice c<strong>all</strong>s received) . . . . 122<br />
case E: shared voice/fax l<strong>in</strong>e with PC modem . . . . . . . . . . . . . . . . . 123<br />
case F: shared voice/fax l<strong>in</strong>e with answer<strong>in</strong>g mach<strong>in</strong>e . . . . . . . . . . . 124<br />
case G: shared voice/fax l<strong>in</strong>e with PC modem and answer<strong>in</strong>g mach<strong>in</strong>e126<br />
case H: shared voice/fax l<strong>in</strong>e with voicemail. . . . . . . . . . . . . . . . . . 127<br />
case I: shared voice/fax l<strong>in</strong>e with PC modem and voicemail . . . . . . . 128<br />
fax<strong>in</strong>g from a DSL l<strong>in</strong>e . . . . . . . . . . . . . . . . . . . . . . . . . . . . . . . . . 130<br />
14 <strong>hp</strong> <strong>in</strong>stant share setup and use . . . . . . . . . . . . . . . . . . . . . . . . 131<br />
use <strong>hp</strong> <strong>in</strong>stant share <strong>in</strong> five easy steps (W<strong>in</strong>dows). . . . . . . . . . . . . . . 131<br />
send a photo or image us<strong>in</strong>g your <strong>hp</strong> <strong>psc</strong> (Mac<strong>in</strong>tosh) . . . . . . . . . . . 135<br />
why should I register with <strong>hp</strong> <strong>in</strong>stant share (W<strong>in</strong>dows)?. . . . . . . . . . . 136<br />
15 troubleshoot<strong>in</strong>g <strong>in</strong>formation . . . . . . . . . . . . . . . . . . . . . . . . . . 137<br />
<strong>in</strong>st<strong>all</strong>ation troubleshoot<strong>in</strong>g . . . . . . . . . . . . . . . . . . . . . . . . . . . . . . 137<br />
operational troubleshoot<strong>in</strong>g. . . . . . . . . . . . . . . . . . . . . . . . . . . . . . 149<br />
<strong>in</strong>dex . . . . . . . . . . . . . . . . . . . . . . . . . . . . . . . . . . . . . . . 151<br />
contents<br />
<strong>reference</strong> <strong>guide</strong> vii
contents<br />
viii<br />
<strong>hp</strong> <strong>psc</strong> <strong>2400</strong> <strong>series</strong>
get help<br />
This Reference Guide conta<strong>in</strong>s <strong>in</strong>formation on us<strong>in</strong>g your HP PSC and provides<br />
additional troubleshoot<strong>in</strong>g assistance for the <strong>in</strong>st<strong>all</strong>ation process. The Reference<br />
Guide also conta<strong>in</strong>s <strong>in</strong>formation on how to order supplies and accessories,<br />
technical specifications, support, and warranty <strong>in</strong>formation.<br />
The table below lists additional sources of <strong>in</strong>formation for your HP PSC.<br />
help description<br />
Setup Poster The Setup Poster provides <strong>in</strong>structions for sett<strong>in</strong>g up and configur<strong>in</strong>g your<br />
HP PSC. Make sure you use the correct poster for your operat<strong>in</strong>g system<br />
(W<strong>in</strong>dows or Mac<strong>in</strong>tosh).<br />
Product Tour The tour provides a brief <strong>in</strong>troduction to the HP PSC and its capabilities,<br />
so you can start us<strong>in</strong>g it immediately. You can take the tour immediately<br />
after <strong>in</strong>st<strong>all</strong><strong>in</strong>g the HP PSC software, or to take the tour at any time, see<br />
the product specific onl<strong>in</strong>e help.<br />
HP Photo & Imag<strong>in</strong>g<br />
Help<br />
The HP Photo & Imag<strong>in</strong>g Help provides detailed <strong>in</strong>formation on us<strong>in</strong>g the<br />
software for your HP PSC.<br />
For W<strong>in</strong>dows users: Go to the HP Director, and click Help.<br />
For Mac<strong>in</strong>tosh users: Go to the HP Director, and click Help, then click <strong>hp</strong><br />
photo & imag<strong>in</strong>g help.<br />
Troubleshoot<strong>in</strong>g help To access troubleshoot<strong>in</strong>g <strong>in</strong>formation, go to the HP Director, then click<br />
Help. Open the Troubleshoot<strong>in</strong>g book <strong>in</strong> the HP Photo & Imag<strong>in</strong>g Help,<br />
then follow the l<strong>in</strong>ks to general troubleshoot<strong>in</strong>g as well as l<strong>in</strong>ks to<br />
Troubleshoot<strong>in</strong>g help that is specific to your HP PSC. Troubleshoot<strong>in</strong>g is<br />
also available from the Help button that appears on some error messages<br />
and <strong>in</strong> the Troubleshoot<strong>in</strong>g chapter of the Reference Guide.<br />
Internet help and<br />
technical support<br />
If you have Internet access, you can get help from the HP website at:<br />
www.<strong>hp</strong>.com/support<br />
The website also provides answers to frequently asked questions.<br />
Readme file After you <strong>in</strong>st<strong>all</strong> your software, you can access the Readme file (if any)<br />
from either the HP PSC CD-ROM or the HP PSC program folder. A<br />
Readme file conta<strong>in</strong>s late-break<strong>in</strong>g <strong>in</strong>formation that does not appear <strong>in</strong> the<br />
Reference Guide or the onl<strong>in</strong>e help.<br />
Dialog-box help<br />
(W<strong>in</strong>dows only)<br />
For W<strong>in</strong>dows: Use <strong>one</strong> of the follow<strong>in</strong>g ways to f<strong>in</strong>d <strong>in</strong>formation on a<br />
specific feature:<br />
• Right-click on the feature<br />
• Select the feature and press F1<br />
• Select the ? <strong>in</strong> the upper-right corner then click on the feature<br />
ix
x<br />
<strong>hp</strong> <strong>psc</strong> <strong>2400</strong> <strong>series</strong>
1<br />
<strong>hp</strong> <strong>psc</strong> overview<br />
Your HP PSC is ready when you are, as many features and functions of your<br />
HP PSC can be used without turn<strong>in</strong>g on your computer. Tasks such as mak<strong>in</strong>g a<br />
copy, send<strong>in</strong>g a fax, or pr<strong>in</strong>t<strong>in</strong>g photos from a photo memory card can be<br />
accomplished quickly and easily on your HP PSC.<br />
Tip: You can do more with your HP PSC by us<strong>in</strong>g the HP Photo &<br />
Imag<strong>in</strong>g Director (HP Director) software that you <strong>in</strong>st<strong>all</strong>ed on your<br />
computer dur<strong>in</strong>g the <strong>in</strong>itial setup. The HP Director <strong>in</strong>cludes<br />
troubleshoot<strong>in</strong>g tips, product-specific help, and enhanced copy,<br />
fax, scan, and photo functionality. For more <strong>in</strong>formation on the use<br />
of the HP Director, see use the <strong>hp</strong> director software to do more<br />
with your <strong>hp</strong> <strong>psc</strong> on page 6.<br />
This section conta<strong>in</strong>s the follow<strong>in</strong>g topics:<br />
• the <strong>hp</strong> <strong>psc</strong> <strong>2400</strong> <strong>series</strong> at a glance on page 2<br />
• front panel overview on page 3<br />
• menu overview on page 5<br />
• use the <strong>hp</strong> director software to do more with your <strong>hp</strong> <strong>psc</strong> on page 6<br />
1<br />
<strong>hp</strong> <strong>psc</strong> overview
<strong>hp</strong> <strong>psc</strong> overview<br />
chapter 1<br />
the <strong>hp</strong> <strong>psc</strong> <strong>2400</strong> <strong>series</strong> at a glance<br />
2<br />
10<br />
9<br />
8<br />
feature purpose<br />
1 Lid<br />
2 Color graphics display<br />
3 Front panel<br />
4 Memory card slots<br />
5 Pr<strong>in</strong>t-carriage access door<br />
6 Input tray<br />
7 Paper-length <strong>guide</strong><br />
8 Output tray<br />
9 Paper-width <strong>guide</strong><br />
10 Glass<br />
11 Power connection<br />
12 USB port<br />
7<br />
13 Teleph<strong>one</strong> and answer<strong>in</strong>g mach<strong>in</strong>e jacks<br />
14 Rear cleanout door<br />
6<br />
1<br />
5<br />
2<br />
3<br />
4<br />
11 12 13 14<br />
<strong>hp</strong> <strong>psc</strong> <strong>2400</strong> <strong>series</strong>
front panel overview<br />
<strong>reference</strong> <strong>guide</strong><br />
19<br />
18<br />
17<br />
16<br />
15<br />
14<br />
13<br />
12<br />
11 9<br />
button purpose<br />
<strong>hp</strong> <strong>psc</strong> overview<br />
1 Color Graphics Display: view menus, photos, and messages.<br />
2 Cancel: stop a job, exit a menu, or exit sett<strong>in</strong>gs.<br />
3 Scan: select the scan function. When the button is lit, the scan<br />
function is selected.<br />
4 Right Arrow: <strong>in</strong>crease values, or go forward when view<strong>in</strong>g<br />
photos on the color graphics display.<br />
5 Photo: select the photo function. When the button is lit, the photo<br />
function is selected. Use this button to pr<strong>in</strong>t photos from a photo<br />
memory card or to save photos to your computer.<br />
6 Down Arrow: navigate down through menu options.<br />
7 Rotate: rotate the currently displayed photo on the color<br />
graphics display 90 degrees. Subsequent presses cont<strong>in</strong>ue to<br />
rotate the photo 90 degrees.<br />
1<br />
2<br />
3<br />
4<br />
5<br />
6<br />
7<br />
8<br />
10<br />
3<br />
<strong>hp</strong> <strong>psc</strong> overview
<strong>hp</strong> <strong>psc</strong> overview<br />
chapter 1<br />
4<br />
button purpose<br />
8 Proof Sheet: pr<strong>in</strong>t a proof sheet when a photo memory card has<br />
been <strong>in</strong>serted <strong>in</strong> a photo memory card slot. A proof sheet shows<br />
thumbnail views of <strong>all</strong> the photos on the photo memory card.<br />
You can select photos on the proof sheet, then pr<strong>in</strong>t those photos<br />
by scann<strong>in</strong>g the proof sheet.<br />
9 Keypad: enter fax numbers, values, or text.<br />
10 Start Black, Start Color: start a black or color copy, scan, fax, or<br />
photo memory card job.<br />
11 E-mail: upload the current photo displayed on the color graphics<br />
display to the HP Photo & Imag<strong>in</strong>g G<strong>all</strong>ery on your computer.<br />
The photo is ready to be e-mailed after you supply an e-mail<br />
address.<br />
12 Slide Show: display <strong>all</strong> photos on the currently <strong>in</strong>serted photo<br />
memory card at three-second <strong>in</strong>tervals.<br />
13 Setup: access the menu system for reports, fax sett<strong>in</strong>gs, and<br />
ma<strong>in</strong>tenance.<br />
14 Fax: select the fax function. When the button is lit, the fax<br />
function is selected.<br />
15 Left Arrow: decrease values, or go back when view<strong>in</strong>g photos<br />
on the color graphics display.<br />
16 Copy: select the copy function. When the button is lit, the copy<br />
function is selected. This button is lit by default.<br />
17 On: turn the HP PSC on or off.<br />
Warn<strong>in</strong>g! When the HP PSC is off, a m<strong>in</strong>imal amount of<br />
power is still supplied to the device. Unplug the power cord<br />
to completely disconnect the power supply to the HP PSC.<br />
18 OK: select a menu, sett<strong>in</strong>g, or value displayed on the color<br />
graphics display.<br />
19 Up Arrow: navigate up through menu options.<br />
<strong>hp</strong> <strong>psc</strong> <strong>2400</strong> <strong>series</strong>
menu overview<br />
<strong>reference</strong> <strong>guide</strong><br />
<strong>hp</strong> <strong>psc</strong> overview<br />
The follow<strong>in</strong>g diagram provides a quick <strong>reference</strong> to top-level menus that<br />
appear on the HP PSC color graphics display.<br />
Copy<br />
1. Borderless<br />
2. Reduce/Enlarge<br />
3. Copy Quality<br />
4. Paper Size<br />
5. Paper Type<br />
6. Lighter/Darker<br />
7. Enhancements<br />
8. Color Intensity<br />
9. Set New Defaults<br />
Photo<br />
1. Number of Copies<br />
2. Borderless<br />
3. Image Size<br />
4. Paper Size<br />
5. Paper Type<br />
6. Layout Style<br />
7. Borders and Frames<br />
8. Transfer to computer<br />
9. HP Instant Share<br />
0. Set New Defaults<br />
Slide Show<br />
Note: Press<strong>in</strong>g this button<br />
displays <strong>all</strong> the photos on your<br />
photo memory card <strong>in</strong> sequence<br />
on the color graphics display.<br />
Scan<br />
1. HP Photo & Imag<strong>in</strong>g G<strong>all</strong>ery<br />
2. HP Instant Share<br />
3. Photo Memory Card<br />
Note: Contents of this menu vary<br />
depend<strong>in</strong>g on the number of<br />
potential scan dest<strong>in</strong>ations on<br />
your computer.<br />
Fax<br />
1. Resolution<br />
2. Lighter/Darker<br />
3. Set New Defaults<br />
Email<br />
Note: Press<strong>in</strong>g this button<br />
uploads the currently displayed<br />
photo to the HP Photo & Imag<strong>in</strong>g<br />
G<strong>all</strong>ery on your computer. You<br />
can e-mail it after you provide<br />
the appropriate e-mail address.<br />
5<br />
<strong>hp</strong> <strong>psc</strong> overview
<strong>hp</strong> <strong>psc</strong> overview<br />
chapter 1<br />
use the <strong>hp</strong> director software to do more with your <strong>hp</strong> <strong>psc</strong><br />
6<br />
Rotate<br />
Note: Press<strong>in</strong>g this button<br />
rotates the photo displayed <strong>in</strong><br />
the color graphics display 90<br />
degrees. Subsequent presses<br />
rotates the photo an additional<br />
90 degrees.<br />
Setup<br />
1. Pr<strong>in</strong>t Report<br />
2. Speed Dial Setup<br />
3. Basic Fax Setup<br />
4. Advanced Fax Setup<br />
5. Tools<br />
6. Network<br />
7. P<strong>reference</strong>s<br />
When you first <strong>in</strong>st<strong>all</strong> the HP PSC software on your computer dur<strong>in</strong>g setup, the<br />
HP Director is automatic<strong>all</strong>y <strong>in</strong>st<strong>all</strong>ed on your computer.<br />
This section conta<strong>in</strong>s the follow<strong>in</strong>g topics:<br />
• open the <strong>hp</strong> director for W<strong>in</strong>dows users on page 6<br />
• open the <strong>hp</strong> director for Mac<strong>in</strong>tosh users on page 8<br />
open the <strong>hp</strong> director for W<strong>in</strong>dows users<br />
Proof Sheet<br />
1. Pr<strong>in</strong>t Proof Sheet<br />
2. Scan Proof Sheet<br />
You can quickly and easily expand the functionality of your HP PSC. Look for<br />
boxes, like this <strong>one</strong>, throughout this <strong>guide</strong> that provide topic-specific tips, and<br />
helpful <strong>in</strong>formation for your projects.<br />
1 Do <strong>one</strong> of the follow<strong>in</strong>g:<br />
– Double-click the HP Director icon on the desktop.<br />
– In the W<strong>in</strong>dows taskbar, click Start, po<strong>in</strong>t to Programs or All Programs<br />
(XP), po<strong>in</strong>t to Hewlett-Packard, po<strong>in</strong>t to HP PSC <strong>2400</strong> Series, then<br />
select HP Photo & Imag<strong>in</strong>g Director.<br />
2 In the Select Device box, click to see a list of <strong>in</strong>st<strong>all</strong>ed HP devices.<br />
3 Select the HP PSC <strong>2400</strong> Series.<br />
The HP Director displays only the icons that are appropriate for the<br />
selected device.<br />
<strong>hp</strong> <strong>psc</strong> <strong>2400</strong> <strong>series</strong>
eference <strong>guide</strong><br />
<strong>hp</strong> <strong>psc</strong> overview<br />
Note: The icons <strong>in</strong> the HP Director graphic below might appear differently<br />
on your computer. The HP Director is customized to display icons<br />
associated with the HP device that is selected. If the selected device is not<br />
equipped with a particular feature or function, then the icon for that feature<br />
or function does not display <strong>in</strong> the HP Director.<br />
Tip: If the HP Director on your computer does not conta<strong>in</strong> any<br />
icons, an error might have occurred dur<strong>in</strong>g the software<br />
<strong>in</strong>st<strong>all</strong>ation. To correct this, use the Control Panel <strong>in</strong> W<strong>in</strong>dows to<br />
completely un<strong>in</strong>st<strong>all</strong> the HP Director software, and then re<strong>in</strong>st<strong>all</strong><br />
the HP Director. For more <strong>in</strong>formation, see software and hardware<br />
<strong>in</strong>st<strong>all</strong>ation troubleshoot<strong>in</strong>g on page 137.<br />
1<br />
2 3 4<br />
5 12<br />
6 7 8 9 10 11<br />
feature purpose<br />
1 Status: use this feature to display the current status of your<br />
HP PSC.<br />
2 Sett<strong>in</strong>gs: use this feature to view or change various sett<strong>in</strong>gs for<br />
your HP PSC, such as pr<strong>in</strong>t, scan, or copy, or fax.<br />
3 Select Device: use this feature to select the device you want to<br />
use from the list of <strong>in</strong>st<strong>all</strong>ed HP devices.<br />
4 Help: use this feature to access the HP Photo & Imag<strong>in</strong>g Help,<br />
which provides software help, a product tour, troubleshoot<strong>in</strong>g<br />
<strong>in</strong>formation for your HP PSC, and HP PSC product-specific<br />
help.<br />
5 Click this arrow to display a second row of buttons if there are<br />
more than will fit on the first row.<br />
6 Scan Picture: use this feature to scan an image and display it<br />
<strong>in</strong> the HP Photo & Imag<strong>in</strong>g G<strong>all</strong>ery.<br />
7 Scan Document: use this feature to scan text and display it <strong>in</strong><br />
the selected text edit<strong>in</strong>g software program.<br />
8 Send a Fax: use this feature to open the Fax dialog box so you<br />
can enter the appropriate <strong>in</strong>formation and then send your fax.<br />
7<br />
<strong>hp</strong> <strong>psc</strong> overview
<strong>hp</strong> <strong>psc</strong> overview<br />
chapter 1<br />
8<br />
feature purpose<br />
9 Make Copies: use this feature to display the Copy dialog box<br />
where you can select the copy quality, number of copies,<br />
color, size, and then start a copy.<br />
10 HP G<strong>all</strong>ery: use this feature to display the HP Photo & Imag<strong>in</strong>g<br />
G<strong>all</strong>ery, where you can view and edit images, pr<strong>in</strong>t photos <strong>in</strong><br />
multiple sizes, make and pr<strong>in</strong>t a photo album, share images<br />
through e-mail or a website, or make a multimedia CD.<br />
11 Transfer Images: use this feature to transfer images from a<br />
photo memory card.<br />
12 Click this arrow to display tool tips that expla<strong>in</strong> each of the<br />
HP Director options.<br />
open the <strong>hp</strong> director for Mac<strong>in</strong>tosh users<br />
Use <strong>one</strong> of the follow<strong>in</strong>g methods to launch or access the HP Director,<br />
depend<strong>in</strong>g on which Mac<strong>in</strong>tosh OS you are us<strong>in</strong>g.<br />
open the <strong>hp</strong> director (<strong>all</strong>-<strong>in</strong>-<strong>one</strong>) us<strong>in</strong>g Mac<strong>in</strong>tosh OS X<br />
If you are us<strong>in</strong>g Mac<strong>in</strong>tosh OS X, the HP Director is launched automatic<strong>all</strong>y<br />
dur<strong>in</strong>g the HP Photo and Imag<strong>in</strong>g software <strong>in</strong>st<strong>all</strong>ation, and causes the<br />
HP Director (All-<strong>in</strong>-One) icon to be created <strong>in</strong> the Dock for your device. You<br />
access the device capabilities via the HP Director menu that is associated with<br />
the HP Director (All-<strong>in</strong>-One) icon.<br />
Tip: If you do not want the HP Director to launch automatic<strong>all</strong>y<br />
each time to start your Mac<strong>in</strong>tosh, you can change this sett<strong>in</strong>g <strong>in</strong><br />
the HP Director Sett<strong>in</strong>gs menu.<br />
To display the HP Director menu:<br />
� In the Dock, click the HP Director (All-<strong>in</strong>-One) icon for your device.<br />
The HP Director menu displays as shown below. Refer to the legend for a<br />
brief explanation of the HP Director features.<br />
Note: If you <strong>in</strong>st<strong>all</strong> more than <strong>one</strong> HP device, an HP Director icon for each<br />
device is displayed <strong>in</strong> the Dock. For example, if you have an HP scanner<br />
and an HP PSC <strong>in</strong>st<strong>all</strong>ed, two HP Director icons are present <strong>in</strong> the Dock,<br />
<strong>one</strong> for each device. However, if you <strong>in</strong>st<strong>all</strong>ed two of the same k<strong>in</strong>d of<br />
device (for example, two HP PSC devices) only <strong>one</strong> HP Director icon is<br />
displayed <strong>in</strong> the Dock to represent <strong>all</strong> devices of that k<strong>in</strong>d.<br />
<strong>hp</strong> <strong>psc</strong> <strong>2400</strong> <strong>series</strong>
eference <strong>guide</strong><br />
feature purpose<br />
<strong>hp</strong> <strong>psc</strong> overview<br />
1 Unload AiO Images: use this feature to unload images from a<br />
photo memory card.<br />
2 Scan Picture: use this feature to scan an image and display it <strong>in</strong><br />
the HP Photo and Imag<strong>in</strong>g G<strong>all</strong>ery.<br />
3 Scan document: use this feature to scan text and display it <strong>in</strong> the<br />
selected dest<strong>in</strong>ation text edit<strong>in</strong>g software program.<br />
4 Make Copies: use this feature to make a copy <strong>in</strong> black and white<br />
or color.<br />
5 Send Fax: use this feature to open the fax dialog box so you can<br />
enter the appropriate <strong>in</strong>formation and then send your fax.<br />
6 HP G<strong>all</strong>ery: use this feature to display the HP Photo and Imag<strong>in</strong>g<br />
G<strong>all</strong>ery to view and edit images.<br />
7 More Applications: use this feature to select other applications<br />
on your computer.<br />
8 HP on the Web: use this feature to select an HP website.<br />
9 HP Help: use this feature to select a source for help with your<br />
HP PSC.<br />
10 Sett<strong>in</strong>gs: use this feature to change device sett<strong>in</strong>gs.<br />
1<br />
2<br />
3<br />
4<br />
5<br />
6<br />
7<br />
8<br />
9<br />
10<br />
open the <strong>hp</strong> director us<strong>in</strong>g Mac<strong>in</strong>tosh OS 9<br />
In Mac<strong>in</strong>tosh OS 9, the HP Director is launched automatic<strong>all</strong>y dur<strong>in</strong>g the<br />
HP Photo and Imag<strong>in</strong>g software <strong>in</strong>st<strong>all</strong>ation, and causes the HP Director icon to<br />
appear as an alias on the desktop. Use <strong>one</strong> of the follow<strong>in</strong>g methods to launch<br />
the HP Director:<br />
9<br />
<strong>hp</strong> <strong>psc</strong> overview
<strong>hp</strong> <strong>psc</strong> overview<br />
chapter 1<br />
10<br />
� Double-click the HP Photo and Imag<strong>in</strong>g Director alias on the desktop.<br />
� Double-click HP Photo and Imag<strong>in</strong>g Director <strong>in</strong> the Applications:Hewlett-<br />
Packard:HP Photo and Imag<strong>in</strong>g Software:HP Photo and Imag<strong>in</strong>g Director<br />
folder.<br />
The HP Director displays only the icons that perta<strong>in</strong> to the selected device. For<br />
more <strong>in</strong>formation, see the onscreen <strong>hp</strong> photo and imag<strong>in</strong>g help that came with<br />
your software.<br />
The follow<strong>in</strong>g figure shows some of the features available through the HP Photo<br />
and Imag<strong>in</strong>g Director for Mac<strong>in</strong>tosh OS 9. Consult the legend for a brief<br />
explanation of specific features.<br />
Note: The HP Photo and Imag<strong>in</strong>g Director graphic below might appear<br />
differently on your computer. The HP Photo and Imag<strong>in</strong>g Director is<br />
customized based upon the HP device that is selected. If your device is not<br />
equipped with a particular feature, then the icon for that feature will not<br />
display <strong>in</strong> the HP Photo and Imag<strong>in</strong>g Director on your computer. Some<br />
HP devices might show additional buttons than shown below.<br />
1 2 3<br />
feature purpose<br />
4 5 6 7 8<br />
1 Unload AiO Images: use this feature to unload images from a<br />
photo memory card.<br />
2 Select Device: use this pull-down list to select the HP device you<br />
want to use.<br />
3 Scan Picture: use this feature to scan an image and display it <strong>in</strong><br />
the HP Photo and Imag<strong>in</strong>g G<strong>all</strong>ery.<br />
4 Scan Document: use this feature to scan text and display it <strong>in</strong><br />
the selected dest<strong>in</strong>ation text edit<strong>in</strong>g software program.<br />
5 Make Copies: use this feature to make a copy <strong>in</strong> black and<br />
white or color.<br />
6 Send Fax: use this feature to open the fax dialog box so you<br />
can enter the appropriate <strong>in</strong>formation and then send your fax.<br />
7 Sett<strong>in</strong>gs: use this pull-down list to provide access to device<br />
sett<strong>in</strong>gs.<br />
8 HP G<strong>all</strong>ery: use this feature to display the HP Photo and<br />
Imag<strong>in</strong>g G<strong>all</strong>ery to view and edit images.<br />
<strong>hp</strong> <strong>psc</strong> <strong>2400</strong> <strong>series</strong>
2<br />
load an orig<strong>in</strong>al<br />
load orig<strong>in</strong>als and load paper<br />
You can load many different types and sizes of paper <strong>in</strong> your HP PSC, <strong>in</strong>clud<strong>in</strong>g<br />
photo paper, transparencies, cont<strong>in</strong>uous banner paper, and envelopes. You can<br />
also change sett<strong>in</strong>gs for paper types and paper sizes to get the highest quality<br />
copies from your HP PSC.<br />
This section conta<strong>in</strong>s the follow<strong>in</strong>g topics:<br />
• load an orig<strong>in</strong>al on page 11<br />
• load paper on page 12<br />
• load envelopes on page 14<br />
• load 4 by 6 <strong>in</strong>ch (10 by 15 cm) photo paper on page 15<br />
• load postcards or Hagaki cards on page 15<br />
• recommended papers on page 16<br />
• load other types of paper <strong>in</strong> the <strong>in</strong>put tray on page 16<br />
• set the paper type on page 17<br />
• set the paper size on page 18<br />
• avoid jams on page 19<br />
The follow<strong>in</strong>g procedure describes how to load paper on the glass.<br />
1 Load your orig<strong>in</strong>al face down on the right front corner of the glass.<br />
Tip: Refer to the diagram on the right front corner of your HP PSC<br />
for further assistance on load<strong>in</strong>g an orig<strong>in</strong>al.<br />
Top edge of<br />
orig<strong>in</strong>al<br />
2 Press Copy, Scan, or Fax on the front panel to select the option you want<br />
to perform.<br />
11<br />
load orig<strong>in</strong>als & paper
load orig<strong>in</strong>als & paper<br />
chapter 2<br />
load paper<br />
12<br />
3 Press Start Black or Start Color on the front panel to start the job.<br />
Note: Many of the Reduce/Enlarge options, such as Fit to Page or Poster,<br />
will not work correctly if the glass and lid back<strong>in</strong>g are not clean. For more<br />
<strong>in</strong>formation, see clean the glass on page 79 and clean the lid back<strong>in</strong>g on<br />
page 79.<br />
Tip: You can copy or scan oversized orig<strong>in</strong>als by completely<br />
remov<strong>in</strong>g the lid from your HP PSC. To remove the lid on the<br />
HP PSC <strong>2400</strong> Series, lift the lid to the open position, and then pull<br />
the tab at the base of the lid upward. Your HP PSC functions<br />
norm<strong>all</strong>y with the lid removed. Replace the lid by <strong>in</strong>sert<strong>in</strong>g the<br />
tabs on the h<strong>in</strong>ge back <strong>in</strong>to the appropriate slot.<br />
This section describes the basic procedure for load<strong>in</strong>g paper <strong>in</strong>to your HP PSC.<br />
There are specific considerations for load<strong>in</strong>g certa<strong>in</strong> types of paper,<br />
transparency film, postcards, and envelopes.<br />
After you review this procedure, see load envelopes on page 14, load 4 by 6<br />
<strong>in</strong>ch (10 by 15 cm) photo paper on page 15, , and load postcards or Hagaki<br />
cards on page 15, load other types of paper <strong>in</strong> the <strong>in</strong>put tray on page 16.<br />
For best results, adjust the paper sett<strong>in</strong>g each time you change paper sizes. For<br />
more <strong>in</strong>formation, see set the paper size on page 18.<br />
Tip: Help prevent rips, wr<strong>in</strong>kles, curled or bent edges by stor<strong>in</strong>g<br />
<strong>all</strong> media flat <strong>in</strong> a resealable bag. Extreme changes <strong>in</strong><br />
temperature and humidity might result <strong>in</strong> curled media that does<br />
not work well <strong>in</strong> the HP PSC if the media is not stored properly.<br />
<strong>hp</strong> <strong>psc</strong> <strong>2400</strong> <strong>series</strong>
eference <strong>guide</strong><br />
load the <strong>in</strong>put tray<br />
load orig<strong>in</strong>als and load paper<br />
1 Remove the output tray, and slide the paper-width and paper-length <strong>guide</strong>s<br />
to their outermost positions.<br />
2 Tap a stack of paper on a flat surface to align the edges, and then check to<br />
make sure <strong>all</strong> of the paper <strong>in</strong> the stack is the same size and type.<br />
3 Slide the short edge of the paper forward <strong>in</strong>to the <strong>in</strong>put tray with the pr<strong>in</strong>t<br />
side down until it stops. If you are us<strong>in</strong>g letterhead, <strong>in</strong>sert the top of the<br />
page first with the pr<strong>in</strong>t side down.<br />
4 Slide the paper-width and paper-length <strong>guide</strong>s <strong>in</strong>ward until they stop at the<br />
edges of the paper. Make sure that the paper stack lies flat <strong>in</strong> the <strong>in</strong>put tray<br />
and is stacked no higher than the paper-length <strong>guide</strong>.<br />
5 Replace the output tray.<br />
13<br />
load orig<strong>in</strong>als & paper
load orig<strong>in</strong>als & paper<br />
chapter 2<br />
load envelopes<br />
14<br />
6 Extend the output tray extender to prevent pr<strong>in</strong>ted paper from f<strong>all</strong><strong>in</strong>g out of<br />
the output tray.<br />
This section describes the basic procedure for load<strong>in</strong>g envelopes <strong>in</strong>to your<br />
HP PSC. Do not use sh<strong>in</strong>y or embossed envelopes, or envelopes that have clasps<br />
or w<strong>in</strong>dows.<br />
Note: Consult the help files <strong>in</strong> your word process<strong>in</strong>g software for specific<br />
details on how to format text for pr<strong>in</strong>t<strong>in</strong>g on envelopes.<br />
1 Before load<strong>in</strong>g <strong>one</strong> or more envelopes, remove <strong>all</strong> paper from the <strong>in</strong>put<br />
tray.<br />
2 Insert <strong>one</strong> or more envelopes <strong>in</strong>to the <strong>in</strong>put tray with the envelope flaps up<br />
and to the left. Slide the stack of envelopes forward until it stops.<br />
3 Slide the paper-length and paper-width <strong>guide</strong>s <strong>in</strong>ward aga<strong>in</strong>st the stack of<br />
envelopes until they stop.<br />
Do not overload the <strong>in</strong>put tray; make sure the stack of envelopes fits with<strong>in</strong><br />
the <strong>in</strong>put tray and is no higher than the top of the paper-length <strong>guide</strong>.<br />
<strong>hp</strong> <strong>psc</strong> <strong>2400</strong> <strong>series</strong>
load 4 by 6 <strong>in</strong>ch (10 by 15 cm) photo paper<br />
<strong>reference</strong> <strong>guide</strong><br />
load orig<strong>in</strong>als and load paper<br />
The follow<strong>in</strong>g describes the procedure for load<strong>in</strong>g 4 by 6 <strong>in</strong>ch (10 by 15 cm)<br />
photo paper <strong>in</strong>to your HP PSC.<br />
Note: For the best results, use a recommended type of 4 by 6 <strong>in</strong>ch (10 by<br />
15 cm) photo paper. For more <strong>in</strong>formation, see recommended papers on<br />
page 16. In addition, for best results, set the paper type and paper size<br />
before pr<strong>in</strong>t<strong>in</strong>g. For more <strong>in</strong>formation, see set the paper type on page 17<br />
and set the paper size on page 18.<br />
Tip: Help prevent rips, wr<strong>in</strong>kles, curled or bent edges by stor<strong>in</strong>g<br />
<strong>all</strong> media flat <strong>in</strong> a resealable bag. Extreme changes <strong>in</strong><br />
temperature and humidity might result <strong>in</strong> curled media that does<br />
not work well <strong>in</strong> the HP PSC if the media is not stored properly.<br />
1 Remove the output tray.<br />
2 Remove <strong>all</strong> paper from the <strong>in</strong>put tray.<br />
Note: If the photo paper you are us<strong>in</strong>g has perforated tabs, load the photo<br />
paper so that the tabs are closest to you.<br />
3 Slide the stack of photo paper (short edge forward, glossy side down)<br />
completely forward and to the far right side of the <strong>in</strong>put tray until it stops.<br />
Tip: Refer to the diagram on the <strong>in</strong>put tray of your HP PSC for<br />
further assistance on load<strong>in</strong>g 4 by 6 <strong>in</strong>ch (10 by 15 cm) photo<br />
paper.<br />
4 Slide the paper-length and paper-width <strong>guide</strong>s <strong>in</strong>ward aga<strong>in</strong>st the stack of<br />
photo paper until they stop. Make sure the paper is lay<strong>in</strong>g flat. Do not<br />
overload the <strong>in</strong>put tray; make sure the stack of photo paper fits with<strong>in</strong> the<br />
<strong>in</strong>put tray and is no higher than the top of the paper-length <strong>guide</strong>.<br />
5 Replace the output tray.<br />
load postcards or Hagaki cards<br />
The follow<strong>in</strong>g describes the procedure for load<strong>in</strong>g postcards or Hagaki cards<br />
<strong>in</strong>to your HP PSC.<br />
1 Remove the output tray.<br />
2 Remove <strong>all</strong> paper from the <strong>in</strong>put tray, and then slide a stack of cards<br />
forward <strong>in</strong>to the <strong>in</strong>put tray until it stops.<br />
Make sure the pr<strong>in</strong>t side faces down.<br />
15<br />
load orig<strong>in</strong>als & paper
load orig<strong>in</strong>als & paper<br />
chapter 2<br />
16<br />
3 Slide the paper-length and paper-width <strong>guide</strong>s <strong>in</strong>ward aga<strong>in</strong>st the stack of<br />
cards until they stop.<br />
Make sure the cards fit with<strong>in</strong> the tray (do not overload it). The stack<br />
should be no higher than the top of the paper-width <strong>guide</strong>.<br />
4 Replace the output tray.<br />
recommended papers<br />
If you want the best pr<strong>in</strong>t quality, HP recommends HP papers. Us<strong>in</strong>g paper that<br />
is too th<strong>in</strong>, paper that has a slick texture, or paper that stretches easily can cause<br />
paper jams. Us<strong>in</strong>g paper that has a heavy texture or does not accept <strong>in</strong>k can<br />
cause pr<strong>in</strong>ted images to smear, bleed, or not fill <strong>in</strong> completely. For more<br />
<strong>in</strong>formation about HP Premium Inkjet papers, go to the HP website:<br />
www.<strong>hp</strong>.com/support<br />
load other types of paper <strong>in</strong> the <strong>in</strong>put tray<br />
paper tips<br />
HP papers<br />
The follow<strong>in</strong>g table provides <strong>guide</strong>l<strong>in</strong>es for load<strong>in</strong>g certa<strong>in</strong> types of paper and<br />
transparency film. For best results, adjust the paper sett<strong>in</strong>gs each time you<br />
change paper sizes. For more <strong>in</strong>formation, see set the paper size on page 18.<br />
• HP Premium Paper: Locate the gray arrow on the nonpr<strong>in</strong>t<strong>in</strong>g side<br />
of the paper, and then <strong>in</strong>sert paper with the arrow side fac<strong>in</strong>g up.<br />
• HP Premium Inkjet Transparency Film: Insert the film so that the<br />
white transparency strip (with arrows and the HP logo) is on top<br />
and is go<strong>in</strong>g <strong>in</strong>to the <strong>in</strong>put tray first.<br />
• HP Iron-On Transfer: Flatten the transfer sheet completely before<br />
us<strong>in</strong>g it; do not load curled sheets. (To prevent curl<strong>in</strong>g, keep<br />
transfer sheets sealed <strong>in</strong> the orig<strong>in</strong>al package until you are ready<br />
to use them.) Manu<strong>all</strong>y feed <strong>one</strong> sheet at a time, with the<br />
unpr<strong>in</strong>ted side fac<strong>in</strong>g down (the blue stripe faces up).<br />
• HP Matte Greet<strong>in</strong>g Cards, HP Glossy Greet<strong>in</strong>g Cards, or<br />
HP Textured Greet<strong>in</strong>g Cards: Insert a sm<strong>all</strong> stack of HP greet<strong>in</strong>gcard<br />
paper, with the pr<strong>in</strong>t side down, <strong>in</strong>to the <strong>in</strong>put tray until it<br />
stops.<br />
<strong>hp</strong> <strong>psc</strong> <strong>2400</strong> <strong>series</strong>
paper tips<br />
Labels<br />
(work only with<br />
pr<strong>in</strong>t<strong>in</strong>g)<br />
Cont<strong>in</strong>uous (banner)<br />
paper<br />
(works only with<br />
pr<strong>in</strong>t<strong>in</strong>g)<br />
set the paper type<br />
<strong>reference</strong> <strong>guide</strong><br />
load orig<strong>in</strong>als and load paper<br />
• Always use letter or A4 label sheets designed for use with<br />
HP <strong>in</strong>kjet products (such as Avery Inkjet Labels), and make sure<br />
that the labels are not over two years old.<br />
• Fan the stack of labels to make sure n<strong>one</strong> of the pages are<br />
stick<strong>in</strong>g together.<br />
• Place a stack of label sheets on top of standard paper <strong>in</strong> the <strong>in</strong>put<br />
tray, pr<strong>in</strong>t side down. Do not <strong>in</strong>sert labels <strong>one</strong> sheet at a time.<br />
Cont<strong>in</strong>uous banner paper is also known as computer or z-fold paper.<br />
• Before load<strong>in</strong>g banner paper, remove <strong>all</strong> other paper from the<br />
<strong>in</strong>put tray, then remove the output tray. Leave the output tray off<br />
of the HP PSC while the banner pr<strong>in</strong>ts to prevent the cont<strong>in</strong>uous<br />
banner paper from tear<strong>in</strong>g.<br />
Remove the output<br />
tray.<br />
Insert the<br />
unattached edge of<br />
the paper <strong>in</strong>to the<br />
<strong>in</strong>put tray.<br />
• If you use non-HP banner paper, use 20-lb. paper and fan the<br />
paper before load<strong>in</strong>g it.<br />
• Verify that the stack of banner paper conta<strong>in</strong>s at least five pages<br />
<strong>in</strong> the stack.<br />
• Carefully tear off the perforated edge strips from both sides of the<br />
paper stack, if any, and unfold and refold the paper to make sure<br />
the pages do not stick together.<br />
• Put the paper <strong>in</strong> the <strong>in</strong>put tray so that the unattached edge is at<br />
the top of the stack. Insert the first edge <strong>in</strong>to the <strong>in</strong>put tray until it<br />
stops, as shown <strong>in</strong> the illustration above.<br />
The follow<strong>in</strong>g procedure describes how to set the paper type for Copy and<br />
Photo options. Select the Paper Type sett<strong>in</strong>g that matches the paper or<br />
transparency film you are us<strong>in</strong>g.<br />
Note: When pr<strong>in</strong>t<strong>in</strong>g from your computer, set the paper type properties <strong>in</strong><br />
the Pr<strong>in</strong>t dialog box of the software application.<br />
This section conta<strong>in</strong>s the follow<strong>in</strong>g topics:<br />
• set paper type from the copy menu on page 17<br />
• set paper type from the photo menu on page 18<br />
set paper type from the copy menu<br />
1 Press Copy twice, and then press 5.<br />
This displays the Copy Menu and then selects Paper Type.<br />
2 Press to highlight a paper type sett<strong>in</strong>g, and then press OK.<br />
17<br />
load orig<strong>in</strong>als & paper
load orig<strong>in</strong>als & paper<br />
chapter 2<br />
18<br />
set paper type from the photo menu<br />
set the paper size<br />
1 Press Photo twice, and then press 5.<br />
This displays the Photo Menu and selects Paper Type.<br />
2 Press to highlight a paper type sett<strong>in</strong>g, and then press OK.<br />
The follow<strong>in</strong>g procedure describes how to set the paper size for Copy, Photo,<br />
and Fax options. Select the Paper Size sett<strong>in</strong>g that matches the paper or<br />
transparency film you are us<strong>in</strong>g.<br />
Note: When pr<strong>in</strong>t<strong>in</strong>g from your computer, set the paper size properties <strong>in</strong><br />
the Pr<strong>in</strong>t dialog box of the software application.<br />
This section conta<strong>in</strong>s the follow<strong>in</strong>g topics:<br />
• set the paper size from the copy menu on page 18<br />
• set the paper size from the photo menu on page 18<br />
• set the paper size for receiv<strong>in</strong>g a fax on page 18<br />
set the paper size from the copy menu<br />
1 Press Copy twice, and then press 4.<br />
This selects the Copy Menu and then Paper Size.<br />
2 Press to highlight a paper size sett<strong>in</strong>g, and then press OK.<br />
set the paper size from the photo menu<br />
1 Press Photo twice, and then press 4.<br />
This selects the Photo Menu and then Paper Size.<br />
2 Press to highlight a paper size sett<strong>in</strong>g, and then press OK.<br />
set the paper size for receiv<strong>in</strong>g a fax<br />
You can select the paper size for received faxes. The paper size selected should<br />
match what is loaded <strong>in</strong> your <strong>in</strong>put tray. Faxes can be pr<strong>in</strong>ted on letter, A4, or<br />
legal paper only.<br />
Note: If an <strong>in</strong>correct paper size is loaded <strong>in</strong> the <strong>in</strong>put tray when a fax is<br />
received, the fax will not pr<strong>in</strong>t. Load letter, A4, or legal paper, and then<br />
press OK to pr<strong>in</strong>t the fax.<br />
1 Press Setup.<br />
2 Press 3, and then press 4.<br />
This selects Basic Fax Setup and then Paper Size.<br />
3 Press to highlight an option, and then press OK.<br />
<strong>hp</strong> <strong>psc</strong> <strong>2400</strong> <strong>series</strong>
avoid jams<br />
<strong>reference</strong> <strong>guide</strong><br />
load orig<strong>in</strong>als and load paper<br />
To help avoid paper jams, follow these <strong>guide</strong>l<strong>in</strong>es:<br />
• Prevent curled or wr<strong>in</strong>kled paper by stor<strong>in</strong>g <strong>all</strong> supplies of media flat <strong>in</strong> a<br />
resealable bag.<br />
• Remove pr<strong>in</strong>ted papers from the output tray frequently.<br />
• Ensure that media loaded <strong>in</strong> the <strong>in</strong>put tray lay flat and the edges are not<br />
bent or torn.<br />
• Do not comb<strong>in</strong>e different paper types and paper sizes <strong>in</strong> the <strong>in</strong>put tray;<br />
load the same paper type and paper size <strong>in</strong> the <strong>in</strong>put tray.<br />
• Adjust paper <strong>guide</strong>s <strong>in</strong> the <strong>in</strong>put tray to fit snugly aga<strong>in</strong>st <strong>all</strong> media. Make<br />
sure the paper <strong>guide</strong>s do not bend the media <strong>in</strong> the <strong>in</strong>put tray.<br />
• Do not force media too far forward <strong>in</strong> the <strong>in</strong>put tray.<br />
• Use paper types that are recommended for your HP PSC.<br />
19<br />
load orig<strong>in</strong>als & paper
load orig<strong>in</strong>als & paper<br />
chapter 2<br />
20<br />
<strong>hp</strong> <strong>psc</strong> <strong>2400</strong> <strong>series</strong>
3<br />
use a photo memory card<br />
The HP PSC can access the memory cards used <strong>in</strong> almost any digital camera so<br />
you can pr<strong>in</strong>t, store, manage, and share your digital photos <strong>in</strong> some very excit<strong>in</strong>g<br />
ways.<br />
This section conta<strong>in</strong>s the follow<strong>in</strong>g topics:<br />
• what is a memory card? on page 21<br />
• <strong>in</strong>sert a memory card and save the files to your computer on page 22<br />
• pr<strong>in</strong>t photos from a proof sheet on page 23<br />
• set photo pr<strong>in</strong>t options on page 26<br />
• pr<strong>in</strong>t photos directly from a memory card on page 28<br />
• view photos <strong>in</strong> a slide show on page 31<br />
• share digital photos through <strong>hp</strong> <strong>in</strong>stant share on page 32<br />
• use the <strong>hp</strong> photo & imag<strong>in</strong>g g<strong>all</strong>ery on page 33<br />
what is a memory card?<br />
If your digital camera uses a memory card to store photos, you can <strong>in</strong>sert the<br />
memory card <strong>in</strong> your HP PSC to pr<strong>in</strong>t or save your photos.<br />
You can pr<strong>in</strong>t a proof sheet, which might be several pages long and shows<br />
thumbnail views of photos stored on the memory card, and pr<strong>in</strong>t photos from the<br />
memory card, even if your HP PSC is not connected to a computer.<br />
Your HP PSC can read CompactFlash (I, II), Memory Sticks, MultiMediaCard<br />
(MMC), Secure Digital, SmartMedia, and xD memory cards.<br />
Note: You can scan a document and send the scanned image to an<br />
<strong>in</strong>serted memory card. See send the scan to a memory card loaded <strong>in</strong> your<br />
<strong>hp</strong> <strong>psc</strong> on page 53 for details.<br />
Your HP PSC features four slots for memory cards, shown <strong>in</strong> the illustration on<br />
the next page, with the memory cards that correspond to each slot.<br />
21<br />
memory card
memory card<br />
chapter 3<br />
22<br />
The slots are configured as follows:<br />
• Top left slot: CompactFlash (I, II)<br />
• Top right slot: Secure Digital, MultiMediaCard (MMC)<br />
• Bottom left slot: SmartMedia, xD (fits <strong>in</strong> top right of the slot)<br />
• Bottom right slot: Memory Stick, Magic Gate Memory Stick, Memory Stick<br />
Duo (with user-supplied adapter), Memory Stick Pro<br />
Warn<strong>in</strong>g! By default, W<strong>in</strong>dows XP will format a memory card of 8 MB or<br />
less and 64 MB or more with the FAT32 format. Digital cameras and other<br />
devices use the FAT (FAT16 or FAT12) format and cannot operate with a<br />
FAT32 formatted card. Either format your card <strong>in</strong> your camera or select FAT<br />
format to format your card <strong>in</strong> a W<strong>in</strong>dows XP PC.<br />
<strong>in</strong>sert a memory card and save the files to your computer<br />
After you take photos with your digital camera, you can pr<strong>in</strong>t them immediately<br />
or save them directly to your computer.<br />
Note: You can only use <strong>one</strong> memory card <strong>in</strong> your HP PSC at a time.<br />
1 Insert the memory card <strong>in</strong>to the appropriate slot on your HP PSC.<br />
When the memory card is <strong>in</strong>serted correctly, the Photo button on the front<br />
panel beg<strong>in</strong>s to bl<strong>in</strong>k.<br />
If you <strong>in</strong>sert a memory card backwards, the LED next to the card slots<br />
bl<strong>in</strong>ks amber and the color graphics display might display an error<br />
message such as “Card is <strong>in</strong> backwards” or “Card is not fully <strong>in</strong>serted.”<br />
2 Read<strong>in</strong>g photos... appears on the color graphics display. The LED next to<br />
the card slots bl<strong>in</strong>ks green when the card is be<strong>in</strong>g accessed.<br />
Warn<strong>in</strong>g! Never attempt to remove a memory card while it is be<strong>in</strong>g<br />
accessed. Do<strong>in</strong>g so can damage files on the card. You can safely remove<br />
a card only when the LED next to the slots rema<strong>in</strong>s on and is not bl<strong>in</strong>k<strong>in</strong>g.<br />
<strong>hp</strong> <strong>psc</strong> <strong>2400</strong> <strong>series</strong>
eference <strong>guide</strong><br />
use a photo memory card<br />
3 If there are photo files on the card that have never been transferred<br />
before, a pop-up on your computer asks you whether you want to save the<br />
photo files to your computer.<br />
4 Click the option to save.<br />
This saves <strong>all</strong> the new photos from the memory card to your computer by<br />
us<strong>in</strong>g the HP PSC software.<br />
Note: You can also use the front panel to transfer memory card files to an<br />
attached computer. Press Photo, and then 8 to choose Transfer to computer.<br />
Follow the prompts on the computer. In addition, the memory card appears<br />
as a drive on your computer. You can go to your computer and simply<br />
move the photo files from the memory card “drive” to the desktop.<br />
For W<strong>in</strong>dows: by default, files are saved <strong>in</strong> month and year folders<br />
depend<strong>in</strong>g on when the photos were taken. The folders are created under<br />
the C:\Documents and Sett<strong>in</strong>gs\username\My Documents\My Pictures<br />
folder <strong>in</strong> W<strong>in</strong>dows XP and W<strong>in</strong>dows 2000.<br />
For Mac<strong>in</strong>tosh: by default, files are saved to the computer at the location<br />
Hard Drive:Documents:HP All-<strong>in</strong>-One Data:Photos folder (OS 9) or Hard<br />
Drive:Users:User Name:Pictures:HP Photos folder (OS X).<br />
If there are no new files, when the HP PSC f<strong>in</strong>ishes read<strong>in</strong>g the card, the<br />
Photo button stops bl<strong>in</strong>k<strong>in</strong>g and stays on. The LED next to the card slots<br />
rema<strong>in</strong>s on. The first photo on the card appears on the color graphics<br />
display.<br />
To navigate through the photos on the card, press or to move<br />
backward or forward through the photos, <strong>one</strong> photo at a time. Press and<br />
hold or to move rapidly backward or forward through the photos.<br />
Is your hard disk full? If your computer is equipped with an <strong>in</strong>ternal or external<br />
CD writer, you can organize large collections of digital photos on CDs by us<strong>in</strong>g<br />
the Memories Disc feature available through the HP Photo and Imag<strong>in</strong>g Director.<br />
Just start the HP Director and click HP G<strong>all</strong>ery. Click the Make CD tab to beg<strong>in</strong><br />
collect<strong>in</strong>g, organiz<strong>in</strong>g, and catalog<strong>in</strong>g your images on CDs.<br />
pr<strong>in</strong>t photos from a proof sheet<br />
A proof sheet is a simple and convenient way to select photos and make pr<strong>in</strong>ts<br />
directly from a memory card without the need for a computer. A proof sheet,<br />
which might be several pages long, shows thumbnail views of photos stored on<br />
the memory card. The file name, <strong>in</strong>dex number, and date appear under each<br />
thumbnail. Proof sheets are also a quick way to create a pr<strong>in</strong>ted catalog of your<br />
digital photos.<br />
This section conta<strong>in</strong>s the follow<strong>in</strong>g topics:<br />
• pr<strong>in</strong>t a proof sheet on page 24<br />
• complete the proof sheet on page 24<br />
• pr<strong>in</strong>t photos by scann<strong>in</strong>g a proof sheet on page 26<br />
23<br />
memory card
memory card<br />
chapter 3<br />
24<br />
pr<strong>in</strong>t a proof sheet<br />
Tip: You can optimize the quality of the photos you pr<strong>in</strong>t with<br />
your HP PSC by purchas<strong>in</strong>g a photo pr<strong>in</strong>t cartridge. Remove the<br />
black pr<strong>in</strong>t cartridge and <strong>in</strong>sert the photo pr<strong>in</strong>t cartridge <strong>in</strong> its<br />
place. With the tri-color pr<strong>in</strong>t cartridge and photo pr<strong>in</strong>t cartridge<br />
<strong>in</strong>st<strong>all</strong>ed, you have a six-<strong>in</strong>k system, which provides enhanced<br />
quality photos. When you want to pr<strong>in</strong>t regular text documents,<br />
swap the black pr<strong>in</strong>t cartridge back <strong>in</strong>.<br />
For more <strong>in</strong>formation, see order supplies on page 77.<br />
Do you want to do more than just pr<strong>in</strong>t your photos? You can enhance and edit<br />
digital photos before pr<strong>in</strong>t<strong>in</strong>g them by us<strong>in</strong>g the HP Image Editor available<br />
through the HP Director. Just start the HP Director and click HP G<strong>all</strong>ery. Select<br />
the photo you want to edit, and click Image Editor <strong>in</strong> the top pane. Add text or<br />
special effects to the photo, improve a poor quality photo, or get rid of red eye.<br />
Mac<strong>in</strong>tosh users can simply double-click an image <strong>in</strong> the HP G<strong>all</strong>ery to open it<br />
for edit<strong>in</strong>g <strong>in</strong> an Image W<strong>in</strong>dow.<br />
1 Insert the memory card <strong>in</strong>to the appropriate slot on your HP PSC.<br />
2 Press Proof Sheet, and then press 1.<br />
This displays the Proof Sheet Menu and then selects Pr<strong>in</strong>t Proof Sheet.<br />
Note: Depend<strong>in</strong>g on how many photos are on the memory card, the time<br />
it takes to pr<strong>in</strong>t a proof sheet can vary greatly.<br />
3 If there are more than 20 photos on the card, the Select Photos Menu<br />
appears. Press the number next to the command you want to select:<br />
– 1. All<br />
– 2. Last 20<br />
– 3. Custom Range<br />
Note: Use the proof sheet <strong>in</strong>dex number to select which photos to pr<strong>in</strong>t for<br />
a custom range. This number might be different from the number associated<br />
with the photo on your digital camera. If you add photos to, or delete<br />
photos from, your memory card, you need to repr<strong>in</strong>t the proof sheet to see<br />
the new <strong>in</strong>dex numbers.<br />
4 If you choose Custom Range, enter the photo <strong>in</strong>dex numbers for the first<br />
and last photos you want to pr<strong>in</strong>t as prompted.<br />
Note: You can erase <strong>in</strong>dex numbers by press<strong>in</strong>g to backspace.<br />
complete the proof sheet<br />
After you have pr<strong>in</strong>ted a proof sheet, as described <strong>in</strong> pr<strong>in</strong>t a proof sheet on<br />
page 24, you can select photos to be pr<strong>in</strong>ted.<br />
<strong>hp</strong> <strong>psc</strong> <strong>2400</strong> <strong>series</strong>
eference <strong>guide</strong><br />
use a photo memory card<br />
1 Select the photos to pr<strong>in</strong>t by us<strong>in</strong>g a dark pen or pencil to fill <strong>in</strong> the circles<br />
located underneath the thumbnail images on the proof sheet.<br />
2 Select <strong>one</strong> layout style by fill<strong>in</strong>g <strong>in</strong> a circle <strong>in</strong> step 2 of the proof sheet.<br />
Note: If you need more control over pr<strong>in</strong>t sett<strong>in</strong>gs than the proof sheet<br />
provides, you can pr<strong>in</strong>t photos directly from the front panel. See pr<strong>in</strong>t photos<br />
directly from a memory card on page 28.<br />
3 Place the completed proof sheet face down on the right front corner of the<br />
glass with the top of the sheet touch<strong>in</strong>g the right edge, and then close the<br />
lid.<br />
25<br />
memory card
memory card<br />
chapter 3<br />
26<br />
pr<strong>in</strong>t photos by scann<strong>in</strong>g a proof sheet<br />
Tip: Make sure the glass of the HP PSC is completely clean or the<br />
proof sheet might not scan properly. See clean the glass on<br />
page 79 for <strong>in</strong>structions.<br />
1 Load the appropriate paper, such as photo paper, <strong>in</strong> the <strong>in</strong>put tray. Make<br />
sure the same memory card you used to pr<strong>in</strong>t a proof sheet is still <strong>in</strong> the<br />
slot when you scan that proof sheet.<br />
2 Press Proof Sheet, and then press 2.<br />
This displays the Proof Sheet Menu and then selects Scan Proof Sheet.<br />
The HP PSC scans the proof sheet and pr<strong>in</strong>ts the selected photos.<br />
set photo pr<strong>in</strong>t options<br />
You can control many aspects of how your HP PSC pr<strong>in</strong>ts photos directly from<br />
the front panel, <strong>in</strong>clud<strong>in</strong>g paper type and size, layout, and more.<br />
This section conta<strong>in</strong>s the follow<strong>in</strong>g topics:<br />
• change photo menu pr<strong>in</strong>t options on page 27<br />
• set new pr<strong>in</strong>t photo defaults on page 28<br />
You access and set photo pr<strong>in</strong>t options through the Photo Menu available<br />
through the front panel.<br />
1 Make sure the memory card is <strong>in</strong>serted <strong>in</strong>to the appropriate slot on your<br />
HP PSC.<br />
2 Press Photo.<br />
The Photo Menu appears.<br />
Photo Menu<br />
1. Number of Copies<br />
2. Borderless<br />
3. Image Size<br />
4. Paper Size<br />
5. Paper Type<br />
6. Layout Style<br />
7. Borders and Frames<br />
8. Transfer to computer<br />
9. HP Instant Share<br />
0. Set New Defaults<br />
3 Press the number next to the option you want to change.<br />
The Photo Menu gives you access to a variety of sett<strong>in</strong>gs that affect the<br />
way digital photos pr<strong>in</strong>t, <strong>in</strong>clud<strong>in</strong>g number of copies, paper types, and so<br />
on, as shown <strong>in</strong> the follow<strong>in</strong>g illustration. The default measurements and<br />
sizes vary accord<strong>in</strong>g to country/region.<br />
<strong>hp</strong> <strong>psc</strong> <strong>2400</strong> <strong>series</strong>
eference <strong>guide</strong><br />
Number of Copies<br />
Copies: 1 ><br />
Press OK when<br />
d<strong>one</strong>.<br />
Paper Size<br />
1. Letter<br />
2. 4 x 6<br />
3. A4<br />
Borders & Frames<br />
1. N<strong>one</strong><br />
2. Rectangle (th<strong>in</strong> frame)<br />
3. Rectangle (thick frame)<br />
4. Oval (no frame)<br />
5. Oval (th<strong>in</strong> frame)<br />
6. Oval (thick frame)<br />
change photo menu pr<strong>in</strong>t options<br />
Borderless<br />
1. Off<br />
2. On<br />
Paper Type<br />
1. Automatic<br />
2. Pla<strong>in</strong> Paper<br />
3. Premium Photo<br />
4. Photo Paper<br />
5. Everyday Photo<br />
6. PhotQual Inkjet<br />
7. Premium Inkjet<br />
8. Brochure Glossy<br />
9. Brochure Matte<br />
0. Iron-On<br />
use a photo memory card<br />
Image Size<br />
1. 4 x 6 <strong>in</strong>ch<br />
2. 5 x 7 <strong>in</strong>ch<br />
3. 8 x 10 <strong>in</strong>ch<br />
4. 2½ x 3¼ <strong>in</strong>ch<br />
5. 3 x 4 <strong>in</strong>ch<br />
Layout Style<br />
1. Paper Saver<br />
2. Album<br />
(Portrait Page)<br />
3. Album<br />
(Landscape Page)<br />
Set New Defaults<br />
1. No<br />
2. Yes<br />
You change each of the Photo Menu pr<strong>in</strong>t options <strong>in</strong> the same general way.<br />
1 Press Photo, and then press the number next to the option you want to<br />
change. You can scroll through the Photo Menu by press<strong>in</strong>g on the front<br />
panel to see <strong>all</strong> the options.<br />
The currently selected option is highlighted, and its default sett<strong>in</strong>g (if any)<br />
appears at the bottom of the menu.<br />
2 Make the change to the sett<strong>in</strong>g, and then press OK.<br />
Note: Press Photo aga<strong>in</strong> to exit the Photo Menu and return to the photo<br />
display.<br />
borderless pr<strong>in</strong>t<br />
This sett<strong>in</strong>g turns borderless pr<strong>in</strong>t<strong>in</strong>g on or off. Borderless pr<strong>in</strong>t<strong>in</strong>g lets you create<br />
professional quality photo pr<strong>in</strong>ts. When the Borderless option is on, the Image<br />
Size, Layout Style, and Borders and Frames options become grayed out on the<br />
Photo Menu. Any choices on other menus that are unsupported for borderless<br />
pr<strong>in</strong>t<strong>in</strong>g are also grayed out. You still need to select a paper size and paper<br />
type, and load the appropriate paper <strong>in</strong> the <strong>in</strong>put tray.<br />
27<br />
memory card
memory card<br />
chapter 3<br />
28<br />
select image size<br />
This sett<strong>in</strong>g lets you select the size of the photo image to be pr<strong>in</strong>ted.<br />
select paper size<br />
This sett<strong>in</strong>g lets you select the paper size for the current pr<strong>in</strong>t job.<br />
select paper type<br />
This sett<strong>in</strong>g lets you select the best paper type for the current pr<strong>in</strong>t job. The<br />
default Automatic value lets the HP PSC detect and set the paper type us<strong>in</strong>g a<br />
sensor. The paper types shown <strong>in</strong> this sett<strong>in</strong>g vary depend<strong>in</strong>g on the paper size<br />
currently selected.<br />
select layout style<br />
The Paper Saver layout style fits as many photos on the paper as possible,<br />
rotat<strong>in</strong>g and cropp<strong>in</strong>g photos if necessary.<br />
The Album layout styles keep the orientation of the orig<strong>in</strong>al photos. Album<br />
(Portrait Page) and Album (Landscape Page) refer to the orientation of the page,<br />
not the photos themselves. Some cropp<strong>in</strong>g might occur.<br />
select borders and frames<br />
This option places the chosen border as a frame around <strong>all</strong> photos <strong>in</strong> the current<br />
pr<strong>in</strong>t job.<br />
set new pr<strong>in</strong>t photo defaults<br />
You can change the pr<strong>in</strong>t photo defaults from the front panel.<br />
1 Press Photo.<br />
The Photo Menu appears.<br />
2 Make changes to any option as needed.<br />
You automatic<strong>all</strong>y return to the Photo Menu when you confirm a new<br />
sett<strong>in</strong>g for any option.<br />
3 Press 0 when at the Photo Menu, and then press OK when prompted to set<br />
new defaults.<br />
All the current sett<strong>in</strong>gs become the new photo defaults.<br />
pr<strong>in</strong>t photos directly from a memory card<br />
You can <strong>in</strong>sert a memory card <strong>in</strong> your HP PSC and use the front panel to pr<strong>in</strong>t<br />
photos directly from the memory card.<br />
This section conta<strong>in</strong>s the follow<strong>in</strong>g topics:<br />
• pr<strong>in</strong>t <strong>in</strong>dividual photos on page 29<br />
• create borderless pr<strong>in</strong>ts on page 29<br />
• deselect photos on page 30<br />
• use quick pr<strong>in</strong>t to pr<strong>in</strong>t the current photo on page 30<br />
• pr<strong>in</strong>t a DPOF file on page 30<br />
<strong>hp</strong> <strong>psc</strong> <strong>2400</strong> <strong>series</strong>
eference <strong>guide</strong><br />
use a photo memory card<br />
Note: When pr<strong>in</strong>t<strong>in</strong>g photos, you should select options for the correct<br />
paper type and photo enhancement. See set photo pr<strong>in</strong>t options on<br />
page 26 for details. You might also want to use the photo pr<strong>in</strong>t cartridge for<br />
superior pr<strong>in</strong>t quality. See work with pr<strong>in</strong>t cartridges on page 80 for more<br />
<strong>in</strong>formation.<br />
You can do more than simply pr<strong>in</strong>t your digital photos if you use the HP Photo<br />
& Imag<strong>in</strong>g G<strong>all</strong>ery feature of the HP Director. This software lets you use digital<br />
photos for iron-on transfers, posters, banners, stickers, and other creative<br />
projects.<br />
pr<strong>in</strong>t <strong>in</strong>dividual photos<br />
You can pr<strong>in</strong>t photos directly from the front panel without us<strong>in</strong>g a proof sheet.<br />
1 Insert the memory card <strong>in</strong>to the appropriate slot on your HP PSC.<br />
The Photo button lights up.<br />
2 Display a photo on the color graphics display and press OK to select it for<br />
pr<strong>in</strong>t<strong>in</strong>g. A selected photo bears a checkmark. Use or to move<br />
backward or forward through the photos, <strong>one</strong> photo at a time. Press and<br />
hold or to move rapidly through the photos.<br />
3<br />
Note: You can also select photos by enter<strong>in</strong>g the <strong>in</strong>dex numbers of the<br />
photos you want to pr<strong>in</strong>t. Use the pound key (#) to specify a range: 21-30.<br />
Press OK when you are f<strong>in</strong>ished enter<strong>in</strong>g the photo <strong>in</strong>dex numbers. If you<br />
don’t know the photo <strong>in</strong>dex number, pr<strong>in</strong>t a photo proof sheet before<br />
select<strong>in</strong>g <strong>in</strong>dividual photos to pr<strong>in</strong>t.<br />
Press Photo to display the Photo Menu, and then modify memory card<br />
pr<strong>in</strong>t options, such as paper type, page size, and so on. Any changes you<br />
make to the default sett<strong>in</strong>gs revert after the pr<strong>in</strong>t job is completed.<br />
4 Press Start Black or Start Color to pr<strong>in</strong>t the selected photos.<br />
Tip: You can press the Rotate button on the front panel to rotate<br />
the current photo for this pr<strong>in</strong>t job. The photo returns to its normal<br />
orientation after you pr<strong>in</strong>t it.<br />
create borderless pr<strong>in</strong>ts<br />
An exceptional feature of your HP PSC is its ability to turn the digital photos on<br />
a memory card <strong>in</strong>to professional, borderless pr<strong>in</strong>ts.<br />
1 Insert the memory card <strong>in</strong>to the appropriate slot on your HP PSC.<br />
The Photo button lights up.<br />
2 Display a photo on the color graphics display and press OK to select it for<br />
pr<strong>in</strong>t<strong>in</strong>g. A selected photo bears a checkmark. Use or to move<br />
backward or forward through the photos, <strong>one</strong> photo at a time. Press and<br />
hold or to move rapidly through the photos.<br />
3<br />
Note: You can also select photos by enter<strong>in</strong>g the <strong>in</strong>dex numbers of the<br />
photos you want to pr<strong>in</strong>t. Use the pound key (#) to specify a range: 21-30.<br />
Press OK when you f<strong>in</strong>ish enter<strong>in</strong>g the photo <strong>in</strong>dex numbers.<br />
Press Photo, and then press 2.<br />
This displays the Photo Menu and then selects Borderless.<br />
29<br />
memory card
memory card<br />
chapter 3<br />
30<br />
4 Press 2 to turn Borderless on.<br />
When the Borderless option is active, the Image Size, Layout Style, and<br />
Borders and Frames options become grayed out on the Photo Menu. Any<br />
choices on other menus that are unsupported for borderless pr<strong>in</strong>t<strong>in</strong>g are<br />
also grayed out.<br />
5 Select a paper type and paper size from the Paper Type and Paper Size<br />
menus. Only choices appropriate to borderless pr<strong>in</strong>t<strong>in</strong>g are available.<br />
6 Make sure you have photo paper of the appropriate size loaded <strong>in</strong> the<br />
paper tray. A prompt on the HP PSC rem<strong>in</strong>ds you to do this.<br />
7 Press Start Black or Start Color to pr<strong>in</strong>t the selected photos as borderless<br />
pr<strong>in</strong>ts.<br />
deselect photos<br />
You can deselect photos from the front panel.<br />
� Do <strong>one</strong> of the follow<strong>in</strong>g:<br />
– Press OK to deselect the photo shown <strong>in</strong> the display.<br />
– Press Cancel twice to deselect <strong>all</strong> photos.<br />
use quick pr<strong>in</strong>t to pr<strong>in</strong>t the current photo<br />
The Quick Pr<strong>in</strong>t feature lets you easily pr<strong>in</strong>t the photo currently be<strong>in</strong>g viewed on<br />
the color graphics display:<br />
1 Insert the memory card <strong>in</strong>to the appropriate slot on your HP PSC.<br />
2 Navigate to a photo you want to pr<strong>in</strong>t.<br />
3 Press Start Black or Start Color to pr<strong>in</strong>t the photo us<strong>in</strong>g the current sett<strong>in</strong>gs.<br />
pr<strong>in</strong>t a DPOF file<br />
The Digital Pr<strong>in</strong>t Order Format (DPOF) is an <strong>in</strong>dustry-standard file that can be<br />
created by some digital cameras. Camera-selected photos are photos you<br />
marked for pr<strong>in</strong>t<strong>in</strong>g with your digital camera. When you select photos with your<br />
camera, the camera creates a Digital Pr<strong>in</strong>t Order Format (DPOF) file that<br />
identifies which photos have been tagged for pr<strong>in</strong>t<strong>in</strong>g. Your HP PSC can read<br />
the DPOF file from the memory card so you do not have to reselect the photos<br />
to pr<strong>in</strong>t.<br />
Note: Not <strong>all</strong> digital cameras <strong>all</strong>ow you to tag your photos for pr<strong>in</strong>t<strong>in</strong>g. See<br />
your digital camera documentation to see if it supports Digital Pr<strong>in</strong>t Order<br />
Format (DPOF). Your HP PSC supports DPOF file format 1.1.<br />
When you pr<strong>in</strong>t camera-selected photos, the HP PSC pr<strong>in</strong>t sett<strong>in</strong>gs do not apply;<br />
the sett<strong>in</strong>gs <strong>in</strong> the DPOF file for photo layout and number of copies override<br />
those of your HP PSC.<br />
The DPOF file is stored by the digital camera on a memory card and specifies<br />
the follow<strong>in</strong>g <strong>in</strong>formation:<br />
• Which photos to pr<strong>in</strong>t<br />
• The quantity of each photo to be pr<strong>in</strong>ted<br />
<strong>hp</strong> <strong>psc</strong> <strong>2400</strong> <strong>series</strong>
eference <strong>guide</strong><br />
use a photo memory card<br />
to pr<strong>in</strong>t camera-selected photos<br />
1 Insert the memory card <strong>in</strong>to the appropriate slot on your HP PSC. If there<br />
are DPOF-tagged photos on the card, the Pr<strong>in</strong>t DPOF Photos prompt<br />
appears on the color graphics display.<br />
2 Do <strong>one</strong> of the follow<strong>in</strong>g:<br />
– Press 1 to pr<strong>in</strong>t <strong>all</strong> DPOF-tagged photos on the memory card.<br />
– Press 2 to bypass DPOF pr<strong>in</strong>t<strong>in</strong>g.<br />
view photos <strong>in</strong> a slide show<br />
The Slide Show button on the front panel lets you view <strong>all</strong> the photos on a<br />
memory card as a slide show.<br />
1 Make sure that the memory card is <strong>in</strong>serted <strong>in</strong>to the appropriate slot on<br />
your HP PSC.<br />
The Photo button lights up.<br />
2 Press Slide Show to beg<strong>in</strong> the slide show.<br />
Tip: If you want to pr<strong>in</strong>t the photo currently be<strong>in</strong>g viewed <strong>in</strong> a<br />
slide show, press Start Black or Start Color while it is be<strong>in</strong>g<br />
displayed.<br />
3 Press Cancel to end the slide show.<br />
Do your slide shows lack excitement? If your computer is equipped with an<br />
<strong>in</strong>ternal or external CD writer, you can create multimedia presentations of your<br />
photo collections by us<strong>in</strong>g the Memories Disc feature available through the HP<br />
Director. Just start the HP Director and open the HP Photo & Imag<strong>in</strong>g G<strong>all</strong>ery.<br />
Click the Make CD tab to beg<strong>in</strong> creat<strong>in</strong>g a movie-like presentation of selected<br />
photos. You can add music, titles, and much more. On a Mac<strong>in</strong>tosh see the <strong>hp</strong><br />
g<strong>all</strong>ery section <strong>in</strong> the <strong>hp</strong> photo and imag<strong>in</strong>g help book for <strong>in</strong>formation on the<br />
Memories Disc.<br />
change the speed of the slide show<br />
You can change the speed of the slide show by chang<strong>in</strong>g the <strong>in</strong>terval between<br />
slides:<br />
1 Press Setup twice.<br />
2 Press 7, and then press 3.<br />
This displays the P<strong>reference</strong>s Menu and then selects Prompt Delay Time.<br />
3 Choose from the follow<strong>in</strong>g options by press<strong>in</strong>g the number next to the<br />
appropriate speed:<br />
– 1. Normal (the default of 5 seconds)<br />
– 2. Fast (3 seconds)<br />
– 3. Slow (10 seconds)<br />
31<br />
memory card
memory card<br />
chapter 3<br />
share digital photos through <strong>hp</strong> <strong>in</strong>stant share<br />
32<br />
The HP PSC and its software can help you share photos with friends and family<br />
members:<br />
• Through e-mail<br />
• In onl<strong>in</strong>e albums<br />
• As quality pr<strong>in</strong>ts<br />
This section conta<strong>in</strong>s the follow<strong>in</strong>g topics:<br />
• share photos through e-mail on page 32<br />
• share photos onl<strong>in</strong>e through <strong>hp</strong> <strong>in</strong>stant share (W<strong>in</strong>dows only) on page 33<br />
Note: You can only use HP Instant Share with the HP PSC if you have the<br />
HP PSC connected to a computer with Internet access and with the HP Photo<br />
& Imag<strong>in</strong>g G<strong>all</strong>ery (HP G<strong>all</strong>ery) software <strong>in</strong>st<strong>all</strong>ed.<br />
share photos through e-mail<br />
The E-mail button on your HP PSC lets you easily send the selected photo to<br />
any<strong>one</strong> with an e-mail account.<br />
1 Navigate to a photo you want to send and press OK to select it.<br />
2 Press E-mail.<br />
For W<strong>in</strong>dows: Your HP PSC transfers the selected photo to the HP G<strong>all</strong>ery.<br />
The path and filename of the digital image are shown <strong>in</strong> the tray at the<br />
bottom of the w<strong>in</strong>dow. For <strong>in</strong>formation on send<strong>in</strong>g the specified image to<br />
some<strong>one</strong> as an e-mail attachment, see use the e-mail button on page 132.<br />
For Mac<strong>in</strong>tosh: Your HP PSC transfers the selected photo to your<br />
Mac<strong>in</strong>tosh. You can then send it as an e-mail attachment by follow<strong>in</strong>g the<br />
prompts on your Mac<strong>in</strong>tosh. For more <strong>in</strong>formation, see the <strong>hp</strong> imag<strong>in</strong>g<br />
g<strong>all</strong>ery section <strong>in</strong> the <strong>hp</strong> photo and imag<strong>in</strong>g help book.<br />
<strong>hp</strong> <strong>psc</strong> <strong>2400</strong> <strong>series</strong>
eference <strong>guide</strong><br />
share photos onl<strong>in</strong>e through <strong>hp</strong> <strong>in</strong>stant share (W<strong>in</strong>dows only)<br />
use a photo memory card<br />
You can share photos with family and friends by mak<strong>in</strong>g them available <strong>in</strong><br />
onl<strong>in</strong>e albums at special websites through HP Instant Share.<br />
1 Select <strong>one</strong> or more photos.<br />
2 Press Photo, and then press 9.<br />
Your HP PSC transfers the selected photo(s) to the HP G<strong>all</strong>ery. The path<br />
and filename of the selected images are shown <strong>in</strong> the tray at the bottom of<br />
the w<strong>in</strong>dow.<br />
3 Follow the prompts on your computer to select an HP Instant Share<br />
dest<strong>in</strong>ation.<br />
use the <strong>hp</strong> photo & imag<strong>in</strong>g g<strong>all</strong>ery<br />
You can use the HP G<strong>all</strong>ery for view<strong>in</strong>g and edit<strong>in</strong>g image files. You can pr<strong>in</strong>t<br />
images, send images by e-mail or fax to family and friends, upload images to<br />
a website, or use images <strong>in</strong> fun and creative pr<strong>in</strong>t<strong>in</strong>g projects with the HP<br />
G<strong>all</strong>ery. HP software lets you do <strong>all</strong> this and much more. Explore the software<br />
to take full advantage of the features of your HP PSC.<br />
For W<strong>in</strong>dows: If you want to open the HP G<strong>all</strong>ery at a later time, open the HP<br />
Director and click the HP G<strong>all</strong>ery icon.<br />
For Mac<strong>in</strong>tosh: If you want to open the HP G<strong>all</strong>ery at a later time, open the HP<br />
Director and click HP G<strong>all</strong>ery (OS 9) or click HP Director <strong>in</strong> the Dock and select<br />
HP G<strong>all</strong>ery from the Manage and Share section of the HP Director menu (OS X).<br />
33<br />
memory card
memory card<br />
chapter 3<br />
34<br />
<strong>hp</strong> <strong>psc</strong> <strong>2400</strong> <strong>series</strong>
4<br />
overview<br />
use the copy features<br />
The HP PSC enables you to produce high-quality color and black-and-white<br />
copies on a variety of paper types, <strong>in</strong>clud<strong>in</strong>g iron-on transfers. You can enlarge<br />
or reduce the size of an orig<strong>in</strong>al to fit a specific paper size, adjust the copy’s<br />
darkness and color <strong>in</strong>tensity, and use special features to create a poster, make<br />
many sizes of photos, and create transparencies.<br />
This section conta<strong>in</strong>s the follow<strong>in</strong>g topics:<br />
• overview on page 35<br />
• copy a two-page black-and-white document on page 37<br />
• make a 4 by 6 <strong>in</strong>ch (10 by 15 cm) borderless copy of a photo on page 38<br />
• make multiple copies of the same orig<strong>in</strong>al on page 40<br />
• copy a 4 by 6 <strong>in</strong>ch (10 by 15 cm) photo onto a full-size page on page 41<br />
• copy a photo several times on <strong>one</strong> page on page 43<br />
• resize an orig<strong>in</strong>al to fit onto letter paper on page 44<br />
• copy a washed-out orig<strong>in</strong>al on page 46<br />
• copy a document that has been faxed several times on page 46<br />
• enhance light areas of your copy on page 47<br />
• make a poster on page 48<br />
• prepare a color t-shirt transfer on page 49<br />
• stop copy<strong>in</strong>g on page 50<br />
You can make copies by us<strong>in</strong>g the front panel of your HP PSC or by us<strong>in</strong>g the<br />
HP Photo & Imag<strong>in</strong>g Director (HP Director) software on your computer. Many<br />
copy features are available through either method. However, you might f<strong>in</strong>d that<br />
the software offers easier access to special copy features.<br />
This section expla<strong>in</strong>s how to perform common copy tasks from the HP PSC front<br />
panel only. For <strong>in</strong>formation on perform<strong>in</strong>g copy tasks from the HP Director, see<br />
the onscreen <strong>hp</strong> photo & imag<strong>in</strong>g help that came with your software.<br />
This section conta<strong>in</strong>s the follow<strong>in</strong>g topics:<br />
• <strong>in</strong>crease copy speed or quality on page 36<br />
• change default copy sett<strong>in</strong>gs on page 36<br />
35<br />
copy
copy<br />
chapter 4<br />
36<br />
<strong>in</strong>crease copy speed or quality<br />
The HP PSC provides three options that affect copy speed and quality.<br />
• Normal delivers high-quality output and is the recommended sett<strong>in</strong>g for<br />
most of your copy<strong>in</strong>g. Normal copies faster than Best.<br />
• Best produces the highest quality for <strong>all</strong> paper and elim<strong>in</strong>ates the band<strong>in</strong>g<br />
(strip<strong>in</strong>g) effect that sometimes occurs <strong>in</strong> solid areas. Best copies more<br />
slowly than the other quality sett<strong>in</strong>gs.<br />
• Fast copies faster than the Normal sett<strong>in</strong>g. The text is of comparable quality<br />
to the Normal sett<strong>in</strong>g, but the graphics might be of lower quality. Us<strong>in</strong>g<br />
Fast cuts down on the frequency of replac<strong>in</strong>g your pr<strong>in</strong>t cartridges, because<br />
it uses less <strong>in</strong>k.<br />
1 Load your orig<strong>in</strong>al face down on the right front corner of the glass.<br />
2 Press Copy twice, and then press 3.<br />
This displays the Copy Menu and then selects Copy Quality.<br />
Copy Menu<br />
1. Borderless<br />
2. Reduce/Enlarge<br />
3. Copy Quality<br />
4. Paper Size<br />
5. Paper Type<br />
6. Lighter/Darker<br />
7. Enhancements<br />
8. Color Intensity<br />
9. Set New Defaults<br />
3 Press to highlight a quality sett<strong>in</strong>g, and then press OK.<br />
4 Press Start Black or Start Color.<br />
change default copy sett<strong>in</strong>gs<br />
Copy Quality<br />
1. Normal<br />
2. Best<br />
3. Fast<br />
When you change copy sett<strong>in</strong>gs from the front panel or the HP Director, they<br />
apply only to the current copy job. To apply copy sett<strong>in</strong>gs to <strong>all</strong> future copy jobs,<br />
you can save the sett<strong>in</strong>gs as defaults.<br />
1 Make any needed changes to the sett<strong>in</strong>gs <strong>in</strong> the Copy Menu.<br />
2 Press 9 to select Set New Defaults from the Copy Menu.<br />
<strong>hp</strong> <strong>psc</strong> <strong>2400</strong> <strong>series</strong>
eference <strong>guide</strong><br />
Copy Menu<br />
1. Borderless<br />
2. Reduce/Enlarge<br />
3. Copy Quality<br />
4. Paper Size<br />
5. Paper Type<br />
6. Lighter/Darker<br />
7. Enhancements<br />
8. Color Intensity<br />
9. Set New Defaults<br />
3 Press OK to accept the sett<strong>in</strong>gs as the new default sett<strong>in</strong>gs.<br />
copy a two-page black-and-white document<br />
use the copy features<br />
The sett<strong>in</strong>gs you specify here are only saved on the HP PSC itself. They do not<br />
adjust the sett<strong>in</strong>gs <strong>in</strong> the software. If you use the HP Director software to control<br />
the sett<strong>in</strong>gs on copies you make, you should set your most frequently used<br />
sett<strong>in</strong>gs as the defaults <strong>in</strong> the HP Copy dialog box. To learn how, see the<br />
onscreen <strong>hp</strong> photo & imag<strong>in</strong>g help that came with your software.<br />
You can use the HP PSC to copy a s<strong>in</strong>gle- or multiple-page document <strong>in</strong> color or<br />
black and white. In this example, the HP PSC is used to copy a two-page blackand-white<br />
orig<strong>in</strong>al.<br />
1 Load the first page of your orig<strong>in</strong>al face down on the right front corner of<br />
the glass.<br />
2 Press Copy, if not already lit.<br />
3 Press Start Black.<br />
4 Remove the first page from the glass and load the second page.<br />
5 Press Start Black.<br />
37<br />
copy
copy<br />
chapter 4<br />
make a 4 by 6 <strong>in</strong>ch (10 by 15 cm) borderless copy of a photo<br />
38<br />
For the best quality when copy<strong>in</strong>g a photo, make sure you select options for the<br />
correct paper type and photo enhancement. You might also want to use the<br />
photo pr<strong>in</strong>t cartridge for superior pr<strong>in</strong>t quality. With the tri-color and photo pr<strong>in</strong>t<br />
cartridges <strong>in</strong>st<strong>all</strong>ed, you have a six-<strong>in</strong>k system. See use a photo pr<strong>in</strong>t cartridge<br />
on page 85 for more <strong>in</strong>formation.<br />
1 Load your orig<strong>in</strong>al photo face down on the right front corner of the glass.<br />
Position the photo on the glass so the long edge of the photo is along the<br />
front edge of the glass.<br />
2 Load 4 by 6 <strong>in</strong>ch (10 by 15 cm) photo paper <strong>in</strong> the <strong>in</strong>put tray.<br />
3 Press Copy twice, and then press 1.<br />
This displays the Copy Menu and then selects Borderless.<br />
Copy Menu<br />
1. Borderless<br />
2. Reduce/Enlarge<br />
3. Copy Quality<br />
4. Paper Size<br />
5. Paper Type<br />
6. Lighter/Darker<br />
7. Enhancements<br />
8. Color Intensity<br />
9. Set New Defaults<br />
4 Press to highlight On, and then press OK.<br />
5<br />
The Reduce/Enlarge menu becomes disabled so that you cannot access it.<br />
Press 4 to select Paper Size from the Copy Menu.<br />
Copy Menu<br />
1. Borderless<br />
( 2. Reduce/Enlarge )<br />
3. Copy Quality<br />
4. Paper Size<br />
5. Paper Type<br />
6. Lighter/Darker<br />
7. Enhancements<br />
8. Color Intensity<br />
9. Set New Defaults<br />
1. Off<br />
2. On<br />
*The paper sizes available vary by country/region.<br />
Borderless<br />
Paper Size*<br />
1. Letter<br />
2. 4 x 6<br />
3. A4<br />
<strong>hp</strong> <strong>psc</strong> <strong>2400</strong> <strong>series</strong>
eference <strong>guide</strong><br />
6 Press to highlight 4 x 6, and then press OK.<br />
7 Press 5 to select Paper Type from the Copy Menu.<br />
Copy Menu<br />
1. Borderless<br />
( 2. Reduce/Enlarge )<br />
3. Copy Quality<br />
4. Paper Size<br />
5. Paper Type<br />
6. Lighter/Darker<br />
7. Enhancements<br />
8. Color Intensity<br />
9. Set New Defaults<br />
use the copy features<br />
Note: Automatic and Pla<strong>in</strong> Paper are disabled <strong>in</strong> the Paper Type menu<br />
when Borderless is turned on.<br />
8 Press to highlight the type of paper you loaded, and then press OK.<br />
9<br />
Caution! When mak<strong>in</strong>g borderless copies, you must have photo<br />
paper (or other specialty paper) loaded. If you have pla<strong>in</strong> paper<br />
loaded, <strong>in</strong>k will bleed off the paper, sta<strong>in</strong><strong>in</strong>g your device.<br />
Press 7 to select Enhancements from the Copy Menu.<br />
Copy Menu<br />
1. Borderless<br />
( 2. Reduce/Enlarge )<br />
3. Copy Quality<br />
4. Paper Size<br />
5. Paper Type<br />
6. Lighter/Darker<br />
7. Enhancements<br />
8. Color Intensity<br />
9. Set New Defaults<br />
Paper Type<br />
( 1. Automatic )<br />
( 2. Pla<strong>in</strong> Paper )<br />
3. Premium Inkjet<br />
4. Premium Photo<br />
5. Photo Paper<br />
6. PhotoQual Inkjet<br />
7. Everyday Photo<br />
8. Transparency<br />
9. Iron-On<br />
0. Brochure Glossy<br />
*. Brochure Matte<br />
Enhancements<br />
1. Text<br />
2. Photo<br />
3. Mixed<br />
4. N<strong>one</strong><br />
39<br />
copy
copy<br />
chapter 4<br />
40<br />
10 Press to highlight the Photo enhancement sett<strong>in</strong>g, and then press OK.<br />
11 Press Start Color.<br />
The HP PSC makes a 4 by 6 <strong>in</strong>ch (10 by 15 cm) borderless copy of your<br />
orig<strong>in</strong>al photo, as shown below.<br />
You might f<strong>in</strong>d it easier to copy a photo by us<strong>in</strong>g the HP Director software that<br />
you <strong>in</strong>st<strong>all</strong>ed with your HP PSC. Us<strong>in</strong>g the HP Director, you can easily make<br />
letter or 4 by 6 <strong>in</strong>ch (10 by 15 cm) borderless copies of your photo, enlarge or<br />
shr<strong>in</strong>k the photo to fill the size of the paper you have loaded, and turn on Photo<br />
enhancements to ensure you get the highest quality photos. For <strong>in</strong>formation on<br />
us<strong>in</strong>g these features <strong>in</strong> the HP Director, see the onscreen <strong>hp</strong> photo & imag<strong>in</strong>g<br />
help that came with your software.<br />
make multiple copies of the same orig<strong>in</strong>al<br />
1 Load your orig<strong>in</strong>al face down on the right front corner of the glass.<br />
2 Press Copy.<br />
The Number of Copies screen appears.<br />
3 Press or use the keypad to enter the number of copies, up to the<br />
4<br />
maximum, and then press OK.<br />
(The maximum number of copies varies by model.)<br />
Tip: If you hold down either of the arrow buttons, the number of<br />
copies changes by <strong>in</strong>crements of 5 to make it easier to set a large<br />
number of copies.<br />
Press Start Black or Start Color.<br />
In this example, the HP PSC makes six copies of the orig<strong>in</strong>al 4 by 6 <strong>in</strong>ch<br />
(10 by 15 cm) photo.<br />
<strong>hp</strong> <strong>psc</strong> <strong>2400</strong> <strong>series</strong>
eference <strong>guide</strong><br />
use the copy features<br />
copy a 4 by 6 <strong>in</strong>ch (10 by 15 cm) photo onto a full-size page<br />
In addition to mak<strong>in</strong>g actual size copies of an orig<strong>in</strong>al, the Borderless feature<br />
can automatic<strong>all</strong>y enlarge or reduce your orig<strong>in</strong>al to fill the paper loaded <strong>in</strong> the<br />
<strong>in</strong>put tray. In this example, Borderless is used to enlarge a 4 by 6 <strong>in</strong>ch (10 by<br />
15 cm) photo to create a full-size borderless copy.<br />
Note: In order to achieve a borderless pr<strong>in</strong>t without chang<strong>in</strong>g the<br />
proportions of the orig<strong>in</strong>al, the HP PSC might crop some of the image<br />
around the marg<strong>in</strong>s. In most cases, this cropp<strong>in</strong>g will not be noticeable.<br />
1 Make sure that the glass and lid back<strong>in</strong>g are clean.<br />
2 Load your orig<strong>in</strong>al photo face down on the right front corner of the glass.<br />
Position the photo on the glass so the long edge of the photo is along the<br />
front edge of the glass.<br />
Tip: When copy<strong>in</strong>g a photo, you might want to use the photo<br />
pr<strong>in</strong>t cartridge for superior pr<strong>in</strong>t quality. With the tri-color and<br />
photo pr<strong>in</strong>t cartridges <strong>in</strong>st<strong>all</strong>ed, you have a six-<strong>in</strong>k system. See use<br />
a photo pr<strong>in</strong>t cartridge on page 85 for more <strong>in</strong>formation.<br />
3 Load letter or A4 photo paper <strong>in</strong> the <strong>in</strong>put tray.<br />
4 Press Copy twice, and then press 1.<br />
This displays the Copy Menu and then selects Borderless.<br />
Copy Menu<br />
1. Borderless<br />
2. Reduce/Enlarge<br />
3. Copy Quality<br />
4. Paper Size<br />
5. Paper Type<br />
6. Lighter/Darker<br />
7. Enhancements<br />
8. Color Intensity<br />
9. Set New Defaults<br />
1. Off<br />
2. On<br />
Borderless<br />
5 Press to highlight On, and then press OK.<br />
The Reduce/Enlarge menu becomes disabled so that you cannot access it.<br />
41<br />
copy
copy<br />
chapter 4<br />
42<br />
6 Press 4 to select Paper Size from the Copy Menu.<br />
Copy Menu<br />
1. Borderless<br />
( 2. Reduce/Enlarge )<br />
3. Copy Quality<br />
4. Paper Size<br />
5. Paper Type<br />
6. Lighter/Darker<br />
7. Enhancements<br />
8. Color Intensity<br />
9. Set New Defaults<br />
*The paper sizes available vary by country/region.<br />
7 Press to highlight Letter or A4, as appropriate, and then press OK.<br />
8 Press 5 to select Paper Type from the Copy Menu.<br />
Copy Menu<br />
1. Borderless<br />
( 2. Reduce/Enlarge )<br />
3. Copy Quality<br />
4. Paper Size<br />
5. Paper Type<br />
6. Lighter/Darker<br />
7. Enhancements<br />
8. Color Intensity<br />
9. Set New Defaults<br />
Paper Size*<br />
1. Letter<br />
2. 4 x 6<br />
3. A4<br />
Paper Type<br />
( 1. Automatic )<br />
( 2. Pla<strong>in</strong> Paper )<br />
3. Premium Inkjet<br />
4. Premium Photo<br />
5. Photo Paper<br />
6. PhotoQual Inkjet<br />
7. Everyday Photo<br />
8. Transparency<br />
9. Iron-On<br />
0. Brochure Glossy<br />
*. Brochure Matte<br />
Note: Automatic and Pla<strong>in</strong> Paper are disabled <strong>in</strong> the Paper Type menu<br />
when Borderless is turned on.<br />
9 Press to highlight the type of paper you loaded, and then press OK.<br />
Caution! When mak<strong>in</strong>g borderless copies, you must have photo<br />
paper (or other specialty paper) loaded. If you have pla<strong>in</strong> paper<br />
loaded, <strong>in</strong>k will bleed off the paper, sta<strong>in</strong><strong>in</strong>g your device.<br />
<strong>hp</strong> <strong>psc</strong> <strong>2400</strong> <strong>series</strong>
eference <strong>guide</strong><br />
10 Press 7 to select Enhancements from the Copy Menu.<br />
Copy Menu<br />
1. Borderless<br />
( 2. Reduce/Enlarge )<br />
3. Copy Quality<br />
4. Paper Size<br />
5. Paper Type<br />
6. Lighter/Darker<br />
7. Enhancements<br />
8. Color Intensity<br />
9. Set New Defaults<br />
use the copy features<br />
11 Press to highlight the Photo enhancement sett<strong>in</strong>g, and then press OK.<br />
12 Press Start Color.<br />
copy a photo several times on <strong>one</strong> page<br />
Enhancements<br />
1. Text<br />
2. Photo<br />
3. Mixed<br />
4. N<strong>one</strong><br />
You can pr<strong>in</strong>t multiple copies of an orig<strong>in</strong>al on <strong>one</strong> page by select<strong>in</strong>g an image<br />
size from the Reduce/Enlarge option <strong>in</strong> the Copy Menu.<br />
After you select <strong>one</strong> of the available sizes, you might be prompted whether you<br />
want to pr<strong>in</strong>t multiple copies of the photo to fill the paper you have loaded <strong>in</strong><br />
the <strong>in</strong>put tray. If you select a photo size that is too large to accommodate<br />
pr<strong>in</strong>t<strong>in</strong>g more than <strong>one</strong> copy on the page, the Fill Page? prompt does not<br />
appear.<br />
1 Load your orig<strong>in</strong>al photo face down on the right front corner of the glass.<br />
Position the photo on the glass so the long edge of the photo is along the<br />
front edge of the glass.<br />
2 Press Copy twice to display the Copy Menu.<br />
3 Press 2, and then press 4.<br />
43<br />
copy
copy<br />
chapter 4<br />
44<br />
This selects Reduce/Enlarge and then selects Image Sizes.<br />
Copy Menu<br />
1. Borderless<br />
2. Reduce/Enlarge<br />
3. Copy Quality<br />
4. Paper Size<br />
5. Paper Type<br />
6. Lighter/Darker<br />
7. Enhancements<br />
8. Color Intensity<br />
9. Set New Defaults<br />
*The image sizes available vary by country/region.<br />
4 Press to highlight the size <strong>in</strong> which you want to copy the photo, and<br />
5<br />
then press OK.<br />
Depend<strong>in</strong>g on the image size you select, the Fill Page? prompt might<br />
appear to determ<strong>in</strong>e whether you want to pr<strong>in</strong>t multiple copies of the<br />
photo to fill the paper <strong>in</strong> the <strong>in</strong>put tray, or just <strong>one</strong> copy.<br />
Some larger sizes do not prompt you for a number of images. In this case,<br />
only <strong>one</strong> image is copied to the page.<br />
If the Fill Page? prompt appears, select Yes or No, and then press OK.<br />
6 Press Start Black or Start Color.<br />
resize an orig<strong>in</strong>al to fit onto letter paper<br />
Reduce/Enlarge<br />
1. Actual Size<br />
2. Fit to Page<br />
3. Custom 100%<br />
4. Image Sizes*<br />
5. Poster<br />
This feature and more are available through the HP Director software if you scan<br />
your photo <strong>in</strong>to the computer. Through the HP Director, you can pr<strong>in</strong>t multiple<br />
photos of different sizes. The HP PSC will fit as many photos as it can on the<br />
paper you have loaded <strong>in</strong> the <strong>in</strong>put tray. For <strong>in</strong>formation on scann<strong>in</strong>g your<br />
photos <strong>in</strong>to the computer to use the HP Director Photo Pr<strong>in</strong>t functions, see the<br />
onscreen <strong>hp</strong> photo & imag<strong>in</strong>g help that came with your software.<br />
If the image or text on your orig<strong>in</strong>al fills the entire sheet with no marg<strong>in</strong>s, use the<br />
Fit to Page feature to reduce your orig<strong>in</strong>al and prevent unwanted cropp<strong>in</strong>g of<br />
the text or images at the edges of the sheet.<br />
Tip: You can also use Fit to Page to enlarge a sm<strong>all</strong> photo to fit<br />
with<strong>in</strong> the pr<strong>in</strong>table area of a full-size page. To do this without<br />
chang<strong>in</strong>g the proportions of the orig<strong>in</strong>al or cropp<strong>in</strong>g the edges,<br />
the HP PSC might leave an uneven amount of white space around<br />
the edges of the paper.<br />
<strong>hp</strong> <strong>psc</strong> <strong>2400</strong> <strong>series</strong>
eference <strong>guide</strong><br />
use the copy features<br />
1 Load your orig<strong>in</strong>al face down on the right front corner of the glass.<br />
2 Press Copy twice, and then press 4.<br />
This displays the Copy Menu and then selects Paper Size.<br />
Copy Menu<br />
1. Borderless<br />
2. Reduce/Enlarge<br />
3. Copy Quality<br />
4. Paper Size<br />
5. Paper Type<br />
6. Lighter/Darker<br />
7. Enhancements<br />
8. Color Intensity<br />
9. Set New Defaults<br />
*The paper sizes available vary by country/region.<br />
3 Press to highlight Letter, and then press OK.<br />
4 Press 2 to select Reduce/Enlarge from the Copy Menu.<br />
Copy Menu<br />
1. Borderless<br />
2. Reduce/Enlarge<br />
3. Copy Quality<br />
4. Paper Size<br />
5. Paper Type<br />
6. Lighter/Darker<br />
7. Enhancements<br />
8. Color Intensity<br />
9. Set New Defaults<br />
Paper Size*<br />
1. Letter<br />
2. 4 x 6<br />
3. A4<br />
5 Press to highlight Fit to Page, and then press OK.<br />
6 Press Start Black or Start Color.<br />
Reduce/Enlarge<br />
1. Actual Size<br />
2. Fit to Page<br />
3. Custom 100%<br />
4. Image Sizes<br />
5. Poster<br />
45<br />
copy
copy<br />
chapter 4<br />
copy a washed-out orig<strong>in</strong>al<br />
46<br />
Use Lighter/Darker to adjust the lightness and darkness of the copies you make.<br />
You can also adjust the color <strong>in</strong>tensity to make colors on your copy more vivid<br />
or more subtle.<br />
1 Load your orig<strong>in</strong>al face down on the right front corner of the glass.<br />
2 Press Copy twice, and then press 6.<br />
This displays the Copy Menu and then selects Lighter/Darker. The range<br />
of Lighter/Darker values appears as a scale on the color graphics display.<br />
3 Press to darken the copy, and then press OK.<br />
Note: You can also press to lighten the copy.<br />
4 Press 8 to select Color Intensity from the Copy Menu.<br />
The range of color <strong>in</strong>tensity values appears as a scale on the color<br />
graphics display.<br />
5 Press to make the image more vivid, and then press OK.<br />
Note: You can also press to make the image more pale.<br />
6 Press Start Color.<br />
copy a document that has been faxed several times<br />
The Enhancements feature automatic<strong>all</strong>y adjusts the quality of text documents by<br />
sharpen<strong>in</strong>g edges of black text or photographs by enhanc<strong>in</strong>g light colors that<br />
might otherwise appear white.<br />
Text enhancement is the default option. Use Text enhancements to sharpen<br />
edges of black text.<br />
1 Load your orig<strong>in</strong>al face down on the right front corner of the glass.<br />
2 Press Copy twice, and then press 7.<br />
This displays the Copy Menu and then selects Enhancements.<br />
Copy Menu<br />
1. Borderless<br />
2. Reduce/Enlarge<br />
3. Copy Quality<br />
4. Paper Size<br />
5. Paper Type<br />
6. Lighter/Darker<br />
7. Enhancements<br />
8. Color Intensity<br />
9. Set New Defaults<br />
Enhancements<br />
1. Text<br />
2. Photo<br />
3. Mixed<br />
4. N<strong>one</strong><br />
<strong>hp</strong> <strong>psc</strong> <strong>2400</strong> <strong>series</strong>
eference <strong>guide</strong><br />
use the copy features<br />
3 Press to highlight the Text enhancement sett<strong>in</strong>g, and then press OK.<br />
4 Press Start Black or Start Color.<br />
Tip: If any of the follow<strong>in</strong>g occur, turn off Text enhancement by<br />
select<strong>in</strong>g Photo or N<strong>one</strong>:<br />
– Stray dots of color surround some text on your copies<br />
– Large, black typefaces look splotchy (not smooth)<br />
– Th<strong>in</strong>, colored objects or l<strong>in</strong>es conta<strong>in</strong> black sections<br />
– Horizontal gra<strong>in</strong>y or white bands appear <strong>in</strong> light- to medium-gray<br />
areas<br />
enhance light areas of your copy<br />
Use Photo enhancements to enhance light colors that might otherwise appear<br />
white. You can also copy with Photo enhancements to elim<strong>in</strong>ate or reduce any<br />
of the follow<strong>in</strong>g that might occur when copy<strong>in</strong>g with Text enhancements:<br />
• Stray dots of color surround some text on your copies<br />
• Large, black typefaces look splotchy (not smooth)<br />
• Th<strong>in</strong>, colored objects or l<strong>in</strong>es conta<strong>in</strong> black sections<br />
• Horizontal gra<strong>in</strong>y or white bands appear <strong>in</strong> light- to medium-gray areas<br />
1 Load your orig<strong>in</strong>al photo face down on the right front corner of the glass.<br />
Position the photo on the glass so the long edge of the photo is along the<br />
front edge of the glass.<br />
2 Press Copy twice, and then press 7.<br />
This displays the Copy Menu and then selects Enhancements.<br />
3 Press to highlight the Photo enhancement sett<strong>in</strong>g, and then press OK.<br />
4 Press Start Color.<br />
It is easy to set Enhancement sett<strong>in</strong>gs for photos and other documents you copy<br />
us<strong>in</strong>g the HP Director software that you <strong>in</strong>st<strong>all</strong>ed with your HP PSC. With <strong>one</strong><br />
click of your mouse button, you can set a photo to copy with Photo<br />
enhancements, a text document to copy with Text enhancements, or a document<br />
that conta<strong>in</strong>s both images and text to copy with both Photo and Text<br />
enhancements turned on. For more <strong>in</strong>formation, see the onscreen <strong>hp</strong> photo &<br />
imag<strong>in</strong>g help that came with your software.<br />
47<br />
copy
copy<br />
chapter 4<br />
make a poster<br />
48<br />
When you use the Poster feature, the HP PSC divides your orig<strong>in</strong>al <strong>in</strong>to sections<br />
and then enlarges the sections onto letter or A4 paper so you can assemble them<br />
<strong>in</strong>to a poster.<br />
1 Load your orig<strong>in</strong>al face down on the right front corner of the glass.<br />
If you are copy<strong>in</strong>g a photo, position the photo on the glass so the long<br />
edge of the photo is along the front edge of the glass.<br />
2 Press Copy twice to display the Copy Menu.<br />
3 Press 2, and then press 5.<br />
This selects Reduce/Enlarge and then selects Poster.<br />
Copy Menu<br />
1. Borderless<br />
2. Reduce/Enlarge<br />
3. Copy Quality<br />
4. Paper Size<br />
5. Paper Type<br />
6. Lighter/Darker<br />
7. Enhancements<br />
8. Color Intensity<br />
9. Set New Defaults<br />
Reduce/Enlarge<br />
1. Actual Size<br />
2. Fit to Page<br />
3. Custom 100%<br />
4. Image Sizes<br />
5. Poster<br />
4 Press to highlight a page width for the poster, and then press OK.<br />
The default poster size is <strong>one</strong> page wide.<br />
<strong>hp</strong> <strong>psc</strong> <strong>2400</strong> <strong>series</strong>
eference <strong>guide</strong><br />
use the copy features<br />
5 Press Start Black or Start Color.<br />
After you select the poster width, the HP PSC adjusts the length<br />
automatic<strong>all</strong>y to ma<strong>in</strong>ta<strong>in</strong> the proportions of the orig<strong>in</strong>al.<br />
Tip: If the orig<strong>in</strong>al cannot be enlarged to the selected poster size<br />
because it exceeds the maximum zoom percentage, an error<br />
message appears that tells you the number of pages wide that are<br />
possible. Select a sm<strong>all</strong>er poster size and make the copy aga<strong>in</strong>.<br />
The HP Director software on your computer enables you to be even more<br />
creative with your photos. You only need to scan your photo <strong>in</strong>to the computer<br />
to use the HP Director Quick Projects tool to create posters, banners, and ironon<br />
T-shirt transfers from your photo. To learn more, see the onscreen <strong>hp</strong> photo<br />
& imag<strong>in</strong>g help that came with your software.<br />
prepare a color t-shirt transfer<br />
You can copy an image or text onto a T-shirt transfer, then iron it onto a T-shirt.<br />
Tip: We recommend that you practice apply<strong>in</strong>g a T-shirt transfer<br />
on an old garment first.<br />
1 Load your orig<strong>in</strong>al face down on the right front corner of the glass.<br />
If you are copy<strong>in</strong>g a photo, position the photo on the glass so the long<br />
edge of the photo is along the front edge of the glass.<br />
2 Load the T-shirt transfer paper <strong>in</strong> the <strong>in</strong>put tray.<br />
3 Press Copy twice, and then press 5.<br />
This displays the Copy Menu and then selects Paper Type.<br />
Copy Menu<br />
1. Borderless<br />
2. Reduce/Enlarge<br />
3. Copy Quality<br />
4. Paper Size<br />
5. Paper Type<br />
6. Lighter/Darker<br />
7. Enhancements<br />
8. Color Intensity<br />
9. Set New Defaults<br />
Paper Type<br />
1. Automatic<br />
2. Pla<strong>in</strong> Paper<br />
3. Premium Inkjet<br />
4. Premium Photo<br />
5. Photo Paper<br />
6. PhotoQual Inkjet<br />
7. Everyday Photo<br />
8. Transparency<br />
9. Iron-On<br />
0. Brochure Glossy<br />
*. Brochure Matte<br />
49<br />
copy
copy<br />
chapter 4<br />
stop copy<strong>in</strong>g<br />
50<br />
4 Press to highlight Iron-On, and then press OK.<br />
5 Press Start Black or Start Color.<br />
When you select Iron-On as the paper type, the HP PSC automatic<strong>all</strong>y<br />
copies a mirror image of your orig<strong>in</strong>al (as shown below) so that it will<br />
appear properly when you iron it onto the T-shirt.<br />
� To stop copy<strong>in</strong>g, press Cancel on the front panel.<br />
<strong>hp</strong> <strong>psc</strong> <strong>2400</strong> <strong>series</strong>
5<br />
scan an orig<strong>in</strong>al<br />
use the scan features<br />
Scann<strong>in</strong>g is the process of convert<strong>in</strong>g text and pictures <strong>in</strong>to an electronic format<br />
for your computer. You can scan just about anyth<strong>in</strong>g: photos, magaz<strong>in</strong>e articles,<br />
text documents, and even 3D objects, as long as you are careful not to scratch<br />
the glass.<br />
Because the scanned image or text is <strong>in</strong> an electronic format, you can br<strong>in</strong>g it<br />
<strong>in</strong>to your word processor or graphics application and modify it to suit your<br />
needs. You can do the follow<strong>in</strong>g:<br />
• Scan text from an article <strong>in</strong>to your word processor and quote it <strong>in</strong> a report,<br />
sav<strong>in</strong>g you a lot of retyp<strong>in</strong>g.<br />
• Scan a logo and use it <strong>in</strong> your publish<strong>in</strong>g software, <strong>all</strong>ow<strong>in</strong>g you to pr<strong>in</strong>t<br />
bus<strong>in</strong>ess cards and brochures for yourself.<br />
• Scan photos of your kids and e-mail them to relatives, create a<br />
photographic <strong>in</strong>ventory of your house or office, or create an electronic<br />
scrapbook.<br />
To use the scan features, your HP PSC and computer must be connected and<br />
turned on. The HP PSC software must also be <strong>in</strong>st<strong>all</strong>ed and runn<strong>in</strong>g on your<br />
computer prior to scann<strong>in</strong>g. To verify that the HP PSC software is runn<strong>in</strong>g on a<br />
W<strong>in</strong>dows PC, look for the <strong>hp</strong> <strong>psc</strong> <strong>2400</strong> <strong>series</strong> icon <strong>in</strong> the system tray at the lower<br />
right side of the screen, next to the time. On a Mac<strong>in</strong>tosh, the HP PSC software<br />
is always runn<strong>in</strong>g.<br />
You can start a scan from your computer or from your HP PSC. This section<br />
expla<strong>in</strong>s how to scan from the front panel of the HP PSC only.<br />
For <strong>in</strong>formation about how to scan from the computer, and how to adjust, resize,<br />
rotate, crop, and sharpen your scans, see the onscreen <strong>hp</strong> photo & imag<strong>in</strong>g help<br />
that came with your software.<br />
This section conta<strong>in</strong>s the follow<strong>in</strong>g topics:<br />
• scan an orig<strong>in</strong>al on page 51<br />
• stop scann<strong>in</strong>g on page 53<br />
This section conta<strong>in</strong>s the follow<strong>in</strong>g topics:<br />
• send the scan to a computer connected directly to the <strong>hp</strong> <strong>psc</strong> on page 52<br />
• send the scan to a memory card loaded <strong>in</strong> your <strong>hp</strong> <strong>psc</strong> on page 53<br />
51<br />
scan
scan<br />
chapter 5<br />
52<br />
send the scan to a computer connected directly to the <strong>hp</strong> <strong>psc</strong><br />
Follow these steps if your HP PSC is directly connected to a computer via a USB<br />
or par<strong>all</strong>el cable.<br />
1 Load your orig<strong>in</strong>al face down <strong>in</strong> the right front corner of the glass.<br />
2 Press Scan, if it is not already lit.<br />
A Scan Menu appears, list<strong>in</strong>g dest<strong>in</strong>ations that are set up to scan to. The<br />
default dest<strong>in</strong>ation is whichever <strong>one</strong> you selected the last time you used<br />
this menu.<br />
Scan Menu<br />
1. HP Photo & Imag<strong>in</strong>g G<strong>all</strong>ery<br />
2. HP Instant Share<br />
3. MS Powerpo<strong>in</strong>t<br />
4. Adobe Photoshop<br />
5. Photo Memory Card<br />
3 To select the default dest<strong>in</strong>ation, press OK. To select another dest<strong>in</strong>ation,<br />
press to highlight the dest<strong>in</strong>ation and press OK, or just enter its number<br />
on the keypad.<br />
4 Press Start Black or Start Color.<br />
A preview image of the scan appears <strong>in</strong> the HP Scan w<strong>in</strong>dow on the<br />
computer, where you can edit it.<br />
For more <strong>in</strong>formation about edit<strong>in</strong>g a preview image, see the onscreen<br />
<strong>hp</strong> photo & imag<strong>in</strong>g help that came with your software.<br />
5 Make any edits to the preview image <strong>in</strong> the HP Scan w<strong>in</strong>dow. When you<br />
have f<strong>in</strong>ished, click Accept.<br />
The HP PSC sends the scan to the selected dest<strong>in</strong>ation. If you chose the<br />
HP Photo & Imag<strong>in</strong>g G<strong>all</strong>ery (HP G<strong>all</strong>ery), it automatic<strong>all</strong>y opens and<br />
displays the image.<br />
The HP G<strong>all</strong>ery has many tools that you can use to edit your scanned image.<br />
You can improve the over<strong>all</strong> image quality by adjust<strong>in</strong>g the brightness,<br />
sharpness, color t<strong>one</strong>, or saturation. You can also crop, straighten, rotate, or<br />
resize the image. When the scanned image looks just the way you want it,<br />
you can open it <strong>in</strong> another application, send it via e-mail, save it to a file, or<br />
pr<strong>in</strong>t it. For more <strong>in</strong>formation about us<strong>in</strong>g the HP G<strong>all</strong>ery, see the onscreen<br />
<strong>hp</strong> photo & imag<strong>in</strong>g help that came with your software.<br />
<strong>hp</strong> <strong>psc</strong> <strong>2400</strong> <strong>series</strong>
eference <strong>guide</strong><br />
send the scan to a memory card loaded <strong>in</strong> your <strong>hp</strong> <strong>psc</strong><br />
stop scann<strong>in</strong>g<br />
use the scan features<br />
You can send the scanned image to the memory card that is currently <strong>in</strong>serted<br />
<strong>in</strong> <strong>one</strong> of the memory card slots on the HP PSC. This enables you to use the photo<br />
memory card features to generate borderless pr<strong>in</strong>ts and album pages from the<br />
scanned image. It also enables you to access the scanned image from other<br />
devices that support the memory card.<br />
1 Load your orig<strong>in</strong>al face down <strong>in</strong> the right front corner of the glass.<br />
2 Press Scan, if it is not already lit.<br />
A Scan Menu appears, list<strong>in</strong>g dest<strong>in</strong>ations that are set up to scan to. The<br />
default dest<strong>in</strong>ation is whichever <strong>one</strong> you selected the last time you used<br />
this menu.<br />
Scan Menu<br />
1. HP Photo & Imag<strong>in</strong>g G<strong>all</strong>ery<br />
2. HP Instant Share<br />
3. MS Powerpo<strong>in</strong>t<br />
4. Adobe Photoshop<br />
5. Photo Memory Card<br />
3 Press to highlight Photo Memory Card, and then press OK.<br />
4 Press Start Black or Start Color.<br />
The HP PSC scans the image and saves the file to the memory card.<br />
� To stop scann<strong>in</strong>g, press Cancel on the front panel.<br />
53<br />
scan
scan<br />
chapter 5<br />
54<br />
<strong>hp</strong> <strong>psc</strong> <strong>2400</strong> <strong>series</strong>
6<br />
send a fax<br />
use the fax features<br />
Us<strong>in</strong>g your HP PSC, you can send and receive faxes, <strong>in</strong>clud<strong>in</strong>g color faxes. You<br />
can set up speed dials to send faxes quickly and easily to frequently used<br />
numbers. From the front panel, you can set a number of fax options, such as<br />
resolution and contrast.<br />
This section conta<strong>in</strong>s the follow<strong>in</strong>g topics:<br />
• send a fax on page 55<br />
• receive a fax on page 59<br />
• set the fax header on page 61<br />
• enter text on page 62<br />
• pr<strong>in</strong>t reports on page 62<br />
• set up speed dial<strong>in</strong>g on page 64<br />
• control resolution and contrast on page 65<br />
• set fax options on page 67<br />
• repr<strong>in</strong>t the faxes <strong>in</strong> memory on page 70<br />
• stop fax<strong>in</strong>g on page 71<br />
You should explore the HP Photo & Imag<strong>in</strong>g Director (HP Director) software that<br />
comes with your HP PSC to take full advantage of <strong>all</strong> of its features. Us<strong>in</strong>g the<br />
HP software, you can do these tasks and more that are not available through<br />
the front panel of your HP PSC. For example:<br />
• send a fax from your computer and <strong>in</strong>clude a cover page<br />
• create a cover page from your computer<br />
• preview a fax on your computer before send<strong>in</strong>g it<br />
• send a fax to multiple recipients<br />
For <strong>in</strong>formation on access<strong>in</strong>g the HP Director software, see use the <strong>hp</strong> director<br />
software to do more with your <strong>hp</strong> <strong>psc</strong> on page 6.<br />
Us<strong>in</strong>g the front panel, you can send a black-and-white or color fax from your<br />
HP PSC.<br />
This section conta<strong>in</strong>s the follow<strong>in</strong>g topics:<br />
• enable fax confirmation on page 56<br />
• send a basic fax on page 56<br />
• send a two-page black-and-white fax on page 57<br />
• send a color orig<strong>in</strong>al or photo fax on page 57<br />
• send a fax us<strong>in</strong>g speed dials on page 58<br />
55<br />
fax
fax<br />
chapter 6<br />
56<br />
enable fax confirmation<br />
By default, your HP PSC pr<strong>in</strong>ts a report only if there is a problem with send<strong>in</strong>g<br />
or receiv<strong>in</strong>g a fax. A confirmation message <strong>in</strong>dicat<strong>in</strong>g whether an item was<br />
successfully sent appears briefly on the color graphics display after each<br />
transaction. If you need pr<strong>in</strong>ted confirmation that your faxes are successfully<br />
sent, follow these <strong>in</strong>structions before send<strong>in</strong>g any faxes.<br />
1 Press Setup.<br />
2 Press 1, then press 5.<br />
This selects Pr<strong>in</strong>t Report and then selects Fax Report Setup.<br />
3 Press 5, then press OK.<br />
This selects Send Only.<br />
Note: You will still receive pr<strong>in</strong>ted reports for any errors that occur dur<strong>in</strong>g<br />
fax<strong>in</strong>g if you select the Send Only report.<br />
For more <strong>in</strong>formation on pr<strong>in</strong>t<strong>in</strong>g reports, see pr<strong>in</strong>t reports on page 62.<br />
send a basic fax<br />
Pr<strong>in</strong>t Report<br />
1. Last Transaction<br />
2. Fax Log<br />
3. Speed Dial List<br />
4. Self-Test Report<br />
5. Fax Report Setup<br />
Fax Report Setup<br />
1. Every Error<br />
2. Send Error<br />
3. Receive Error<br />
4. Every Fax<br />
5. Send Only<br />
6. Off<br />
This section describes how to send a basic black-and-white fax.<br />
If you are <strong>in</strong>terested <strong>in</strong> send<strong>in</strong>g a multiple-page fax, see send a two-page blackand-white<br />
fax on page 57. You can also send a color or photo fax. For more<br />
<strong>in</strong>formation, see send a color orig<strong>in</strong>al or photo fax on page 57.<br />
1 Load the first page face down on the right front corner of the glass.<br />
For more <strong>in</strong>formation, see load an orig<strong>in</strong>al on page 11.<br />
2 Press Fax.<br />
The Enter Fax Number screen appears.<br />
3 Enter the fax number.<br />
Tip: To enter a three-second pause with<strong>in</strong> a number sequence,<br />
press the pound (#) button repeatedly, until a dash appears on the<br />
color graphics display.<br />
<strong>hp</strong> <strong>psc</strong> <strong>2400</strong> <strong>series</strong>
eference <strong>guide</strong><br />
use the fax features<br />
4 Press Start Black.<br />
Press<strong>in</strong>g Start Black scans the first page to memory. After the page has<br />
been scanned, the front panel prompts you to scan another page.<br />
5 Press 1 (Yes) to fax another page or 2 (No) if you do not have another<br />
page to fax.<br />
send a two-page black-and-white fax<br />
You can send a two-page (or more) fax <strong>in</strong> black and white from your HP PSC.<br />
Note: You can also send a color orig<strong>in</strong>al or photo fax. For more<br />
<strong>in</strong>formation, see send a color orig<strong>in</strong>al or photo fax on page 57.<br />
1 Load the first page face down on the right front corner of the glass.<br />
For more <strong>in</strong>formation, see load an orig<strong>in</strong>al on page 11.<br />
2 Press Fax.<br />
The Enter Fax Number screen appears.<br />
3 Enter the fax number.<br />
Tip: To enter a three-second pause with<strong>in</strong> a number sequence,<br />
press the pound (#) button repeatedly, until a dash appears on the<br />
color graphics display.<br />
4 Press Start Black.<br />
Press<strong>in</strong>g Start Black scans the first page to memory. After the page has<br />
been scanned, the front panel prompts you to scan another page.<br />
5 Press 1 (Yes) to scan another page.<br />
6 When prompted, remove the first page from the glass and load the<br />
second page.<br />
7 Press OK to fax the second page.<br />
After the pages are scanned <strong>in</strong>to memory, the HP PSC dials the number<br />
and then sends the fax.<br />
Did you know that you can send a fax from your computer by us<strong>in</strong>g the<br />
HP Director software that comes with your HP PSC? You can also create and<br />
attached a computer-generated cover page with your fax. It’s easy.<br />
For more <strong>in</strong>formation, see the onscreen <strong>hp</strong> photo & imag<strong>in</strong>g help that came with<br />
your software.<br />
send a color orig<strong>in</strong>al or photo fax<br />
You can fax a color orig<strong>in</strong>al or photo from your HP PSC. When send<strong>in</strong>g a color<br />
fax, if your HP PSC determ<strong>in</strong>es that the recipient’s fax mach<strong>in</strong>e supports only<br />
black-and-white faxes, the HP PSC will send the fax <strong>in</strong> black and white.<br />
We recommend that you use only color orig<strong>in</strong>als for color fax<strong>in</strong>g.<br />
1 Load your orig<strong>in</strong>al face down on the right front corner of the glass.<br />
For more <strong>in</strong>formation, see load an orig<strong>in</strong>al on page 11.<br />
Tip: To center a 4 by 6 <strong>in</strong>ch (10 by 15 cm) photo, place the<br />
photo on the center of a blank letter- or A4-size paper, and then<br />
place the orig<strong>in</strong>al on the glass.<br />
57<br />
fax
fax<br />
chapter 6<br />
58<br />
2 Press Fax.<br />
The Enter Fax Number screen appears.<br />
3 Enter the fax number.<br />
Tip: To enter a three-second pause with<strong>in</strong> a number sequence,<br />
press the pound (#) button repeatedly, until a dash appears on the<br />
color graphics display.<br />
4 If you are fax<strong>in</strong>g a photo, it is recommended that you change the resolution<br />
to Photo. For <strong>in</strong>formation on chang<strong>in</strong>g the resolution, see change resolution<br />
on page 65.<br />
5 Press Start Color.<br />
Press<strong>in</strong>g Start Color dials the number and then sends the fax as the pages<br />
are scanned.<br />
Did you know that you can send a fax from your computer by us<strong>in</strong>g the<br />
HP Director software that comes with your HP PSC? You can also create and<br />
attach a computer-generated cover page with your fax. It’s easy.<br />
For more <strong>in</strong>formation, see the onscreen <strong>hp</strong> photo & imag<strong>in</strong>g help that came with<br />
your software.<br />
send a fax us<strong>in</strong>g speed dials<br />
You can quickly send a fax from the HP PSC us<strong>in</strong>g Speed Dials.<br />
Speed Dials will not appear unless you have set them up first. For more<br />
<strong>in</strong>formation, see set up speed dial<strong>in</strong>g on page 64.<br />
1 Load your orig<strong>in</strong>al face down on the right front corner of the glass.<br />
For more <strong>in</strong>formation, see load an orig<strong>in</strong>al on page 11.<br />
2 Press Fax.<br />
The Enter Fax Number screen appears.<br />
_<br />
Enter Fax Number<br />
Press for Redial.<br />
Press for Speed Dials.<br />
Press Fax for sett<strong>in</strong>gs.<br />
3 Press to access Speed Dials.<br />
Tip: You can also press to redial the last number dialed.<br />
4 Press until the appropriate speed-dial entry appears.<br />
5 Press OK.<br />
6 Press Start Black or Start Color.<br />
<strong>hp</strong> <strong>psc</strong> <strong>2400</strong> <strong>series</strong>
eceive a fax<br />
<strong>reference</strong> <strong>guide</strong><br />
use the fax features<br />
After a page has been scanned, the front panel prompts you to scan<br />
another page. To fax another page, press 1 (Yes), otherwise press 2 (No).<br />
If you press 1, you will be prompted to load the next orig<strong>in</strong>al. Press OK<br />
when prompted, after you have placed the orig<strong>in</strong>al on the glass.<br />
You can quickly and easily set up speed-dial entries from your computer by<br />
us<strong>in</strong>g the HP Director software. For <strong>in</strong>formation, see the onscreen <strong>hp</strong> photo &<br />
imag<strong>in</strong>g help that came with your software.<br />
Depend<strong>in</strong>g on how you set up your HP PSC, you can receive faxes<br />
automatic<strong>all</strong>y or manu<strong>all</strong>y. Your HP PSC is set to automatic<strong>all</strong>y pr<strong>in</strong>t received<br />
faxes unless you have selected No Answer for the R<strong>in</strong>gs to Answer sett<strong>in</strong>g. For<br />
more <strong>in</strong>formation on R<strong>in</strong>gs to Answer, see set number of r<strong>in</strong>gs before answer<strong>in</strong>g<br />
on page 59.<br />
If you receive a legal-size fax and your HP PSC is not currently set to use legalsize<br />
paper, the device automatic<strong>all</strong>y reduces the fax so that it fits on the paper<br />
that is loaded. If you have disabled the automatic-reduction feature, the fax will<br />
be pr<strong>in</strong>ted on two pages. For more <strong>in</strong>formation, see set automatic reduction for<br />
<strong>in</strong>com<strong>in</strong>g faxes on page 68.<br />
If you have an answer<strong>in</strong>g mach<strong>in</strong>e connected to the same l<strong>in</strong>e as your HP PSC,<br />
you might need to set the number of r<strong>in</strong>gs required before the HP PSC beg<strong>in</strong>s<br />
receiv<strong>in</strong>g the fax. The default number of r<strong>in</strong>gs before the HP PSC receives a fax<br />
is 6 (varies by country/region). For more <strong>in</strong>formation on sett<strong>in</strong>g the number of<br />
r<strong>in</strong>gs to answer, see set number of r<strong>in</strong>gs before answer<strong>in</strong>g on page 59.<br />
You might also want to set up your HP PSC to answer fax c<strong>all</strong>s manu<strong>all</strong>y if you<br />
have a voice mail service through your ph<strong>one</strong> company.<br />
For <strong>in</strong>formation on sett<strong>in</strong>g up your HP PSC with other office equipment, such as<br />
answer<strong>in</strong>g mach<strong>in</strong>es and voice mail, see fax setup on page 115.<br />
Note: If you have <strong>in</strong>st<strong>all</strong>ed a photo pr<strong>in</strong>t cartridge for pr<strong>in</strong>t<strong>in</strong>g photos, you<br />
might want to replace it with the black pr<strong>in</strong>t cartridge when receiv<strong>in</strong>g faxes.<br />
See work with pr<strong>in</strong>t cartridges on page 80 for more <strong>in</strong>formation.<br />
This section conta<strong>in</strong>s the follow<strong>in</strong>g topics:<br />
• set number of r<strong>in</strong>gs before answer<strong>in</strong>g on page 59<br />
• set up your <strong>hp</strong> <strong>psc</strong> to answer fax c<strong>all</strong>s manu<strong>all</strong>y on page 60<br />
• receive a fax manu<strong>all</strong>y on page 61<br />
set number of r<strong>in</strong>gs before answer<strong>in</strong>g<br />
You can specify how many r<strong>in</strong>gs should occur before your HP PSC automatic<strong>all</strong>y<br />
answers the ph<strong>one</strong>. The default is 6 r<strong>in</strong>gs (varies by country/region).<br />
If you do not want your HP PSC to automatic<strong>all</strong>y answer the ph<strong>one</strong>, set R<strong>in</strong>gs to<br />
Answer to No Answer.<br />
1 Press Setup.<br />
2 Press 3, then press 3 aga<strong>in</strong>.<br />
This selects Basic Fax Setup and then selects R<strong>in</strong>gs to Answer.<br />
59<br />
fax
fax<br />
chapter 6<br />
60<br />
3 Press until the number of r<strong>in</strong>gs before answer<strong>in</strong>g is highlighted.<br />
4<br />
If you have an answer<strong>in</strong>g mach<strong>in</strong>e on this ph<strong>one</strong> l<strong>in</strong>e, set your HP PSC to<br />
answer the ph<strong>one</strong> after the answer<strong>in</strong>g mach<strong>in</strong>e. The number of r<strong>in</strong>gs to<br />
answer for the HP PSC should be greater than the number of r<strong>in</strong>gs to<br />
answer for the answer<strong>in</strong>g mach<strong>in</strong>e.<br />
You want the answer<strong>in</strong>g mach<strong>in</strong>e to answer before your HP PSC. The<br />
HP PSC monitors c<strong>all</strong>s and will answer if it detects fax t<strong>one</strong>s.<br />
Press OK to accept the sett<strong>in</strong>g.<br />
5 If you have a modem on this ph<strong>one</strong> l<strong>in</strong>e, turn off the sett<strong>in</strong>g <strong>in</strong> the modem’s<br />
software that automatic<strong>all</strong>y receives faxes to your computer; otherwise,<br />
your HP PSC will not receive faxes properly.<br />
For <strong>in</strong>formation on sett<strong>in</strong>g up your HP PSC with other office equipment, such as<br />
answer<strong>in</strong>g mach<strong>in</strong>es and voice mail, see fax setup on page 115.<br />
set up your <strong>hp</strong> <strong>psc</strong> to answer fax c<strong>all</strong>s manu<strong>all</strong>y<br />
In certa<strong>in</strong> situations, you might want to receive faxes manu<strong>all</strong>y. For example, if<br />
you share a l<strong>in</strong>e between your HP PSC and ph<strong>one</strong> and you do not have<br />
dist<strong>in</strong>ctive r<strong>in</strong>g<strong>in</strong>g, you will need to set up the HP PSC to answer fax c<strong>all</strong>s<br />
manu<strong>all</strong>y. This is because the HP PSC will not be able to dist<strong>in</strong>guish between<br />
fax c<strong>all</strong>s and ph<strong>one</strong> c<strong>all</strong>s. When receiv<strong>in</strong>g faxes manu<strong>all</strong>y, you must be<br />
available to respond <strong>in</strong> person to the <strong>in</strong>com<strong>in</strong>g fax c<strong>all</strong>, or your HP PSC cannot<br />
receive faxes. For more <strong>in</strong>formation on receiv<strong>in</strong>g faxes manu<strong>all</strong>y, see receive a<br />
fax manu<strong>all</strong>y on page 61.<br />
For <strong>in</strong>formation on sett<strong>in</strong>g up your HP PSC with other office equipment, such as<br />
answer<strong>in</strong>g mach<strong>in</strong>es and voice mail, see fax setup on page 115.<br />
1 Press Setup.<br />
2 Press 3, then press 3 aga<strong>in</strong>.<br />
This selects Basic Fax Setup and then selects R<strong>in</strong>gs to Answer.<br />
Basic Fax Setup<br />
1. Date and Time<br />
2. Fax Header<br />
3. R<strong>in</strong>gs to Answer<br />
4. Paper Size<br />
5. T<strong>one</strong> or Pulse Dial<strong>in</strong>g<br />
6. R<strong>in</strong>g and Beep Volume<br />
3 Press 2.<br />
This selects No Answer.<br />
4 Press OK to accept the sett<strong>in</strong>g.<br />
R<strong>in</strong>gs to Answer<br />
1. 6 r<strong>in</strong>gs<br />
2. No Answer<br />
3. 1 r<strong>in</strong>g<br />
4. 2 r<strong>in</strong>gs<br />
5. 3 r<strong>in</strong>gs<br />
6. 4 r<strong>in</strong>gs<br />
7. 5 r<strong>in</strong>gs<br />
<strong>hp</strong> <strong>psc</strong> <strong>2400</strong> <strong>series</strong>
eference <strong>guide</strong><br />
receive a fax manu<strong>all</strong>y<br />
set the fax header<br />
use the fax features<br />
If you set up your HP PSC to receive faxes manu<strong>all</strong>y, you will need to respond<br />
<strong>in</strong> person to the <strong>in</strong>com<strong>in</strong>g fax c<strong>all</strong>.<br />
1 When your HP PSC r<strong>in</strong>gs, pick up the handset of a teleph<strong>one</strong> that is on the<br />
same teleph<strong>one</strong> l<strong>in</strong>e as your HP PSC.<br />
2 If you hear fax t<strong>one</strong>s, do <strong>one</strong> of the follow<strong>in</strong>g:<br />
– If your teleph<strong>one</strong> is plugged <strong>in</strong>to the back of the HP PSC, press Fax,<br />
and then Start Black or Start Color.<br />
– If your teleph<strong>one</strong> is not plugged <strong>in</strong>to the back of the HP PSC but is on<br />
the same teleph<strong>one</strong> l<strong>in</strong>e, press 123 on your teleph<strong>one</strong>.<br />
3 Wait for the fax t<strong>one</strong>s, and then hang up the teleph<strong>one</strong>.<br />
The fax header pr<strong>in</strong>ts your name and fax number on the top of every fax you<br />
send. We recommend that you use the Fax Setup Wizard dur<strong>in</strong>g the<br />
HP software <strong>in</strong>st<strong>all</strong>ation to set up the fax header; however, you can also set it<br />
up from the front panel.<br />
The fax header <strong>in</strong>formation is required by law <strong>in</strong> many countries.<br />
Note: In Hungary, the subscriber identification code (fax header) can be<br />
set or changed only by authorized personnel. For more <strong>in</strong>formation, contact<br />
your authorized HP dealer.<br />
1 Press Setup.<br />
2 Press 3, then press 2.<br />
This selects Basic Fax Setup and then selects Fax Header.<br />
3 After Your Name appears, enter your name us<strong>in</strong>g the numeric keypad and<br />
then press OK.<br />
For <strong>in</strong>formation on enter<strong>in</strong>g text, see enter text on page 62.<br />
4 Us<strong>in</strong>g the keypad, enter your fax number.<br />
5 Press OK.<br />
You might f<strong>in</strong>d it easier to enter fax header <strong>in</strong>formation by us<strong>in</strong>g the Fax Setup<br />
Wizard <strong>in</strong> the HP Director software that you <strong>in</strong>st<strong>all</strong>ed with your HP PSC. In<br />
addition to enter<strong>in</strong>g fax header <strong>in</strong>formation, you can enter cover page<br />
<strong>in</strong>formation. This <strong>in</strong>formation will be used when you send a fax from your<br />
computer and attach a cover page.<br />
For more <strong>in</strong>formation, see the onscreen <strong>hp</strong> photo & imag<strong>in</strong>g help that came with<br />
your software.<br />
61<br />
fax
fax<br />
chapter 6<br />
enter text<br />
pr<strong>in</strong>t reports<br />
62<br />
The follow<strong>in</strong>g list provides tips for enter<strong>in</strong>g text by us<strong>in</strong>g the keypad on the front<br />
panel.<br />
• Press the keypad numbers that correspond to the letters of a name.<br />
ABC<br />
2<br />
The letters A, B, and C correspond to<br />
the number 2, and so on.<br />
• Press a button multiple times to see a letter first <strong>in</strong> lowercase and then <strong>in</strong><br />
uppercase. The first letter of a word is upper-cased automatic<strong>all</strong>y.<br />
JKL<br />
5<br />
To get this character:<br />
Press 5 this many times:<br />
j<br />
1<br />
Note: Depend<strong>in</strong>g on the country/region you selected, additional<br />
characters might be available.<br />
• After the correct letter appears, press , and then press the number that<br />
•<br />
corresponds to the next letter <strong>in</strong> the name. Press the button multiple times<br />
until the correct letter appears.<br />
The cursor automatic<strong>all</strong>y advances to the right 1.5 seconds after the last<br />
button is pressed.<br />
• To <strong>in</strong>sert a space, press the pound (#) button.<br />
• To enter a dash, press the pound (#).<br />
• To enter a symbol, such as @, press the asterisk (*) button repeatedly to<br />
scroll through the list of available symbols, which are: *, -, &, ., / (), ‘, =,<br />
#, @, _, and !<br />
• If you make a mistake, press<br />
entry.<br />
to clear it, and then make the correct<br />
• After you are d<strong>one</strong> enter<strong>in</strong>g text, press OK to store your entry.<br />
You can set up your HP PSC to automatic<strong>all</strong>y pr<strong>in</strong>t error reports and<br />
confirmation reports for each fax you send and receive. You can also manu<strong>all</strong>y<br />
pr<strong>in</strong>t system reports as you need them; these reports provide useful system<br />
<strong>in</strong>formation about your HP PSC.<br />
By default, your HP PSC is set to pr<strong>in</strong>t a report only if there is a problem with<br />
send<strong>in</strong>g or receiv<strong>in</strong>g a fax. A confirmation message that <strong>in</strong>dicates whether a fax<br />
was successfully sent appears briefly on the color graphics display after each<br />
transaction.<br />
This section conta<strong>in</strong>s the follow<strong>in</strong>g topics:<br />
• generate automated reports on page 63<br />
• generate manual reports on page 63<br />
k<br />
2<br />
l<br />
3<br />
J<br />
4<br />
K<br />
5<br />
L<br />
6<br />
5<br />
7<br />
<strong>hp</strong> <strong>psc</strong> <strong>2400</strong> <strong>series</strong>
eference <strong>guide</strong><br />
generate automated reports<br />
use the fax features<br />
This sett<strong>in</strong>g enables you to configure your HP PSC so that it automatic<strong>all</strong>y pr<strong>in</strong>ts<br />
confirmation and error reports.<br />
Note: If you need pr<strong>in</strong>ted confirmation each time your faxes are<br />
successfully sent, follow these <strong>in</strong>structions before send<strong>in</strong>g any faxes.<br />
1 Press Setup.<br />
2 Press 1, then press 5.<br />
This selects Pr<strong>in</strong>t Report and then selects the Fax Report Setup.<br />
Pr<strong>in</strong>t Report<br />
1. Last Transaction<br />
2. Fax Log<br />
3. Speed Dial List<br />
4. Self-Test Report<br />
5. Fax Report Setup<br />
3 Press to scroll through the follow<strong>in</strong>g report types:<br />
– 1. Every Error: pr<strong>in</strong>ts whenever there is any k<strong>in</strong>d of fax error (default).<br />
– 2. Send Error: pr<strong>in</strong>ts whenever there is a transmission error.<br />
– 3. Receive Error: pr<strong>in</strong>ts whenever there is a receiv<strong>in</strong>g error.<br />
– 4. Every Fax: confirms every time a fax is sent or received.<br />
– 5. Send Only: pr<strong>in</strong>ts every time a fax is sent.<br />
– 6. Off: does not pr<strong>in</strong>t fax reports.<br />
4 After the report that you want is highlighted, press OK.<br />
generate manual reports<br />
You can manu<strong>all</strong>y generate reports about your HP PSC, such as the status of the<br />
last fax you sent.<br />
1 Press Setup, then press 1.<br />
This selects Pr<strong>in</strong>t Report.<br />
Pr<strong>in</strong>t Report<br />
1. Last Transaction<br />
2. Fax Log<br />
3. Speed Dial List<br />
4. Self-Test Report<br />
5. Fax Report Setup<br />
Fax Report Setup<br />
1. Every Error<br />
2. Send Error<br />
3. Receive Error<br />
4. Every Fax<br />
5. Send Only<br />
6. Off<br />
63<br />
fax
fax<br />
chapter 6<br />
set up speed dial<strong>in</strong>g<br />
64<br />
2 Press to scroll through the follow<strong>in</strong>g report types:<br />
– 1. Last Transaction: pr<strong>in</strong>ts details of the last fax transaction.<br />
– 2. Fax Log: pr<strong>in</strong>ts a log of approximately the last 40 faxes<br />
transactions.<br />
– 3. Speed Dial List: pr<strong>in</strong>ts a list of programmed speed-dial entries.<br />
– 4. Self-Test Report: pr<strong>in</strong>ts a report to assist you <strong>in</strong> diagnos<strong>in</strong>g pr<strong>in</strong>t and<br />
alignment problems. For more <strong>in</strong>formation, see pr<strong>in</strong>t a self-test report<br />
on page 81.<br />
– 5. Fax Report Setup: pr<strong>in</strong>ts the automatic fax reports as described <strong>in</strong><br />
generate automated reports on page 63.<br />
3 After the report that you want is highlighted, press OK.<br />
You can assign speed-dial entries to fax numbers you use often. This lets you<br />
dial those numbers quickly by us<strong>in</strong>g the front panel. You can create up to 60<br />
<strong>in</strong>dividual speed-dial entries (varies by model).<br />
We recommend that you use the HP Director to set up speed-dial sett<strong>in</strong>gs;<br />
however, you can also use the front panel.<br />
For <strong>in</strong>formation on send<strong>in</strong>g a fax us<strong>in</strong>g speed dials, see send a fax us<strong>in</strong>g speed<br />
dials on page 58.<br />
Note: A speed-dial entry can only be associated with <strong>one</strong> ph<strong>one</strong> number;<br />
speed-dial groups are not supported.<br />
You can quickly and easily set up speed-dial entries from your computer by<br />
us<strong>in</strong>g the HP Director software. For more <strong>in</strong>formation, see the onscreen <strong>hp</strong> photo<br />
& imag<strong>in</strong>g help that came with your software.<br />
This section conta<strong>in</strong>s the follow<strong>in</strong>g topics:<br />
• create speed-dial entries on page 64<br />
• delete speed-dial entries on page 65<br />
create speed-dial entries<br />
You can create speed-dial entries for fax numbers that you use frequently.<br />
1 Press Setup.<br />
2 Press 2, then press 1.<br />
This selects Speed Dial Setup and then selects Individual Speed Dial.<br />
Speed Dial Setup<br />
1. Individual Speed Dial<br />
2. Delete Speed Dial<br />
3. Pr<strong>in</strong>t Speed Dial List<br />
3<br />
The first unassigned speed-dial entry appears on the display.<br />
Press OK to select the displayed speed-dial entry. You can also press<br />
to select a another empty entry.<br />
or<br />
<strong>hp</strong> <strong>psc</strong> <strong>2400</strong> <strong>series</strong>
eference <strong>guide</strong><br />
use the fax features<br />
4 Enter the fax number to assign to that entry, and then press OK.<br />
Tip: To enter a three-second pause with<strong>in</strong> a number sequence,<br />
press the pound (#) button repeatedly, until a dash appears on the<br />
color graphics display.<br />
5 Enter the person’s or company’s name, and then press OK.<br />
For more <strong>in</strong>formation on enter<strong>in</strong>g text, see enter text on page 62.<br />
6 After Enter Another? appears, press 1 (Yes), if you want to set up another<br />
number, or press 2 (No) to exit.<br />
delete speed-dial entries<br />
Follow these steps to delete an <strong>in</strong>dividual speed-dial entry.<br />
1 Press Setup.<br />
2 Press 2, then press 2 aga<strong>in</strong>.<br />
This selects Speed Dial Setup and then selects Delete Speed Dial.<br />
3 Press until the <strong>in</strong>dividual entry that you want to delete appears, and then<br />
press OK.<br />
control resolution and contrast<br />
You can change the resolution and contrast of documents that you are send<strong>in</strong>g.<br />
Your changes revert to the default values after two m<strong>in</strong>utes of <strong>in</strong>activity, unless<br />
you set them as the default. For <strong>in</strong>formation, see set new defaults on page 66.<br />
Note: These sett<strong>in</strong>gs do not affect copy sett<strong>in</strong>gs. Copy resolution and copy<br />
contrast are set <strong>in</strong>dependently from fax resolution and fax contrast. Also,<br />
the sett<strong>in</strong>gs you change from the front panel do not affect faxes sent from<br />
your computer.<br />
This section conta<strong>in</strong>s the follow<strong>in</strong>g topics:<br />
• change resolution on page 65<br />
• change contrast on page 66<br />
• set new defaults on page 66<br />
change resolution<br />
Resolution affects the transmission speed and quality of faxed documents. The<br />
HP PSC only sends faxes at the highest resolution supported by the receiv<strong>in</strong>g fax<br />
mach<strong>in</strong>e.<br />
1 Load your orig<strong>in</strong>al face down on the right front corner of the glass.<br />
For more <strong>in</strong>formation, see load an orig<strong>in</strong>al on page 11.<br />
2 Press Fax.<br />
The Enter Fax Number screen appears.<br />
3 Enter the fax number.<br />
4 Press Fax, and then press 1.<br />
This displays the Fax Menu and then Resolution.<br />
65<br />
fax
fax<br />
chapter 6<br />
66<br />
5 Press to select a resolution sett<strong>in</strong>g:<br />
– F<strong>in</strong>e: this is the default sett<strong>in</strong>g. It provides high-quality text suitable for<br />
fax<strong>in</strong>g most documents.<br />
– Photo: this sett<strong>in</strong>g provides the best quality fax when send<strong>in</strong>g<br />
photographs. If you choose Photo, be aware that the fax<strong>in</strong>g process<br />
takes longer to complete. When fax<strong>in</strong>g photographs, we recommend<br />
that you choose Photo.<br />
– Standard: this sett<strong>in</strong>g provides the fastest possible transmission with<br />
the lowest quality of fax.<br />
6 Press OK.<br />
7 Press Start Black or Start Color.<br />
change contrast<br />
Use this sett<strong>in</strong>g to change the contrast of a fax to be to be darker or lighter than<br />
the orig<strong>in</strong>al. This feature is useful if you are fax<strong>in</strong>g a document that is faded,<br />
washed out, or hand written. You can darken the orig<strong>in</strong>al by adjust<strong>in</strong>g the<br />
contrast.<br />
1 Load your orig<strong>in</strong>al face down on the right front corner of the glass.<br />
For more <strong>in</strong>formation, see load an orig<strong>in</strong>al on page 11.<br />
2 Press Fax.<br />
The Enter Fax Number screen appears.<br />
3 Enter the fax number.<br />
4 Press Fax, and then press 2.<br />
This displays the Fax Menu and then Lighter/Darker.<br />
The range of contrast values appears as a scale on the color graphics<br />
display.<br />
5 Press to lighten the fax or to darken it.<br />
6<br />
The <strong>in</strong>dicator moves to the left or right, depend<strong>in</strong>g on the button you press.<br />
Press OK.<br />
7 Press Start Black or Start Color.<br />
set new defaults<br />
Resolution<br />
1. F<strong>in</strong>e<br />
2. Photo<br />
3. Standard<br />
You can change the default values for resolution and contrast through the front<br />
panel.<br />
1 Make your changes to Resolution and Lighter/Darker.<br />
2 If you are not already <strong>in</strong> the Fax Menu, press Fax twice.<br />
This selects the Fax Menu.<br />
<strong>hp</strong> <strong>psc</strong> <strong>2400</strong> <strong>series</strong>
set fax options<br />
<strong>reference</strong> <strong>guide</strong><br />
3 Press 3.<br />
This selects Set New Defaults.<br />
4 Press OK.<br />
use the fax features<br />
There are numerous fax options that you can set, such as controll<strong>in</strong>g whether the<br />
HP PSC redials a busy number automatic<strong>all</strong>y. Review this section for <strong>in</strong>formation<br />
on chang<strong>in</strong>g fax options.<br />
This section conta<strong>in</strong>s the follow<strong>in</strong>g topics:<br />
• redial a busy or unanswered number automatic<strong>all</strong>y on page 67<br />
• use error correction mode (ECM) on page 68<br />
• set automatic reduction for <strong>in</strong>com<strong>in</strong>g faxes on page 68<br />
• adjust the volume on page 68<br />
• change the answer r<strong>in</strong>g pattern (dist<strong>in</strong>ctive r<strong>in</strong>g<strong>in</strong>g) on page 68<br />
• set the date and time on page 69<br />
• set the paper size on page 69<br />
• set t<strong>one</strong> or pulse dial<strong>in</strong>g on page 70<br />
• set backup fax reception on page 70<br />
redial a busy or unanswered number automatic<strong>all</strong>y<br />
You can set your HP PSC to redial a busy or an unanswered number<br />
automatic<strong>all</strong>y. The default sett<strong>in</strong>g for Busy Redial is Redial. The default sett<strong>in</strong>g<br />
for No Answer Redial is No Redial.<br />
1 Press Setup.<br />
2 Do <strong>one</strong> of the follow<strong>in</strong>g:<br />
– To change the Busy Redial sett<strong>in</strong>g, press 4, and then press 3.<br />
This selects Advanced Fax Setup and then selects Busy Redial.<br />
– To change the No Answer Redial sett<strong>in</strong>g press 4, and then press 4<br />
aga<strong>in</strong>.<br />
This selects Advanced Fax Setup and then selects No Answer Redial.<br />
Advanced Fax Setup<br />
1. Fax Reports Setup<br />
2. Answer R<strong>in</strong>g Pattern<br />
3. Busy Redial<br />
4. No Answer Redial<br />
5. Automatic Reduction<br />
6. Backup Fax Reception<br />
7. Error Correction Mode<br />
3 Press to select Redial or No Redial.<br />
4 Press OK.<br />
Busy Redial<br />
1. Redial<br />
2. No Redial<br />
No Answer Redial<br />
1. No Redial<br />
2. Redial<br />
67<br />
fax
fax<br />
chapter 6<br />
68<br />
use error correction mode (ECM)<br />
ECM elim<strong>in</strong>ates data lost due to poor ph<strong>one</strong> l<strong>in</strong>es by detect<strong>in</strong>g errors that occur<br />
dur<strong>in</strong>g transmission and automatic<strong>all</strong>y request<strong>in</strong>g retransmission of the<br />
err<strong>one</strong>ous portion. Ph<strong>one</strong> charges are unaffected, or might even be reduced, on<br />
good ph<strong>one</strong> l<strong>in</strong>es. On poor ph<strong>one</strong> l<strong>in</strong>es, ECM <strong>in</strong>creases send<strong>in</strong>g time and<br />
ph<strong>one</strong> charges, but sends the data much more reliably. Turn ECM off (the<br />
default sett<strong>in</strong>g is on) only if it <strong>in</strong>creases ph<strong>one</strong> charges substanti<strong>all</strong>y and you are<br />
will<strong>in</strong>g to accept poorer quality <strong>in</strong> exchange for reduced charges.<br />
1 Press Setup.<br />
2 Press 4, then press 7.<br />
This selects Advanced Fax Setup and then selects Error Correction Mode.<br />
3 Press to select Off or On.<br />
4 Press OK.<br />
set automatic reduction for <strong>in</strong>com<strong>in</strong>g faxes<br />
This sett<strong>in</strong>g determ<strong>in</strong>es what your HP PSC does if it receives a fax too large for<br />
the default paper size. With this sett<strong>in</strong>g on (the default), the image is reduced to<br />
fit on <strong>one</strong> page if possible. With this feature off, the <strong>in</strong>formation that will not fit<br />
on the first page is pr<strong>in</strong>ted on a second page. This feature is useful when you<br />
receive a legal-size fax and letter-size paper is loaded <strong>in</strong> the <strong>in</strong>put tray.<br />
1 Press Setup.<br />
2 Press 4, then press 5.<br />
This selects Advanced Fax Setup and then selects Automatic Reduction.<br />
3 Press to select Off or On.<br />
4 Press OK.<br />
adjust the volume<br />
Your HP PSC provides three levels for adjust<strong>in</strong>g the r<strong>in</strong>g and speaker volume.<br />
The r<strong>in</strong>g volume is the volume of the ph<strong>one</strong> r<strong>in</strong>gs. The speaker volume is the level<br />
of everyth<strong>in</strong>g else, such as the dial t<strong>one</strong>s, fax t<strong>one</strong>s, and button press beeps. The<br />
default sett<strong>in</strong>g is Soft.<br />
1 Press Setup.<br />
2 Press 3, then press 6.<br />
This selects Basic Fax Setup and then selects R<strong>in</strong>g and Beep Volume.<br />
3 Press to select <strong>one</strong> of the options: Soft, Loud, or Off.<br />
4 Press OK.<br />
change the answer r<strong>in</strong>g pattern (dist<strong>in</strong>ctive r<strong>in</strong>g<strong>in</strong>g)<br />
Many ph<strong>one</strong> companies offer a dist<strong>in</strong>ctive r<strong>in</strong>g<strong>in</strong>g feature that <strong>all</strong>ows you to<br />
have several ph<strong>one</strong> numbers on <strong>one</strong> ph<strong>one</strong> l<strong>in</strong>e. When you subscribe to this<br />
service, each number will have a different r<strong>in</strong>g pattern, for example, s<strong>in</strong>gle,<br />
double, and triple r<strong>in</strong>gs. If you do not have this service, use the default r<strong>in</strong>g<br />
pattern, which is All R<strong>in</strong>gs.<br />
<strong>hp</strong> <strong>psc</strong> <strong>2400</strong> <strong>series</strong>
eference <strong>guide</strong><br />
use the fax features<br />
If you connect your HP PSC to a l<strong>in</strong>e with dist<strong>in</strong>ctive r<strong>in</strong>g<strong>in</strong>g, have your<br />
teleph<strong>one</strong> company assign <strong>one</strong> r<strong>in</strong>g pattern to voice c<strong>all</strong>s and another to fax<br />
c<strong>all</strong>s. We recommend that you request double or triple r<strong>in</strong>gs for a fax number.<br />
1 Verify that your HP PSC is set to answer fax c<strong>all</strong>s automatic<strong>all</strong>y. For<br />
<strong>in</strong>formation, see set number of r<strong>in</strong>gs before answer<strong>in</strong>g on page 59.<br />
2 Press Setup.<br />
3 Press 4, then press 2.<br />
This selects Advanced Fax Setup and then selects Answer R<strong>in</strong>g Pattern.<br />
4 Press to scroll through these options: All R<strong>in</strong>gs, S<strong>in</strong>gle R<strong>in</strong>gs, Double<br />
R<strong>in</strong>gs, Triple R<strong>in</strong>gs, and Double & Triple R<strong>in</strong>gs.<br />
5 When the r<strong>in</strong>g pattern that the ph<strong>one</strong> company established for this number<br />
appears, press OK.<br />
set the date and time<br />
You can set the date and time from the front panel. When a fax is transmitted,<br />
the current date and time are pr<strong>in</strong>ted along with the fax header. The date and<br />
time format is based upon the language and country/region sett<strong>in</strong>g.<br />
Norm<strong>all</strong>y the computer software sets the date and time automatic<strong>all</strong>y.<br />
Note: If your HP PSC loses power, you will need to reset the date and time.<br />
1 Press Setup.<br />
2 Press 3, then press 1.<br />
This selects Basic Fax Setup and then selects Date and Time.<br />
3 Enter the month, day, and year (last two digits only) by press<strong>in</strong>g the<br />
appropriate number on the keypad.<br />
The underl<strong>in</strong>e cursor presented <strong>in</strong>iti<strong>all</strong>y beneath the first digit advances<br />
automatic<strong>all</strong>y to each digit each time you press a button. The time prompt<br />
automatic<strong>all</strong>y appears after you enter the last digit of the date.<br />
4 Enter the hours and m<strong>in</strong>utes.<br />
The AM/PM prompt automatic<strong>all</strong>y appears after the last digit of the time is<br />
entered if your time is displayed <strong>in</strong> the 12-hour format.<br />
5 If prompted, press 1 for AM or 2 for PM.<br />
The new date and time sett<strong>in</strong>gs appear on the front panel.<br />
set the paper size<br />
You can select the paper size for received faxes. The paper size selected should<br />
match what is loaded <strong>in</strong> your <strong>in</strong>put tray. Faxes can be pr<strong>in</strong>ted on letter, A4, or<br />
legal paper only.<br />
Note: If an <strong>in</strong>correct paper size is loaded <strong>in</strong> the <strong>in</strong>put tray when a fax is<br />
received, the fax will not pr<strong>in</strong>t. Load letter, A4, or legal paper, and then<br />
press OK to pr<strong>in</strong>t the fax.<br />
1 Press Setup.<br />
2 Press 3, then press 4.<br />
This selects Basic Fax Setup and then Paper Size.<br />
3 Press to highlight an option, and then press OK.<br />
69<br />
fax
fax<br />
chapter 6<br />
70<br />
set t<strong>one</strong> or pulse dial<strong>in</strong>g<br />
You can set the dial mode for t<strong>one</strong> or pulse dial<strong>in</strong>g. Most ph<strong>one</strong> systems work<br />
with either t<strong>one</strong> or pulse dial<strong>in</strong>g. If you have a public ph<strong>one</strong> system or a private<br />
branch exchange (PBX) system that requires pulse dial<strong>in</strong>g, you will need to select<br />
Pulse Dial<strong>in</strong>g. The default sett<strong>in</strong>g is T<strong>one</strong> Dial<strong>in</strong>g. Some ph<strong>one</strong> system features<br />
might not be accessible if pulse dial<strong>in</strong>g is used. In addition, it can take longer<br />
to dial a fax number with pulse dial<strong>in</strong>g. Contact your local ph<strong>one</strong> company if<br />
you are unsure which sett<strong>in</strong>g to use.<br />
Note: If your ph<strong>one</strong> system does not require pulse dial<strong>in</strong>g, we recommend<br />
us<strong>in</strong>g the default sett<strong>in</strong>g of T<strong>one</strong> Dial<strong>in</strong>g.<br />
1 Press Setup.<br />
2 Press 3, then press 5.<br />
This selects Basic Fax Setup and then T<strong>one</strong> or Pulse Dial<strong>in</strong>g.<br />
3 Press to highlight an option, and then press OK.<br />
set backup fax reception<br />
Use the Backup Fax Reception feature to store received faxes <strong>in</strong> memory. For<br />
example, if your pr<strong>in</strong>t cartridge runs out of <strong>in</strong>k while receiv<strong>in</strong>g a fax, the fax will<br />
be stored <strong>in</strong> memory. Then, after you have replaced the pr<strong>in</strong>t cartridge, you can<br />
pr<strong>in</strong>t out the fax. The color graphics display notifies you when there are faxes<br />
stored <strong>in</strong> memory that need to be pr<strong>in</strong>ted.<br />
By default, Backup Fax Reception feature is enabled. For <strong>in</strong>formation on pr<strong>in</strong>t<strong>in</strong>g<br />
faxes stored <strong>in</strong> memory, see repr<strong>in</strong>t the faxes <strong>in</strong> memory on page 70.<br />
Your HP PSC can store up to 60 pages <strong>in</strong> its memory, with the number of pages<br />
depend<strong>in</strong>g on the model you purchased. As the memory becomes full, the<br />
HP PSC overwrites the oldest, pr<strong>in</strong>ted faxes.<br />
Note: All unpr<strong>in</strong>ted faxes will rema<strong>in</strong> <strong>in</strong> memory until they are pr<strong>in</strong>ted or<br />
deleted. When the memory becomes full of unpr<strong>in</strong>ted faxes, the HP PSC<br />
will not receive any more fax c<strong>all</strong>s until the unpr<strong>in</strong>ted faxes are pr<strong>in</strong>ted. To<br />
delete <strong>all</strong> faxes <strong>in</strong> memory, <strong>in</strong>clud<strong>in</strong>g the unpr<strong>in</strong>ted faxes, turn off your<br />
HP PSC.<br />
1 Press Setup.<br />
2 Press 4, then press 6.<br />
This selects Advanced Fax Setup and then Backup Fax Reception.<br />
3 Press to select On or Off.<br />
4 Press OK.<br />
repr<strong>in</strong>t the faxes <strong>in</strong> memory<br />
Repr<strong>in</strong>t Faxes <strong>in</strong> Memory enables you to repr<strong>in</strong>t a fax stored <strong>in</strong> memory. Any<br />
time the HP PSC beg<strong>in</strong>s pr<strong>in</strong>t<strong>in</strong>g a fax you do not need, press Cancel to stop it<br />
from pr<strong>in</strong>t<strong>in</strong>g. The HP PSC beg<strong>in</strong>s pr<strong>in</strong>t<strong>in</strong>g the next fax <strong>in</strong> memory. You will need<br />
to press Cancel for each stored fax <strong>in</strong> order to stop it from pr<strong>in</strong>t<strong>in</strong>g.<br />
Note: All faxes stored <strong>in</strong> memory will be lost if you turn off the power to<br />
your HP PSC.<br />
<strong>hp</strong> <strong>psc</strong> <strong>2400</strong> <strong>series</strong>
stop fax<strong>in</strong>g<br />
<strong>reference</strong> <strong>guide</strong><br />
use the fax features<br />
In order for faxes to be stored <strong>in</strong> memory, Backup Fax Reception must be<br />
enabled. For <strong>in</strong>formation, see set backup fax reception on page 70.<br />
1 Press Setup.<br />
2 Press 5, then press 4.<br />
This selects Tools and then selects Repr<strong>in</strong>t Faxes <strong>in</strong> Memory.<br />
The faxes are pr<strong>in</strong>ted from memory.<br />
� To stop a fax you are send<strong>in</strong>g or receiv<strong>in</strong>g, press Cancel.<br />
71<br />
fax
fax<br />
chapter 6<br />
72<br />
<strong>hp</strong> <strong>psc</strong> <strong>2400</strong> <strong>series</strong>
7<br />
pr<strong>in</strong>t from your computer<br />
Most pr<strong>in</strong>t sett<strong>in</strong>gs are automatic<strong>all</strong>y handled by the software application you are<br />
pr<strong>in</strong>t<strong>in</strong>g from or by HP ColorSmart technology. You need to change the sett<strong>in</strong>gs<br />
manu<strong>all</strong>y only when you change pr<strong>in</strong>t quality, pr<strong>in</strong>t on specific types of paper or<br />
film, or use special features.<br />
Note: If you have a photo memory card, you can select and pr<strong>in</strong>t photos<br />
directly from it us<strong>in</strong>g the HP PSC. For <strong>in</strong>formation, see use a photo memory<br />
card on page 21.<br />
This section conta<strong>in</strong>s the follow<strong>in</strong>g topics:<br />
• pr<strong>in</strong>t from a software application on page 73<br />
• set pr<strong>in</strong>t options on page 74<br />
• stop a pr<strong>in</strong>t job on page 75<br />
For more <strong>in</strong>formation on perform<strong>in</strong>g special pr<strong>in</strong>t jobs, see the onscreen HP Photo<br />
& Imag<strong>in</strong>g Help that came with your software.<br />
pr<strong>in</strong>t from a software application<br />
Follow these steps to pr<strong>in</strong>t from the software application that you used to create<br />
your document.<br />
W<strong>in</strong>dows users<br />
1 Load the <strong>in</strong>put tray with the appropriate paper.<br />
For more <strong>in</strong>formation, see load paper on page 12.<br />
2 From your software application’s File menu, click Pr<strong>in</strong>t.<br />
3 Make sure that you select the HP PSC to pr<strong>in</strong>t.<br />
If you need to change sett<strong>in</strong>gs, click the button that opens the Properties<br />
dialog box (depend<strong>in</strong>g on your software application, this button might be<br />
c<strong>all</strong>ed Properties, Options, Pr<strong>in</strong>ter Setup, or Pr<strong>in</strong>ter), and then select the<br />
appropriate options for your pr<strong>in</strong>t job by us<strong>in</strong>g the features available <strong>in</strong><br />
the Paper/Quality, F<strong>in</strong>ish<strong>in</strong>g, Effects, Basics, and Color tabs.<br />
Note: When pr<strong>in</strong>t<strong>in</strong>g a photo, you must select options for the correct paper<br />
type and photo enhancement. You might also want to use the photo pr<strong>in</strong>t<br />
cartridge for superior pr<strong>in</strong>t quality. For <strong>in</strong>formation on order<strong>in</strong>g pr<strong>in</strong>t<br />
cartridges, see the Reference Guide. For more <strong>in</strong>formation on <strong>in</strong>st<strong>all</strong><strong>in</strong>g<br />
pr<strong>in</strong>t cartridges, see work with pr<strong>in</strong>t cartridges on page 80.<br />
The sett<strong>in</strong>gs you select apply only to the current pr<strong>in</strong>t job. To set pr<strong>in</strong>t<br />
sett<strong>in</strong>gs for <strong>all</strong> jobs, see set pr<strong>in</strong>t options on page 74.<br />
4 Close the Properties dialog box.<br />
5 Click Pr<strong>in</strong>t to beg<strong>in</strong> your pr<strong>in</strong>t job.<br />
73<br />
pr<strong>in</strong>t
pr<strong>in</strong>t<br />
chapter 7<br />
74<br />
Mac<strong>in</strong>tosh users<br />
set pr<strong>in</strong>t options<br />
To specify a document’s paper size, scal<strong>in</strong>g, and orientation, use the Page Setup<br />
dialog box. To specify other pr<strong>in</strong>t sett<strong>in</strong>gs for a document, and to send the<br />
document to the HP PSC, use the Pr<strong>in</strong>t dialog box.<br />
Note: The follow<strong>in</strong>g steps are specific to OS X. For OS 9, the steps might be<br />
slightly different. Be sure to select the HP PSC <strong>in</strong> the Pr<strong>in</strong>t Center (OS X) or<br />
<strong>in</strong> the Chooser (OS 9) before you beg<strong>in</strong> pr<strong>in</strong>t<strong>in</strong>g.<br />
1 From your software application’s File menu, select Page Setup.<br />
The Page Setup dialog box appears.<br />
2 In the Format for pop-up menu, select the HP PSC.<br />
3 Select the page attributes:<br />
– Select the paper size.<br />
– Select the orientation.<br />
– Enter the scal<strong>in</strong>g percentage.<br />
For OS 9, the Page Setup dialog box <strong>in</strong>cludes options to mirror the image,<br />
and to adjust page marg<strong>in</strong>s for two-sided pr<strong>in</strong>t<strong>in</strong>g.<br />
4 Click OK.<br />
5 From your software application’s File menu, select Pr<strong>in</strong>t.<br />
The Pr<strong>in</strong>t dialog box appears.<br />
If you are us<strong>in</strong>g OS X, the Copies & Pages panel opens. If you are us<strong>in</strong>g<br />
OS 9, the General panel opens.<br />
6 Select the pr<strong>in</strong>t sett<strong>in</strong>gs appropriate for your project.<br />
Use the pop-up menus to access the other panels.<br />
7 Click Pr<strong>in</strong>t to beg<strong>in</strong> pr<strong>in</strong>t<strong>in</strong>g.<br />
You can customize the pr<strong>in</strong>t sett<strong>in</strong>gs of the HP PSC to handle nearly any pr<strong>in</strong>t<br />
task.<br />
W<strong>in</strong>dows users<br />
If you want to change pr<strong>in</strong>t sett<strong>in</strong>gs, you need to decide if you want to change<br />
them for the current job, or for <strong>all</strong> jobs. How you display pr<strong>in</strong>t sett<strong>in</strong>gs depends<br />
on whether or not you want to make the sett<strong>in</strong>g permanent.<br />
to change the pr<strong>in</strong>t sett<strong>in</strong>gs for <strong>all</strong> future jobs<br />
1 In the HP Photo & Imag<strong>in</strong>g Director (HP Director) click Sett<strong>in</strong>gs, and then<br />
select Pr<strong>in</strong>t Sett<strong>in</strong>gs.<br />
2 Make changes to the pr<strong>in</strong>t sett<strong>in</strong>gs, and click Apply.<br />
to change the pr<strong>in</strong>t sett<strong>in</strong>gs for the current pr<strong>in</strong>t job<br />
1 From your software application’s File menu, select Pr<strong>in</strong>t, Pr<strong>in</strong>t Setup, or<br />
Page Setup. Make sure that the selected pr<strong>in</strong>ter is the HP PSC.<br />
2 Click Properties, Options, Pr<strong>in</strong>ter Setup, or Pr<strong>in</strong>ter (the option names are<br />
different depend<strong>in</strong>g on your software application) to display the pr<strong>in</strong>t<br />
sett<strong>in</strong>gs.<br />
<strong>hp</strong> <strong>psc</strong> <strong>2400</strong> <strong>series</strong>
eference <strong>guide</strong><br />
3 Make changes to the sett<strong>in</strong>gs, and click Apply.<br />
4 Click Pr<strong>in</strong>t to pr<strong>in</strong>t the job.<br />
Mac<strong>in</strong>tosh users<br />
stop a pr<strong>in</strong>t job<br />
pr<strong>in</strong>t from your computer<br />
Use the Pr<strong>in</strong>t dialog box to customize the pr<strong>in</strong>t sett<strong>in</strong>gs. The options displayed<br />
depend on the panel selected.<br />
� To display the Pr<strong>in</strong>t dialog box, open the document you want to pr<strong>in</strong>t, then<br />
select Pr<strong>in</strong>t from the File menu.<br />
Note: To f<strong>in</strong>d out more about the sett<strong>in</strong>gs <strong>in</strong> a particular panel, click the ?<br />
<strong>in</strong> the lower left corner of the Pr<strong>in</strong>t dialog box.<br />
copies & pages panel<br />
Use the Copies & Pages panel <strong>in</strong> OS X and the General panel <strong>in</strong> OS 9 <strong>in</strong> the<br />
Pr<strong>in</strong>t dialog box to select the number of copies and the pages you want to pr<strong>in</strong>t.<br />
You can also choose to collate your pr<strong>in</strong>ts from this panel.<br />
� Click the Preview button to see a preview of the pr<strong>in</strong>ted document.<br />
layout panel<br />
Use the Layout panel <strong>in</strong> the Pr<strong>in</strong>t dialog box to pr<strong>in</strong>t multiple pages on a sheet<br />
and to arrange the order <strong>in</strong> which the pages will pr<strong>in</strong>t. You can also choose<br />
border options from this panel.<br />
output options panel<br />
Use the Output Options panel <strong>in</strong> the Pr<strong>in</strong>t dialog box to save your file as an<br />
Adobe Acrobat PDF ® (portable document format) file. The HP PSC does not<br />
support PostScript pr<strong>in</strong>t<strong>in</strong>g.<br />
� Select the Save as File check box to save your document as a PDF file.<br />
Note: The Output Options panel is not available <strong>in</strong> OS 9.<br />
paper type/quality panel<br />
Use the Paper Type/Quality panel <strong>in</strong> the Pr<strong>in</strong>t dialog box to select the paper<br />
type, pr<strong>in</strong>t quality, and color sett<strong>in</strong>gs. You can also use this panel to change the<br />
contrast and sharpness of your digital photos and to adjust the amount of <strong>in</strong>k<br />
you want to use <strong>in</strong> your pr<strong>in</strong>ts.<br />
summary panel<br />
Use the Summary panel <strong>in</strong> the Pr<strong>in</strong>t dialog box to preview your sett<strong>in</strong>gs and<br />
make sure that they are correct before pr<strong>in</strong>t<strong>in</strong>g.<br />
Note: In OS 9, the summary of your sett<strong>in</strong>gs appears <strong>in</strong> the General panel.<br />
You can stop a pr<strong>in</strong>t job from the HP PSC or from your computer.<br />
� To stop a pr<strong>in</strong>t job from the HP PSC, press Cancel on the front panel. Look<br />
for the Pr<strong>in</strong>t Cancelled message on the color graphics display. If it doesn’t<br />
appear, press Cancel aga<strong>in</strong>.<br />
The HP PSC pr<strong>in</strong>ts any pages it has already started pr<strong>in</strong>t<strong>in</strong>g and then<br />
cancels the rema<strong>in</strong>der of the pr<strong>in</strong>t job. This can take a few moments.<br />
75<br />
pr<strong>in</strong>t
pr<strong>in</strong>t<br />
chapter 7<br />
76<br />
<strong>hp</strong> <strong>psc</strong> <strong>2400</strong> <strong>series</strong>
8<br />
order media<br />
order supplies<br />
Use the <strong>in</strong>formation <strong>in</strong> this section to order pr<strong>in</strong>t cartridges, recommended types<br />
of HP paper, and HP PSC accessories onl<strong>in</strong>e from the HP website.<br />
This section conta<strong>in</strong>s the follow<strong>in</strong>g topics:<br />
• order media on page 77<br />
• order pr<strong>in</strong>t cartridges on page 77<br />
To order media such as HP Premium Paper, HP Premium Inkjet Transparency<br />
Film, HP Iron-On paper, or HP Greet<strong>in</strong>g Cards, go to:<br />
www.<strong>hp</strong>.com<br />
Choose your country/region, and then select Buy or Shopp<strong>in</strong>g.<br />
order pr<strong>in</strong>t cartridges<br />
The follow<strong>in</strong>g table lists the pr<strong>in</strong>t cartridges that are compatible with your<br />
HP PSC. Use the <strong>in</strong>formation below to determ<strong>in</strong>e which pr<strong>in</strong>t cartridge to order.<br />
pr<strong>in</strong>t cartridges <strong>hp</strong> reorder number<br />
HP black <strong>in</strong>kjet pr<strong>in</strong>t cartridge<br />
HP black <strong>in</strong>kjet pr<strong>in</strong>t cartridge<br />
HP tri-color <strong>in</strong>kjet pr<strong>in</strong>t cartridge<br />
HP photo <strong>in</strong>kjet pr<strong>in</strong>t cartridge<br />
HP tri-color <strong>in</strong>kjet pr<strong>in</strong>t cartridge<br />
#56, 19 ml black pr<strong>in</strong>t cartridge<br />
#27, 10 ml black pr<strong>in</strong>t cartridge<br />
#57, 17 ml color pr<strong>in</strong>t cartridge<br />
#58, 17 ml color pr<strong>in</strong>t cartridge<br />
#28, 8 ml color pr<strong>in</strong>t cartridge<br />
Get more <strong>in</strong>formation about pr<strong>in</strong>t cartridges from the HP website.<br />
www.<strong>hp</strong>.com<br />
Choose your country/region, and then select Buy or Shopp<strong>in</strong>g.<br />
77<br />
order supplies
order supplies<br />
chapter 8<br />
78<br />
<strong>hp</strong> <strong>psc</strong> <strong>2400</strong> <strong>series</strong>
9<br />
clean the glass<br />
ma<strong>in</strong>ta<strong>in</strong> your <strong>hp</strong> <strong>psc</strong><br />
The HP PSC requires little ma<strong>in</strong>tenance. Sometimes you might want to clean the<br />
glass and lid back<strong>in</strong>g to remove surface dust and ensure that your copies and<br />
scans rema<strong>in</strong> clear. You might also want to replace, align, or clean your pr<strong>in</strong>t<br />
cartridges from time to time. This section provides <strong>in</strong>structions for keep<strong>in</strong>g your<br />
HP PSC <strong>in</strong> top work<strong>in</strong>g condition. Perform these simple ma<strong>in</strong>tenance procedures<br />
as necessary.<br />
This section conta<strong>in</strong>s the follow<strong>in</strong>g topics:<br />
• clean the glass on page 79<br />
• clean the lid back<strong>in</strong>g on page 79<br />
• clean the exterior on page 80<br />
• work with pr<strong>in</strong>t cartridges on page 80<br />
• restore factory defaults on page 89<br />
• set the power save time on page 89<br />
• set the prompt delay time on page 90<br />
Dirty glass from f<strong>in</strong>gerpr<strong>in</strong>ts, smudges, hair, and so on, slows down performance<br />
and affects the accuracy of features such as Fit to Page.<br />
1 Turn off the HP PSC, unplug the power cord, and raise the lid.<br />
Note: When you unplug the power cord, you will need to reset the date and<br />
time. For more <strong>in</strong>formation, see set the date and time on page 69.<br />
2 Clean the glass with a soft cloth or sponge slightly moistened with a<br />
nonabrasive glass cleaner.<br />
Caution! Do not use abrasives, acet<strong>one</strong>, benzene, or carbon<br />
tetrachloride on the glass; these can damage it. Do not place or<br />
spray liquids directly on the glass. They might seep under it and<br />
damage the device.<br />
3 Dry the glass with a chamois or cellulose sponge to prevent spott<strong>in</strong>g.<br />
clean the lid back<strong>in</strong>g<br />
M<strong>in</strong>or debris can accumulate on the white document back<strong>in</strong>g located<br />
underneath the lid of the HP PSC.<br />
1 Turn off the HP PSC, unplug the power cord, and raise the lid.<br />
Note: When you unplug the power cord, you will need to reset the date and<br />
time. For more <strong>in</strong>formation, see set the date and time on page 69.<br />
2 Clean the white document back<strong>in</strong>g with a soft cloth or sponge slightly<br />
moistened with a mild soap and warm water.<br />
79<br />
ma<strong>in</strong>ta<strong>in</strong> your <strong>hp</strong> <strong>psc</strong>
ma<strong>in</strong>ta<strong>in</strong> your <strong>hp</strong> <strong>psc</strong><br />
chapter 9<br />
clean the exterior<br />
80<br />
3 Wash the back<strong>in</strong>g gently to loosen debris; do not scrub the back<strong>in</strong>g.<br />
4 Dry the back<strong>in</strong>g with a chamois or soft cloth.<br />
Caution! Do not use paper-based wipes as these might scratch the<br />
back<strong>in</strong>g.<br />
5 If this does not clean the back<strong>in</strong>g well enough, repeat the previous steps<br />
us<strong>in</strong>g isopropyl (rubb<strong>in</strong>g) alcohol, and wipe the back<strong>in</strong>g thoroughly with a<br />
damp cloth to remove any residual alcohol.<br />
Use a soft cloth or slightly moistened sponge to wipe dust, smudges, and sta<strong>in</strong>s<br />
off the case. The <strong>in</strong>terior of the HP PSC does not require clean<strong>in</strong>g. Keep fluids<br />
away from the <strong>in</strong>terior of the device as well as the front panel.<br />
Note: To avoid damage to pa<strong>in</strong>ted parts of the HP PSC, do not use alcohol<br />
or alcohol-based clean<strong>in</strong>g products on the front panel or the lid of the<br />
HP PSC.<br />
work with pr<strong>in</strong>t cartridges<br />
To ensure the best pr<strong>in</strong>t quality from your HP PSC, you will need to perform some<br />
simple ma<strong>in</strong>tenance procedures and, when prompted by a front panel message,<br />
replace the pr<strong>in</strong>t cartridges.<br />
This section conta<strong>in</strong>s the follow<strong>in</strong>g topics:<br />
• check the <strong>in</strong>k levels on page 80<br />
• pr<strong>in</strong>t a self-test report on page 81<br />
• handle pr<strong>in</strong>t cartridges on page 82<br />
• replace the pr<strong>in</strong>t cartridges on page 83<br />
• use a photo pr<strong>in</strong>t cartridge on page 85<br />
• use the pr<strong>in</strong>t cartridge protector on page 85<br />
• align the pr<strong>in</strong>t cartridges on page 86<br />
• clean the pr<strong>in</strong>t cartridges on page 87<br />
• clean the pr<strong>in</strong>t cartridge contacts on page 87<br />
check the <strong>in</strong>k levels<br />
You can easily check the <strong>in</strong>k supply level to determ<strong>in</strong>e how soon you might need<br />
to replace a pr<strong>in</strong>t cartridge. The <strong>in</strong>k level supply shows an approximation of the<br />
amount of <strong>in</strong>k rema<strong>in</strong><strong>in</strong>g <strong>in</strong> the pr<strong>in</strong>t cartridges. Check<strong>in</strong>g the <strong>in</strong>k levels can only<br />
be d<strong>one</strong> from the HP Photo & Imag<strong>in</strong>g Director (HP Director).<br />
to check the <strong>in</strong>k level for W<strong>in</strong>dows users<br />
1 From the HP Director, choose Sett<strong>in</strong>gs, choose Pr<strong>in</strong>t Sett<strong>in</strong>gs, and then<br />
choose Pr<strong>in</strong>ter Toolbox.<br />
2 Click the Estimated Ink Levels tab.<br />
The estimated <strong>in</strong>k levels appear for the pr<strong>in</strong>t cartridges.<br />
<strong>hp</strong> <strong>psc</strong> <strong>2400</strong> <strong>series</strong>
eference <strong>guide</strong><br />
ma<strong>in</strong>ta<strong>in</strong> your <strong>hp</strong> <strong>psc</strong><br />
to check the <strong>in</strong>k level for Mac<strong>in</strong>tosh users<br />
1 From the HP Director, click Sett<strong>in</strong>gs, and then choose Ma<strong>in</strong>ta<strong>in</strong> Pr<strong>in</strong>ter.<br />
2 If the Select Pr<strong>in</strong>ter dialog box opens, select your HP PSC, and then click<br />
Utilities.<br />
3 From the list, select Ink Level.<br />
The estimated <strong>in</strong>k levels appear for the pr<strong>in</strong>t cartridges.<br />
pr<strong>in</strong>t a self-test report<br />
If you are experienc<strong>in</strong>g problems with pr<strong>in</strong>t<strong>in</strong>g, pr<strong>in</strong>t a Self-Test Report before you<br />
replace the pr<strong>in</strong>t cartridges. This report provides useful <strong>in</strong>formation about your<br />
pr<strong>in</strong>t cartridges, <strong>in</strong>clud<strong>in</strong>g status <strong>in</strong>formation.<br />
1 Press Setup.<br />
2 Press 1, then press 4.<br />
This selects Pr<strong>in</strong>t Report, and then selects Self-Test Report.<br />
Pr<strong>in</strong>t Report<br />
1. Last Transaction<br />
2. Fax Log<br />
3. Speed Dial List<br />
4. Self-Test Report<br />
5. Fax Report Setup<br />
The HP PSC pr<strong>in</strong>ts a Self-Test Report, which might <strong>in</strong>dicate the source of<br />
the pr<strong>in</strong>t<strong>in</strong>g problem.<br />
Test patterns<br />
L<strong>in</strong>es of color<br />
Color blocks<br />
81<br />
ma<strong>in</strong>ta<strong>in</strong> your <strong>hp</strong> <strong>psc</strong>
ma<strong>in</strong>ta<strong>in</strong> your <strong>hp</strong> <strong>psc</strong><br />
chapter 9<br />
82<br />
3 Check the Self-Test Report for the follow<strong>in</strong>g:<br />
– The test patterns are even and show a complete grid. If the grids are<br />
not complete, this might <strong>in</strong>dicate a problem with the nozzles. You might<br />
need to clean the pr<strong>in</strong>t cartridges. For more <strong>in</strong>formation, see clean the<br />
pr<strong>in</strong>t cartridges on page 87.<br />
– The Low Ink warn<strong>in</strong>g message value. The value will appear above the<br />
test pattern for the black, photo (if applicable), or tri-color pr<strong>in</strong>t<br />
cartridges. This value represents the number of Low Ink warn<strong>in</strong>g<br />
messages that have displayed for each of the pr<strong>in</strong>t cartridges. If the<br />
value displays 1, 2, or 3, the pr<strong>in</strong>t cartridge might be low on <strong>in</strong>k. You<br />
might need to replace the pr<strong>in</strong>t cartridge. For more <strong>in</strong>formation on<br />
replac<strong>in</strong>g pr<strong>in</strong>t cartridges, see replace the pr<strong>in</strong>t cartridges on page 83.<br />
– The l<strong>in</strong>es of color extend across the page.<br />
– The color blocks have even consistency. You should see cyan, magenta,<br />
yellow, violet, green, and red color blocks. If color blocks are miss<strong>in</strong>g,<br />
this might <strong>in</strong>dicate that the tri-color pr<strong>in</strong>t cartridge is out of <strong>in</strong>k. You<br />
might need to replace the pr<strong>in</strong>t cartridge. For more <strong>in</strong>formation on<br />
replac<strong>in</strong>g pr<strong>in</strong>t cartridges, see replace the pr<strong>in</strong>t cartridges on page 83.<br />
Also check for streak<strong>in</strong>g or white l<strong>in</strong>es. Streaks might <strong>in</strong>dicate clogged<br />
nozzles or dirty contacts. You might need to clean the pr<strong>in</strong>t cartridges.<br />
For more <strong>in</strong>formation on clean<strong>in</strong>g the pr<strong>in</strong>t cartridges, see clean the<br />
pr<strong>in</strong>t cartridges on page 87. Do not clean with alcohol.<br />
handle pr<strong>in</strong>t cartridges<br />
Before you replace or clean a pr<strong>in</strong>t cartridge, you should know the part names<br />
and how to handle the pr<strong>in</strong>t cartridge.<br />
Ink nozzles<br />
under tape<br />
Do not touch the copper contacts or the <strong>in</strong>k nozzles<br />
Copper contacts<br />
Plastic tape with<br />
p<strong>in</strong>k pull tab<br />
(must be removed)<br />
<strong>hp</strong> <strong>psc</strong> <strong>2400</strong> <strong>series</strong>
eference <strong>guide</strong><br />
replace the pr<strong>in</strong>t cartridges<br />
ma<strong>in</strong>ta<strong>in</strong> your <strong>hp</strong> <strong>psc</strong><br />
A message appears on the color graphics display to let you know when the <strong>in</strong>k<br />
level for the pr<strong>in</strong>t cartridge is low. When you receive this message, it is<br />
recommended that you replace the pr<strong>in</strong>t cartridge. You should also replace the<br />
pr<strong>in</strong>t cartridges when you see faded text or if you experience pr<strong>in</strong>t quality issues<br />
related to the pr<strong>in</strong>t cartridges.<br />
You might also need to replace a pr<strong>in</strong>t cartridge when you want to use the photo<br />
pr<strong>in</strong>t cartridge for pr<strong>in</strong>t<strong>in</strong>g high-quality photos.<br />
For more <strong>in</strong>formation on order<strong>in</strong>g replacement pr<strong>in</strong>t cartridges, see order<br />
supplies on page 77.<br />
1 Turn on the HP PSC, then open the pr<strong>in</strong>t-carriage access door by lift<strong>in</strong>g the<br />
handle until the door locks <strong>in</strong>to place.<br />
The pr<strong>in</strong>t carriage will be on the far right side of the HP PSC. Wait for the<br />
ramp below the pr<strong>in</strong>t carriage to lower before remov<strong>in</strong>g the pr<strong>in</strong>t<br />
cartridge.<br />
Pr<strong>in</strong>t-carriage<br />
access door<br />
Pr<strong>in</strong>t cartridge<br />
2 After the carriage stops mov<strong>in</strong>g and the ramp has lowered, lift the latch to<br />
up release the pr<strong>in</strong>t cartridge.<br />
83<br />
ma<strong>in</strong>ta<strong>in</strong> your <strong>hp</strong> <strong>psc</strong>
ma<strong>in</strong>ta<strong>in</strong> your <strong>hp</strong> <strong>psc</strong><br />
chapter 9<br />
84<br />
3 Push down on the pr<strong>in</strong>t cartridge to release it, and then pull it toward you<br />
out of its slot.<br />
4 If you are remov<strong>in</strong>g the black pr<strong>in</strong>t cartridge <strong>in</strong> order to <strong>in</strong>st<strong>all</strong> the photo<br />
pr<strong>in</strong>t cartridge, store it <strong>in</strong> the pr<strong>in</strong>t cartridge protector. For more<br />
<strong>in</strong>formation on the pr<strong>in</strong>t cartridge protector, see use the pr<strong>in</strong>t cartridge<br />
protector on page 85.<br />
5 Remove the new pr<strong>in</strong>t cartridge from its packag<strong>in</strong>g and, be<strong>in</strong>g careful to<br />
touch only the black plastic, gently remove the plastic tape by us<strong>in</strong>g the<br />
p<strong>in</strong>k pull tab.<br />
Caution! Do not touch the copper contacts or <strong>in</strong>k nozzles.<br />
6 Push the new pr<strong>in</strong>t cartridge below the metal bar at a slight angle, <strong>in</strong>to the<br />
appropriate slot, until it clicks <strong>in</strong>to place.<br />
The tri-color pr<strong>in</strong>t cartridge goes on the left and the black or photo pr<strong>in</strong>t<br />
cartridge goes on the right.<br />
<strong>hp</strong> <strong>psc</strong> <strong>2400</strong> <strong>series</strong>
eference <strong>guide</strong><br />
ma<strong>in</strong>ta<strong>in</strong> your <strong>hp</strong> <strong>psc</strong><br />
7 Press down on the latch until it stops. Make sure the latch catches below the<br />
bottom tabs.<br />
8 Close the pr<strong>in</strong>t-carriage access door.<br />
use a photo pr<strong>in</strong>t cartridge<br />
You can optimize the quality of the photos you pr<strong>in</strong>t with your HP PSC by<br />
purchas<strong>in</strong>g a photo pr<strong>in</strong>t cartridge. Remove the black pr<strong>in</strong>t cartridge and <strong>in</strong>sert<br />
the photo pr<strong>in</strong>t cartridge <strong>in</strong> its place. With the tri-color pr<strong>in</strong>t cartridge and photo<br />
pr<strong>in</strong>t cartridge <strong>in</strong>st<strong>all</strong>ed, you have a six-<strong>in</strong>k system, which provides enhanced<br />
quality photos. When you want to pr<strong>in</strong>t regular text documents, swap the black<br />
pr<strong>in</strong>t cartridge back <strong>in</strong>. Use a pr<strong>in</strong>t cartridge protector to keep your pr<strong>in</strong>t<br />
cartridge secure when it is not be<strong>in</strong>g used. For more <strong>in</strong>formation on us<strong>in</strong>g the<br />
pr<strong>in</strong>t cartridge protector, see use the pr<strong>in</strong>t cartridge protector on page 85 and<br />
for more <strong>in</strong>formation on replac<strong>in</strong>g pr<strong>in</strong>t cartridges, see replace the pr<strong>in</strong>t<br />
cartridges on page 83.<br />
For more <strong>in</strong>formation on purchas<strong>in</strong>g a photo pr<strong>in</strong>t cartridge, see order pr<strong>in</strong>t<br />
cartridges on page 77.<br />
use the pr<strong>in</strong>t cartridge protector<br />
When you purchase a photo pr<strong>in</strong>t cartridge, you will receive a pr<strong>in</strong>t cartridge<br />
protector.<br />
The pr<strong>in</strong>t cartridge protector is designed to keep your pr<strong>in</strong>t cartridge secure<br />
when it is not be<strong>in</strong>g used. It also prevents the <strong>in</strong>k from dry<strong>in</strong>g out. Whenever<br />
you remove a pr<strong>in</strong>t cartridge from the HP PSC, store it <strong>in</strong> the pr<strong>in</strong>t cartridge<br />
protector.<br />
� To <strong>in</strong>sert a pr<strong>in</strong>t cartridge <strong>in</strong>to the pr<strong>in</strong>t cartridge protector, slide the pr<strong>in</strong>t<br />
cartridge <strong>in</strong>to the pr<strong>in</strong>t cartridge protector at a slight angle and snap it<br />
securely <strong>in</strong>to place.<br />
85<br />
ma<strong>in</strong>ta<strong>in</strong> your <strong>hp</strong> <strong>psc</strong>
ma<strong>in</strong>ta<strong>in</strong> your <strong>hp</strong> <strong>psc</strong><br />
chapter 9<br />
86<br />
� To remove the pr<strong>in</strong>t cartridge from the pr<strong>in</strong>t cartridge protector, press<br />
down and back on the top of the pr<strong>in</strong>t cartridge protector to release the<br />
pr<strong>in</strong>t cartridge, then slide the pr<strong>in</strong>t cartridge out of the pr<strong>in</strong>t cartridge<br />
protector.<br />
align the pr<strong>in</strong>t cartridges<br />
The HP PSC prompts you to align cartridges every time you <strong>in</strong>st<strong>all</strong> or replace a<br />
pr<strong>in</strong>t cartridge. You can also align the pr<strong>in</strong>t cartridges at any time from the front<br />
panel or the HP Director. Align<strong>in</strong>g the pr<strong>in</strong>t cartridges ensures high-quality<br />
output.<br />
Note: If you remove and re-<strong>in</strong>st<strong>all</strong> the same pr<strong>in</strong>t cartridge, the HP PSC will<br />
not prompt you to align the pr<strong>in</strong>t cartridges.<br />
to align the pr<strong>in</strong>t cartridges from the front panel when prompted<br />
� Press OK.<br />
The HP PSC pr<strong>in</strong>ts a pr<strong>in</strong>t cartridge alignment sheet and aligns the pr<strong>in</strong>t<br />
cartridges. Recycle or discard the page.<br />
to align the cartridges from the front panel<br />
1 Press Setup.<br />
2 Press 5, then press 2.<br />
This selects Tools, and then selects Align Pr<strong>in</strong>t Cartridge.<br />
Tools<br />
1. Clean Pr<strong>in</strong>t Cartridge<br />
2. Align Pr<strong>in</strong>t Cartridge<br />
3. Restore Factory Defaults<br />
4. Repr<strong>in</strong>t Faxes <strong>in</strong> Memory<br />
The HP PSC pr<strong>in</strong>ts a pr<strong>in</strong>t cartridge alignment sheet and aligns the pr<strong>in</strong>t<br />
cartridges. Recycle or discard the page.<br />
<strong>hp</strong> <strong>psc</strong> <strong>2400</strong> <strong>series</strong>
eference <strong>guide</strong><br />
ma<strong>in</strong>ta<strong>in</strong> your <strong>hp</strong> <strong>psc</strong><br />
to align the pr<strong>in</strong>t cartridges from the <strong>hp</strong> director for W<strong>in</strong>dows users<br />
1 From the HP Director, choose Sett<strong>in</strong>gs, choose Pr<strong>in</strong>t Sett<strong>in</strong>gs, and then<br />
choose Pr<strong>in</strong>ter Toolbox.<br />
2 Click the Device Services tab.<br />
3 Click Align the Pr<strong>in</strong>t Cartridges.<br />
The HP PSC pr<strong>in</strong>ts a pr<strong>in</strong>t cartridge alignment sheet and aligns the pr<strong>in</strong>t<br />
cartridges. Recycle or discard the page.<br />
to align the pr<strong>in</strong>t cartridges from the <strong>hp</strong> director for Mac<strong>in</strong>tosh users<br />
1 From the HP Director, click Sett<strong>in</strong>gs, and then choose Ma<strong>in</strong>ta<strong>in</strong> Pr<strong>in</strong>ter.<br />
2 If the Select Pr<strong>in</strong>ter dialog box opens, select your HP PSC, and then click<br />
Utilities.<br />
3 From the list, select Calibrate.<br />
4 Click Align.<br />
The HP PSC pr<strong>in</strong>ts a pr<strong>in</strong>t cartridge alignment sheet and aligns the pr<strong>in</strong>t<br />
cartridges. Recycle or discard the page.<br />
clean the pr<strong>in</strong>t cartridges<br />
Use this feature when the Self-Test Report shows streak<strong>in</strong>g or white l<strong>in</strong>es through<br />
any of the l<strong>in</strong>es of color. Do not clean pr<strong>in</strong>t cartridges unnecessarily. This wastes<br />
<strong>in</strong>k and shortens the life of the <strong>in</strong>k nozzles.<br />
1 Press Setup.<br />
2 Press 5, then press 1.<br />
This selects Tools, and then selects Clean Pr<strong>in</strong>t Cartridge.<br />
Tools<br />
1. Clean Pr<strong>in</strong>t Cartridge<br />
2. Align Pr<strong>in</strong>t Cartridges<br />
3. Restore Factory Defaults<br />
4. Repr<strong>in</strong>t Faxes <strong>in</strong> Memory<br />
If copy or pr<strong>in</strong>t quality still seem poor after you clean the pr<strong>in</strong>t cartridges,<br />
replace the pr<strong>in</strong>t cartridge that is affected. For <strong>in</strong>formation on replac<strong>in</strong>g<br />
pr<strong>in</strong>t cartridges, see replace the pr<strong>in</strong>t cartridges on page 83.<br />
clean the pr<strong>in</strong>t cartridge contacts<br />
Clean the pr<strong>in</strong>t cartridge contacts only if you get repeated front panel messages<br />
prompt<strong>in</strong>g you to check a pr<strong>in</strong>t cartridge after you already have cleaned or<br />
aligned the pr<strong>in</strong>t cartridges.<br />
Caution! Do not remove both pr<strong>in</strong>t cartridges at the same time.<br />
Remove and clean each pr<strong>in</strong>t cartridge <strong>one</strong> at a time.<br />
87<br />
ma<strong>in</strong>ta<strong>in</strong> your <strong>hp</strong> <strong>psc</strong>
ma<strong>in</strong>ta<strong>in</strong> your <strong>hp</strong> <strong>psc</strong><br />
chapter 9<br />
88<br />
Make sure you have the follow<strong>in</strong>g materials available:<br />
• Dry foam rubber swabs, l<strong>in</strong>t-free cloth, or any soft material that will not<br />
come apart or leave fibers.<br />
• Distilled, filtered, or bottled water (tap water might conta<strong>in</strong> contam<strong>in</strong>ants<br />
that can damage the pr<strong>in</strong>t cartridges).<br />
Caution! Do not use platen cleaners or alcohol to clean the pr<strong>in</strong>t<br />
cartridge contacts. These can damage the pr<strong>in</strong>t cartridge or the<br />
HP PSC.<br />
1 Turn the HP PSC on and open the pr<strong>in</strong>t-carriage access door.<br />
The pr<strong>in</strong>t carriage will be on the far right side of the HP PSC. Wait for the<br />
ramp below the pr<strong>in</strong>t carriage to lower before remov<strong>in</strong>g the pr<strong>in</strong>t<br />
cartridge.<br />
2 After the pr<strong>in</strong>t carriage has moved to the right and the ramp has lowered,<br />
unplug the power cord from the back of the HP PSC.<br />
3 Lift the latch to release the pr<strong>in</strong>t cartridge, then pull it out of its slot.<br />
4 Inspect the pr<strong>in</strong>t cartridge contacts for <strong>in</strong>k and debris buildup.<br />
5 Dip a clean foam rubber swab or l<strong>in</strong>t-free cloth <strong>in</strong>to distilled water, and<br />
squeeze any excess water from it.<br />
6 Hold the pr<strong>in</strong>t cartridge by its sides.<br />
7 Clean only the contacts. Do not clean the nozzles.<br />
Nozzles<br />
(do not clean)<br />
Contacts<br />
8 Place the pr<strong>in</strong>t cartridge back <strong>in</strong>to the carriage and close the latch.<br />
9 Repeat if necessary for the other pr<strong>in</strong>t cartridge.<br />
10 Gently close the pr<strong>in</strong>t-carriage access door and plug <strong>in</strong> the HP PSC.<br />
<strong>hp</strong> <strong>psc</strong> <strong>2400</strong> <strong>series</strong>
estore factory defaults<br />
<strong>reference</strong> <strong>guide</strong><br />
ma<strong>in</strong>ta<strong>in</strong> your <strong>hp</strong> <strong>psc</strong><br />
You can restore the orig<strong>in</strong>al factory sett<strong>in</strong>gs to what they were when you<br />
purchased your HP PSC.<br />
Note: Restor<strong>in</strong>g the factory defaults will not change the date <strong>in</strong>formation<br />
you set, nor will it affect any changes you made to scan sett<strong>in</strong>gs and the<br />
language and country/region sett<strong>in</strong>gs.<br />
You can perform this process from the front panel only.<br />
1 Press Setup.<br />
2 Press 5, then press 3.<br />
This selects Tools, and then selects Restore Factory Defaults.<br />
set the power save time<br />
Tools<br />
1. Clean Pr<strong>in</strong>t Cartridge<br />
2. Align Pr<strong>in</strong>t Cartridges<br />
3. Restore Factory Defaults<br />
4. Repr<strong>in</strong>t Faxes <strong>in</strong> Memory<br />
The factory default sett<strong>in</strong>gs are restored.<br />
The bulb <strong>in</strong> your HP PSC rema<strong>in</strong>s on for a specified period so that the HP PSC<br />
is immediately ready to respond to your request. When the HP PSC has not been<br />
used with<strong>in</strong> that specified period, it turns the bulb off to preserve power and<br />
displays Power Save On <strong>in</strong> the color graphics display. You can exit this mode<br />
by press<strong>in</strong>g any button on the front panel.<br />
Your HP PSC is automatic<strong>all</strong>y set to enter power-save mode after 12 hours. You<br />
can also choose 1, 4, 8, or 12 hours for the prompt delay time. Follow these<br />
steps if you want the HP PSC to enter this mode earlier.<br />
1 Press Setup.<br />
2 Press 7, then press 2.<br />
This selects P<strong>reference</strong>s, and then selects Set Power Save Mode Time.<br />
P<strong>reference</strong>s<br />
1. Set Language & Country/Region<br />
2. Set Power Save Mode Time<br />
3. Set Prompt Delay Time<br />
3 Press until the appropriate time appears, then press OK.<br />
89<br />
ma<strong>in</strong>ta<strong>in</strong> your <strong>hp</strong> <strong>psc</strong>
ma<strong>in</strong>ta<strong>in</strong> your <strong>hp</strong> <strong>psc</strong><br />
chapter 9<br />
set the prompt delay time<br />
90<br />
The Prompt Delay Time option <strong>all</strong>ows you to control the amount of time that<br />
passes before a message prompts you to take further action. For example, if you<br />
press Copy and the prompt delay time passes without you press<strong>in</strong>g another<br />
button, “Press Start to beg<strong>in</strong>” appears <strong>in</strong> the front panel display. You can choose<br />
Normal, Fast, or Slow. The default is Normal.<br />
1 Press Setup.<br />
2 Press 7, then press 3.<br />
This selects P<strong>reference</strong>s, and then selects Set Prompt Delay Time.<br />
P<strong>reference</strong>s<br />
1. Set Language & Country/Region<br />
2. Set Power Save Mode Time<br />
3. Set Prompt Delay Time<br />
3 Press until the delay time appears, then press OK.<br />
<strong>hp</strong> <strong>psc</strong> <strong>2400</strong> <strong>series</strong>
10<br />
get <strong>hp</strong> <strong>psc</strong> support<br />
Hewlett-Packard provides Internet and ph<strong>one</strong> support for your HP PSC.<br />
This section conta<strong>in</strong>s the follow<strong>in</strong>g topics:<br />
• get support and other <strong>in</strong>formation from the Internet on page 91<br />
• <strong>hp</strong> customer support on page 91<br />
• prepare your <strong>hp</strong> <strong>psc</strong> for shipment on page 94<br />
• <strong>hp</strong> distribution center on page 96<br />
If you are unable to f<strong>in</strong>d the answer you need <strong>in</strong> the pr<strong>in</strong>ted or onscreen documentation<br />
supplied with your product, you can contact <strong>one</strong> of the HP support services listed <strong>in</strong> the<br />
follow<strong>in</strong>g pages. Some support services are available only <strong>in</strong> the U.S. and Canada, while<br />
others are available <strong>in</strong> many countries worldwide. If a support service number is not listed<br />
for your country/region, contact your nearest authorized HP dealer for help.<br />
get support and other <strong>in</strong>formation from the Internet<br />
If you have Internet access, you can get help for the HP PSC <strong>2400</strong> Series from the follow<strong>in</strong>g<br />
HP website:<br />
www.<strong>hp</strong>.com/support<br />
This website offers technical support, drivers, supplies, and order<strong>in</strong>g <strong>in</strong>formation.<br />
<strong>hp</strong> customer support<br />
Software programs from other companies might be <strong>in</strong>cluded with your HP PSC. If you<br />
experience problems with any of those programs, you will receive the best technical<br />
assistance by c<strong>all</strong><strong>in</strong>g the experts at that company.<br />
If you need to contact HP Customer Support, do the follow<strong>in</strong>g before you c<strong>all</strong>.<br />
1 Make sure that:<br />
a. Your HP PSC is plugged <strong>in</strong> and turned on.<br />
b. The specified pr<strong>in</strong>t cartridges are <strong>in</strong>st<strong>all</strong>ed correctly.<br />
c. The recommended paper is properly loaded <strong>in</strong> the <strong>in</strong>put tray.<br />
2 Reset your HP PSC:<br />
a. Turn off the HP PSC by us<strong>in</strong>g the On button located on the front panel.<br />
b. Unplug the power cord from the back of the device.<br />
c. Plug the power cord back <strong>in</strong>to the HP PSC.<br />
d. Turn on the HP PSC by us<strong>in</strong>g the On button.<br />
3 For more <strong>in</strong>formation, check the HP website at:<br />
www.<strong>hp</strong>.com/support<br />
91<br />
<strong>hp</strong> <strong>psc</strong> support
<strong>hp</strong> <strong>psc</strong> support<br />
chapter 10<br />
92<br />
4 If you are still experienc<strong>in</strong>g problems and need to speak with an HP Customer<br />
Support Representative do the follow<strong>in</strong>g:<br />
– Have the specific name of your HP PSC, as it appears on the device, available.<br />
– Have your serial number and service ID ready. To display your serial number,<br />
press OK and Start Black at the same time, until the serial number appears <strong>in</strong><br />
the color graphics display. To display your service ID, press OK and Start Color<br />
at the same time, until Service ID: and the number appear <strong>in</strong> the color graphics<br />
display.<br />
– Pr<strong>in</strong>t a Self-Test Report. See pr<strong>in</strong>t a self-test report on page 81 for <strong>in</strong>formation<br />
on pr<strong>in</strong>t<strong>in</strong>g this report.<br />
– Make a color copy.<br />
– Be prepared to describe your problem <strong>in</strong> detail.<br />
5 C<strong>all</strong> HP Customer Support. Be near your HP PSC when you c<strong>all</strong>.<br />
c<strong>all</strong> <strong>in</strong> North America dur<strong>in</strong>g warranty<br />
C<strong>all</strong> 1-800-HP-INVENT. US ph<strong>one</strong> support is available <strong>in</strong> both English and Spanish<br />
languages 24 hours a day, 7 days a week (days and hours of support may change without<br />
notice). This service is free dur<strong>in</strong>g the warranty period. A fee may apply outside the<br />
warranty period.<br />
c<strong>all</strong> elsewhere <strong>in</strong> the world<br />
The numbers listed below are current as of the publication date of this <strong>guide</strong>. For a list of<br />
current <strong>in</strong>ternational HP Support Service numbers, go to the website listed below and<br />
choose your own country/region or language:<br />
www.<strong>hp</strong>.com/support<br />
You can c<strong>all</strong> the HP support center <strong>in</strong> the follow<strong>in</strong>g countries/regions. If your countries/<br />
regions is not listed, contact your local dealer or nearest HP Sales and Support Office to<br />
f<strong>in</strong>d out how to obta<strong>in</strong> services.<br />
Support service is free dur<strong>in</strong>g the warranty period; however, your standard long-distance<br />
ph<strong>one</strong> charges will apply. In some cases, a flat fee per s<strong>in</strong>gle <strong>in</strong>cident will also apply.<br />
For ph<strong>one</strong> support <strong>in</strong> Europe, please check for the details and conditions of ph<strong>one</strong> support<br />
<strong>in</strong> your country/region. Go to the follow<strong>in</strong>g website:<br />
www.<strong>hp</strong>.com/support<br />
Alternatively, you can ask your dealer or c<strong>all</strong> HP at the ph<strong>one</strong> number provided <strong>in</strong> this<br />
booklet.<br />
As part of our constant efforts to improve our ph<strong>one</strong> support service, we advise you to<br />
check our website on a regular basis for new <strong>in</strong>formation regard<strong>in</strong>g service features and<br />
delivery.<br />
country/region <strong>hp</strong> technical support country/region <strong>hp</strong> technical support<br />
Algeria 1<br />
Argent<strong>in</strong>a (54)11-4778-8380<br />
0-810-555-5520<br />
Australia +61 3 8877 8000<br />
1902 910 910<br />
+213(0)61 56 45 43 Luxembourg (French) 900 40 006<br />
Luxembourg (German) 900 40 007<br />
Malaysia 1-800-805405<br />
Austria +43 (0) 820 87 4417 Mexico 01-800-472-6684<br />
Bahra<strong>in</strong> (Dubai) +973 800 728 Mexico (Mexico City) 5258-9922<br />
Belgium (Dutch) +32 (0) 70 300 005 Morocco 1<br />
+212 224 047 47<br />
Belgium (French) +32 (0) 70 300 004 Netherlands (0.10 Euro/<br />
m<strong>in</strong>.)<br />
0900 2020 165<br />
<strong>hp</strong> <strong>psc</strong> <strong>2400</strong> <strong>series</strong>
eference <strong>guide</strong><br />
get <strong>hp</strong> <strong>psc</strong> support<br />
country/region <strong>hp</strong> technical support country/region <strong>hp</strong> technical support<br />
Bolivia 800-100247 New Zealand 0800 441 147<br />
Brazil (Grande São<br />
Paulo)<br />
Brazil (Demais<br />
Localidades)<br />
Canada dur<strong>in</strong>g<br />
warranty<br />
Canada post-warranty<br />
(per-c<strong>all</strong> charge)<br />
Caribbean & Central<br />
America<br />
(11) 3747 7799 Norway +47 815 62 070<br />
0800 157751 Oman +971 4 883 8454<br />
(905) 206 4663 Palest<strong>in</strong>e +971 4 883 8454<br />
1-877-621-4722 Panama 001-800-7112884<br />
1-800-711-2884 Peru 0-800-10111<br />
Chile 800-360-999 Philipp<strong>in</strong>es 632-867-3551<br />
Ch<strong>in</strong>a 86-21-38814518<br />
8008206616<br />
Poland +48 22 865 98 00<br />
Colombia 9-800-114-726 Portugal +351 808 201 492<br />
Costa Rica 0-800-011-0524 Puerto Rico 1-877-232-0589<br />
Czech Republic +42 (0) 2 6130 7310 Qatar +971 4 883 8454<br />
Denmark +45 70202845 Romania +40 1 315 44 42<br />
Ecuador (And<strong>in</strong>atel) 999119+1-800-<br />
7112884<br />
Ecuador (Pacifitel) 1-800-225528+1-800-<br />
7112884<br />
Russia, Moscow +7 095 797 3520<br />
Russia, St. Petersburg +7 812 346 7997<br />
Europe (English) +44 (0) 207 512 5202 Saudi Arabia +966 800 897 1444<br />
Egypt +20 02 532 5222 S<strong>in</strong>gapore (65) 272-5300<br />
F<strong>in</strong>land +358 (0) 203 66 767 Slovakia + 421 2 6820 8080<br />
France (0.34 Euro/<br />
m<strong>in</strong>.)<br />
Germany (0.12 Euro/<br />
m<strong>in</strong>.)<br />
+33 (0) 892 6960 22 South Africa (RSA) 086 000 1030<br />
+49 (0) 180 5652 180 South Africa, Outside<br />
Republic<br />
+27-11 258 9301<br />
Greece +30 10 6073 603 Spa<strong>in</strong> +34 902 010 059<br />
Hong Kong +85 (2) 3002 8555 Sweden +46 (0)77 120 4765<br />
Guatemala 1800-995-5105 Switzerland 2 (0.08 CHF/<br />
m<strong>in</strong>. dur<strong>in</strong>g peak hours,<br />
0.04 CHF/m<strong>in</strong>. dur<strong>in</strong>g offpeak<br />
hours)<br />
+41 (0) 848 672 672<br />
Hungary +36 (0) 1 382 1111 Taiwan +886-2-2717-0055<br />
0800 010 055<br />
India 1-600-112267<br />
91 11 682 6035<br />
Thailand +66 (2) 661 4000<br />
Ind<strong>one</strong>sia 62-21-350-3408 Tunisia 1 +216 1 891 222<br />
Ireland +353 1890 923902 Turkey +90 216 579 7171<br />
Israel +972 (0) 9 803 4848 Ukra<strong>in</strong>e +7 (380-44) 490-3520<br />
93<br />
<strong>hp</strong> <strong>psc</strong> support
<strong>hp</strong> <strong>psc</strong> support<br />
chapter 10<br />
country/region <strong>hp</strong> technical support country/region <strong>hp</strong> technical support<br />
Italy +39 848 800 871 United Arab Emirates +971 4 883 845<br />
Japan 0570 000 511<br />
+81 3 3335 9800<br />
94<br />
c<strong>all</strong> <strong>in</strong> Australia post-warranty<br />
If your product is not under warranty, you can c<strong>all</strong> 03 8877 8000. A per-<strong>in</strong>cident, out-ofwarranty<br />
support fee of $27.50 (<strong>in</strong>c GST) will be charged to your credit card. You can also<br />
c<strong>all</strong> 1902 910 910 ($27.50 charged to your ph<strong>one</strong> account) from 9:00 A.M. to<br />
5:00 P.M. Monday through Friday. Charges and support hours are subject to change<br />
without notice.<br />
prepare your <strong>hp</strong> <strong>psc</strong> for shipment<br />
United K<strong>in</strong>gdom +44 (0) 870 010 4320<br />
Jordan +971 4 883 8454 Venezuela 01-800-4746.8368<br />
Korea +82 1588 3003 Venezuela (Caracas) (502) 207-8488<br />
Kuwait +971 4 883 8454 Vietnam 84-8-823-4530<br />
Lebanon +971 4 883 8454 Yemen +971 4 883 8454<br />
1 This C<strong>all</strong> Center supports French-speak<strong>in</strong>g customers from the follow<strong>in</strong>g countries: Morocco,<br />
Tunisia, and Algeria.<br />
2 This C<strong>all</strong> Center supports German-, French- and Italian-speak<strong>in</strong>g customers <strong>in</strong> Switzerland.<br />
If after contact<strong>in</strong>g HP Customer Support or return<strong>in</strong>g to the po<strong>in</strong>t of purchase, you are<br />
requested to send your HP PSC <strong>in</strong> for service, please follow the power off and repackage<br />
steps below to avoid further damage to the HP product.<br />
1 Turn on the HP PSC.<br />
Disregard steps 1 through 6 if your device will not turn on and the pr<strong>in</strong>t carriage is<br />
<strong>in</strong> the home position. You will not be able to remove the pr<strong>in</strong>t cartridges. Proceed to<br />
step 7.<br />
2 Open the pr<strong>in</strong>t-carriage access door.<br />
3 Remove the pr<strong>in</strong>t cartridges from their holders, and lower the latches. See replace<br />
the pr<strong>in</strong>t cartridges on page 83 for <strong>in</strong>formation on remov<strong>in</strong>g the pr<strong>in</strong>t cartridges.<br />
Caution! Remove both pr<strong>in</strong>t cartridges and lower both latches. Failure to<br />
do so might damage your HP PSC.<br />
4 Place the pr<strong>in</strong>t cartridges <strong>in</strong> an airtight bag so they will not dry out, and put them<br />
aside. Do not send them with the HP PSC, unless <strong>in</strong>structed to by the HP customer<br />
support c<strong>all</strong> agent.<br />
5 Close the pr<strong>in</strong>t-carriage access door and wait a few m<strong>in</strong>utes for the pr<strong>in</strong>t carriage to<br />
move back to its home position.<br />
6 Turn off the HP PSC.<br />
<strong>hp</strong> <strong>psc</strong> <strong>2400</strong> <strong>series</strong>
eference <strong>guide</strong><br />
get <strong>hp</strong> <strong>psc</strong> support<br />
7 Remove the front panel cover as follows:<br />
a. Make sure the color graphics display is ly<strong>in</strong>g flat aga<strong>in</strong>st the HP PSC.<br />
b. Place your f<strong>in</strong>ger on the top right corner of the front panel cover.<br />
c. Gently pry the corner up and lift the front panel cover from the device as shown<br />
below.<br />
Tip: You can also use a th<strong>in</strong>, flat object, such as a credit card, to lift the<br />
front panel cover. Gently slide the credit card at a slight angle, about 45<br />
degrees, between the color graphics display and the front panel cover.<br />
Apply slight downward pressure to lift the front panel cover.<br />
8 Reta<strong>in</strong> the front panel cover. Do not return the front panel cover with the HP PSC.<br />
9 If available, pack the HP PSC for shipment by us<strong>in</strong>g the orig<strong>in</strong>al pack<strong>in</strong>g materials or<br />
the packag<strong>in</strong>g materials that came with your exchange device.<br />
If you do not have the orig<strong>in</strong>al packag<strong>in</strong>g materials, please use other adequate<br />
packag<strong>in</strong>g materials. Shipp<strong>in</strong>g damage caused by improper packag<strong>in</strong>g and/or<br />
improper transportation is not covered under the warranty.<br />
95<br />
<strong>hp</strong> <strong>psc</strong> support
<strong>hp</strong> <strong>psc</strong> support<br />
chapter 10<br />
96<br />
10 Place the return shipp<strong>in</strong>g label on the outside of the box.<br />
11 Include the follow<strong>in</strong>g items <strong>in</strong> the box:<br />
– A brief description of symptoms for service personnel (samples of pr<strong>in</strong>t quality<br />
problems are helpful).<br />
– A copy of the sales slip or other proof of purchase to establish the warranty<br />
coverage period.<br />
– Your name, address, and a ph<strong>one</strong> number where you can be reached dur<strong>in</strong>g<br />
the day.<br />
<strong>hp</strong> distribution center<br />
To order HP PSC software, a copy of the pr<strong>in</strong>ted Reference Guide, a Setup Poster, or other<br />
customer-replaceable parts, do <strong>one</strong> of the follow<strong>in</strong>g:<br />
• In the U.S. or Canada, c<strong>all</strong> 1-800-HP-INVENT (1-800-474-6836).<br />
• Outside of this country/region, go to this website:<br />
www.<strong>hp</strong>.com/support<br />
<strong>hp</strong> <strong>psc</strong> <strong>2400</strong> <strong>series</strong>
11<br />
warranty <strong>in</strong>formation<br />
Your HP PSC comes with a limited warranty that is described <strong>in</strong> this section. Information<br />
about how to obta<strong>in</strong> warranty service and how you can upgrade your standard factory<br />
warranty is also provided.<br />
This section conta<strong>in</strong>s the follow<strong>in</strong>g topics:<br />
• duration of limited warranty on page 97<br />
• warranty service on page 97<br />
• warranty upgrades on page 97<br />
• return<strong>in</strong>g your <strong>hp</strong> <strong>psc</strong> for service on page 98<br />
• hewlett-packard limited global warranty statement on page 98<br />
duration of limited warranty<br />
warranty service<br />
Duration of Limited Warranty (hardware and labor): 1 Year<br />
Duration of Limited Warranty (CD media): 90 Days<br />
Duration of Limited Warranty (<strong>in</strong>k cartridges): Until the genu<strong>in</strong>e HP <strong>in</strong>k is depleted, or the<br />
“end of warranty” date pr<strong>in</strong>ted on the product is reached, whichever occurs first.<br />
express service<br />
warranty upgrades<br />
To obta<strong>in</strong> HP express repair service, the customer must contact an HP service office or an<br />
HP Customer Support Center for basic troubleshoot<strong>in</strong>g first. See <strong>hp</strong> customer support on<br />
page 91 for steps to take before c<strong>all</strong><strong>in</strong>g Customer Support.<br />
If a customer device needs a m<strong>in</strong>or part replacement and these parts can norm<strong>all</strong>y be<br />
replaced by the customer, the customer-replaceable comp<strong>one</strong>nts may be serviced through<br />
expedited part shipment. In this event, HP will prepay shipp<strong>in</strong>g charges, duty and taxes;<br />
provide teleph<strong>one</strong> assistance on replacement of the comp<strong>one</strong>nt; and pay shipp<strong>in</strong>g<br />
charges, duty, and taxes for any part that HP asks to be returned.<br />
The HP Customer Support Center may direct customers to designated authorized service<br />
providers who are certified by HP to service the HP product.<br />
Upgrade your standard factory warranty to a total of three years with the<br />
HP SUPPORTPACK. Service coverage beg<strong>in</strong>s on product purchase date and the pack must<br />
be purchased with<strong>in</strong> the first 180 days of product purchase. This program offers ph<strong>one</strong><br />
support from 6:00 A.M. to 10:00 P.M. Mounta<strong>in</strong> Standard Time (MST) Monday through<br />
Friday and 9:00 A.M. to 4:00 P.M. (MST) on Saturdays. If dur<strong>in</strong>g your technical support<br />
c<strong>all</strong> it is determ<strong>in</strong>ed that you need a replacement product, then HP will ship you this product<br />
next bus<strong>in</strong>ess day free of charge. Available <strong>in</strong> U.S. only.<br />
For more <strong>in</strong>formation, please c<strong>all</strong> 1-888-999-4747 or visit the HP website:<br />
www.<strong>hp</strong>.com/go/<strong>hp</strong>supportpack<br />
Outside the U.S., please c<strong>all</strong> your local HP Customer Support office. See c<strong>all</strong> elsewhere <strong>in</strong><br />
the world on page 92 for a list of <strong>in</strong>ternational Customer Support numbers.<br />
97<br />
warranty <strong>in</strong>formation
warranty <strong>in</strong>formation<br />
chapter 11<br />
return<strong>in</strong>g your <strong>hp</strong> <strong>psc</strong> for service<br />
98<br />
Before return<strong>in</strong>g your HP PSC for service, you must c<strong>all</strong> HP Customer Support. See<br />
<strong>hp</strong> customer support on page 91 for steps to take before c<strong>all</strong><strong>in</strong>g Customer Support.<br />
hewlett-packard limited global warranty statement<br />
The follow<strong>in</strong>g <strong>in</strong>formation specifies the HP limited global warranty.<br />
This section conta<strong>in</strong>s the follow<strong>in</strong>g topics:<br />
• extent of limited warranty on page 98<br />
• limitations of warranty on page 99<br />
• limitations of liability on page 99<br />
• local law on page 99<br />
• limited warranty <strong>in</strong>formation for EU countries on page 100<br />
extent of limited warranty<br />
Hewlett-Packard (“HP”) warrants to the end-user customer (“Customer”) that each HP PSC<br />
<strong>2400</strong> Series product (“Product”), <strong>in</strong>clud<strong>in</strong>g related software, accessories, media, and<br />
supplies, sh<strong>all</strong> be free from defects <strong>in</strong> material and workmanship for the duration, which<br />
beg<strong>in</strong>s on the date of purchase by the Customer.<br />
For each hardware Product, the duration of HP’s limited warranty is <strong>one</strong> year for parts<br />
and <strong>one</strong> year for labor. For <strong>all</strong> other Products, the duration of HP’s limited warranty for<br />
both parts and labor is n<strong>in</strong>ety days.<br />
For each software Product, HP’s limited warranty applies only to a failure to execute<br />
programm<strong>in</strong>g <strong>in</strong>structions. HP does not warrant that the operation of any Product sh<strong>all</strong> be<br />
un<strong>in</strong>terrupted or error free.<br />
HP’s limited warranty covers only those defects which arise as a result of normal use of a<br />
Product, and does not cover any other problems, <strong>in</strong>clud<strong>in</strong>g those which arise as a result of<br />
(a) improper ma<strong>in</strong>tenance or modification, (b) software, accessories, media, or supplies<br />
not provided or supported by HP, or (c) operation outside the Product’s specifications.<br />
For any hardware Product, the use of a non-HP <strong>in</strong>k cartridge or a refilled <strong>in</strong>k cartridge does<br />
not affect either the warranty to the Customer or any HP support contract with the Customer.<br />
However, if Product failure or damage is attributable to the use of a non-HP or refilled <strong>in</strong>k<br />
cartridge, HP sh<strong>all</strong> charge its standard labor and materials charges to service the Product<br />
for the failure or damage.<br />
If HP receives, dur<strong>in</strong>g the applicable warranty period, notice of a defect <strong>in</strong> any Product,<br />
HP sh<strong>all</strong> either repair or replace the defective Product, at HP’s option. Where labor charges<br />
are not covered by HP’s limited warranty, repairs sh<strong>all</strong> be at HP’s standard charges for<br />
labor.<br />
If HP is unable to repair or replace, as applicable, a defective Product which is covered by<br />
HP’s warranty, HP sh<strong>all</strong>, with<strong>in</strong> a reasonable time after be<strong>in</strong>g notified of the defect, refund<br />
the purchase price for the Product.<br />
HP sh<strong>all</strong> have no obligation to repair, replace, or refund until the Customer returns the<br />
defective Product to HP.<br />
Any replacement product may be either new or like-new, provided that it has functionality<br />
at least equal to that of the Product be<strong>in</strong>g replaced.<br />
HP products, <strong>in</strong>clud<strong>in</strong>g each Product, may conta<strong>in</strong> remanufactured parts, comp<strong>one</strong>nts, or<br />
materials equivalent to new <strong>in</strong> performance.<br />
<strong>hp</strong> <strong>psc</strong> <strong>2400</strong> <strong>series</strong>
eference <strong>guide</strong><br />
warranty <strong>in</strong>formation<br />
HP’s limited warranty for each Product is valid <strong>in</strong> any country/region or locality where HP<br />
has a support presence for the Product and where HP has marketed the Product. The level<br />
of warranty service may vary accord<strong>in</strong>g to local standards. HP sh<strong>all</strong> have no obligation to<br />
alter the form, fit, or function of the Product <strong>in</strong> order to make it operate <strong>in</strong> a country/region<br />
or locality for which the Product was never <strong>in</strong>tended to operate.<br />
limitations of warranty<br />
TO THE EXTENT ALLOWED BY LOCAL LAW, NEITHER HP NOR ITS THIRD PARTY<br />
SUPPLIERS MAKE ANY OTHER WARRANTY OR CONDITION OF ANY KIND, WHETHER<br />
EXPRESS OR IMPLIED, WITH RESPECT TO THE COVERED HP PRODUCTS, AND<br />
SPECIFICALLY DISCLAIM THE IMPLIED WARRANTIES OR CONDITIONS OF<br />
MERCHANTABILITY, SATISFACTORY QUALITY, AND FITNESS FOR A PARTICULAR<br />
PURPOSE.<br />
limitations of liability<br />
local law<br />
To the extent <strong>all</strong>owed by local law, the remedies provided <strong>in</strong> this Limited Warranty<br />
Statement are the Customer’s sole and exclusive remedies.<br />
TO THE EXTENT ALLOWED BY LOCAL LAW, EXCEPT FOR THE OBLIGATIONS<br />
SPECIFICALLY SET FORTH IN THIS LIMITED WARRANTY STATEMENT, IN NO EVENT<br />
SHALL HP OR ITS THIRD PARTY SUPPLIERS BE LIABLE FOR DIRECT, INDIRECT, SPECIAL,<br />
INCIDENTAL, OR CONSEQUENTIAL DAMAGES, WHETHER BASED ON CONTRACT,<br />
TORT, OR ANY OTHER LEGAL THEORY AND WHETHER ADVISED OF THE POSSIBILITY<br />
OF SUCH DAMAGES.<br />
This Limited Warranty Statement gives the Customer specific legal rights. The Customer may<br />
also have other rights which vary from state to state <strong>in</strong> the United States, from prov<strong>in</strong>ce to<br />
prov<strong>in</strong>ce <strong>in</strong> Canada, and from country/region to country/region elsewhere <strong>in</strong> the world.<br />
To the extent this Limited Warranty Statement is <strong>in</strong>consistent with local law, this Statement<br />
sh<strong>all</strong> be deemed modified to be consistent with such local law. Under such local law,<br />
certa<strong>in</strong> disclaimers and limitations of this Statement may not apply to the Customer. For<br />
example, some states <strong>in</strong> the United States, as well as some governments outside the United<br />
States (<strong>in</strong>clud<strong>in</strong>g prov<strong>in</strong>ces <strong>in</strong> Canada), may:<br />
Preclude the disclaimers and limitations <strong>in</strong> this Statement from limit<strong>in</strong>g the statutory rights<br />
of a consumer (e.g. the United K<strong>in</strong>gdom);<br />
Otherwise restrict the ability of a manufacturer to enforce such disclaimers or limitations; or<br />
Grant the Customer additional warranty rights, specify the duration of implied warranties<br />
which the manufacturer cannot disclaim, or not <strong>all</strong>ow limitations on the duration of implied<br />
warranties.<br />
FOR CONSUMER TRANSACTIONS IN AUSTRALIA AND NEW ZEALAND, THE TERMS<br />
IN THIS LIMITED WARRANTY STATEMENT, EXCEPT TO THE EXTENT LAWFULLY<br />
PERMITTED, DO NOT EXCLUDE, RESTRICT, OR MODIFY, AND ARE IN ADDITION TO,<br />
THE MANDATORY STATUTORY RIGHTS APPLICABLE TO THE SALE OF THE COVERED HP<br />
PRODUCTS TO SUCH CUSTOMERS.<br />
99<br />
warranty <strong>in</strong>formation
warranty <strong>in</strong>formation<br />
chapter 11<br />
100<br />
limited warranty <strong>in</strong>formation for EU countries<br />
Listed below are the names and addresses of the HP entities which grant HP’s Limited<br />
Warranty (manufacturer’s warranty) <strong>in</strong> EU countries.<br />
You may also have statutory legal rights aga<strong>in</strong>st the seller on the basis of the purchase<br />
agreement <strong>in</strong> addition to the manufacturer’s warranty, which are not restricted by this<br />
manufacturer’s warranty.<br />
Belgique/Luxembourg<br />
Hewlett-Packard Belgium SA/NV<br />
Woluwedal 100<br />
Boulevard de la Woluwe<br />
B-1200 Brussels<br />
Danmark<br />
Hewlett-Packard A/S<br />
Kongevejen 25<br />
DK-3460 Birkeroed<br />
France<br />
Hewlett-Packard France<br />
1 Avenue du Canada<br />
Z<strong>one</strong> d’Activite de Courtaboeuf<br />
F-91947 Les Ulis Cedex<br />
Deutschland<br />
Hewlett-Packard GmbH<br />
Herrenberger Straße 110-140<br />
D-71034 Böbl<strong>in</strong>gen<br />
España<br />
Hewlett-Packard Española S.A.<br />
Carretera Nacional VI<br />
km 16.500<br />
28230 Las Rozas<br />
E-Madrid<br />
Greece<br />
Hewlett-Packard Hellas<br />
265, Mesogion Avenue<br />
15451 N. Psychiko Athens<br />
Italia<br />
Hewlett-Packard Italiana S.p.A<br />
Via G. Di Vittorio 9<br />
20063 Cernusco sul Naviglio<br />
I-Milano<br />
Ireland<br />
Hewlett-Packard Ireland Ltd.<br />
30 Herbert Street<br />
IRL-Dubl<strong>in</strong> 2<br />
Nederland<br />
Hewlett-Packard Nederland BV<br />
Startbaan 16<br />
1187 XR Amstelveen NL<br />
Portugal<br />
Hewlett-Packard Portugal - Sistemas de<br />
Informática e de Medida S.A.<br />
Edificio D. Sancho I<br />
Qu<strong>in</strong>ta da Fonte<br />
Porto Salvo<br />
2780-730 Paco de Arcos<br />
P-Oeiras<br />
Österreich<br />
Hewlett-Packard Ges.m.b.H.<br />
Lieblgasse 1<br />
A-1222 Wien<br />
Suomi<br />
Hewlett-Packard Oy<br />
Piispank<strong>all</strong>iontie 17<br />
FIN-02200 Espoo<br />
Sverige<br />
Hewlett-Packard Sverige AB<br />
Skalholtsgatan 9<br />
S-164 97 Kista<br />
United K<strong>in</strong>gdom<br />
Hewlett-Packard Ltd<br />
Ca<strong>in</strong> Road<br />
Bracknell<br />
GB-Berks RG12 1HN<br />
<strong>hp</strong> <strong>psc</strong> <strong>2400</strong> <strong>series</strong>
12<br />
technical <strong>in</strong>formation<br />
The technical specifications and <strong>in</strong>ternational regulatory <strong>in</strong>formation for your HP PSC are<br />
provided <strong>in</strong> this section.<br />
This section conta<strong>in</strong>s the follow<strong>in</strong>g topics:<br />
• system requirements on page 101<br />
• paper specifications on page 102<br />
• pr<strong>in</strong>t specifications on page 104<br />
• pr<strong>in</strong>t marg<strong>in</strong> specifications on page 104<br />
• copy specifications on page 105<br />
• fax specifications on page 106<br />
• photo memory card specifications on page 106<br />
• scan specifications on page 107<br />
• physical specifications on page 107<br />
• power specifications on page 107<br />
• environmental specifications on page 107<br />
• additional specifications on page 107<br />
• environmental product stewardship program on page 108<br />
• regulatory notices on page 109<br />
system requirements<br />
The follow<strong>in</strong>g specifications are subject to change without notice.<br />
W<strong>in</strong>dows PC requirements<br />
item m<strong>in</strong>imum recommended<br />
Processor See Read Me file for details<br />
Operat<strong>in</strong>g System<br />
W<strong>in</strong>dows 98<br />
W<strong>in</strong>dows 98SE<br />
W<strong>in</strong>dows ME<br />
W<strong>in</strong>dows 2000<br />
W<strong>in</strong>dows XP<br />
RAM<br />
128 MB<br />
RAM<br />
128 MB<br />
Disk space needed for <strong>in</strong>st<strong>all</strong>ation See Read Me file for details<br />
Additional disk space needed for<br />
scanned images<br />
Additional disk space needed for<br />
Memories Disc<br />
50 MB<br />
700 MB<br />
Monitor SVGA 800 by 600<br />
16-bit color<br />
Additional hardware CD-ROM drive<br />
I/O Available USB port<br />
RAM<br />
256 MB<br />
RAM<br />
256 MB or more<br />
Internet access Recommended<br />
101<br />
technical <strong>in</strong>formation
technical <strong>in</strong>formation<br />
chapter 12<br />
paper specifications<br />
102<br />
W<strong>in</strong>dows PC requirements<br />
item m<strong>in</strong>imum recommended<br />
Sound card Recommended<br />
Other Microsoft Internet Explorer<br />
5.01 or higher<br />
Mac<strong>in</strong>tosh requirements<br />
item m<strong>in</strong>imum recommended<br />
Processor See Read Me file for details<br />
Operat<strong>in</strong>g System<br />
Mac<strong>in</strong>tosh OS 9<br />
Mac<strong>in</strong>tosh OS X<br />
Disk space needed for <strong>in</strong>st<strong>all</strong>ation<br />
Mac<strong>in</strong>tosh OS 9<br />
Mac<strong>in</strong>tosh OS X<br />
Additional disk space needed for<br />
scanned images<br />
Additional disk space needed for<br />
Memories Disc<br />
This section conta<strong>in</strong>s the follow<strong>in</strong>g topics:<br />
• paper tray capacities on page 102<br />
• paper sizes on page 103<br />
paper tray capacities<br />
RAM<br />
64 MB<br />
128 MB<br />
See Read Me file for details<br />
50 MB<br />
700 MB<br />
Monitor SVGA 800 by 600<br />
Additional hardware CD-ROM drive<br />
I/O Available USB port<br />
RAM<br />
128 MB<br />
256 MB<br />
Internet access Recommended<br />
Sound card Recommended<br />
Other Microsoft Internet Explorer<br />
5.01 or higher<br />
type paper weight <strong>in</strong>put tray 1<br />
Pla<strong>in</strong> paper 16 to 24 lb.<br />
(60 to 90 gsm)<br />
Legal paper 20 to 24 lb.<br />
(75 to 90 gsm)<br />
Cards 110 lb. <strong>in</strong>dex max<br />
(200 gsm)<br />
Envelopes 20 to 24 lb.<br />
(75 to 90 gsm)<br />
output tray 2<br />
150 (20 lb. paper) 50 (20 lb. paper)<br />
150 (20 lb. paper) 50 (20 lb. paper)<br />
60 10<br />
22 10<br />
<strong>hp</strong> <strong>psc</strong> <strong>2400</strong> <strong>series</strong>
type paper weight <strong>in</strong>put tray 1 output tray 2<br />
Banners 16 to 24 lb.<br />
(60 to 90 gsm)<br />
paper sizes<br />
<strong>reference</strong> <strong>guide</strong><br />
20 20 or fewer<br />
Transparency film N/A 25 25 or fewer<br />
Labels N/A 20 sheets 20 sheets<br />
4 by 6 <strong>in</strong>ch<br />
(10 by 15 cm)<br />
photo paper<br />
145 lb.<br />
(236 gsm)<br />
30 30<br />
technical <strong>in</strong>formation<br />
1 Maximum capacity.<br />
2 Output tray capacity is affected by the type of paper and the amount of <strong>in</strong>k you are us<strong>in</strong>g.<br />
HP recommends empty<strong>in</strong>g the output tray frequently.<br />
type size<br />
Paper Letter: 8.5 by 11 <strong>in</strong>ches (216 by 279 mm)<br />
Legal: 8.5 by14 <strong>in</strong>ch (216 by 356 mm)<br />
A4: 210 by 297 mm<br />
Photo: 4 by 6 <strong>in</strong>ches (101 by 152 mm), 5 by 7 <strong>in</strong>ches (127<br />
by 178 mm), 8.5 by 11 <strong>in</strong>ches (216 by 279 mm), L (Japan<br />
only) 3.5 by 5 <strong>in</strong>ches (89 by 127 mm)<br />
Banner Letter: HP Banner Paper, A4<br />
Z-fold Computer Paper: (Tractor Perforations Removed)<br />
Envelopes U.S. #10: 4.12 by 9.5 <strong>in</strong>ches (105 by 241 mm)<br />
A2: 4.37 by 5.75 <strong>in</strong>ches (111 by146 mm)<br />
DL: 4.33 by 8.66 <strong>in</strong>ches (110 by 220 mm)<br />
C6: 4.49 by 6.38 <strong>in</strong>ches (114 by 162 mm)<br />
Transparency films Letter: 8.5 by 11 <strong>in</strong>ches (216 by 279 mm)<br />
A4: 210 by 297 mm<br />
Cards 3 by 5 <strong>in</strong>ches (76 by 127 mm)<br />
4 by 6 <strong>in</strong>ches (101 by 152 mm)<br />
5 by 7 <strong>in</strong>ches (127 by 178 mm)<br />
Hagaki postcard: 100 by 148 mm<br />
Labels Letter: 8.5 by 11 <strong>in</strong>ches (216 by 279 mm)<br />
A4: 210 by 297 mm<br />
Custom 3 by 5 <strong>in</strong>ches up to 8.5 by 14 <strong>in</strong>ches (76 by 127 mm up to<br />
216 by 356 mm)<br />
103<br />
technical <strong>in</strong>formation
technical <strong>in</strong>formation<br />
chapter 12<br />
pr<strong>in</strong>t specifications<br />
104<br />
• 600 by 600 dpi black<br />
• 1200 by 1200 dpi color with HP PhotoREt III<br />
• Method: drop-on-demand thermal <strong>in</strong>kjet<br />
• Language: HP PCL Level 3, PCL3 GUI or PCL 10<br />
• Pr<strong>in</strong>t speeds vary accord<strong>in</strong>g to the complexity of the document<br />
• Duty cycle: 500 pr<strong>in</strong>ted pages per month (average)<br />
• Duty cycle: 5000 pr<strong>in</strong>ted pages per month (maximum)<br />
mode resolution (dpi) speed (ppm)<br />
Best Black 1200 by 1200 2<br />
pr<strong>in</strong>t marg<strong>in</strong> specifications<br />
Color 1200 by 1200<br />
(up to 4800 dpi optimized 1 )<br />
Normal Black 600 by 600 7<br />
Color 600 by 600 4<br />
Fast Black 300 by 300 21<br />
1 Up to 4800 by 1200 optimized dpi color pr<strong>in</strong>t<strong>in</strong>g on premium photo papers,<br />
1200 by 1200 <strong>in</strong>put dpi.<br />
top<br />
(lead<strong>in</strong>g edge)<br />
paper<br />
U.S. letter 0.07 <strong>in</strong>ches<br />
(1.8 mm)<br />
U.S. legal 0.07 <strong>in</strong>ches<br />
(1.8 mm)<br />
ISO A4 0.07 <strong>in</strong>ches<br />
(1.8 mm)<br />
envelopes<br />
U.S. No. 10 0.13 <strong>in</strong>ches<br />
(3.4 mm)<br />
A2 (5.5 baronial) 0.13 <strong>in</strong>ches<br />
(3.4 mm)<br />
DL 0.13 <strong>in</strong>ches<br />
(3.4 mm)<br />
C6 0.13 <strong>in</strong>ches<br />
(3.4 mm)<br />
cards<br />
U.S. 3 by 5 <strong>in</strong>ches 0.07 <strong>in</strong>ches<br />
(1.8 mm)<br />
0.5<br />
Color 300 by 300 15<br />
bottom<br />
(trail<strong>in</strong>g edge) 1<br />
0.46 <strong>in</strong>ches<br />
(11.7 mm)<br />
0.46 <strong>in</strong>ches<br />
(11.7 mm)<br />
0.46 <strong>in</strong>ches<br />
(11.7 mm)<br />
0.46 <strong>in</strong>ches<br />
(11.7 mm)<br />
0.46 <strong>in</strong>ches<br />
(11.7 mm)<br />
0.46 <strong>in</strong>ches<br />
(11.7 mm)<br />
0.46 <strong>in</strong>ches<br />
(11.7 mm)<br />
0.46 <strong>in</strong>ches<br />
(11.7 mm)<br />
left right<br />
0.25 <strong>in</strong>ches<br />
(6.4 mm)<br />
0.25 <strong>in</strong>ches<br />
(6.4 mm)<br />
0.13 <strong>in</strong>ches<br />
(3.4 mm)<br />
0.13 <strong>in</strong>ches<br />
(3.4 mm)<br />
0.13 <strong>in</strong>ches<br />
(3.4 mm)<br />
0.13 <strong>in</strong>ches<br />
(3.4 mm)<br />
0.13 <strong>in</strong>ches<br />
(3.4 mm)<br />
0.13 <strong>in</strong>ches<br />
(3.4 mm)<br />
0.25 <strong>in</strong>ches<br />
(6.4 mm)<br />
0.25 <strong>in</strong>ches<br />
(6.4 mm)<br />
0.13 <strong>in</strong>ches<br />
(3.4 mm)<br />
0.13 <strong>in</strong>ches<br />
(3.4 mm)<br />
0.13 <strong>in</strong>ches<br />
(3.4 mm)<br />
0.13 <strong>in</strong>ches<br />
(3.4 mm)<br />
0.13 <strong>in</strong>ches<br />
(3.4 mm)<br />
0.13 <strong>in</strong>ches<br />
(3.4 mm)<br />
<strong>hp</strong> <strong>psc</strong> <strong>2400</strong> <strong>series</strong>
copy specifications<br />
<strong>reference</strong> <strong>guide</strong><br />
U.S. 4 by 6 <strong>in</strong>ches 0.07 <strong>in</strong>ches<br />
(1.8 mm)<br />
U.S. 5 by 8 <strong>in</strong>ches 0.07 <strong>in</strong>ches<br />
(1.8 mm)<br />
ISO and JIS A6 0.07 <strong>in</strong>ches<br />
(1.8 mm)<br />
Hagaki (100 by<br />
148 mm)<br />
Borderless photo<br />
(4 by 6 <strong>in</strong>ches)<br />
Borderless A6 card<br />
(105 by 148 mm)<br />
Borderless Hagaki<br />
(100 by 148 mm)<br />
top<br />
(lead<strong>in</strong>g edge)<br />
0.07 <strong>in</strong>ches<br />
(1.8 mm)<br />
0.46 <strong>in</strong>ches<br />
(11.7 mm)<br />
0.46 <strong>in</strong>ches<br />
(11.7 mm)<br />
0.46 <strong>in</strong>ches<br />
(11.7 mm)<br />
0.46 <strong>in</strong>ches<br />
(11.7 mm)<br />
0.13 <strong>in</strong>ches<br />
(3.4 mm)<br />
0.13 <strong>in</strong>ches<br />
(3.4 mm)<br />
0.13 <strong>in</strong>ches<br />
(3.43.4 mm)<br />
0.13 <strong>in</strong>ches<br />
(3.4 mm)<br />
0 0 0 0<br />
0 0 0 0<br />
0 0 0 0<br />
technical <strong>in</strong>formation<br />
0.13 <strong>in</strong>ches<br />
(3.4 mm)<br />
0.13 <strong>in</strong>ches<br />
(3.4 mm)<br />
0.13 <strong>in</strong>ches<br />
(3.4 mm)<br />
0.13 <strong>in</strong>ches<br />
(3.4 mm)<br />
1 This marg<strong>in</strong> is not Inkjet-compatible; however, the total writ<strong>in</strong>g area is compatible. The<br />
writ<strong>in</strong>g area is offset from center by 0.21 <strong>in</strong>ches (5.4 mm), which causes asymmetric<br />
top and bottom marg<strong>in</strong>s.<br />
• Digital image process<strong>in</strong>g<br />
• Up to 99 copies from orig<strong>in</strong>al (varies by model)<br />
• Digital zoom from 25 to 400% (varies by model)<br />
• Fit to page, Poster, Many on page<br />
• Up to 21 copies per m<strong>in</strong>ute black; 14 copies per m<strong>in</strong>ute color (varies by model)<br />
• Copy speeds vary accord<strong>in</strong>g to the complexity of the document<br />
mode speed<br />
(ppm)<br />
bottom<br />
(trail<strong>in</strong>g edge) 1<br />
Best Black up to 0.8 1200 by 1200 2<br />
Color up to 0.8 1200 by 1200 2<br />
1 Maximum at 400% scal<strong>in</strong>g.<br />
2 On photo paper or premium paper.<br />
left right<br />
pr<strong>in</strong>t resolution (dpi) scan resolution (dpi) 1<br />
1200 by <strong>2400</strong><br />
1200 by <strong>2400</strong><br />
Normal Black up to 7 600 by 1200 600 by 1200<br />
Color up to 4 600 by 600 600 by 1200<br />
Fast Black up to 21 300 by 1200 600 by 1200<br />
Color up to 14 600 by 300 600 by 1200<br />
105<br />
technical <strong>in</strong>formation
technical <strong>in</strong>formation<br />
chapter 12<br />
fax specifications<br />
106<br />
• Walk-up color fax<br />
• Up to 60 speed dials (varies by model)<br />
• Up to 60-page memory (varies by model). (Based on ITU-T Test Image #1 at<br />
standard resolution. More complicated pages or higher resolution will take longer<br />
and use more memory.)<br />
• Manual multiple page fax<br />
• Automatic redial (up to five times)<br />
• Confirmation and activity reports<br />
• CCITT/ITU Group 3 fax with Error Correction Mode<br />
• 36.6 Kbps transmission<br />
• 6 seconds/page speed at 33.6 Kbps. (based on ITU-T Test Image #1 at standard<br />
resolution. More complicated pages or higher resolution will take longer and use<br />
more memory.)<br />
• R<strong>in</strong>g detect with automatic fax/answer<strong>in</strong>g mach<strong>in</strong>e switch<strong>in</strong>g<br />
Black 200 by 200<br />
(8-bit grayscale)<br />
photo memory card specifications<br />
photo (dpi) f<strong>in</strong>e (dpi) standard (dpi)<br />
200 by 200 200 by 100<br />
Color 200 by 200 200 by 200 200 by 200<br />
• Maximum recommended number of files on a memory card: 1,000<br />
• Maximum recommended <strong>in</strong>dividual file size: 12 megapixels maximum, 8 MB<br />
maximum<br />
• Maximum recommended memory card size: 1 GB (solid state only)<br />
Note: Approach<strong>in</strong>g any of the recommended maximums on a memory card might<br />
cause the performance of the HP PSC to run slower than expected.<br />
supported memory card types<br />
CompactFlash<br />
SmartMedia<br />
Memory Stick<br />
Memory Stick Duo<br />
Memory Stick Pro<br />
Secure Digital<br />
MultiMediaCard (MMC)<br />
xD-Picture Card<br />
<strong>hp</strong> <strong>psc</strong> <strong>2400</strong> <strong>series</strong>
scan specifications<br />
<strong>reference</strong> <strong>guide</strong><br />
• Image editor <strong>in</strong>cluded<br />
• OCR software automatic<strong>all</strong>y converts scanned text to editable text<br />
• Scan speeds vary accord<strong>in</strong>g to the complexity of the document<br />
physical specifications<br />
power specifications<br />
item description<br />
• Height: 8.7 <strong>in</strong>ches (22 cm) (color graphics display <strong>in</strong> the down position)<br />
• Width: 18.2 <strong>in</strong>ches (46 cm)<br />
• Depth: 14.6 <strong>in</strong>ches (37 cm)<br />
• Weight:19 pounds (8.6 kg)<br />
• Power consumption: 80 W maximum<br />
• Input voltage: AC 100 to 240 V ~ 1 A 50–60 Hz, grounded<br />
• Output voltage: DC 32 V===940 mA, 16V===625 mA<br />
environmental specifications<br />
technical <strong>in</strong>formation<br />
• Recommended operat<strong>in</strong>g temperature range: 15º to 32º C (59º to 90º F)<br />
• Allowable operat<strong>in</strong>g temperature range: 5º to 40º C (41º to 104º F)<br />
• Humidity: 15 to 85% RH non-condens<strong>in</strong>g<br />
• Non-operat<strong>in</strong>g (Storage) temperature range: –4º to 60º C (–40º to 140º F)<br />
• In the presence of high electromagnetic fields, it is possible the output from the<br />
HP PSC might be slightly distorted<br />
• HP recommends us<strong>in</strong>g a USB cable less than or equal to 3 m (10 feet) <strong>in</strong> length to<br />
m<strong>in</strong>imize <strong>in</strong>jected noise due to potential high electromagnetic fields<br />
additional specifications<br />
Resolution 1200 by <strong>2400</strong> dpi optical, up to 19,200<br />
dpi enhanced<br />
Color 48-bit color<br />
8-bit grayscale (256 levels of gray)<br />
Interface TWAIN-compliant<br />
Scann<strong>in</strong>g Area US letter, A4<br />
• Memory: 8 MB ROM, 32 MB DRAM<br />
If you have Internet access, you can get acoustic <strong>in</strong>formation from the HP website. Go to:<br />
www.<strong>hp</strong>.com/support<br />
107<br />
technical <strong>in</strong>formation
technical <strong>in</strong>formation<br />
chapter 12<br />
environmental product stewardship program<br />
108<br />
This section conta<strong>in</strong>s the follow<strong>in</strong>g topics:<br />
• protect<strong>in</strong>g the environment on page 108<br />
• oz<strong>one</strong> production on page 108<br />
• energy use on page 108<br />
• paper use on page 108<br />
• plastics on page 108<br />
• material safety data sheets on page 108<br />
• recycl<strong>in</strong>g program on page 109<br />
• <strong>hp</strong> <strong>in</strong>kjet supplies recycl<strong>in</strong>g program on page 109<br />
protect<strong>in</strong>g the environment<br />
Hewlett-Packard is committed to provid<strong>in</strong>g quality products <strong>in</strong> an environment<strong>all</strong>y sound<br />
manner. This product has been designed with several attributes to m<strong>in</strong>imize impacts on our<br />
environment.<br />
For more <strong>in</strong>formation, visit HP’s Commitment to the Environment website at:<br />
www.<strong>hp</strong>.com/<strong>hp</strong><strong>in</strong>fo/globalcitizenship/environment/<strong>in</strong>dex.html<br />
oz<strong>one</strong> production<br />
energy use<br />
paper use<br />
plastics<br />
This product generates no appreciable oz<strong>one</strong> gas (O 3 ).<br />
Energy usage drops significantly while <strong>in</strong> ENERGY STAR ® mode, which saves natural<br />
resources, and saves m<strong>one</strong>y without affect<strong>in</strong>g the high performance of this product. This<br />
product qualifies for ENERGY STAR, which is a voluntary program established to<br />
encourage the development of energy-efficient office products.<br />
ENERGY STAR is a U.S. registered service mark of the U.S. EPA. As an ENERGY STAR<br />
partner, HP has determ<strong>in</strong>ed that this product meets ENERGY STAR <strong>guide</strong>l<strong>in</strong>es for energy<br />
efficiency.<br />
For more <strong>in</strong>formation on ENERGY STAR <strong>guide</strong>l<strong>in</strong>es, go to the follow<strong>in</strong>g website:<br />
www.energystar.gov<br />
This product is suited for the use of recycled paper accord<strong>in</strong>g to DIN 19309.<br />
Plastic parts over 25 grams are marked accord<strong>in</strong>g to <strong>in</strong>ternational standards that enhance<br />
the ability to identify plastics for recycl<strong>in</strong>g purposes at the end of the product’s life.<br />
material safety data sheets<br />
Material safety data sheets (MSDS) can be obta<strong>in</strong>ed from the HP website at:<br />
www.<strong>hp</strong>.com/go/msds<br />
Customers without Internet access should contact their local HP Customer Support Center.<br />
<strong>hp</strong> <strong>psc</strong> <strong>2400</strong> <strong>series</strong>
eference <strong>guide</strong><br />
recycl<strong>in</strong>g program<br />
technical <strong>in</strong>formation<br />
HP offers an <strong>in</strong>creas<strong>in</strong>g number of product return and recycl<strong>in</strong>g programs <strong>in</strong> many<br />
countries, as well as partner<strong>in</strong>g with some of the largest electronic recycl<strong>in</strong>g centers<br />
throughout the world. HP also conserves resources by refurbish<strong>in</strong>g and resell<strong>in</strong>g some of<br />
its most popular products.<br />
This HP product conta<strong>in</strong>s the follow<strong>in</strong>g materials that might require special handl<strong>in</strong>g at endof-life:<br />
• Mercury <strong>in</strong> the fluorescent lamp <strong>in</strong> the scanner (< 2mg)<br />
• Lead <strong>in</strong> solder<br />
<strong>hp</strong> <strong>in</strong>kjet supplies recycl<strong>in</strong>g program<br />
regulatory notices<br />
HP is committed to protect<strong>in</strong>g the environment. The HP Inkjet Supplies Recycl<strong>in</strong>g Program<br />
is available <strong>in</strong> many countries/regions, and lets you recycle used pr<strong>in</strong>t cartridges free of<br />
charge. For more <strong>in</strong>formation, see the follow<strong>in</strong>g website:<br />
www.<strong>hp</strong>.com/<strong>hp</strong><strong>in</strong>fo/globalcitizenship/environment/recycle/<strong>in</strong>kjet.html<br />
The HP PSC is designed to meet the regulatory requirements for your country/region.<br />
This section conta<strong>in</strong>s the follow<strong>in</strong>g topics:<br />
• regulatory model identification number on page 109<br />
• notice to users of the U.S. teleph<strong>one</strong> network: FCC requirements on page 109<br />
• FCC statement on page 110<br />
• note à l’attention des utilisateurs du réseau téléphonique Canadien/notice to users<br />
of the Canadian teleph<strong>one</strong> network on page 111<br />
• note à l’attention des utilisateurs Canadien/notice to users <strong>in</strong> Canada on page 112<br />
• notice to users of the European Economic Area on page 112<br />
• notice to users of the German teleph<strong>one</strong> network on page 112<br />
• declaration of conformity (European Union) on page 112<br />
• geräuschemission on page 113<br />
• notice to users <strong>in</strong> Japan (VCCI-2) on page 113<br />
• notice to users <strong>in</strong> Korea on page 113<br />
regulatory model identification number<br />
For regulatory identification purposes, your product is assigned a Regulatory Model<br />
Number. The Regulatory Model Number for your product is SDGOB-0301-02. This<br />
regulatory number should not be confused with the market<strong>in</strong>g name (HP PSC <strong>2400</strong><br />
Photosmart Series) or product number (Q3083A).<br />
notice to users of the U.S. teleph<strong>one</strong> network: FCC requirements<br />
This equipment complies with FCC rules, Part 68. On this equipment is a label that<br />
conta<strong>in</strong>s, among other <strong>in</strong>formation, the FCC Registration Number and R<strong>in</strong>ger Equivalent<br />
Number (REN) for this equipment. If requested, provide this <strong>in</strong>formation to your teleph<strong>one</strong><br />
company.<br />
An FCC compliant teleph<strong>one</strong> cord and modular plug is provided with this equipment. This<br />
equipment is designed to be connected to the teleph<strong>one</strong> network or premises wir<strong>in</strong>g us<strong>in</strong>g<br />
a compatible modular jack which is Part 68 compliant. This equipment connects to the<br />
teleph<strong>one</strong> network through the follow<strong>in</strong>g standard network <strong>in</strong>terface jack: USOC RJ-11C.<br />
109<br />
technical <strong>in</strong>formation
technical <strong>in</strong>formation<br />
chapter 12<br />
110<br />
FCC statement<br />
The REN is useful to determ<strong>in</strong>e the quantity of devices you may connect to your teleph<strong>one</strong><br />
l<strong>in</strong>e and still have <strong>all</strong> of those devices r<strong>in</strong>g when your number is c<strong>all</strong>ed. Too many devices<br />
on <strong>one</strong> l<strong>in</strong>e may result <strong>in</strong> failure to r<strong>in</strong>g <strong>in</strong> response to an <strong>in</strong>com<strong>in</strong>g c<strong>all</strong>. In most, but not<br />
<strong>all</strong>, areas the sum of the RENs of <strong>all</strong> devices should not exceed five (5). To be certa<strong>in</strong> of<br />
the number of devices you may connect to your l<strong>in</strong>e, as determ<strong>in</strong>ed by the REN, you should<br />
c<strong>all</strong> your local teleph<strong>one</strong> company to determ<strong>in</strong>e the maximum REN for your c<strong>all</strong><strong>in</strong>g area.<br />
If this equipment causes harm to the teleph<strong>one</strong> network, your teleph<strong>one</strong> company may<br />
discont<strong>in</strong>ue your service temporarily. If possible, they will notify you <strong>in</strong> advance. If advance<br />
notice is not practical, you will be notified as soon as possible. You will also be advised of<br />
your right to file a compla<strong>in</strong>t with the FCC. Your teleph<strong>one</strong> company may make changes<br />
<strong>in</strong> its facilities, equipment, operations, or procedures that could affect the proper operation<br />
of your equipment. If they do, you will be given advance notice so you will have the<br />
opportunity to ma<strong>in</strong>ta<strong>in</strong> un<strong>in</strong>terrupted service.<br />
If you experience trouble with this equipment, please contact the manufacturer, or look<br />
elsewhere <strong>in</strong> this manual, for warranty or repair <strong>in</strong>formation. Your teleph<strong>one</strong> company may<br />
ask you to disconnect this equipment from the network until the problem has been corrected<br />
or until you are sure that the equipment is not malfunction<strong>in</strong>g.<br />
This equipment may not be used on co<strong>in</strong> service provided by the teleph<strong>one</strong> company.<br />
Connection to party l<strong>in</strong>es is subject to state tariffs. Contact your state’s public utility<br />
commission, public service commission, or corporation commission for more <strong>in</strong>formation.<br />
This equipment <strong>in</strong>cludes automatic dial<strong>in</strong>g capability. When programm<strong>in</strong>g and/or mak<strong>in</strong>g<br />
test c<strong>all</strong>s to emergency numbers:<br />
• Rema<strong>in</strong> on the l<strong>in</strong>e and expla<strong>in</strong> to the dispatcher the reason for the c<strong>all</strong>.<br />
• Perform such activities <strong>in</strong> the off-peak hours, such as early morn<strong>in</strong>g or late even<strong>in</strong>g.<br />
Note: The FCC hear<strong>in</strong>g aid compatibility rules for teleph<strong>one</strong>s are not applicable to<br />
this equipment.<br />
The Teleph<strong>one</strong> Consumer Protection Act of 1991 makes it unlawful for any person to use<br />
a computer or other electronic device, <strong>in</strong>clud<strong>in</strong>g fax mach<strong>in</strong>es, to send any message unless<br />
such message clearly conta<strong>in</strong>s <strong>in</strong> a marg<strong>in</strong> at the top or bottom of each transmitted page<br />
or on the first page of transmission, the date and time it is sent and an identification of the<br />
bus<strong>in</strong>ess, other entity, or other <strong>in</strong>dividual send<strong>in</strong>g the message and the teleph<strong>one</strong> number<br />
of the send<strong>in</strong>g mach<strong>in</strong>e or such bus<strong>in</strong>ess, other entity, or <strong>in</strong>dividual. (The teleph<strong>one</strong> number<br />
provided may not be a 900 number or any other number for which charges exceed local<br />
or long-distance transmission charges.) In order to program this <strong>in</strong>formation <strong>in</strong>to your fax<br />
mach<strong>in</strong>e, you should complete the steps described <strong>in</strong> the software.<br />
The United States Federal Communications Commission (<strong>in</strong> 47 CFR 15.105) has specified<br />
that the follow<strong>in</strong>g notice be brought to the attention of users of this product.<br />
Declaration of Conformity: This equipment has been tested and found to comply with the<br />
limits for a Class B digital device, pursuant to part 15 of the FCC Rules. Operation is<br />
subject to the follow<strong>in</strong>g two conditions: (1) this device may not cause harmful <strong>in</strong>terference,<br />
and (2) this device must accept any <strong>in</strong>terference received, <strong>in</strong>clud<strong>in</strong>g <strong>in</strong>terference that may<br />
cause undesired operation. Class B limits are designed to provide reasonable protection<br />
aga<strong>in</strong>st harmful <strong>in</strong>terference <strong>in</strong> a residential <strong>in</strong>st<strong>all</strong>ation. This equipment generates, uses,<br />
and can radiate radio frequency energy, and, if not <strong>in</strong>st<strong>all</strong>ed and used <strong>in</strong> accordance with<br />
the <strong>in</strong>structions, may cause harmful <strong>in</strong>terference to radio communications. However, there<br />
is no guarantee that <strong>in</strong>terference will not occur <strong>in</strong> a particular <strong>in</strong>st<strong>all</strong>ation. If this equipment<br />
<strong>hp</strong> <strong>psc</strong> <strong>2400</strong> <strong>series</strong>
eference <strong>guide</strong><br />
technical <strong>in</strong>formation<br />
does cause harmful <strong>in</strong>terference to radio or television reception, which can be determ<strong>in</strong>ed<br />
by turn<strong>in</strong>g the equipment off and on, the user is encouraged to try to correct the<br />
<strong>in</strong>terference by <strong>one</strong> or more of the follow<strong>in</strong>g measures:<br />
• Reorient the receiv<strong>in</strong>g antenna.<br />
• Increase the separation between the equipment and the receiver.<br />
• Connect the equipment <strong>in</strong>to an outlet on a circuit different from that to which the<br />
receiver is connected.<br />
• Consult the dealer or an experienced radio/TV technician for help.<br />
Product Regulations Manager, Hewlett-Packard Company, San Diego, (858) 655-4100.<br />
The user may f<strong>in</strong>d the follow<strong>in</strong>g booklet prepared by the Federal Communications<br />
Commission helpful: How to Identify and Resolve Radio-TV Interference Problems. This<br />
booklet is available from the U.S. Government Pr<strong>in</strong>t<strong>in</strong>g Office, Wash<strong>in</strong>gton DC, 20402.<br />
Stock No. 004-000-00345-4.<br />
Caution! Pursuant to Part 15.21 of the FCC Rules, any changes or<br />
modifications to this equipment not expressly approved by the<br />
Hewlett-Packard Company may cause harmful <strong>in</strong>terference and void the<br />
FCC authorization to operate this equipment.<br />
note à l’attention des utilisateurs du réseau téléphonique Canadien/notice to<br />
users of the Canadian teleph<strong>one</strong> network<br />
Cet appareil est conforme aux spécifications techniques des équipements term<strong>in</strong>aux<br />
d’Industrie Canada. Le numéro d’enregistrement atteste de la conformité de l’appareil.<br />
L’abréviation IC qui précède le numéro d’enregistrement <strong>in</strong>dique que l’enregistrement a été<br />
effectué dans le cadre d’une Déclaration de conformité stipulant que les spécifications<br />
techniques d’Industrie Canada ont été respectées. Néanmo<strong>in</strong>s, cette abréviation ne<br />
signifie en aucun cas que l’appareil a été validé par Industrie Canada.<br />
Pour leur propre sécurité, les utilisateurs doivent s’assurer que les prises électriques reliées<br />
à la terre de la source d’alimentation, des lignes téléphoniques et du circuit mét<strong>all</strong>ique<br />
d’alimentation en eau sont, le cas échéant, branchées les unes aux autres. Cette précaution<br />
est particulièrement importante dans les z<strong>one</strong>s rurales.<br />
Le numéro REN (R<strong>in</strong>ger Equivalence Number) attribué à chaque appareil term<strong>in</strong>al fournit<br />
une <strong>in</strong>dication sur le nombre maximal de term<strong>in</strong>aux qui peuvent être connectés à une<br />
<strong>in</strong>terface téléphonique. La term<strong>in</strong>aison d’une <strong>in</strong>terface peut se composer de n’importe<br />
quelle comb<strong>in</strong>aison d’appareils, à condition que le total des numéros REN ne dépasse pas<br />
5.<br />
Basé sur les résultats de tests FCC Partie 68, le numéro REN de ce produit est 0.2B.<br />
This equipment meets the applicable Industry Canada Term<strong>in</strong>al Equipment Technical<br />
Specifications. This is confirmed by the registration number. The abbreviation IC before the<br />
registration number signifies that registration was performed based on a Declaration of<br />
Conformity <strong>in</strong>dicat<strong>in</strong>g that Industry Canada technical specifications were met. It does not<br />
imply that Industry Canada approved the equipment.<br />
Users should ensure for their own protection that the electrical ground connections of the<br />
power utility, teleph<strong>one</strong> l<strong>in</strong>es and <strong>in</strong>ternal met<strong>all</strong>ic water pipe system, if present, are<br />
connected together. This precaution may be particularly important <strong>in</strong> rural areas.<br />
Note: The R<strong>in</strong>ger Equivalence Number (REN) assigned to each term<strong>in</strong>al device<br />
provides an <strong>in</strong>dication of the maximum number of term<strong>in</strong>als <strong>all</strong>owed to be connected<br />
to a teleph<strong>one</strong> <strong>in</strong>terface. The term<strong>in</strong>ation on an <strong>in</strong>terface may consist of any<br />
comb<strong>in</strong>ation of devices subject only to the requirement that the sum of the R<strong>in</strong>ger<br />
Equivalence Numbers of <strong>all</strong> the devices does not exceed 5.<br />
The REN for this product is 0.2B, based on FCC Part 68 test results.<br />
111<br />
technical <strong>in</strong>formation
technical <strong>in</strong>formation<br />
chapter 12<br />
112<br />
note à l’attention des utilisateurs Canadien/notice to users <strong>in</strong> Canada<br />
Le présent appareil numérique n‘émet pas de bruit radioélectrique dépassant les limites<br />
applicables aux appareils numériques de la classe B prescrites dans le Règlement sur le<br />
brouillage radioélectrique édicté par le m<strong>in</strong>istère des Communications du Canada.<br />
This digital apparatus does not exceed the Class B limits for radio noise emissions from the<br />
digital apparatus set out <strong>in</strong> the Radio Interference Regulations of the Canadian Department<br />
of Communications.<br />
notice to users of the European Economic Area<br />
This product is designed to <strong>in</strong>terwork with the analogue teleph<strong>one</strong> networks <strong>in</strong> the<br />
follow<strong>in</strong>g countries:<br />
:<br />
Austria Greece Portugal<br />
Belgium Ireland Spa<strong>in</strong><br />
Denmark Italy Sweden<br />
F<strong>in</strong>land Luxembourg Switzerland<br />
France Netherlands United K<strong>in</strong>gdom<br />
Germany Norway<br />
Network compatibility depends on customer selected sett<strong>in</strong>gs, which must be reset to use<br />
the equipment on a teleph<strong>one</strong> network <strong>in</strong> a country/region other than where the product<br />
was purchased. Contact the vendor or Hewlett-Packard Company if addition product<br />
support is necessary.<br />
This equipment has been certified by the manufacturer <strong>in</strong> accordance with Directive 1999/<br />
5/EC (annex II) for Pan-European s<strong>in</strong>gle-term<strong>in</strong>al connection to the public switched<br />
teleph<strong>one</strong> network (PSTN). However, due to differences between the <strong>in</strong>dividual PSTNs<br />
provided <strong>in</strong> different countries, the approval does not, of itself, give an unconditional<br />
assurance of successful operation on every PSTN network term<strong>in</strong>ation po<strong>in</strong>t.<br />
In the event of problems, you should contact your equipment supplier <strong>in</strong> the first <strong>in</strong>stance.<br />
This equipment is designed for DTMF t<strong>one</strong> dial<strong>in</strong>g and loop disconnect dial<strong>in</strong>g. In the<br />
unlikely event of problems with loop disconnect dial<strong>in</strong>g, it is recommended to use this<br />
equipment only with the DTMF t<strong>one</strong> dial sett<strong>in</strong>g.<br />
notice to users of the German teleph<strong>one</strong> network<br />
This HP fax product is designed to connect only to the analogue public-switched teleph<strong>one</strong><br />
network (PSTN). Please connect the TAE N teleph<strong>one</strong> connector plug, provided with the<br />
HP PSC <strong>2400</strong> and HP PSC 2500 <strong>series</strong> <strong>in</strong>to the w<strong>all</strong> socket (TAE 6) code N. This HP fax<br />
product can be used as a s<strong>in</strong>gle device and/or <strong>in</strong> comb<strong>in</strong>ation (<strong>in</strong> serial connection) with<br />
other approved term<strong>in</strong>al equipment.<br />
declaration of conformity (European Union)<br />
The Declaration of Conformity <strong>in</strong> this document complies with ISO/IEC Guide 22 and<br />
EN 45014. It identifies the product, manufacturer’s name and address, and applicable<br />
specifications recognized <strong>in</strong> the European community.<br />
<strong>hp</strong> <strong>psc</strong> <strong>2400</strong> <strong>series</strong>
eference <strong>guide</strong><br />
geräuschemission<br />
LpA < 70 dB<br />
am Arbeitsplatz<br />
im Normalbetrieb<br />
nach DIN 45635 T. 19<br />
notice to users <strong>in</strong> Japan (VCCI-2)<br />
notice to users <strong>in</strong> Korea<br />
technical <strong>in</strong>formation<br />
113<br />
technical <strong>in</strong>formation
technical <strong>in</strong>formation<br />
chapter 12<br />
declaration of conformity<br />
114<br />
Accord<strong>in</strong>g to ISO/IEC Guide 22 and EN 45014<br />
Manufacturer’s Name and Address:<br />
Hewlett-Packard Company, 16399 West Bernardo Drive, San Diego, CA 92127-1899, USA<br />
Regulatory Model<br />
Number:<br />
Declares that the product:<br />
SDGOB-0301-02<br />
Product Name: HP PSC <strong>2400</strong> Photosmart Series (Q3083A)<br />
Model Number(s): 2405 (Q3086A), 2410 (Q3087A), 2410xi (Q3088A), 2410v<br />
(Q3089A), 2420 (Q3085A), 2450 (Q3090A-Japan only)<br />
Power Adapters: 0950-4466<br />
Conforms to the follow<strong>in</strong>g product specifications:<br />
Safety: IEC 60950:1991+A1+A2+A3+A4<br />
EN 60950:1992+A1+A2+A3+A4+A11<br />
UL1950/CSA22.2 No.950, 3rd Edition:1995<br />
NOM 019-SFCI-1993<br />
GB4943: 2001<br />
EMC: CISPR22:1997 / EN 55022:1998, Class B<br />
CISPR 24:1997 / EN 55024:1998<br />
IEC 61000-3-2:1995 / EN 61000-3-2:1995<br />
IEC 61000-3-3:1994 / EN 61000-3-3:1995<br />
AS/NZS3548<br />
CNS13438, VCCI-2<br />
FCC Part15-Class B/ICES-003, Issue 2<br />
GB9254: 1998<br />
Telecom: TBR 21:1998<br />
Supplementary Information:<br />
The Product herewith complies with the requirements of EMC Directive 89/336/EEC, Low Voltage<br />
Directive 73/23/EEC and the R&TTE Directive 1999/5/EEC (Annex ll) and carries the CE<br />
mark<strong>in</strong>g accord<strong>in</strong>gly:<br />
• This product was tested <strong>in</strong> a typical configuration<br />
European Contact for regulatory topics only: Hewlett Packard GmbH, HQ-TRE, Herrenberger<br />
Strasse 140, D-71034 Böbl<strong>in</strong>gen Germany. (FAX +49-7031-14-3143)<br />
<strong>hp</strong> <strong>psc</strong> <strong>2400</strong> <strong>series</strong>
13<br />
fax setup<br />
After complet<strong>in</strong>g <strong>all</strong> steps <strong>in</strong> the Setup Poster, use the <strong>in</strong>structions <strong>in</strong> this section<br />
to complete your fax setup. Please keep your Setup Poster for later use.<br />
In this section, you will learn how to set up your HP PSC so that fax<strong>in</strong>g works<br />
successfully with any equipment and services you might already have on the<br />
same teleph<strong>one</strong> l<strong>in</strong>e as your HP PSC.<br />
This section conta<strong>in</strong>s the follow<strong>in</strong>g topics:<br />
• how to tell if the <strong>in</strong>structions <strong>in</strong> this chapter apply to you on page 115<br />
• how to choose the right fax setup for your office on page 116<br />
• select your fax setup case from this table on page 118<br />
• case A: separate fax l<strong>in</strong>e (no voice c<strong>all</strong>s received) on page 119<br />
• case B: fax<strong>in</strong>g with a dist<strong>in</strong>ctive r<strong>in</strong>g service on the same l<strong>in</strong>e on page 119<br />
• case C: shared voice/fax l<strong>in</strong>e on page 121<br />
• case D: fax l<strong>in</strong>e shared with PC modem (no voice c<strong>all</strong>s received) on<br />
page 122<br />
• case E: shared voice/fax l<strong>in</strong>e with PC modem on page 123<br />
• case F: shared voice/fax l<strong>in</strong>e with answer<strong>in</strong>g mach<strong>in</strong>e on page 124<br />
• case G: shared voice/fax l<strong>in</strong>e with PC modem and answer<strong>in</strong>g mach<strong>in</strong>e on<br />
page 126<br />
• case H: shared voice/fax l<strong>in</strong>e with voicemail on page 127<br />
• case I: shared voice/fax l<strong>in</strong>e with PC modem and voicemail on page 128<br />
• fax<strong>in</strong>g from a DSL l<strong>in</strong>e on page 130<br />
how to tell if the <strong>in</strong>structions <strong>in</strong> this chapter apply to you<br />
The fax setup <strong>in</strong>structions <strong>in</strong> this chapter are <strong>in</strong>tended for par<strong>all</strong>el-type teleph<strong>one</strong><br />
systems, which are most common <strong>in</strong> the countries/regions listed <strong>in</strong> the follow<strong>in</strong>g<br />
table.<br />
• Check the table to see if you are located <strong>in</strong> <strong>one</strong> of the listed countries/<br />
regions.<br />
– If your country/region is listed, use the <strong>in</strong>structions <strong>in</strong> this chapter to<br />
complete your fax setup.<br />
– If your country/region does not appear <strong>in</strong> this list, you probably have<br />
a serial-type teleph<strong>one</strong> system and you should not use the connection<br />
<strong>in</strong>structions <strong>in</strong> this chapter. In a serial-type teleph<strong>one</strong> system, connect<br />
<strong>all</strong> other teleph<strong>one</strong> equipment (modems, ph<strong>one</strong>s, and answer<strong>in</strong>g<br />
115<br />
fax setup
fax setup<br />
chapter 13<br />
116<br />
mach<strong>in</strong>es) directly at your teleph<strong>one</strong> w<strong>all</strong> jack. If you are unsure which<br />
k<strong>in</strong>d of teleph<strong>one</strong> system you have (par<strong>all</strong>el or serial), check with your<br />
teleph<strong>one</strong> company.<br />
use this chapter if located <strong>in</strong> <strong>one</strong> of these countries/regions<br />
Argent<strong>in</strong>a Australia Brazil<br />
Canada Chile Ch<strong>in</strong>a<br />
Colombia Greece India<br />
Ind<strong>one</strong>sia Ireland Japan<br />
Korea Lat<strong>in</strong> America Malaysia<br />
Mexico Philipp<strong>in</strong>es Poland<br />
Portugal Russia Saudi Arabia<br />
S<strong>in</strong>gapore Spa<strong>in</strong> Taiwan<br />
Thailand USA Venezuela<br />
Vietnam<br />
how to choose the right fax setup for your office<br />
To fax successfully, you need to know what types of equipment and services (if<br />
any) share the same teleph<strong>one</strong> l<strong>in</strong>e with your HP PSC. This is important because<br />
you might need to connect some of your exist<strong>in</strong>g office equipment directly to<br />
your HP PSC, and you might also need to change some fax sett<strong>in</strong>gs before you<br />
can fax successfully.<br />
To determ<strong>in</strong>e the best way to set up the HP PSC <strong>in</strong> your office, first read through<br />
the questions <strong>in</strong> this section and record your answers. Next, refer to the table <strong>in</strong><br />
the follow<strong>in</strong>g section and choose the recommended setup case based on your<br />
answers.<br />
Be sure to read and answer the follow<strong>in</strong>g questions <strong>in</strong> the order they are<br />
presented.<br />
1 Do you subscribe to a dist<strong>in</strong>ctive r<strong>in</strong>g<strong>in</strong>g service through your ph<strong>one</strong><br />
company that provides multiple ph<strong>one</strong> numbers with different r<strong>in</strong>g<br />
patterns?<br />
�Yes, I have dist<strong>in</strong>ctive r<strong>in</strong>g.<br />
�No.<br />
If you answered “Yes,” proceed directly to case B: fax<strong>in</strong>g with a dist<strong>in</strong>ctive<br />
r<strong>in</strong>g service on the same l<strong>in</strong>e on page 119. You do not need to cont<strong>in</strong>ue<br />
answer<strong>in</strong>g questions.<br />
If you answered “No,” please cont<strong>in</strong>ue answer<strong>in</strong>g questions.<br />
Not sure if you have dist<strong>in</strong>ctive r<strong>in</strong>g? Many ph<strong>one</strong> companies offer a<br />
dist<strong>in</strong>ctive r<strong>in</strong>g<strong>in</strong>g feature that <strong>all</strong>ows you to have several ph<strong>one</strong> numbers<br />
on <strong>one</strong> ph<strong>one</strong> l<strong>in</strong>e.<br />
<strong>hp</strong> <strong>psc</strong> <strong>2400</strong> <strong>series</strong>
eference <strong>guide</strong><br />
fax setup<br />
When you subscribe to this service, each number will have a different r<strong>in</strong>g<br />
pattern, for example, s<strong>in</strong>gle, double, and triple r<strong>in</strong>gs. You might assign<br />
<strong>one</strong> ph<strong>one</strong> number with a s<strong>in</strong>gle r<strong>in</strong>g to your voice c<strong>all</strong>s, and another<br />
ph<strong>one</strong> number with double r<strong>in</strong>gs to your fax c<strong>all</strong>s. This <strong>all</strong>ows you—and<br />
your HP PSC—to tell the difference between voice and fax c<strong>all</strong>s when the<br />
ph<strong>one</strong> r<strong>in</strong>gs.<br />
2 Do you receive voice c<strong>all</strong>s at the same ph<strong>one</strong> number you will use for fax<br />
c<strong>all</strong>s on your HP PSC?<br />
�Yes, I receive voice c<strong>all</strong>s.<br />
�No.<br />
Please cont<strong>in</strong>ue answer<strong>in</strong>g questions.<br />
3 Do you have a PC modem on the same teleph<strong>one</strong> l<strong>in</strong>e as your HP PSC?<br />
�Yes, I have a PC modem.<br />
�No.<br />
Here is how to determ<strong>in</strong>e if you have a PC modem. If you answer “yes” to<br />
any of the follow<strong>in</strong>g questions, you are us<strong>in</strong>g a PC modem:<br />
– Do you send and receive faxes directly to and from your computer<br />
programs via dial-up connection?<br />
– Do you use e-mail on your computer via dial-up connection?<br />
– Do you access the Internet from your computer via dial-up connection?<br />
Please cont<strong>in</strong>ue answer<strong>in</strong>g questions.<br />
4 Do you have an answer<strong>in</strong>g mach<strong>in</strong>e that answers voice c<strong>all</strong>s at the same<br />
ph<strong>one</strong> number you will use for fax c<strong>all</strong>s on your HP PSC?<br />
� Yes, I have an answer<strong>in</strong>g mach<strong>in</strong>e.<br />
� No.<br />
Please cont<strong>in</strong>ue answer<strong>in</strong>g questions.<br />
5 Do you subscribe to a voicemail service through your ph<strong>one</strong> company at<br />
the same ph<strong>one</strong> number you will use for fax c<strong>all</strong>s on your HP PSC?<br />
� Yes, I have a voicemail service.<br />
� No.<br />
Please cont<strong>in</strong>ue answer<strong>in</strong>g questions.<br />
6 Do you have a digital subscriber l<strong>in</strong>e (DSL) through your ph<strong>one</strong> company?<br />
�Yes, I have a DSL l<strong>in</strong>e.<br />
�No.<br />
If you answered “Yes,” you will need to connect a DSL filter between your<br />
teleph<strong>one</strong> w<strong>all</strong> jack and your HP PSC.<br />
First select and connect a fax setup case accord<strong>in</strong>g to your answers to the<br />
previous questions, and then see fax<strong>in</strong>g from a DSL l<strong>in</strong>e on page 130 for<br />
<strong>in</strong>structions on how to connect the DSL filter.<br />
Caution! If you have a DSL l<strong>in</strong>e and you do not connect a DSL<br />
filter, you will not be able to send and receive faxes with your<br />
HP PSC.<br />
117<br />
fax setup
fax setup<br />
chapter 13<br />
select your fax setup case from this table<br />
118<br />
Now that you have answered <strong>all</strong> of the questions about the equipment and<br />
services that share the ph<strong>one</strong> l<strong>in</strong>e with your HP PSC, you are ready to choose<br />
the best setup case for your office.<br />
From the first column <strong>in</strong> the follow<strong>in</strong>g table, choose the comb<strong>in</strong>ation of<br />
equipment and services applicable to your office sett<strong>in</strong>g. Then look up the<br />
appropriate setup case <strong>in</strong> the second column. Step-by-step <strong>in</strong>structions are<br />
<strong>in</strong>cluded for each case later <strong>in</strong> this chapter.<br />
If you have answered <strong>all</strong> of the questions <strong>in</strong> the previous section and have n<strong>one</strong><br />
of the described equipment or services, choose “N<strong>one</strong>” from the first column <strong>in</strong><br />
the table.<br />
other equipment/services shar<strong>in</strong>g your fax l<strong>in</strong>e recommended fax setup<br />
N<strong>one</strong><br />
(You answered “No” to <strong>all</strong> questions.)<br />
Dist<strong>in</strong>ctive r<strong>in</strong>g<strong>in</strong>g service<br />
(You answered “Yes” to question 1 only.)<br />
Voice c<strong>all</strong>s<br />
(You answered “Yes” to question 2 only.)<br />
PC modem<br />
(You answered “Yes” to question 3 only.)<br />
Voice c<strong>all</strong>s and PC modem<br />
(You answered “Yes” to questions 2 and 3 only.)<br />
Voice c<strong>all</strong>s and answer<strong>in</strong>g mach<strong>in</strong>e<br />
(You answered “Yes” to questions 2 and 4 only.)<br />
Voice c<strong>all</strong>s, PC modem, and answer<strong>in</strong>g mach<strong>in</strong>e<br />
(You answered “Yes” to questions 2, 3, and 4<br />
only.)<br />
Voice c<strong>all</strong>s and voicemail service<br />
(You answered “Yes” to questions 2 and 5 only.)<br />
Voice c<strong>all</strong>s, PC modem, and voicemail service<br />
(You answered “Yes” to questions 2, 3, and 5<br />
only.)<br />
Digital subscriber l<strong>in</strong>e (DSL), plus any other equipment<br />
and services listed <strong>in</strong> this table<br />
(You answered “Yes” to question 6 and any<br />
others.)<br />
Case A: Separate fax l<strong>in</strong>e<br />
(no voice c<strong>all</strong>s received)<br />
Case B: Fax<strong>in</strong>g with a dist<strong>in</strong>ctive r<strong>in</strong>g<br />
service on the same l<strong>in</strong>e<br />
Case C: Shared voice/fax l<strong>in</strong>e<br />
Case D: Fax l<strong>in</strong>e shared with PC<br />
modem (no voice c<strong>all</strong>s received)<br />
Case E: Shared voice/fax l<strong>in</strong>e with PC<br />
modem<br />
Case F: Shared voice/fax l<strong>in</strong>e with<br />
answer<strong>in</strong>g mach<strong>in</strong>e<br />
Case G: Shared voice/fax l<strong>in</strong>e with<br />
PC modem and answer<strong>in</strong>g mach<strong>in</strong>e<br />
Case H: Shared voice/fax l<strong>in</strong>e with<br />
voicemail<br />
Case I: Shared voice/fax l<strong>in</strong>e with PC<br />
modem and voicemail<br />
Connect any other equipment as<br />
described <strong>in</strong> the setup case you<br />
selected from this table, and then<br />
connect a DSL filter as described <strong>in</strong><br />
fax<strong>in</strong>g from a DSL l<strong>in</strong>e on page 130.<br />
<strong>hp</strong> <strong>psc</strong> <strong>2400</strong> <strong>series</strong>
case A: separate fax l<strong>in</strong>e (no voice c<strong>all</strong>s received)<br />
<strong>reference</strong> <strong>guide</strong><br />
fax setup<br />
If you have a separate fax l<strong>in</strong>e on which you receive no voice c<strong>all</strong>s, and you have<br />
no other equipment connected on this ph<strong>one</strong> l<strong>in</strong>e, connect your HP PSC as<br />
described <strong>in</strong> this section.<br />
Teleph<strong>one</strong><br />
w<strong>all</strong> jack<br />
Use the ph<strong>one</strong> cord<br />
supplied <strong>in</strong> the box with<br />
your HP PSC<br />
1 Us<strong>in</strong>g the ph<strong>one</strong> cord supplied <strong>in</strong> the box with your HP PSC, connect <strong>one</strong><br />
end to your teleph<strong>one</strong> w<strong>all</strong> jack, then connect the other end to the port<br />
labeled “1-LINE” on the back of your HP PSC.<br />
Caution! If you do not use the supplied cord to connect from the<br />
teleph<strong>one</strong> w<strong>all</strong> jack to your HP PSC, you might not be able to fax<br />
successfully. This special 2-wire cord is different from the more<br />
common 4-wire ph<strong>one</strong> cords you might already have <strong>in</strong> your<br />
office. For more <strong>in</strong>formation about how to tell the difference<br />
between the cords, see I have difficulties when send<strong>in</strong>g faxes and<br />
when receiv<strong>in</strong>g faxes on page 145.<br />
2 (Optional) Change the R<strong>in</strong>gs to Answer sett<strong>in</strong>g to 1 r<strong>in</strong>g or 2 r<strong>in</strong>gs.<br />
For <strong>in</strong>formation on how to change this sett<strong>in</strong>g, see set number of r<strong>in</strong>gs<br />
before answer<strong>in</strong>g on page 59.<br />
how your <strong>hp</strong> <strong>psc</strong> will answer fax c<strong>all</strong>s<br />
Back view of the HP PSC<br />
When the ph<strong>one</strong> r<strong>in</strong>gs, your HP PSC will answer automatic<strong>all</strong>y after the number<br />
of r<strong>in</strong>gs you set <strong>in</strong> the R<strong>in</strong>gs to Answer sett<strong>in</strong>g. Then it will beg<strong>in</strong> emitt<strong>in</strong>g fax<br />
reception t<strong>one</strong>s to the send<strong>in</strong>g fax mach<strong>in</strong>e and receive the fax.<br />
case B: fax<strong>in</strong>g with a dist<strong>in</strong>ctive r<strong>in</strong>g service on the same l<strong>in</strong>e<br />
If you subscribe to a dist<strong>in</strong>ctive r<strong>in</strong>g<strong>in</strong>g service through your ph<strong>one</strong> company that<br />
<strong>all</strong>ows you to have multiple ph<strong>one</strong> numbers on <strong>one</strong> ph<strong>one</strong> l<strong>in</strong>e, each with a<br />
different r<strong>in</strong>g pattern, connect your HP PSC as described <strong>in</strong> this section.<br />
119<br />
fax setup
fax setup<br />
chapter 13<br />
120<br />
Teleph<strong>one</strong><br />
w<strong>all</strong> jack<br />
Use the ph<strong>one</strong> cord<br />
supplied <strong>in</strong> the box with<br />
your HP PSC<br />
1 Us<strong>in</strong>g the ph<strong>one</strong> cord supplied <strong>in</strong> the box with your HP PSC, connect <strong>one</strong><br />
end to your teleph<strong>one</strong> w<strong>all</strong> jack, then connect the other end to the port<br />
labeled “1-LINE” on the back of your HP PSC.<br />
Caution! If you do not use the supplied cord to connect from the<br />
teleph<strong>one</strong> w<strong>all</strong> jack to your HP PSC, you might not be able to fax<br />
successfully. This special 2-wire cord is different from the more<br />
common 4-wire ph<strong>one</strong> cords you might already have <strong>in</strong> your<br />
office. For more <strong>in</strong>formation about how to tell the difference<br />
between the cords, see I have difficulties when send<strong>in</strong>g faxes and<br />
when receiv<strong>in</strong>g faxes on page 145.<br />
2 Change the Answer R<strong>in</strong>g Pattern sett<strong>in</strong>g to the pattern that has been<br />
assigned by the ph<strong>one</strong> company to your fax number, for example, double<br />
r<strong>in</strong>gs or triple r<strong>in</strong>gs.<br />
For <strong>in</strong>formation on how to change this sett<strong>in</strong>g, see change the answer r<strong>in</strong>g<br />
pattern (dist<strong>in</strong>ctive r<strong>in</strong>g<strong>in</strong>g) on page 68.<br />
Note: Your HP PSC is factory-set to answer <strong>all</strong> r<strong>in</strong>g patterns. If you do not<br />
set the correct r<strong>in</strong>g pattern assigned by the ph<strong>one</strong> company to your fax<br />
number, your HP PSC might answer both voice c<strong>all</strong>s and fax c<strong>all</strong>s or it<br />
might not answer at <strong>all</strong>.<br />
3 (Optional) Change the R<strong>in</strong>gs to Answer sett<strong>in</strong>g to 1 r<strong>in</strong>g or 2 r<strong>in</strong>gs.<br />
For <strong>in</strong>formation on how to change this sett<strong>in</strong>g, see set number of r<strong>in</strong>gs<br />
before answer<strong>in</strong>g on page 59.<br />
how your <strong>hp</strong> <strong>psc</strong> will answer fax c<strong>all</strong>s<br />
Back view of the HP PSC<br />
Your HP PSC will automatic<strong>all</strong>y answer <strong>in</strong>com<strong>in</strong>g c<strong>all</strong>s that have the r<strong>in</strong>g pattern<br />
you selected (Answer R<strong>in</strong>g Pattern sett<strong>in</strong>g) and after the number of r<strong>in</strong>gs you<br />
selected (R<strong>in</strong>gs to Answer sett<strong>in</strong>g). Then it will beg<strong>in</strong> emitt<strong>in</strong>g fax reception t<strong>one</strong>s<br />
to the send<strong>in</strong>g fax mach<strong>in</strong>e and receive the fax.<br />
<strong>hp</strong> <strong>psc</strong> <strong>2400</strong> <strong>series</strong>
case C: shared voice/fax l<strong>in</strong>e<br />
<strong>reference</strong> <strong>guide</strong><br />
fax setup<br />
If you receive both voice c<strong>all</strong>s and fax c<strong>all</strong>s at the same ph<strong>one</strong> number, and you<br />
have no other office equipment on this ph<strong>one</strong> l<strong>in</strong>e, connect your HP PSC as<br />
described <strong>in</strong> this section.<br />
Teleph<strong>one</strong><br />
w<strong>all</strong> jack<br />
Use the ph<strong>one</strong> cord<br />
supplied <strong>in</strong> the box with<br />
your HP PSC<br />
Back view of the HP PSC Teleph<strong>one</strong><br />
1 Us<strong>in</strong>g the ph<strong>one</strong> cord supplied <strong>in</strong> the box with your HP PSC, connect <strong>one</strong><br />
end to your teleph<strong>one</strong> w<strong>all</strong> jack, then connect the other end to the port<br />
labeled “1-LINE” on the back of your HP PSC.<br />
Caution! If you do not use the supplied cord to connect from the<br />
teleph<strong>one</strong> w<strong>all</strong> jack to your HP PSC, you might not be able to fax<br />
successfully. This special 2-wire cord is different from the more<br />
common 4-wire ph<strong>one</strong> cords you might already have <strong>in</strong> your<br />
office. For more <strong>in</strong>formation about how to tell the difference<br />
between the cords, see I have difficulties when send<strong>in</strong>g faxes and<br />
when receiv<strong>in</strong>g faxes on page 145.<br />
2 Remove the white plug from the port labeled “2-EXT” on the back of your<br />
HP PSC, and then connect a ph<strong>one</strong> to this port.<br />
Now you need to decide how you want to answer fax c<strong>all</strong>s: automatic<strong>all</strong>y or<br />
manu<strong>all</strong>y.<br />
how to answer fax c<strong>all</strong>s automatic<strong>all</strong>y<br />
The HP PSC is factory-set to answer <strong>all</strong> c<strong>all</strong>s automatic<strong>all</strong>y after 5 r<strong>in</strong>gs, so you<br />
do not need to change any sett<strong>in</strong>gs if you want to automatic<strong>all</strong>y receive faxes.<br />
Your HP PSC will not be able to dist<strong>in</strong>guish between fax and voice c<strong>all</strong>s <strong>in</strong> this<br />
case, however, so if you suspect a voice c<strong>all</strong> is <strong>in</strong>com<strong>in</strong>g, you will need to<br />
answer it before the 5th r<strong>in</strong>g or the HP PSC will answer first.<br />
Note: If you pick up the ph<strong>one</strong> before the 5th r<strong>in</strong>g and hear fax t<strong>one</strong>s from<br />
a send<strong>in</strong>g fax mach<strong>in</strong>e, you will need to manu<strong>all</strong>y answer the fax c<strong>all</strong>. For<br />
<strong>in</strong>formation on how to receive fax c<strong>all</strong>s manu<strong>all</strong>y from your attached ph<strong>one</strong><br />
and from an extension ph<strong>one</strong>, see receive a fax manu<strong>all</strong>y on page 61.<br />
121<br />
fax setup
fax setup<br />
chapter 13<br />
122<br />
how to answer fax c<strong>all</strong>s manu<strong>all</strong>y<br />
To receive faxes manu<strong>all</strong>y, you must be available to respond <strong>in</strong> person to<br />
<strong>in</strong>com<strong>in</strong>g fax c<strong>all</strong>s or your HP PSC cannot receive faxes.<br />
Before you can answer fax c<strong>all</strong>s manu<strong>all</strong>y, you must change the R<strong>in</strong>gs to Answer<br />
sett<strong>in</strong>g to No Answer as described <strong>in</strong> set number of r<strong>in</strong>gs before answer<strong>in</strong>g on<br />
page 59. For <strong>in</strong>formation on how to receive fax c<strong>all</strong>s manu<strong>all</strong>y from your<br />
attached ph<strong>one</strong> and from an extension ph<strong>one</strong>, see receive a fax manu<strong>all</strong>y on<br />
page 61.<br />
case D: fax l<strong>in</strong>e shared with PC modem (no voice c<strong>all</strong>s<br />
received)<br />
If you have a fax l<strong>in</strong>e on which you receive no voice c<strong>all</strong>s, and you also have a<br />
PC modem connected on this l<strong>in</strong>e, connect your HP PSC as described <strong>in</strong> this<br />
section.<br />
Note: S<strong>in</strong>ce your PC modem shares the teleph<strong>one</strong> l<strong>in</strong>e with your HP PSC,<br />
you will not be able to use both simultaneously. For example, while you are<br />
send<strong>in</strong>g and receiv<strong>in</strong>g faxes, you will not be able to e-mail or access the<br />
Internet.<br />
Teleph<strong>one</strong><br />
w<strong>all</strong> jack<br />
Use the ph<strong>one</strong> cord<br />
supplied <strong>in</strong> the box with<br />
your HP PSC<br />
Back view of the HP PSC PC modem<br />
1 Remove the white plug from the port labeled “2-EXT” on the back of your<br />
HP PSC.<br />
2 F<strong>in</strong>d the ph<strong>one</strong> cord that connects from the back of your computer (your<br />
PC modem) to a w<strong>all</strong> jack. Disconnect the cord from the w<strong>all</strong> jack and<br />
plug it <strong>in</strong>to the port labeled “2-EXT” on the back of your HP PSC.<br />
3 Us<strong>in</strong>g the ph<strong>one</strong> cord supplied <strong>in</strong> the box with your HP PSC, connect <strong>one</strong><br />
end to your teleph<strong>one</strong> w<strong>all</strong> jack, then connect the other end to the port<br />
labeled “1-LINE” on the back of your HP PSC.<br />
Caution! If you do not use the supplied cord to connect from the<br />
teleph<strong>one</strong> w<strong>all</strong> jack to your HP PSC, you might not be able to fax<br />
successfully. This special 2-wire cord is different from the more<br />
common 4-wire ph<strong>one</strong> cords you might already have <strong>in</strong> your<br />
<strong>hp</strong> <strong>psc</strong> <strong>2400</strong> <strong>series</strong>
eference <strong>guide</strong><br />
fax setup<br />
office. For more <strong>in</strong>formation about how to tell the difference<br />
between the cords, see I have difficulties when send<strong>in</strong>g faxes and<br />
when receiv<strong>in</strong>g faxes on page 145.<br />
4 If your PC modem’s software is set to automatic<strong>all</strong>y receive faxes to your<br />
computer, turn off that sett<strong>in</strong>g.<br />
Caution! If you do not turn off the auto fax receive sett<strong>in</strong>g <strong>in</strong> your<br />
PC modem software, your HP PSC will not be able to receive<br />
faxes.<br />
5 (Optional) Change the R<strong>in</strong>gs to Answer sett<strong>in</strong>g to 1 r<strong>in</strong>g or 2 r<strong>in</strong>gs.<br />
For <strong>in</strong>formation on how to change this sett<strong>in</strong>g, see set number of r<strong>in</strong>gs<br />
before answer<strong>in</strong>g on page 59.<br />
how your <strong>hp</strong> <strong>psc</strong> will answer fax c<strong>all</strong>s<br />
When the ph<strong>one</strong> r<strong>in</strong>gs, your HP PSC will answer automatic<strong>all</strong>y after the number<br />
of r<strong>in</strong>gs you set <strong>in</strong> the R<strong>in</strong>gs to Answer sett<strong>in</strong>g. Then it will beg<strong>in</strong> emitt<strong>in</strong>g fax<br />
reception t<strong>one</strong>s to the send<strong>in</strong>g fax mach<strong>in</strong>e and receive the fax.<br />
case E: shared voice/fax l<strong>in</strong>e with PC modem<br />
Teleph<strong>one</strong><br />
w<strong>all</strong> jack<br />
If you receive both voice c<strong>all</strong>s and fax c<strong>all</strong>s at the same ph<strong>one</strong> number, and you<br />
also have a PC modem connected on this ph<strong>one</strong> l<strong>in</strong>e, connect your HP PSC as<br />
described <strong>in</strong> this section.<br />
Note: S<strong>in</strong>ce your PC modem shares the teleph<strong>one</strong> l<strong>in</strong>e with your HP PSC,<br />
you will not be able to use both simultaneously. For example, while you are<br />
send<strong>in</strong>g and receiv<strong>in</strong>g faxes, you will not be able to e-mail or access the<br />
Internet.<br />
Use the ph<strong>one</strong> cord<br />
supplied <strong>in</strong> the box with<br />
your HP PSC<br />
IN OUT<br />
Back view of the HP PSC PC modem Teleph<strong>one</strong><br />
1 Remove the white plug from the port labeled “2-EXT” on the back of your<br />
HP PSC.<br />
2 F<strong>in</strong>d the ph<strong>one</strong> cord that connects from the back of your computer (your<br />
PC modem) to a w<strong>all</strong> jack. Disconnect the cord from the w<strong>all</strong> jack and<br />
plug it <strong>in</strong>to the port labeled “2-EXT” on the back of your HP PSC.<br />
123<br />
fax setup
fax setup<br />
chapter 13<br />
124<br />
3 If your PC modem’s software is set to automatic<strong>all</strong>y receive faxes to your<br />
computer, turn off that sett<strong>in</strong>g.<br />
Caution! If you do not turn off the auto fax receive sett<strong>in</strong>g <strong>in</strong> your<br />
PC modem software, your HP PSC will not be able to receive<br />
faxes.<br />
4 Connect a ph<strong>one</strong> to the “out” port on the back of your PC modem.<br />
5 Us<strong>in</strong>g the ph<strong>one</strong> cord supplied <strong>in</strong> the box with your HP PSC, connect <strong>one</strong><br />
end to your teleph<strong>one</strong> w<strong>all</strong> jack, then connect the other end to the port<br />
labeled “1-LINE” on the back of your HP PSC.<br />
Caution! If you do not use the supplied cord to connect from the<br />
teleph<strong>one</strong> w<strong>all</strong> jack to your HP PSC, you might not be able to fax<br />
successfully. This special 2-wire cord is different from the more<br />
common 4-wire ph<strong>one</strong> cords you might already have <strong>in</strong> your<br />
office. For more <strong>in</strong>formation about how to tell the difference<br />
between the cords, see I have difficulties when send<strong>in</strong>g faxes and<br />
when receiv<strong>in</strong>g faxes on page 145.<br />
Now you need to decide how you want to answer fax c<strong>all</strong>s: automatic<strong>all</strong>y or<br />
manu<strong>all</strong>y.<br />
how to answer fax c<strong>all</strong>s automatic<strong>all</strong>y<br />
The HP PSC is factory-set to answer <strong>all</strong> c<strong>all</strong>s automatic<strong>all</strong>y after 5 r<strong>in</strong>gs, so you<br />
do not need to change any sett<strong>in</strong>gs if you want to automatic<strong>all</strong>y receive faxes.<br />
Your HP PSC will not be able to dist<strong>in</strong>guish between fax and voice c<strong>all</strong>s,<br />
however, so if you suspect a voice c<strong>all</strong> is <strong>in</strong>com<strong>in</strong>g, you will need to answer it<br />
before the 5th r<strong>in</strong>g or the HP PSC will answer first.<br />
Note: If you pick up the ph<strong>one</strong> before the 5th r<strong>in</strong>g and hear fax t<strong>one</strong>s from<br />
a send<strong>in</strong>g fax mach<strong>in</strong>e, you will need to manu<strong>all</strong>y answer the fax c<strong>all</strong>. For<br />
<strong>in</strong>formation on how to receive fax c<strong>all</strong>s manu<strong>all</strong>y from your attached ph<strong>one</strong><br />
and from an extension ph<strong>one</strong>, see receive a fax manu<strong>all</strong>y on page 61.<br />
how to answer fax c<strong>all</strong>s manu<strong>all</strong>y<br />
To receive faxes manu<strong>all</strong>y, you must be available to respond <strong>in</strong> person to<br />
<strong>in</strong>com<strong>in</strong>g fax c<strong>all</strong>s or your HP PSC cannot receive faxes.<br />
Before you can answer fax c<strong>all</strong>s manu<strong>all</strong>y, you need to change the R<strong>in</strong>gs to<br />
Answer sett<strong>in</strong>g to No Answer as described <strong>in</strong> set number of r<strong>in</strong>gs before<br />
answer<strong>in</strong>g on page 59. For <strong>in</strong>formation on how to receive fax c<strong>all</strong>s manu<strong>all</strong>y<br />
from your attached ph<strong>one</strong> and from an extension ph<strong>one</strong>, see receive a fax<br />
manu<strong>all</strong>y on page 61.<br />
case F: shared voice/fax l<strong>in</strong>e with answer<strong>in</strong>g mach<strong>in</strong>e<br />
If you receive both voice c<strong>all</strong>s and fax c<strong>all</strong>s at the same ph<strong>one</strong> number, and you<br />
also have an answer<strong>in</strong>g mach<strong>in</strong>e that answers voice c<strong>all</strong>s at this ph<strong>one</strong> number,<br />
connect your HP PSC as described <strong>in</strong> this section.<br />
<strong>hp</strong> <strong>psc</strong> <strong>2400</strong> <strong>series</strong>
Teleph<strong>one</strong><br />
w<strong>all</strong> jack<br />
<strong>reference</strong> <strong>guide</strong><br />
IN OUT<br />
Back view of the HP PSC Answer<strong>in</strong>g<br />
mach<strong>in</strong>e<br />
Use the ph<strong>one</strong> cord<br />
supplied <strong>in</strong> the box with<br />
your HP PSC<br />
Teleph<strong>one</strong><br />
(Optional)<br />
fax setup<br />
1 Remove the white plug from the port labeled “2-EXT” on the back of your<br />
HP PSC.<br />
2 Unplug your answer<strong>in</strong>g mach<strong>in</strong>e from the teleph<strong>one</strong> w<strong>all</strong> jack, and<br />
connect it to the port labeled “2-EXT” on the back of your HP PSC.<br />
Caution! If you do not connect your answer<strong>in</strong>g mach<strong>in</strong>e directly<br />
to your HP PSC, fax t<strong>one</strong>s from a send<strong>in</strong>g fax mach<strong>in</strong>e might be<br />
recorded on your answer<strong>in</strong>g mach<strong>in</strong>e, and you might not be able<br />
to receive faxes with your HP PSC.<br />
3 Set your answer<strong>in</strong>g mach<strong>in</strong>e to answer after 4 or fewer r<strong>in</strong>gs.<br />
4 Change the R<strong>in</strong>gs to Answer sett<strong>in</strong>g on your HP PSC to 6 r<strong>in</strong>gs.<br />
For <strong>in</strong>formation on how to change this sett<strong>in</strong>g, see set number of r<strong>in</strong>gs<br />
before answer<strong>in</strong>g on page 59.<br />
5 Us<strong>in</strong>g the ph<strong>one</strong> cord supplied <strong>in</strong> the box with your HP PSC, connect <strong>one</strong><br />
end to your teleph<strong>one</strong> w<strong>all</strong> jack, then connect the other end to the port<br />
labeled “1-LINE” on the back of your HP PSC.<br />
Caution! If you do not use the supplied cord to connect from the<br />
teleph<strong>one</strong> w<strong>all</strong> jack to your HP PSC, you might not be able to fax<br />
successfully. This special 2-wire cord is different from the more<br />
common 4-wire ph<strong>one</strong> cords you might already have <strong>in</strong> your<br />
office. For more <strong>in</strong>formation about how to tell the difference<br />
between the cords, see I have difficulties when send<strong>in</strong>g faxes and<br />
when receiv<strong>in</strong>g faxes on page 145.<br />
6 (Optional) If your answer<strong>in</strong>g mach<strong>in</strong>e has no built-<strong>in</strong> ph<strong>one</strong>, for<br />
convenience you might want to connect a ph<strong>one</strong> to the back of your<br />
answer<strong>in</strong>g mach<strong>in</strong>e at the “out” port.<br />
how your <strong>hp</strong> <strong>psc</strong> will answer fax c<strong>all</strong>s<br />
You set the HP PSC to answer after 6 r<strong>in</strong>gs, and you set your answer<strong>in</strong>g<br />
mach<strong>in</strong>e to answer after 4 or fewer r<strong>in</strong>gs. This ensures that your answer<strong>in</strong>g<br />
mach<strong>in</strong>e will always answer before the HP PSC.<br />
125<br />
fax setup
fax setup<br />
chapter 13<br />
126<br />
When the ph<strong>one</strong> r<strong>in</strong>gs, your answer<strong>in</strong>g mach<strong>in</strong>e will answer after the<br />
number of r<strong>in</strong>gs you have set, and then play your recorded greet<strong>in</strong>g. The<br />
HP PSC monitors the c<strong>all</strong> dur<strong>in</strong>g this time, “listen<strong>in</strong>g” for fax t<strong>one</strong>s. If<br />
<strong>in</strong>com<strong>in</strong>g fax t<strong>one</strong>s are detected, the HP PSC will emit fax reception t<strong>one</strong>s<br />
and receive the fax; if there are no fax t<strong>one</strong>s, the HP PSC stops monitor<strong>in</strong>g<br />
the l<strong>in</strong>e and your answer<strong>in</strong>g mach<strong>in</strong>e can record a voice message.<br />
case G: shared voice/fax l<strong>in</strong>e with PC modem and answer<strong>in</strong>g<br />
mach<strong>in</strong>e<br />
Teleph<strong>one</strong><br />
w<strong>all</strong> jack<br />
If you receive both voice c<strong>all</strong>s and fax c<strong>all</strong>s at the same ph<strong>one</strong> number, and you<br />
also have a PC modem and answer<strong>in</strong>g mach<strong>in</strong>e connected on this ph<strong>one</strong> l<strong>in</strong>e,<br />
connect your HP PSC as described <strong>in</strong> this section.<br />
Note: S<strong>in</strong>ce your PC modem shares the teleph<strong>one</strong> l<strong>in</strong>e with your HP PSC,<br />
you will not be able to use both simultaneously. For example, while you are<br />
send<strong>in</strong>g and receiv<strong>in</strong>g faxes, you will not be able to e-mail or access the<br />
Internet.<br />
IN OUT<br />
Back view of the HP PSC<br />
Use the ph<strong>one</strong> cord<br />
supplied <strong>in</strong> the box with<br />
your HP PSC<br />
PC modem Answer<strong>in</strong>g<br />
mach<strong>in</strong>e<br />
Teleph<strong>one</strong><br />
(Optional)<br />
1 Remove the white plug from the port labeled “2-EXT” on the back of your<br />
HP PSC.<br />
2 F<strong>in</strong>d the ph<strong>one</strong> cord that connects from the back of your computer (your<br />
PC modem) to a w<strong>all</strong> jack. Disconnect the cord from the w<strong>all</strong> jack and<br />
plug it <strong>in</strong>to the port labeled “2-EXT” on the back of your HP PSC.<br />
3 If your PC modem’s software is set to automatic<strong>all</strong>y receive faxes to your<br />
computer, turn off that sett<strong>in</strong>g.<br />
Caution! If you do not turn off the auto fax receive sett<strong>in</strong>g <strong>in</strong> your<br />
PC modem software, your HP PSC will not be able to receive<br />
faxes.<br />
4 Unplug your answer<strong>in</strong>g mach<strong>in</strong>e from the teleph<strong>one</strong> w<strong>all</strong> jack, and<br />
connect it to the “out” port on the back of your PC modem.<br />
<strong>hp</strong> <strong>psc</strong> <strong>2400</strong> <strong>series</strong>
eference <strong>guide</strong><br />
fax setup<br />
This <strong>all</strong>ows a direct connection between the HP PSC and your answer<strong>in</strong>g<br />
mach<strong>in</strong>e, even though the PC modem is connected first <strong>in</strong> l<strong>in</strong>e.<br />
Caution! If you do not connect your answer<strong>in</strong>g mach<strong>in</strong>e <strong>in</strong> this<br />
way, fax t<strong>one</strong>s from a send<strong>in</strong>g fax mach<strong>in</strong>e might be recorded on<br />
your answer<strong>in</strong>g mach<strong>in</strong>e, and you might not be able to receive<br />
faxes with your HP PSC.<br />
5 Set your answer<strong>in</strong>g mach<strong>in</strong>e to answer after 4 or fewer r<strong>in</strong>gs.<br />
6 Change the R<strong>in</strong>gs to Answer sett<strong>in</strong>g on your HP PSC to 6 r<strong>in</strong>gs.<br />
For <strong>in</strong>formation on how to change this sett<strong>in</strong>g, see set number of r<strong>in</strong>gs<br />
before answer<strong>in</strong>g on page 59.<br />
7 Us<strong>in</strong>g the ph<strong>one</strong> cord supplied <strong>in</strong> the box with your HP PSC, connect <strong>one</strong><br />
end to your teleph<strong>one</strong> w<strong>all</strong> jack, then connect the other end to the port<br />
labeled “1-LINE” on the back of your HP PSC.<br />
Caution! If you do not use the supplied cord to connect from the<br />
teleph<strong>one</strong> w<strong>all</strong> jack to your HP PSC, you might not be able to fax<br />
successfully. This special 2-wire ph<strong>one</strong> cord is different from the<br />
more common 4-wire cords you might already have <strong>in</strong> your office.<br />
For more <strong>in</strong>formation about how to tell the difference between the<br />
cords, see I have difficulties when send<strong>in</strong>g faxes and when<br />
receiv<strong>in</strong>g faxes on page 145.<br />
8 (Optional) If your answer<strong>in</strong>g mach<strong>in</strong>e has no built-<strong>in</strong> ph<strong>one</strong>, for<br />
convenience you might want to connect a ph<strong>one</strong> to the back of your<br />
answer<strong>in</strong>g mach<strong>in</strong>e at the “out” port.<br />
how your <strong>hp</strong> <strong>psc</strong> will answer fax c<strong>all</strong>s<br />
You set the HP PSC to answer after 6 r<strong>in</strong>gs, and you set your answer<strong>in</strong>g<br />
mach<strong>in</strong>e to answer after 4 or fewer r<strong>in</strong>gs. This ensures that your answer<strong>in</strong>g<br />
mach<strong>in</strong>e will always answer before the HP PSC.<br />
When the ph<strong>one</strong> r<strong>in</strong>gs, your answer<strong>in</strong>g mach<strong>in</strong>e will answer after the<br />
number of r<strong>in</strong>gs you have set, and then play your recorded greet<strong>in</strong>g. The<br />
HP PSC monitors the c<strong>all</strong> dur<strong>in</strong>g this time, “listen<strong>in</strong>g” for fax t<strong>one</strong>s. If<br />
<strong>in</strong>com<strong>in</strong>g fax t<strong>one</strong>s are detected, the HP PSC will emit fax reception t<strong>one</strong>s<br />
and receive the fax; if there are no fax t<strong>one</strong>s, the HP PSC stops monitor<strong>in</strong>g<br />
the l<strong>in</strong>e and your answer<strong>in</strong>g mach<strong>in</strong>e can record a voice message.<br />
case H: shared voice/fax l<strong>in</strong>e with voicemail<br />
If you receive both voice c<strong>all</strong>s and fax c<strong>all</strong>s at the same ph<strong>one</strong> number, and you<br />
also subscribe to a voicemail service through your ph<strong>one</strong> company, connect<br />
your HP PSC as described <strong>in</strong> this section.<br />
Note: The HP PSC cannot receive faxes automatic<strong>all</strong>y if you have a<br />
voicemail service, therefore, you must be available to respond <strong>in</strong> person to<br />
<strong>in</strong>com<strong>in</strong>g fax c<strong>all</strong>s manu<strong>all</strong>y. If you want to receive faxes automatic<strong>all</strong>y<br />
<strong>in</strong>stead, contact your ph<strong>one</strong> company to subscribe to a dist<strong>in</strong>ctive r<strong>in</strong>g<strong>in</strong>g<br />
service, or to obta<strong>in</strong> a separate ph<strong>one</strong> l<strong>in</strong>e for fax<strong>in</strong>g.<br />
127<br />
fax setup
fax setup<br />
chapter 13<br />
128<br />
Teleph<strong>one</strong><br />
w<strong>all</strong> jack<br />
Use the ph<strong>one</strong> cord<br />
supplied <strong>in</strong> the box with<br />
your HP PSC<br />
1 Us<strong>in</strong>g the ph<strong>one</strong> cord supplied <strong>in</strong> the box with your HP PSC, connect <strong>one</strong><br />
end to your teleph<strong>one</strong> w<strong>all</strong> jack, then connect the other end to the port<br />
labeled “1-LINE” on the back of your HP PSC.<br />
Caution! If you do not use the supplied cord to connect from the<br />
teleph<strong>one</strong> w<strong>all</strong> jack to your HP PSC, you might not be able to fax<br />
successfully. This special 2-wire cord is different from the more<br />
common 4-wire ph<strong>one</strong> cords you might already have <strong>in</strong> your<br />
office. For more <strong>in</strong>formation about how to tell the difference<br />
between the cords, see I have difficulties when send<strong>in</strong>g faxes and<br />
when receiv<strong>in</strong>g faxes on page 145.<br />
2 Remove the white plug from the port labeled “2-EXT” on the back of your<br />
HP PSC, and then connect a ph<strong>one</strong> to this port.<br />
3 Change the R<strong>in</strong>gs to Answer sett<strong>in</strong>g to No Answer us<strong>in</strong>g the <strong>in</strong>structions <strong>in</strong><br />
set up your <strong>hp</strong> <strong>psc</strong> to answer fax c<strong>all</strong>s manu<strong>all</strong>y on page 60.<br />
how to answer fax c<strong>all</strong>s manu<strong>all</strong>y<br />
Back view of the HP PSC Teleph<strong>one</strong><br />
You must be available to respond <strong>in</strong> person to <strong>in</strong>com<strong>in</strong>g fax c<strong>all</strong>s, or your<br />
HP PSC cannot receive faxes. For <strong>in</strong>formation on how to receive fax c<strong>all</strong>s<br />
manu<strong>all</strong>y from your attached ph<strong>one</strong> and from an extension ph<strong>one</strong>, see receive a<br />
fax manu<strong>all</strong>y on page 61.<br />
case I: shared voice/fax l<strong>in</strong>e with PC modem and voicemail<br />
If you receive both voice c<strong>all</strong>s and fax c<strong>all</strong>s at the same ph<strong>one</strong> number, use a<br />
PC modem on the same ph<strong>one</strong> l<strong>in</strong>e, and also subscribe to a voicemail service<br />
through your ph<strong>one</strong> company, connect your HP PSC as described <strong>in</strong> this section.<br />
Note: The HP PSC cannot receive faxes automatic<strong>all</strong>y if you have a<br />
voicemail service, therefore, you must be available to respond <strong>in</strong> person to<br />
<strong>in</strong>com<strong>in</strong>g fax c<strong>all</strong>s manu<strong>all</strong>y. If you want to receive faxes automatic<strong>all</strong>y<br />
<strong>in</strong>stead, contact your ph<strong>one</strong> company to subscribe to a dist<strong>in</strong>ctive r<strong>in</strong>g<strong>in</strong>g<br />
service, or to obta<strong>in</strong> a separate ph<strong>one</strong> l<strong>in</strong>e for fax<strong>in</strong>g.<br />
<strong>hp</strong> <strong>psc</strong> <strong>2400</strong> <strong>series</strong>
Teleph<strong>one</strong><br />
w<strong>all</strong> jack<br />
<strong>reference</strong> <strong>guide</strong><br />
Use the ph<strong>one</strong> cord<br />
supplied <strong>in</strong> the box with<br />
your HP PSC<br />
fax setup<br />
Note: S<strong>in</strong>ce your PC modem shares the teleph<strong>one</strong> l<strong>in</strong>e with your HP PSC,<br />
you will not be able to use both simultaneously. For example, while you are<br />
send<strong>in</strong>g and receiv<strong>in</strong>g faxes, you will not be able to e-mail or access the<br />
Internet.<br />
IN OUT<br />
Back view of the HP PSC PC modem Teleph<strong>one</strong><br />
1 Remove the white plug from the port labeled “2-EXT” on the back of your<br />
HP PSC.<br />
2 F<strong>in</strong>d the ph<strong>one</strong> cord that connects from the back of your computer (your<br />
PC modem) to a w<strong>all</strong> jack. Disconnect the cord from the w<strong>all</strong> jack and<br />
plug it <strong>in</strong>to the port labeled “2-EXT” on the back of your HP PSC.<br />
3 If your PC modem’s software is set to automatic<strong>all</strong>y receive faxes to your<br />
computer, turn off that sett<strong>in</strong>g.<br />
Caution! If you do not turn off the auto fax receive sett<strong>in</strong>g <strong>in</strong> your<br />
modem software, your HP PSC will not be able to receive faxes.<br />
4 Connect a ph<strong>one</strong> to the “out” port on the back of your PC modem.<br />
5 Us<strong>in</strong>g the ph<strong>one</strong> cord supplied <strong>in</strong> the box with your HP PSC, connect <strong>one</strong><br />
end to your teleph<strong>one</strong> w<strong>all</strong> jack, then connect the other end to the port<br />
labeled “1-LINE” on the back of your HP PSC.<br />
Caution! If you do not use the supplied cord to connect from the<br />
teleph<strong>one</strong> w<strong>all</strong> jack to your HP PSC, you might not be able to fax<br />
successfully. This special 2-wire cord is different from the more<br />
common 4-wire ph<strong>one</strong> cords you might already have <strong>in</strong> your<br />
office. For more <strong>in</strong>formation about how to tell the difference<br />
between the cords, see I have difficulties when send<strong>in</strong>g faxes and<br />
when receiv<strong>in</strong>g faxes on page 145.<br />
6 Change the R<strong>in</strong>gs to Answer sett<strong>in</strong>g to No Answer us<strong>in</strong>g the <strong>in</strong>structions <strong>in</strong><br />
set up your <strong>hp</strong> <strong>psc</strong> to answer fax c<strong>all</strong>s manu<strong>all</strong>y on page 60.<br />
129<br />
fax setup
fax setup<br />
chapter 13<br />
130<br />
how to answer fax c<strong>all</strong>s manu<strong>all</strong>y<br />
You must be available to respond <strong>in</strong> person to <strong>in</strong>com<strong>in</strong>g fax c<strong>all</strong>s, or your HP PSC<br />
cannot receive faxes. For <strong>in</strong>formation on how to receive fax c<strong>all</strong>s manu<strong>all</strong>y from<br />
your attached ph<strong>one</strong> and from an extension ph<strong>one</strong>, see receive a fax manu<strong>all</strong>y<br />
on page 61.<br />
fax<strong>in</strong>g from a DSL l<strong>in</strong>e<br />
If you have a digital subscriber l<strong>in</strong>e (DSL) service through your ph<strong>one</strong> company,<br />
use the <strong>in</strong>structions <strong>in</strong> this section to connect a DSL filter between the teleph<strong>one</strong><br />
w<strong>all</strong> jack and your HP PSC. This filter removes the digital signal that would block<br />
your HP PSC from communicat<strong>in</strong>g properly with the teleph<strong>one</strong> l<strong>in</strong>e.<br />
Caution! If you have a DSL l<strong>in</strong>e and you do not connect the DSL<br />
filter, you will not be able to send and receive faxes with your<br />
HP PSC.<br />
Teleph<strong>one</strong><br />
w<strong>all</strong> jack<br />
DSL filter supplied<br />
by your DSL<br />
provider<br />
Back view of the HP PSC<br />
Use the ph<strong>one</strong> cord<br />
supplied <strong>in</strong> the box with<br />
your HP PSC<br />
1 First, connect your HP PSC accord<strong>in</strong>g to the appropriate setup case for<br />
your office. For <strong>in</strong>formation, see how to choose the right fax setup for your<br />
office on page 116.<br />
2 Obta<strong>in</strong> a DSL filter from your DSL provider.<br />
3 Us<strong>in</strong>g the ph<strong>one</strong> cord supplied <strong>in</strong> the box with your HP PSC, connect <strong>one</strong><br />
end to the open port on the DSL filter, then connect the other end to the<br />
port labeled “1-LINE” on the back of your HP PSC.<br />
Note: While connect<strong>in</strong>g your setup case, you might have already<br />
connected your HP PSC to the teleph<strong>one</strong> w<strong>all</strong> jack us<strong>in</strong>g the HP-supplied<br />
cord. If so, remove this cord from the w<strong>all</strong> jack and connect it to the open<br />
port on the DSL filter.<br />
Caution! If you do not use the supplied cord to connect from the<br />
DSL filter to your HP PSC, you might not be able to fax<br />
successfully. This special 2-wire cord is different from the more<br />
common 4-wire ph<strong>one</strong> cords you might already have <strong>in</strong> your<br />
office. For more <strong>in</strong>formation about how to tell the difference<br />
between the cords, see I have difficulties when send<strong>in</strong>g faxes and<br />
when receiv<strong>in</strong>g faxes on page 145.<br />
4 Connect the DSL filter cord to the teleph<strong>one</strong> w<strong>all</strong> jack.<br />
<strong>hp</strong> <strong>psc</strong> <strong>2400</strong> <strong>series</strong>
14<br />
<strong>hp</strong> <strong>in</strong>stant share setup and use<br />
HP Instant Share makes it easy to send photos that family and friends can view.<br />
Just take a photo or scan an image, select the photograph or image, and use the<br />
software on your computer to forward the media to an e-mail dest<strong>in</strong>ation. You<br />
can even upload your photos (depend<strong>in</strong>g on your country/region) to an onl<strong>in</strong>e<br />
photo album, or an onl<strong>in</strong>e photo f<strong>in</strong>ish<strong>in</strong>g service.<br />
With HP Instant Share, family and friends always get photos they can view—no<br />
more large downloads or images that are too big to open. An e-mail with<br />
thumbnail images of your photos is sent with a l<strong>in</strong>k to a secure Web page where<br />
your family and friends can easily view, share, pr<strong>in</strong>t, and save your pictures.<br />
Note: Some operat<strong>in</strong>g systems do not support HP Instant Share, but you can<br />
still use your HP Photo & Imag<strong>in</strong>g Director (HP Director) software to send a<br />
photo to family and friends as an e-mail attachment. (For more <strong>in</strong>formation,<br />
see send a photo or image us<strong>in</strong>g your <strong>hp</strong> <strong>psc</strong> (Mac<strong>in</strong>tosh) on page 135.)<br />
This section conta<strong>in</strong>s the follow<strong>in</strong>g topics:<br />
• use <strong>hp</strong> <strong>in</strong>stant share <strong>in</strong> five easy steps (W<strong>in</strong>dows) on page 131<br />
• send a photo or image us<strong>in</strong>g your <strong>hp</strong> <strong>psc</strong> (Mac<strong>in</strong>tosh) on page 135<br />
• why should I register with <strong>hp</strong> <strong>in</strong>stant share (W<strong>in</strong>dows)? on page 136<br />
use <strong>hp</strong> <strong>in</strong>stant share <strong>in</strong> five easy steps (W<strong>in</strong>dows)<br />
HP Instant Share is easy to use with your HP PSC <strong>2400</strong> Series (HP PSC)—<br />
simply:<br />
1 Insert a photo memory card <strong>in</strong> your HP PSC and select an image that you<br />
want to send.<br />
2 Press the E-mail button on the front panel of your HP PSC.<br />
The HP Instant Share tab <strong>in</strong> the HP Photo & Imag<strong>in</strong>g G<strong>all</strong>ery (HP G<strong>all</strong>ery)<br />
opens on your computer.<br />
3 From the HP Instant Share tab, click Start HP Instant Share.<br />
4 Create an e-mail dest<strong>in</strong>ation with<strong>in</strong> HP Instant Share.<br />
Note: You can also set up an Address Book to reta<strong>in</strong> your e-mail addresses.<br />
5 Send your e-mail message.<br />
For specific <strong>in</strong>formation on how to use HP Instant Share, see the follow<strong>in</strong>g<br />
procedures:<br />
• use the e-mail button on page 132<br />
• use the <strong>hp</strong> <strong>in</strong>stant share photo menu option on page 133<br />
• use a scanned image on page 133<br />
• access <strong>hp</strong> <strong>in</strong>stant share from the <strong>hp</strong> director on page 134<br />
131<br />
<strong>hp</strong> <strong>in</strong>stant share
<strong>hp</strong> <strong>in</strong>stant share<br />
chapter 14<br />
132<br />
Note: Your computer must be connected to the Internet to use HP Instant<br />
Share. If you are an AOL or Compuserve user, please connect to your<br />
Internet service provider before attempt<strong>in</strong>g to use HP Instant Share.<br />
use the e-mail button<br />
The E-mail button on your HP PSC lets you easily send a selected photo to<br />
any<strong>one</strong> with an e-mail account. For more <strong>in</strong>formation see use a photo memory<br />
card on page 21.<br />
1 Navigate to a photo you want to send and press OK to select it.<br />
2 Press E-mail.<br />
The HP Instant Share tab with<strong>in</strong> the HP G<strong>all</strong>ery displays.<br />
Your HP PSC transfers the selected photo to the HP G<strong>all</strong>ery. The path and<br />
filename of the digital image are shown <strong>in</strong> the Selection Tray at the bottom<br />
of the w<strong>in</strong>dow.<br />
Note: Make sure the photo you select appears on the color graphics<br />
display. The photo that appears on the display is sent to the HP G<strong>all</strong>ery,<br />
even if it is different from the <strong>one</strong> that you selected.<br />
3 In the Control area, click Start HP Instant Share.<br />
The Go Onl<strong>in</strong>e screen appears <strong>in</strong> the Work area.<br />
4 Click Next.<br />
The One-Time Setup—Region and Terms of Use screen appears.<br />
5 Select your country/region from the drop-down list.<br />
6 Read the Terms of Service, check the I agree box, and click Next.<br />
The Create HP Instant Share E-Mail screen appears.<br />
7 Complete the To, From, Subject, and Message fields.<br />
Note: To open and ma<strong>in</strong>ta<strong>in</strong> an e-mail address book, click Address Book,<br />
register with HP Instant Share, and obta<strong>in</strong> a HP Passport.<br />
Note: To send your e-mail to multiple addresses, click the How to e-mail<br />
multiple people l<strong>in</strong>k.<br />
8 Click Next.<br />
The Add Captions screen appears.<br />
9 Enter a caption for your photo, and then click Next.<br />
Your photo is uploaded to the HP Instant Share services website.<br />
After the photo is uploaded, the Photos E-mailed screen appears.<br />
Your e-mail is sent with a l<strong>in</strong>k to a secure Web page that stores your photo<br />
for 60 days.<br />
10 Click F<strong>in</strong>ish.<br />
The HP Instant Share website opens <strong>in</strong> your browser.<br />
From the website you can select your photo, and choose from a number of<br />
process<strong>in</strong>g options.<br />
<strong>hp</strong> <strong>psc</strong> <strong>2400</strong> <strong>series</strong>
eference <strong>guide</strong><br />
use the <strong>hp</strong> <strong>in</strong>stant share photo menu option<br />
<strong>hp</strong> <strong>in</strong>stant share setup and use<br />
For <strong>in</strong>formation on us<strong>in</strong>g a photo memory card, see use a photo memory card<br />
on page 21.<br />
1 Select an photo from your photo memory card.<br />
2 From the front panel, press Photo, and then press 9.<br />
The HP Instant Share tab with<strong>in</strong> the HP G<strong>all</strong>ery displays on your PC.<br />
Your HP PSC transfers the selected photo to the HP G<strong>all</strong>ery. The path and<br />
filename of the digital image are shown <strong>in</strong> the Selection Tray at the bottom<br />
of the w<strong>in</strong>dow.<br />
Note: Make sure the photo you select appears on the color graphics<br />
display. The photo that appears on the display is sent to the HP G<strong>all</strong>ery,<br />
even if it is different from the <strong>one</strong> that you selected.<br />
3 In the Control area, click Start HP Instant Share.<br />
The Go Onl<strong>in</strong>e screen appears <strong>in</strong> the Work area.<br />
4 To use HP Instant Share, go to step 6 <strong>in</strong> access <strong>hp</strong> <strong>in</strong>stant share from the<br />
<strong>hp</strong> director below.<br />
use a scanned image<br />
For <strong>in</strong>formation on scann<strong>in</strong>g an image, see use the scan features on page 51.<br />
1 Load your orig<strong>in</strong>al face down <strong>in</strong> the right front corner of the glass.<br />
2 Press Scan.<br />
A preview image of the scan appears <strong>in</strong> the HP Scan w<strong>in</strong>dow on the<br />
computer, where you can edit it.<br />
For more <strong>in</strong>formation about edit<strong>in</strong>g a preview image, see the onscreen<br />
<strong>hp</strong> photo & imag<strong>in</strong>g help that came with your software.<br />
3 Make any needed edits to the preview image <strong>in</strong> the HP Scan w<strong>in</strong>dow.<br />
When you have f<strong>in</strong>ished, click Accept.<br />
The HP PSC sends the scan to the HP G<strong>all</strong>ery, which automatic<strong>all</strong>y opens<br />
and displays the image.<br />
4 After you have edited the scanned image, select it.<br />
Note: The HP G<strong>all</strong>ery has many edit<strong>in</strong>g tools that you can use to edit your<br />
image and achieve the results you want. For more <strong>in</strong>formation, see the<br />
onscreen <strong>hp</strong> photo & imag<strong>in</strong>g help that came with your software.<br />
5 Click the HP Instant Share tab.<br />
6 In the Control area, click Start HP Instant Share.<br />
The Go Onl<strong>in</strong>e screen appears <strong>in</strong> the Work area.<br />
7 To use HP Instant Share, go to step 6 <strong>in</strong> access <strong>hp</strong> <strong>in</strong>stant share from the<br />
<strong>hp</strong> director below.<br />
133<br />
<strong>hp</strong> <strong>in</strong>stant share
<strong>hp</strong> <strong>in</strong>stant share<br />
chapter 14<br />
134<br />
access <strong>hp</strong> <strong>in</strong>stant share from the <strong>hp</strong> director<br />
This section addresses how to use the HP Instant Share e-mail service. The terms<br />
photo and image are both referred to as image <strong>in</strong> this section. For more<br />
<strong>in</strong>formation on us<strong>in</strong>g the HP Director, see the onscreen <strong>hp</strong> photo & imag<strong>in</strong>g help<br />
that came with your software.<br />
1 Open the HP Director.<br />
2 From the HP Director, click HP G<strong>all</strong>ery.<br />
The HP Photo & Imag<strong>in</strong>g G<strong>all</strong>ery appears.<br />
3 Select an image from the folder <strong>in</strong> which it is stored.<br />
Note: For more <strong>in</strong>formation, see the onscreen <strong>hp</strong> photo & imag<strong>in</strong>g help that<br />
came with your software.<br />
4 Click the HP Instant Share tab.<br />
5 In the Control area, click Start HP Instant Share.<br />
The Go Onl<strong>in</strong>e screen appears <strong>in</strong> the Work area.<br />
6 Click Next.<br />
The One-Time Setup—Region and Terms of Use screen appears.<br />
7 Select your country/region from the drop-down list.<br />
8 Read the Terms of Service, select the I agree check box, and click Next.<br />
The Select an HP Instant Share Service screen appears.<br />
9 Select HP Instant Share E-mail: send images through e-mail.<br />
10 Click Next.<br />
11 At the Create HP Instant Share E-Mail screen, complete the To, From,<br />
Subject, and Message fields.<br />
Note: To open and ma<strong>in</strong>ta<strong>in</strong> an e-mail address book, click Address Book,<br />
register with HP Instant Share, and obta<strong>in</strong> a HP Passport.<br />
Note: To send your e-mail to multiple addresses, click How to e-mail<br />
multiple people.<br />
12 Click Next.<br />
The Add Captions screen appears.<br />
13 Enter a caption for your digital image, and then click Next.<br />
Your image is uploaded to the HP Instant Share services site.<br />
After the image is uploaded, the Photos E-mailed screen appears.<br />
Your e-mail is sent with a l<strong>in</strong>k to a secure Web page that stores your image<br />
for 60 days.<br />
14 Click F<strong>in</strong>ish.<br />
The HP Instant Share website opens <strong>in</strong> your browser.<br />
From the website, you can select an image, and choose from a number of<br />
process<strong>in</strong>g options.<br />
<strong>hp</strong> <strong>psc</strong> <strong>2400</strong> <strong>series</strong>
eference <strong>guide</strong><br />
<strong>hp</strong> <strong>in</strong>stant share setup and use<br />
send a photo or image us<strong>in</strong>g your <strong>hp</strong> <strong>psc</strong> (Mac<strong>in</strong>tosh)<br />
If your HP PSC is connected to a Mac<strong>in</strong>tosh, you can send a photo or image to<br />
any<strong>one</strong> with an e-mail account. You <strong>in</strong>itiate your e-mail message from an e-mail<br />
application <strong>in</strong>st<strong>all</strong>ed on your computer by press<strong>in</strong>g E-mail <strong>in</strong> the HP G<strong>all</strong>ery. You<br />
open the HP G<strong>all</strong>ery from the HP Director.<br />
This section conta<strong>in</strong>s the follow<strong>in</strong>g topics:<br />
• use the e-mail button on page 135<br />
• use the <strong>hp</strong> <strong>in</strong>stant share photo menu option on page 135<br />
• use a scanned image on page 136<br />
• access the e-mail option from the <strong>hp</strong> director on page 136<br />
use the e-mail button<br />
The E-mail button on your HP PSC lets you easily send a selected photo to<br />
any<strong>one</strong> with an e-mail account. For more <strong>in</strong>formation see use a photo memory<br />
card on page 21.<br />
1 Navigate to a photo you want to send and press OK to select it.<br />
2 Press E-mail.<br />
Your HP PSC transfers the selected photo to the e-mail program on your<br />
Mac<strong>in</strong>tosh. You can then send it as an e-mail attachment by follow<strong>in</strong>g the<br />
prompts on your Mac<strong>in</strong>tosh. For more <strong>in</strong>formation, see the <strong>hp</strong> imag<strong>in</strong>g<br />
g<strong>all</strong>ery section <strong>in</strong> the onscreen <strong>hp</strong> photo and imag<strong>in</strong>g help.<br />
Note: Make sure the photo you select appears on the color graphics<br />
display. The photo that appears on the display is sent to the HP G<strong>all</strong>ery,<br />
even if it is different from the <strong>one</strong> that you selected.<br />
use the <strong>hp</strong> <strong>in</strong>stant share photo menu option<br />
You can share photos with family and friends by send<strong>in</strong>g a selected photo to<br />
any<strong>one</strong> with an e-mail account.<br />
1 Select an image from your photo memory card.<br />
For more <strong>in</strong>formation, see use a photo memory card on page 21<br />
2 From the front panel, press Photo, and then press 9.<br />
The photo appears <strong>in</strong> the HP G<strong>all</strong>ery on your computer.<br />
Note: Make sure the photo you select appears on the color graphics<br />
display. The photo that appears on the display is sent to the HP G<strong>all</strong>ery,<br />
even if it is different from the <strong>one</strong> that you selected.<br />
3 Click E-mail.<br />
The e-mail program on your Mac<strong>in</strong>tosh opens.<br />
You can then send the photo as an e-mail attachment by follow<strong>in</strong>g the<br />
prompts on your Mac<strong>in</strong>tosh.<br />
135<br />
<strong>hp</strong> <strong>in</strong>stant share
<strong>hp</strong> <strong>in</strong>stant share<br />
chapter 14<br />
136<br />
use a scanned image<br />
For <strong>in</strong>formation on scann<strong>in</strong>g an image, see use the scan features on page 51.<br />
1 Load your orig<strong>in</strong>al face down <strong>in</strong> the right front corner of the glass.<br />
2 Press Scan.<br />
A preview image of the scan appears <strong>in</strong> the HP Scan w<strong>in</strong>dow on the<br />
computer, where you can edit it.<br />
For more <strong>in</strong>formation about edit<strong>in</strong>g a preview image, see the onscreen<br />
<strong>hp</strong> photo and imag<strong>in</strong>g help that came with your software.<br />
3 Make any edits to the preview image <strong>in</strong> the HP Scan w<strong>in</strong>dow. When you<br />
have f<strong>in</strong>ished, click Accept.<br />
The HP PSC sends the scan to the HP G<strong>all</strong>ery, which automatic<strong>all</strong>y opens<br />
and displays the image.<br />
4 After you have edited the scanned image, select it.<br />
Note: The HP G<strong>all</strong>ery has many edit<strong>in</strong>g tools that you can use to edit your<br />
image and achieve the results you want. For more <strong>in</strong>formation, see the<br />
onscreen <strong>hp</strong> photo and imag<strong>in</strong>g help that came with your software.<br />
5 Click E-mail.<br />
The e-mail program on your Mac<strong>in</strong>tosh opens.<br />
You can now send the images as an e-mail attachment by follow<strong>in</strong>g the<br />
prompts on your Mac<strong>in</strong>tosh.<br />
access the e-mail option from the <strong>hp</strong> director<br />
1 Open the HP Director and click HP G<strong>all</strong>ery (OS 9).<br />
OR<br />
Click HP Director <strong>in</strong> the Dock, and select HP G<strong>all</strong>ery from the Manage and<br />
Share section of the HP Director menu (OS X).<br />
The HP Photo and Imag<strong>in</strong>g G<strong>all</strong>ery opens.<br />
2 Select an image.<br />
For more <strong>in</strong>formation, see the onscreen <strong>hp</strong> photo and imag<strong>in</strong>g help that<br />
came with your software.<br />
3 Click E-mail.<br />
The e-mail program on your Mac<strong>in</strong>tosh opens.<br />
You can now send the images as an e-mail attachment by follow<strong>in</strong>g the<br />
prompts on your Mac<strong>in</strong>tosh.<br />
why should I register with <strong>hp</strong> <strong>in</strong>stant share (W<strong>in</strong>dows)?<br />
With the HP PSC <strong>2400</strong> Series, HP Instant Share user registration is only<br />
required if you choose to use the Address Book. User registration is a separate<br />
log-on process from the HP product registration and is accomplished us<strong>in</strong>g the<br />
HP Passport setup program.<br />
If you choose to save e-mail addresses and create distribution lists <strong>in</strong> a HP Instant<br />
Share Address Book, you will be prompted to register. Registration is required<br />
prior to configur<strong>in</strong>g the Address Book and access<strong>in</strong>g the Address Book when<br />
address<strong>in</strong>g an HP Instant Share e-mail.<br />
<strong>hp</strong> <strong>psc</strong> <strong>2400</strong> <strong>series</strong>
15<br />
troubleshoot<strong>in</strong>g <strong>in</strong>formation<br />
This section conta<strong>in</strong>s troubleshoot<strong>in</strong>g <strong>in</strong>formation for the HP PSC <strong>2400</strong> Series<br />
(HP PSC). Specific <strong>in</strong>formation is provided for <strong>in</strong>st<strong>all</strong>ation and configuration<br />
issues. References to our onl<strong>in</strong>e troubleshoot<strong>in</strong>g help are provided for<br />
operational topics.<br />
This section conta<strong>in</strong>s the follow<strong>in</strong>g:<br />
• <strong>in</strong>st<strong>all</strong>ation troubleshoot<strong>in</strong>g on page 137<br />
• operational troubleshoot<strong>in</strong>g on page 149<br />
<strong>in</strong>st<strong>all</strong>ation troubleshoot<strong>in</strong>g<br />
Inst<strong>all</strong>ation and configuration troubleshoot<strong>in</strong>g tips are <strong>in</strong>cluded <strong>in</strong> this section for<br />
some of the most common issues associated with HP PSC fax setup, software<br />
and hardware <strong>in</strong>st<strong>all</strong>ation, and HP Instant Share.<br />
This section conta<strong>in</strong>s the follow<strong>in</strong>g topics:<br />
• software and hardware <strong>in</strong>st<strong>all</strong>ation troubleshoot<strong>in</strong>g on page 137<br />
• fax setup troubleshoot<strong>in</strong>g on page 144<br />
• <strong>hp</strong> <strong>in</strong>stant share setup troubleshoot<strong>in</strong>g on page 149<br />
software and hardware <strong>in</strong>st<strong>all</strong>ation troubleshoot<strong>in</strong>g<br />
If you encounter a software or hardware problem dur<strong>in</strong>g <strong>in</strong>st<strong>all</strong>ation, see the<br />
topics below for a possible solution.<br />
Dur<strong>in</strong>g a normal <strong>in</strong>st<strong>all</strong>ation of the HP PSC software, the follow<strong>in</strong>g th<strong>in</strong>gs occur:<br />
• The HP PSC CD-ROM runs automatic<strong>all</strong>y when the CD-ROM is <strong>in</strong>serted<br />
• The software <strong>in</strong>st<strong>all</strong>s<br />
• Files are copied to your hard drive<br />
• You are requested to plug <strong>in</strong> the HP PSC<br />
• A green OK and check mark appear on an <strong>in</strong>st<strong>all</strong>ation wizard screen<br />
• You are requested to restart your computer (might not occur <strong>in</strong> <strong>all</strong> cases)<br />
• The registration process runs<br />
If any of these th<strong>in</strong>gs did not occur, there might be a problem with the<br />
<strong>in</strong>st<strong>all</strong>ation. To check the <strong>in</strong>st<strong>all</strong>ation on a PC, verify the follow<strong>in</strong>g:<br />
• Start the HP Director and check to make sure the follow<strong>in</strong>g icons appear:<br />
scan picture, scan document, and <strong>hp</strong> g<strong>all</strong>ery. For <strong>in</strong>formation about<br />
start<strong>in</strong>g HP Director, see use the <strong>hp</strong> director software to do more with your<br />
<strong>hp</strong> <strong>psc</strong> on page 6. If the icons do not appear immediately, you might need<br />
137<br />
troubleshoot<strong>in</strong>g
troubleshoot<strong>in</strong>g<br />
chapter 15<br />
138<br />
to wait a few m<strong>in</strong>utes for the HP PSC to connect to your computer.<br />
Otherwise, see Some of the icons are miss<strong>in</strong>g <strong>in</strong> the <strong>hp</strong> director on<br />
page 140.<br />
• Open the Pr<strong>in</strong>ters dialog box and check to see that the HP PSC is listed.<br />
• Look at the Task Tray for an HP PSC icon. This <strong>in</strong>dicates that the HP PSC is<br />
ready.<br />
Task Tray<br />
software <strong>in</strong>st<strong>all</strong>ation troubleshoot<strong>in</strong>g<br />
Use this section to solve any problems you might encounter while <strong>in</strong>st<strong>all</strong><strong>in</strong>g the<br />
HP PSC software.<br />
problem possible cause and solution<br />
When I <strong>in</strong>sert the CD-<br />
ROM <strong>in</strong>to my<br />
computer’s CD-ROM<br />
drive, noth<strong>in</strong>g<br />
happens<br />
The m<strong>in</strong>imum system<br />
checks screen<br />
appears<br />
follow these steps:<br />
1 From the W<strong>in</strong>dows Start menu, choose Run.<br />
2 In the Run dialog box, enter d:\setup.exe (if your CD-ROM drive is<br />
not assigned to drive letter d, use the appropriate drive letter), and<br />
then click OK.<br />
Your system does not meet the m<strong>in</strong>imum requirements to <strong>in</strong>st<strong>all</strong> the<br />
software. Click Details to see what the specific problem is. Then correct<br />
the problem before attempt<strong>in</strong>g to <strong>in</strong>st<strong>all</strong> the software.<br />
<strong>hp</strong> <strong>psc</strong> <strong>2400</strong> <strong>series</strong>
problem possible cause and solution<br />
A red X or yellow<br />
triangle appears on<br />
the USB connect<br />
prompt<br />
I received a message<br />
that an unknown error<br />
has occurred<br />
<strong>reference</strong> <strong>guide</strong><br />
troubleshoot<strong>in</strong>g <strong>in</strong>formation<br />
follow these steps<br />
1 Verify that the front panel cover is firmly attached, then unplug the<br />
HP PSC and plug it <strong>in</strong> aga<strong>in</strong>.<br />
2 Verify that the USB and power cables are plugged <strong>in</strong>.<br />
3 Verify that the USB cable is set up properly as follows:<br />
– Unplug the USB cable and plug it <strong>in</strong> aga<strong>in</strong>.<br />
– Do not attach the USB cable to a keyboard or non-powered<br />
hub.<br />
– Verify that the USB cable is 3 meters or less <strong>in</strong> length.<br />
– If you have several USB devices attached to your computer,<br />
you might want to unplug the other devices dur<strong>in</strong>g the<br />
<strong>in</strong>st<strong>all</strong>ation.<br />
4 Cont<strong>in</strong>ue with the <strong>in</strong>st<strong>all</strong>ation and reboot the computer when<br />
prompted. Then open HP Director and check for the essential icons<br />
(scan picture, scan document, and <strong>hp</strong> g<strong>all</strong>ery)<br />
5 If the essential icons do not appear, remove the software and then<br />
re<strong>in</strong>st<strong>all</strong> it as described <strong>in</strong> Some of the icons are miss<strong>in</strong>g <strong>in</strong> the<br />
<strong>hp</strong> director on page 140.<br />
Try to cont<strong>in</strong>ue with the <strong>in</strong>st<strong>all</strong>ation. If that doesn’t work, stop and then<br />
restart the <strong>in</strong>st<strong>all</strong>ation.<br />
139<br />
troubleshoot<strong>in</strong>g
troubleshoot<strong>in</strong>g<br />
chapter 15<br />
problem possible cause and solution<br />
Some of the icons are<br />
miss<strong>in</strong>g <strong>in</strong> the<br />
<strong>hp</strong> director<br />
140<br />
If the essential icons (scan picture, scan document, send fax, and HP<br />
G<strong>all</strong>ery) do not appear, your <strong>in</strong>st<strong>all</strong>ation might not be complete.<br />
If your <strong>in</strong>st<strong>all</strong>ation is <strong>in</strong>complete, you might need to un<strong>in</strong>st<strong>all</strong> and then<br />
re<strong>in</strong>st<strong>all</strong> the software. Do not simply delete the HP PSC program files<br />
from your hard drive. Be sure to remove them properly us<strong>in</strong>g the<br />
un<strong>in</strong>st<strong>all</strong> utility provided <strong>in</strong> the HP PSC program group.<br />
to un<strong>in</strong>st<strong>all</strong> from a W<strong>in</strong>dows computer<br />
1 Disconnect your HP PSC from your computer.<br />
2 On the W<strong>in</strong>dows task bar, click Start, Programs All Programs<br />
(XP), Hewlett-Packard, <strong>hp</strong> <strong>psc</strong> <strong>2400</strong> <strong>series</strong>, un<strong>in</strong>st<strong>all</strong> software.<br />
3 Follow the directions on the screen.<br />
4 If you are asked whether you would like to remove shared files,<br />
click No.<br />
Other programs that use these files might not work properly if the<br />
files are deleted.<br />
5 After the program f<strong>in</strong>ishes remov<strong>in</strong>g the software, disconnect your<br />
HP PSC, and restart your computer.<br />
Note: It is important that you disconnect your HP PSC before<br />
restart<strong>in</strong>g your computer.<br />
6 To re<strong>in</strong>st<strong>all</strong> the software, <strong>in</strong>sert the HP PSC <strong>2400</strong> Series CD-ROM<br />
<strong>in</strong>to your computer’s CD-ROM drive, and follow the <strong>in</strong>structions<br />
that appear on the screen<br />
7 After the software is <strong>in</strong>st<strong>all</strong>ed, connect the HP PSC to your<br />
computer. Turn on the HP PSC us<strong>in</strong>g the On button. To cont<strong>in</strong>ue<br />
with the <strong>in</strong>st<strong>all</strong>ation, follow the onscreen <strong>in</strong>structions and the<br />
<strong>in</strong>structions provided <strong>in</strong> the Setup Poster that came with your HP<br />
PSC.<br />
After connect<strong>in</strong>g and turn<strong>in</strong>g on your HP PSC, you might have to<br />
wait several m<strong>in</strong>utes for <strong>all</strong> of the Plug and Play events to<br />
complete.<br />
When the software <strong>in</strong>st<strong>all</strong>ation is complete, you will see a Status<br />
Monitor icon <strong>in</strong> the System Tray.<br />
8 To verify that the software is properly <strong>in</strong>st<strong>all</strong>ed, double-click the<br />
HP Director icon on the desktop. If the HP Director shows the key<br />
icons (scan picture, scan document, send fax, and HP G<strong>all</strong>ery),<br />
the software has been properly <strong>in</strong>st<strong>all</strong>ed.<br />
<strong>hp</strong> <strong>psc</strong> <strong>2400</strong> <strong>series</strong>
problem possible cause and solution<br />
Some of the icons are<br />
miss<strong>in</strong>g <strong>in</strong> the<br />
<strong>hp</strong> director<br />
(cont<strong>in</strong>ued)<br />
The fax wizard does<br />
not start<br />
The registration<br />
screen does not<br />
appear<br />
The Digital Imag<strong>in</strong>g<br />
Monitor does not<br />
appear <strong>in</strong> the Task<br />
Tray<br />
<strong>reference</strong> <strong>guide</strong><br />
troubleshoot<strong>in</strong>g <strong>in</strong>formation<br />
to un<strong>in</strong>st<strong>all</strong> from a Mac<strong>in</strong>tosh computer<br />
1 Disconnect the HP PSC from your Mac<strong>in</strong>tosh.<br />
2 Double-click the Applications:HP All-<strong>in</strong>-One Software folder.<br />
3 Double-click HP Un<strong>in</strong>st<strong>all</strong>er.<br />
4 Follow the onscreen <strong>in</strong>structions.<br />
5 After the software is un<strong>in</strong>st<strong>all</strong>ed, disconnect your HP PSC, and<br />
restart your computer.<br />
6 To re<strong>in</strong>st<strong>all</strong> the software, <strong>in</strong>sert the HP PSC <strong>2400</strong> Series CD-ROM<br />
<strong>in</strong>to your computer’s CD-ROM drive.<br />
Note: When re<strong>in</strong>st<strong>all</strong><strong>in</strong>g the software, follow the <strong>in</strong>structions <strong>in</strong> the<br />
Setup Poster. Do not connect the HP PSC to your computer until<br />
after you have completed the software <strong>in</strong>st<strong>all</strong>ation.<br />
7 On the desktop, open the CD-ROM, double-click <strong>hp</strong> <strong>all</strong>-<strong>in</strong>-<strong>one</strong><br />
<strong>in</strong>st<strong>all</strong>er, and follow the <strong>in</strong>structions that appear.<br />
launch the fax wizard as follows<br />
1 Start the HP Director. For more <strong>in</strong>formation, see use the <strong>hp</strong> director<br />
software to do more with your <strong>hp</strong> <strong>psc</strong> on page 6.<br />
2 Click the Sett<strong>in</strong>gs menu, select Fax Sett<strong>in</strong>gs and Setup, then select<br />
Fax Setup Wizard.<br />
Launch the Product Registration program <strong>in</strong> the HP folder on the<br />
W<strong>in</strong>dows Start menu. Click Start, Start Programs or All Programs (XP),<br />
Hewlett-Packard, HP PSC <strong>2400</strong> Series, product registration.<br />
If the Digital Imag<strong>in</strong>g Monitor does not appear <strong>in</strong> the Task Tray, start<br />
the HP Director to check whether or not essential icons are there. For<br />
more <strong>in</strong>formation, see Some of the icons are miss<strong>in</strong>g <strong>in</strong> the <strong>hp</strong> director<br />
on page 140.<br />
The Task Tray norm<strong>all</strong>y appears <strong>in</strong> the lower-right corner of the desktop.<br />
HP Digital<br />
Imag<strong>in</strong>g Monitor<br />
icon<br />
Task Tray<br />
141<br />
troubleshoot<strong>in</strong>g
troubleshoot<strong>in</strong>g<br />
chapter 15<br />
142<br />
hardware <strong>in</strong>st<strong>all</strong>ation troubleshoot<strong>in</strong>g<br />
Use this section to solve any problems you might encounter while <strong>in</strong>st<strong>all</strong><strong>in</strong>g the<br />
HP PSC hardware.<br />
problem possible cause and solution<br />
I received a message<br />
on the front panel<br />
display to attach the<br />
front panel cover<br />
The front panel<br />
displays the wrong<br />
language<br />
This might mean the front panel cover is not attached, or it is attached<br />
<strong>in</strong>correctly. Make sure to align the cover over the buttons on the top<br />
of the HP PSC and snap it firmly <strong>in</strong>to place.<br />
Usu<strong>all</strong>y, you set the language and country/region when you first set<br />
up the HP PSC. However, you can change these sett<strong>in</strong>gs at any time<br />
by us<strong>in</strong>g the follow<strong>in</strong>g procedure:<br />
1 Press Setup.<br />
2 Press 7, and then press 1.<br />
This selects P<strong>reference</strong>s, and then selects Set Language &<br />
Country/Region.<br />
You are prompted with a list of languages. You can scroll<br />
through the up and down arrows.<br />
3 Press OK on the appropriate language.<br />
4 When prompted, press 1 for Yes or 2 for No.<br />
You are prompted with <strong>all</strong> the countries/regions for the selected<br />
language. You can scroll through the up and down arrows.<br />
5 Us<strong>in</strong>g the keypad, enter the two-digit number for the appropriate<br />
country/region.<br />
6 When prompted, press 1 for Yes or 2 for No.<br />
7 You can confirm the language and country/region by pr<strong>in</strong>t<strong>in</strong>g a<br />
Self-Test Report, as follows:<br />
a. Press Setup.<br />
b. Press 1, and then press 4.<br />
This selects Pr<strong>in</strong>t Report, and then selects Self-Test Report.<br />
<strong>hp</strong> <strong>psc</strong> <strong>2400</strong> <strong>series</strong>
problem possible cause and solution<br />
I received a message<br />
on the front panel<br />
display to align the<br />
pr<strong>in</strong>t cartridges<br />
My HP PSC does not<br />
turn on<br />
The HP PSC does not<br />
pr<strong>in</strong>t<br />
I received a message<br />
on the front panel<br />
display about a paper<br />
jam or a blocked<br />
carriage<br />
<strong>reference</strong> <strong>guide</strong><br />
troubleshoot<strong>in</strong>g <strong>in</strong>formation<br />
The HP PSC prompts you to align cartridges every time you <strong>in</strong>st<strong>all</strong> a<br />
new pr<strong>in</strong>t cartridge. For more <strong>in</strong>formation, see align the pr<strong>in</strong>t<br />
cartridges on page 86.<br />
Make sure each of the power cords is firmly connected, and wait a<br />
few seconds for the HP PSC to turn on. Also, if the HP PSC is plugged<br />
<strong>in</strong> to a power strip, make sure the power strip is turned on.<br />
First check to see whether the pr<strong>in</strong>t cartridge is out of <strong>in</strong>k. To do this,<br />
see pr<strong>in</strong>t a self-test report on page 81.<br />
However, before you do this, check the pr<strong>in</strong>t cartridge to make sure<br />
you have properly removed its packag<strong>in</strong>g. Be<strong>in</strong>g careful not to touch<br />
the copper contacts or <strong>in</strong>k nozzles, make sure you have gently pulled<br />
the p<strong>in</strong>k tab to remove the plastic tape.<br />
If you determ<strong>in</strong>e that you need to replace a pr<strong>in</strong>t cartridge see replace<br />
the pr<strong>in</strong>t cartridges on page 83.<br />
If either a paper jam or blocked carriage error message appears <strong>in</strong><br />
the front panel display, there might be some pack<strong>in</strong>g material <strong>in</strong>side<br />
the HP PSC. Lift open the pr<strong>in</strong>t-carriage access door to expose the<br />
pr<strong>in</strong>t cartridges and remove any pack<strong>in</strong>g material or other items that<br />
do not belong there.<br />
143<br />
troubleshoot<strong>in</strong>g
troubleshoot<strong>in</strong>g<br />
chapter 15<br />
problem possible cause and solution<br />
My USB cable is not<br />
connected<br />
144<br />
Connect<strong>in</strong>g your computer to your HP PSC with a USB cable is<br />
straightforward. Simply plug <strong>one</strong> end of the USB cable <strong>in</strong>to the back<br />
of your computer and the other <strong>in</strong>to the back of the HP PSC. You can<br />
connect to any USB port on the back of your computer.<br />
Note: AppleTalk is not supported.<br />
additional <strong>in</strong>st<strong>all</strong>ation troubleshoot<strong>in</strong>g help<br />
You might want to refer to the Read Me file for more <strong>in</strong>formation on possible<br />
<strong>in</strong>st<strong>all</strong>ation problems. On W<strong>in</strong>dows, you can access the Read Me file from the<br />
Start button on the task bar; select Programs, Hewlett-Packard, <strong>hp</strong> <strong>psc</strong><br />
<strong>2400</strong> <strong>series</strong>, View the Readme File. In Mac<strong>in</strong>tosh OS 9 or OS X, you can access<br />
the readme file by double-click<strong>in</strong>g the icon located <strong>in</strong> the top-level folder of the<br />
HP PSC software CD-ROM.<br />
The readme file provides more <strong>in</strong>formation, <strong>in</strong>clud<strong>in</strong>g:<br />
• Us<strong>in</strong>g the re<strong>in</strong>st<strong>all</strong> utility after a failed <strong>in</strong>st<strong>all</strong>ation to return your computer<br />
to a state that will <strong>all</strong>ow the HP PSC to be re<strong>in</strong>st<strong>all</strong>ed.<br />
• Us<strong>in</strong>g the re<strong>in</strong>st<strong>all</strong> utility <strong>in</strong> W<strong>in</strong>dows 98 to recover from a Composite USB<br />
System Driver miss<strong>in</strong>g.<br />
This error might occur if the hardware is <strong>in</strong>st<strong>all</strong>ed prior to <strong>in</strong>st<strong>all</strong><strong>in</strong>g the<br />
software. After runn<strong>in</strong>g the re<strong>in</strong>st<strong>all</strong> utility, reboot your PC, and <strong>in</strong>st<strong>all</strong> the<br />
HP PSC software before connect<strong>in</strong>g the HP PSC to your computer.<br />
You can also f<strong>in</strong>d more <strong>in</strong>formation on the HP website at:<br />
www.<strong>hp</strong>.com/support<br />
fax setup troubleshoot<strong>in</strong>g<br />
Use this section to solve any problems you might encounter while sett<strong>in</strong>g up your<br />
HP PSC for fax<strong>in</strong>g.<br />
For <strong>in</strong>formation on how to set up your HP PSC for fax<strong>in</strong>g, see fax setup on<br />
page 115.<br />
<strong>hp</strong> <strong>psc</strong> <strong>2400</strong> <strong>series</strong>
eference <strong>guide</strong><br />
troubleshoot<strong>in</strong>g <strong>in</strong>formation<br />
For additional <strong>in</strong>formation on solv<strong>in</strong>g problems you might encounter while<br />
fax<strong>in</strong>g with your HP PSC, see the <strong>hp</strong> <strong>psc</strong> <strong>2400</strong>/2500 <strong>series</strong> troubleshoot<strong>in</strong>g<br />
section <strong>in</strong> the onscreen <strong>hp</strong> photo & imag<strong>in</strong>g help.<br />
problem possible cause and solution<br />
I have difficulties<br />
when send<strong>in</strong>g faxes<br />
and when receiv<strong>in</strong>g<br />
faxes<br />
• Make sure you connected the HP PSC from the port labeled<br />
“1-LINE” to your teleph<strong>one</strong> w<strong>all</strong> jack us<strong>in</strong>g the ph<strong>one</strong> cord<br />
supplied <strong>in</strong> the box with your HP PSC.* This special 2-wire cord is<br />
different from the more common 4-wire cords you might already<br />
have <strong>in</strong> your office. Check the end of the cord and compare it to<br />
the two types of cords shown below:<br />
2-wire cord<br />
End view of the 2-wire ph<strong>one</strong><br />
cord supplied <strong>in</strong> the box with<br />
your HP PSC<br />
4-wire cord<br />
End view of a 4-wire ph<strong>one</strong> cord<br />
that might cause fax<strong>in</strong>g problems<br />
if connected directly to your<br />
HP PSC<br />
If you used the 4-wire cord, disconnect it, f<strong>in</strong>d the supplied 2-wire<br />
cord, and then connect the 2-wire cord to the HP PSC (at the port<br />
labeled “1-LINE”). For more <strong>in</strong>formation on how to connect this<br />
cord, refer to fax setup on page 115.<br />
* This possible cause/solution applies only <strong>in</strong> the countries/regions that<br />
receive a 2-wire ph<strong>one</strong> cord <strong>in</strong> the box with the HP PSC, <strong>in</strong>clud<strong>in</strong>g:<br />
Argent<strong>in</strong>a, Australia, Brazil, Canada, Chile, Ch<strong>in</strong>a, Colombia, Greece,<br />
India, Ind<strong>one</strong>sia, Ireland, Japan, Korea, Lat<strong>in</strong> America, Malaysia, Mexico,<br />
Philipp<strong>in</strong>es, Poland, Portugal, Russia, Saudi Arabia, S<strong>in</strong>gapore, Spa<strong>in</strong>,<br />
Taiwan, Thailand, USA, Venezuela, and Vietnam.<br />
Note: If the 2-wire cord is not long enough and you need to extend<br />
it, you might want to purchase a teleph<strong>one</strong> cord extension<br />
connector. Attach the 2-wire cord from the HP PSC to <strong>one</strong> end of the<br />
extension connector, and then attach a 4-wire cord from the other<br />
end of the connector to the teleph<strong>one</strong> w<strong>all</strong> jack.<br />
• Make sure you have correctly connected the HP PSC to the<br />
teleph<strong>one</strong> w<strong>all</strong> jack, and correctly connected any additional<br />
equipment and services that share the ph<strong>one</strong> l<strong>in</strong>e with your<br />
HP PSC.<br />
Use the 1-LINE port on the back of the HP PSC to connect to the<br />
w<strong>all</strong> jack, and use the 2-EXT port to connect any other equipment,<br />
such as a PC modem or an answer<strong>in</strong>g mach<strong>in</strong>e. For more<br />
<strong>in</strong>formation and connection diagrams, see fax setup on page 115.<br />
145<br />
troubleshoot<strong>in</strong>g
troubleshoot<strong>in</strong>g<br />
chapter 15<br />
problem possible cause and solution<br />
I have difficulties<br />
when send<strong>in</strong>g faxes<br />
and when receiv<strong>in</strong>g<br />
faxes<br />
(cont<strong>in</strong>ued)<br />
I cannot receive<br />
faxes, but I can send<br />
faxes<br />
146<br />
• Us<strong>in</strong>g a teleph<strong>one</strong> l<strong>in</strong>e splitter might cause fax<strong>in</strong>g problems. Try<br />
remov<strong>in</strong>g the splitter and connect<strong>in</strong>g the HP PSC directly to the<br />
teleph<strong>one</strong> w<strong>all</strong> jack.<br />
• Check that the teleph<strong>one</strong> w<strong>all</strong> jack has a work<strong>in</strong>g teleph<strong>one</strong> l<strong>in</strong>e by<br />
plugg<strong>in</strong>g <strong>in</strong> a ph<strong>one</strong> and check<strong>in</strong>g for a dial t<strong>one</strong>.<br />
• Teleph<strong>one</strong> l<strong>in</strong>es with poor sound quality (noise) can cause fax<strong>in</strong>g<br />
problems. Check the sound quality of the teleph<strong>one</strong> l<strong>in</strong>e by<br />
plugg<strong>in</strong>g a ph<strong>one</strong> <strong>in</strong>to the w<strong>all</strong> jack and listen<strong>in</strong>g for static or other<br />
noise. If you hear noise, turn off the Error Correction Mode (ECM)<br />
feature on your HP PSC and try fax<strong>in</strong>g aga<strong>in</strong>. For <strong>in</strong>formation, see<br />
use error correction mode (ECM) on page 68. Also contact your<br />
ph<strong>one</strong> company to report the noise problem on your l<strong>in</strong>e.<br />
• Other equipment us<strong>in</strong>g the same teleph<strong>one</strong> l<strong>in</strong>e as the HP PSC<br />
might be <strong>in</strong> use. For example, you cannot use your HP PSC for<br />
fax<strong>in</strong>g if an extension ph<strong>one</strong> is off-hook, or if you are us<strong>in</strong>g your<br />
PC modem to e-mail or access the Internet.<br />
• If you are us<strong>in</strong>g a digital subscribe l<strong>in</strong>e (DSL), make sure that you<br />
have a DSL filter connected or you will not be able to fax<br />
successfully. Obta<strong>in</strong> a DSL filter from your DSL provider. The DSL<br />
filter removes the digital signal that blocks your HP PSC from<br />
communicat<strong>in</strong>g properly with the teleph<strong>one</strong> l<strong>in</strong>e. For <strong>in</strong>formation<br />
on how to connect the DSL filter, see fax<strong>in</strong>g from a DSL l<strong>in</strong>e on<br />
page 130.<br />
• Check for error messages on the front panel of your HP PSC. Until<br />
a product error condition is resolved, you will not be able to send<br />
or receive faxes. For <strong>in</strong>formation on resolv<strong>in</strong>g error conditions, see<br />
the Error Messages section of the <strong>hp</strong> <strong>psc</strong> <strong>2400</strong>/2500 <strong>series</strong><br />
troubleshoot<strong>in</strong>g section <strong>in</strong> the onscreen <strong>hp</strong> photo & imag<strong>in</strong>g help.<br />
• If you are us<strong>in</strong>g either a PBX or an ISDN converter, make sure the<br />
HP PSC is connected to the port that is designated for fax and<br />
ph<strong>one</strong> use.<br />
Note that some ISDN systems <strong>all</strong>ow you to configure the ports for<br />
specific ph<strong>one</strong> equipment; for example, you might have assigned<br />
<strong>one</strong> port for teleph<strong>one</strong> and Group 3 fax and another for multiple<br />
purposes. If you cont<strong>in</strong>ue to have problems when connected to the<br />
fax/ph<strong>one</strong> port, try us<strong>in</strong>g the port designated for multiple purposes<br />
(might be labeled “multi-combi” or someth<strong>in</strong>g similar).<br />
• The R<strong>in</strong>gs to Answer feature might not be set to answer after the<br />
appropriate number of r<strong>in</strong>gs for your office setup. For more<br />
<strong>in</strong>formation, see how to choose the right fax setup for your office<br />
on page 116.<br />
• If you have a voicemail service at the same ph<strong>one</strong> number you use<br />
for fax c<strong>all</strong>s, you must receive faxes manu<strong>all</strong>y, not automatic<strong>all</strong>y.<br />
For <strong>in</strong>formation on sett<strong>in</strong>g up for fax<strong>in</strong>g when you have a voicemail<br />
service, see fax setup on page 115. For <strong>in</strong>formation on how to<br />
receive faxes manu<strong>all</strong>y, see set up your <strong>hp</strong> <strong>psc</strong> to answer fax c<strong>all</strong>s<br />
manu<strong>all</strong>y on page 60.<br />
<strong>hp</strong> <strong>psc</strong> <strong>2400</strong> <strong>series</strong>
problem possible cause and solution<br />
I cannot receive<br />
faxes, but I can send<br />
faxes<br />
(cont<strong>in</strong>ued)<br />
<strong>reference</strong> <strong>guide</strong><br />
troubleshoot<strong>in</strong>g <strong>in</strong>formation<br />
• If you have a PC modem on the same ph<strong>one</strong> l<strong>in</strong>e with your<br />
HP PSC, check to make sure that the modem’s software is not set to<br />
receive faxes automatic<strong>all</strong>y. Modems with this auto fax receive<br />
feature turned on will take over the ph<strong>one</strong> l<strong>in</strong>e to receive <strong>all</strong><br />
<strong>in</strong>com<strong>in</strong>g faxes, which will prevent the HP PSC from receiv<strong>in</strong>g fax<br />
c<strong>all</strong>s.<br />
• If you have an answer<strong>in</strong>g mach<strong>in</strong>e on the same ph<strong>one</strong> l<strong>in</strong>e with<br />
your HP PSC, you might have <strong>one</strong> of the follow<strong>in</strong>g problems:<br />
– Your outgo<strong>in</strong>g message might be too long or too loud to <strong>all</strong>ow<br />
the HP PSC to detect fax t<strong>one</strong>s, which could cause the c<strong>all</strong><strong>in</strong>g<br />
fax mach<strong>in</strong>e to disconnect.<br />
– Your answer<strong>in</strong>g mach<strong>in</strong>e might not have enough quiet time<br />
after your outgo<strong>in</strong>g message to <strong>all</strong>ow the HP PSC to detect fax<br />
t<strong>one</strong>s. This problem is more common with digital answer<strong>in</strong>g<br />
mach<strong>in</strong>es.<br />
The follow<strong>in</strong>g actions might help solve these problems:<br />
a. Disconnect the answer<strong>in</strong>g mach<strong>in</strong>e and then try receiv<strong>in</strong>g a<br />
fax. If fax<strong>in</strong>g is successful without it, the answer<strong>in</strong>g mach<strong>in</strong>e<br />
might be caus<strong>in</strong>g the problem.<br />
b. Reconnect the answer<strong>in</strong>g mach<strong>in</strong>e and re-record your outgo<strong>in</strong>g<br />
message. Make sure the message is as short as possible (no<br />
more than 10 seconds long), and that you speak softly and<br />
slowly when record<strong>in</strong>g it. Try aga<strong>in</strong> to receive a fax.<br />
• If you have a special r<strong>in</strong>g pattern for your fax ph<strong>one</strong> number (us<strong>in</strong>g<br />
a dist<strong>in</strong>ctive r<strong>in</strong>g service through your teleph<strong>one</strong> company), make<br />
sure that the Answer R<strong>in</strong>g Pattern feature on your HP PSC is set to<br />
match. For example, if the ph<strong>one</strong> company has assigned your fax<br />
number a double r<strong>in</strong>g pattern, make sure Double R<strong>in</strong>gs is selected<br />
as the Answer R<strong>in</strong>g Pattern sett<strong>in</strong>g. For <strong>in</strong>formation on chang<strong>in</strong>g<br />
this sett<strong>in</strong>g, see change the answer r<strong>in</strong>g pattern (dist<strong>in</strong>ctive r<strong>in</strong>g<strong>in</strong>g)<br />
on page 68.<br />
Note that some r<strong>in</strong>g patterns cannot be recognized by the HP PSC,<br />
such as those with alternat<strong>in</strong>g short and long r<strong>in</strong>g<strong>in</strong>g patterns. If<br />
you are hav<strong>in</strong>g problems with a r<strong>in</strong>g pattern of this type, ask your<br />
ph<strong>one</strong> company to assign a non-alternat<strong>in</strong>g r<strong>in</strong>g pattern.<br />
• If you are not us<strong>in</strong>g a dist<strong>in</strong>ctive r<strong>in</strong>g service, check to make sure<br />
that the Answer R<strong>in</strong>g Pattern feature on your HP PSC is set to All<br />
R<strong>in</strong>gs. For <strong>in</strong>formation, see change the answer r<strong>in</strong>g pattern<br />
(dist<strong>in</strong>ctive r<strong>in</strong>g<strong>in</strong>g) on page 68.<br />
147<br />
troubleshoot<strong>in</strong>g
troubleshoot<strong>in</strong>g<br />
chapter 15<br />
problem possible cause and solution<br />
I cannot receive<br />
faxes, but I can send<br />
faxes<br />
(cont<strong>in</strong>ued)<br />
I cannot send faxes,<br />
but I can receive<br />
faxes<br />
Fax t<strong>one</strong>s are<br />
recorded on my<br />
answer<strong>in</strong>g mach<strong>in</strong>e<br />
I hear static on my<br />
teleph<strong>one</strong> l<strong>in</strong>e ever<br />
s<strong>in</strong>ce I connected the<br />
HP PSC<br />
148<br />
• If your HP PSC shares the same ph<strong>one</strong> l<strong>in</strong>e with other types of<br />
ph<strong>one</strong> equipment—such as an answer<strong>in</strong>g mach<strong>in</strong>e or a PC<br />
modem—the fax signal level might be reduced, caus<strong>in</strong>g fax<br />
reception problems.<br />
To f<strong>in</strong>d out if other equipment is caus<strong>in</strong>g a problem, disconnect<br />
everyth<strong>in</strong>g except the HP PSC from the ph<strong>one</strong> l<strong>in</strong>e, and then try to<br />
receive a fax. If fax reception is successful without the equipment,<br />
then <strong>one</strong> or more pieces of the equipment is caus<strong>in</strong>g problems; try<br />
add<strong>in</strong>g them back <strong>one</strong> at a time and fax<strong>in</strong>g, until you identify<br />
which equipment is caus<strong>in</strong>g the problem.<br />
• If you are us<strong>in</strong>g speed dial to dial the fax number, the HP PSC<br />
might be dial<strong>in</strong>g too fast or too soon. Try re-creat<strong>in</strong>g the speed dial<br />
entry and <strong>in</strong>sert<strong>in</strong>g some pauses. For <strong>in</strong>formation, see create speeddial<br />
entries on page 64.<br />
• If your teleph<strong>one</strong> l<strong>in</strong>e has a PBX system, make sure you are dial<strong>in</strong>g<br />
the number for an outside l<strong>in</strong>e before dial<strong>in</strong>g the fax number.<br />
• The receiv<strong>in</strong>g fax mach<strong>in</strong>e might be hav<strong>in</strong>g problems. To check<br />
this, try c<strong>all</strong><strong>in</strong>g the fax number from a teleph<strong>one</strong> and listen for fax<br />
t<strong>one</strong>s. If you cannot hear fax t<strong>one</strong>s, the receiv<strong>in</strong>g fax might not be<br />
turned on or connected, or a voicemail service could be <strong>in</strong>terfer<strong>in</strong>g<br />
with the recipient’s ph<strong>one</strong> l<strong>in</strong>e.<br />
• When you have an answer<strong>in</strong>g mach<strong>in</strong>e on the same ph<strong>one</strong> l<strong>in</strong>e<br />
you use for fax c<strong>all</strong>s, you must connect the answer<strong>in</strong>g mach<strong>in</strong>e<br />
directly to the HP PSC (or through a directly-connected PC modem,<br />
if applicable) as described <strong>in</strong> fax setup on page 115. If you do not<br />
connect it as recommended, fax t<strong>one</strong>s might be recorded on your<br />
answer<strong>in</strong>g mach<strong>in</strong>e.<br />
• If you did not connect the HP PSC from the port labeled “1-LINE” to<br />
your teleph<strong>one</strong> w<strong>all</strong> jack us<strong>in</strong>g the ph<strong>one</strong> cord supplied <strong>in</strong> the box<br />
with your HP PSC, you might hear static on your ph<strong>one</strong> l<strong>in</strong>e and<br />
you might not be able to fax successfully.* This special 2-wire cord<br />
is different from the more common 4-wire cords you might already<br />
have <strong>in</strong> your office. For more <strong>in</strong>formation, see I have difficulties<br />
when send<strong>in</strong>g faxes and when receiv<strong>in</strong>g faxes on page 145.<br />
* This possible cause/solution applies only <strong>in</strong> the countries/regions that<br />
receive a 2-wire ph<strong>one</strong> cord <strong>in</strong> the box with the HP PSC, <strong>in</strong>clud<strong>in</strong>g:<br />
Argent<strong>in</strong>a, Australia, Brazil, Canada, Chile, Ch<strong>in</strong>a, Colombia, Greece,<br />
India, Ind<strong>one</strong>sia, Ireland, Japan, Korea, Lat<strong>in</strong> America, Malaysia, Mexico,<br />
Philipp<strong>in</strong>es, Poland, Portugal, Russia, Saudi Arabia, S<strong>in</strong>gapore, Spa<strong>in</strong>,<br />
Taiwan, Thailand, USA, Venezuela, and Vietnam.<br />
• Us<strong>in</strong>g a teleph<strong>one</strong> l<strong>in</strong>e splitter might affect the sound quality of<br />
your ph<strong>one</strong> l<strong>in</strong>e, caus<strong>in</strong>g static. Try remov<strong>in</strong>g the splitter and<br />
connect<strong>in</strong>g the HP PSC directly to the teleph<strong>one</strong> w<strong>all</strong> jack.<br />
<strong>hp</strong> <strong>psc</strong> <strong>2400</strong> <strong>series</strong>
eference <strong>guide</strong><br />
<strong>hp</strong> <strong>in</strong>stant share setup troubleshoot<strong>in</strong>g<br />
troubleshoot<strong>in</strong>g <strong>in</strong>formation<br />
HP Instant Share setup errors (such as might occur when sett<strong>in</strong>g up the Address<br />
Book) are covered <strong>in</strong> the HP Instant Share screen-specific help. Specific<br />
operational troubleshoot<strong>in</strong>g <strong>in</strong>formation is provided <strong>in</strong> operational<br />
troubleshoot<strong>in</strong>g below.<br />
operational troubleshoot<strong>in</strong>g<br />
The <strong>hp</strong> <strong>psc</strong> <strong>2400</strong>/2500 <strong>series</strong> troubleshoot<strong>in</strong>g section <strong>in</strong> the <strong>hp</strong> photo & imag<strong>in</strong>g<br />
help conta<strong>in</strong>s troubleshoot<strong>in</strong>g tips for some of the most common issues<br />
associated with your HP PSC. To access the troubleshoot<strong>in</strong>g <strong>in</strong>formation from a<br />
W<strong>in</strong>dows computer, go to the HP Photo & Imag<strong>in</strong>g Director, click Help, and<br />
then choose Troubleshoot<strong>in</strong>g and Support. Troubleshoot<strong>in</strong>g is also available<br />
through the Help button that appears on some error messages.<br />
To access troubleshoot<strong>in</strong>g <strong>in</strong>formation from the Mac<strong>in</strong>tosh (OS X), click the<br />
HP Director (All-<strong>in</strong>-One) icon <strong>in</strong> the Dock, select HP Help from the HP Director<br />
menu, select HP Photo and Imag<strong>in</strong>g Help, and then click <strong>hp</strong> <strong>psc</strong> <strong>2400</strong>/2500<br />
<strong>series</strong> troubleshoot<strong>in</strong>g <strong>in</strong> the Help Viewer.<br />
If you have Internet access, you can get help from the HP website at:<br />
www.<strong>hp</strong>.com/support<br />
The website also provides answers to frequently asked questions.<br />
<strong>hp</strong> <strong>in</strong>stant share troubleshoot<strong>in</strong>g<br />
Basic HP Instant Share troubleshoot<strong>in</strong>g topics are covered <strong>in</strong> the table below.<br />
When you access the HP Instant Share website, onl<strong>in</strong>e help is provided for any<br />
error messages encountered.<br />
error message possible cause and solution<br />
Can’t connect to the<br />
Internet<br />
HP Instant Share<br />
Service temporarily<br />
unavailable<br />
Your computer is unable to connect to the HP Instant Share server after<br />
the Go Onl<strong>in</strong>e screen appears.<br />
• Check your Internet connection and make sure you are onl<strong>in</strong>e.<br />
• If you are beh<strong>in</strong>d a firew<strong>all</strong>, verify that your browser proxy sett<strong>in</strong>gs<br />
are correct.<br />
The HP Instant Share server is currently down for ma<strong>in</strong>tenance.<br />
• Try connect<strong>in</strong>g aga<strong>in</strong> later.<br />
149<br />
troubleshoot<strong>in</strong>g
troubleshoot<strong>in</strong>g<br />
chapter 15<br />
150<br />
<strong>hp</strong> <strong>psc</strong> <strong>2400</strong> <strong>series</strong>
<strong>in</strong>dex<br />
Numerics<br />
4 by 6 <strong>in</strong>ch (10 x 15 cm)<br />
borderless photos<br />
copy, 38<br />
A<br />
align pr<strong>in</strong>t cartridges, 86<br />
answer r<strong>in</strong>g pattern, 68<br />
B<br />
backup fax reception, 70<br />
best copy quality, 36<br />
borderless photos<br />
copy, 38<br />
pr<strong>in</strong>t from memory card, 29<br />
C<br />
cancel<br />
copy, 50<br />
fax, 71<br />
pr<strong>in</strong>t, 75<br />
scan, 53<br />
cartridges, 80<br />
align, 86<br />
check <strong>in</strong>k level, 80<br />
clean, 87<br />
clean contacts, 87<br />
handle, 82<br />
order, 77<br />
photo pr<strong>in</strong>t cartridge, 85<br />
replace, 83<br />
store, 85<br />
clean<br />
exterior, 80<br />
glass, 79<br />
lid back<strong>in</strong>g, 79<br />
pr<strong>in</strong>t cartridge contacts, 87<br />
pr<strong>in</strong>t cartridges, 87<br />
color<br />
copies, 47<br />
faxes, 57<br />
<strong>in</strong>tensity, 46<br />
pr<strong>in</strong>t cartridge comb<strong>in</strong>ations<br />
for best, 24<br />
CompactFlash memory card,<br />
21<br />
contrast, fax, 66<br />
copy<br />
black-and-white documents,<br />
37<br />
borderless photos, 38<br />
cancel, 50<br />
color <strong>in</strong>tensity, 46<br />
default sett<strong>in</strong>gs, 36<br />
enhance light areas, 47<br />
enlarge <strong>in</strong>to poster, 48<br />
legal onto letter paper, 44<br />
number of copies, 40<br />
paper size, 18<br />
paper type, 17<br />
photos onto letter paper, 41<br />
photos, enhance, 46<br />
quality, 36<br />
several on <strong>one</strong> page, 43<br />
speed, 36<br />
text, enhance, 46<br />
T-shirt transfer, 49<br />
country/region setup, 142<br />
customer support, 91<br />
Australia, 94<br />
contact, 91<br />
North America, 92<br />
outside U.S., 92<br />
return your HP PSC, 94<br />
website, 91<br />
D<br />
darken<br />
copies, 46<br />
faxes, 66<br />
date, set, 69<br />
declaration of conformity<br />
(European Union), 112<br />
default sett<strong>in</strong>gs, restore, 89<br />
DPOF file, 30<br />
E<br />
E-mail button, 132, 135<br />
envelopes<br />
load, 14<br />
environment<br />
energy use, 108<br />
environmental product<br />
stewardship program,<br />
108<br />
<strong>in</strong>kjet supplies recycl<strong>in</strong>g,<br />
109<br />
material safety data sheets,<br />
108<br />
oz<strong>one</strong> production, 108<br />
paper use, 108<br />
plastics, 108<br />
protect<strong>in</strong>g, 108<br />
recycl<strong>in</strong>g program, 109<br />
Error Correction Mode, 68<br />
F<br />
factory defaults, restore, 89<br />
fast copy quality, 36<br />
fax<br />
answer r<strong>in</strong>g pattern, 68<br />
black and white, 57<br />
cancel, 71<br />
color, 57<br />
confirmation, 56<br />
contrast, 65<br />
darken, 66<br />
date and time, 69<br />
defaults, 66<br />
Error Correction Mode, 68<br />
header, 61<br />
lighten, 66<br />
number of r<strong>in</strong>gs, 59<br />
paper size, 18<br />
photos, 57<br />
receive automatic<strong>all</strong>y, 59<br />
receive manu<strong>all</strong>y, 60, 61<br />
redial, 67<br />
reduce to fit page, 68<br />
reports, 62<br />
repr<strong>in</strong>t, 70<br />
resolution, 65<br />
save <strong>in</strong> memory, 70<br />
sounds, adjust, 68<br />
speed dial, 58<br />
speed-dial entries, add, 64<br />
speed-dial entries, delete,<br />
65<br />
fit to page, 41<br />
front panel<br />
enter text, 62<br />
overview, 3<br />
front panel display<br />
151
<strong>in</strong>dex<br />
152<br />
set language, 142<br />
G<br />
glass, clean, 79<br />
greet<strong>in</strong>g cards, 16<br />
H<br />
help, ix<br />
HP customer support, 91<br />
HP Director<br />
do more, 6<br />
e-mail option access<br />
(Mac<strong>in</strong>tosh), 136<br />
HP Instant Share access<br />
(W<strong>in</strong>dows), 134<br />
overview, 6<br />
HP distribution center, 96<br />
HP Instant Share, 32<br />
e-mail, 32<br />
onl<strong>in</strong>e albums, 32<br />
overview, 131<br />
photo menu option, 133<br />
quality pr<strong>in</strong>ts, 32<br />
simplified approach, 131<br />
use a scanned image, 133<br />
use E-mail button, 132<br />
HP PSC overview<br />
at a glance, 2<br />
I<br />
<strong>in</strong>k cartridges, 80<br />
iron-on T-shirt transfers<br />
copy, 49<br />
load, 16<br />
K<br />
keypad, enter text, 62<br />
L<br />
labels<br />
load, 16<br />
language setup, 142<br />
lid back<strong>in</strong>g, clean, 79<br />
lighten<br />
copies, 46<br />
faxes, 66<br />
load<br />
envelopes, 14<br />
greet<strong>in</strong>g cards, 16<br />
Hagaki cards, 15<br />
iron-on transfers, 16<br />
labels, 16<br />
paper <strong>in</strong> the <strong>in</strong>put tray, 12<br />
paper on the glass, 11<br />
photo paper, 15<br />
postcards, 15<br />
transparencies, 16<br />
M<br />
ma<strong>in</strong>tenance<br />
align pr<strong>in</strong>t cartridges, 86<br />
check <strong>in</strong>k level, 80<br />
clean exterior, 80<br />
clean glass, 79<br />
clean lid back<strong>in</strong>g, 79<br />
clean pr<strong>in</strong>t cartridges, 87<br />
power save mode, 89<br />
replace pr<strong>in</strong>t cartridges, 83<br />
restore factory defaults, 89<br />
self-test report, 81<br />
memory cards<br />
<strong>in</strong>sert a card, 22<br />
overview, 21<br />
pr<strong>in</strong>t DPOF file, 30<br />
pr<strong>in</strong>t photos, 28<br />
proof sheet, 23<br />
save files to computer, 22<br />
Memory Stick memory card, 21<br />
menu overview, 5<br />
MicroDrive memory card, 21<br />
MultiMediaCard (MMC)<br />
memory card, 21<br />
N<br />
normal copy quality, 36<br />
number of copies<br />
copy, 40<br />
O<br />
order<br />
media, 77<br />
pr<strong>in</strong>t cartridges, 77<br />
P<br />
paper<br />
recommended types, 16<br />
size, set, 18<br />
type, set, 17<br />
ph<strong>one</strong> numbers, customer<br />
support, 91<br />
photos<br />
borderless, 29<br />
deselect, 30<br />
enhance copies, 47<br />
fax, 57<br />
paper size, 18<br />
paper type, 17<br />
photo pr<strong>in</strong>t cartridge, 85<br />
pr<strong>in</strong>t from DPOF file, 30<br />
pr<strong>in</strong>t from memory card, 28<br />
Quick Pr<strong>in</strong>t, 30<br />
slide show, 31<br />
posters<br />
copy, 48<br />
power save mode, 89<br />
pr<strong>in</strong>t<br />
cancel, 75<br />
envelopes, 14<br />
fax reports, 62<br />
faxes <strong>in</strong> memory, 70<br />
photos from DPOF file, 30<br />
photos from memory card,<br />
28<br />
proof sheet, 23<br />
Quick Pr<strong>in</strong>t, 30<br />
self-test report, 81<br />
pr<strong>in</strong>t cartridge protector, 85<br />
pr<strong>in</strong>t cartridges, 80<br />
align, 86<br />
check <strong>in</strong>k level, 80<br />
clean, 87<br />
clean contacts, 87<br />
handle, 82<br />
order, 77<br />
photo pr<strong>in</strong>t cartridge, 85<br />
replace, 83<br />
store, 85<br />
prompt delay time, 90<br />
proof sheet<br />
fill <strong>in</strong>, 24<br />
pr<strong>in</strong>t, 23<br />
scan, 26<br />
Q<br />
quality<br />
copy, 36<br />
fax, 65<br />
Quick Pr<strong>in</strong>t, 30<br />
R<br />
receive faxes, 59<br />
reduce/enlarge copies<br />
fit several on <strong>one</strong> page, 43<br />
fit to page, 41<br />
poster, 48<br />
resize to fit letter, 44<br />
regulatory notices, 109<br />
Canadian statement, 111<br />
declaration of conformity<br />
(U.S.), 114<br />
European Economic Area<br />
statement, 112<br />
FCC requirements, 109<br />
FCC statement, 110<br />
geräuschemission, 113<br />
German statement, 112<br />
Korea statement, 113<br />
<strong>hp</strong> <strong>psc</strong> <strong>2400</strong> <strong>series</strong>
notice to users <strong>in</strong> Canada,<br />
112<br />
regulatory model<br />
identification number, 109<br />
VCCI-2 (Japan), 113<br />
replace pr<strong>in</strong>t cartridges, 83<br />
reports<br />
fax, automatic, 63<br />
fax, manual, 63<br />
self-test, 81<br />
resolution<br />
fax, 65<br />
restore factory sett<strong>in</strong>gs, 89<br />
return your HP PSC, 94, 98<br />
r<strong>in</strong>g<strong>in</strong>g, dist<strong>in</strong>ctive fax, 68<br />
S<br />
save<br />
faxes <strong>in</strong> memory, 70<br />
photos to computer, 22<br />
scan<br />
from directly connected<br />
device, 52<br />
from front panel, 51<br />
proof sheet, 26<br />
stop, 53<br />
Secure Digital memory card,<br />
21<br />
self-test report, 81<br />
send a photo<br />
Mac<strong>in</strong>tosh, 135<br />
photo menu option, 135<br />
use a scanned image, 136<br />
use the E-mail button, 135<br />
set<br />
language and country/<br />
region, 142<br />
sett<strong>in</strong>gs<br />
country/region and<br />
language, 142<br />
setup<br />
fax, 115<br />
ship your HP PSC, 94<br />
slide show, 31<br />
SmartMedia memory card, 21<br />
sounds, adjust fax, 68<br />
speed<br />
copy, 36<br />
speed dial entries<br />
add, 64<br />
delete, 65<br />
send fax with, 58<br />
stop<br />
copy, 50<br />
fax, 71<br />
pr<strong>in</strong>t, 75<br />
scan, 53<br />
support services, 91<br />
T<br />
technical <strong>in</strong>formation<br />
additional specifications,<br />
107<br />
copy specifications, 105<br />
environmental<br />
specifications, 107<br />
fax specifications, 106<br />
paper sizes, 103<br />
paper specifications, 102<br />
photo memory card<br />
specifications, 106<br />
physical specifications, 107<br />
power specifications, 107<br />
pr<strong>in</strong>t specifications, 104<br />
<strong>in</strong>dex<br />
scan specifications, 107<br />
system requirements, 101<br />
teleph<strong>one</strong> l<strong>in</strong>e with multiple<br />
numbers, 68<br />
teleph<strong>one</strong> numbers, customer<br />
support, 91<br />
text<br />
enhance on copies, 46<br />
enter on keypad, 62<br />
time, set, 69<br />
transparencies<br />
load, 16<br />
troubleshoot<strong>in</strong>g<br />
fax setup, 144<br />
hardware and software<br />
<strong>in</strong>st<strong>all</strong>ation, 137<br />
hardware <strong>in</strong>st<strong>all</strong>ation, 142<br />
HP Instant Share setup, 149<br />
HP Instant Share use, 149<br />
<strong>in</strong>st<strong>all</strong>ation, 137<br />
operations, 149<br />
software <strong>in</strong>st<strong>all</strong>ation, 138<br />
T-shirt transfers, 49<br />
U<br />
USB cable <strong>in</strong>st<strong>all</strong>ation, 144<br />
V<br />
volume, adjust fax, 68<br />
W<br />
warranty<br />
service, 97<br />
statement, 98<br />
upgrades, 97<br />
X<br />
xD memory card, 21<br />
<strong>reference</strong> <strong>guide</strong> 153
<strong>in</strong>dex<br />
154<br />
<strong>hp</strong> <strong>psc</strong> <strong>2400</strong> <strong>series</strong>
Visit the <strong>hp</strong> <strong>psc</strong> <strong>in</strong>formation center<br />
It has everyth<strong>in</strong>g you need to get the most value from your HP PSC.<br />
• Technical Support<br />
• Supplies and Order<strong>in</strong>g Information<br />
• Project Tips<br />
• Ways to Enhance Your Product<br />
www.<strong>hp</strong>.com/support<br />
© 2003 Hewlett-Packard Company<br />
Pr<strong>in</strong>ted on recycled paper.<br />
Pr<strong>in</strong>ted <strong>in</strong> the U.S.A., Germany, S<strong>in</strong>gapore, or Malaysia.<br />
*Q3083-90207*<br />
*Q3083-90207*<br />
Q3083-90207