Mizu VoIP Server Tutorial
Mizu VoIP Server Tutorial
Mizu VoIP Server Tutorial

Create successful ePaper yourself
Turn your PDF publications into a flip-book with our unique Google optimized e-Paper software.
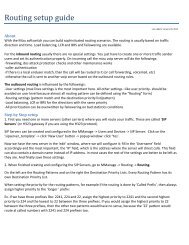
Setup outbound routing<br />
This is needed if you would like to route the calls from the users to another servers or carriers (for example calls to mobile and<br />
landline numbers)<br />
For outgoing calls it is not enough to add a “SIP server” user from the “Users and devices” form. Add it with any meaningful<br />
username and make sure to set the IP field correctly on the Edit tab. (This field can also contain a domain name instead of IP<br />
address). Some carriers require the usage of a techprefix which can be entered in the “Tech Prefix” field. Others settings are rarely<br />
used.<br />
You must also add this server(s) in your routing.<br />
Open the “Routing” form. In the left side you have to define your pattern which will restrict the condition when the actual route<br />
entries can be used. If all fields are empty and the time definition is set to “All times” then all patterns will match. You can make<br />
restriction if you make specification here (caller, called prefix, time restriction, etc) . Make sure that you increase the priority for the<br />
pattern (to be higher than the your “general” pattern where you have not made any restrictions)<br />
On the right side you will have to add one or more sip proxy user. If you set more than one route with equal priority, then you have<br />
load balancing, LCR or BRS (depending on the “brs_lcr” global config option); otherwise the traffic will be routed after the<br />
prioritizations (will flow to the lower priority servers only if you have reached the maximum port limitations or because automatic<br />
failowering). For more details please read the routing guide.<br />
Register to your outbound server [optional]<br />
Usually for a B2B usage, uppers servers (your carrier or <strong>VoIP</strong> service provider) will setup IP based authentication. This is the<br />
favorized method for a high amount of calls. If your outbound server (where you are sending traffic and receive incoming calls)<br />
needs username/password based digest authentication instead of IP based authentication, you can set it from the “SIP server” user<br />
configuration. Create a SIP server user, then switch to the “Edit” page. On the bottom of the page you can find a grid named “Proxy<br />
authentication”. Here you can add the login details (multiple username/passwords can be used for your convenience). Then select<br />
“Username/password must match” from the “Authorization” drop-down list.<br />
These are the basic and most commonly used authentication settings. There are many other combinations, for example you can forward the<br />
username/password as received from your users. For more details please consult the Admin Guide.<br />
Setup inbound routing [optional]<br />
This is needed if you would like to route the calls from the users to another servers or carriers (for example calls to mobile and<br />
landline numbers).<br />
If you would like to accept traffic from other servers (for example you are doing a wholesale business), then you must create a<br />
“Traffic sender” user. Usually you can use IP based authentication. For this, add the peer IP to the “Auth IP” field.<br />
For each incoming calls, the server will first check if the called party is a local user. If not, than the call are routed regarding the<br />
rules which is set by the “Routing” form.<br />
Actually you could also use “Enduser” users for the same thing, but for a bigger traffic volume it is always to differentiate normal<br />
endusers from “traffic sender” so your statistics will be easier to understood.<br />
First test calls<br />
For a test call create 2 enduser accounts with username/password authentication.<br />
Register with two softphones and call from the first account to the second account.<br />
Softphone configuration:<br />
• domain: your server IP or domain name (and the server port if your server is not using the standard 5060 UDP port)<br />
• proxy: you can leave it empty<br />
• username: the “username” field from the newly created user (tb_users.username)<br />
• password: the “password” field from the newly created user (tb_users.username)<br />
No any other special settings are required (such as NAT, STUN, etc).<br />
The network setting should be automatically handled by the server. If you don’t hear any voice you might change the RTP routing for the user(s) to<br />
“always route RTP” from <strong>Mizu</strong>Manage -> Users and devices -> Edit tab.