download User's manual complete - Sea-Seg.com
download User's manual complete - Sea-Seg.com
download User's manual complete - Sea-Seg.com

You also want an ePaper? Increase the reach of your titles
YUMPU automatically turns print PDFs into web optimized ePapers that Google loves.
HSL-WI5APM BodymakerHigh Speed Front EndUser’s ManualSystems Engineering Associates, Inc.14989 West 69th AvenueArvada, Colorado 80007 U.S.A.Telephone: (303) 421-0484Fax: (303) 421-8108www.sea-seg.<strong>com</strong>03/2004
HSL-WI5APM BodymakerHigh Speed Front EndUser’s ManualCopyright © 2004 Systems Engineering Associates, Inc.All Rights Reserved!Revised 23 March 2004
WARNINGTo ensure the equipment described by this User Manual, as well as the equipment connected toand used with it, operates satisfactorily and safely, all applicable local and national codes thatapply to installing and operating the equipment must be followed. This includes the NationalElectric Code in the USA and other applicable legislation, regulations, and codes in practiceelsewhere. Since codes can vary geographically and can change with time, it is the user’sresponsibility to determine which standards and codes apply, and to <strong>com</strong>ply with them.FAILURE TO COMPLY WITH APPLICABLE CODES AND STANDARDS CAN RESULT INDAMAGE TO EQUIPMENT AND/OR SERIOUS INJURY TO PERSONNEL.Persons supervising and performing installation or maintenance must be suitably qualified and<strong>com</strong>petent in these duties, and should carefully study this User Manual and any other <strong>manual</strong>sreferred to by it prior to installation and/or operation of the equipment.The contents of the User Manual are believed to be correct at the time of printing; however, noresponsibility is assumed for inaccuracies. In the interests of a <strong>com</strong>mitment to a policy ofcontinuous development and improvement, the manufacturer reserves the right to change thespecification of the product or it’s performance or the contents of the User Manual without notice.Copyright © 2004 Systems Engineering Associates, Inc.All Rights Reserved !
CONTENTS1. General Description 11.1 Features 11.2 Functional Description 21.3 Clutch/Brake Control 31.3.1 Clutch Control Via Host PLC 41.4 Cupfeed Solenoid Control 61.5 Air Strip Control 71.6 Brake Wear Compensation 71.7 Alarm Detection 81.8 Interlocks to Existing Control System 91.9 Interlocks from Existing Control System 91.10 Data Collection 102. Installation 112.1 What’s Included 112.2 Power Required 112.3 Mounting and Wiring the HSL-WI5 122.4 Mounting the RSV34-MS1 Resolver 142.5 HSL-WI5 Software Installation 142.5.1 Setup Program Installation 152.5.2 SYSdev Program Development SoftwareInstallation 152.5.3 Application Program Installation 162.6 Modify Existing PLC Program 162.7 HSL-WI5 Set-up 192.7.1 Default Set-up Variables 192.7.2 Verify Main Crank Resolver 202.7.3 Set Bodymaker Set-up Parameters 212.7.4 Set Trimmer Speed References 232.7.5 Set Machine Zero 232.7.6 Verify Location of Short Can Timing (CH02) 242.7.7 Verify Single Cupfeed 252.7.8 Verify Machine Operation 262.8 M4500/P4500/D4591 Installation 282.8.1 M4500 Module Installation 282.8.2 P4500 Power Supply Installation 292.8.3 D4591 Keypad/Display Installation 292.8.4 Download HSLWI5 Application Program andSet-up Data to M4500 30HSL-WI5 User’s ManualSYSTEMS Electronics Group- i -
CONTENTS3. Using the Keypad/Display 313.1 Default Screen 323.2 “Brake Response” Key 323.3 “Last Shift” Key 323.4 “Set-up” Key 333.4.1 Set Bodymaker Parameters 343.4.2 Set Trimmer Parameters 353.4.3 Set Machine Timing (Set-Points, etc.) 363.4.4 Zero Machine (set resolver offset) 383.4.5 Display Lifetime Stroke Count 384. HSLWI5 Setup Program Reference 394.1 General Description 404.2 The File Menu 414.2.1 The Setup Data File 424.2.2 Upload (save) Data 444.2.3 Download Program 444.2.4 Download (restore) Data 454.2.5 Print Report 454.3 The Edit Menu 464.3.1 Enable Offline Editing 464.3.2 Setup Comm Port 474.4 The View Menu 484.4.1 Target Board Interface 494.4.2 View Online Data 504.4.3 View Offline Data 504.5 The Window Menu 514.5.1 The Main Display Window 524.5.2 The Setup Parameters Window 534.5.3 The Machine Timing Window 554.5.4 The Shift Data Window 584.5.5 The I/O States Window 605. General Timing Signal Locations 616. Re<strong>com</strong>mended Spares 63HSL-WI5 User’s ManualSYSTEMS Electronics Group- ii -
CONTENTSLIST OF FIGURESFigure 1 – Re<strong>com</strong>mended Panel Door Cut-out 12Figure 2 – Short Can Check Timing Sequence 24Keypad/Display Legend 31APPENDICESDrawingsAppendix AHSL-WI5 User’s ManualSYSTEMS Electronics Group- iii -
SECTION 1GENERAL DESCRIPTIONThis section describes the features of the HSL-WI5. This includes afunctional description, alarms detected and a description of theinterlocks between the HSL-WI5 and the existing control system.________________________________________________________1.1 FEATURES• Performs the high-speed control functions of the APMBodymaker to speeds in excess of 500 CPM. This includes clutchcontrol, cupfeed control, air strip control and short can detection.• Rapid response control of clutch/brake system for emergencystops die protection) as well as precise BDC stops. The clutchsolenoid outputs of the HSL-WI5 are not intended as safetycontacts for the bodymaker clutch and must not be the onlyinterrupt to the clutch solenoids.• Accurate short can detection to a resolution of 1/4” can length.• Highly repeatable air strip control to reduce can stripping andblow out problems.• Reliable timed cupfeed control to insure proper cup loading andprotection from misloads.• Brake Wear <strong>com</strong>pensation (Auto BDC timing programming)algorithm to stop press at BDC regardless of brake response.Brake response determination allows displaying of actual brakeresponse (in degrees). Brake response alarm to indicate whenbrake-stopping response (in degrees) has exceeded user presetlimit.• Trimmer speed reference (0-10volt analog output) providesreference to trimmer proportional to speed of bodymaker (userscalable).• Alarm detection: short can detection, die sensor fail alarm, timingsignal fail detection, clutch output failure detection, no rammotion alarm, resolver failure detection, and brake response toolong alarm.HSL-WI5 User’s ManualSYSTEMS Electronics Group- 1 -
SECTION 1GENERAL DESCRIPTION• Data Acquisition: Total number of good cans produced and totalnumber of short can faults (for both current shift and last shift).• Built-in 2 Line X 40 character sealed display with 24 keymembrane keypad allows local viewing of collected data (goodcan count, short can count, brake response) and set-up of all uservariables (key switch enabled).• Interfaces directly with the machine-mounted resolver, short cansensor, flywheel motion sensor and all clutch, cupfeed, and airstrip solenoids.• Based on the high performance M4500 PLC/PLS module, thatallows easy trouble-shooting and user customization usingSYSdev program development software.• Built-in PLS provides all machine timing, eliminating need for anadditional PLS.________________________________________________________1.2 FUNCTIONAL DESCRIPTIONThe HSL-WI5 bodymaker high-speed logic module is an electronicupgrade for the APM bodymaker that performs the high-speed controlfunctions including: rapid response clutch/brake control, accurateshort can detection, reliable cupfeed and precise air strip control. Inaddition, the brake wear <strong>com</strong>pensation feature automatically adjuststhe BDC timing signals to stop the press at BDC regardless of brakestopping time.Alarm detection is provided including:• Short Can Detection• Die Sensor Failure Detection• Timing Signal Failure• Brake Response Too Long AlarmData collection includes (both for the current shift and previous (last)shift):• Total Good Can Count• Short Can Faults CountHSL-WI5 User’s ManualSYSTEMS Electronics Group- 2 -
SECTION 1GENERAL DESCRIPTIONInterfaces directly to:• The Machine Mounted Resolver• Short Can Sensor• Clutch/Brake Solenoids• Cupfeed and Air Strip Solenoids• Host PLC via Discrete DC I/O.________________________________________________________1.3 CLUTCH CONTROLThe clutch solenoids are activated by the HSL-WI5 through theelectro-mechanical two-hand control circuitry provided externally bythe user. The throughput of the HSL-WI5 is 0.5 milliseconds. Thisfast throughput, along with a fully integrated PLS, allows extremelyfast and repeatable de-clutching/braking response to be achieved.Outputs from the host PLC to inputs of the HSL-WI5 control theclutch solenoids. The detection of any alarm (short can fault, diesensor failure, etc.) will result in an immediate de-clutch of thesolenoids.The M4500 incorporates a built-in PLS which interfaces directly withthe machine-mounted resolver and provides all machine timing,eliminating the need for an external PLS.Six discrete DC inputs to the HSL-WI5 are used to control the clutch:1. “Clutch ON (IMED)”2. “Clutch ON (BDC)”3. “Run Mode (not Bar)”4. “Continuous Mode”5. “Single Mode”6. “Inch Mode”Note: The “Clutch ON (IMED)” and “Clutch ON (BDC)” inputsmust be turned “ON” simultaneously (within 0.5 seconds) in order forthe clutch to activate.HSL-WI5 User’s ManualSYSTEMS Electronics Group- 3 -
SECTION 1GENERAL DESCRIPTION________________________________________________________1.3.1 CLUTCH CONTROL VIA HOST PLCThe following description of operation defines the requirements of thehost PLC logic to activate the clutch through the HSL-WI5:Continuous Mode: Continuous mode is selected when the “RunMode” and “Continuous Mode” inputs are ON and the “SingleMode” and “Inch Mode” inputs are off. Turning both the “ClutchON (IMED)” and “Clutch ON (BDC)” inputs ON simultaneouslywill activate the clutch.BDC Stop: To perform a BDC stop, turn the “Clutch ON(BDC)” input off while leaving the “Clutch ON (IMED)” inputON.Immediate Stop: To perform an immediate or emergency stop,turn both the “Clutch ON (BDC)” and “Clutch ON (IMED)”inputs off simultaneously. This will indicate to the HSL-WI5 thatthe clutch should be disengaged immediately and not wait for theBDC timing signal.Single Mode: Single mode is selected when the “Run Mode” and“Single Mode” inputs are ON and the “Continuous Mode” and“Inch Mode” inputs are off. Turning both the “Clutch ON(IMED)” and “Clutch ON (BDC)” inputs ON simultaneously for 5to 50 milliseconds will activate the clutch and the press will makeone stroke.Inch Mode: Inch mode is selected when the “Run Mode” and “InchMode” inputs are ON and the “Continuous Mode” and “SingleMode” inputs are off. Turning both the “Clutch ON (IMED)” and“Clutch ON (BDC)” inputs ON simultaneously will activate theclutch as long as both inputs are ON.Bar Mode: Bar mode is selected when the “Run Mode” input is off.Turning both the “Clutch ON (IMED)” and “Clutch ON (BDC)”inputs ON simultaneously will activate the clutch will activate theclutch as long as both inputs are ON.Refer to the schematic at the back of this <strong>manual</strong> for typical HSL-WI5clutch connections.HSL-WI5 User’s ManualSYSTEMS Electronics Group- 4 -
SECTION 1GENERAL DESCRIPTIONIMPORTANT SAFETY WARNING –The HSL-WI5 is intended as a high-speed logic gate to provideconsistent and accurate clutch control. It is not designed as aredundant, dual-processor clutch brake safety module.The HSL-WI5 must not be the only means of controlling theclutch mechanism. Good design practice dictates the use ofsafety interlocks on any device that starts or stopsautomatically that can cause personnel injury to operating ormaintenance personnel.The HSL-WI5 must be used only in conjunction with industryapproved safety interlock contacts, implemented in accordancewith ANSI B11.1 safety requirements; otherwise, seriouspersonnel injury may result.HSL-WI5 User’s ManualSYSTEMS Electronics Group- 5 -
SECTION 1GENERAL DESCRIPTION________________________________________________________1.4 CUPFEED SOLENOID CONTROLThe HSL-WI5 provides control for both the cupfeed ON and offsolenoids. For auto operation, the cupfeed is enabled by the host PLCvia a discrete input to the HSL-WI5. The cupfeed is timed ON and offwith the cupfeed timing signal to provide accurate cup loading. The<strong>manual</strong> cupfeed input is provided to activate the cupfeed as long asthe <strong>manual</strong> input is ON.Control Of Cupfeed Solenoid Via Host PLC: Two discrete DCinputs to the HSL-WI5 from the host PLC are used to control thecupfeed solenoid:1. “Cupfeed Auto Enable”2. “Cupfeed Manual”The following description of operation defines the requirements of thehost PLC logic to activate the cupfeed through the HSL-WI5:Cupfeed Auto Mode: In single and continuous modes, the cupfeedis gated ON with the leading edge of the cupfeed timing signal(CH04) and gated off with the trailing edge of the cupfeed timingsignal. The cupfeed is opened after two strokes when the“Cupfeed Auto Enable” input is turned ON and the leading edgeof CH04 occurs. This allows three strokes of air strip to clear thepunch of coolant before the first can is made. The cupfeed isclosed when the “Cupfeed Auto Enable” input is turned “off” andthe trailing edge of CH04 occurs.Note: It takes two strokes once the cupfeed is opened for the firstcan to travel through the positive cupfeed and is punched. Oncethe cupfeed is closed, it requires two strokes to punch the last twocups, which are in process of traveling through the positivecupfeed.Manual Mode: The cupfeed can be activated directly (<strong>manual</strong>ly) byactivating the “Cupfeed ON Manual” input. With the machinestopped, activating the “Cupfeed ON Manual” input opens thecupfeed. When the “Cupfeed ON Manual” input is off, the cupfeed isclosed. With the machine running, activating the <strong>manual</strong> cupfeedfeeds one cup with the corresponding three strokes of air strip prior tomaking the cup.HSL-WI5 User’s ManualSYSTEMS Electronics Group- 6 -
SECTION 1GENERAL DESCRIPTION________________________________________________________1.5 AIR STRIP CONTROLThe HSL-WI5 provides a repeatability of 0.5 milliseconds for the airstrip thus reducing can stripping and blow out problems. Both an “AirStrip (Low)” and “Air Strip (High)” timing signal are provided toactivate the air strip two stokes prior to the cupfeed open (when thepress is running).________________________________________________________1.6 BRAKE WEAR COMPENSATIONThe HSL-WI5 incorporates a brake wear <strong>com</strong>pensation or automaticBDC timing feature. This stops the press at BDC regardless of theactual braking response of the clutch/brake. This is ac<strong>com</strong>plished byautomatically adjusting the BDC timing signal based on the previousstopping response. Any overrun is detected and a new BDC timingsignal is <strong>com</strong>puted such that the machine will stop at the desiredlocation on the next stop. Two BDC signals are provided, one for“Continuous/Single” modes and one for “Inch” mode. Theappropriate BDC timing signal is adjusted based on the mode of themachine when a BDC stop is initiated.The actual brake response (in degrees) is calculated. This is thenumber of degrees from where the clutch was de-activated (BDCtiming location) to the position where the crankshaft actually stopped.This can then be displayed on the Keypad/Display to determine thecondition of the brake.A “Brake Response Too Long” alarm is generated when the actualbrake response exceeds a user specified maximum allowed brakeresponse. This can be used to indicate that service to the brake shouldbe performed.HSL-WI5 User’s ManualSYSTEMS Electronics Group- 7 -
SECTION 1GENERAL DESCRIPTION________________________________________________________1.7 ALARM DETECTIONThe HSL-WI5 detects the following additional alarms:Short Can Detection: The “Short Can Check” timing signal(CH02), along with the machine mounted short can sensor, is used toverify the entire length of the can. The short can sensor must see canthe entire time the “Short Can Check” timing signal (CH02) is ON. Ifthe can is short (tear off) or any void is detected, the short can alarmis generated and the cupfeed is immediately closed. The resolution ofthe short can check is 0.5 milliseconds. At a machine speed of250CPM, this translates to approximately 1/4” resolution in canlength. The “Short Can” alarm output must be interlocked to theexisting control system to dis-engage the clutch immediately.Die Sensor Failure: This alarm occurs when the short can sensorfails ON. The “Sensor Check” timing signal (CH03) is used to verifythat the short can sensor does indeed turn off when a can is notpresent.Timing Signal Fail: The timing signal fail occurs when any of thetiming signals generated in the PLS section fail to change stateperiodically while the machine is running. This alarm activates the“Can Sensor/Timing Fail” output.Brake Response Too Long: The “Brake Response Too Long”alarm is generated when the actual brake response exceeds a userspecified maximum allowed brake response. This can be used toindicate that service to the brake should be performed.The above alarms are available to the host PLC via discrete outputs.These should be used to stop the machine and indicate the problemwhen any one of the alarms occurs.HSL-WI5 User’s ManualSYSTEMS Electronics Group- 8 -
SECTION 1GENERAL DESCRIPTION________________________________________________________1.8 INTERLOCKS TO EXISTING CONTROL SYSTEMIn addition to the alarms listed in section 1.7, the following (+24VDCdiscrete signals) should be interlocked to the existing control system:Clutch ON: This signal is provided to the host PLC to indicatewhen the clutch solenoids are ON.Pulse Train (3-PPS): This pulse train signal gives three pulses perstroke. It is provided to the host PLC to check for ram motion oncethe clutch solenoids have been engaged.Logic Sync (CH07): This signal will provide the host PLC withone pulse per stroke. It is based on the state of timing channel CH07(PLC Clock Timing). It is generally set for 180 degrees on, 180degrees off.Flywheel at Bar Speed: This signal is provided to determineflywheel zero speed. This output is set when there is no motiondetected by the main crank resolver.Flywheel at Inch Speed: This output is set when the RPM of theresolver is above the bodymaker Low Speed threshold set-point.Flywheel at Punch Speed: This output is set when the RPM ofthe resolver is above the bodymaker High Speed threshold set-point.Cupfeed is Open: This signal is provided to the host PLC toindicate that the cupfeed is open and the bodymaker is in production.________________________________________________________1.9 INTERLOCKS FROM EXISTING CONTROL SYSTEMIn addition to the clutch control interlocks described in section 1.3and the cupfeed control interlocks described in section 1.4, thefollowing interlocks should be provided by the existing controlsystem:End Of Shift: This signal is used transfer the “Current Shift” datato the “Last Shift” data.Alarm Reset: This signal is used to reset the alarms generated bythe HSL-WI5.HSL-WI5 User’s ManualSYSTEMS Electronics Group- 9 -
SECTION 1GENERAL DESCRIPTION________________________________________________________1.10 DATA COLLECTIONThe following data is collected for both the current shift and theprevious (last) shift:1) Total number of good cans produced2) Total number of short can faultsThis data can be viewed locally on the Keypad/Display. Thisinformation is updated (“current” shift transferred to “Last” shift)based on the change of state of the “End of Shift” input.HSL-WI5 User’s ManualSYSTEMS Electronics Group- 10 -
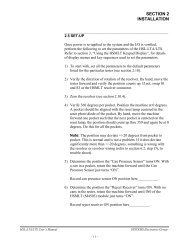
SECTION 2INSTALLATIONThe HSL-WI5 module is provided for door mounting on the existinguser's control cabinet door or console.________________________________________________________2.1 WHAT’S INCLUDEDVerify that the following items are included when unpacking theHSL-WI5 (back-panel mounting):1ea.HSL-WI5 back-panel for mounting in existing control cabinet(includes the following):1ea.1ea.1ea1ea.1ea.1ea.M4500 PLC/PLS Module with required I/O boardsP4500 Power SupplyD4591 Display with ribbon cable for mounting in theexisting control cabinet doorHSL-WI5 <strong>User's</strong> ManualM4500 <strong>User's</strong> ManualHSL-WI5 Program DiskThe following items are optional items and can be purchasedseparately as required or desired:1ea.1ea.RSV34-MS1 ResolverRSV-RSCBLE-XX Resolver Cable________________________________________________________2.2 POWER REQUIREDThe HSL-WI5 is powered from 115/230VAC 50/60HZ and +24VDC.The 115/230VAC is used to power the P4500 power supply while the+24VDC is used to power the +24VDC I/O (sensors, clutchsolenoids, etc.).Note: +24VDC solenoids must be used for all clutch, cupfeed, andair strip solenoids. These provide a much more consistent andrepeatable response time than 115VAC solenoids. Assuming+24VDC solenoids were used in the existing system, the +24VDCcurrent required by the HSL-WI5 is no more than the existing systems+24VDC current requirement therefore the existing +24VDC powersupply should be adequate.HSL-WI5 User’s ManualSYSTEMS Electronics Group- 11 -
SECTION 2INSTALLATION________________________________________________________2.3 MOUNTING AND WIRING THE HSL-WI5The HSL-WI5 control panel should be mounted in the existing controlcabinet. Perform the following steps to mount the HSL-WI5:Refer to the “Re<strong>com</strong>mended Cut-Out” in figure 1. Create a cut-out inthe door of the existing control cabinet and mount the D4591Keypad/Display and connect the ribbon cable from the M4500 to thedisplay.Note: The Keypad/Display must be located within 6 feet of theM4500 to avoid EMI pick-up on the display ribbon cable.________________________________________________________________________________Figure 1 –Re<strong>com</strong>mended Panel Door Cut-outHSL-WI5 User’s ManualSYSTEMS Electronics Group- 12 -
SECTION 2INSTALLATIONReferring to the electrical control schematic at the back of this<strong>manual</strong>, wire the HSL-WI5 as follows:Note: Keep all +24VDC wiring, resolver cable, and trimmer speedreference wiring away from high voltage wiring. Wire the machinemountedresolver directly to the 8-pin resolver input connector on theM4500.1) In<strong>com</strong>ing Power: 115VAC-230VAC to FU1, neutral to 900 andground to GND. Logic power (+24VDC) to 501 and <strong>com</strong>mon to500. Control power (+24VDC) to 601 and <strong>com</strong>mon to 600.2) Interlocks from existing control system to HSL-WI5 (terminalsI14 through I23).3) Interlocks to existing control system from HSL-WI5 (terminalsO10, O15 through O24) and FLT output.4) Wire the Clutch Solenoids to O10 and O11 (see note 2 of theelectrical control schematics). Wire the Cupfeed and Air Stripsolenoids to FU4 through FU6.5) Short Can Sensor (I08) and Flywheel Motion Sensor (I10) usingthree conductor shielded cable. The shield of the sensor cableshould be tied to earth ground at a terminal inside the existingcontrol cabinet and left floating at the sensor.6) Set-Up Enable key switch (if desired).7) Resolver cable from resolver or existing PLS to RO-S4 connectoron M4500 using a three pair, two-conductor shielded cable. Theshield of the resolver cable should be tied to the “SHLD” terminalof the resolver input connector. Make sure the resolver cableshield is left floating at the resolver.8) Trimmer Speed reference (0-10Vdc) analog output to trimmerdrive (if used), using two conductor shielded cable. It may benecessary to use an analog isolation amplifier (not provided) toisolate the drive from the M4500 to prevent damage to themodule.HSL-WI5 User’s ManualSYSTEMS Electronics Group- 13 -
SECTION 2INSTALLATION________________________________________________________2.4 MOUNTING THE RSV34-MS1 RESOLVER(IF REQUIRED)The HSL-WI5 is designed to interface to a resolver (not encoder) formachine timing. If the machine is not already equipped with aresolver, then the existing encoder will have to be removed and anRSV34-MS1 resolver will have to be mounted in it's place. If this isthe case, refer to the RSV34-MS1 data sheet for details on mountingthe resolver. Use the RSV-RSCBLE cable to connect the resolver tothe HSL-WI5. Route the resolver cable in a separate conduit, awayfrom all other high voltage and control wiring. Wire the cable directlyto the 8-pin resolver connector on the HSL-WI5 (see section 2.3).________________________________________________________2.5 HSL-WI5 SOFTWARE INSTALLATIONThe HSL-WI5 set-up software is used to• Download the Program to the M4500• Tune (Set-Up) the User Adjustable Variables• Download and Upload (Save) the User Set-Up Variables to Disk• View Shift DataFollow the steps below to install either the HSLWI5 setup programand PLC application program on a PC used to support the HSL-WI5control system.HSL-WI5 User’s ManualSYSTEMS Electronics Group- 14 -
SECTION 2INSTALLATION________________________________________________________2.5.1 SETUP PROGRAM INSTALLATIONThe HSMWI5 setup program is <strong>com</strong>patible with Windows95/98/ME/2000/XP operating systems.To install the set-up software, perform the following steps:1) Insert the HSL-WI5 CD into the drive2) From the Windows desktop, “Click” Start and then select run.3) From the “Run” dialog box, “Click” the Browse button. Select thedrive with HSL-WI5 CD. Select the “setup.exe” file and “Click”Open and then Ok.4) This will initiate the installation process. Follow the instructionsthat appear on the screen to <strong><strong>com</strong>plete</strong> the installation process. TheHSMWI5 setup program can be executed from the “Systems”folder located in Programs.________________________________________________________2.5.2 SYSDEV PROGRAM DEVELOPMENT SOFTWAREINSTALLATIONThe SYSdev Program Development software is used to perform onlinetrouble-shooting and program modifications to the HSL-WI5. IfSYSdev was purchased with the HSL-WI5 package and is not alreadyinstalled on the your <strong>com</strong>puter, install SYSdev onto the hard drive ofyour <strong>com</strong>puter following the steps in the SYSdev ProgramDevelopment <strong>manual</strong>.HSL-WI5 User’s ManualSYSTEMS Electronics Group- 15 -
SECTION 2INSTALLATION________________________________________________________2.5.3 APPLICATION PROGRAM INSTALLATIONThe application program is a SYSdev based program, loaded into theM4500 module and performs the HSL-WI5 logic. The program iswritten in a <strong>com</strong>bination of Ladder logic and High-level. If the userdesires to make program changes or perform on-line monitoring ofthe program execution the files, which constitute the HSLWI5program, will have to be loaded onto the hard drive of the PC used tosupport the system. The SYSdev Program Development Software willalso have to be loaded on the PC. To install this program perform thefollowing:1) Install the “PROGRAMS” disk into the drive.2) Create one directory off the root directory of the PC for the filesthat makeup the HSLWI5 application program.3) Copy all the files from the program disk to this subdirectory.________________________________________________________2.6 MODIFY EXISTING PLC PROGRAMModify the existing control system PLC program to interface with theHSL-WI5 by incorporating the following into the existing PLC ladderlogic:1) The HSL-WI5 now controls the clutch BDC stop, cupfeed, airstrip, and short can detection. Defeat the existing short candetection in the PLC and add the following alarm inputs from theHSL-WI5:• “Short Can” (O18)• “Can Sensor/Timing Fail” (O19)• “Brake Response Too Long” (O20)Note: These alarms must immediately disable the clutch logic inthe PLC. The alarms are true logic (“on” when alarm detected).HSL-WI5 User’s ManualSYSTEMS Electronics Group- 16 -
SECTION 2INSTALLATION2) Add the following inputs into the PLC logic:• Clutch ON (O10): This signal indicates the state of theclutch solenoids.• Pulse Train 3-PPS (O16): This pulse train signal givesthree pulses per stroke. It is intended as a check for rammotion once the clutch solenoids have been engaged.• Logic Sync CH07 (O17): This signal is based on the stateof timing channel CH07 (PLC Clock Timing). It provides thehost PLC with one pulse per stroke and is generally set for 180degrees on, 180 degrees off.• Flywheel at Bar Speed (O21): This signal is set whenthere is no motion detected by the main crank resolver.• Flywheel at Inch Speed (O22): This signal is set whenthe RPM of the resolver is above the bodymaker Low Speedthreshold set-point.• Flywheel at Punch Speed (O23): This signal is set whenthe RPM of the resolver is above the bodymaker High Speedthreshold set-point.• Cupfeed is Open (O24): This signal is provided to the hostPLC to indicate that the cupfeed is open and the bodymaker isin production.3) Add the “Clutch ON (IMED)” and “Clutch ON (BDC)” outputsinto the PLC logic. In general, these can be derived from the logicthat use to drive the clutch solenoids by removing the BDC timingsignal from the original logic.Both outputs should <strong>com</strong>e on simultaneously to engage the clutch.To perform an immediate or emergency stop, turn off the “ClutchON (IMED)” signal. To perform a BDC stop, turn off the “ClutchON (BDC)” signal. In either case removal of either signal willdisengage the clutch.4) Add the “Run (not Bar)” mode output to the existing PLC logic.This signal should be ON to run the machine in either continuous,single or inch modes and should otherwise be off.5) Add the “Continuous”, “Single”, and “Inch” mode outputs to theexisting PLC logic. The respective output should be ON when thecorresponding mode is selected when in “Run” (not Bar) mode.HSL-WI5 User’s ManualSYSTEMS Electronics Group- 17 -
SECTION 2INSTALLATION6) Add the “Cupfeed On” output into the PLC program. Incontinuous and single modes, this signal should be the summationof the cupfeed auto mode and all line control stand-by conditions(when “on”, the cupfeed will be timed opened by the HSL-WI5when the machine is running and feed cups in the normalproduction mode). In inch mode, the cupfeed will be openedwhen this output is “on”.7) Add the “Cupfeed Auto Enable” output to the PLC program. Thismust be ON to open the cupfeed in normal production.8) Add the “Cupfeed ON Manual” output to the PLC program. Withthe machine stopped, activating the “Cupfeed ON Manual” inputopens the cupfeed. When the “Cupfeed ON Manual” input is off,the cupfeed is closed. With the machine running, activating the<strong>manual</strong> cupfeed feeds one cup with the corresponding threestrokes of air strip prior to making the cup.9) Add the “Alarm Reset” output to the PLC program. This signalshould be “on” as long as the system reset push-button isdepressed.10) Add the “End of Shift” output to the PLC program. This signal isused transfer the “Current Shift” data to the “Last Shift” data atthe end of an eight or twelve hour period.HSL-WI5 User’s ManualSYSTEMS Electronics Group- 18 -
SECTION 2INSTALLATION________________________________________________________2.7 HSL-WI5 SET-UPThe HSL-WI5 is shipped from the factory with the PLC program“HSLWI5” loaded in the PLC section of the HSL-WI5 module andthe PLS channel set-point file “WI5TMG” loaded in the PLS section.In most cases, the following user variables and timing channels mayhave to be altered to tune the HSL-WI5 to the actual bodymaker it iscontrolling.Once the HSL-WI5 is installed and the control system is poweredback up, perform the following to set-up and tune the HSL-WI5. Theset-up is performed using the Display/Keypad or a PC running the“HSLWI5” set-up program. See section 3 for a description of theKeypad <strong>com</strong>mands and menu displays of the HSL-WI5 Keypad/Display. See section 4 for a description of the menus, variables andhow to use set-up program.________________________________________________________2.7.1 DEFAULT SET-UP VARIABLESAs shipped, the set-up variables for the M4500 main processor are setto the following defaults:Brake Wear Compensation:Enabled: YDesired BDC Stop Position (cont./single) : 000°Maximum Allowed Stopping Response : 350°Bodymaker Running Speeds:Low Speed (SPM) : 175High Speed (SPM) : 350Number of Cupfeed Open/Initial Air Strip Strokes:Number of Strokes Before Cupfeed Open : 2Number of Cans Made with Initial Air Strip : 20Trimmer Speed Reference:Maximum Speed : 375Idle Speed (W/I stopped) : 250HSL-WI5 User’s ManualSYSTEMS Electronics Group- 19 -
SECTION 2INSTALLATIONThe “WI5TMG” timing channel file, as shipped, contains thefollowing default timing set points:CHAN ON - OFF DESCRIPTIONCH00: 150 – 170 BDC (Cont./Sing) timingCH01: 200 – 220 BDC (Inch) timingCH02: 155 – 175 Short Can Check timingCH03: 110 – 130 Sensor Check timingCH04: 150 – 350 Cupfeed timingCH05: 150 – 200 Air strip (Normal) timingCH06: 120 – 190 Air strip (Initial) timingCH07: 180 – 000 PLC Clock Timing________________________________________________________2.7.2 VERIFY MAIN CRANK RESOLVERUsing the Keypad/Display, press the “Set-up” key and select option 3“Set Machine Timing” (see section 3.4.3). Verify that the main crankresolver direction is correct and linear by barring or inching themachine forward. The position (POS) should increment linearlythrough the range of 0 to 359. If the direction is backwards, reversethe S1 and S3 leads where the resolver cable connects to the M4500.If the position is not linear (increments up then down or does notincrement through full range), verify that the resolver leads are allconnected and connected correctly. Refer to the electrical controlschematics at the back of the <strong>manual</strong> for wiring details.HSL-WI5 User’s ManualSYSTEMS Electronics Group- 20 -
SECTION 2INSTALLATION________________________________________________________2.7.3 SET BODYMAKER SET-UP PARAMETERSThe Bodymaker set-up parameters include:1) Enabling or Disabling the Brake Wear Compensation2) Setting the Desired Stopping Points (if the brake wear<strong>com</strong>pensation is enabled)3) Setting the Maximum Allowed Stopping Response4) Setting the Bodymaker Running Low and High Speeds5) Setting the Number of Strokes before the Cupfeed Opens andNumber of Cans Made With Initial “Air Strip”Brake Wear Compensation: If the brake wear <strong>com</strong>pensation is tobe used, enable it by setting the “Brake Wear CompensationEnable” to “Y” and set the “Desired BDC Stop Position(cont./single)”. The desired BDC stop position is the desiredlocation of the ram when it <strong>com</strong>es to rest after a BDC stop. Thedesired stopping position is generally set to 000 degrees. Enablingthe brake wear <strong>com</strong>pensation allows the M4500 to automaticallyadjust the BDC timing channel (CH00-Cont./Single) as necessarysuch that the press will stop at the desired stopping positionregardless of the actual brake response.If the brake wear <strong>com</strong>pensation is not to be used, disable it bysetting the “Brake Wear Compensation Enable” to “N”. Disablingthe brake wear <strong>com</strong>pensation requires the BDC timing (CH00)signal to be set <strong>manual</strong>ly such that the press stops at BDC.Note: If the brake response then changes, the press will not stopat the desired position if the brake wear <strong>com</strong>pensation is disabled.Maximum Allowed Stopping Response: This parameter definesthe maximum allowed brake response before the “Brake ResponseToo Long” alarm is generated. If the actual brake response(number of degrees from when the brake is activated to theposition where the press ends up at rest) when a BDC stop isperformed is longer than this number, the alarm is generated. Ifthe actual brake response is less, the alarm is not generated. Setthis parameter to the value where the brake response is consideredtoo long and service to the brake should be performed (typically270 to 350 degrees).HSL-WI5 User’s ManualSYSTEMS Electronics Group- 21 -
SECTION 2INSTALLATIONBodymaker Running Speeds: Set the Bodymaker running “LowSpeed” and “High Speed” to the speeds that the bodymaker willactually run at when the respective speed is selected.Note: This is not a speed reference that will make the bodymakerrun at the speeds entered but is instead simply parameters used bythe M4500 to know when to switch between the “High” and“Low” speed settings.Number of Strokes before Cupfeed Open: This is the numberof strokes (plus 2) that the machine will make with air strip oncethe cupfeed is enabled, before it actually opens. This allowscoolant to be blown from the ram to prevent “Hydraulic Lock”(normally set to 2).Number of Cans made with Initial Air Strip: This is thenumber of cans made using the CH06 – “Initial Air Strip” timingchannel when the cupfeed is first opened before switching toCH05 – “Normal Air Strip”. This allows the first cans to madewith more “Air Strip” while the tooling is cool.See section 3 “Using the Keypad/Display” or section 4 “HSLWI5 SetupProgram Reference” for details on setting the above set-upparameters.HSL-WI5 User’s ManualSYSTEMS Electronics Group- 22 -
SECTION 2INSTALLATION________________________________________________________2.7.4 SET TRIMMER SPEED REFERENCESSet both the “Trimmer Maximum Speed” and “Trimmer Idle Speed”as desired. These two parameters are used to control the speedreference (0-10VDC) to the trimmer.Trimmer Maximum Speed: The “Trimmer Maximum Speed”parameter is used to scale the 0-10VDC analog output such thatwhen the bodymaker is running at the speed entered in “TrimmerMaximum Speed”, the analog output will be at 10 volts.Trimmer Idle (Minimum) Speed: This parameter determines thespeed the trimmer will run at when the bodymaker is stopped (declutched).Note: When the bodymaker is running, the trimmer speed referenceis proportional (as set by the “Trimmer Maximum Speed” scaling) tothe speed of the bodymaker. This parameter is used to provide thespeed reference when the bodymaker speed is zero.See section 3 “Using the Keypad/Display” or section 4 “HSLWI5 SetupProgram Reference” for details on setting the above set-upparameters.________________________________________________________2.7.5 SET MACHINE ZEROInch the main crank of the bodymaker to back dead center (BDC) andset the M4500 offset using the D4591 Keypad/Display.1) Press the “Set-up” key and select option 4 “Zero Machine (setresolver offset)”, see section 3.4.4.2) Enter “0” to set the resolver offset. The timing set-up menu willthen be displayed, showing the “POS:” at zero. The M4500calculates the actual offset value required to make this the zeroposition and displays this number in the offset field.3) Return to the primary set-up menu by pressing . Return tothe default screen by pressing again.HSL-WI5 User’s ManualSYSTEMS Electronics Group- 23 -
SECTION 2INSTALLATION________________________________________________________2.7.6 VERIFY LOCATION OF SHORT CAN TIMING (CH02)Inch the machine and verify that the “Short Can” timing (CH02) ofthe M4500 first turns ON when the short can sensor is over the noseof the punch on the forward portion of the stroke. This would bewhere the sensor would first “see” the can as it emerges from the dieset. Verify that the “Short Can” timing turns “off” right before thesensor would quit seeing the lip of the can as the ram continues it'sforward motion. Adjust either or both of the ON or off locations ofCH02 until the above is achieved. Depending on the location of theshort can sensor, CH02 is typically set ON at 155 degrees and off at175 degrees.________________________________________________________________________________Figure 2 – Short Can Check Timing SequenceHSL-WI5 User’s ManualSYSTEMS Electronics Group- 24 -
SECTION 2INSTALLATIONNote: The short can sensor must “see” can the entire time the “ShortCan” timing (CH02) is ON in order to pass the short can check,otherwise the “Short Can” alarm will be generated.Verify that the “Sensor Check” timing (CH03) is set correctly. Thistiming signal should go ON for 20 degrees then off prior to the punchemerging from the die set (typically 110 to 130 degrees). This signalis used to verify that the short can sensor has not failed ON andtherefore the short can sensor must be off the entire time CH03 is ONotherwise the “Die Sensor Fail” alarm is generated.See section 3 “Using the Keypad/Display” or section 4 “HSLWI5 SetupProgram Reference” for details on setting CH02 and CH03.________________________________________________________2.7.7 VERIFY SINGLE CUPFEEDWith the machine running in continuous mode and the “Cupfeed AutoEnable” off, feed a single cup through the machine by depressing the“Cupfeed ON Manual” push-button. The cupfeed solenoid shouldopen for one cup and activate the air strip for three strokes prior to thecan being punched (can punched on fourth stroke). Verify the cupfeedtiming (CH04), air strip timing (CH05 and CH06), and short cantiming (CH02). Adjust as necessary to achieve smooth cupfeedoperation with no false short can shut downs.HSL-WI5 User’s ManualSYSTEMS Electronics Group- 25 -
SECTION 2INSTALLATION________________________________________________________2.7.8 VERIFY MACHINE OPERATIONRun the machine in normal production.Verify Air Strip Timing: With the machine running and the cupfeedopen, adjust the respective “Air Strip” timing (CH05-Normal,CH06-Initial) and verify that the cans are stripped without anyproblems. See section 3 “Using the Keypad/Display” or section 4“HSLWI5 Set-up Program Reference” for details on adjustingCH05 and CH06.Verify Short Can Timing: With the machine running and thecupfeed open, verify that no false short can faults are occurring(short can alarm occurs when full length can is made). If a falseshort can alarm are occurs, narrow the short can timing windowone degree at a time until false short can alarms are no longergenerated.Verify that the short can detection is working correctly bygenerating a short can and verifying that the short can alarm isgenerated. This can be done by stopping the press, removing oneof the die rings, then punching a cup in single stroke mode. Theshort can alarm should be generated when the cup is punched.Verify BDC Stop: If the brake wear <strong>com</strong>pensation is enabled, verifythat the press does stop at the desired location.Note: When the system is first installed, it will take a fewsuccessive stops for the algorithm to program the BDC timingchannel to the correct position. The <strong>com</strong>pensation is enabled afterthe press has been running at a fixed speed in continuous. TheBDC timing channel will not be modified when single strokes aremade or if press is started in continuous and then immediatelystopped again. Wait about 5 seconds after the press is startedbefore performing the BDC stop to verify the stop position.If the brake wear <strong>com</strong>pensation is disabled, <strong>manual</strong>ly adjust boththe BDC (Cont./Single) timing (CH00) and the BDC (Inch) timing(CH01) such that the press stops at back dead center at bothrespective speeds. See section 3 “Using the Keypad/Display” orsection 4 “HSLWI5 Set-up Program Reference” for details onadjusting CH00 and CH01.HSL-WI5 User’s ManualSYSTEMS Electronics Group- 26 -
SECTION 2INSTALLATIONVerify BDC Stop Sequence: Perform a normal <strong>manual</strong> BDC stopwhile the cupfeed is open and verify that the cupfeed closes. Themachine should make two extra strokes processing the tworemaining cups in the cupfeed cam and stop at BDC with no cupsin the cup locator or cupfeed cam. This sequence should be truefor standby stops and BDC alarm stops as well.The Machine is Now Set-Up and Ready to Run!HSL-WI5 User’s ManualSYSTEMS Electronics Group- 27 -
SECTION 2INSTALLATION________________________________________________________2.8 M4500/P4500/D4591 INSTALLATIONThe following is provided as a reference only. These steps areperformed by the factory prior to shipping the HSL-WI5. These stepsneed only be performed in the event either the M4500 module, P4500power supply, or D4591 display need to be replaced. Refer to theM4500 <strong>User's</strong> Manual for general details on installing the M4500,P4500, and D4591.________________________________________________________2.8.1 M4500 MODULE INSTALLATIONTo install the M4500 module, perform the following:1) Remove the cover from the M4500 chassis (retained with threecaptive screws on the lower front of the cover and two captivescrews on each side of the M4500 chassis).2) Install the S4563 (SLOT0-0, furthest left slot): Set the slot addressdip switches (SW1) to the following positions:S4563: SW1 switch1 = "OFF"SW1 switch2 = "OFF"3) Install the S4573 (SLOT0-1, slot next to S4563): Set the slotaddress dip switches (SW1) to the following positions:S4573: SW1 switch1 = "ON"SW1 switch2 = "OFF"4) Install the on the M4500, making sure all the board connectorsprotrude through the slots in the cover. Tighten the three captivescrews on the lower front of the cover and the two captive screwson each side of the M4500 chassis.5) Connect the display ribbon cable to the connector on the back ofthe M4500 (the connector will mate with the connector on theM4500 only one way).6) Mount the M4500 chassis to the HSL-WI5 back panel using four8-32 screws.HSL-WI5 User’s ManualSYSTEMS Electronics Group- 28 -
SECTION 2INSTALLATION7) With power to the P4500 "off", install the P4500 power supplycable to the +5/C/+12/C/-12 connector on the M4500 (theconnector will mate with the connector on the M4500 only oneway).8) Install the respective field wiring arms on all the I/O boards of theM4500 (I/O slots 0 and 1, resolver connector, and IN0/IN1connector). Make sure all field-wiring connectors are fully matedto the M4500.________________________________________________________2.8.2 P4500 POWER SUPPLY INSTALLATIONTo install the P4500, perform the following steps:1) Mount the P4500 to the HSL-WI5 in the mounting holes next tothe M4500 (left side) using two 8-32 screws.2) With power to the P4500 "off", install the P4500 power supplycable to the +5/C/+12/C/-12 connector on the M4500 (theconnector will mate with the connector on the M4500 only oneway).________________________________________________________2.8.3 D4591 KEYPAD/DISPLAY INSTALLATIONTo install the D4591, perform the following steps:1) With the gasket installed on the mounting studs of the D4591,install the D4591 in the cut-out of existing control cabinet. Securethe display to the enclosure using 7ea. 8-32 nuts and external lockwashers.2) Connect the display ribbon cable to the connector on the lowerback of the display.HSL-WI5 User’s ManualSYSTEMS Electronics Group- 29 -
SECTION 2INSTALLATION________________________________________________________2.8.4 DOWNLOAD HSLWI5 APPLICATION PROGAM ANDSET-UP DATA TO M4500Once the M4500/P4500/D4591 are installed, perform the following to<strong>download</strong> the application program as well as the previously saved setupdata and timing channel set-points:1) Power up the M4500 and the PC used to interface with the HSL-WI5.2) Connect an RS-232 cable from the <strong>com</strong>puter COM port on the<strong>com</strong>puter to the "PROG" port on the M4500.3) Execute the HSLWI5 setup program.4) Download the HSLWI5 application program to the M4500, seesection 4.2.3.5) Download the previously saved set-up data to the M4500, seesection 4.2.4.6) The M4500 is now ready to run, loaded with HSLWI5 applicationprogram, timing set-points, and set-up data.Note: Double check the machine zero position and re-zero theresolver if necessary, prior to running the machine.HSL-WI5 User’s ManualSYSTEMS Electronics Group- 30 -
SECTION 3USING THE KEYPAD/DISPLAYThe keypad of the D4591 contains 24 keys consisting of data display<strong>com</strong>mands, set-up <strong>com</strong>mands, and a numeric keypad. The display ofthe D4591 is a 2 line by 40-character backlit LCD display thatdisplays the selected data and set-up menus. The Keypad/Display canbe used to view data or adjust the timing and set-up parameters.The Keypad/Display allows the following to be viewed or adjusted:1) Set the Bodymaker Parameters2) Set the Trimmer Parameters3) Set Machine Timing4) Set Machine Zero5) View the Actual Brake Response (in degrees)6) View the Current Shift Data7) View the Last Shift Data8) View Life Time Stroke CountThe definitions of the keypad <strong>com</strong>mands and menus are described inthe following sections.Note: For virtually all the menus, the “NEXT” and “PREV” keyscan be used to advance to the next item of the menu or retard to theprevious item. To change a parameter, simply enter the new value onthe numeric keypad and press . The value will be enteredand the next parameter will automatically be displayed. When the lastparameter is entered, the primary set-up menu is again displayed.Pressing at anytime will also exit you back to the primary setupmenu.HSL-WI5 User’s ManualSYSTEMS Electronics Group- 31 -
SECTION 3USING THE KEYPAD/DISPLAY________________________________________________________3.1 DEFAULT SCREENThe default screen (displayed when no other <strong>com</strong>mands are active)contains the following data:MACHINE SPEED (SPM):xxxx POSITION:xxxGOOD CANS:xxxxxxx SHORT CANS:xxxxxxThe “Machine Speed” is the current speed of the bodymaker, the“Position” is the current angular position of the bodymakercrankshaft, the “Good Cans” field is the total number of good cansproduced so far into the current shift and the “Short Cans” field is thetotal number of short can faults for the current shift. This displayeffectively replaces a speed meter, a position display and two cancounters. This screen is always returned to when no other <strong>com</strong>mandsare active.________________________________________________________3.2 “BRAKE RESPONSE” KEYThis key displays the brake response when a “BDC” stop isperformed. The response is the number of degrees it takes the press tostop from when the clutch is de-activated for a BDC stop to theposition that the machine <strong>com</strong>es to rest. This can be used to determinethe general condition of the brake and whether servicing of the brakeis required. To exit back to the default screen, simply press the “ESC”key.________________________________________________________3.3 “LAST SHIFT” KEYThe Last shift data menu displays the “Total Good Can” count and the“Total Short Can” fault count. This data is the totals for the last(previous) shift. This data is transferred from the current shift to the“Last shift” data when the end of shift input transfers from a “0” to a“1”. This can be at the end of either an 8 or 12-hour shift.Note: The Current shift “Good Cans” and “Short Cans” is displayedas part of the default screen (see section 4.5.1 – Main DisplayWindow).HSL-WI5 User’s ManualSYSTEMS Electronics Group- 32 -
SECTION 3USING THE KEYPAD/DISPLAYThe Last shift data is defined as follows:Good Cans: This is the total number of good cans produced for theprevious shift. This is essentially a can counter.Short Cans: This is the total number of short can faults the machinehad the previous shift.________________________________________________________3.4 “SET-UP” KEYThis selection is used to invoke the primary set-up menu. Thisconsists of the following six selections:1: SET BODYMAKER PARAMETERS2: SET TRIMMER PARAMETERS3: SET MACHINE TIMING (SET POINTS, ETC.)4: ZERO MACHINE (SET RESOLVER OFFSET)5: DISPLAY LIFETIME STROKE COUNTWhen selected, each of the above selections brings up a sub-menuwith the corresponding set-up parameters. The following sectionsdescribe these sub-menus and the definitions of the correspondingvariables. To select the respective set-up sub-menu, simply press thecorresponding numeric key (1 through 5).Note: The primary set-up menu is protected with an enable switchinside the logic <strong>com</strong>partment of the main control panel. The “M4500Set-up Enable” switch must be in the “Enable” position in gain accessto the primary set-up menu.HSL-WI5 User’s ManualSYSTEMS Electronics Group- 33 -
SECTION 3USING THE KEYPAD/DISPLAY________________________________________________________3.4.1 SET BODYMAKER PARAMETERSThis menu is activated when the “1” key (SET BODYMAKERPARAMETERS) is pressed while the primary set-up menu is active.The following four set-up parameters may then be adjusted or viewed:Brake Wear Comp Enable? (0=No, 1=Yes): This prompt is usedto enable or disable the brake wear <strong>com</strong>pensation. If the<strong>com</strong>pensation is to be disabled, enter “0”. If the <strong>com</strong>pensation is to beenabled, enter “1”.Desired BDC Stop POS (Cont./Single): This is the desiredstopping location (in degrees) for a BDC stop when brake wear<strong>com</strong>pensation is enabled. This is typical set to 000 degrees (BackDead Center). This prompt is only displayed when the brake wear<strong>com</strong>pensation is enabled.Maximum Allowed Stopping Response: This defines themaximum allowed brake response before a “Brake Response TooLong” alarm is generated. If the actual brake response (number ofdegrees from when the brake is activated to the position where thepress ends up at rest) when a BDC stop is performed is longer thanthis number, the alarm is generated. Set this parameter to the valuewhere the brake response is considered too long and service to thebrake should be performed (typically 270 to 300 degrees).Running Bodymaker Low Speed (SPM): This is the speed (instrokes per minute) the bodymaker will run in low (inch) speed.Running Bodymaker High Speed (SPM): This is the speed (instrokes per minute) the bodymaker will run when in high(cont./single) speed.Number of Strokes before Cupfeed Open: This is the numberof strokes (plus 2) the machine will make with air strip once thecupfeed is enabled, before it actually opens. This allows coolant to beblown from the ram to prevent “Hydraulic Lock” (normally set to 2).Number of Cans made with Initial Air Strip: This is thenumber of cans made using the CH06 – “Initial Air Strip” timingchannel when the cupfeed is first opened before switching to CH05 –“Normal Air Strip”. This allows the first cans to made with more“Air Strip” while the tooling is cool.HSL-WI5 User’s ManualSYSTEMS Electronics Group- 34 -
SECTION 3USING THE KEYPAD/DISPLAY________________________________________________________3.4.2 SET TRIMMER PARAMETERSThis menu is activated when the “2” key (SET TRIMMERPARAMETERS) is pressed while the primary set-up menu is active.The following trimmer set-up parameters may then be adjusted orviewed:Trimmer Maximum Speed (CPM): The “Trimmer MaximumSpeed” parameter is used to scale the 0-10VDC analog output suchthat when the bodymaker is running at the speed entered the analogoutput will be at 10 volts. This is typically set to the running highspeed of the Bodymaker or slightly higher.Trimmer Minimum Speed (CPM): This parameter determines thespeed the trimmer will run at when the bodymaker is stopped (declutched).Note: When the bodymaker is running, the trimmer speed referenceis proportional (as set by the “Trimmer Maximum Speed” scaling) tothe speed of the bodymaker. This parameter is used to provide thespeed reference when the bodymaker speed is zero.HSL-WI5 User’s ManualSYSTEMS Electronics Group- 35 -
SECTION 3USING THE KEYPAD/DISPLAY________________________________________________________3.4.3 SET MACHINE TIMING (SET-POINTS, ETC.)This selection brings up the timing set-point menu, which displays thefollowing fields:CHuu SETPOINT:xxx [] “channel name”RPM:yyyy POS:zzz OFFSET:wwww SCALE:360Each field is defined as follows:FieldCHuuSETPOINT:xxxDefinitionCurrently selected channel (CH00 through CH17)where “uu” is the octal channel number.Channel “on” or “off” set-point where “xxx” isthe set-point position[] State of channel set-point (blank = “off”, solidblock character = “on”)“channel name”RPM:yyyyPOS:zzzOFFSET:wwwwSCALE:360selected channel name: (CH00) BDC(CONT./SINGLE) TIMING, (CH01) BDC(INCH) TIMING, etc.Current machine speed where “yyyy” is in CPM.Current resolver position where “zzz” is indegrees.Resolver offset where “wwww” is the offset indegrees.Resolver SCALE FACTOR (360 degrees perrevolution).In addition to displaying the timing set-point menu, the followingkeys are also enabled: “ENTER SET-POINT”, “CLEARCHANNEL”, “SELECT CHANNEL”, and “SEARCH CHANNEL”.HSL-WI5 User’s ManualSYSTEMS Electronics Group- 36 -
SECTION 3USING THE KEYPAD/DISPLAYThe “ENTER SET-POINT” key is used to enter a new set-point (both“on” and “off” set-points) in the selected channel. The “CLEARCHANNEL” key is used to clear all set-points from the selectedchannel. The “SELECT CHANNEL” key is used to select a newchannel for programming. The “SEARCH CHANNEL” is used toview both the “on” and “off” set-points in the selected channel.<strong>Sea</strong>rching Channel: To view the set-points in a channel simplypress the “SEARCH CHANNEL” key. The next “off” or “on” setpointis shown in the “SETPOINT” field. The state character [] willbe a solid block if the set-point is ON or blank if the set-point is off.Entering or Adjusting Set-point: To set-or adjust a timingchannel, perform the following:1) Select the channel to be adjusted by pressing the “SELECTCHANNEL” key, entering the channel number (00 to 07) andpressing enter. In addition, the “NEXT” and “PREV” keys can beused to advance to the next channel or retard to the previouschannel.2) Press “CLEAR CHANNEL” to clear out the current channel.Note: Entering a new set-point does not automatically clear theold set-point out. If the two set-points are not in the same place,the channel will simply have two set-points in it if the old one isnot cleared out first. Therefore, always clear the channel beforeentering a new set-point. A set-point may however, be “extended”by programming another set-point onto an existing set-point usingeither the existing “on” or “off” set-point as the starting positionfor the new set-point. This will result in one larger set-point.3) Press “ENTER SET-POINT” to enter the new set-point. Thedisplay will then prompt “ON SETPOINT:”. Enter the position (indegrees) where the set-point should go “on” and press .The display will now prompt “OFF SETPOINT:”. Enter theposition (in degrees) where the set-point should go “off” and press. The channel will now be programmed with a set-pointthat goes “on” at the “on” position entered and “off” at the “off”position entered.4) Return to the primary set-up menu by pressing . Return tothe default screen by pressing again.HSL-WI5 User’s ManualSYSTEMS Electronics Group- 37 -
SECTION 3USING THE KEYPAD/DISPLAY________________________________________________________3.4.4 ZERO MACHINE (SET RESOLVER OFFSET)To set the machine zero (resolver offset) perform the following:1) Select “3: SET MACHINE TIMING” and observe the “POS:”field. Verify that as the machine is rotated forward (either inchedor barred) that the position increases linearly from 0 through 359.If not, swap the S1 and S3 leads of the resolver cable at theM4500 resolver connector. Then verify that the position thenindeed does increase with forward movement. Press “ESC” to exitback to the primary set-up menu.2) Position the machine at machine zero (back dead center).3) Auto zero the resolver by selecting “4: ZERO MACHINE” fromthe primary set-up menu. Enter “0” to zero the resolver. Thetiming set-up menu will be displayed, now showing the “POS:” atzero. The M4500 will calculate the offset value required to makethis the 000 position and displays this number in the offset field.4) Return to the primary set-up menu by pressing . Return tothe default screen by pressing again.________________________________________________________3.4.5 DISPLAY LIFETIME STROKE COUNTThe lifetime stroke count is used to display the total number ofstrokes made by the machine. This register is never reset and displaysthe count in 1,000 can incrementsPerform the following to view the lifetime stroke count:1) Select “5: DISPLAY LIFETIME STROKE COUNT “ from theprimary set-up menu.2) The M4500 will automatically display the total lifetime strokecount in thousands of cans.3) Return to the primary set-up menu by pressing . Return tothe default screen by pressing again.HSL-WI5 User’s ManualSYSTEMS Electronics Group- 38 -
SECTION 4HSLWI5 SETUP PROGRAMREFERENCEThe set-up program is a Windows based menu driven program,allowing the user to easily view data, alter set-up variables or setmachine timing (machine offset, timing signal locations, etc.), using aPC running the Windows (95/98/ME/2000/XP) operating system.The set-up variables are used to configure and tune the M4500 tomatch the configuration and performance of the specific bodymaker(see section 2.7 – HSLW-WI5 Set-Up).Note: The set-up program is an on-line <strong>com</strong>munications programused to interface with the. The data displayed and set in the windowsis <strong>com</strong>municated directly to the module, while in the “Online” editmode. Therefore, prior to going online with the processor, make surean RS-232 cable is connected from the COM port on the <strong>com</strong>puter tothe “PROG” of the M4500. The variables displayed while in the“Online” edit mode are read directly from the processor. Data issaved to a “Set-up Data” file (*.sdt) whenever changes are made to aparameter or when data is uploaded from the processor.HSL-WI5 User’s ManualSYSTEMS Electronics Group- 39 -
SECTION 4HSLWI5 SETUP PROGRAMREFERENCE________________________________________________________4.1 GENERAL DESCRIPTIONTitle Bar: At the top of the window is the “Title Bar”. The title baris used to display the name of the working “Set-up Data” file, as wellas, the name of the active “Window”. The title bar is dark if thewindow is active and grayed if another window is active. The colordepends on the settings of the Display Properties of the Control Panel.Status Bar: At the bottom of the window is the “Status Bar”. Thestatus bar is used to display system messages, online or offline mode,as well as, the current time and date as set by the operating system.The system messages panel displays general information aboutoperation of the system. The Online/Offline mode panel displays thestatus of the current set-up program mode of operation. The mode ofoperation can be changed by simply double clicking the online/offlinemode panel.Hot Keys: Hot keys are activated by holding down the “ALT” keyand simultaneously pressing the underlined letter of the desiredfunction. Almost every function can be activated by either pressing aseries of hot keys or using the “TAB” key to move between fields.Online/Offline Modes: The set-up program allows the user tomake changes while “Online” with the processor. The “Offline”mode is used to preset parameters prior to <strong>download</strong>. All functionsare available to the user while “Online”, however, specific “Online”functions are disabled in the “Offline” edit mode.Note: Offline changes can only be made by enabling “OfflineEditing”, accessed from the “Edit” menu.Getting Help: The entire contents of the user’s <strong>manual</strong> is containedwithin the help file. Pressing Ctrl+H will display the help filewindow. Pressing the F1 key will display the contents file. Hot spotsallow jumps to other topics to display additional information asdesired. Selecting “About HSLWI5” from the Help menu will displaya dialog box listing information about the current revision of the setupprogram and how to obtain technical support.HSL-WI5 User’s ManualSYSTEMS Electronics Group- 40 -
SECTION 4HSLWI5 SETUP PROGRAMREFERENCE________________________________________________________4.2 THE FILE MENUThe “File” menu allows the user to perform the following functions:• Create a “New” set-up “Data File”.• Open an existing “Data File”.• Save any changes made to the current “Data File” to disk.• Upload (save) Data from the M4500.• Download a SYSdev (.sdv) program to the M4500.• Download (restore) Data to the M4500.• Print a Report of the current set-up parameters.• Exit the set-up programHSL-WI5 User’s ManualSYSTEMS Electronics Group- 41 -
SECTION 4HSLWI5 SETUP PROGRAMREFERENCE________________________________________________________4.2.1 THE SETUP DATA FILEThe set-up “Data File” (.sdt) is a binary access file, designed for fastfile I/O operation. When the set-up program is first invoked, thedefault set-up parameters are loaded into memory. If changes aremade to any of the set-up parameters (either online or offline), as wellas shift data, the user will be flagged to “Save Changes” upon exit ofthe program.Note: Any windows based “Set-up” program can open a set-up“Data File”, however, the data tables will not be properly aligned. If aset-up data file was created by either a different set-up program or adifferent revision of software, the user will be alerted to the problem.The set-up “Data File” is similar to that of a word processing file.When the program first starts a default set of values is loaded and theuser is able to make any changes as desired. The set-up program isunaware of the parameters that exist within the M4500. Therefore, tonormalize the set-up program with the processor, the user shoulddefine or open an existing file, then upload (save) data from theprocessor. This allows the user to either create a backup of the dataor maintain an existing file. The user can even open a data file foranother machine, save the file to a new name, make the necessarychanges and simply <strong>download</strong> the new parameters to anotherprocessor.The following functions can be accessed any time, from any set-up ordisplay windows.New: To create a “New” data file, select “New” from the “File”menu or press “Ctrl + N”. This creates a <strong><strong>com</strong>plete</strong>ly new file, loadedwith the default variables and the word “[unnamed]” is displayed inthe title bar. If any changes were made to the existing file, the user isprompted to save changes prior to exit.Open: To “Open” and existing data file, select “Open” from the“File” menu or press “Ctrl + O”. This displays a dialog box, whichallows the user to navigate and select an existing data file to open andthe name of the file will be displayed in the title bar. If any changeswere made to the existing file, the user will be prompted to save anychanges first.HSL-WI5 User’s ManualSYSTEMS Electronics Group- 42 -
SECTION 4HSLWI5 SETUP PROGRAMREFERENCESave: To “Save” data file to disk, select “Save” from the “File”menu or press “Ctrl + S”. This displays a dialog box, which allowsthe user to select a folder and enter in a name for the file. The userwill be notified if the file name already exists and the extension “.sdt”will automatically be added to the file name. If this is a “New” file,the user will be prompted to enter a file name.Save As: To save the data file to a new name, select “Save As”from the “File” menu.. This displays a dialog box, which allows theuser to select a folder and enter in a new name for the file. The userwill be notified if the file name already exists and the extension “.sdt”will automatically be added to the file name.Export Shift Data…: This function allows the user to export theshift data to a “Tab Delimited” text file. This allows the user to easilyuse the shift data to produce production reports.HSL-WI5 User’s ManualSYSTEMS Electronics Group- 43 -
SECTION 4HSLWI5 SETUP PROGRAMREFERENCE________________________________________________________4.2.2 UPLOAD (SAVE) DATAThe “Set-up” program allows the user to upload set-up parameters,timing channel set-points and shift data from the M4500 to a set-up“Data File”. This function is accessed from the “File”.________________________________________________________4.2.3 DOWNLOAD PROGRAMThe “Set-up” program allows the user to “Download” any SYSdevprogram file to the M4500.Note: To “Download” a SYSdev program to the processor, theprogram must be “Online”. If “Online” mode cannot be achieved,program <strong>download</strong> will not be executed. If the program is currently“Offline”, the user will be prompted to first go “Online”.Once selected, and the set-up program “Online” with the processor, adialog box will be displayed, allowing the user to select the SYSdevfile to <strong>download</strong>.Note: Only the files with the “.sdv” file extension will be displayed.It is important to keep in mind that only a valid M4500 PLC SYSdevfile can be <strong>download</strong>ed. Care should be taken when selecting theprogram to <strong>download</strong>.Once selected, a message box is displayed informing the user of thecurrent program, revision and checksum of the program loaded in theprocessor, as well as, that of the selected program.HSL-WI5 User’s ManualSYSTEMS Electronics Group- 44 -
SECTION 4HSLWI5 SETUP PROGRAMREFERENCEThe user must confirm their selection by clicking the “Yes” <strong>com</strong>mandbutton. After the user confirms their choice, program <strong>download</strong> isinitiated and the current program <strong>download</strong> address is displayed.When program <strong>download</strong> is <strong><strong>com</strong>plete</strong>, the user is prompted toacknowledge. Control is passed back to the main program and theset-up program remains in an “Online” edit mode.________________________________________________________4.2.4 DOWNLOAD (RESTORE) DATAThe set-up program allows the user to <strong>download</strong> “Set-up”parameters, timing channel set-points and shift data to the M4500from the set-up “Data File”. This function is accessed from the “File”menu.Note: Only the values contained within the current data file are used.If the validity of the current data file is questionable, review the datain an “Offline” mode prior to <strong>download</strong>.________________________________________________________4.2.5 PRINT REPORTThe “Set-up” program allows the user to generate a “Report” printoutof all the set-up parameters, timing channel set-points and shift data(of the current set-up file). This function is accessed from the “File”menu. At the top of each page, the report displays the name of the setupfile, at the bottom of each page is the date and time the printoutwas generated, as well as the page number.To printout a report of the settings contained in the set-up “Data File”,perform the following:1) From the “File” menu, select “Print Report” or press “Ctrl + P”.2) The “Print Setup” dialog box will then be displayed, allowing theuser to select a printer, as well as, the paper size and orientation.Once the user selects “OK”, the report is generated and sent to thespecified printer device.Note: This function makes use of the windows print manager, whichallows the user to continue with their work while the document isbeing printed.HSL-WI5 User’s ManualSYSTEMS Electronics Group- 45 -
SECTION 4HSLWI5 SETUP PROGRAMREFERENCE________________________________________________________4.3 THE EDIT MENUThe “Edit” menu allows the user to perform the following functions:• Enable/Disable Offline Editing.• Set-up the Comm Port.________________________________________________________4.3.1 ENABLE OFFLINE EDITINGThis function allows the user to perform “Offline” editing on thecurrently loaded set-up data file, making any necessary changes toset-up parameters or timing channels while not online with theprocessor.If offline editing is not enabled, the user is only able to view the setupand shift data. When the program is first invoked, the defaultsetting is “Offline Editing” - disabled. The user will need to select“Enable Offline Editing” from the edit menu (or press function keyF2) to enable or disable this feature.HSL-WI5 User’s ManualSYSTEMS Electronics Group- 46 -
SECTION 4HSLWI5 SETUP PROGRAMREFERENCE________________________________________________________4.3.2 SETUP COMM PORTThis function allows the user to specify the serial <strong>com</strong>municationsport and rate to talk to the M4500. The programming port of theM4500 is set to 9600 baud.Once selected, a dialog box requesting the user to select a “CommPort” and “Baud Rate” will be displayed. The default setting isCOM1 at 9600 baud.In most cases the user will only need to specify the <strong>com</strong>municationsport and leave the baud rate at 9600. If <strong>com</strong>munication problemsoccur, make sure there is a secure connection from the PC to the PLC.Then check the Comm port. In most cases the user will only need toselect a new Comm port. If <strong>com</strong>munication problems persist, theremay be another program causing a conflict with the port. Check theport configuration from the “Settings” folder.HSL-WI5 User’s ManualSYSTEMS Electronics Group- 47 -
SECTION 4HSLWI5 SETUP PROGRAMREFERENCE________________________________________________________4.4 THE VIEW MENUThe “View” menu allows the user to perform the following functions:• View the “Target Board Interface”• View “Online” Data• View “Offline” DataHSL-WI5 User’s ManualSYSTEMS Electronics Group- 48 -
SECTION 4HSLWI5 SETUP PROGRAMREFERENCE________________________________________________________4.4.1 TARGET BOARD INTERFACEThis function allows the user to view fault codes, S3000 network<strong>com</strong>munication error codes and review the current “Ident” and“Revision” of the application program. This is accessed by the“View” menu, by selecting “Target Board Interface”.Once invoked, the set-up program will prompt the user to select aprogram to <strong>com</strong>pare with the one existing in the processor. Whethera program is selected or the user cancels, the setup program willattempt to <strong>com</strong>municate with the M4500. If unsuccessful, a warningmessage will be displayed, prompting the user to either “Retry” or“Cancel” the operation. If the operation is canceled and<strong>com</strong>munication with the processor cannot be established the systemwill be placed in an “Offline” mode, however the “Target BoardInterface” window will be displayed.HSL-WI5 User’s ManualSYSTEMS Electronics Group- 49 -
SECTION 4HSLWI5 SETUP PROGRAMREFERENCE________________________________________________________4.4.2 VIEW ONLINE DATAThis function allows the user to place the set-up program in an“Online” mode with the processor. This is accessed by the “View”menu, by selecting “Online Data” or by simply pressing the “F3”function key.Note: The program can be toggled between “Offline” and “Online”by simply double clicking on the “Online” or “Offline” paneldisplayed in the status bar at the bottom of the window.Once invoked, the set-up program will attempt to open the Commport and <strong>com</strong>municate with the M4500. If the set-up program isunsuccessful, a warning message will be displayed prompting the userto either “Retry” or “Cancel” the operation. If the operation iscanceled and <strong>com</strong>munication with the processor cannot be establishedthe system will be placed in an “Offline” edit mode.Note: Anytime while the set-up program is “Online” with theprocessor and <strong>com</strong>munication is interrupted, a warning message willbe displayed, prompting the user to either “Retry” or “Cancel” theoperation.________________________________________________________4.4.3 VIEW OFFLINE DATAThis function allows the user to place the set-up program in an“Offline” mode. This is accessed by the “View” menu, by selecting“Offline Data” or by simply pressing the “F4” function key. Thisallows the user to perform “Offline” editing. All values displayed in“Offline” edit mode reflect the actual values contained in thecurrently loaded set-up data file.Note: The program can be toggled between “Online” and “Offline”by simply double clicking on the “Online” or “Offline” paneldisplayed in the status bar at the bottom of the window.Once invoked, the set-up program will close the Comm port and cease<strong>com</strong>munication with the M4500.HSL-WI5 User’s ManualSYSTEMS Electronics Group- 50 -
SECTION 4HSLWI5 SETUP PROGRAMREFERENCE________________________________________________________4.5 THE WINDOW MENUThe “Window” menu allows the user to select one of five differentDisplay/Set-up windows to modify set-up parameters, view shift dataor receive feedback about the current status of the control system.Once a window menu item is selected, a check mark is placed next tothe selected item and the selected window is displayed with the namechanged in the title bar of the main window.Note: “Read” only variables are displayed in blue with a graybackground. Any variables that can be altered by the user aredisplayed in black with a white background. In most cases, aparameter that can be changed by the user will have associated with itincrement and decrement controls. The user can either click on thedesired parameter to adjust and enter in a new value, or use theincrement or decrement controls to change the value by 1 unit.HSL-WI5 User’s ManualSYSTEMS Electronics Group- 51 -
SECTION 4HSLWI5 SETUP PROGRAMREFERENCE________________________________________________________4.5.1 THE MAIN DISPLAY WINDOWThe “Main Display” window is used to display the general state of thecontrol system. This window is selected from the “Window” menu.The following is a list of the functions of the “Main Display”window.Messages: The “Messages” display is continuously updated. Itdisplays alarm and status messages specific to the M4500, as well as,the current “Online” or “Offline” status of the set-up program. Bysimply scrolling the display, the user is able to view all active alarmand status messages. If no alarm or status messages are active, adefault message is displayed.Machine Speed SPM: This display is only active while “Online”and displays the current speed of the machine in “Strokes PerMinute”.Machine Position: This display is only active while “Online” anddisplays the current position to the main crank resolver in degrees..HSL-WI5 User’s ManualSYSTEMS Electronics Group- 52 -
SECTION 4HSLWI5 SETUP PROGRAMREFERENCE________________________________________________________4.5.2 THE SETUP PARAMETERS WINDOWThe “Set-up Parameters” window is used to view and adjust the setupparameters. This window is selected from the “Window” menu.Canfeed Open/Initial Airstrip Strokes:Number of Strokes before Cupfeed Open: This is the numberof strokes (plus 2) that the machine will make with air strip, oncethe cupfeed is enabled, before it actually opens. This allowscoolant to be blown from the ram to prevent “Hydraulic Lock”(normally set to 2).Number of Cans Made with Initial Air Strip: This is thenumber of cans made using the CH06 – “Initial Air Strip” timingchannel when the cupfeed is first opened before switching toCH05 – “Normal Air Strip”. This allows the first cans to madewith more “Air Strip” while the tooling is cool.HSL-WI5 User’s ManualSYSTEMS Electronics Group- 53 -
SECTION 4HSLWI5 SETUP PROGRAMREFERENCEBrake Wear Compensation:Brake Wear Compensation Enable: This is used to enable ordisable the brake wear <strong>com</strong>pensation. If the <strong>com</strong>pensation is to bedisabled, click the checkbox to remove checked state. If the<strong>com</strong>pensation is to be enabled, click the checkbox to set thechecked state.Desired BDC Stop Position (Cont./Single): This is the desiredstopping location (in degrees) for a BDC stop when the brakewear <strong>com</strong>pensation is enabled. This is typical set to 000 degrees(Back Dead Center).Note: This parameter is automatically disabled whenever “BrakeWear Compensation” is disabled.Maximum Allowed Stopping Response: This defines what themaximum allowed brake response is before the “Brake ResponseToo Long” alarm is generated. If the actual brake response(number of degrees from when the brake is activated to theposition where the press ends up at rest) when a BDC stop isperformed is longer than this number, the alarm is generated. Ifthe actual brake response is less, the alarm is not generated. Setthis parameter to the value where the brake response is consideredtoo long and service to the brake should be performed (typically270 to 300 degrees).Trimmer Speed References:Trimmer Maximum Speed (CPM): The “Trimmer MaximumSpeed” parameter is used to scale the 0-10VDC analog outputsuch that when the bodymaker is running at the speed entered in“Trimmer Maximum Speed”, the analog output will be at 10 volts.This is typically set to the running high speed of the Bodymakeror slightly higher.Trimmer Idle Speed (CPM): This parameter determines the speedthe trimmer will run at when the bodymaker is stopped (de-clutched).Note: When the bodymaker is running, the trimmer speed referenceis proportional (as set by the “Trimmer Maximum Speed” scaling) tothe speed of the bodymaker. This parameter is used to provide thespeed reference when the bodymaker speed is zero.HSL-WI5 User’s ManualSYSTEMS Electronics Group- 54 -
Bodymaker Running Speeds:SECTION 4HSLWI5 SETUP PROGRAMREFERENCERunning Bodymaker Low Speed (SPM): This is the speed (instrokes per minute) the bodymaker will run when in low (inch)speed.Running Bodymaker High Speed (SPM): This is the speed (instrokes per minute) the bodymaker will run when in high(cont./single) speed.________________________________________________________4.5.3 THE MACHINE TIMING WINDOWThe Machine Timing window is used to invoke the PLS programming<strong>com</strong>mand menus. From this window, the user can view or adjust thefollowing parameters:• Adjust Timing Channel set-points.• Set the Main Crank resolver offset.• Clear or Recall a PLS timing channel.• View the current PLS configuration• Reset the PLS configuration to default settings.HSL-WI5 User’s ManualSYSTEMS Electronics Group- 55 -
SECTION 4HSLWI5 SETUP PROGRAMREFERENCEIn addition, the following parameters are displayed at the bottom ofthis window:RPM: This is the current speed in “Revolutions per Minute” of themain crank resolver.Position: This is the current “Position” in degrees of the main crankresolver.Offset: This is the current resolver offset (set in degrees).Scale: This is the scale factor of the resolver or the number ofdivisions in one revolution.Note: Section 5 – General Timing Signal Locations, provides a<strong><strong>com</strong>plete</strong> description of each timing channel signal.Zeroing Machine (set resolver offset): To set machine zero,perform the following:1) From the “Window” menu, select “Machine Timing”.2) From the “View” menu, select “Online Data”. The set-upprogram will attempt to <strong>com</strong>municate with the processor andplace the system into an “Online” mode of operation.3) Observe the “Position” field at the bottom of the window. Verifythat as the machine is rotated forward, that the position increaseslinearly from 0 through 359 degrees. If not, swap the S1 and S3leads at the resolver connector on the M4500. Then, verify thatthe position does indeed increase with forward movement.4) Position the machine at back dead center.5) Auto zero the resolver by entering “0” in the “Resolver Offset”field and clicking the “Set Offset” <strong>com</strong>mand button. A messagebox will appear, prompting the user to confirm their choice.Select “Yes” to set the resolver offset.6) The M4500 will calculate the actual offset value required to makethis the “0” position. The new offset value will be displayed inthe “Offset” filed and the position will then read zero.HSL-WI5 User’s ManualSYSTEMS Electronics Group- 56 -
SECTION 4HSLWI5 SETUP PROGRAMREFERENCEAdjusting the Timing Channel Set-points: To set any of thetiming signal set-points, perform the following:Note: Any changes made to the timing channel set-points will besaved as part of the setup data file.1) From the “Window” menu, select “Machine Timing”.2) From the “View” menu, select “Online Data”. The set-upprogram will attempt to <strong>com</strong>municate with the processor andplace the system into an “Online” mode of operation.3) Set all channels per section 5 – General Timing Signal Locations.Set-points for a particular channel are either entered in the field oradjusted by using the increment/decrement controls.Note: Only one set-point is used per channel.4) If a channel needs to be “Recalled” or “Cleared”, enter the desiredchannel number into the “PLS Channel” field. Click the “RecallChannel” <strong>com</strong>mand button to recall the set-points. Click the“Clear Channel” <strong>com</strong>mand button the <strong><strong>com</strong>plete</strong>ly clear all setpointsfor the selected channel.Note: If a channel has been cleared or the “On” and “Off” setpointshave the same setting, the set-point will be displayed as“*****”.Resetting the PLS Configuration: As an aid to the user thecurrent PLS configuration is displayed as part of this window. ThePLS configuration should only need to be reset if a new module hasbeen installed. To reset the PLS configuration, click the “Reset PLSConfig” <strong>com</strong>mand button. This function only resets the PLSconfiguration to the default settings for the bodymaker.HSL-WI5 User’s ManualSYSTEMS Electronics Group- 57 -
SECTION 4HSLWI5 SETUP PROGRAMREFERENCE________________________________________________________4.5.4 THE SHIFT DATA WINDOWThis window is used to view the Current Shift data, Last Shift data,Low and High speed brake responses and to invoke the “End of Shift”data transfer.Note: Prior to selecting this selection, make sure an RS-232 SYSdevcable is connected from the COM port on the <strong>com</strong>puter to the PROGport on the M4500. The following data is displayed in this window:Current Shift - Total Good Cans: This is the total number ofgood cans produced so far into the current shift. This is essentially acan counter.Current Shift - Total Short Can Faults: This is the total numberof short can faults that have occurred so far into the current shift.Last Shift - Total Good Cans: This is the total number of goodcans produced in the last (previous) shift. This is essentially a cancounter.Last Shift - Total Short Can Faults: This is the total number ofshort can faults that occurred in the last (previous) shift.HSL-WI5 User’s ManualSYSTEMS Electronics Group- 58 -
SECTION 4HSLWI5 SETUP PROGRAMREFERENCENote: The current shift data is transferred to the “Last shift” datawhen the end of shift input transfers from a “0” to a “1”. This can beat the end of either an 8 or 12-hour shift. This data can also be resetfrom this menu by clicking the “Transfer Data” <strong>com</strong>mand button.Lo Speed Brake Response (degrees): This is the number ofdegrees from the when the clutch was de-activated (at the BDC (Lo)timing) to where the bodymaker crankshaft came to rest when a BDCstop was performed at Low speed. This can be used to determine thegeneral condition of the brake and whether servicing of the brake isrequired.Hi Speed Brake Response (degrees): This is the number ofdegrees from the when the clutch was de-activated (at the BDC (hi)timing) to where the bodymaker crankshaft came to rest when a BDCstop was performed at high speed. This can be used to determine thegeneral condition of the brake and whether servicing of the brake isrequired.Note: The brake response for both high and low speeds is updatedafter each BDC stop.HSL-WI5 User’s ManualSYSTEMS Electronics Group- 59 -
SECTION 4HSLWI5 SETUP PROGRAMREFERENCE________________________________________________________4.5.5 THE I/O STATES WINDOWThe “I/O States” window is provided to display states of the inputsand outputs. The control boards, the states of the timing channels, aswell as states of the M4500 are shown. This includes the interruptinputs (IN0 and IN1), the analog I/O and the resolver. These valuesare displayed as read by the M4500 processor.HSL-WI5 User’s ManualSYSTEMS Electronics Group- 60 -
SECTION 5GENERAL TIMING SIGNALLOCATIONSThe following is a general description of the timing signals and thelocations they should be set at:CH00: BDC (Cont./Single) Timing: This signal is used to deactivatethe clutch for a BDC stop at high speed (continuousand single modes).Note: The leading edge is used to de-activate the clutch,thus the width of the signal is not critical (generally set 20°wide). When the brake wear <strong>com</strong>pensation is enabled, thissignal is adjusted automatically by the M4510. If the brakewear <strong>com</strong>pensation is disabled, this signal must be set<strong>manual</strong>ly. In this case is should be set such that the pressstops at back dead center for a BDC stop at high speed.CH01: BDC (Inch) Timing: Same as the BDC (Cont./Single) timing(CH00) except used when the machine is activated in “Inch”mode.CH02: Short Can Timing: This signal is used to verify the lengthof the can and verify that the can is good. The short cansensor must “see” can the entire time this signal is “ON” toprevent a short can alarm. This signal is generally set in therange of “on” at 150° to 160° and “off” at 170° to 175°.CH03: Sensor Check Timing: This signal is used to verify that theshort can sensor does not fail “ON”. The short can sensormust be “off” the entire time this signal is “on” in order toprevent a “Die Sensor Fail” alarm. This signal is generallyprogrammed to be “ON” just prior to the punch emergingfrom the die set, on the forward stroke (typical “ON” at 110°and “off” at 130°).CH04: Cupfeed Timing: This signal is used to activate the cupfeed“ON” when enabled and back “off” when disabled. Theleading edge of this signal is used to activate the solenoid“on” while the trailing edge is used to activate it “off”. The“ON” set-point is generally set such that when the cupfeed isopened, the cup will drop onto the high part of the rotarycam. The “off” set-point is generally set such that thecupfeed will close such that the cup is caught with-outcausing damage to the cup that is retained. This signal isgenerally set “ON” at 150° and “off” at 350°.HSL-WI5 User’s ManualSYSTEMS Electronics Group- 61 -
SECTION 5GENERAL TIMING SIGNALLOCATIONSCH05: Air Strip (Normal) Timing: This signal is used to activatethe air strip solenoid once the machine has established“Normal” production. The “Air Strip” is “ON” for the entirewindow that CH05 is “on” while the machine is runningwith the cupfeed open. This signal is generally set “ON”about 150° and then set “off” at about 200° (see section2.7.8).CH06: Air Strip (Initial) Timing: Same as the Air Strip (Normal)timing (CH05) except used when the machine is firstinitiated into production (see section 2.7.8). This is generallyset “ON” about 120° and then “off” at about 190°.CH07: PLC Clock Timing: This is a general purpose, timing signalavailable for use by existing PLC for whatever purposesnecessary. This signal is not used by the M4500.HSL-WI5 User’s ManualSYSTEMS Electronics Group- 62 -
SECTION 6RECOMMENDED SPARESThe Following are re<strong>com</strong>mended spares for the HSL-WI5. Theseparts are available through Systems Engineering Assoc. Inc.Quantity Part Number Description1ea. M4500 PLC/PLS Processor/Chassis – 4Slot1ea. P4500 Power Supply1ea. S4563 16-point, 10-30VDC Input Board1ea. S4573 16-point, 10-30VDC Output Board1ea. D4591 Keypad/Display1ea. RSV34-MS1 Resolver with MS ConnectorHSL-WI5 User’s ManualSYSTEMS Electronics Group- 63 -