EPM Live Online Upgrade Guide
EPM Live Online Upgrade Guide
EPM Live Online Upgrade Guide
- No tags were found...

You also want an ePaper? Increase the reach of your titles
YUMPU automatically turns print PDFs into web optimized ePapers that Google loves.
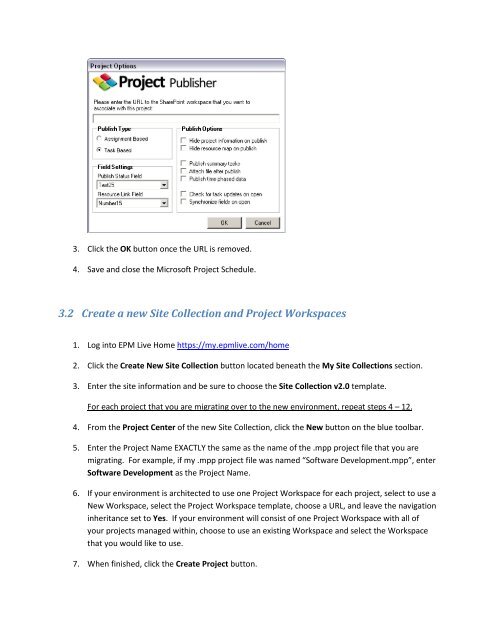
3. Click the OK button once the URL is removed.4. Save and close the Microsoft Project Schedule.3.2 Create a new Site Collection and Project Workspaces1. Log into <strong>EPM</strong> <strong>Live</strong> Home https://my.epmlive.com/home2. Click the Create New Site Collection button located beneath the My Site Collections section.3. Enter the site information and be sure to choose the Site Collection v2.0 template.For each project that you are migrating over to the new environment, repeat steps 4 – 12.4. From the Project Center of the new Site Collection, click the New button on the blue toolbar.5. Enter the Project Name EXACTLY the same as the name of the .mpp project file that you aremigrating. For example, if my .mpp project file was named “Software Development.mpp”, enterSoftware Development as the Project Name.6. If your environment is architected to use one Project Workspace for each project, select to use aNew Workspace, select the Project Workspace template, choose a URL, and leave the navigationinheritance set to Yes. If your environment will consist of one Project Workspace with all ofyour projects managed within, choose to use an existing Workspace and select the Workspacethat you would like to use.7. When finished, click the Create Project button.