INSTALLATION MANUAL - Jergens Inc.
INSTALLATION MANUAL - Jergens Inc.
INSTALLATION MANUAL - Jergens Inc.

Create successful ePaper yourself
Turn your PDF publications into a flip-book with our unique Google optimized e-Paper software.
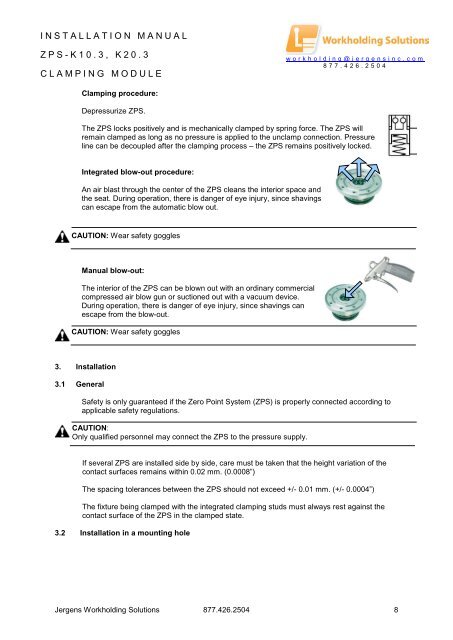
<strong>INSTALLATION</strong> <strong>MANUAL</strong>ZPS- K 10.3, K20.3CLAMPING MODULEworkholding@jergensinc.com877.426.2504Clamping procedure:Depressurize ZPS.The ZPS locks positively and is mechanically clamped by spring force. The ZPS willremain clamped as long as no pressure is applied to the unclamp connection. Pressureline can be decoupled after the clamping process – the ZPS remains positively locked.Integrated blow-out procedure:An air blast through the center of the ZPS cleans the interior space andthe seat. During operation, there is danger of eye injury, since shavingscan escape from the automatic blow out.CAUTION: Wear safety gogglesManual blow-out:The interior of the ZPS can be blown out with an ordinary commercialcompressed air blow gun or suctioned out with a vacuum device.During operation, there is danger of eye injury, since shavings canescape from the blow-out.CAUTION: Wear safety goggles3. Installation3.1 GeneralSafety is only guaranteed if the Zero Point System (ZPS) is properly connected according toapplicable safety regulations.CAUTION:Only qualified personnel may connect the ZPS to the pressure supply.If several ZPS are installed side by side, care must be taken that the height variation of thecontact surfaces remains within 0.02 mm. (0.0008”)The spacing tolerances between the ZPS should not exceed +/- 0.01 mm. (+/- 0.0004”)The fixture being clamped with the integrated clamping studs must always rest against thecontact surface of the ZPS in the clamped state.3.2 Installation in a mounting hole<strong>Jergens</strong> Workholding Solutions 877.426.2504 8