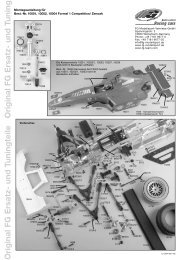
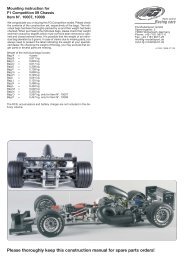
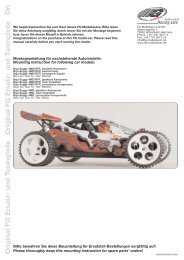
Mounting instruction for conversion kit Monster mod
Mounting instruction for conversion kit Monster mod
Mounting instruction for conversion kit Monster mod

Create successful ePaper yourself
Turn your PDF publications into a flip-book with our unique Google optimized e-Paper software.
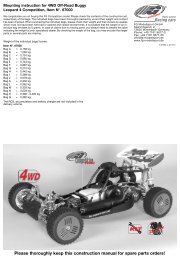
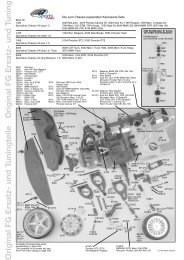
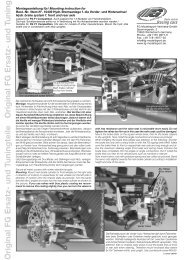
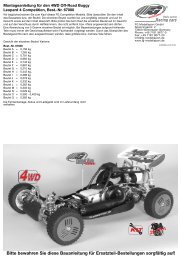
Position 15Parts are inbag EStopnut M5NutM5ScrewM5x25Rear shock absorbermountedRear damperplateScrew M5x25 cylinder screws into the reardamper plate and counter with M5 nuts,then fix the top of the shock absorber withM5 stop nuts. Don’t tighten the stop nut.Mount the rear shock absorbers to the rearlower wishbones by using M4x30 headlesspins.Hint: In order to withdraw the front lower wishbonepins, screw an M4 screw into the threaded hole ofthe front lower wishbone pins.A clearance of the steel ball in the front lowerwishbone can be adjusted with the 2,9x13 screw.Position 16Parts are inbag FFront axlehousingrightAll metric screws need to be securedwith thread lock fluid.Screw4,2x16Guide <strong>for</strong>stabilizerFront axlehousing leftFront lowerwishbone pin4. Impress the stabilizer guide aslocking device <strong>for</strong> the front lowerwishbone pins into the left and rightfront axle housings and fix it using4,2x16 pan-head screws.Front lowerwishboneScrew2,9x133. Insert the front lower wishbones in the front axle housings, thenpush the front lower wishbone pins with threaded hole towardsthe front in the front axle housings and press them through thepre-assembled front lower wishbones. Make sure the wishbonescan be moved easily up and down.HeadlesspinM5x16Steel ball1. Screw the headless pin M5x16 from thebottom into the front lower wishbone untilapprox. 2mm thread are visible.2. Disassemble the steel balls from the front axle of your existing2WD <strong>mod</strong>el and push them into the front lower wishbones,then screw in the 2,9x13 pan-head screws.