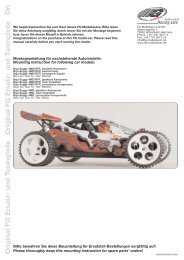
Mounting instruction for conversion kit Monster mod
Mounting instruction for conversion kit Monster mod
Mounting instruction for conversion kit Monster mod

Create successful ePaper yourself
Turn your PDF publications into a flip-book with our unique Google optimized e-Paper software.
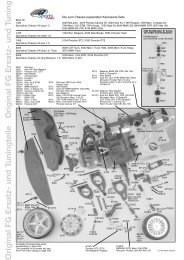
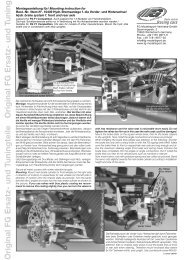
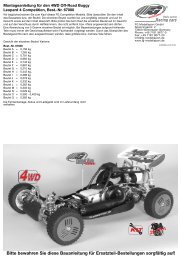
Position 8Parts are inbag D4. Impress the stabilizer 5mm (only <strong>for</strong> <strong>Monster</strong>/Stadium<strong>mod</strong>els) in the plastic braces <strong>for</strong> stabilizer.Alloy connectionbraceRear axle mountrightStabilizer5mmRear axle coverScrewM4x20DiskØ4,31. Push the rear axle cover between the leftand right rear axle mounts and fix it with thealloy connection brace, M4x20 pan-headscrew and disk Ø4,3.2. Disassemble the rear lower wishbone withstabilizer from your 2WD <strong>mod</strong>el (stabilizeronly in <strong>Monster</strong>/Stadium <strong>mod</strong>els).3. Fix the rear lower wishbones to the frontball-and-socket joints using M5x30 countersunkscrews and 4 disks Ø5,3 (between balland-socketjoints and alloy chassis), then fixall with M5 stop nuts to the alloy chassis.Now fasten the rear ball-and-socket jointswith M5x25 countersunk screws and M5stop nuts to the alloy chassis. Make sure themounted wishbones can be moved easily upand down.Rear axle mountleftStop nut M5ScrewM5x25Ball-andsocketjointAdjusting screwr/l 32mmAlloy chassisScrewM5x30Disk Ø5,3Plastic brace <strong>for</strong>stabilizer only <strong>for</strong><strong>Monster</strong>/StadiumRear lowerwishbonePosition 9Parts are inbag Dapprox. 38mmapprox. 37,5mmAdjust the setting screwscorresponding to yourexisting <strong>mod</strong>el.All metric screws need to be secured with thread lock fluid.