ANAMORPHIC LENS ATTACHMENT PLATE - Planar
ANAMORPHIC LENS ATTACHMENT PLATE - Planar
ANAMORPHIC LENS ATTACHMENT PLATE - Planar

You also want an ePaper? Increase the reach of your titles
YUMPU automatically turns print PDFs into web optimized ePapers that Google loves.
PD8130/PD8150 installation instructions<br />
CONNECTING THE AKPro <strong>ATTACHMENT</strong> <strong>PLATE</strong><br />
(Chief RPA mount and Phillips screwdrivers required)<br />
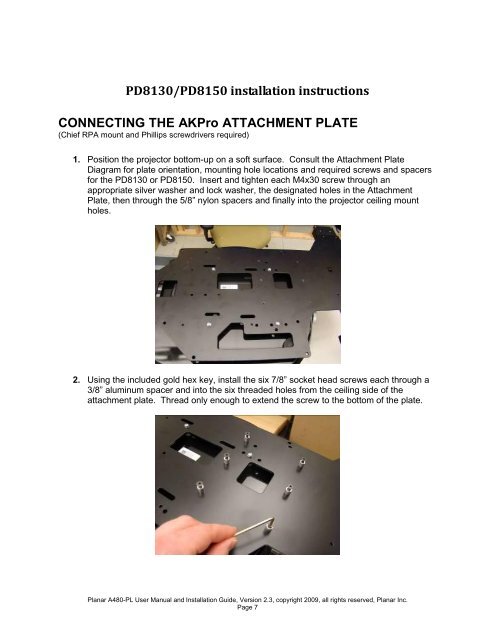
1. Position the projector bottom-up on a soft surface. Consult the Attachment Plate<br />
Diagram for plate orientation, mounting hole locations and required screws and spacers<br />
for the PD8130 or PD8150. Insert and tighten each M4x30 screw through an<br />
appropriate silver washer and lock washer, the designated holes in the Attachment<br />
Plate, then through the 5/8” nylon spacers and finally into the projector ceiling mount<br />
holes.<br />
2. Using the included gold hex key, install the six 7/8” socket head screws each through a<br />
3/8” aluminum spacer and into the six threaded holes from the ceiling side of the<br />
attachment plate. Thread only enough to extend the screw to the bottom of the plate.<br />
<strong>Planar</strong> A480-PL User Manual and Installation Guide, Version 2.3, copyright 2009, all rights reserved, <strong>Planar</strong> Inc.<br />
Page 7