


Create successful ePaper yourself
Turn your PDF publications into a flip-book with our unique Google optimized e-Paper software.
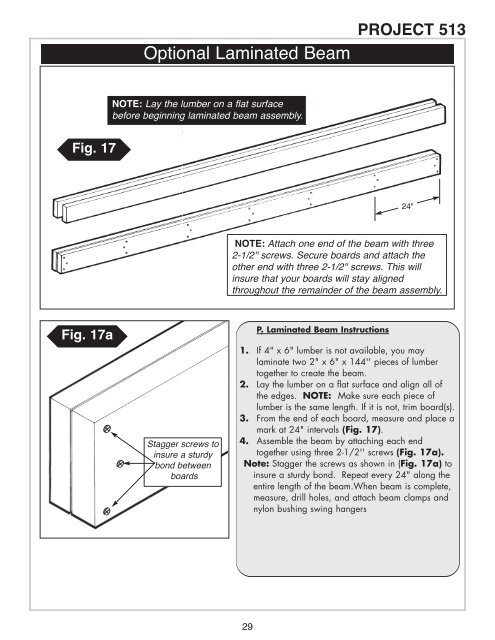
Optional Laminated Beam<strong>PROJECT</strong> <strong>513</strong>NOTE: Lay the lumber on a flat surfacebefore beginning laminated beam assembly.Fig. 1724"NOTE: Attach one end of the beam with three2-1/2'' screws. Secure boards and attach theother end with three 2-1/2'' screws. This willinsure that your boards will stay alignedthroughout the remainder of the beam assembly.Fig. 17aStagger screws toinsure a sturdybond betweenboardsP. Laminated Beam Instructions1. If 4" x 6" lumber is not available, you maylaminate two 2" x 6" x 144'' pieces of lumbertogether to create the beam.2. Lay the lumber on a flat surface and align all ofthe edges. NOTE: Make sure each piece oflumber is the same length. If it is not, trim board(s).3. From the end of each board, measure and place amark at 24" intervals (Fig. 17).4. Assemble the beam by attaching each endtogether using three 2-1/2'' screws (Fig. 17a).Note: Stagger the screws as shown in (Fig. 17a) toinsure a sturdy bond. Repeat every 24" along theentire length of the beam.When beam is complete,measure, drill holes, and attach beam clamps andnylon bushing swing hangers29


