


You also want an ePaper? Increase the reach of your titles
YUMPU automatically turns print PDFs into web optimized ePapers that Google loves.
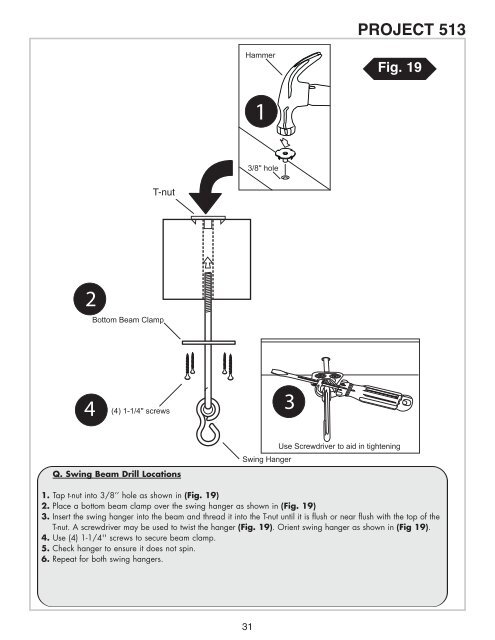
<strong>PROJECT</strong> <strong>513</strong>HammerFig. 193/8'' holeT-nutt-nutBottom Beam Clamp(4) 1-1/4'' screwsQ. <strong>Swing</strong> Beam Drill Locations<strong>Swing</strong> HangerUse Screwdriver to aid in tightening1. Tap t-nut into 3/8’’ hole as shown in (Fig. 19)2. Place a bottom beam clamp over the swing hanger as shown in (Fig. 19)3. Insert the swing hanger into the beam and thread it into the T-nut until it is flush or near flush with the top of theT-nut. A screwdriver may be used to twist the hanger (Fig. 19). Orient swing hanger as shown in (Fig 19).4. Use (4) 1-1/4'' screws to secure beam clamp.5. Check hanger to ensure it does not spin.6. Repeat for both swing hangers.31


