ShoreTel® Programmable Buttons User Guide Supplement To IP
ShoreTel® Programmable Buttons User Guide Supplement To IP
ShoreTel® Programmable Buttons User Guide Supplement To IP
Create successful ePaper yourself
Turn your PDF publications into a flip-book with our unique Google optimized e-Paper software.
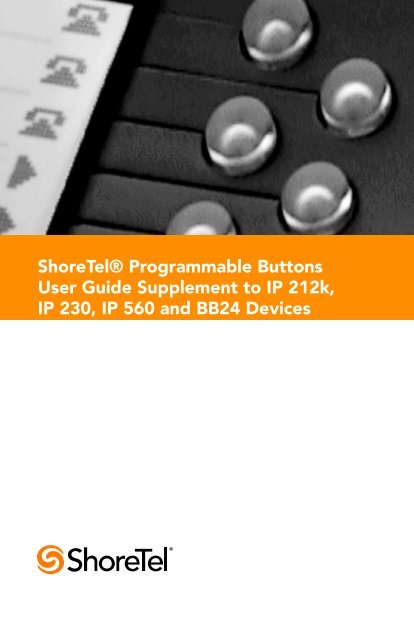
<strong>ShoreTel®</strong> <strong>Programmable</strong> <strong>Buttons</strong><br />
<strong>User</strong> <strong>Guide</strong> <strong>Supplement</strong> to <strong>IP</strong> 212k,<br />
<strong>IP</strong> 230, <strong>IP</strong> 560 and BB24 Devices
Document and Software Copyrights<br />
Copyright © 1998–2007 by ShoreTel, Inc., Sunnyvale, California, U.S.A. All<br />
rights reserved. Printed in the United States of America. Contents of this<br />
publication may not be reproduced or transmitted in any form or by any<br />
means, electronic or mechanical, for any purpose, without prior written<br />
authorization of ShoreTel, Inc.<br />
ShoreTel, Inc. reserves the right to make changes without notice to the<br />
specifications and materials contained herein and shall not be responsible<br />
for any damage (including consequential) caused by reliance on the<br />
materials presented, including, but not limited to, typographical, arithmetic,<br />
or listing errors.<br />
Trademarks<br />
<strong>ShoreTel®</strong>, ShoreCare®, ShoreWare®, ShoreGear® and ControlPoint® are<br />
registered trademarks of ShoreTel, Inc. in the United States and/or other<br />
countries. ShorePhone is a trademarks of ShoreTel, Inc. in the United<br />
States and/or other countries. All other copyrights and trademarks herein<br />
are the property of their respective owners.<br />
Patents<br />
This product is covered by one or more of the following patents: United<br />
States Patent 6,996,059, United States Patent 7,003,091. ShoreTel, Inc. All<br />
rights reserved.<br />
Version Information<br />
PN 850-1055-03<br />
ShoreTel Release 7.5<br />
Revision 2<br />
ShoreTel <strong>Programmable</strong> <strong>Buttons</strong> <strong>User</strong> <strong>Guide</strong><br />
Date: August 13, 2007<br />
Company Information<br />
ShoreTel, Inc.<br />
960 Stewart Drive<br />
Sunnyvale, California 94085 USA<br />
Phone: +1.408.331.3300 OR +1.800.425.9385<br />
Fax: +1.408.331.3333<br />
www.shoretel.com
Contents<br />
OVERVIEW. . . . . . . . . . . . . . . . . . . . . . . . . . . . . . . . . . . . . . . . . . . . . . . . 5<br />
HOW TO ASSOCIATE A BUTTON BOX WITH A PHONE . . . . . . . . . . . 6<br />
HOW TO TIE A USER TO A PHONE . . . . . . . . . . . . . . . . . . . . . . . . . . . . 8<br />
HOW TO PROGRAM BUTTONS FROM DIRECTOR . . . . . . . . . . . . . . . . 10<br />
HOW TO PROGRAM BUTTONS FROM AN <strong>IP</strong> PHONE . . . . . . . . . . . . . 14<br />
SUPPORTED FUNCTIONS. . . . . . . . . . . . . . . . . . . . . . . . . . . . . . . . . . . . 15<br />
LEDS AND ICONS BY PHONE TYPE. . . . . . . . . . . . . . . . . . . . . . . . . . . . 16<br />
COLOR AND BLINK PATTERNS FOR CUSTOM KEYS . . . . . . . . . . . . . . 18<br />
STATUS ICONS FOR OPERATIONAL STATES . . . . . . . . . . . . . . . . . . . . 19<br />
3
OVERVIEW<br />
The programmable buttons allow an administrator or an end user to change<br />
the functions associated with the custom buttons on some <strong>IP</strong> phones and on<br />
the button box. This lets the user create shortcuts for operations that would<br />
normally require pressing two or three buttons.<br />
For example, the action associated with the bottom button on an <strong>IP</strong> 560 could<br />
be configured to speed-dial a particular extension or external number. The<br />
button above that could be set to perform overhead paging, and so on. All of<br />
the custom buttons on the <strong>IP</strong> 560 phone are configurable except for the topmost<br />
button, which is permanently set to provide call appearance information<br />
(i.e. ringing indicator and call timer information). All 24 buttons on the<br />
button box (BB24) are configurable with none limited to call appearance.<br />
<strong>User</strong>s can figure out which actions they perform on a regular basis and then<br />
associate those actions with the custom buttons so that instead of having to<br />
dial a star code (such as *14 for picking up the Night Bell) they can just press<br />
one button. See the table on the following page for supported functions.<br />
Details:<br />
After a function is assigned to a button, users can enter a label (up to five<br />
characters on the <strong>IP</strong> 560 and up to six characters on the <strong>IP</strong> 100 and<br />
BB24). The label appears on the LED display next to the custom button.<br />
The system administrator can configure the custom buttons via<br />
ShoreWare Director on behalf of a user or can enable permissions for an<br />
individual user so that the user can modify the custom buttons on the <strong>IP</strong><br />
phone via the telephone interface.<br />
The programmable button feature is supported on the BB24, <strong>IP</strong> 100, <strong>IP</strong><br />
212k, <strong>IP</strong> 230, and <strong>IP</strong> 560 models. The feature is not supported on the<br />
analog models or on the <strong>IP</strong> 210.<br />
The <strong>IP</strong>100 does not have custom buttons, but the soft keys can be<br />
configured (via ShoreWare Director) in the same way that custom<br />
buttons are configured on the other phones.<br />
<strong>IP</strong> 100 phones cannot be configured by the user. The buttons on these<br />
phones must be configured by the system administrator.<br />
5
HOW TO ASSOCIATE A BUTTON BOX WITH A PHONE<br />
Before you can program the buttons on a BB24 button box, you must first<br />
associate the button box device with a user’s <strong>IP</strong> 212k, 230, or 560 phone. <strong>To</strong><br />
create this association using ShoreWare Director, follow the procedure below:<br />
6<br />
Step 1 Launch ShoreWare Director and enter the user ID and<br />
password. Then click the Login button.<br />
Step 2 Click on the Administration link to expand the list (if it has<br />
not already been expanded).<br />
Step 3 Click on the <strong>IP</strong> Phones link and then the Individual <strong>IP</strong><br />
Phones link to display a list of devices on this system.<br />
Figure 1 The MAC address appears in the left-most column<br />
Step 4 In the Name column, click on the MAC address of the<br />
button box you are configuring. (The system automatically<br />
pulls this information from the device upon connection.)<br />
A pop-up window appears displaying information about the<br />
button box device, as shown below.
Figure 2 Select the button box order<br />
Step 5 The MAC address appears in the Name field. If desired, you<br />
can rename the device to something that will be easier to<br />
remember.<br />
Step 6 Verify that the information is correct for the Site, Switch, and<br />
other fields, and then in the Assign <strong>To</strong> drop-down menu,<br />
click on the MAC address of the <strong>IP</strong> phone. (The name of the<br />
user may appear next to the MAC address to indicate that he<br />
or she is tied to this phone.)<br />
Step 7 In the Button Box Order drop-down menu, select 1 if you<br />
only have one BB24 assigned to this user’s phone. Only four<br />
button boxes can be assigned to a single <strong>IP</strong> 212k, 230, or 560<br />
phone.<br />
After assigning the button box order, the administrator can<br />
rearrange the order of the assigned boxes or can reassign the<br />
button box device to the phone of another user, if desired.<br />
Step 8 Click Save to store your changes.<br />
7
HOW TO TIE A USER TO A PHONE<br />
At this point, you should have successfully associated the button box with an<br />
<strong>IP</strong> phone. If you have not already done so, you may want to associate a user<br />
with that same <strong>IP</strong> phone to ensure that the correct person has access to the<br />
new button box. <strong>To</strong> assign a user to the phone using ShoreWare Director,<br />
follow the procedure below:<br />
8<br />
Step 1 Click on the Individual <strong>User</strong>s link to display a list of users<br />
on this system.<br />
Step 2 From the list of names that appears in the left-most column,<br />
click on the name of the user who will be associated with the<br />
<strong>IP</strong> phone that will act as the “parent” of the button box.<br />
Figure 3 Select the MAC address of the parent phone
Step 3 Select the MAC address of the user’s phone from the Home<br />
Port - <strong>IP</strong> Phones drop-down menu, as shown.<br />
Step 4 Click Save to store your changes.<br />
You are now ready to move on to the next section, which<br />
provides information on programming the buttons on your<br />
BB24 button box.<br />
9
HOW TO PROGRAM BUTTONS FROM DIRECTOR<br />
<strong>To</strong> configure programmable buttons on the phone of a specific user via<br />
ShoreWare Director, follow the procedure below:<br />
10<br />
Step 1 Launch ShoreWare Director and enter the user ID and<br />
password. Then click the Login button.<br />
Step 2 Click on the Administration link to expand the list (if it has<br />
not already been expanded).<br />
Step 3 Click on the <strong>User</strong>s link and then the Individual <strong>User</strong>s link<br />
to display the list of users on this system.<br />
Step 4 Click on the name of the user to modify and then click on<br />
the Personal Options tab.<br />
Step 5 Scroll to the bottom of the window and click on the<br />
Customize <strong>IP</strong> Phone <strong>Buttons</strong> link.<br />
Step 6 Click the <strong>IP</strong> Phone Type drop-down menu and select the<br />
appropriate <strong>IP</strong> phone type (or button box) for which you<br />
would like to program buttons.<br />
Step 7 For each button except the first one, which is permanently<br />
associated with the Call Appearance function, click on the<br />
Function drop-down menu and select the action you would<br />
like to associate with a particular button.<br />
Figure 4 Program the Custom Keys on an <strong>IP</strong> 560 phone
Step 8 In the Label field to the left of the drop-down menu, enter a<br />
descriptive word to remind the user which function is<br />
associated with that button. This label will appear on the<br />
LED display adjacent to the button. Note that this label can<br />
be up to five characters long for the <strong>IP</strong> 212k, 230, and 560<br />
phones and up to six characters long for the <strong>IP</strong> 100 phone<br />
and BB24 device.<br />
Step 9 After you have selected a function and entered a label for a<br />
particular button, you may optionally enter destination<br />
information in the Target field. Certain functions , such as<br />
“Pickup Nightbell” do not require entering a destination, but<br />
other functions such as speed-dial or blind transfer can<br />
optionally take a destination. Some functions take only<br />
extensions and some take any type of phone number.<br />
Step 10 When you have finished entering functions and labels for all<br />
of the buttons, click the Save button at the top of the<br />
window to store your changes.<br />
<strong>To</strong> enable a user to configure the programmable buttons on his or her phone,<br />
follow the procedure below:<br />
Step 1 Launch ShoreWare Director and enter the user ID and<br />
password.<br />
Step 2 Click on the Administration link to expand the list (if it has<br />
not already been expanded).<br />
Step 3 Click on the <strong>User</strong>s link and then the Individual <strong>User</strong>s link<br />
to display the list of users on this system.<br />
Step 4 Click on the name of the user whose profile you would like<br />
to modify (enabling him to customize the buttons on his <strong>IP</strong><br />
phone). A window similar to the one shown below appears.<br />
11
Figure 5 Access the <strong>User</strong> Group via the Edit <strong>User</strong> window<br />
12<br />
Step 5 Click on the Go to this <strong>User</strong> Group link and on the next<br />
window that appears, click on the Go to this Class of<br />
Service link located to the right of the COS - Telephony<br />
field. The Class of Service window appears, similar to the<br />
one shown below.
Figure 6 Enable customization of <strong>IP</strong> phone buttons<br />
Step 6 Select the Allow Customization of <strong>IP</strong> Phone <strong>Buttons</strong> check<br />
box.<br />
Step 7 Click the Save button to store your changes.<br />
Details:<br />
The default for new Class of Service (Telephony) profiles is to have this<br />
feature disabled, thus preventing users from modifying their own custom<br />
buttons.<br />
Once this Class of Service (Telephony) profile has been created, you can<br />
apply it to every person in the system that you would like to allow to<br />
change his or her custom buttons. (Note that the user must belong to the<br />
appropriate user group in order for the modified Class of Service to take<br />
effect.)<br />
13
HOW TO PROGRAM BUTTONS FROM AN <strong>IP</strong> PHONE<br />
<strong>To</strong> change the custom buttons on your <strong>IP</strong> 212k, 230, 560 phone or BB24<br />
device via the telephone interface, follow the procedure below:<br />
14<br />
Step 1 Press the Options button on your <strong>IP</strong> phone and enter your<br />
password, followed by the # key or OK soft key.<br />
Step 2 Scroll through the list to option 4. Program <strong>Buttons</strong>, or press<br />
4 on the keypad.<br />
Step 3 Press the Edit soft key.<br />
Step 4 Press the custom button that you would like to modify. (If<br />
you are modifying the buttons on the BB24 device via the<br />
212k/230/560 interface, press the button on the BB24 that<br />
you would like to configure.)<br />
Step 5 Scroll through the list of functions until you find the<br />
function that you would like to apply to this button.<br />
NOTE Your choices are limited to just Call Appearance and Dial<br />
Number (i.e. Speed Dial) when programming the buttons via the<br />
212k/230 interface. This limitation does not apply to the <strong>IP</strong> 560<br />
phone. <strong>To</strong> program one of the other functions, contact your<br />
system administrator.<br />
Step 6 When you have highlighted the appropriate function, press<br />
the Next soft key.<br />
Step 7 Enter an extension, external number, or leave it blank. Then,<br />
press the Next soft key.<br />
Step 8 Press the soft key to shift the key pad between<br />
numeric and alphabet mode.<br />
Step 9 Use the key pad to enter a short descriptive label that will<br />
remind you of the new function of the custom button. The<br />
label can be up to five characters long for an <strong>IP</strong> 212k, 230, or<br />
560 phone and up to six characters long for a BB24 button<br />
box.<br />
Step 10 Press the Done soft key.<br />
Step 11 Press the Done soft key again to store your changes.
SUPPORTED FUNCTIONS<br />
Table 1 Supported Functions<br />
Function Parameter Comments<br />
Barge In Extension or none<br />
Call Appearance None Not supported on Button<br />
Box<br />
Conference Blind Extension or external<br />
number<br />
Conference Consultative Extension or external<br />
number<br />
Conference Intercom Extension or none<br />
Dial Mailbox Extension or none<br />
Dial Number (Speed Dial) Extension or external<br />
number<br />
Intercom Extension<br />
Monitor Extension Extension<br />
Page None<br />
Park Extension or none<br />
Park and Page Extension or none<br />
Pickup Extension or none<br />
Pickup Night Bell None<br />
Pickup/Unpark Extension or none Uses internal presence to<br />
determine which operation<br />
to perform<br />
Record Call Mailbox Operates on selected<br />
external call while<br />
connected; Pressing a<br />
second time stops the<br />
recording.<br />
Call recordings can be<br />
saved in the mailbox of the<br />
initiating client (by leaving<br />
the mailbox field blank),<br />
or can be routed to an<br />
alternate mailbox by<br />
entering a mailbox number<br />
in the field.<br />
15
Table 1 Supported Functions<br />
Function Parameter Comments<br />
LEDS AND ICONS BY PHONE TYPE<br />
The table below lists the type of device, and the number of colors that the<br />
LEDs on that device are capable of displaying. The next column lists the<br />
number of characters that can appear across the display, and the last column<br />
indicates whether or not the device supports the display of icons.<br />
16<br />
Record Extension Extension or mailbox Call recordings can be<br />
saved in the mailbox of the<br />
initiating client (by leaving<br />
the mailbox field blank),<br />
or can be routed to an<br />
alternate mailbox by<br />
entering a mailbox number<br />
in the field.<br />
Send Digits Over Call Extension<br />
Silent Monitor Extension or none<br />
Transfer Blind Extension or external<br />
number<br />
Transfer Consultative Extension or external<br />
number<br />
Transfer Intercom Extension or none<br />
Transfer to Mailbox Extension or none<br />
Transfer Whisper Extension or none<br />
Unpark Extension or none<br />
Whisper Page Extension or none<br />
Whisper Page Mute None<br />
Table 2 LEDs and Icons By Phone Type<br />
Device LEDs<br />
LABEL<br />
(characters)<br />
<strong>IP</strong> 212k Phone 3-color 6 No<br />
<strong>IP</strong> 230 Phone 1-color 5 Yes<br />
<strong>IP</strong> 560 Phone 3-color 5 Yes<br />
ICON
Table 2 LEDs and Icons By Phone Type<br />
Device LEDs<br />
LABEL<br />
(characters)<br />
BB24 3-color 6 No<br />
ICON<br />
17
COLOR AND BLINK PATTERNS FOR CUSTOM KEYS<br />
The LEDs on your ShoreTel <strong>IP</strong> phone or button box provide color cues to help<br />
determine the operational status of the device. The table below provides<br />
information about the colors and blink patterns associated with various<br />
operational states.<br />
Note that the information in this table applies to the following devices, which<br />
have LEDs capable of displaying three colors: <strong>IP</strong> 212k, 530, 560, 560g, and<br />
BB24.<br />
18<br />
Call State Color and Blink Pattern<br />
Held or Parked Calls or<br />
Conference Calls<br />
Orange<br />
250ms on<br />
250ms off<br />
Monitored Ext. Call + Offering Call Green<br />
800ms on<br />
200ms off<br />
Red<br />
800ms on<br />
200ms off<br />
Monitored Ext. Call + Held or<br />
Parked Owner Call/Conference Call<br />
(Unpark, Pick/Unpark Only) Held or<br />
Parked<br />
Orange<br />
200ms on<br />
100ms off<br />
200ms on<br />
500ms off<br />
Orange<br />
250ms on<br />
250ms off
STATUS ICONS FOR OPERATIONAL STATES<br />
In addition to multi-colored LEDs, your ShoreTel <strong>IP</strong> phone offers icons to help<br />
indicate the status of the device. The table below provides information about<br />
these icons, and offers additional information about the LED blink pattern and<br />
color. The information in this table applies to <strong>IP</strong> phone models that support<br />
the display of icons (<strong>IP</strong> 530, 560, 560g models).<br />
Icon<br />
Blink<br />
Icon<br />
LED Color and<br />
Blink Pattern<br />
Off Idle<br />
Orange<br />
Steady on<br />
State<br />
Call Appearance States<br />
Idle and DND<br />
Off Idle and Message Waiting<br />
Orange<br />
Steady on<br />
Green<br />
Steady on<br />
Green<br />
Steady on<br />
Green<br />
Steady on<br />
Green<br />
Steady on<br />
Green<br />
1000ms on, 1000ms off<br />
Orange<br />
250ms on, 250ms off<br />
Idle, Message Waiting and DND<br />
Off Hook<br />
Active Call<br />
Active Conference Call<br />
Remote Hold<br />
Offering Call<br />
Held or Parked Call or<br />
Conference Call<br />
19
20<br />
Icon<br />
Blink<br />
Icon<br />
LED Color and<br />
Blink Pattern<br />
Red<br />
Steady on<br />
Red<br />
Steady on<br />
Off Idle<br />
Orange<br />
Steady on<br />
Whisper Page Call<br />
Active Call Whisper Muted<br />
Extension Monitor States<br />
Idle and DND<br />
Off Idle and Message Waiting<br />
Orange<br />
Steady on<br />
Green<br />
1000ms on, 1000ms off<br />
Green<br />
Steady on<br />
Orange<br />
250ms on, 250ms off<br />
Red<br />
Steady on<br />
Red<br />
Steady on<br />
Green<br />
200ms on, 100ms off,<br />
700ms on, 1000ms off<br />
Green<br />
800ms on<br />
Orange<br />
200ms on<br />
State<br />
Idle, Message Waiting and DND<br />
Offering Call<br />
Active Call Picked Up<br />
Held or Parked Call or<br />
Conference Call<br />
Monitored Ext. on Active Call<br />
Monitored Ext. on Conference<br />
Call<br />
Monitored Ext on active Call +<br />
Offering Call<br />
Picked up Monitored Ext. Call +<br />
Monitor Ext on Active Call
Icon<br />
Blink<br />
Icon<br />
LED Color and<br />
Blink Pattern<br />
Orange<br />
200ms on, 100ms off,<br />
200ms on, 500ms off<br />
Orange<br />
200ms on<br />
Green<br />
800ms on<br />
Orange<br />
200ms on<br />
Green<br />
100 on<br />
Off Idle<br />
Green<br />
1000ms on, 1000ms off<br />
Green<br />
Steady on<br />
Red<br />
Steady on<br />
Orange<br />
250ms on, 250ms off<br />
Picked up Monitored Ext. Call<br />
and Held + Monitor Ext on<br />
Active Call<br />
Picked up Monitored Ext. Call +<br />
Monitor Ext held Active Call<br />
Bridged Call Appearance States<br />
Offering Call<br />
Active Call Picked Up<br />
Line In-Use<br />
Held or Parked Call or<br />
Conference Call<br />
Feature Key With Extension<br />
Target States<br />
Off Idle or Offering Call<br />
Red<br />
Steady on<br />
Orange<br />
Steady on<br />
Red<br />
Steady on<br />
State<br />
Connected or Held Call<br />
DND<br />
(Dial/Transfer Mailbox Only) MWI<br />
21
22<br />
Icon<br />
Blink<br />
Icon<br />
LED Color and<br />
Blink Pattern<br />
Green<br />
1000ms on, 1000ms off<br />
Orange<br />
250ms on, 250ms off<br />
(Pickup, Pick/Unpark, Pickup<br />
NightBell Only) Offering<br />
(Unpark, Pick/Unpark Only) Held/<br />
Parked<br />
<strong>To</strong>ggle Functions<br />
(Record, Whisper Mute)<br />
Off Function Off<br />
Orange<br />
Steady on<br />
Orange<br />
500ms on, 500ms off<br />
Orange<br />
500ms on, 500ms off<br />
State<br />
Function Available<br />
Record Active<br />
Whisper Mute Active


