VEX Pneumatics Kit - VEX Robotics
VEX Pneumatics Kit - VEX Robotics
VEX Pneumatics Kit - VEX Robotics
- No tags were found...

Create successful ePaper yourself
Turn your PDF publications into a flip-book with our unique Google optimized e-Paper software.
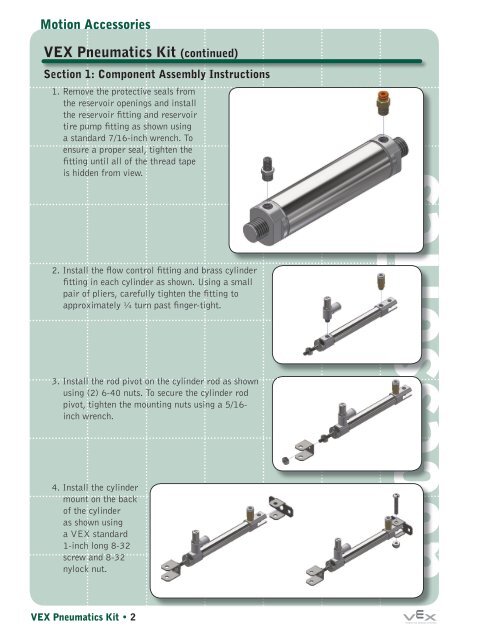
Motion Accessories<strong>VEX</strong> <strong>Pneumatics</strong> <strong>Kit</strong> (continued)Section 1: Component Assembly Instructions1. Remove the protective seals fromthe reservoir openings and installthe reservoir fitting and reservoirtire pump fitting as shown usinga standard 7/16-inch wrench. Toensure a proper seal, tighten thefitting until all of the thread tapeis hidden from view.2. Install the flow control fitting and brass cylinderfitting in each cylinder as shown. Using a smallpair of pliers, carefully tighten the fitting toapproximately ¼ turn past finger-tight.3. Install the rod pivot on the cylinder rod as shownusing (2) 6-40 nuts. To secure the cylinder rodpivot, tighten the mounting nuts using a 5/16-inch wrench.4. Install the cylindermount on the backof the cylinderas shown usinga <strong>VEX</strong> standard1-inch long 8-32screw and 8-32nylock nut.accessories<strong>VEX</strong> <strong>Pneumatics</strong> <strong>Kit</strong> • 2