Tutorial 2: Drawing Setup in AutoCAD 2010
Tutorial 2: Drawing Setup in AutoCAD 2010
Tutorial 2: Drawing Setup in AutoCAD 2010

Create successful ePaper yourself
Turn your PDF publications into a flip-book with our unique Google optimized e-Paper software.
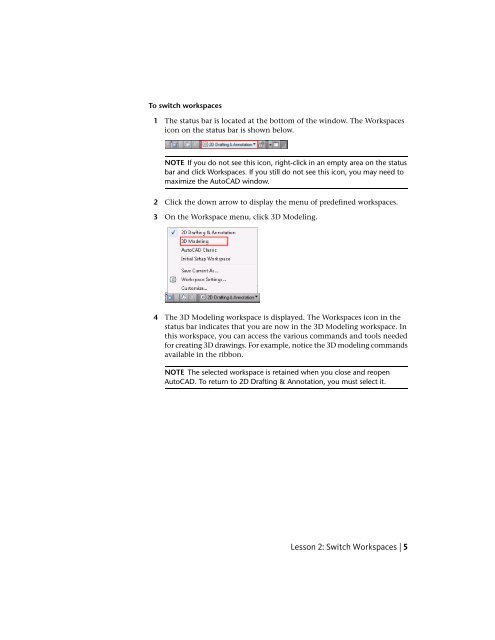
To switch workspaces1 The status bar is located at the bottom of the w<strong>in</strong>dow. The Workspacesicon on the status bar is shown below.NOTE If you do not see this icon, right-click <strong>in</strong> an empty area on the statusbar and click Workspaces. If you still do not see this icon, you may need tomaximize the <strong>AutoCAD</strong> w<strong>in</strong>dow.2 Click the down arrow to display the menu of predef<strong>in</strong>ed workspaces.3 On the Workspace menu, click 3D Model<strong>in</strong>g.4 The 3D Model<strong>in</strong>g workspace is displayed. The Workspaces icon <strong>in</strong> thestatus bar <strong>in</strong>dicates that you are now <strong>in</strong> the 3D Model<strong>in</strong>g workspace. Inthis workspace, you can access the various commands and tools neededfor creat<strong>in</strong>g 3D draw<strong>in</strong>gs. For example, notice the 3D model<strong>in</strong>g commandsavailable <strong>in</strong> the ribbon.NOTE The selected workspace is reta<strong>in</strong>ed when you close and reopen<strong>AutoCAD</strong>. To return to 2D Draft<strong>in</strong>g & Annotation, you must select it.Lesson 2: Switch Workspaces | 5