Preprufe® 300R & 160R Pre-applied Waterproofing Membranes ...
Preprufe® 300R & 160R Pre-applied Waterproofing Membranes ...
Preprufe® 300R & 160R Pre-applied Waterproofing Membranes ...

You also want an ePaper? Increase the reach of your titles
YUMPU automatically turns print PDFs into web optimized ePapers that Google loves.
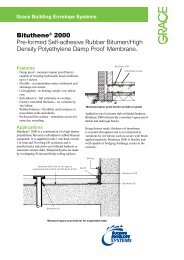
cover the gap. Wrap the penetration with <strong>Pre</strong>prufe Tape bypositioning the tape 12 mm above the membrane.Mix and apply Bituthene Liquid Membrane around thepenetrations using a fillet to provide a watertight sealbetween the <strong>Pre</strong>prufe membrane and <strong>Pre</strong>prufe Tape.Membrane RepairInspect the membrane before installation of reinforcementsteel, formwork and final placement of concrete. Themembrane can be easily cleaned by jet washing if required.Repair damage by wiping the area with a damp cloth toensure the area is clean and free from dust, and allow todry. Apply <strong>Pre</strong>prufe Tape centered over the damaged areaand roll firmly. Any areas of damaged adhesive should becovered with <strong>Pre</strong>prufe Tape. Remove printed plastic releaseliner from tape. Where exposed selvedge has lost adhesionor laps have not been sealed, ensure the area is clean anddry and cover with fresh <strong>Pre</strong>prufe Tape, rolling firmly.Alternatively, use a hot air gun or similar to activate adhesiveand firmly roll lap to achieve continuity.Pouring of ConcreteEnsure the plastic release liner is removed from all areasof <strong>Pre</strong>prufe R membrane and Tape. It is recommended thatconcrete be poured within 56 days (42 days in hot climates)of application of the membrane. Concrete must be placedand compacted carefully to avoid damage to the membrane.Never use a sharp object to consolidate the concrete.Alternative wall base detail for early shutter removalWall base detail2 <strong>Pre</strong>prufe Tape 4 Liquid Membrane 6 Hydroduct ®53532 15 1 4150 mm lap1100 mm lapWall base with toe detail showing drainage option300 mmWall base detail against permanent shutter3216475 mm lap21 21line ofpermanent1formwork150 mm lap61100 mm lap100 mm lapPipe penetration2Pile detail4 1reinforcement4 11 <strong>Pre</strong>prufe 3 Bituthene ® or Procor ® 5 ProtectionDetails shown are typical illustrations and not working details. For assistance with detailing and problem solving please contact Grace Technical Department.