You also want an ePaper? Increase the reach of your titles
YUMPU automatically turns print PDFs into web optimized ePapers that Google loves.
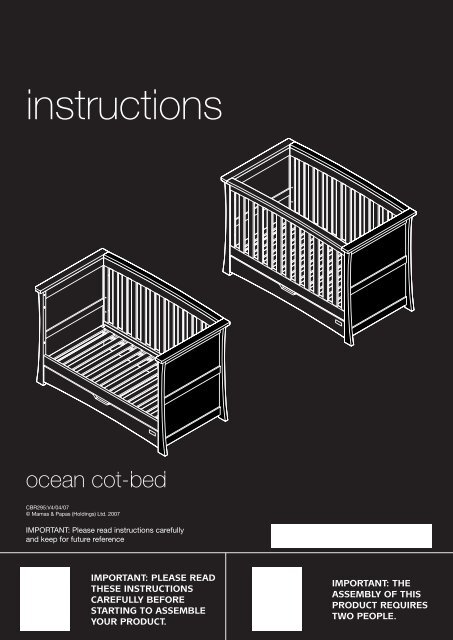
<strong>Ocean</strong> cot-bedBefore assembling your product...Do not discard any packaging until you are certain you have all the correct components and fittings.If any items are damaged or missing, please contact your retailer or <strong>Mamas</strong> & <strong>Papas</strong> on 0870 8307700.Allow plenty of time and space when beginning the construction of your product.Components13597456210119128Item Description Part no. Qty.1 Left drawer side 311397900001 12 Right drawer side 311397900002 13 Drawer back 311397900003 14 Centre rail 311397900004 15 Drawer bases 311397900005 26 Drawer front 311397900006 1Item Description Part no. Qty.7 Head end 311397900101 18 Foot end 311397900102 19 <strong>Cot</strong> sides 311397900103 210 Back rail 311397900107 111 Base 311397900100 112 Front rail 311397900106 1--
ASTEP 1Slot four cams (A) intothe large holes in theinside faces of the twodrawer sides (1&2).Ensure the arrows on thecam heads are pointingtowards the connectingholes in the edges of thedrawer sides.12STEP 2Ensure that the slots inthe drawer back and sidesface into the drawer andare correctly aligned, seediagram.Screw four long assemblyscrews (B) through theholes in drawer sides(1&2) and into the holesin the side edges of thedrawer back (3).Screw two long assemblyscrews through the holesin the centre of thedrawer back and into theholes in the centre rail(4).Tighten the screws usinga cross-head screwdriver.1B432--
STEP 3Slot the drawer bases (5)into the grooves in thedrawer sides and centrerail.Push the drawer basesalong the grooves andinto the recess in thedrawer back.The drawer bases arerectangular. Ensurethat the short edges ofthe drawer bases areconnected to the drawersides and centre rail.556STEP 4Screw six cam studs (C)into the metal insertsin the inside face of thedrawer front (6).Use a cross-headscrewdriver to tighten thecam studs into the drawerfront.C--
STEP 5Slot the drawer front (6)onto the drawer sides,centre rail and drawerbases, see diagram.Align the cam studs inthe drawer front withthe connecting holes inthe drawer sides andcentre rail. Ensure thatthe drawer bases slot intothe recesses in the drawerfront.Secure the drawer front inposition by tightening thefour cams in the drawersides. Lock the cams byturning them clockwisewith the thick end of theallen key (J).6JSTEP 6Turn the assembleddrawer upside down andslot two cams (A) intothe large holes in thecentre rail (4). Ensure thearrows on the cam headsare pointing towards theconnecting holes in thefront edge of the centrerail.Lock the cams by turningthem clockwise using thethick end of the allen key(J).JA4--
STEP 7Slot the back rail (10)onto the head end (7) asshown.Fasten the back rail to thehead end by slotting oneof the rail inserts (H) intothe hole in the rail.Push one of the shortbolts (D) through the holein the rail insert and backrail.Tighten the short boltinto the head end usingthe long end of the allenkey (J).Important: Only halftighten the bolts into thecot end.7H10DJSTEP 8Slot one of the cot sides(9) onto the head end asshown in the diagram.Fasten the cot side inplace by inserting twolong bolts (E) through theend rail of the cot side.Screw the bolts half wayinto the head end usingthe long end of the allenkey (J).IMPORTANT: Do not fullytighten the bolts of fastenthe cam in the bottomrail of the cot side untilthe remaining cot side hasbeen fitted.EJ9--
STEP 9Fasten the foot end (8) tothe other end of the cotside using two long bolts(E) and the thin end ofthe allen key (J).Slot one of the rail inserts(H) into the bottom rail.Slot one of the short bolts(D) through the hole inthe insert and tighten intothe foot end using thethin end of the allen key(J).Important: Only halftighten the bolts until theother cot side is fitted.JDH8JESTEP 10Attach the remaining cotside (9) to the cot ends.Fasten the cot side to thecot ends by screwing infour long bolts (E). Fullytighten the bolts into thecot ends using the longend of the allen key (J).9JE--
JSTEP 11Tighten all of the fourlong bolts in the sidefitted first using the longend of the allen key (J).Tighten the two longbolts in the bottom backrail with the long end ofthe allen key.STEP 12Slot the four basebrackets (F) into theholes in the cot sides, seediagram. Select one of thethree base heights thatyou require. Ensure theyare all at the same height.See ‘Instructions For SafeUse and Maintenance’on page 19 for moreinformation on baseheights.F--
11STEP 13Attach the base (11)(with the informationlabel facing upwards) bylowering it onto the basebrackets. Ensure that thethreaded ends of the basebrackets fit into the holesin the corners of the base.Push the base bracketnuts (G) into the holes inthe corners of the baseand screw them ontothe threaded ends ofthe base brackets usingthe flat head screwdriversupplied.GSTEP 14Slot the runners on thedrawer into the runnerson the cot ends and pushthe drawer into the cot.-10-
STEP 15The cot is now fullyassembled.Check that all the fittingsare fully tightened beforeuse.STEP 16Before the day bed can beassembled you will needto partially dismantle thecot.Remove the drawer, thefront cot side (9) and thebase (11).Store all unused fittingsand components in a safeplace.911-11-
JSTEP 17Half loosen the four longbolts in the cot side usingthe long end of the allenkey (J).Half loosen the two shortbolts in the back rail usingthe allen key.STEP 18Gently spread the cotends until the dowels onthe front rail (12) will slotinto there relevant holesin the cot ends.Slot two of the rail inserts(H) into the front rail.Slot two of the shortbolts (D) through theholes in the inserts andtighten into the cot endsusing the long end of theallen key (J).12H-12-DJ
JSTEP 19Fully tighten the four longbolts in the cot side usingthe long end of the allenkey (J).Tighten the two shortbolts in the back rail usingthe allen key.STEP 20Slot the ends of the fourbase brackets (F) into theholes in the cot side andfront rail.Only use the bottombase height holes in thecot side. Ensure the basebrackets are all at thesame height.F-13-
INSTRUCTIONS FOR SAFE USE & maintenance• When using the cot the bottom base height position is the safest. You should use the cotin this position as soon as your baby is old enough to sit up.• Never leave anything in the cot/bed which could provide a foothold for your child to climbout or would present a danger of suffocation or strangulation.• All assembly fittings should be tightened properly and care should be taken to ensurethat no screws are loose, a child could trap parts of the body, or clothing (e.g. ribbons,drawstrings, necklaces) this could pose a risk of strangulation.• Regularly check that all fittings and components of the cot/bed are fully tightened andin working order. If any parts have become worn or damaged then do not use the cot/bed, seek advice from your retailer or by calling our Customer Services Helpline on:0870 8307700. Do not use replacement parts that are not recommended or supplied by<strong>Mamas</strong> & <strong>Papas</strong>. Non-approved parts may render the repair or cot/bed unsafe.• Do not place your cot/bed in the close proximity of an open fire and other sources ofheat, such as radiators, electric or gas fires.• For reasons of safety we only recommend the use of the <strong>Mamas</strong> & <strong>Papas</strong> size 400mattress for this cot/bed.• The mattress should be no more than 40mm shorter or narrower than the internal lengthor width of the cot/bed.• The thickness of the mattress chosen should be such that the internal height (thedistance between the surface of the mattress to the upper edge of the cot side) is aminimum of 500mm when the base is set in the lowest position and a minimum of200mm when the cot base is set in the highest position.• Wood is a natural product and as such one of its charms is occasional variation in colouror marking. These marks are not defects and do not detract from the strength orperformance of your cot-bed.• Your cot/bed may be cleaned with a damp cloth. Never use bleach or harsh abrasives.The maximum height (i.e. upper surface) of any mattress fitted must not exceed the lineengraved on the inside of the cot sides. We recommend the use of the <strong>Mamas</strong> & <strong>Papas</strong> size:400 mattress.Due to constant updating and improvements, some components may occasionally differ slightly from the diagrams shown inthese <strong>instructions</strong>. We reserve the right to change the specifications of any product without prior notice.After sales Service: If you need assistance, spare parts or you are unhappy with any aspect of the goods pleasecontact Customer Services on: 0870 8307700, or e-mail us at: customer.services@mamasandpapas.com.Visit our website at www.mamasandpapas.com for the latest product information.-16-


