
You also want an ePaper? Increase the reach of your titles
YUMPU automatically turns print PDFs into web optimized ePapers that Google loves.
3 – <strong>Workflow</strong> Overview<br />
Creating a Final Cut Pro Project<br />
1 – Launch the Final Cut Pro application.<br />
<strong>Sony</strong> <strong>NXCAM</strong> <strong>Workflow</strong>s in Apple Final Cut Pro7<br />
2 – If not adding any video material to an existing FCP Project, create a new<br />
Project by simultaneously pressing + Shift + N. Alternatively, use the mouse<br />
to select File > New Project. This will create a new project initially entitled<br />
“Untitled Project”.<br />
3 – Save the Project to the computer hard drive. The standard location for this is in<br />
the /Users/username/Documents/Final Cut Pro Documents/ folder. During the<br />
Save process, change “Untitled Project” to something meaningful.<br />
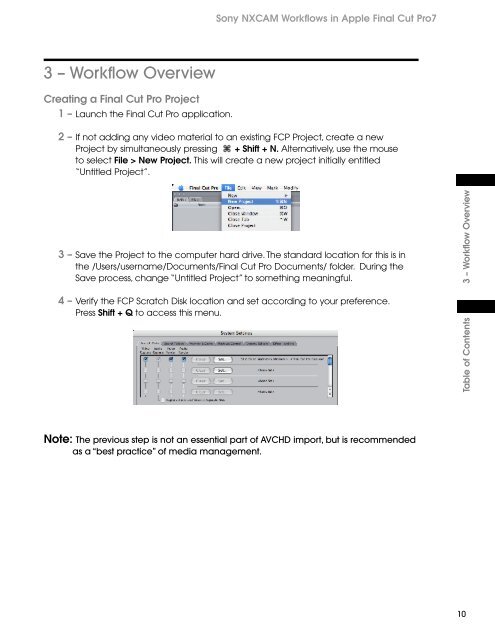
4 – Verify the FCP Scratch Disk location and set according to your preference.<br />
Press Shift + Q to access this menu.<br />
Note: The previous step is not an essential part of AVCHD import, but is recommended<br />
as a “best practice” of media management.<br />
Table of Contents 3 – <strong>Workflow</strong> Overview<br />
10