BioDocAnalyze (BDA) digital - Biometra
BioDocAnalyze (BDA) digital - Biometra
BioDocAnalyze (BDA) digital - Biometra
- No tags were found...

You also want an ePaper? Increase the reach of your titles
YUMPU automatically turns print PDFs into web optimized ePapers that Google loves.
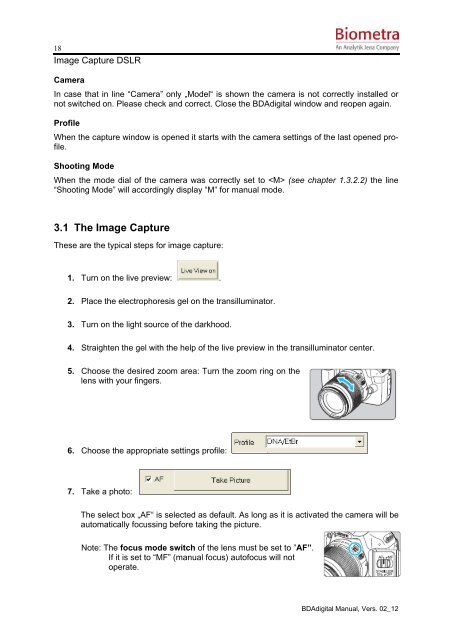
18Image Capture DSLRCameraIn case that in line “Camera” only „Model“ is shown the camera is not correctly installed ornot switched on. Please check and correct. Close the <strong>BDA</strong><strong>digital</strong> window and reopen again.ProfileWhen the capture window is opened it starts with the camera settings of the last opened profile.Shooting ModeWhen the mode dial of the camera was correctly set to (see chapter 1.3.2.2) the line“Shooting Mode” will accordingly display “M” for manual mode.3.1 The Image CaptureThese are the typical steps for image capture:1. Turn on the live preview: .2. Place the electrophoresis gel on the transilluminator.3. Turn on the light source of the darkhood.4. Straighten the gel with the help of the live preview in the transilluminator center.5. Choose the desired zoom area: Turn the zoom ring on thelens with your fingers.6. Choose the appropriate settings profile:7. Take a photo:The select box „AF“ is selected as default. As long as it is activated the camera will beautomatically focussing before taking the picture.Note: The focus mode switch of the lens must be set to ”AF”.If it is set to “MF” (manual focus) autofocus will notoperate.<strong>BDA</strong><strong>digital</strong> Manual, Vers. 02_12