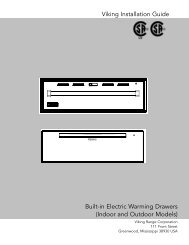
BUILT-IN TRIM KIT INSTALLATION INSTRUCTION
BUILT-IN TRIM KIT INSTALLATION INSTRUCTION
BUILT-IN TRIM KIT INSTALLATION INSTRUCTION
- No tags were found...

Create successful ePaper yourself
Turn your PDF publications into a flip-book with our unique Google optimized e-Paper software.
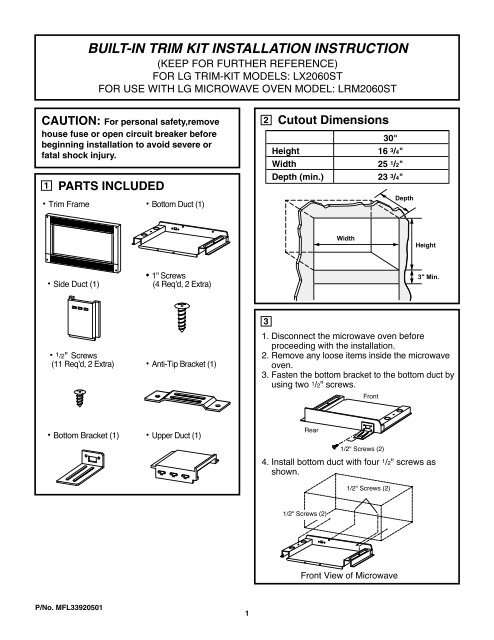
<strong>BUILT</strong>-<strong>IN</strong> <strong>TRIM</strong> <strong>KIT</strong> <strong>IN</strong>STALLATION <strong>IN</strong>STRUCTION(KEEP FOR FURTHER REFERENCE)FOR LG <strong>TRIM</strong>-<strong>KIT</strong> MODELS: LX2060STFOR USE WITH LG MICROWAVE OVEN MODEL: LRM2060STCAUTION: For personal safety,removehouse fuse or open circuit breaker beforebeginning installation to avoid severe orfatal shock injury.1PARTS <strong>IN</strong>CLUDEDTrim Frame Bottom Duct (1)2Cutout Dimensions30"Height16 3 /4"Width25 1 /2"Depth (min.)23 3 /4"DepthWidthHeight1" ScrewsSide Duct (1) (4 Req’d, 2 Extra)3" Min.31 /2" Screws(11 Req’d, 2 Extra) Anti-Tip Bracket (1)1. Disconnect the microwave oven beforeproceeding with the installation.2. Remove any loose items inside the microwaveoven.3. Fasten the bottom bracket to the bottom duct byusing two 1 /2" screws.FrontBottom Bracket (1) Upper Duct (1)Rear1/2" Screws (2)4. Install bottom duct with four 1 /2" screws asshown.1/2" Screws (2)1/2" Screws (2)Front View of MicrowaveP/No. MFL339205011
41. Fold or cut the front edge of the template,along the front guide line. Place the templateflush along the front edge of the cutout floor,aligning the center line of the template with thecenter line of the cutout floor. Mark the centerpositions with an awl or center punch for theanti-tip bracket location as shown.51. Remove the one existing screw from the left sideof the microwave oven.2. Connect the side duct to the upper duct asshown.a) Insert projecting tabs of the upper duct intothe holes of the side duct.b) Bend the tabs up as shown.NOTE: Remove any oil or dirt on the surface ofthe microwave oven before the ducts are attached.Upper Duct3 TabsSide Duct3 HolesCutout Floor2. Remove the template and drill two holes forthe anti-tip bracket.a) b)1 2" Screws (2)Anti-Tip Bracket3. Peel off the backing of the double sided tape.Attach the side duct and upper duct assemblyon the microwave cabinet. Press down firmlyon the ducts. Fasten the duct assembly to theleft side of the cabinet with one existing screw.3. Install the anti-tip bracket onto the cutoutfloor using two 1 /2" screws.Existing Screw (1)2
61. Slide the microwave oven part way into thecabinet opening.Bottom DuctAnti-TipBracketAnti-Tip AssemblyBottom Bracket1 2" Screw2. Bottom bracket must be flat to the cutout floorto engage correctly with the anti-tip bracket asshown.3. Plug in the microwave oven.4. Center the microwave oven within the cutoutopening and slide the microwave oven in place,engaging the anti-tip bracket.5. Ensure the microwave oven is accuratelycentered .71. Place the trim frame over the microwave oven.2. Make sure the trim frame is level and themicrowave oven is centered within the trimframe. Mark four center positions through thefour mounting holes of the trim frame.NOTE: Center the trim frame equally on all foursides.3. Remove the trim frame and drill four pilotholes.1" ScrewPilot HoleCutout OpeningTrim FrameMounting Hole4. Attach the trim frame by using four screws.1 2" ScrewPositioning FlangeCutout Opening6. Drill pilot holes through the positioning flangeand then install three 1 /2" screws at the front ofthe bottom duct as shown.81. Your trim kit is now fully installed. Replaceany loose items that were removed from theinside of the microwave oven.2. Please keep these installation instructions forfuture reference.3