Installation and User Manual - AJ Madison
Installation and User Manual - AJ Madison
Installation and User Manual - AJ Madison
- No tags were found...

You also want an ePaper? Increase the reach of your titles
YUMPU automatically turns print PDFs into web optimized ePapers that Google loves.
IMPORTANT SAFETY INSTRUCTIONS1 - Proper <strong>Installation</strong> - Be sure your appliance is properly grounded <strong>and</strong> installedby a qualified technician.2 - Never Use your Appliance for Warming or Heating the Room.3 - Do Not Leave Children Alone - Children should not be left alone or unattendedin an area where appliance is in use. They should never be allowed to sit or st<strong>and</strong>on any part of the appliance.4 - Wear Proper Apparel - Loose-fitting or hanging garments should never be wornwhile using the appliance.5 - <strong>User</strong> Servicing - Do not repair or replace any part of the appliance unlessspecifically recommended in the manual. All other servicing should be referred to aqualified technician.6 - Storage in or on Appliance - Flammable materials should not be stored nearsurface units.7 - Do Not Use Water on Grease Fires - Smother fire or flame or use dry chemical orfoam-type extinguisher.8 - Use Only Dry Potholders - Moist or damp potholders on hot surfaces may resultin burns from steam. Do not let potholder touch hot heating elements. Do not usea towel or other bulky cloth.9 - Use Proper Pan Size - This appliance is equipped with several, differently sized,induction elements. Select utensils having flat bottoms, large enough to cover thesurface unit heating element. Proper size pots <strong>and</strong> pans will also improve efficiency.10 - DO NOT TOUCH SURFACE UNITS OR AREAS NEAR UNITS - Surface units maybe hot even though they are dark in color. Areas near surface units may become hotenough to cause burns. During <strong>and</strong> after use, do not touch, or let clothing or otherflammable materials contact surface units or areas near units until they have hadsufficient time to cool.11. Do Not Heat Unopened Food Containers - Build-up of pressure may causecontainer to burst <strong>and</strong> result in injury.12. Never Leave Surface Units Unattended at High Heat Settings - Boil-over causessmoking <strong>and</strong> greasy spillovers that may ignite.13. Do not use aluminum foil, aluminum liners or aluminum containers on theunit.2
Other <strong>Installation</strong> RequirementsCabinet AboveCabinet Above750 750 mm mm 30” (30”)10 [3/8" [3/8”]]CrossSectionMinimumClearanceRequirementsetc.) which could obstruct the air inlet underyour induction cooktop.Although induction-cooktop heat rejection isminimal <strong>and</strong> the unit does not create anyfumes in operation, such unit must beinstalled underneath a properly sizedventilation hood for exhausting any smell,vapor <strong>and</strong> smoke created by cooking itself.Also, a proper downdraft system can beused for ventilation.AirIntake50 mm (2”)Cabinet belowCabinet Belo wExhausA minimum vertical clearance of 750 mm[30”] is required between the top of thecooking surface <strong>and</strong> the bottom of anyunprotected combustible material, suchas cabinets, wooden trim etc.During cooking, built-in fan inside thecooktop will operate constantly to keep theinternal components cool. The air intake ison the bottom of the cooktop box, <strong>and</strong> thewarm air exhaust is located on the front ofthe rim, as shown on the schematic. If the airintake or the exhaust is obstructed, thecooktop safeties will either diminish thepower output or shut down the unit.We suggest that you should periodicallycheck that there are no objects (dust, paper,In the back, leave a minimum of 10 mm[3/8”] between the cooktop edge <strong>and</strong>adjacent vertical surfaces (backsplash,wall, high cabinets etc.). This space isneeded for the unit to breath properly.If a downdraft ventilation system is used,a minimum of 6 mm (1/4”) of clearanceis required between the rear edge of thecooktop <strong>and</strong> the downdraft snorkel.Leave a minimum of 50 mm [2”]underneath the unit for the air intake.Your cook-top must always breath adequately. Make sure that the air inlet <strong>and</strong> itsexhaust are not obstructed.The unit must not be installed above a washing machine, a refrigerator or a deepfreezerboxTo eliminate the risk of burns or fire by reaching over heated surface units, cabinetstorage space located above the surface units should be avoided.The unit must be installed such that it can be pulled without difficulty out of the cut-outfor servicing or cleaning.Never glue, silicone or wedge the unit inside its cut-out.7
Electrical Connectioncooktop electrical characteristics are:Operating voltage................................................... 240 V~ 60 HzMaximum power output .............................................. 7200 W 30AConnect to .............. 240 V, 60 Hz, 2 Pole+G, 40 A minimum supply,(3 conductors #10 AWG)Electrical wiring informationAn adequate electrical supply must be providedfor this unit. All wire connections <strong>and</strong>grounding must be done in accordance withlocal electrical codes, or if these codes arenot established, then with the National ElectricalCode, ANSI/NFPA No. 70 in the US , orwith the Canadian Electrical Code, CAN/CSAC22.1, in Canada.•240 VConnect the 3 wires as per the followingcolour codeGreenThis unit comes equipped with three connectionwires in a flexible conduit. The conduitmust be routed <strong>and</strong> properly connected to anapproved, owner-supplied, electrical, walljunction-box. An approved connector must beused for connecting the conduit to the junctionbox. A three wire, 2 poles, 240 V, 60 Hzservice with minimum 40 A circuit protectormust be provided. The red <strong>and</strong> the black wirefrom the unit are to be connected to the service(”hot”) wires, <strong>and</strong> the green wire is to beconnected to the ground conductor.The circuit protector for the unit should beproperly marked inside electric panel <strong>and</strong> anybodyusing the unit, or technician servicingthe unit, should be advised of circuit protector’slocation, so that the power to the unit canbe disconnected when necessary.Once the unit is properly fitted <strong>and</strong> connectedto the electrical power supply, turn the unit onto ensure that all elements <strong>and</strong> controls areoperating well.Note that your unit is designed for a stabile<strong>and</strong> steady 240 V supply <strong>and</strong> the manufacturer,its distributors <strong>and</strong> dealers cannot be heldRedBlackPhase 2LPhase 1LEarthresponsible for any unit malfunction due to aninadequate electrical supply (inadequate cablesize, low voltage, power surge etc). Furthermore,if your residence has only a 208 Vsupply system, <strong>and</strong> if the voltage frequentlyfluctuates, your cooktop may not function properlyIt is recommended that the connection toelectrical supply is done by a qualified electrician.If there is any visible physical damage on theconduit <strong>and</strong> the wires, the unit must not beconnected to the mains. A qualified electricianor approved service agent should be called into replace the wires <strong>and</strong> the conduit.8
Safety Precautions - Read before operating your cooktopYour induction-cooking unit has beendesigned for residential use <strong>and</strong> foodpreparation, <strong>and</strong> all of the safety parametershave been rectified accordingly.The unit incorporates numerous safetydevices <strong>and</strong> controls, <strong>and</strong> a few devices willbe mentioned here.- A number of sensors monitor temperatureof internal components. If any of thesesensors senses that the componenttemperature is above the limit, the poweroutput of the unit will automatically bereduced, allowing the component to cooldown. Once this is achieved, the unit willcontinue to operate normally at the outputlevel set initially by the operator.- Each induction coil is equipped with asensor which is continuously monitoring thetemperature of the bottom of the pan toprevent the pan from overheating.- Each induction coil is equipped with a pansensing device. This device will not allow theheating element to turn on unless it sensesa cooking utensil on the coil coveringenough surface area. The indication that thecoil is not running is the flashing of thedigital display. Once the pan is put properlyon the coil, the digital display will becomesteady. Note that a small object such as afork, a spoon, a piece of jewelry, etc. will notbe mistaken for a cooking utensil, <strong>and</strong> it willnot trigger this sensor. Moreover, this devicewill distinguish between cooking utensilswhich are <strong>and</strong> are not suitable for inductioncooking. If a cooking utensil which is notsuitable for induction cooking is placed on acoil there will be no power output on thecoil.- If an operator leans on the keypad bychance for more then ten seconds, controlswill disable the heating section of the unit.This occurrence is called ‘long press’ <strong>and</strong>when it happens “-” signs will appear onpower displays. The unit will act the same ifthere is an accumulation of some liquid onthe keypad area, or if a damp cloth is leftsitting on the keypad. The section willbecome operational again once the spill orthe object/h<strong>and</strong> is removed, <strong>and</strong> theelement turned back on.In an effort of constantly improving ourproducts, we reserve the right to make anychanges to internal components, as well as,to make any(cosmetic) modifications on theoutside frame.This unit does not contain any asbestos orasbestos based components.This unit has been tested <strong>and</strong> certified underFCC part 15 <strong>and</strong> CFR Title 47, Part 18, forelectromagnetic interference.The users with heart pacemakers mustconsult with the pacemaker manufacturerprior to using this cooktop whichincorporates induction heating source.If a crack appears in the glass surface, disconnect the unit immediately to avoid any riskof electric shock. If the unit is connected directly to supply inside a junction box, thendisconnect its breaker, or remove fuses manually.Do not re-use your cooktop until the glass top is changed.When cooking never use aluminum foil <strong>and</strong> never place products wrapped in aluminum foil, norproducts deep-frozen in aluminum packs on the hob. Aluminum foil could melt <strong>and</strong> damagevitroceramic glass surface beyond repair.9
The principle of inductionWhen an induction element - also called: ‘aheating zone’, or simply: ‘a coil’ - is switchedon, the appropriate utensil is used, <strong>and</strong> a desiredlevel of heating power selected, the electroniccircuit unit (‘induction generator’ or ‘inverter’)powers up the induction coil whichcreates a magnetic field. This magnetic fieldcontinuously changes in terms of frequency<strong>and</strong> intensity, <strong>and</strong> this creates induced currentsin the bottom of the utensil <strong>and</strong> ultimatelyresults in heat. The heat is transferred directlyto the food being cooked.Thus, induction heat makes the utensil a directsource of heat, featuring high level of efficiencywith extremely low energy loss <strong>and</strong> unparalleledheating level control.With induction cooking there is very little ‘heatinginertia’. Induction cooking elements donot incorporate a heat generating element -unlike convectional electric rings, halogen orradiant elements etc. - therefore, heat levelscan be changed very quickly.Energy efficiency for induction is within rangeof 90-95%, compared with 55-65% for conventional<strong>and</strong> radiant element, or 45% - 55% forgas fueled burners. The energy efficiencycontributes to substantial energy savings,both beneficial to the owner as well as the environment.Induction cooking elements are sensitive tothe utensil type being used :- if there is no utensil placed on the coil, or ifthe utensil is not of induction grade, there willbe no power emitted by the coil;- if the utensil is placed partially on the coil, orif it is smaller than the coil, the internal sensorswill reduce power to the coil; The Principleof InductionABCAInduction coilInverterInduced currents- if the utensil is fully removed from the coil,the power output will be instantaneously reducedto ‘0’, <strong>and</strong>, eventually, the controls willturn the element off after a minute, unless theutensil is returned back onto the coil.When compared to the other methods of cooking,induction cooking has a very low levelof ambient heat, thus makes cooking morepleasurable, with a reduced need for ventilation.Finally, the vitroceramic glass as a cookingsurface barely becomes hot <strong>and</strong> this makescleaning much easier.+-CBFor a proper choice of utensils, please refer to “Utensils for Your Induction”When using induction elements, some utensils may producefaint humming sound. This is a normal occurrence - the noiseis a result of vibrations caused by induced currents.10
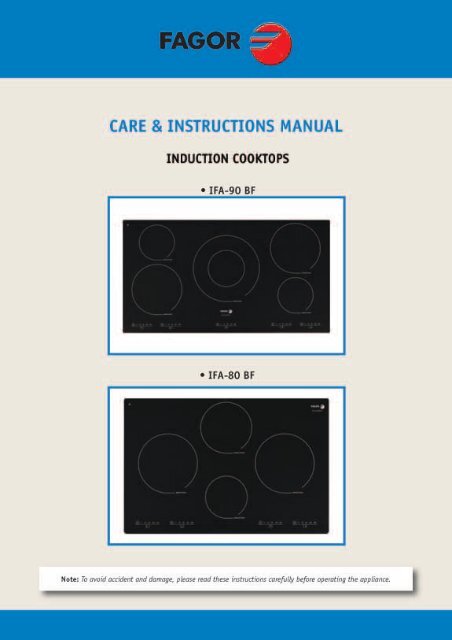
8 5 5 79932Glass Top, Coil Size <strong>and</strong> Controls18 cm (8”)50 W à 2800 WIF-8022 cm (9”)50 W à 2800 W22 cm (9”)50 W à 2800 WCooking zone16 cm (6” 1/ 2 )50 W à 2200 WControl zone16 cm(6” 1/ 2 )50 W à 2200 W28 cm50 W à 3600 W22 cm (9”)50 W à 2800 WIF-90Cooking zone22 cm (9”)50 W à 2800 W16 cm (6” 1/ 2 )50 W à 2200 WControl zone• DESCRIPTION OF THE CONTROL PANEL• ADJUSTING THE POWERPress the + or - power touch controls.or on pre-select touch controls.A BDABStart/stop touch control.Power - + touch controls.Touch Display Setting Use6 medium low heat10 high moderate heat12 Maximum maximumDPower pre-select touch controls.• POWERING ONPress the start/stop touch control for thezone you want to use. A flashing "0" indicatesthat the zone is on. You can then choose thedesired power level.If you do not select a power level, the cookingzone will automatically shut off.11TipFor simultaneous use, favour the useof cooking zones located on opposite sidesof the hob.On the same side, the use of a cookingzone at maximum power results in anautomatic limitation of the other cookingzone on that side, which is indicated in thepower level display.
• WHICH COOKING ZONESHOULD YOU USE BASED ONYOUR COOKWARE?• POWER SHARINGUnder the pretense that only one zone isused with an adequate utensil covering thewhole surface of the coil, <strong>and</strong> that power onthe zone is adjusted to the maximum (‘12’):- the maximum power output of 22 cm (9”)heating zone is 2.8 kW;- the maximum power output of 16 cm (61/2”) heating zone is 2.0 kW.CookingzoneADiameter A16 cm (6 1/ 2 ”) 10 ..... 18 cm (4..7”)18 cm (7) 12 ..... 22 cm (4 3/ 4 ”..8 1/ 2 ”)22 cm (9 ”) 18 ..... 24 cm (7..9 1/ 2 ”)TipTo check the suitability of yourcookware:Place the vessel on a cooking zone atpower level 4.If the display remains on, your cookware iscompatible.If the display flashes, your cookware cannotbe used with induction cooking.You can also use a magnet to test thecookware.If a magnet "sticks" to the bottom of thecookware, it is compatible with induction.If only one coil is employed, it can beutilized at its maximum power, but as soonas the other coil is turned on, the controlsadjust the power on both coilsautomatically for ‘power sharing’. Thispower sharing is administered by unit’smicroprocessors, which will alternatepower between the two elements. There aretwo factors affecting improved powersharing on your cooktops.The first is the application of an improvedtechnology for power sharing - not usingcommon relays, but rather semiconductorswhich makes power sharing quicker, thusmore efficient. The second factor is that,when in a power-sharing mode, two zonescan share full, 3.6 kW, power output of theinverter.Note that the controls will not allow bothzones to operate at full power, <strong>and</strong> thepower will be adjusted automatically - e.g. ifthe power on one zone is adjusted to amaximum, <strong>and</strong> the other zone is turned on<strong>and</strong> power level also adjusted to itsmaximum, the power level on the first zonewill automatically become lower. Thischange will be visible on digital displays.The controls are set in such a manner thatthe last instruction (comm<strong>and</strong>) given to anelement is always a priority.12
Utensils for Your InductionInduced current can be created only inmaterials which have magnetic properties.Thus, utensils for use with an induction unitmust be made from a ferromagnetic materialor have inserts with magnetic properties.Your household may already have cookwaresuitable for induction cooking, <strong>and</strong> you maytest any utensil with an induction element.Incorporated controls are able to recognizea suitable utensil. To perform a utensil test:induction cooking, but most manufacturersmake such utensils in layers for better heatdistribution, <strong>and</strong> a good number of suchpots <strong>and</strong> pans can be used with induction.To make sure if a stainless steel utensil canbe used perform the utensil test.Use of utensils with enameled coated basewill prevent the glass top of your unit fromgetting scratched.- Turn an element on <strong>and</strong> adjust power to anylevel - you will notice that the digital powerdisplay is flashing.- Place your utensil on the coil. If the piecebeing tested is suitable for inductioncooking, the display will become steady.However, if it keeps flashing, the utensilcannot be used on your induction unit.- If the utensil is empty, remove it from thecoil immediately after you have done test <strong>and</strong>turn the element OFF.Another simple test to determine if a piece ofcookware can be used on an inductioncooktop is the ‘magnet test’. Use a magnet<strong>and</strong> place it on the utensil. If the magnetsticks to it, the piece will work withinduction.Utensils compatible with induction are:• Cookware made of enamel coated steelwith or without a non-stick coating.• Cast iron cookware with or without enamelcoated base.• Stainless steel pots <strong>and</strong> pans designed forinduction cookware.Note:Stainless steel used for utensils is nonmagnetic,in most cases, <strong>and</strong> unsuitable forPots <strong>and</strong> pans which do not have a flatbottom still may be used, however theyshould not be overly deformed.Cookware made from glass, ceramic,earthenware, aluminum <strong>and</strong> copper pots <strong>and</strong>pans <strong>and</strong> non-magnetic stainless steelcookware are not suitable for inductioncooking.Matching Pots & Pans with Coils, etc.Small elements,16 cm (6 1/2”), are bestutilized:- With small utensils - but normally notsmaller then 10 cm (4”);- For slow cooking <strong>and</strong> simmering (sauces,creams, etc.);- For cooking small quantities of food.Large elements, 22 cm (9”), are primarilydesigned for day-to-day cooking needs <strong>and</strong>most commonly used pans - 18 to 25 cm (7to 9 1/2”) in diameter.When cooking large quantities of food, it isalways better to use a large diameter pan<strong>and</strong> a larger coil, thus better <strong>and</strong> moreefficient heat distribution will be achieved<strong>and</strong> food cooked evenly.Utensils with thick flat bases should be chosen for the benefit of uniform heatdistribution.Never leave an empty piece of cookware on an induction heating element for more then a fewseconds. If a utensil is left on an element at full power, temperature of the dish mayincrease rapidly, the safeties would not engage, <strong>and</strong> this may damage your utensil,the cooktop, <strong>and</strong> could result in an injury or a damage to your property.13
To Do or Not To DoYou must:- Always place your utensil such that itscenter is aligned with the centre of the coil.- Avoid hitting the vitroceramic glass withutensils or any hard objects - the glasssurface is highly resistant but notunbreakable.- Pick-up your utensils when moving themaround. Do not slide them <strong>and</strong> avoidexcessive rubbing of the top, as this leavesscratches <strong>and</strong> erases the markings .- Avoid using utensils with rough ordeformed bottoms.- Avoid leaving any metal cookingaccessories, knives <strong>and</strong> forks, or metalobjects on the hob. They may get hot if leftclose to any heating element in use.- Avoid storing flammable products in thecabinets under your cooktop.- Never leave an empty utensil on aninduction heating element, even when theelement is turned OFF.- Only use maximum power for boiling <strong>and</strong>frying.- Never try heating up a closed can.- Avoid pre-heating your non-stick pans (e.g.with teflon coating) at maximum heat.- Avoid storing solid <strong>and</strong> heavy items in thecabinets above your cooktop. They mayunintentionally drop <strong>and</strong> damage the glass.To Do or Not To DoDo not connect any appliances to the plugs above or near to the induction cooktop;connection cable insulation can melt if in contact with heat, <strong>and</strong> this may result in aninjury <strong>and</strong> a property damage.Your cooktop must never be used as a storage space or surface for piling up of anymaterial.14
3 / DAILY CARE OF YOUR APPLIANCE• MAINTAINING YOUR APPLIANCECleaning of an induction cooktop is easy. Read <strong>and</strong> follow theserecommendations:TYPE OF STAINS/SPOTSMinorWHAT TO DOSoak the area to be cleaned withsoapy water, then wipe it.ACCESSORIES orAGENTS EMPLOYEDCleaning sponges & milddetergentsAccumulated burn-onstains.Rings <strong>and</strong> traces of limescale.Burn-on stains followingsugar spillage, meltedaluminium or plastic.Soak the area to be cleaned withwarm soapy water. Use a specialscraper for vitroceramic glass toremove grease <strong>and</strong> food particles.Finish off with a cleaning sponge,then wipe it clean.Apply warm white vinegar on thestain. Leave to act then wipe offwith a soft cloth. OR Use acommercial cleaner on affectedarea. Note that such cleaner mayleave stains on stainless steelframe, thus protect exposedstainless steel.Apply special vitroceramicglass cleaner on the surface,preferably one which containssilicone (protective action).Leave to act, then finish off witha cleaning sponge, then wipe itclean.Cleaning sponges, milddetergents <strong>and</strong> cleaningagents for vitroceramicglassCleaning cloth,whitevinegar, or dilutedde-liming agent.Vitroceramic cleaningagents <strong>and</strong> sponge.NonabrasivePasteOrdinary Sponge or SpecialSponge for Delicate ItemsPowderAbrasive-backedsponge15
4 / SPECIAL MESSAGES, DIFFICULTIESYou have doubts about whether your hob is working correctly. This does notnecessarily mean that there is a breakdown. Nevertheless, check the followingpoints.PROBLEMPOSSIBLE CAUSESWHAT SHOULD YOU DO?When you switch the unit on, thesupply-line breaker trips off or thesupply-line fuse burn.Your unit may be connectedincorrectly,or there is aninternal problem.Have the connection checkedfirst. If the connection is OK,contact your service agent.When you switch elements on, onlyone element works.There is an internal problemwith the unit.Contact your service agent.The fans keep running for a fewminutes after the unit has beenswitched off,The electronics are coolingdownThis is a normal occurrence.The top of the unit is alwayslukewarm (even when elements arenot switched on).The electronic components areunder power <strong>and</strong> they createheat.This is a normal occurrence.Your hob makes faint clicking noisewhen in operation.This noise occurs when the power isbeing shared between twoinduction coils.This is a normal occurrence.The unit doesn't work at all.After turning an element ON <strong>and</strong>having utensil placed on the coil,there is no heat <strong>and</strong> the digitalindicator continues flashing..Utensil makes noise during cooking.There may be a power supplyor internal problem.The utensil you are trying to useis not compatible with inductioncooking or its diameter is under10 cm. (4”).Your utensil creates noise fromvibrations caused by inducedcurrent .Check your beakers (fuses)<strong>and</strong>/or connection cable.If OK, contact your service agent.Use another utensil suitable forinduction cooking.Under high power thisphenomenon is normal with sometypes of pots <strong>and</strong> pans. There isno danger for the hob.The hob gives off a smell when firstused for cooking.A new unitUse each heating element for anhour with a pan filled with water.Servicing of an induction unit is to be done by an authorizedservice agent. Contact your dealer for service location closest toyour residence. Never try servicing the unit yourself.If any crack on the vitroceramic glass can be noticed, or the glassis broken DO NOT USE THE UNIT. Disconnect the electricalsupply to the unit by tripping the breaker off (if the unit is hardwiredto the supply) or just unplug the unit (if there is a plug onthe supply cable).1699645821 02/08
FAGOR AMERICA, INC.PO BOX 94LYNDHURST, NJ 07071Toll Free: 1.800.207.0806Email: infoappliances@fagoramerica.comwww.fagoramerica.comThe manufacturer reserves the right to modify the items described in this manual.Le producteur se réserve le droit de modifier les articles décrits dans cette guide.El fabricante se reserva el derecho de modificar los productos descritos en este manual.