Recalibration of Paroscientific Transducers ... - Paroscientific, Inc.
Recalibration of Paroscientific Transducers ... - Paroscientific, Inc.
Recalibration of Paroscientific Transducers ... - Paroscientific, Inc.
- No tags were found...
You also want an ePaper? Increase the reach of your titles
YUMPU automatically turns print PDFs into web optimized ePapers that Google loves.
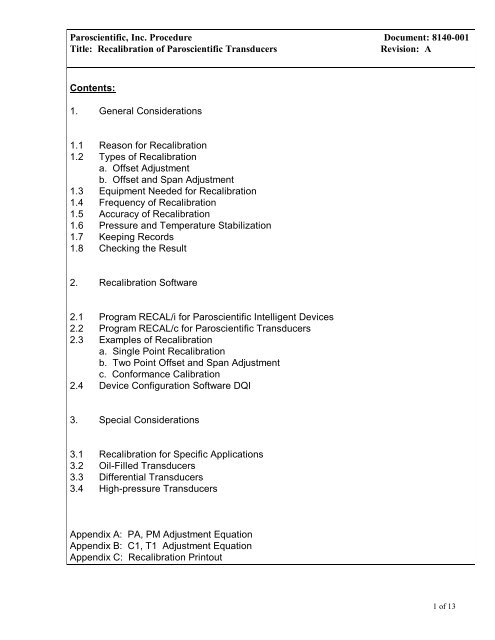
<strong>Paroscientific</strong>, <strong>Inc</strong>. Procedure Document: 8140-001Title: <strong>Recalibration</strong> <strong>of</strong> <strong>Paroscientific</strong> <strong>Transducers</strong>Revision: Atwo primary pressure standards at different calibration laboratories differ by asmuch as 0.03 percent. The computation <strong>of</strong> true pressure from the dead weight testermust include corrections due to local gravity, buoyancy, head effects, thermal expansion,and piston deformation.2. The user has elected to recalibrate the transducer on a periodic schedule. Somelaboratories are required to maintain current traceability <strong>of</strong> their instruments. Inany case, it is a good idea to check the transducer periodically against knownpressure values, and to keep a record <strong>of</strong> the results.3. The transducer may be recalibrated for a specific application over a limitedpressure and/or temperature range.4. The transducer needs periodic recalibration to maintain an absolute accuracy <strong>of</strong>+ 0.01 percent <strong>of</strong> transducer full scale. All instruments need period recalibration,even primary pressure standards. As described in more detail below, it is usuallysufficient to adjust an <strong>of</strong>fset between true and indicated pressure twice a year.1.2 Types <strong>of</strong> <strong>Recalibration</strong>a. Offset AdjustmentThe <strong>Paroscientific</strong> transducer measures a force that is generated by externalpressure. Since the quartz crystal is extremely sensitive, any other small force that istransmitted to the sensing element will be added to the pressure measurement. Apressure <strong>of</strong>fset generated in this way is purely additive and is the same at allpressure values. In principle, checking accuracy at a single applied pressure issufficient to determine an <strong>of</strong>fset. Of course, the <strong>of</strong>fset can be calculated as theaverage <strong>of</strong>fset <strong>of</strong> many pressure points.In practice, all <strong>Paroscientific</strong> transducers stay within + 0.01 percent <strong>of</strong> full scaleabsolute accuracy during their entire lifetime if the <strong>of</strong>fset is checked and adjustedperiodically. No other adjustment is necessary.In Digiquartz ® Intelligent Devices, an <strong>of</strong>fset constant called the PA parameter canbe adjusted (use program RECAL/i and consult the “Programming and OperationManual <strong>of</strong> Intelligent Transmitter” and Appendix A). If the coefficients <strong>of</strong>transducers are adjusted directly, the T1 and C1 terms are changed (use programRECAL/c or consult Appendix B).3 <strong>of</strong> 13
<strong>Paroscientific</strong>, <strong>Inc</strong>. Procedure Document: 8140-001Title: <strong>Recalibration</strong> <strong>of</strong> <strong>Paroscientific</strong> <strong>Transducers</strong>Revision: Ab. Offset and Span AdjustmentSpan is defined here as the pressure difference from minimum pressure to full scalepressure. A span error is the difference between the indicated pressure span asmeasured by the transducer and the true pressure span. If a transducer is carefullyadjusted at minimum pressure, the span error is simply the difference betweenindicated and true applied pressure at full scale.The span <strong>of</strong> a <strong>Paroscientific</strong> transducer is rarely adjusted since the scale factor <strong>of</strong>the sensing element is very stable. Differences are sometimes due to differentcalibration standards. The span <strong>of</strong> a dead weight tester used as a primary standarddepends directly on the piston area and the value <strong>of</strong> local gravity. Any apparentchange <strong>of</strong> span in a <strong>Paroscientific</strong> transducer should be carefully checked toascertain that the pressure is correctly applied and calculated with the correct pistonarea and gravity constant, and that the piston is vertical. We recommendrecording several pressure points over the entire pressure range to establish any spanerror. The <strong>Paroscientific</strong> calibration s<strong>of</strong>tware program RECAL calculates the bestspan by a least-squares fit optimization.In Digiquartz ® Intelligent Devices, a pressure multiplier called the PM parametercan be adjusted (use program RECAL/i and see Programming and OperationManual <strong>of</strong> Intelligent Transmitter and Appendix A). If the coefficients <strong>of</strong>transducers are adjusted directly, the T1 and C1 terms are changed (use programRECAL/c or see Appendix B).1.3 Equipment Needed for <strong>Recalibration</strong>The <strong>Paroscientific</strong> Calibration Laboratory uses state-<strong>of</strong>-the-art dead weight testersas primary pressure standards with current calibration and periodic cross calibrationbetween standards. The calibration is traceable to the National Institute <strong>of</strong>Standards and Technology (NIST). For recalibration, we recommend using aprimary standard with an absolute accuracy <strong>of</strong> 0.02 percent <strong>of</strong> reading or better.Special recalibration procedures are covered in Chapter 3. Differential units can bechecked at 0 psig without a standard. High pressure units can be checked with arelatively more accurate barometer at ambient atmospheric pressure. Two or moretransducers can be checked for relative accuracy against each other.4 <strong>of</strong> 13
<strong>Paroscientific</strong>, <strong>Inc</strong>. Procedure Document: 8140-001Title: <strong>Recalibration</strong> <strong>of</strong> <strong>Paroscientific</strong> <strong>Transducers</strong>Revision: A1.4 Frequency <strong>of</strong> <strong>Recalibration</strong>Most <strong>Paroscientific</strong> transducers keep an absolute accuracy <strong>of</strong> + 0.01 percent <strong>of</strong> full scale ifthe pressure <strong>of</strong>fset is recalibrated twice a year. Digiquartz ® Barometric Standards carry aguarantee <strong>of</strong> stability <strong>of</strong> better than 0.1 hPa per year. This is usually the case for laboratoryapplications. More stressful environments, especially at high temperature, may affect atransducer more. Systems using pressure instruments should be designed in such a waythat recalibration is possible to the accuracyneeded. For example, systems with differentialtransducers may include an option to vent both ports and “rezero” (recalibrate the indicatedpressure to read 0 psig) before use. It is standard practice to increase the calibrationinterval if in-tolerance conditions are found.1.5 Accuracy <strong>of</strong> <strong>Recalibration</strong>The resolution and short-term stability <strong>of</strong> <strong>Paroscientific</strong> transducers routinelyexceed one part per million (ppm) <strong>of</strong> transducer full scale, e.g., the resolution <strong>of</strong> atransducer with P(full scale) = 100 psia is P(full scale)/1,000,000 or 0.0001 psia.Good practice dictates reading and recording the indicated and applied pressure to thatresolution. As a rule, pressure values should be recorded with seven significantdigits (starting with the highest digit <strong>of</strong> the full scale pressure), e.g. 5014.443 psia(6000 psia full scale), or 14.5288 psia (100 psia full scale), or 14.52886 psia(barometer).If several indicated pressure values are recorded at the same nominal appliedpressure, the difference between measurements is related to the stability <strong>of</strong> theapplied “true” pressure. The stability <strong>of</strong> the pressure standard should exceed thedesigned accuracy by at least a factor <strong>of</strong> four. For example, if a transducer iscalibrated with a standard that is certified to 0.012 percent at the transducer fullscale, the stability <strong>of</strong> individual pressure points should be better than 0.003 percent<strong>of</strong> full scale (30ppm).1.6 Pressure and Temperature StabilizationThe applied pressure should be kept constant for at least three minutes. Thisensures that the manifold is leak-free and allows for proper stabilization <strong>of</strong> pressure.At the <strong>Paroscientific</strong> Calibration Laboratory, applied pressure is monitored duringthe application with a relative accuracy <strong>of</strong> parts per million. This helps greatly todetect pressure leaks and pressure instability which may originate from the primarystandard, e.g. weight bounce or cleanliness <strong>of</strong> piston.5 <strong>of</strong> 13
<strong>Paroscientific</strong>, <strong>Inc</strong>. Procedure Document: 8140-001Title: <strong>Recalibration</strong> <strong>of</strong> <strong>Paroscientific</strong> <strong>Transducers</strong>Revision: ATemperature instability or lack <strong>of</strong> temperature correction will result in apparent<strong>of</strong>fset errors. <strong>Transducers</strong> must be in thermal equilibrium for accurate calibrationvalues. Sufficient insulation and stable temperature surroundings are necessary tokeep the whole transducer body at the same temperature.The indicated pressure must be temperature corrected. This is automatically donein the Digiquartz ® Intelligent Devices. A quartz crystal temperature sensor,characterization equation, and coefficients necessary to generate thermallycompensated,linearized pressure outputs are provided with each Digiquartz ®Transducer. The residual temperature error is less than 0.0008 percent f.s. per degC. Without temperature correction, the indicated pressure can be erroneous by0.005 percent f.s. per degree C(low pressure units), and up to 0.02 percent f.s. perdegree C(high pressure units), hence thermal compensation is recommended toachieve the best absolute accuracy.1.7 Keeping RecordsWe recommend keeping a record <strong>of</strong> the coefficients supplied by the <strong>Paroscientific</strong>Calibration Laboratory and keeping a record <strong>of</strong> recalibration changes. For IntelligentDevices, it is best to maintain the original coefficients and only adjust PA (and PM),if necessary.1.8 Checking the ResultThe result <strong>of</strong> a recalibration can be easily checked. One method is to make surethat the transducer reads ambient pressure correctly (if a barometer is available)and that differential transducers are correctly rezeroed (read 0 psig with both portsopen).2. <strong>Recalibration</strong> S<strong>of</strong>tware<strong>Paroscientific</strong>, <strong>Inc</strong>., has a s<strong>of</strong>tware program called RECAL available to calculatethe proper <strong>of</strong>fset (and span) adjustment. As input, the true applied and theindicated pressure values <strong>of</strong> one or many pressure measurements are entered. Thevalues entered can be saved as a file, edited with a word editor (e.g. EDIT), and rerunagain. The program calculates pressure errors as entered, which can also be displayedgraphically. The data are then summarized as:6 <strong>of</strong> 13
<strong>Paroscientific</strong>, <strong>Inc</strong>. Procedure Document: 8140-001Title: <strong>Recalibration</strong> <strong>of</strong> <strong>Paroscientific</strong> <strong>Transducers</strong>Revision: Aa. Average pressure error as entered.b. Average pressure <strong>of</strong>fset and remaining error after <strong>of</strong>fset adjustment.c. Offset and span error and remaining error (also called conformance) after both<strong>of</strong>fset and span adjustment.The user makes a selection among:(N)(O)(S)No adjustment,Offset adjustment only,Span and <strong>of</strong>fset adjustment.The data are then shown after adjustment. The remaining error is referred to aspressure conformance to the calibration data after adjustment. If three or morepressure points are entered, the optimal <strong>of</strong>fset and span are found with a linearleast-squares fit to all points.The computer program RECAL is a proprietary product <strong>of</strong> <strong>Paroscientific</strong>, <strong>Inc</strong>., andis protected by copyright law.2.1 Program RECAL/i for <strong>Paroscientific</strong> Intelligent DevicesIf the program is loaded as RECAL/i or simply as RECAL, the program calculatesPA (and PM) parameters to be loaded into the device.2.2. Program RECAL/c for <strong>Paroscientific</strong> <strong>Transducers</strong>If the program is loaded as RECAL/c the program calculates new C1 and T1coefficients.7 <strong>of</strong> 13
<strong>Paroscientific</strong>, <strong>Inc</strong>. Procedure Document: 8140-001Title: <strong>Recalibration</strong> <strong>of</strong> <strong>Paroscientific</strong> <strong>Transducers</strong>Revision: A2.3 Examples <strong>of</strong> <strong>Recalibration</strong>a. Single Point <strong>Recalibration</strong>(Choice “∅” for <strong>of</strong>fset adjustment)As an example, assume that a 15 psia full scale transducer with C,D,Tau∅coefficients indicates pressure as 15.00155 psia when true pressure <strong>of</strong> 15.00000 psiais applied. The transducer reads high by 0.00155 psia or 0.0103 percent <strong>of</strong> full scale(%f.s.). Invoke the calibration s<strong>of</strong>tware as RECAL/c and enter one pressuremeasurement. Choose “∅” for <strong>of</strong>fset adjustment when prompted. Finally calculatenew C1,T1 coefficients. (Example: if old coefficients were C1=83.20394,D1=0.0392875, T1=25.27268, the new recalibrated coefficients will readC1(new)=83.20228, T1(new)=25.27292).b. Two Point Offset and Span Adjustment(Choice “S” for <strong>of</strong>fset and span adjustment)Again, as an illustration, assume that a 30 psig full scale transducer with anIntelligent Transmitter indicates -0.00330 psig with both ports open (-0.0110 percentf.s.). At full scale with true pressure <strong>of</strong> 30.00000 psig applied, the transducerindicates a pressure equal to 30.00610 psig (0.0204%f.s.). Enter both pressuremeasurements into program RECAL/i. The data summary will indicate that theaverage RMS error is 0.0164% f.s., and that the average <strong>of</strong>fset was only 0.0047%f.s. with a large remaining error. The proper adjustment would be to apply an <strong>of</strong>fset<strong>of</strong> -0.0110% f.s. and a span error <strong>of</strong> 0.0314% f.s. (the program will caution that thespan error is unusually large). If PA = 0 and PM = 1 before recalibration, the newvalues are PA = 0.003300 and PM = 0.999686. Note that PA is in pressureengineering units (psig in this example) and that the Intelligent Transmitter must beprogrammed to the same engineering units (e.g. UN=1).c. Conformance CalibrationWith three or more points, the optimal <strong>of</strong>fset and span adjustments are calculatedwith a least-squares fitting routine. As an example <strong>of</strong> this technique, a sample datafile called RECAL.DAT is included. Start program RECAL and load this file.Even though most measured errors are as large as 0.05% f.s. in this example, thepressure conformance is on average only 0.0015 percent <strong>of</strong> full scale after <strong>of</strong>fset andspan recalibration. In Appendix C, this sample printout summary is shown.8 <strong>of</strong> 13
<strong>Paroscientific</strong>, <strong>Inc</strong>. Procedure Document: 8140-001Title: <strong>Recalibration</strong> <strong>of</strong> <strong>Paroscientific</strong> <strong>Transducers</strong>Revision: A2.4 Device Configuration S<strong>of</strong>tware DQI<strong>Paroscientific</strong>, <strong>Inc</strong>., provides a device configuration s<strong>of</strong>tware program called DQI(Digiquartz Interactive) with intelligent RS-232 transmitters. It can be used to view andchange all configuration parameters (especially the pressure adder PA and the pressuremultiplier PM), and to print out a record <strong>of</strong> the change. PA and PM can also bereconfigured from the previously decribed RECAL/i program directly. Alternatively, a serialcommunication program (e.g. PROCOMM or TERMINAL) can be used to communicatewith intelligent devices and change parameters. Consult the transmitter programmingmanual for details.3. Special Considerations<strong>Paroscientific</strong>, <strong>Inc</strong>., produces a wide range <strong>of</strong> pressure transducers for many specialapplications. The need for recalibration depends on the application. Some <strong>of</strong> themore commonly encountered cases are listed here.3.1 <strong>Recalibration</strong> for Specific ApplicationsIn some cases, the calibration can be somewhat improved if the transducer isrecalibrated over a selected pressure and temperature range. In any case,recalibration should be done over the pressure range and temperature range <strong>of</strong>interest. It does not make sense to recalibrate a 15 psia transducer at 0 psia(vacuum) if the instrument is exclusively used as a barometer in the range 13 to 15psia. Also, an instrument that is used exclusively in a laboratory setting should notbe exposed to temperatures above 50 deg C or below -10 deg C.<strong>Recalibration</strong> also acts as a check on performance whether or not the calibration ischanged. A high pressure unit used to measure water depths should be checked attypical ocean temperatures, whereas a high pressure unit used to measure pressurein a hot oil well should be checked at relatively high temperatures.9 <strong>of</strong> 13
<strong>Paroscientific</strong>, <strong>Inc</strong>. Procedure Document: 8140-001Title: <strong>Recalibration</strong> <strong>of</strong> <strong>Paroscientific</strong> <strong>Transducers</strong>Revision: A3.2 Oil-filled <strong>Transducers</strong>Some applications require oil-filled transducers, <strong>of</strong>ten for depth measurements inwater. Oil-filled transducers may not be pressurized with gas since the gas maydiffuse into the oil and foam out after pressure release. Oil-filled units can bechecked at ambient pressure against a high precision barometer or against a primarystandard with gas lines at a pressure close to ambient.Oil can safely be removed with special techniques only in 2000 series transducers(contact <strong>Paroscientific</strong>, <strong>Inc</strong>.), but not in high pressure units.Oil in vertical pressure lines will add pressure called “head effects”. Head effectsare pure pressure <strong>of</strong>fsets if the pressure medium is incompressible. The transducershould be positioned as in the intended application. The exit <strong>of</strong> the oil-filledpressure line is the reference height at which the pressure is compared to ambientpressure. Program RECAL calculates the proper adjustment <strong>of</strong> calibrationcoefficients from one or more measurements. It works with both frequency outputtransducers and Intelligent Devices.If there is a question whether oil is present in the unit, ambient pressure can bemeasured with the pressure port up and then with the pressure port down.Differences in indicated pressure would indicate oil since the acceleration sensitivity<strong>of</strong> air-filled units is very small (less than 0.0038% f.s./g).3.3 Differential <strong>Transducers</strong>Differential transducers can easily be checked at 0 psid with both ports open toambient air.3.4 High-Pressure <strong>Transducers</strong><strong>Transducers</strong> above 200 psia full scale are most conveniently checked under ambientconditions against a barometric standard with 1 mbar reading accuracy or better. Asmentioned above, a simple <strong>of</strong>fset check will correct the absolute accuracy at allpressures since the span is very stable.10 <strong>of</strong> 13
<strong>Paroscientific</strong>, <strong>Inc</strong>. Procedure Document: 8140-001Title: <strong>Recalibration</strong> <strong>of</strong> <strong>Paroscientific</strong> <strong>Transducers</strong>Revision: ANote that oil-filled units may not be pressurized with pneumatic (gas filled) pressurelines. A complete conformance check requires a hydraulic primary standard.Note that air-filled pressure units need additional time for pressurestabilization, since the expansion and contraction <strong>of</strong> gas induces adiabatic cooling orheating. After full scale pressure changes above a few hundred psia, the transducershould be stabilized for at least 5 minutes before taking dat11 <strong>of</strong> 13
<strong>Paroscientific</strong>, <strong>Inc</strong>. Procedure Document: 8140-001Title: <strong>Recalibration</strong> <strong>of</strong> <strong>Paroscientific</strong> <strong>Transducers</strong>Revision: AAppendix APA.PM Adjustment EquationUse <strong>Paroscientific</strong> recalibration s<strong>of</strong>tware RECAL/i to calculate PA (and PM)adjustment. As a technical reference, the PA and PM adjustment equation forDigiquartz ® Intelligent Devices is given here.a. Offset (PA) AdjustmentThe “calculated” pressure is determined from the frequencies <strong>of</strong> the pressure andtemperature crystals with C, D, Tau0 coefficients. The “indicated” (displayed)pressure is:Indicated P = PM * (Calculated P + PA)Default values are PA = 0 and PM = 1, in which case, the indicated pressure issimply the calculated pressure based on C, D, Tau0 coefficients.Define the current PA setting as “Old PA”, the current pressure multiplier as “OldPM”. Define the pressure “<strong>of</strong>fset” = true pressure minus indicated pressure.Evaluate the new PA variable as:PA = (Old PA) + (Offset/Old PM)b. Span (PM) AdjustmentAdjust PA as described above such that the transducer indicates pressure correctlyat minimum scale (or close to it).Now measure true “ref” pressure at full scale which is displayed as “indicated”pressure. If the indicated pressure disagrees with the reference pressure, evaluate:and load the PM parameter.PM = (Old PM) * (Ref P)/(Indicated P)Program RECAL uses a more sophisticated method <strong>of</strong> extracting the span errorfrom a series <strong>of</strong> pressure measurements.12 <strong>of</strong> 13
<strong>Paroscientific</strong>, <strong>Inc</strong>. Procedure Document: 8140-001Title: <strong>Recalibration</strong> <strong>of</strong> <strong>Paroscientific</strong> <strong>Transducers</strong>Revision: AAppendix BC1, T1 Adjustment EquationUse <strong>Paroscientific</strong> recalibration s<strong>of</strong>tware RECAL/c to calculate C1 and T1adjustment. As a technical reference, the C1 and T1 adjustment equation for<strong>Paroscientific</strong> transducer coefficients is given here.a. Offset AdjustmentCalculate pressure “<strong>of</strong>fset” true “reference” pressure minus “indicated” pressure(calculated with C, D, Tau0 coefficients):Define:Offset = (RefP) - (Indicated P)x = 0.2 if C1 coefficient is positivex = -0.2 if C1 coefficient is negativeDefine current C1, D1, and T1 coefficients as “Old C1, D1, and Old T1”.The new recalibrated C1 and T1 coefficients are:T1 = Old T1 - Offset * Old T1 / (2 * Old C1)C1 = Old C1 + Offset * (1 + 2 * D1 - 2 * D1 * x) / (1 - D1 * x)b. Span AdjustmentExpress the “span correction” as the ratio <strong>of</strong> “true” applied divided by “indicated”(measured) pressure range from minimum to full scale.(Span Correction) = (True P Range) / (Indicated P Range)Adjust the <strong>of</strong>fset error as described above in Section a. which results in a C1 (<strong>of</strong>fsetadjusted) term.Evaluate a new span adjusted C1 term as:C1(Span Adjusted) = C1(<strong>of</strong>fset adjusted) * (Span Correction)13 <strong>of</strong> 13
<strong>Paroscientific</strong>, <strong>Inc</strong>. Procedure Document: 8140-001Title: <strong>Recalibration</strong> <strong>of</strong> <strong>Paroscientific</strong> <strong>Transducers</strong>Revision: AAppendix CPrintout using data file RECAL.DAT Date: 06-07-1990Full scale pressure: 100Pressure engineering units: psiaData as found:Applied Indicated DifferencePressure Pressure %f.s.1 1.5005 1.4446 -0.05592 10.0012 9.9505 -0.05073 20.0000 19.9453 -0.05474 29.2183 29.1684 -0.04995 39.2144 39.1640 -0.05046 49.2124 49.1650 -0.04747 59.2115 59.1650 -0.04658 69.2119 69.1653 -0.04669 79.2123 79.1697 -0.042610 89.2123 89.1722 -0.040111 99.2126 99.1742 -0.0384Offset error:Span error:-0.0556 percent <strong>of</strong> full scale0.0163 percent <strong>of</strong> full scaleData as left (after <strong>of</strong>fset and span adjustment):Applied Corrected ResidualPressure Pressure Error% f.s.1 1.5005 1.5000 -0.00052 10.0012 10.0045 0.00333 20.0000 19.9977 -0.00234 29.2183 29.2193 0.00105 39.2144 39.2133 -0.00116 49.2124 49.2126 0.00027 59.2115 59.2110 -0.00058 69.2119 69.2097 -0.00229 79.2123 79.2124 0.000110 89.2123 89/2133 0.001011 99.2126 99.2137 0.0011RMS Conformance:0.0015 percent <strong>of</strong> full scale14 <strong>of</strong> 13


