

Instruction Manual - GME
Instruction Manual - GME
Instruction Manual - GME
- No tags were found...

You also want an ePaper? Increase the reach of your titles
YUMPU automatically turns print PDFs into web optimized ePapers that Google loves.
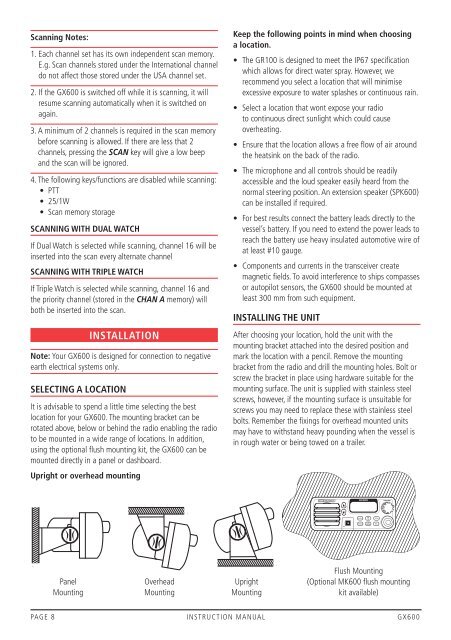
Scanning Notes:1. Each channel set has its own independent scan memory.E.g. Scan channels stored under the International channeldo not affect those stored under the USA channel set.2. If the GX600 is switched off while it is scanning, it willresume scanning automatically when it is switched onagain.3. A minimum of 2 channels is required in the scan memorybefore scanning is allowed. If there are less that 2channels, pressing the SCAN key will give a low beepand the scan will be ignored.4. The following keys/functions are disabled while scanning:• PTT• 25/1W• Scan memory storageSCANNING WITH DUAL WATCHIf Dual Watch is selected while scanning, channel 16 will beinserted into the scan every alternate channelSCANNING WITH TRIPLE WATCHIf Triple Watch is selected while scanning, channel 16 andthe priority channel (stored in the CHAN A memory) willboth be inserted into the scan.INSTALLATIONNote: Your GX600 is designed for connection to negativeearth electrical systems only.SELECTING A LOCATIONIt is advisable to spend a little time selecting the bestlocation for your GX600. The mounting bracket can berotated above, below or behind the radio enabling the radioto be mounted in a wide range of locations. In addition,using the optional flush mounting kit, the GX600 can bemounted directly in a panel or dashboard.Upright or overhead mountingKeep the following points in mind when choosinga location.• The GR100 is designed to meet the IP67 specificationwhich allows for direct water spray. However, werecommend you select a location that will minimiseexcessive exposure to water splashes or continuous rain.• Select a location that wont expose your radioto continuous direct sunlight which could causeoverheating.• Ensure that the location allows a free flow of air aroundthe heatsink on the back of the radio.• The microphone and all controls should be readilyaccessible and the loud speaker easily heard from thenormal steering position. An extension speaker (SPK600)can be installed if required.• For best results connect the battery leads directly to thevessel’s battery. If you need to extend the power leads toreach the battery use heavy insulated automotive wire ofat least #10 gauge.• Components and currents in the transceiver createmagnetic fields. To avoid interference to ships compassesor autopilot sensors, the GX600 should be mounted atleast 300 mm from such equipment.INSTALLING THE UNITAfter choosing your location, hold the unit with themounting bracket attached into the desired position andmark the location with a pencil. Remove the mountingbracket from the radio and drill the mounting holes. Bolt orscrew the bracket in place using hardware suitable for themounting surface. The unit is supplied with stainless steelscrews, however, if the mounting surface is unsuitable forscrews you may need to replace these with stainless steelbolts. Remember the fixings for overhead mounted unitsmay have to withstand heavy pounding when the vessel isin rough water or being towed on a trailer.Panel Overhead UprightMounting Mounting MountingFlush Mounting(Optional MK600 flush mountingkit available)PAGE 8 INSTRUCTION MANUAL GX600


