SolarEdge Installation Guide for Three Phase Inverters - Solco Solar ...
SolarEdge Installation Guide for Three Phase Inverters - Solco Solar ...
SolarEdge Installation Guide for Three Phase Inverters - Solco Solar ...
- No tags were found...

You also want an ePaper? Increase the reach of your titles
YUMPU automatically turns print PDFs into web optimized ePapers that Google loves.
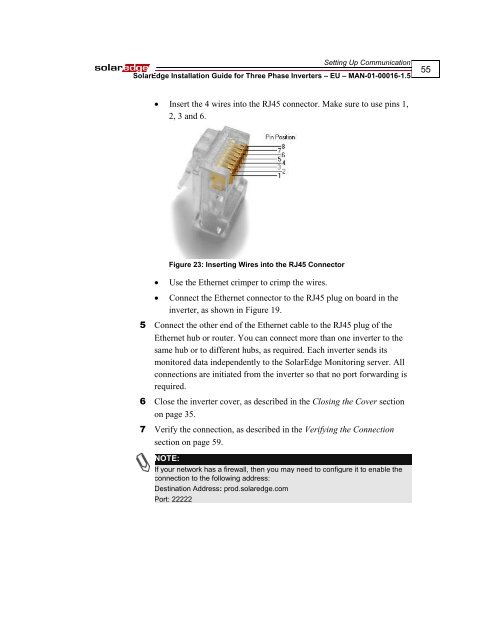
Setting Up Communication<strong><strong>Solar</strong>Edge</strong> <strong>Installation</strong> <strong>Guide</strong> <strong>for</strong> <strong>Three</strong> <strong>Phase</strong> <strong>Inverters</strong> – EU – MAN-01-00016-1.555 Insert the 4 wires into the RJ45 connector. Make sure to use pins 1,2, 3 and 6.Figure 23: Inserting Wires into the RJ45 ConnectorUse the Ethernet crimper to crimp the wires.Connect the Ethernet connector to the RJ45 plug on board in theinverter, as shown in Figure 19.5 Connect the other end of the Ethernet cable to the RJ45 plug of theEthernet hub or router. You can connect more than one inverter to thesame hub or to different hubs, as required. Each inverter sends itsmonitored data independently to the <strong><strong>Solar</strong>Edge</strong> Monitoring server. Allconnections are initiated from the inverter so that no port <strong>for</strong>warding isrequired.6 Close the inverter cover, as described in the Closing the Cover sectionon page 35.7 Verify the connection, as described in the Verifying the Connectionsection on page 59.NOTE:If your network has a firewall, then you may need to configure it to enable theconnection to the following address:Destination Address: prod.solaredge.comPort: 22222