

GR9200 SERIES - GME
GR9200 SERIES - GME
GR9200 SERIES - GME
- No tags were found...

You also want an ePaper? Increase the reach of your titles
YUMPU automatically turns print PDFs into web optimized ePapers that Google loves.
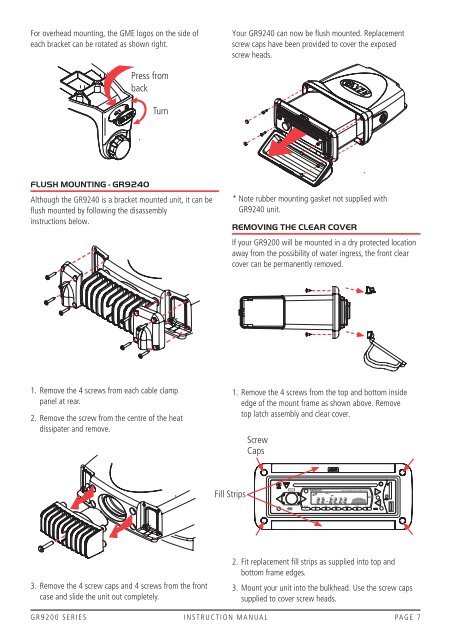
D-DN4x45WattsFor overhead mounting, the <strong>GME</strong> logos on the side ofeach bracket can be rotated as shown right.Your GR9240 can now be flush mounted. Replacementscrew caps have been provided to cover the exposedscrew heads.Press frombackTurnFlush mounting - gr9240Although the GR9240 is a bracket mounted unit, it can beflush mounted by following the disassemblyinstructions below.* Note rubber mounting gasket not supplied withGR9240 unit.Removing the Clear CoverIf your <strong>GR9200</strong> will be mounted in a dry protected locationaway from the possibility of water ingress, the front clearcover can be permanently removed.1. Remove the 4 screws from each cable clamppanel at rear.2. Remove the screw from the centre of the heatdissipater and remove.1. Remove the 4 screws from the top and bottom insideedge of the mount frame as shown above. Removetop latch assembly and clear cover.ScrewCapsFill Strips<strong>GR9200</strong>3. Remove the 4 screw caps and 4 screws from the frontcase and slide the unit out completely.2. Fit replacement fill strips as supplied into top andbottom frame edges.3. Mount your unit into the bulkhead. Use the screw capssupplied to cover screw heads.<strong>GR9200</strong> series instruction manual PAGE 7


